
Loading ...
CARE & MAINTENANCE
All parts of the Professional Access Doors can be cleaned with hot soapy water, rinsed, dried and bued to
a shine with a soft, heavy cloth. Always try this rst, as it is the mildest cleaning procedure. Always rub in
the direction of the grain. Use only clean sponges, soft cloths, paper towels, plastic non-metal soap pads for
cleaning or scouring as recommended in this section. Use only soap pads with soap still in them. An empty
pad can scratch.
After cleaning, use a stainless steel polish, such as Stainless Steel Magic® applied to the door and handle
surfaces. To touch up noticeable scratches in the stainless steel, sand very lightly with wet 100 grit emery
paper in the direction of the grain.
NOTE: Stainless steel tends to corrode in the presence of chlorides and suldes, especially in coastal
areas. To ensure corrosion prevention, wash all stainless steel surfaces every 3-4 weeks with
fresh water and stainless cleaner.
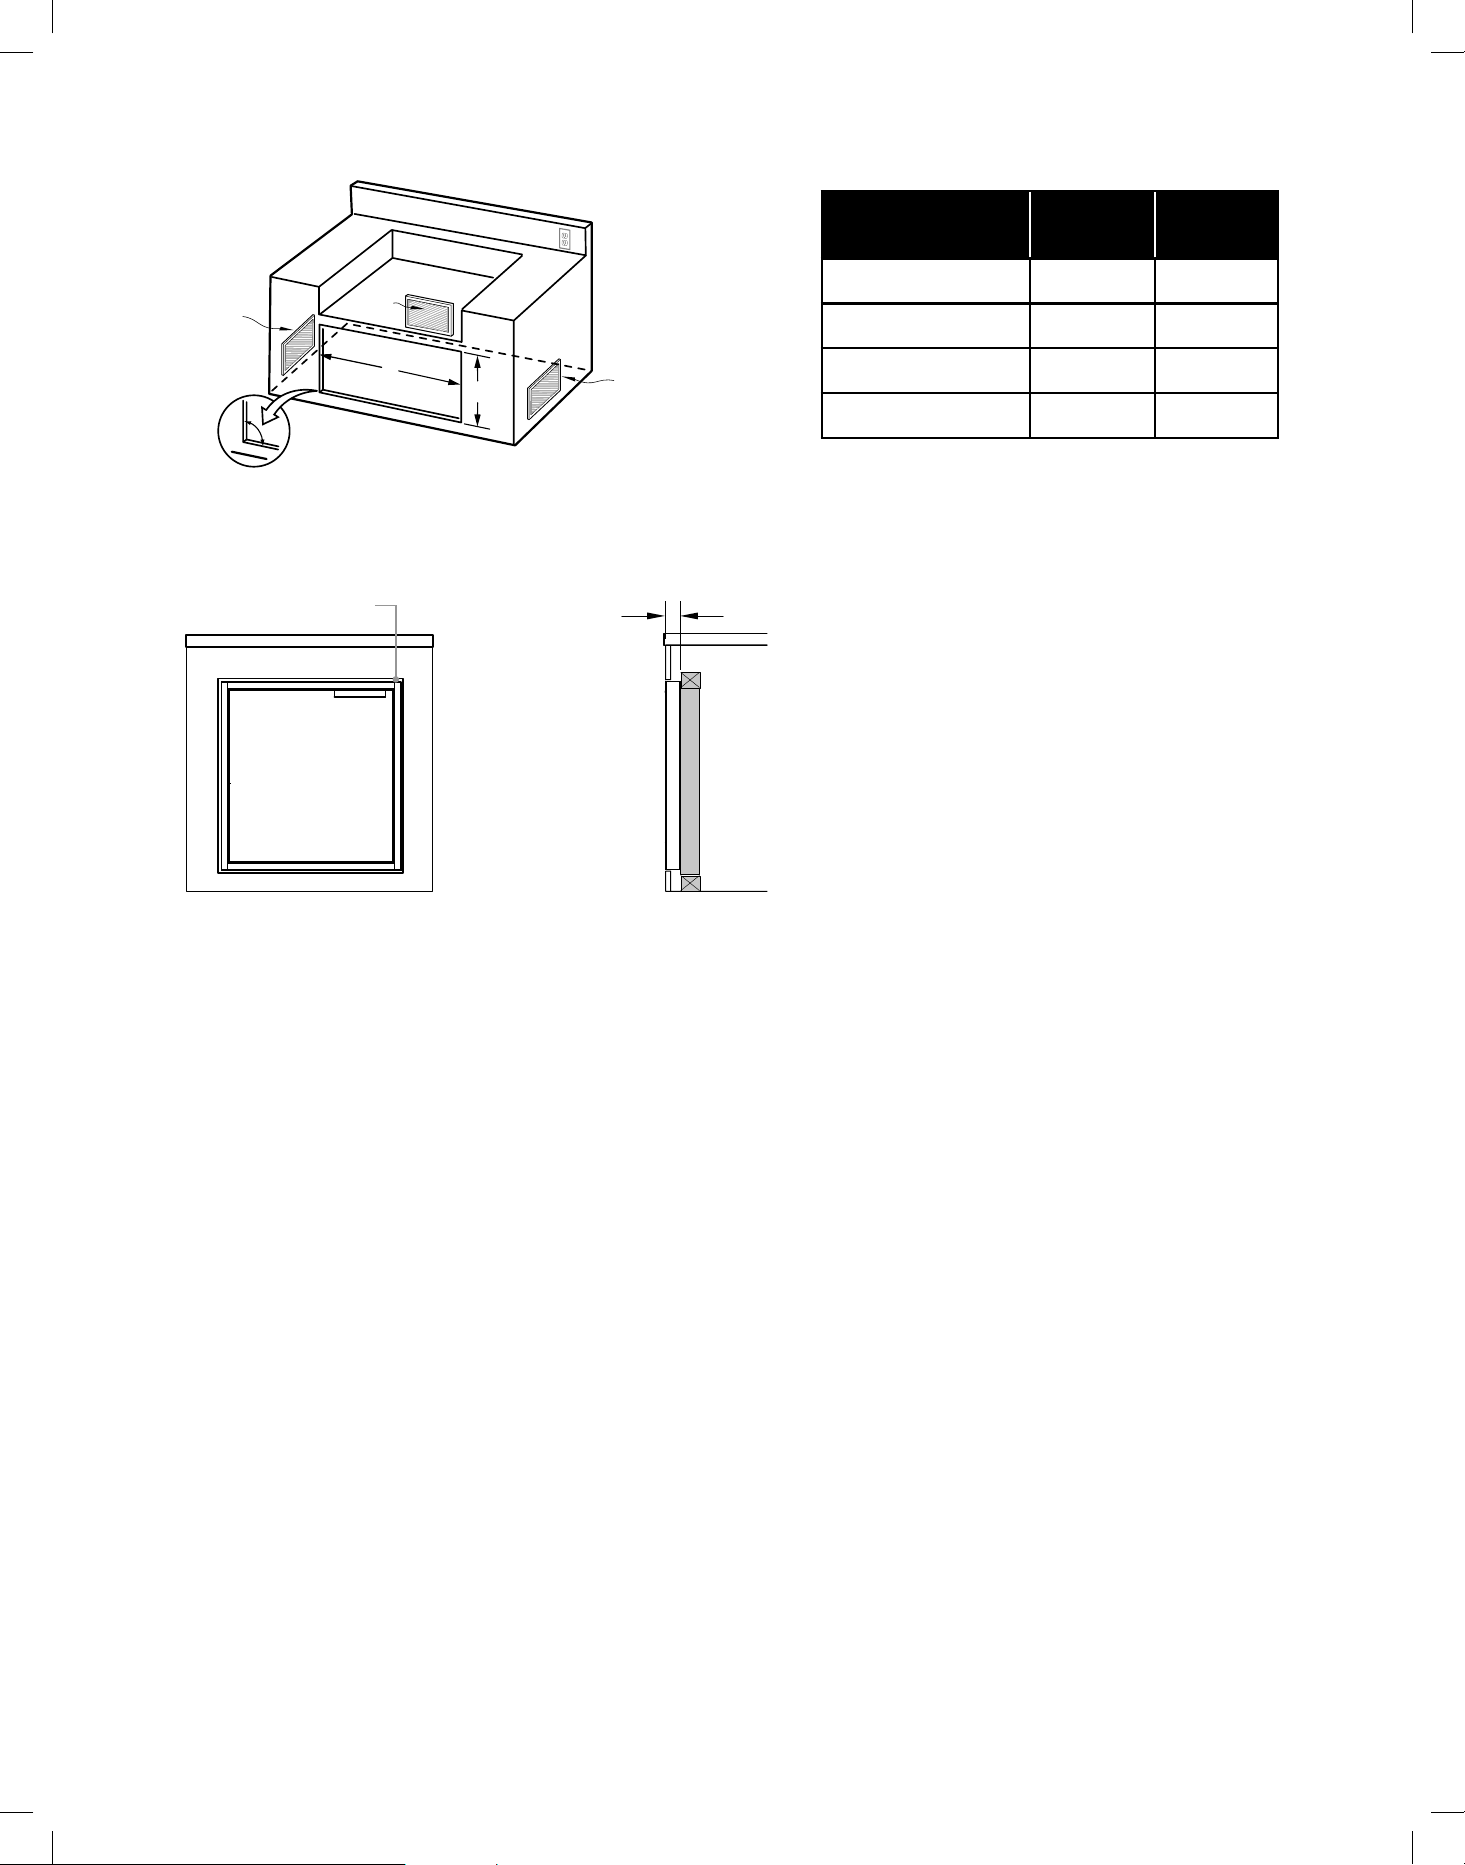
CUTOUT SPECIFICATION - FLUSH INSTALLATION
A
90º
B
Vent*
Ve
nt*
Vent*
ACCESS DOOR
MODELS
A
(-0”, +1/8”)
B
(-0”, +1/8”)
ADN1-20x48 48 3/16" 22 1/16”
ADN1-20x36 36 3/16” 22 1/16”
ADN1-20x30 30 3/16” 22 1/16”
ADN1-20x24 24 3/16” 22 1/16”
NOTE: The cutout of each corner should be 90° angle in order for the access doors to t properly.
* Island installation to use minimum of 3 vents providing 10 sq. in. per vent (typical).
D
FRONT
SIDE
Minimum 3/16” (4 mm)
cutout clearance around
front frame
A frame should be constructed 2” (51 mm) setback from the front
face of the product to both push the product up against and
conceal the cutout clearance around the front frame.
The frame should locate the access door assembly in the center of
the cutout, and be fastened to the enclosure such that the unit is
reliably secured in place.
Important!
Do not seal the product in with silicone caulk or similiar. Doing so will
result in the product being difficult to remove for servicing.
2” (51 mm)
INSTALLATION INSTRUCTIONS
1. Slide frame into opening (see cutout dimensions in chart above).
2. Check for proper alignment.
3. Using the four slotted holes in the frame as a guide, pre drill four pilot holes on the left & right sides of
your island. Secure the unit using screws and anchors suited for the type of cabinet material.
4. Install the access door and check for proper alignment of doors and frame.
Loading ...
Loading ...