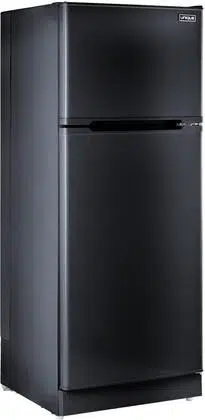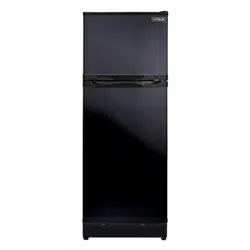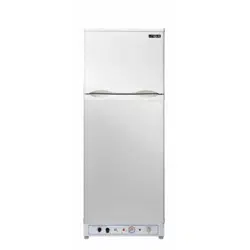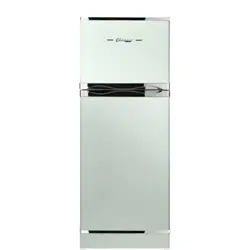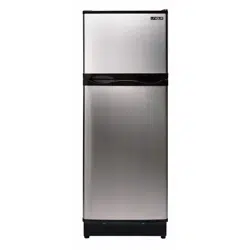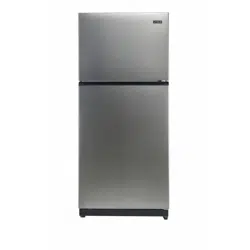
625.8 L / 22.1 cu. ft.
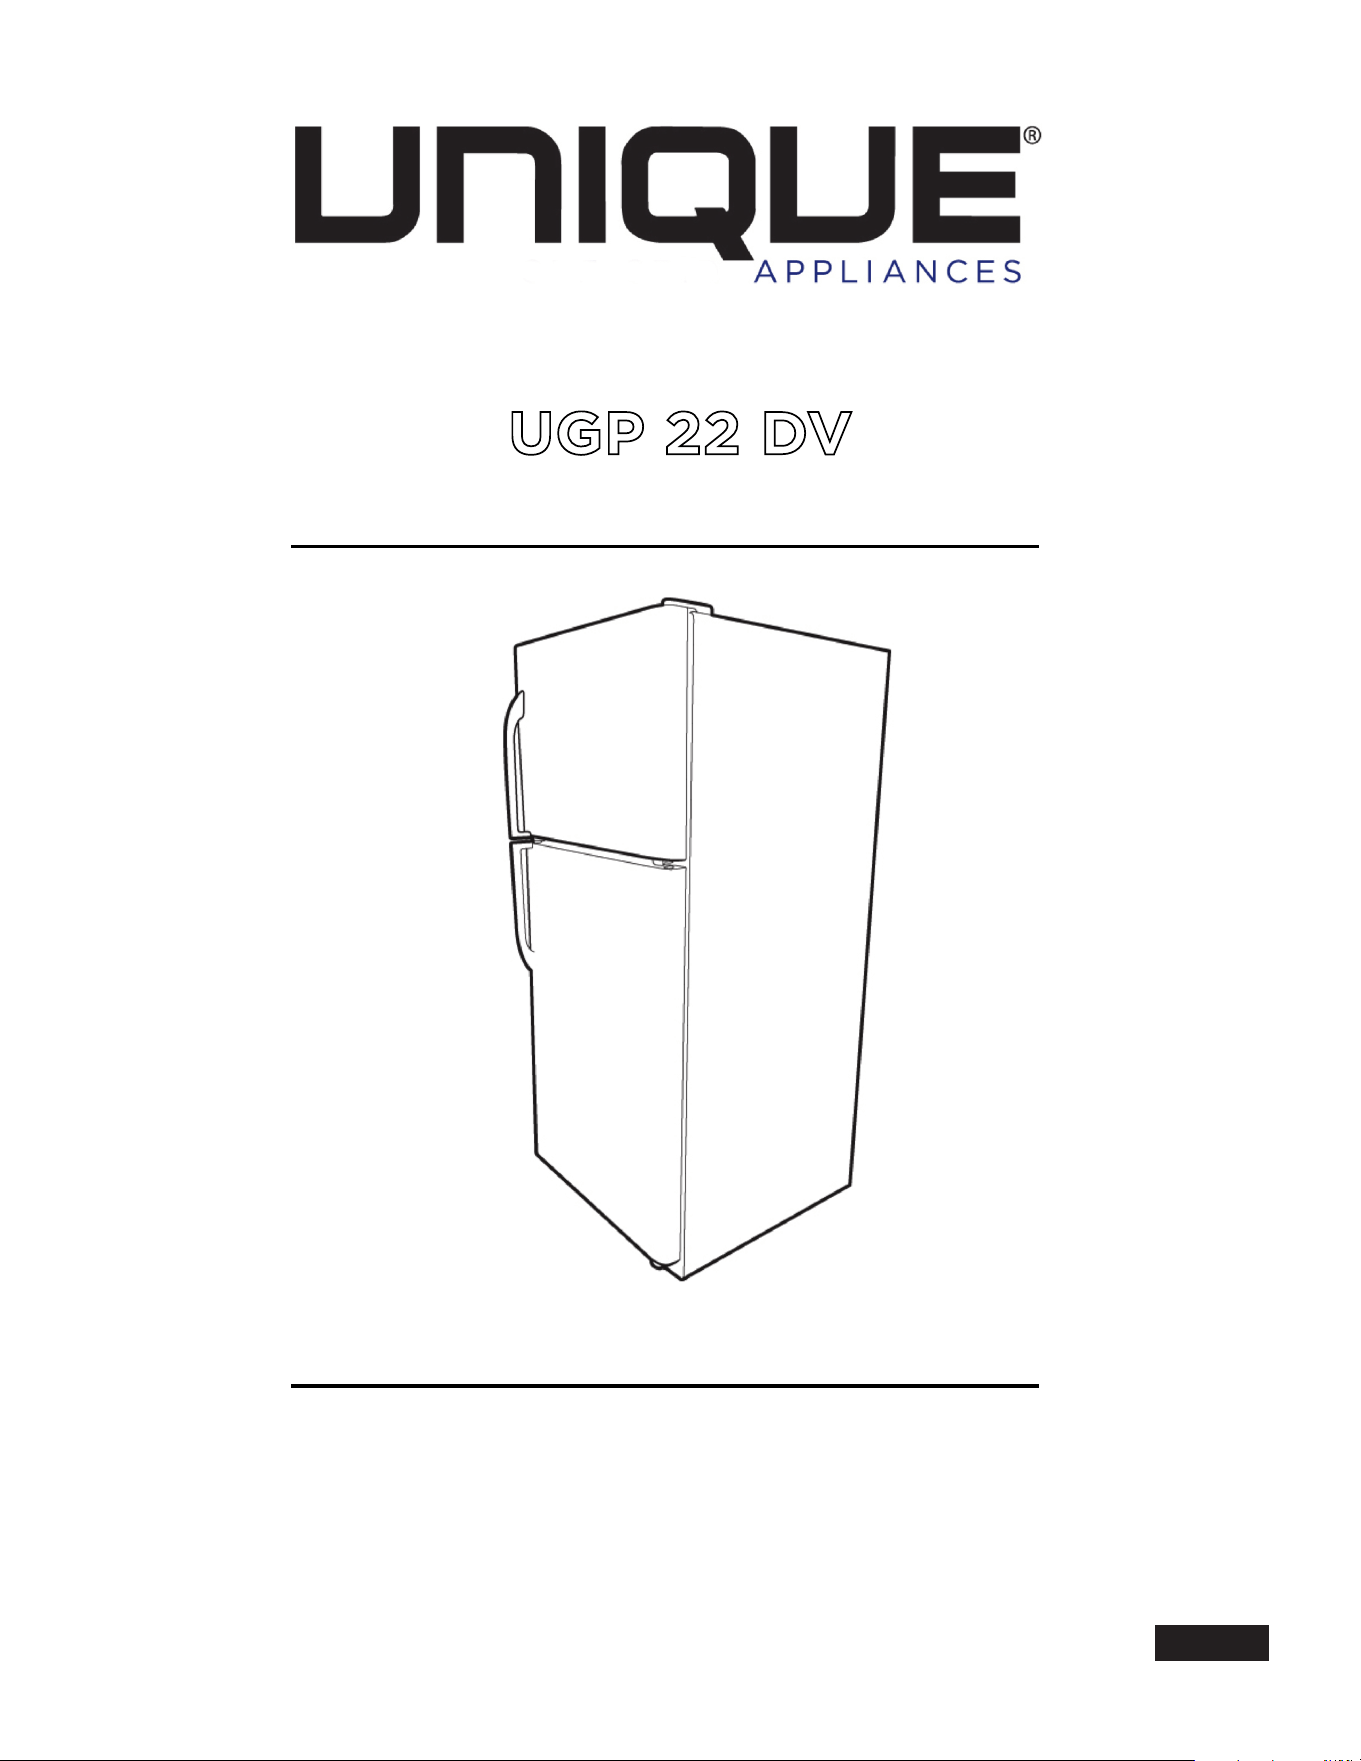
UGP 22 DV
Direct Vent Propane Refrigerator
OWNER’S GUIDE
serial number:
Sept22V1
UNIQUE UGP-22 DV
DIRECT'VENT'REFRIGERAT OR'(Balanced)Flue)System)!
Installation)and)Owner’s)Manual)
The installation of the appliance must conform with local codes or,
in the absence of local codes, to the national Fuel Gas Code, ANSI
Z233.1 and in Canada B149.2 Propane Storage and Handling Code
WARNING
FIRE OR EXPLOSION HAZARD
If you smell gas:
1. Open windows.
2. Do not attempt to light appliance and make sure the appliance is in the OFF position.
3. Extinguish any open fl ame.
4. Do not touch electrical switches.
5. Do not use electronic devices such as cell phones or landline phones.
6. Evacuate the building or recreational vehicle.
7. Shut o fuel supply at LP tank.
8. Call emergency services.
Failure to follow these instructions could result in fi re or explosion, which could cause property damage,
personal injury or death.
WARNING
CARBON MONOXIDE POISONING MAY CAUSE DEATH OR INJURY
When used without adequate combustion and ventilation air, the refrigerator may give o excess
CARBON MONOXIDE, and odorless poisonous gas.
This is an unvented gas-fi red appliance. The refrigerator uses air (oxygen) from the area in which the
refrigerator is used. Adequate combustion and ventilation air must be provided. Refer to page 5.
WARNING: In Canada, an unvented refrigerator shall only be installed in an area that is
not normally occupied, not used in sleeping quarter sand does not directly communicate with
occupied areas.
FOR YOUR SAFETY: Do not store or use gasoline or other fl ammable vapors and liquids in
the vicinity of this unit or any other appliance.
WARNING: Improper installation, adjustment, alteration, service or maintenance can cause injury
or property damage. Refer to this manual. For assistance or additional information consult a qualifi ed
installer, service agency or the gas supplier.

MANUFACTURED AND CERTIFIED BY
Unique Gas Products Ltd
2245 Wyecroft Road
Oakville, Ontario Canada L6L 5L7
Ph: 905-827-6154 Toll Free: 1-877-427-2266 Fax: 905-827-2027
www.UniqueOffGrid.com
E-mail: info@uniqueoffgrid.com
“Personal Service & Knowledge makes us Unique”
Table of Contents
Chapters
Welcome 1
Safety and Warnings 1
Appliance, Heat Shield, & Venting Installation
Instructions 2
General Operating Instructions 3
How To Use The Refrigerator 3
Maintenance & Service 4
Troubleshooting & Suggested Spares 5
Door Removal and Reversal 6
Temperature Controls, Food Storage and
Cleaning 7
Parts List (incl. venting components) & Warranty 8
Note: It is unsafe to operate your fridge without the supplied venting
attached to the appliance due to the chance of Carbon Monoxide poisoning.
UNIQUE UGP- 22 DV
1
Welcome &
Congratulations
ongratulations!on!your!purchase!of!a!UNIQUE!refrigerator!.!We !are!very!
proud!of!our!product!and!we!are!completely!committe d!to!providing!you!
with!the!best!service!possible.!Your!satisfaction!is!our!#1!priority.!Please!
read!this!manual!very!carefully.!It!contains!valuable!information!on!how!to!
properly!maintain!your!new!gas!refrigerator.!
We!know!you!will!enjoy!your!new!refrigerator!and!thank!you!for!choosing!one!of!
our!Unique!Gas!Products.!We!hope!you!will!consider!us!for!future !purchases.!
PLEASE)READ)AND)SAVE)THESE)INSTRUCTIONS)
This!manual!provides!specific!operation!instructions!for!your!model.!Use!your!
refrigerator!only!as!instructed!in!this!manual.!These!instructions!are!not!meant!to!
cover!every!possible!condition!and!situation!that!may!occur.!Common!sense!and!
caution!must!be!practiced!when!installing,!operating!and!maintaining!the!
appliance!!
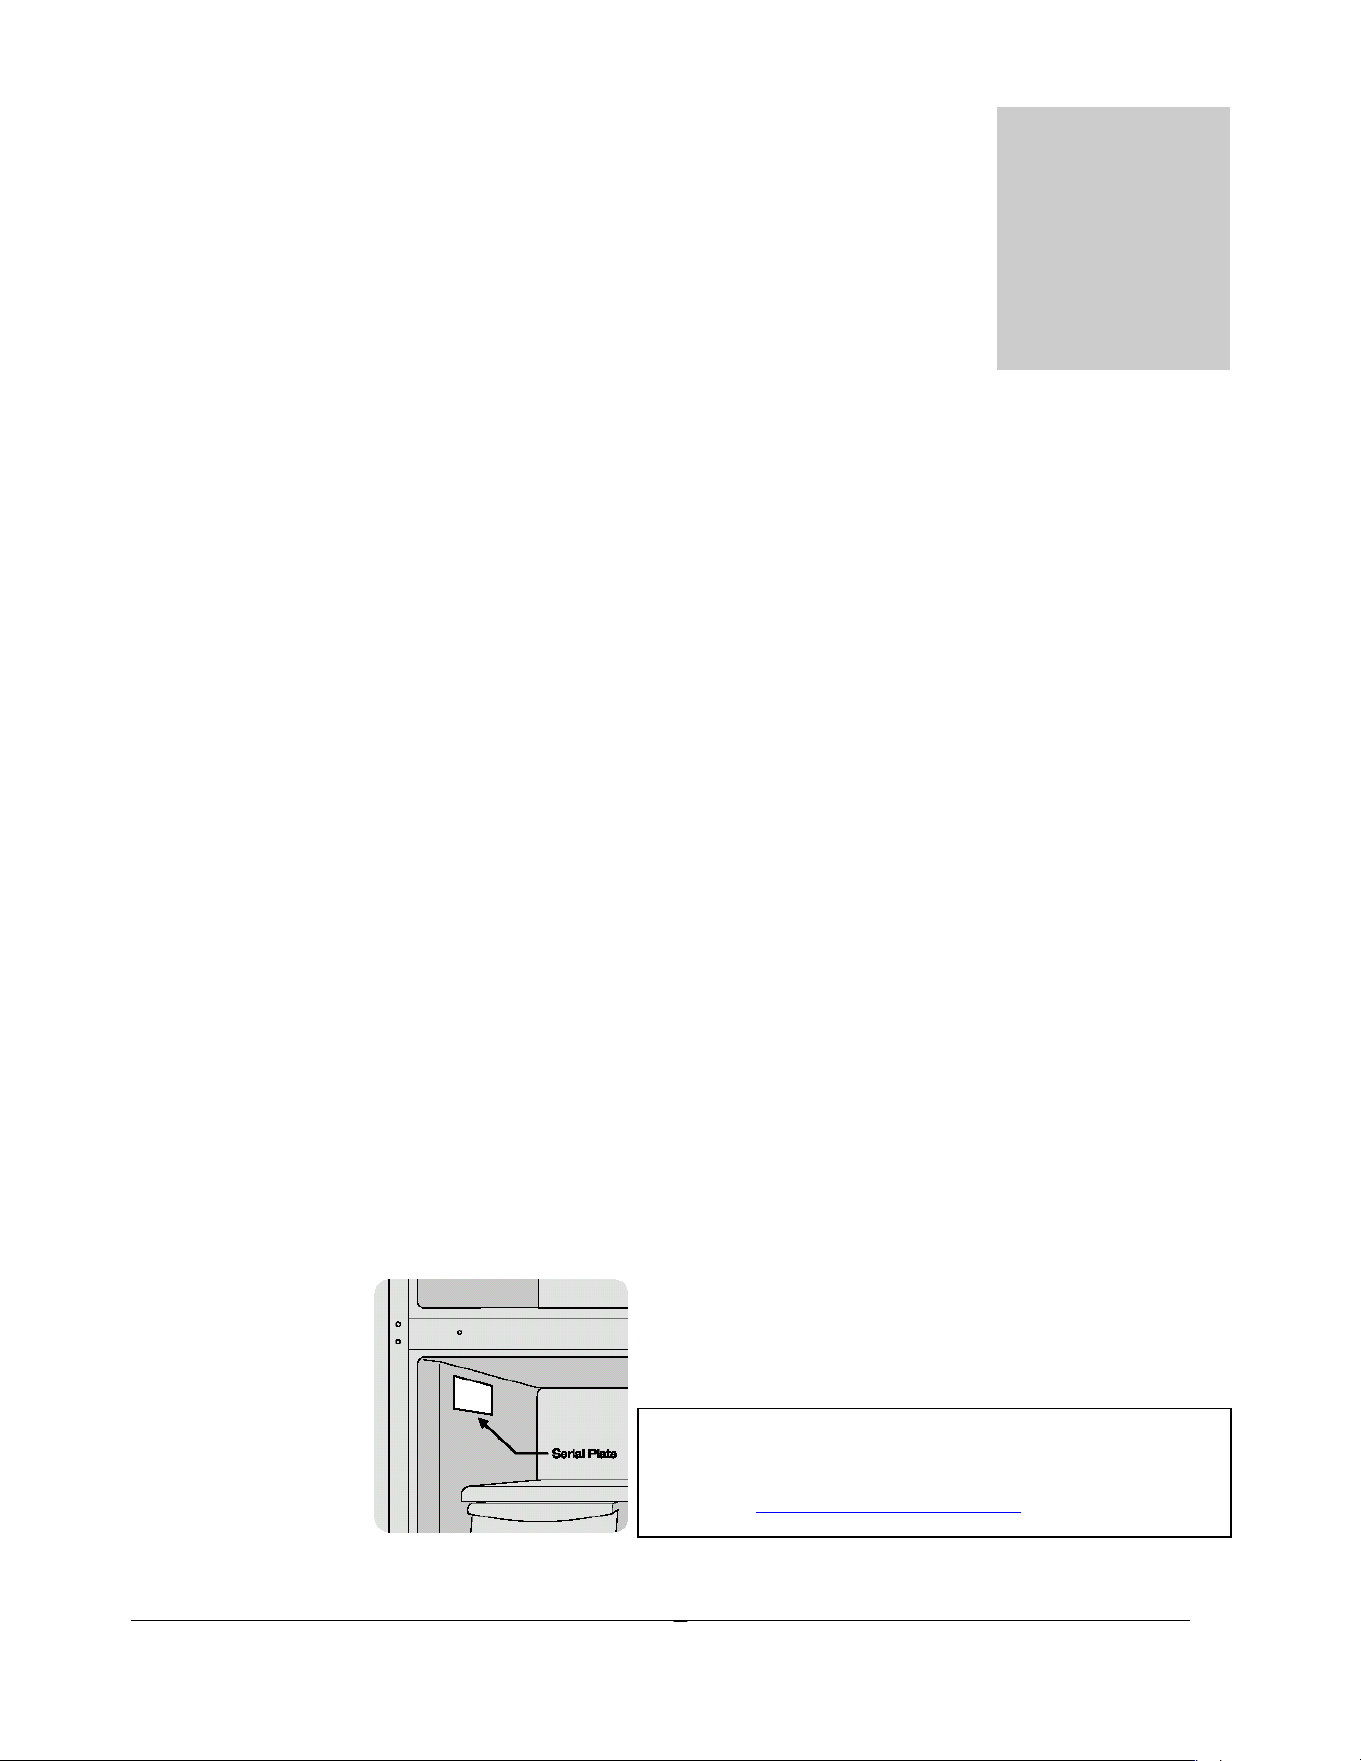
Please!record!your!model!and!serial!#!shown!below!for!future!reference.!This!
information!is!found!on!your!CSA!rating/serial!plate!inside!the!refrigerator!
compartment.!
Chapter
1
C
Please!mail!in!the!Warranty)Registration)Card!
included!with!your!refrigerator!or!you!can!register!
online!at!www.uniqueoffgrid.com!

UNIQUE UGP- 22 DV
2
Safety and Warnings
A)licensed)gas)installer)must)hook)up)the)direct)vent)system.)
Failure)to)fully)hook)up)the)direct)vent)system)to)the)outside)wall)will)result)in)
flue)gases)being)discharged)into)the)room.)This)will)result)in)an)illegal)uncertified)
application,) and) may) result) in) unsafe) levels) of) carbon) monoxide,) leading) to)
injury)and/or)death.)
If)you)smell)gas!
• Open!windows
• Don’t!touch!electrical!switches
• Extinguish!any!open!flame
• Immediately!call!your!gas!supplier
For)your)Safety)
• Due!to!the!potential!of!carbon!monoxide!(CO)!from!many!different!sources
inside!your!dwelling,!and!to!meet!most !building!codes,!the!dwelling!must
have!a!separate!wall-mounted!CO!alarming!de vice.!This!is!beyond!any
safety!devices/construction!inherent!to!the!Unique!appliance.
• Do!not!store!or!use!gasoline!or!other!flammable!vapors!and!liquids!in!the
vicinity!of!this!unit!or!any!other!appliance
Warning)
• Improper!installation,!adjustment,!alteration,!service!or!maintenance!can
cause!injury!or!property!damage.!Refer!to!this!manual.!For!assistance!or
additional!information!consult!a!qualified!installer,!service!agency!or!the
gas!supplier.
• This!product!can!produce!Carbon!Monoxide.!Carbon!Monoxide!has!no
odour!and!can!kill!you.!The!burner!and!flue!system!must!be!kept!clean.!See
owner’s!manual!for!cleaning!instructions.
!
UNIQUE UGP- 22 DV
3
Installation)Instructions)
• The!installation!of!the!appliance!must!conform!with
local!codes!or,!in!the!absence!of!loca l!national!Fuel!Gas
Code,!ANSI!Z233.1!and!in!Canada!B149.2
UNIQUE UGP- 22 DV
4
Installation of Appliance
For!best!performance!at!high!ambient!temperatures,!there!must!be!free!air!
circulation!over!the!cooling!unit!at!the!rear!of!the!refrigerator.!!
Ensure!that!there!is!a!free!air!space!above!the!refrigerator!and!that!the!flue!
(chimney)!on!top!of!the!cabinet!is!not!covered!in!any!way.!Do!not!place!the!
refrigerator!in!a!space!where!air!circulation!is!restricted.!Follow!“clearance”!
instructions.!
This!free-standing!refrigerator!requires!accessibility!to!the!back!for!servicing!
the!gas!equipment,!which!can!be!obtained!by!using!a!certified!Flexible!Metal!
Connector!to!allow!the!refrigerator!to!be!withdrawn!without!disrupting!the!
gas!supply.!!“Where!a!flexible!metal!connector!is!used,!it!must!comply!with!
local!authorities!and!in!Canada!with!the!provisions!of!the!current!Standard!
CAN!1-6.10,!Metal!Connectors!for!Gas!Appliances”.!!However,!if!the!Local!
Authorities!require!a!rigid!gas!supply!connector,!the!refrigerator!should!be!
located!with!sufficient!space!at!the!back!for!servicing!or,!if!located!against!a!
wall!a!removable!panel!of!a!minimum!size!of!16”!x!20”!should!be!provided!in!
the!wall!to!allow!access!to!the!rear!of!the!refrigerator.!If!you!purchased!a!CM!
(CO!Monitor!model)!you!must!follow!instructions!in!Section!6!-!5.0!onward.!
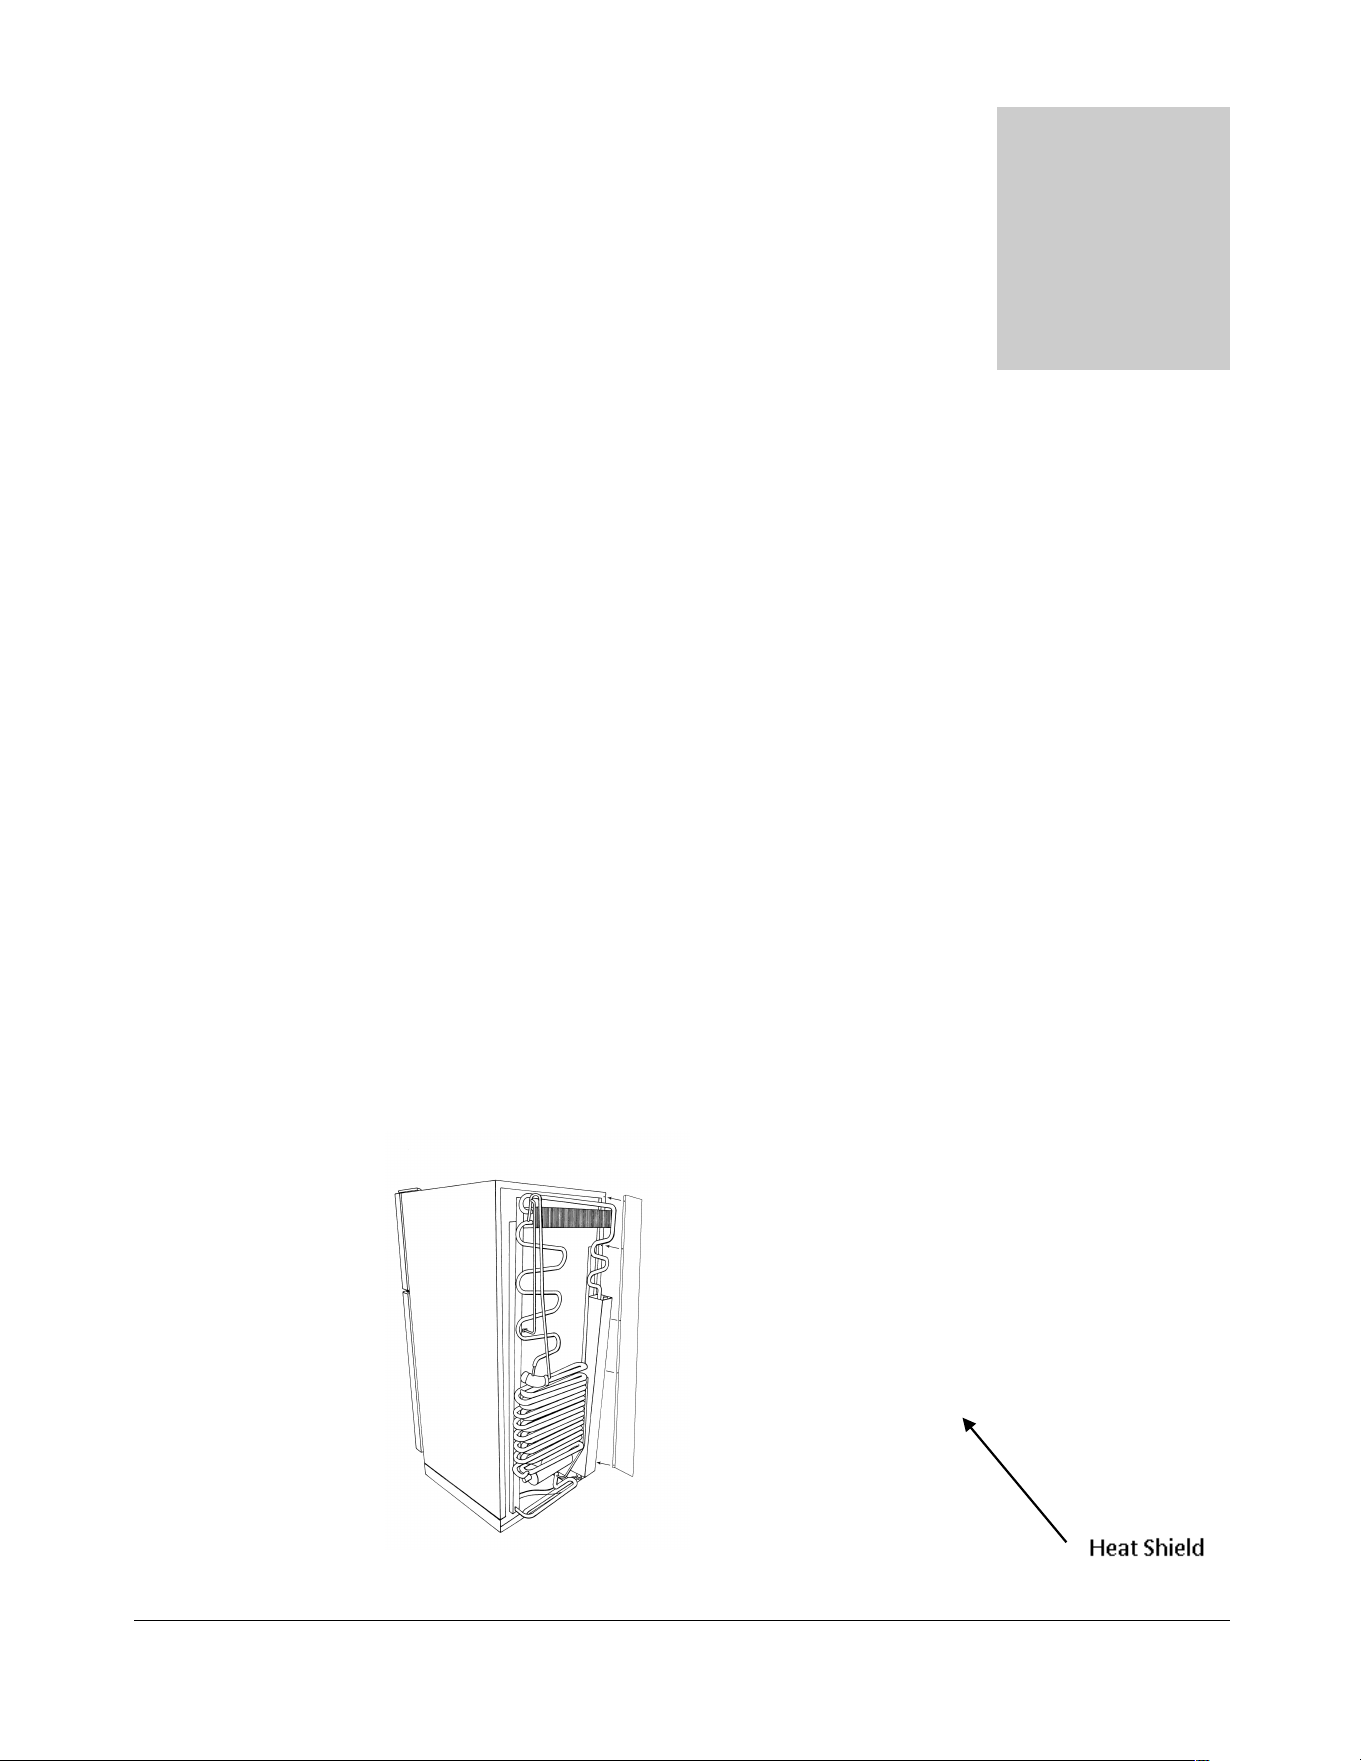
Heat Shield
The!heat!shield!must!be!installed!before!operating!
the!appliance.!This!is!a!CSA!requirement.!!
Un-wrap!the!heat!shield!(located!inside!the!box!
along!with!the!appliance).!Mount!heat!shield!with!
the!screws!(supplied)!to!left!side!of!the!fridge.!See!
diagram.!!
Chapter
2
UNIQUE UGP- 22 DV
5
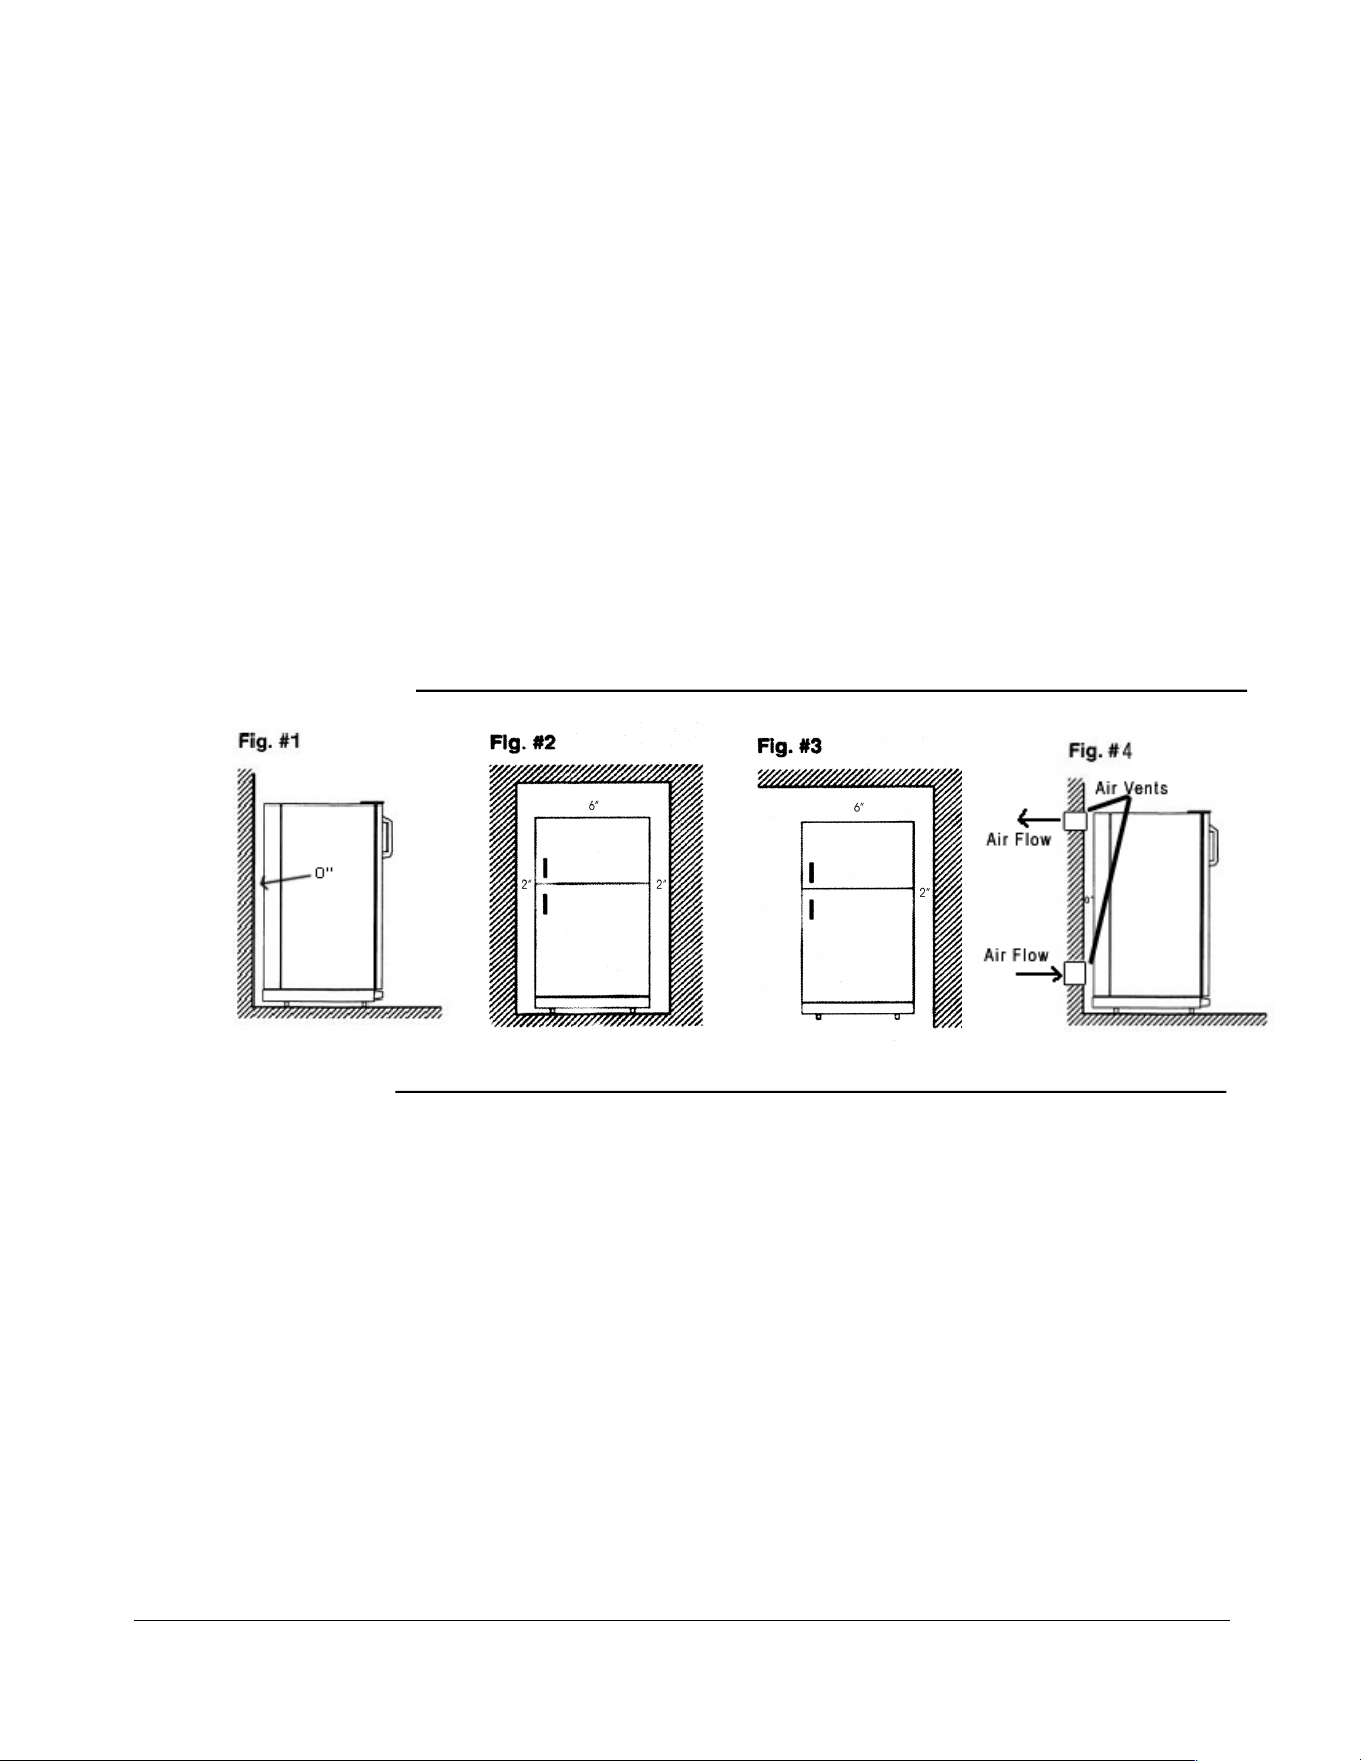
Clearances
Minimum!clearances!to!combustible!materials!are:!
Top!–!10”!
Sides!–!2”!
Rear!–!1”!with!left!hand!side!rear!shield!mounted!
as!shown!in!Figures.!1,!2!&!3.!
Note:)DO)NOT)install)the)appliance)directly)on)carpeting.)Carpeting)must)be)
removed)or)protected)by)a)metal)or)wood)panel)beneath)the)appliance,)
which)extends)at)least)the)full)width)and)depth)of)the)appliance.
• Fig#1!-!This!is!ideal!as!both!top!and!sides!are!open!! !
• Fig#2!–!During!hot/humid!weather!this!confined!area!will!be come!very!
warm.!To!reduce!heat!build-up,!we!recom mend!providing!an!area!for!two!
air!vents!to!circulate!the!air.!One!placed!6”!off!the!floor!and!the!other!at!or!
above!the!appliance!top.!Cold!air!return!vents!with!adjustable!louvers,!
work!very!well.!This!will!allow!hot!air!to!evacuate!the!area!and!assist!in!air!
flow!across!the!fins!(similar!to!air!passing!across!a!r adiator)!–!See)Fig)#4)
• Fig#3!–!If!this!is!your!opening!you!only!need!to!stay!the!diagramed!distance!
from!the!wall!and!ceiling.!There!is!no!need!for!additional!venting.!
Air Flow - to release heat trap

UNIQUE UGP- 22 DV
6
Gas Connection
Hook-up!t o!the!gas!supply!line:!3/8”!SAE!(UNF!5/8”!-!18)!male!flare!connection.!A!
backup!wrench!must!be!used!when!tightening!gas!supply!fitt ing.!!All!completed!
connections!should!be!checked!for!leaks!with!a!non-corrosive!leak!detector!and/or!
soap!and!water!for!a!bubble!check.!
WARNING) –)DO)NOT) USE ) FL AME) T O)CHE CK) FOR)GAS )L EAKS )
The!gas!supply!system!must!incorporate!a!pressure!regulator!to!maintain!a!supply !
pressure!of!not!more!than!12”!water!column!and!no!less!than!11 ”!water!column.!
(Max!setting)!!
Make!sure!the!refrigerator!and!any!other!hig h!BTU!appliances!on!your!line!are!
turned!on!when!checking!the!gas!pressure.!The!appliance!and!its!individual!shut-
off!valve!must!be!disconnected!from!the!gas!supply!piping!system!during!any !
pressure!testing!of!that!system!at!pressures!in!exc ess!of!½”!psig.!
If!de tailed!instructions!on!the!installation!and!connection!of!the!gas!supply!are !
required,!contact!your!dealer!or!distributor.!
Leveling
Ensure!the!fridge!is!level!by!using! a!2ft! level.!This!is! accomplished! by!adjusting! the!feet!at!
the!front,!undern eath!the!fridge.!
UNIQUE UGP- 22 DV
7
Venting Installation Instructions
Before! installing! venting! ensure! you! have! followed! the! appliance! installation!
instructions! above,! which! includes! the! gas! hook! up,! and! the! heat! shield!
installation.!This!will!allow!you!to!install!the!venting!and!then!proceed!to!start!your!
fridge! for! use.! You! will! need! to! ensure! you! have! provided! yourself! with! enough!
length!of!gas!supply!line!to!the!fridge!in!order!to!pull!your!fridge!out!for!servicing!
and!for!initial!installation!and!hook!up!of!t he!venting!to!your!interior!wall.!
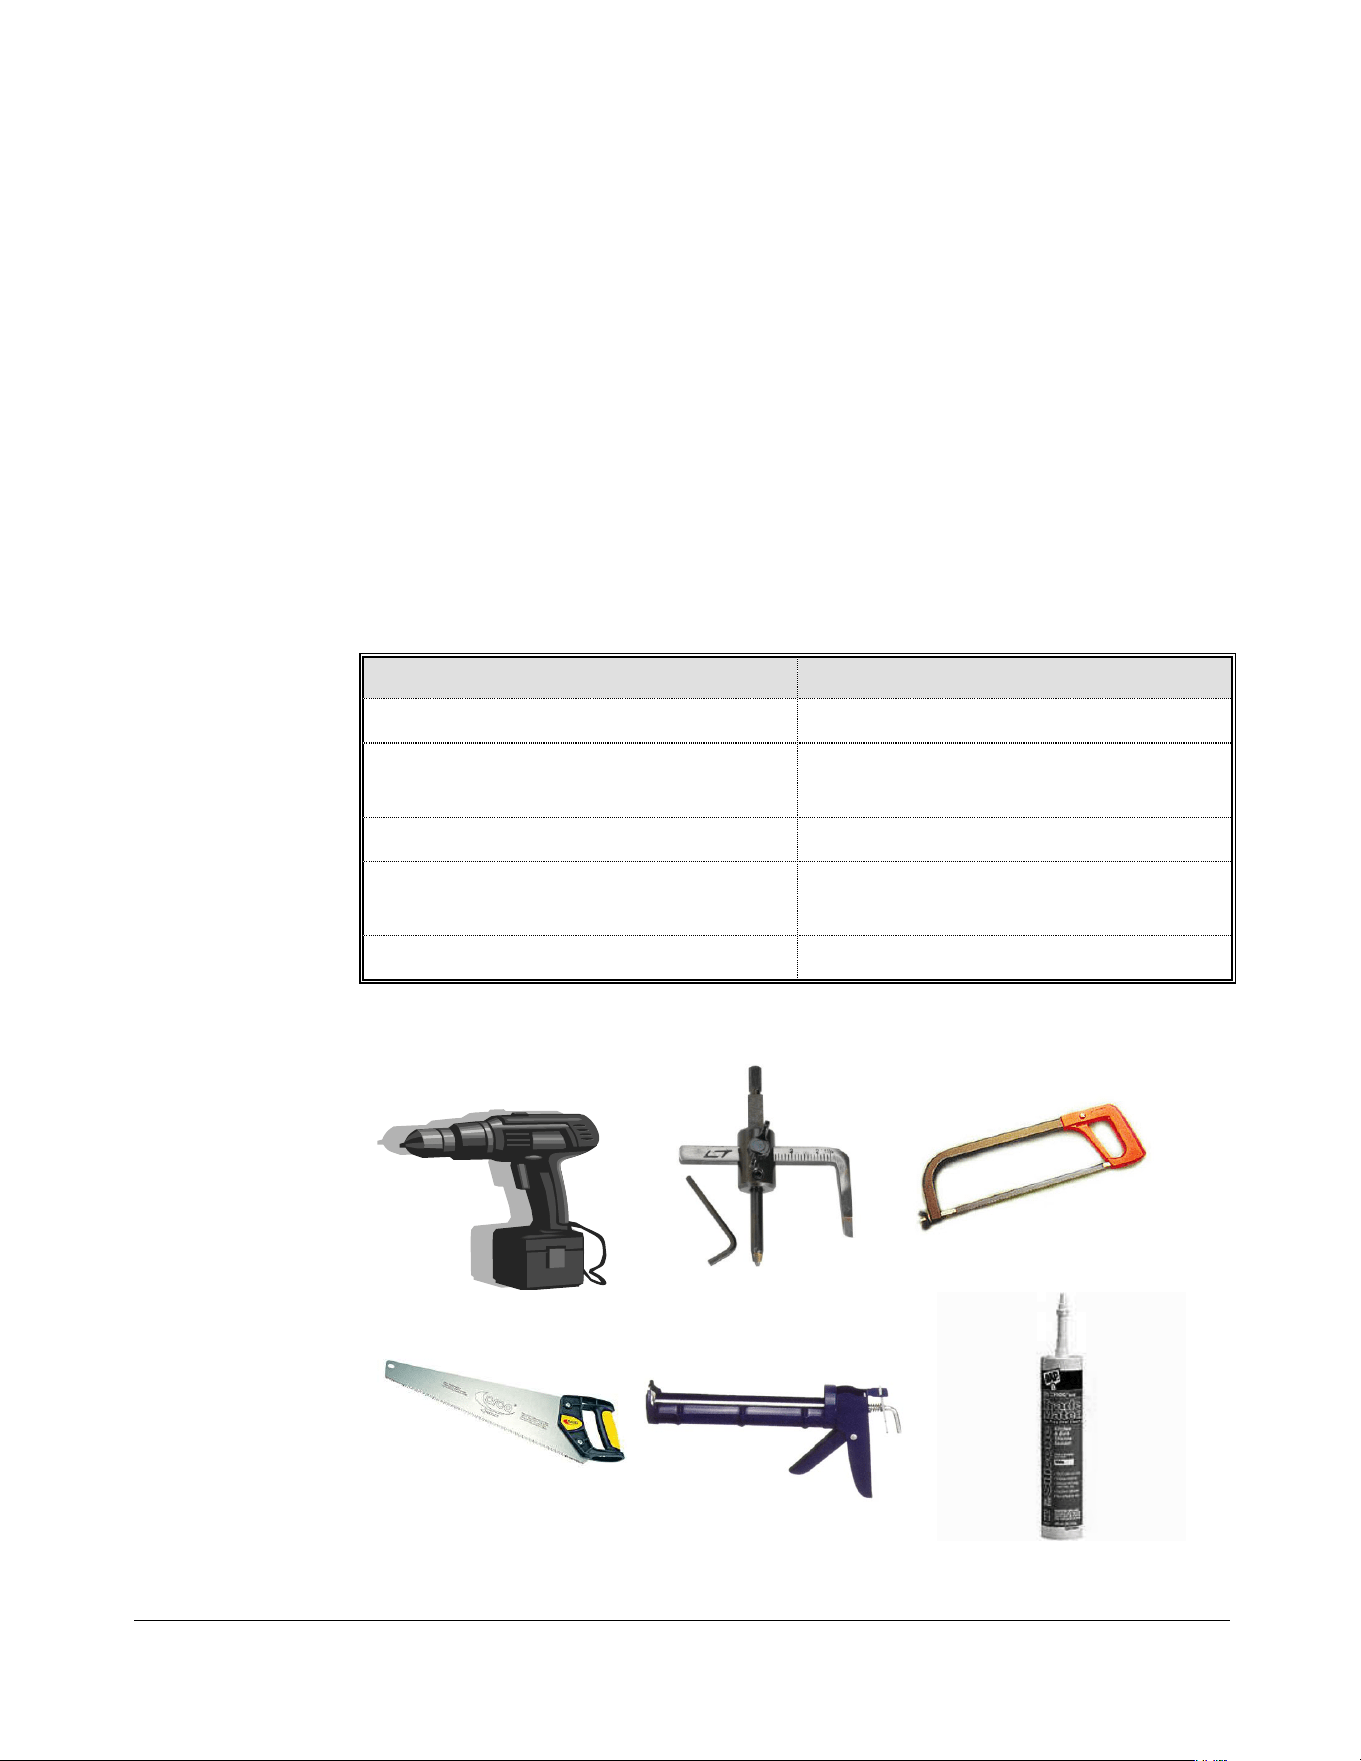
TOOLS)&)SUPPLIES)REQUIRED)FOR)INSTALLATION)OF)
VENTING)
TOOLS
APPLICATION
Drill!
Drill!holes!in!exterior!wall!
Adjustable!Drill!Bit!
Required!to!drill!approx!2.375”!hole!in!
exterior!wall!
Small!drill!bit!
To!drill!center!hole!positions!for!venting!!
Hack!Saw/Hand!Saw!
To!cut!fresh!air!and!flue!exhaust!tube!to!
custom!length!for!the!application!!
Caulking!Gun!&!Silicone!Sealant!
For!sealing!spaces!around!venting!in!wall!
UNIQUE UGP- 22 DV
8
PARTS)LIST)- ) SUPPLIED)(parts!required!for!installation!are!
found!at!back!of!applian ce)!
PARTS
LOCATION/FUNCTION
1 x Fresh air intake pipe
Back of appliance – fresh air supply
1 x Flue exhaust pipe
Back of appliance – flue exhaust
POLY PARTS BAG
1 x Tube of high temp red
silicone
To connect fresh air pipe and flue
exhaust pipe to existing venting on
appliance
Fresh!Air!Vent!
Flue!Exhaust!Vent!
High!Temp!Silicone!

UNIQUE UGP- 22 DV
9
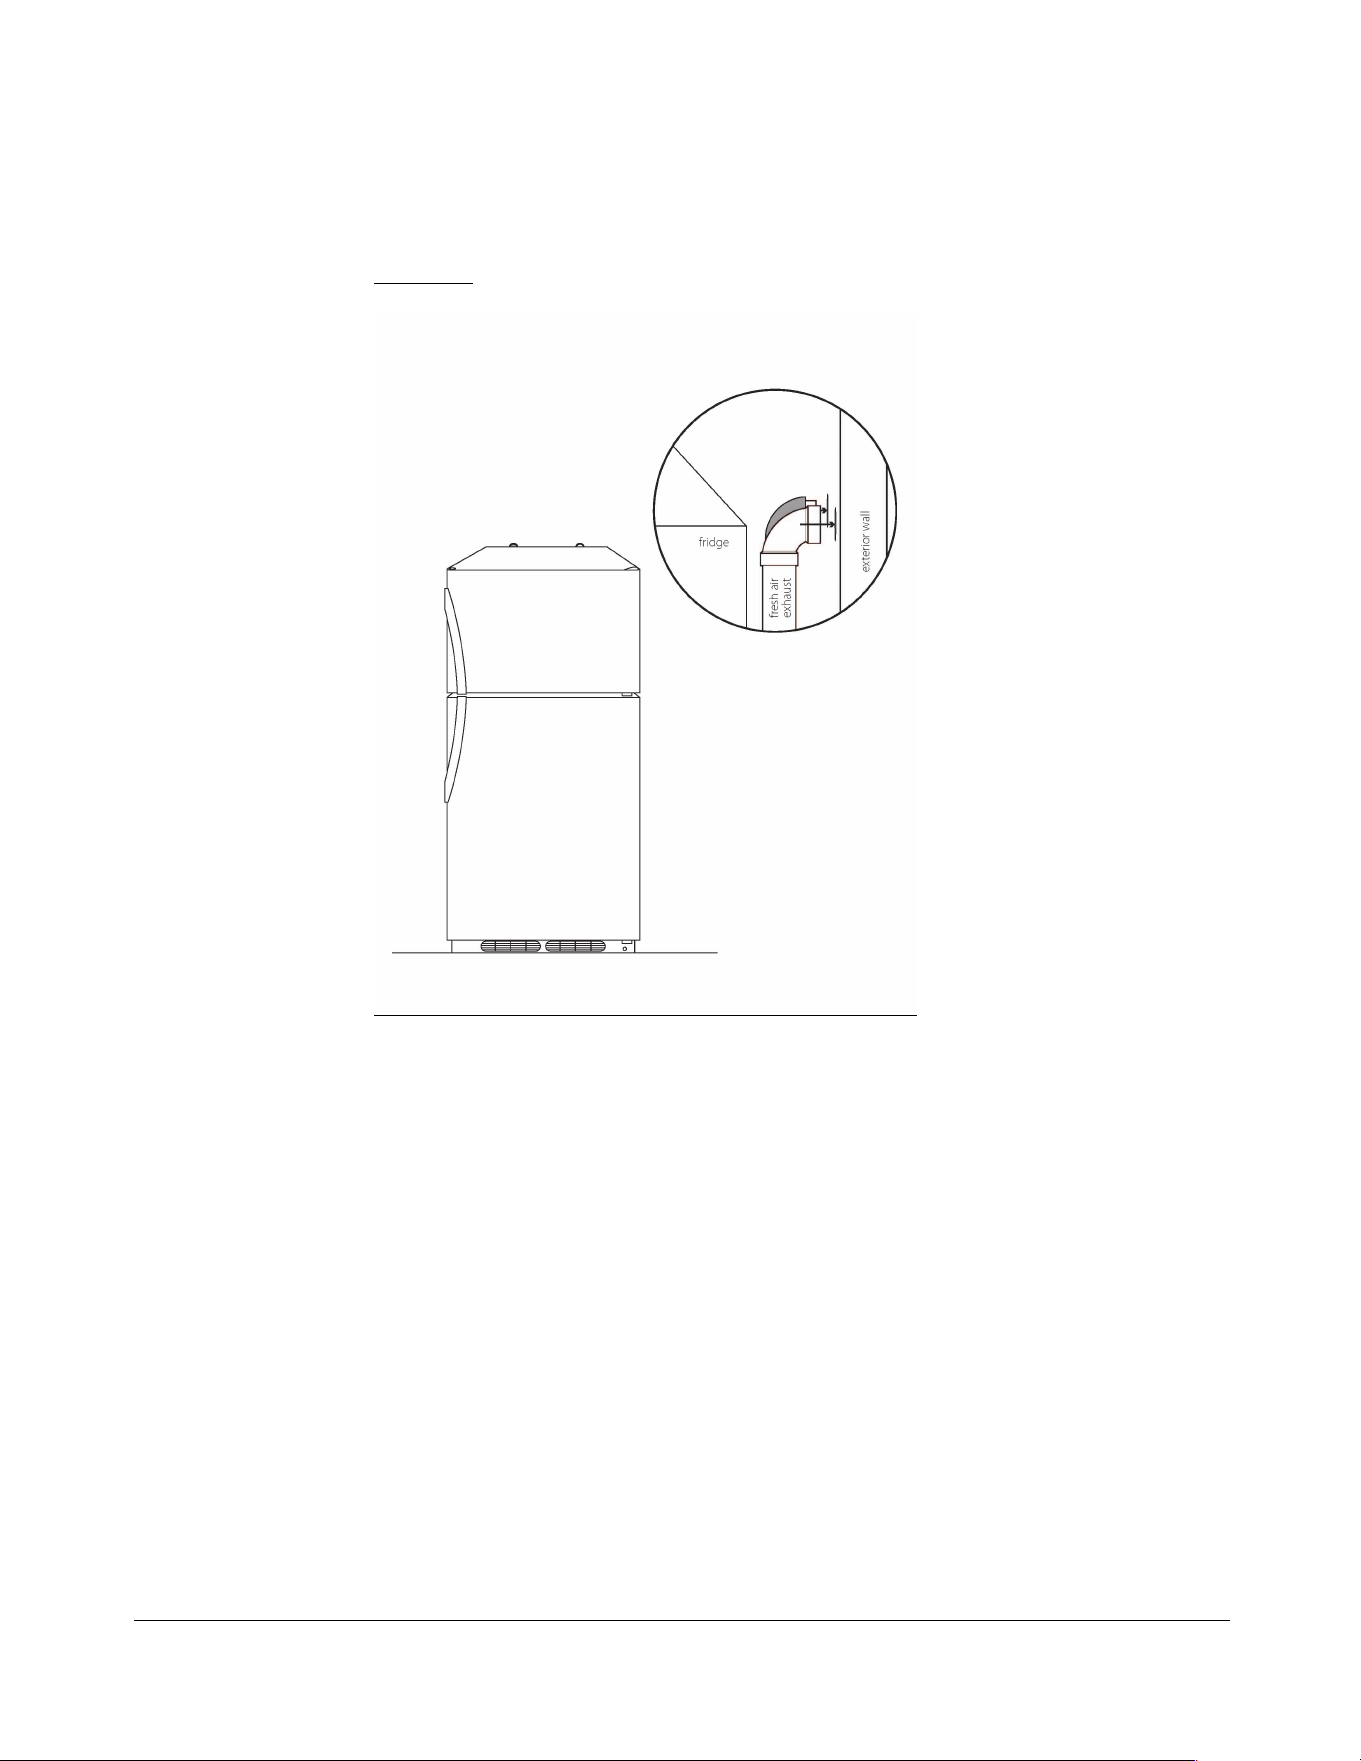
Fresh Air and Flue Exhaust Vent Location &
Assembly
• If!not!already!done,!locate!the!fresh!air!vent,!flue!exhaust!vent!and!poly!
bag!containing!high!temp!silicone!from!the!back!of!the!appliance!and!set!
aside.!
• Decide!where!the!fridge!is!to!be!located.!It!must!be!against!an!exterior!wall!
keeping!in!mind!that!included!with!the!fridge!there!is!19"!of!available!
venting!from!the!exterior!wall!to!the!back!of!fridge!(can!be!cut!down!to!fit!
application)!
• It's!best!to! keep! the!location! of!the! appliance!as! close!as! possibl e! to!the!
interior!wall!for!optimal!operation.!"
• The! next! step! will! determine! where! the! holes! are! to! be! drilled! to!
accommodate!the!fresh!air!and!flue!exhaust!vents."
• Slide! your! fridge! close! as! possible! to! the! interior! wall.! Mark! the! bottom!
position! of! the! f resh! air! vent! tube! that! is! attached! to! the! fridge! on! your!
inner!wall,!also!mark!the!top!position!with!a!pencil.!"
• Once!you!have!done!this!go!ahead! and! do ! th e! same! for! th e! fl ue! exhau st!
pipe.!Note:)the!flue!exhaust!tube!could!be!a!slightly!different!height."
• Make)sure)you)have)leveled)your)fridge )before)the)next)step.)
• After!both!the!fresh!air!and!flue!exhaust!vents!have!been!marked!on!your!
interior! wall ,! find! the! center! of! each! and! mark.! For! the! flue! exhaust!
increase!the!height!of!the!center!marking!approx!3/8”.!This!will!allow!the!
flue! exhaust! tube! to! be! on! a! slight! upwards! angle! once! installed.! See!
Figure!A!on!next!page."
UNIQUE UGP- 22 DV
10
Figure A
• Now! prepare! to! drill! ho les! in! the! interior! wall! for! each! the! fresh! air! and!
flue!exhaust!tube.!Depending!on!what’s!on!your!outside!wall!you!will!have!
to!make!necessary!adjustments!in!the!drilling!process.!
• Take! your! adjustable! drill! bit! or! similar! tool! and! set! it! to! a! diameter! of!
approx.!2.375”!which!is!the!outer!diameter!of!the!venting.!We!suggest!you!
make!it!slightly!larger!to!allow!for!thicker/deeper!walls,!This!wi ll !allow!for!a!
little!play!if!you!do!not!have!it!lined!up!just!right!where!measurements!are!
not!exact.!The!extra!space!can!be!filled!in!with!silicone!afterwards.!
• You! now! have! your! holes! in ! the! wall.! The! next! step! is! to! take! each! the!
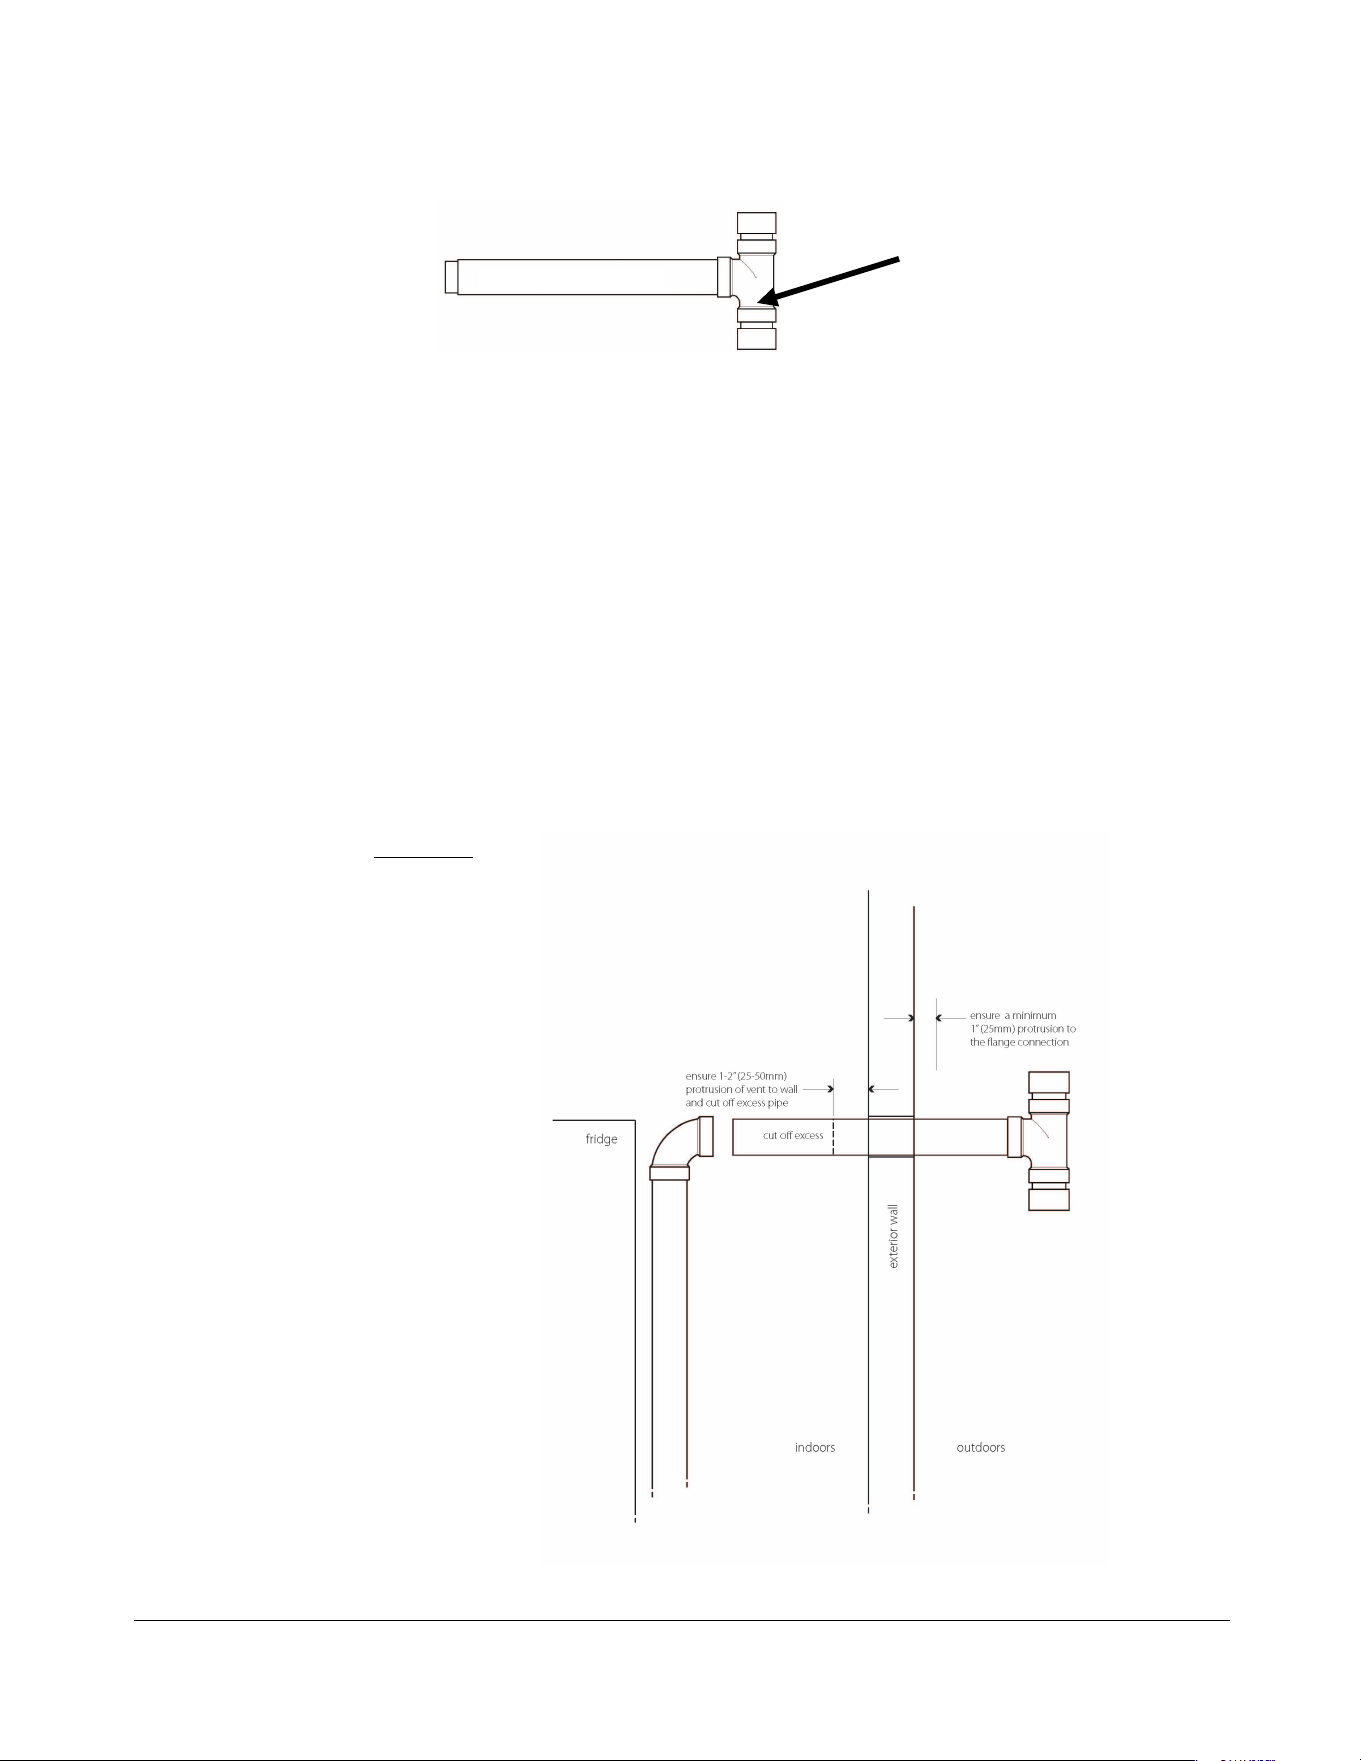
fresh! air! vent! and! flue! exhaust! vent! and! push! them! through! from! the!
exterior! wall! inward.! Make) sure) the) long) part) of) the) “T”) on) the) flue)
exhaust)vent,)faces)down)–)see)below"
)
"
UNIQUE UGP- 22 DV
11
Note:)Both"the"fresh"air"and"flue"exhaust" vent"can"be"cut"down"so"that"the"fridge" can"
be" pushed" as" close" as" possible" to" the" interior" wall" being" mindful" of" the" allowable"
clearances." The" fridge" co mes" with" enough" venting" to" vent" your" fridge" 1 9”" from" the"
exterior"wall"to"the"back"of"your"fridge.""
In# high# wind # situa tio n s # the # sho rte r # you # ma k e # the# ven t s,# the # incre a s ed # cha n c e # the#
fridge# will# shu t# dow n.# An# alternative # solution# is# a# vent# shroud# available# through#
Unique.#
• Push!your!fridge!up!against!the!interior!wall! to!meet!both!the!fresh!air!and
the! flue! exhaust! vent! that! you! have! just! pushed! through,! temporarily
connect!them!to!the!fridge!in!order!to!determine!what!length!you!need!to
cut!off,!if!any.
Figure B
Long Part Down
Flue Exhaust Vent

UNIQUE UGP- 22 DV
12
• In!order!to!determine!what!lengths!you!need!to!cut!off!measure!from!the!
inside!wall!to!the!back!of!your!fridge.!We!suggest!allowing!1”!for!clearance!
between!the!back!of!the!fridge!and!the!interior!wall.!Therefore!cut!the!
fresh!air!and!the!flue!exhaust!vent!with!suggested!tools!allowing!for!a!1”!
to!2”!protrusion!or!more!through!the!interior!wall!into!the!room!and!a!
minimum!1”!space!from!the!exterior!wall!to!the!flange!connection.!!
Note: You"will"find"that"on"the"flue"exhaust"tube"there"is"a"slight"protrusion"of"the"
aluminum"interior"vent"tube;"this"allows"you"the"ability"to"connect"it"to"the"fridge’s"
chimney."Ensure"you"maintain"this"protrusion"when"cutting"your"flue"exhaust"tube.!
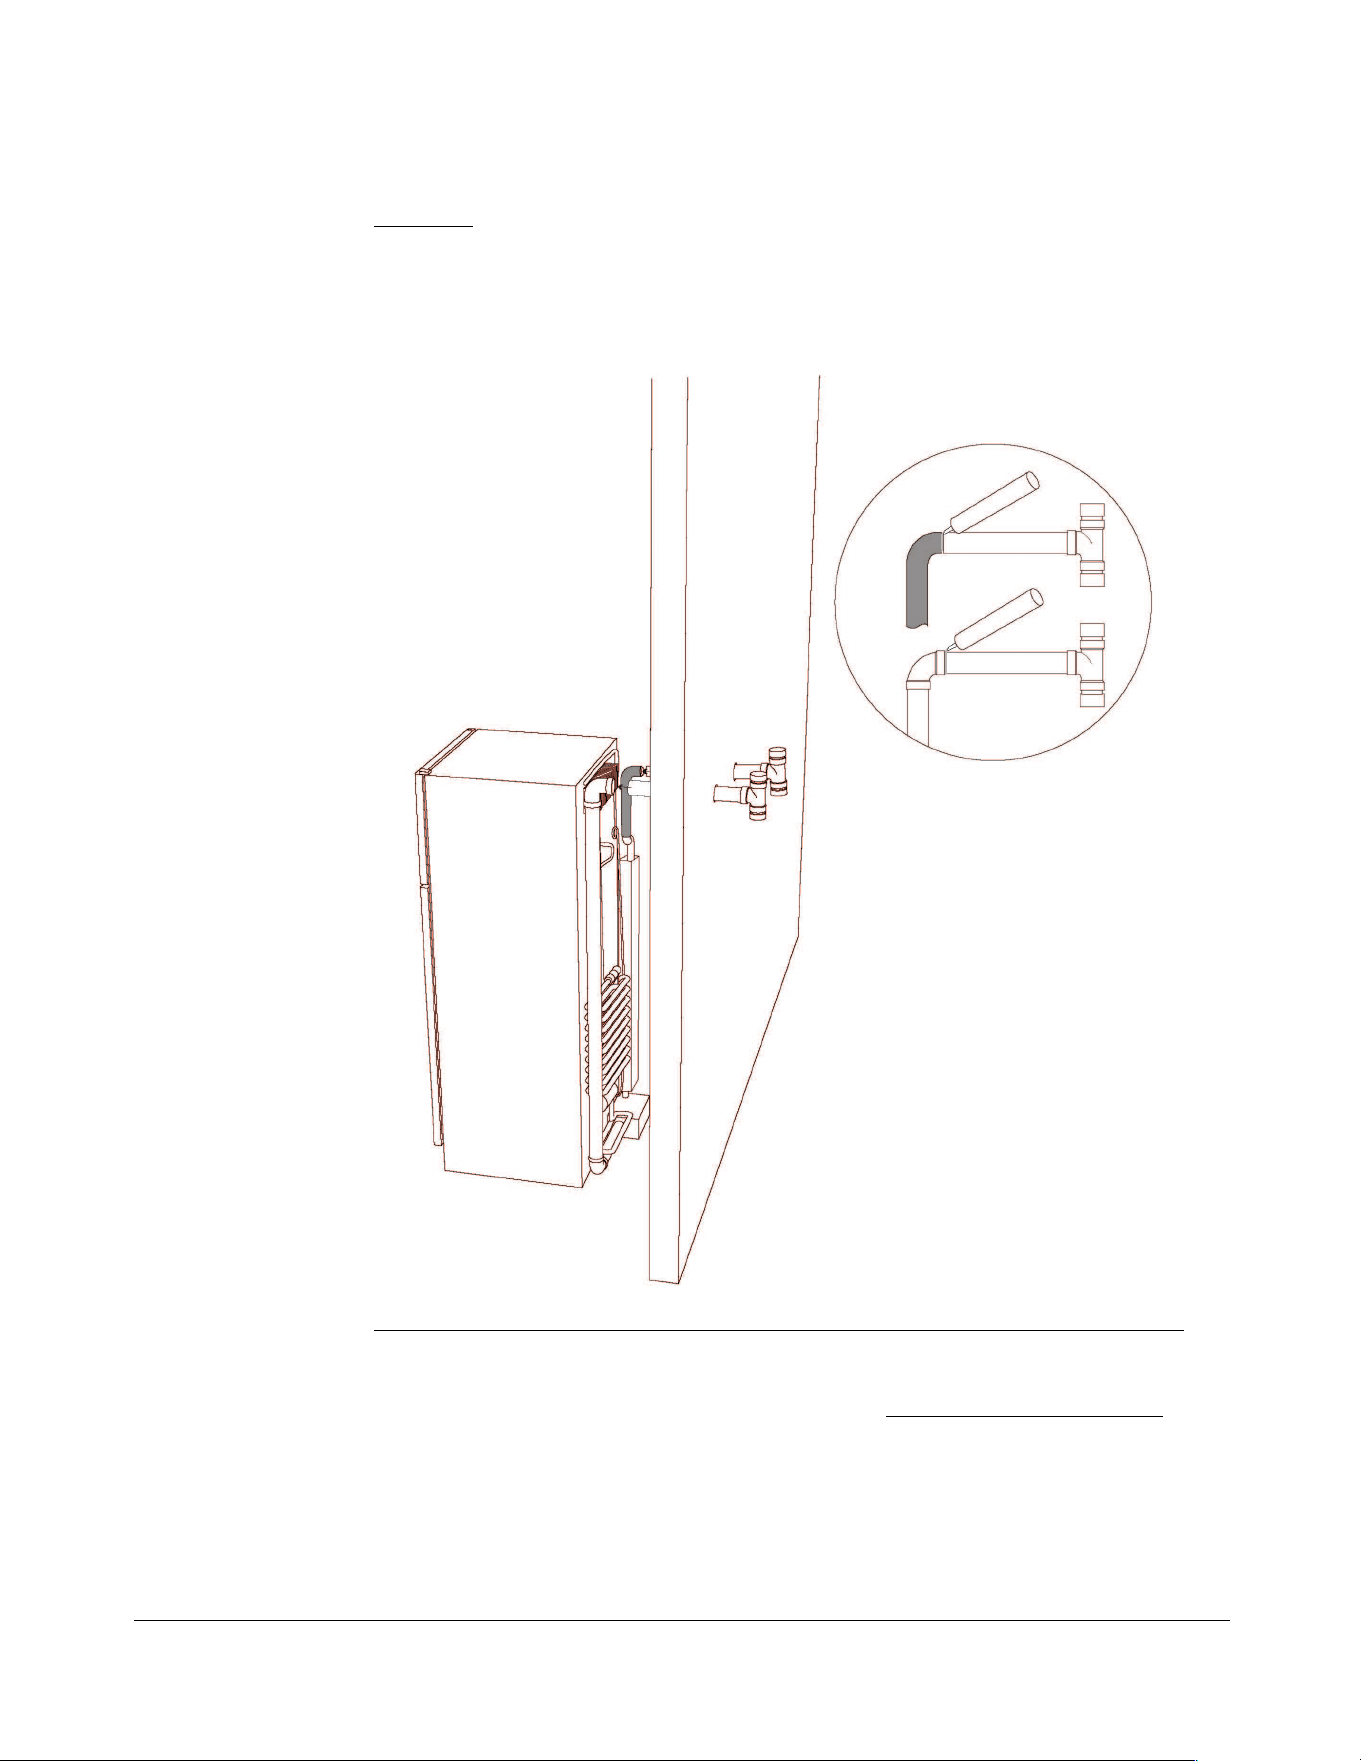
CONNECTING)VENTING)TO)FRIDGE#!
• After!cutting!your!tubes!to!the!required!length!for!your!application,!push!
your!fridge!up!to!the!fresh!air!and!flue!exhaust!tube.!They!wil l!fit!into!the!
venting!connections!on!the!fridge.!Take!the!high!temp!silicone!and!apply!a!
¼”! bead! around! bo th! the! outside! of! the! fresh! air! and! the! flue! exhaust!
vents!or!the!inside!of!the!venting!that’s!attached!to!the!fridge.!Either!way!
you! want! to! ensure! an! air! tight! fit! once! they! are! joined! together.! See)
Figure)C)on)next)page.!
• For!the!flue!exhaust!once!you!have!joined!the!connection!you!can!pull!the!
black! insulation! from! the! chimney! bend! over! the! connection! to! cover! it.!
This!will!ensure!it’s!well!insulated.!)
s
Please!be!aware! the!venting!does!not!have!to!b e!cut!dow n!as!it!will!operate!
with!the!supplied!vent!lengths.!Only!cut!down!the!lengths!if!the!venting!will!
protrude!too!far!out!from!the!exterior!wall!and!will!be!in!the!way!of!a!
walkway,!etc!where!someone!may!bump!into!them.!In#high#wind#situations#
the#shorter#you#make#the#vents,#the#increased#chance#the#fridge#will#shut#down.#
An#alternative#solution#is#a#ve nt #shroud#available #through#Unique
UNIQUE UGP- 22 DV
13
Figure C
Sealing)the)fresh)air)and)flue)exhaust)tubes)at)interior)and)exterior ) wall)
• You!now!need!to!seal!the!inside!and!exterior!spaces!surrounding!both!the!
fresh!air!tube!and!flue!exhaust.!See)Figure)D)below)on)next)page.!
UNIQUE UGP- 22 DV
14
Figure D
Venting!installation!is!now!complete.!You!now!can!move!onto!General!Operating!
Instructions!–!Chapter)3!

UNIQUE UGP- 22 DV
15
General Operating Instructions
Importance!of!Levelling!a!Refrigerator!
The!refrigerator!must!be!adjusted!to!a!horizontal!position!in!both!directions.!In!an!
absorption!refrigeration!system,!ammonia!is!liquefied!in!the!finned!condenser!coil!
at!the!top!rear!of!the!refrigerator.!The!liquid!ammonia!then!flows!into!the!
evaporator!(inside!the!freezer!section)!and!is!exposed!to!circulating!flow!of!
hydrogen!gas,!which!causes!the!ammonia!to!evaporate, !creating!a!cold!condition!
in!the!freezer.
!
When!starting!this!refrigerator,!the!cooling!cycle!may!require!up!to!8!hours!of!
running!time!to!begin!cooling!before!the!unit!is!fully!operational.!After!8!hours!you!
can!slowly)begin!loading!the!compa rtment.!
The!tubing!in!the!evaporator!section!is!specifically!sloped!to!provide!a!continuous!
movement!of!liquid!ammonia,!flowing!downward!by!gravity!through!this!section.!
If!the!refrigerator!is!operated!when!not!level,!liquid!ammonia!will!accumulate!in!
sections!of!the!evaporator!tubing.!This!will!slow!the!circulation!of!hydrogen!and!
ammonia!gas,!or!in!severe!cases,!completely!block!it,!resulting!in!a!loss!of!cooling.!
Warranty!will!not!cover!recharge/rebuild!if!caused!by!not !running!the!fridge!level.!
This)refrigerator)operates)only)on)LP)Gas)(Propane))
Note:"After"changing"an"LP"tank,"or"after"a"long"shut"off"period,"the"gas"line"is"likely"
to"be"filled"with"air."You"may"have"to"repeat"the"lighting"procedure"several"times"to"
purge"the"air"out"of"the"gas"lines."We"suggest"first"turning"off"gas"at"the"control"
panel,"then"the"tank,"this"will"reduce"an"air"trap"in"the"gas"line."
Chapter
3

UNIQUE UGP- 22 DV
16
Gas Operation
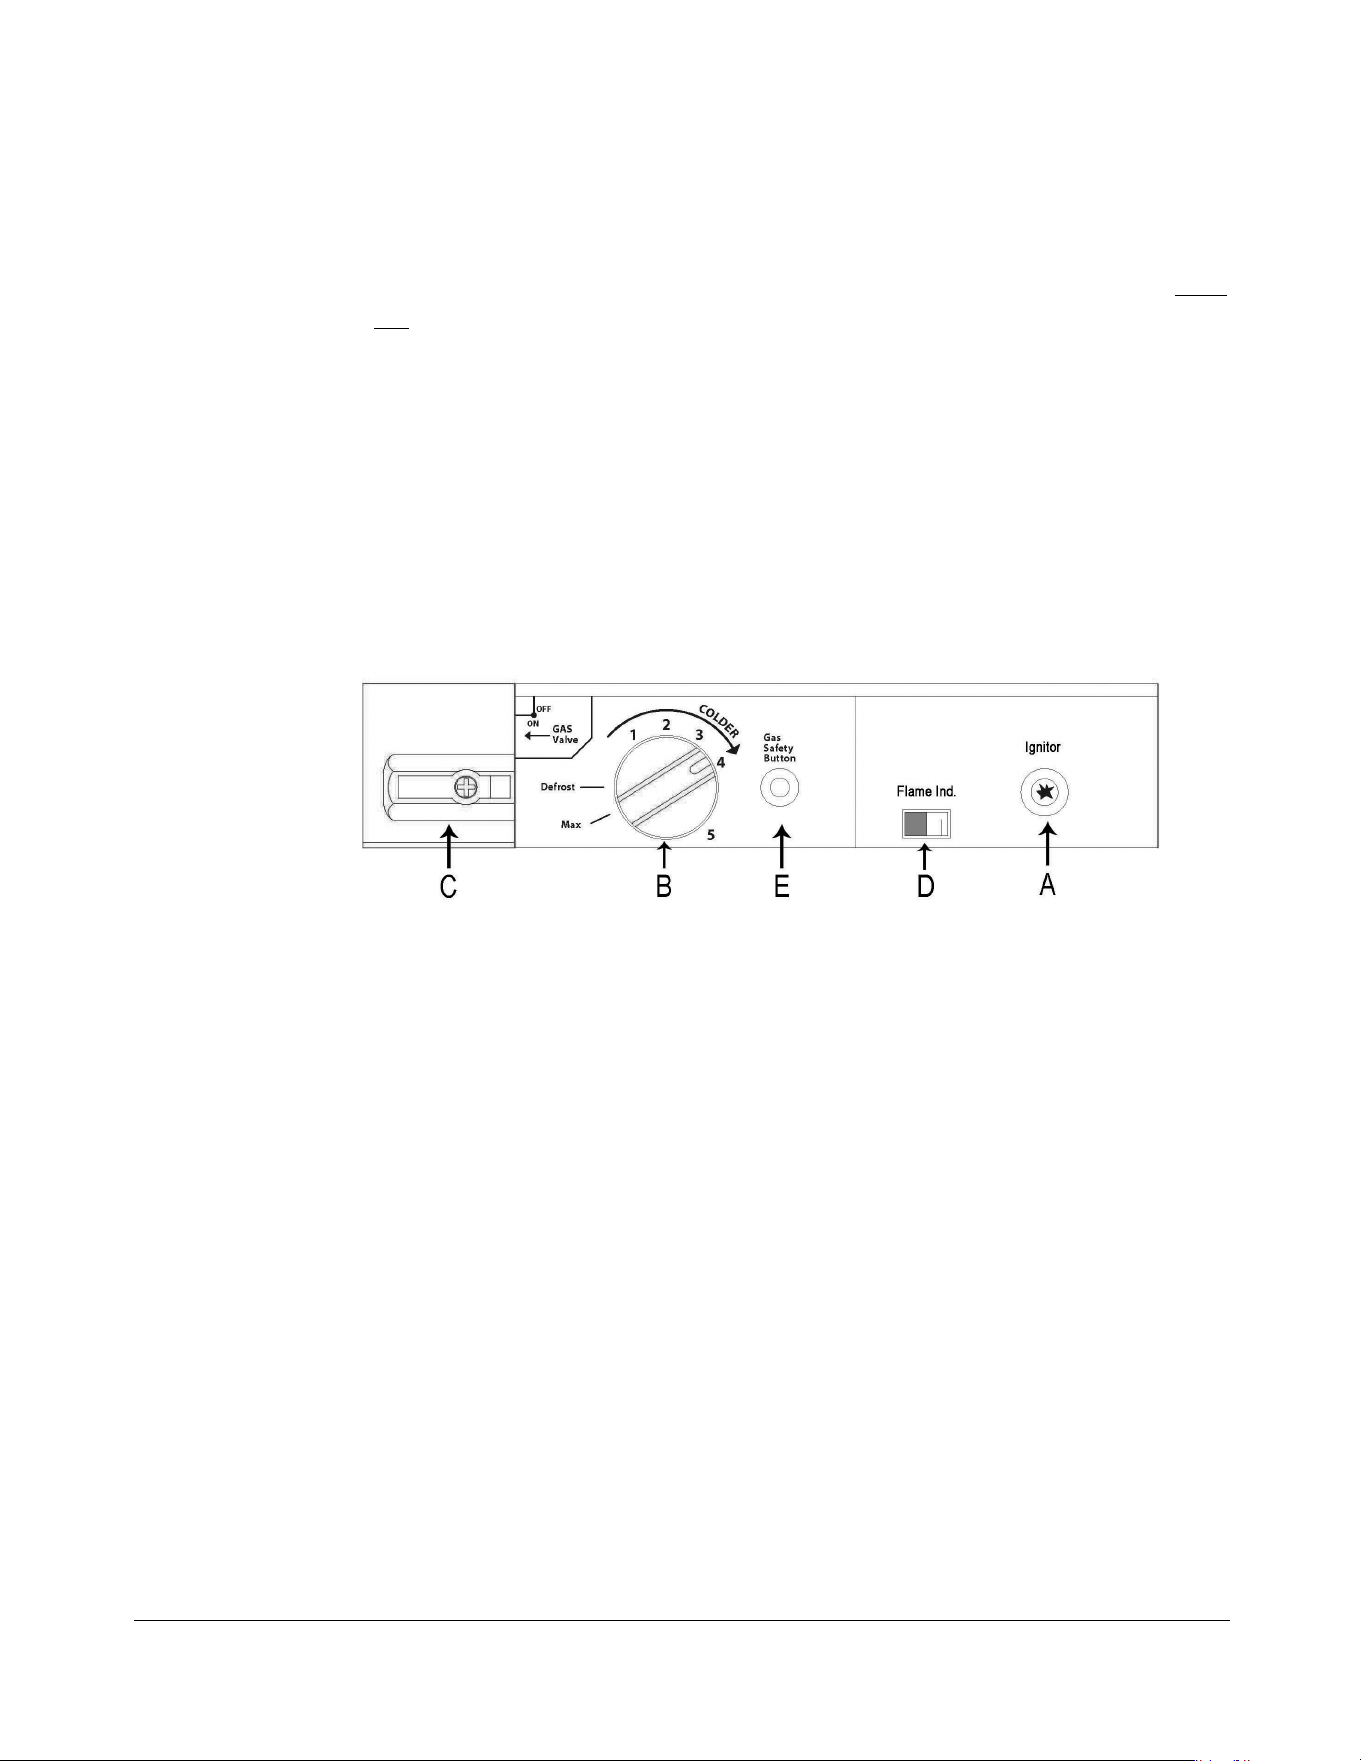
“Start)Up”)Procedure)–)see!Figure!#!5!on!next!page!for!control!panel)
1. Locate! the! control! panel! below! the! bottom! of! the! fridge! door,! behind! the
plastic!grill,!pull!off!plastic!grill!to!access!controls.
2. Turn!the!gas!shut!off!valve!C)to!the!ON!position!–!to!the!left
3. Turn!thermostat!button!B!fully!clockwise!(Max),!start!to!spark!ignitor!button!A
before!depressing!the!gas!control!button!E,!there!may!be!a!period!of!time
required!for!air!to!escape!from!the!gas!line!and!flow!up!to!burner.)Length)of
time)will)vary)depending)on)distance)of)the)fridge)to)propane)tank.)Continue
pushing!the!igniter!button!while!holding!in!the!gas!button!until!the!ne edle!in
the!flame!indicator!D)moves!into!the!green!area!(to!the!left).!It"is"important
that"you"start"sparking"first"before"pressing"in"the"gas"button,"otherwise"you
may"flood"the"burner"box"with"gas,"if"this"happens"it"will"not"light"and"you"will
have"to"wait"a"period"of"time"for"the"gas"to"dissipate"before"starting"the
process"again.
4. When!the!needle!starts!to!move!into!the!green!area,!this!means!flame!is!now
lit.!Stop!sparking!and!continue!to!hold!gas! button!E!down!for!an!additional!10
seconds.!!Release!gas!button,!fridge!should!now!stay!lit!and!the!needle!should
remain!in!the!green!area.
5. Once!all!the!above!has!been!done!and!you!are!ready!to!re-start!your!fr idge!for
use,!leave!the!thermostat!button!at!“4”.)Setting!the !thermostat!to!"4"!will
allow!the!fridge!to!get!to!optimum!cooling!temperature.!It!may!be!necessary
to!adjust!the!temperature!control!on!the!thermostat!knob!to!suit!your!needs.
6. The!quantity!of!food!in!the!refrigerator,!the!frequency!with!which!the
refrigerator!doors!are!opened!and!the!room!temperature!will!all!affect
refrigerator!temperatures.
UNIQUE UGP- 22 DV
17
Note:" If" ignition" does" not" occur" immediately" while" lighting" the" refrigerator," you"
have"flooded"the"burner"box,"wait"5"to"10"minutes"and"repeat."This"time"will"allow"
the" propane" to" dissipate" then" repeat" the" lighting" process" again." The" fridge" must"
not" run" with" any" of" its" venting" disconnected" or" with" burner" box" cover" removed,"
except" for" servicing/testing" the" unit." Doing" this" will" cause" a" danger" of" carbon"
monoxide"entering"the"room."
“Shut)Down”)Procedure!
1. Turn!knob!C!to!Gas!“Off”!position!–!to!the!right.
CONTROLS)–)See!Fig!5.!for!description!
Thermostat
A!thermostat!controls!the!refrigerator!cooling!temperature;!it!can!be!adjusted!by!
turning!knob!B)to!different!settings!to!maintain!the!desired!refrigerator!
temperature.!Knob!E!also!incorporates!a!safety!device,!which!automatically!shuts!
off!the!supply!of!gas!if!the!flame!goes!out.!The!piezo!electric!igniter!discharg es!
sparks!onto!the!burner!when!the!button!is!pushed.!!
1. “Defrost”)Defrost)setting)on)the)Gas)Thermostat:)In!gas!operation,!the
thermostat!closes!its!main!valve!and!the!burner!runs!continuously!at!the!bypass
rate!or!pilot!flame.!(turn!fully!counter!clockwise)!
2. “Max”)Setting)of)the)Thermostat:)In!gas!operation,!the!thermostat!allows!the
burner!to!remain!on!high!flame!continuously.!(turn!clockwise)!
3. The!thermostat!can!be!adjusted!between!“Max”!and!“Defrost”!to!obtain!the
desired!fridge!temperature.
Figure 5

UNIQUE UGP- 22 DV
18
When!the!thermostat!reaches!the!set!temperature,!it!will!reduce!the!burner!back!
to!bypass!operation.!
The!setting!of!the!thermostat!is!critical;!we!recommend!it!be!adjuste d!to!maintain!
a!dry!frost!on!the!cooling!fins!(approx.!38°!Fahrenheit!or!3°!Celsius).!Adjust!the!
thermostat!knob!closer!to!“Max”!(clockwise)!when!the!ambient!temperature!rises.!
How to Use the Refrigerator
FOOD)STORAGE)COMPARTMENT)
The!food!storage!compartment!is!completely!closed!and!unventilated,!w hich!is!
necessary!to!maintain!the!required!low!temperat ure!for!food!storage.!!The!coldest!
areas!in!the!refrigerator!are!under!the!cooling!fins!and!at!the!bottom!of!the!
refrigerator.!The!warmer!areas!are!on!the!upper!door!shelves.!This!should!be!
considered!when!placing!different!types!of!food!in!the!refrigerator.!
FROZEN)FOOD)STORAGE)COMPARTMENT!
Quick!frozen!soft!fruits!and!ice!cream!should!be!placed!in!the!coldest!part!of!the!
compartment!which!is!at!the!bottom!of!the!aluminum!liner.!Frozen!vegetables,!
may!be!stored!in!any!part!of!the!compartment.!
This!compartment!is!not!designed!for!deep!or!quick!freezing!of!food.!Meat!or!fish,!
whether!raw!or!prepared,!can!be!stored!in!the!frozen!food!storage!compartment!
provided!they!are!pre-cooled!in!the!refrigerator.!To!prevent!food!from!drying!out,!
keep!it!in!covered!dishes,!containers,!plastic!bags!or!wrapped!in!aluminum!foil.!
Defrosting
Frost!will!gradually!accumulate!inside!the!refrigerat or!and!freezer!surfaces.!It!must!
not!be!allowed!to!grow!too!thick!as!it!acts!as!an!insulator!and!adverse ly!affects!the!
refrigerator!performance.!Check!the!formation!of!frost!every!week!and!when!it!
exceeds!3/8”!thick,!defrost!the!refrigerator.!It!will!not!hurt!the!fridge!to!have!the!
ice!buildup.!If!it!gets!too!thick!it!will!act!as!an!insulator!and!hamper!the!cooling!
ability!of!the!fridge.!
Defrosting!can!be!done!with!the!fridge!running!if!so!desired.!Simply!open!both!
doors!and!turn!thermostat!to!defrost,!or!fully!counter!clockwise.!Once!the!ice!
starts!to!melt!a!towel!can!be!placed!under!the!evaporator!fins!in!the!fridge,!then!
pull!off!the!ice.!Wipe!the!fins!clean!and!shut!both!doors.!For!the!freezer,!defrosting!
UNIQUE UGP- 22 DV
19
time!can!be!reduced!by!filling!a!tray!with!hot!water!and!placing!it!in!the!freezer!
compartment.!Again!wipe!clean!with!a!towel!once!melted.!
DO)NOT)USE)A)HOT) AIR) BLOWER,)PERMANENT)DAMAGE)COULD)RESULT),)DO)NOT)USE)A)
KNIFE,)AN)ICE )PICK,)OR)ANY)OTHER) SHARP )TOOL S)TO) REMOVE) FROST )FROM)THE)
FREEZER)COMPARTMENT.)
FRIDGE)SECTION)
Inside!the!refrigerator!compartment,!the!defrost!water!runs!from!a!collector!
channel!to!a!drip!tray/cup!at!the!rear!of!the!refrigerator!where!it!normally!
evaporates.!If!heavy!frost!has!built!up!on!the!cooling!fins!creating!a!lot!of!defrost!
water,!beware!your!water!reservoir!may!overflow.!We!suggest!you!inspect!the!
reservoir!before!and!after!defrosting.!
FREEZER)SECTI ON)
This!area!must!be!wiped!down!with!cloths!to!remove!water!after!defrosting;!there!
is!no!drain!for!this!compartment!
Note:!When!all! frost! has! melted!in! the! freezer! compartment!and! the!interior! of!
the!refrigerator!it!should!be!wiped!up!with!a!clean!cloth.!!Set!the!thermostat!to!its!
Max!position!until!desired!interior!temperature!has!been!achieved,!approx.!8!plus!
hrs!dependent!on!room!temperature,!and!then!replac e!all!food.!!
Cleaning
Cleaning!the!refrigerator!is!usually!done!after!it!is!defrosted!or!put!into!storage .!To!
clean!the!interior!liner!of!the!refrigerator,!use!a!lukewarm!dish!soap!solution.!Use !
only!warm!water!to!clean!the!finned!evaporator,!gasket,!ic e!trays!and!shelves.!!
Never)use)strong)chemicals)or)abrasives!to!clean!these!parts!as!the!
protective!surfaces!will!be!damaged.!It!is!important !to!always!keep!the!
refrigerator!clean.!Dish!soap!is!recomm ended.!
Interior Light
The! interior! light! is! located! inside! the! fridge! compartment! at! the! top.! You! can!
replace! it! by! unscrewing! counter! clockwise.! Four! “D”! size! batteries! operate! the!
interior! light.! The! battery! compartment! is! located! on! the! exterior! back! of! the!
fridge,!upper!right!side!while!facing!the!back!of!the!fridge.!

UNIQUE UGP- 22 DV
20
Shut Down Procedure
A. Turn!gas!valve!knob!“C”!to!the!“off”!position
B. If!the!refrigerator!will!not!be!in!operation!for!a!period!of!weeks,!it!should!be
emptied,!defrosted,!cleaned!and!the!doors!left!open.!The!ice!tray!should!also
be!dried!and!kept!outside!the!cabinet.!Also!turn!off!gas!at!gas!control!then!the
main!supply!source.

UNIQUE UGP- 22 DV
21
Maintenance & Service
The!user!should!be!aware!of!service!that!must!be!done!on!a!regular!sche dule!to!
keep!the!refrigerator!operating!properly.!!Installation!must!be!by!a!licensed!gas!
fitter!in!accordance!with!local!codes!or!in!the!absence!of!local!national!Fuel! Gas!
Code,!ANSI!Z233.1!and!in!Canada!B149.2!Propane!Storage!and!Handling!Code!
(latest!edition).)
REFRIGERATOR)REMOVAL!
Before!working!on!the!refrigerator,!shut!off!the!gas!supply.!Disconnect!the!gas!
supply!line!at!the!rear!of!the!refrigerator.!Always!use!a!backup!wrench!when!
loosening!and!tightening!this!connection.!Cap!t he!gas!supply!line!and!remove!the!
refrigerator.!Replacement!is!the!reverse!of!removal.!Check!all!connections!for!gas!
leaks.!
Refer!to!Chapter!2!INSTALLATION!
PERIODIC)MAINTENANCE)
Before!working!on!refrigerator, !shut!off!the!gas!supply.!Disconnect!the!gas!line!at!
the! rear! of! the! refrigerator.! Always! use! a! backup! wrench! when! loosening! and!
tightening! this! connection.! Cap! the! gas! supply! line! and! remove! refrigerator.!
Replacement!is!the!reverse!of!removal.!Check!all!connections!for!gas!leaks.!Refer)
to)Chapter)2,)Installation.)
To!keep!your!refrigerator!operating!effectively!and!safely,!periodic!inspection!and!
cleaning!of!several!components!is!recommended!once!or!twice!a!year,!sometimes!
more!often!depending!on!environment.!!
• It's!important!to!keep!the!area!at!the!back!of!the!refr igerator!clean.!Clean!the
coils!on!the!back!of!the!refrigerator.!Use!a!soft!bristled!brush!to!dust!off!the
coils.
Note:))The)following)maintenance)is)required )at)least)once)or)twice)a)year)at)
least.))
Chapter
4
UNIQUE UGP- 22 DV
22
• Check!all!connectors!in!the!complete!refrigerator!LP!gas!system!for!gas
leaks.!The!LP!gas!supply!must!be!turne d!on.!Apply!a!non-corrosive!bubble
solution!to!all!LP!connections.!The!appearance!of!bubbles!indicates!a!leak
and!should!be!repaired!immediately!by!a!qualified!servic eman.!
WARNI NG)–)DO)NOT) US E) FLAME)TO)CHECK)FOR)GAS)LEAKS
Check!burner!flame!for!proper!appearance.!!The!flame!should!be!light!blue!with!no!
yellow!at!the!tip.!See)figure)#6!
• The!LP!gas!pressure!should!be!checked!and!the!main!regulator!re adjusted
if!pressure!is!incorrect.!The!correct!operat ing!pressure!is!11”!W.C.!(water
column).!
• Inspect!the!flue!baffle,!it!should!be!clean!and!free!of!soot.!Any!soot
formation!indicates!improper!functioning!of!the!burner.!!The!flue!and
burner!both!require!cleaning!in!the!following!manner:!
o
Remove!cover!from!the!burner!housing.!
o
Disconnect!the!wire!from!the!spark!electrode!
o
Remove!the!burner!
o
Remove!the!wire!and!flue!baffle!from!the!top!of!flue!tube.!Clean
the!flue!from!the!top!using!a!flue!brush,!be)sure)to)cover)the
Fig. #6
Fig. #7
UNIQUE UGP- 22 DV
23
burner)if)remaining)intact!to!eliminate!dirt!falling!into!burner.!
Replace!the!flue!baffle.!
o
Clean!burner!tube!with!compressed!air,!check!for!fluff!or!spider
webs.!
o
Before!removing!burner!orifice,!clean!burner!area!of!any!soot,
scale!or!dirt.!Remove!the!orifice!and!soak!it!in!alcohol!(isopropyl
alcohol!or!thinners)!and!blow!it!out!with!compressed!air.!Re-install
and!tighten!burner!orifice.!
o Re-install!burner!
Warning)-)DO) NOT)use!a!pin!or! wire!when!cleaning!the!burner!orifice
as! d amage!can!occur!to!the!precision!opening.!This!can!cause!damag
e
to!the!refrige rato r!o r!c rea te!a!fire!ha zard .!It!will!also!cre ate !extremely
dangerous)levels!of!carbo n !monoxid e.
o Be!sure!to!reconnect!the!wire!to!the!electrode.!Check!the
electrode!for!proper!location!and!gap.!See)figure)#8!
o The!inlet!&!outle t!gas!fittings!on!the!refrigerator!need!to!be
checked!for!leaks.!Apply!a!non-corrosive!bubble!solution!to!the
fittings!and!observe!for!leaks.!The!safety!valve!will!not! allow!gas
pressure!to!any!connections!between!it!and!the!burner !orifice.
These!fittings!must!be!checked!while!burner!is!in!operation!(gas
flow!will!be!present!between!saftey!valve!and!burner!head).
!
WARNING) –) The! safety! valve! (“E”) button) Fig#5)) must! be
manually! depres s e d! to! allow! gas! pressur e ! to! fl ow ! to! the
burner!orifice.!Be!sure!to!apply!the!leak!check!solution!before
depressing!the!saf ety!shut –off.!DO!NOT!allow!any!open!flame,
sparks,!smoking,!etc.!i n!the!area!of!the!test.!DO!NOT!depress
safety!shut-off !for !over !30! sec onds.
Fig. #8

UNIQUE UGP- 22 DV
24
o If!leak!occurs,!then!allow!ten!minutes!to!dissipate!from!the!burner
area.!Fix!leak!then!light!the!burner!according!to!the!instructions
under!GENERAL!OPERATION!INSTRUCTIONS!–!GAS! OPERATION,!CHAPTER!3

UNIQUE UGP- 22 DV
25
TROUBLESHOOTING INSTRUCTIONS &
SUGGESTED SPARE PARTS TO KEEP ON HAND
REFRIGERATOR)DOES)NOT)COOL,)CHECK)LIKELY)CAUSES:!
1.
Burner!orifice!clogged.!Clean.!See!section!Maintenance!&!Service,!CHAPTER! 4,!
Item!#2.!Periodic!Maintenance,!Items!1-9.!
2.
Check!to!ensure!refrigerator!is!level!–!(left!to!right!and!front!to!back).!
3.
Restriction!on!air!flow!across!cooling!unit.!
4.
Heavy!frost!build!up!on!evaporator!fins.!Defrost.
5. Flue!baffle!not!inserted!properly!in!flue!tube.!
6.
Improperly!set!thermostat.!See!paragraph!on!thermostat.!In!hot!weather!or
heavy!use!the!setting!should!be!closer!to!“Max”!than!usual.!
7.
Burner!dirty.!Clean.!See!Section!MAINTE NANCE!&!SERVICE,!CHAPTER!4,!PERIODIC!
MAINTENANCE
8. LP!gas!pressure!low!at!burner.!Regulator!pre ssure!must!not!drop!below!11
inches!W.C!(water!column).!CHAPTER!2,!!GAS!CONNECTION
9. Burner!not!located!properly!under!the!flue!tube.!Relocate,!flame!must!be
directly!into!flue!
10.
Burner!damaged.!Replace.!
11.
Odours!and!fumes!
• Dislocated!burner!
• Damaged!burner!
• Dirty!orifice!
• Dirty!flue!tube!–!CHAPTER!4.
Chapter
5

UNIQUE UGP- 22 DV
26
Spare Parts
The!following!is!a!list!of!commonly!used!parts!which!are!available:!
• Burner!orifice!
• Burner!
• Electrode!
• Thermocouple!
• Safety!valve!&!thermostat!
• Piezo!igniter!(push!button)!
• Baffle!
Contact!your!dealer!or!an!authorized!service!center!for!parts!and!repairs!as!
needed.!Quote!Model!&!Serial!#!-!See!CSA!rating/serial!plate!on!inside!left!wall.!
UNIQUE UGP- 22 DV
27
Door Removal & Reversal Instructions
NOTE:)The!direction!in!which!your!refrigerator!doors!open!(door!swing)!can!be!
reversed,!from!left!to!right!or!right!to!left,!by!moving!the!door!hinges!from!one!
side!to!the!other.!A!qualified!person!should!perform!reversing!the!door!swing.!
Some"earlier"Stainless"Steel"models"are"not"reversible,"they"had"to"be"ordered"as"
Left"or"Right"hinged."
1. Remove!toe!grille!and!top!hinge!cover.!
2. Remove!top!hinge!with!3/8”!hex!driver!and!lift!freezer!door!off!of!center!hinge!
pin.!Set!door!aside.!
3. Unscrew! center! hinge! pin! using! adjustable! wrench! and! save! for! reassembly.!
Ensure!plastic!washer!stays!on!hinge!pin.!
4. Lift!refrigerator!door!off!of!bottom!hinge!and!set!aside.!
5. Remove!center! hinge! and!shim! by! removing!inside! screw! and!loosening! two!
outside!screws!enough! to!allow!hinge! and!shim! to!slide! out.!Tighten! screws.!
Loosen! two! outside! screws! on! opposite! side! of! refrigerator,! remove! inside!
screw!and!install!center!hinge.!
6. Remove!three!screws!on!bottom!hinge!with!⅜”!socket!wrench.!Install!bottom!
hinge!on!opposite!side!with!the!three!screws!removed.!
7. Unscrew!bottom!hinge!pin!using!adjustable!wrench.!Move!hinge!pin!to!other!
hole!in!hinge!and!tighten!with!adjustable!wrench.!
Chapter
6
UNIQUE UGP- 22 DV
28
8. Reverse!door!handles!(see!instructions!on!next!page).!
9. Move! freezer! and! refrigerator! door! stops! to! opposite! side.! Before! starting!
screws,!use!an!awl!to!puncture!the!foam.!
10. Position!refrigerator!door! onto!bottom!hinge!pin! and!screw!center!hinge! pin!
through! center! hinge! into! top! of! door.! Close! refrigerator! door! to! help! align!
hinge!hole.!
11. Tighten!center!hinge!pin!with!adjustable!wrench.!
12. Remove!cabinet!and!hinge!hole!plugs!and!move!to!opposite!side.!
13. Lower!freezer!door!onto!center!hinge!pin.!
14. Close! freezer! door.! Have! an! assistant! lift! up! on! opposite! side! of! door! while!
tightening!screws!to!install!top!hinge.!
15. Replace!toe!grille!and!top!hinge!cover.!
UNIQUE UGP- 22 DV
29
To Remove Fridge or Freezer Handle
(Handles!may!be!easier!to!reverse!while!doors!are!off.)!
1. Remove!two!screws!attaching!handle!to!bottom!of!freezer!door.!
2. Lift!off!handle!from!dovetail!screw!
To attach Fridge or Freezer Handle
1. To!reinstall!handle!on!opposite!side,!first!remove!small!plug!on!side!of!door.!
2. Move!dovetail!screw!from!one!side!of!the!door!to!the!opposite!side!
3. Slide!the!handle!over!the!screw!
4. Attach!handle!to!bottom!of!door!–!two!screws!
5. Tale!removed!plug!and!insert!into!hole!from!where!you!just!removed!the!
dovetail!screw!!
UNIQUE UGP- 22 DV
30
Temperature Controls
!
Note:)Maximum)setting)is)override;)therefore)the)thermostat)function)is)not)
operational)at)this)setting.)This)setting)is)usually)only)required)during)very)hot)
and)humid)days.)
)
COOL)DOWN)PERIOD)
To!ensure!safe!food!storage,!allow!the!refrigerator!to!operate!w ith!the!doors!
closed!for!at!least!8!hours!before!loading!it!with!food.!
!
REFRIGERATOR)CONTROL)
NOTE:!When!first!setting!the!controls!or!when!changing!a!setting,!wait!24!hours!
for!the!temperature!to!stabilize!before!making!additional!changes.!
!
TEMPERATURE)ADJUSTMENT)
• Adjust)temperature)gradually:)move)the)knob)in)small)increments,)allowing)
the)temperature)to)stabilize.)
• For!colder!interior!temperatures,!turn!the !knob!clockwise.!
• For!warmer!interior!temperatures,!turn!the!knob!towards!counter-clockwise!
!
Adjusting!the!refrigerator!control!will!change!temperatures!in!both!compartments.!!
!
Remember!there!is!no!fan!to!circulate!the!air!in!the!refrigerator!and!freezer!
compartments!as!in!an!electric!fridge.!For!good!circulation,!do!not!block!the!
internal!cooling!fins!on!back-wall!and!try!to!maintain!a!temperature!of!38°!F!or!4°C!
in!the!fridge!
!
NOTE:)When!first!turning!refrigerator!on,!move!refrigerator!controls!to!Max, !
which!is!the!recommended!initial!setting.!After!24!hours,!adjust!the!controls!as!
needed.!
Chapter
7
UNIQUE UGP- 22 DV
31
Looking Inside
!
SHELF ADJUSTMENT
Refrigerator!shelves!are!easily!adjusted!to!suit!individual!needs.!Before!adjusting!
the!shelves,!remove!all!food.!
Crispers & Deli Drawers
The!crispers,!located!under!the!bottom!refrigerator!shelf, !are!designed!for!storing!
fruits,!vegetables,!and!other!fresh!produce.!Wash!items!in!clean!water!and!remove!
excess!water!before!placing!them!in!the!crispers.!Items!with!strong!odors!or!high!
moisture!content!should!be!wrapped!before!storing.)
!
!
!

UNIQUE UGP- 22 DV
32
Food Storage Ideas
FRESH)FOOD) STORAGE)
• The! fresh! food! compartment! should! be! kept! between! 38°! F! and! 40°! F!
(3.3°!C!and!4.4°!C)!with!an!optimum!temperature!of!38°!F!(3.3°C).!
• Avoid!overcrowding!the!refrigerator!shelves.!This!reduces!the!circulation!
of!air!around!the!food!and!results!in!uneven!cooling.!
FRUITS)AND)VEGETABLES)
• Storage! in! the! crisper! drawers! traps! moisture! to! help! preserve! the! fruit!
and!vegetable!quality!for!longer!time!periods.!
MEAT)
• Raw! meat! and! poultry! should! be! wrapped! securely! so! leakage! and!
contamination!of!other!foods!or!surfaces!does!not!occur.!
FROZEN)FOOD)STORAGE)
• The! freezer! compartment! should! be! kept! at! 8.6°F! (-13°C)! at! a! 77°F!!!!!!!!
(25°C)!room!ambient!
• A!freezer!operates!most!efficiently!when!it!is!slowly!loaded!to!2/3!full.!
PAC KAGING)FOODS)FOR) FREEZING)
• To! minimize! dehydration! and! quality! deterioration,! use! aluminum! foil,!
freezer!wrap,!freezer!bags!or!airtight!containers.!
• Force!as!much!air!out!of!the!packages!as!possible!and!seal!them!tightly.!
Trapped!air!can!cause!food!to!dry!out,!change!color,!and!develop!an!off-
flavor!(freezer!burn).!
• Wrap!fresh!meats!and!poultry!with!suitable!freezer!wrap!prior!to!freezing.!
• Do!not!refreeze!meat!that!has!completely!thawed.!

UNIQUE UGP- 22 DV
33
LOADING)THE)FREEZER)
• Avoid!adding!too!much!warm!food!to!the!freezer!at!one!time.!This!overloads!
the! freezer,! slows! the! rate! of! freezing,! and! can! raise! the! temperature! of!
frozen!foods.!
• Leave!a!space!between!the!packages,!so!cold!air!can!circulate!freely,!allowing!
food!to!fr eeze!as!quickly!as!possible.!
• Avoid!storing!hard -to-freeze!foods!such!as!ice!cream!and!orange!juice!on!the!
freezer!door!shelves.!These!foods!are!best!stored!in!the!freezer!interior!where!
the!temperature!varies!less.!
Care and Cleaning
Keep! your! refrigerator! and! freezer! clean! to! prevent! odor! build-up.! Wipe! up! any!
spills!immediately!and!clean!both!sections!at!least!twice!a!year.!Never)use!metallic!
scouring! pads,! brushes,! abrasive! cleaners! or! strong! alkaline! solutions! on! any!
surface.!Do)not)wash!any!removable!parts!in!a!dishwasher.!
• When)moving)the)refrigerator,)pull)straight)out.)You)must)turn)gas)off)at)
source)or)have)adequate)flex)line)to)move)refrigerator.)Do)not)shift)the)
refrigerator) from) side) to) side) as) this) may) tear) or) gouge) the) floor)
covering)and)damage)the)gas)supply)lin e.))
• Damp) objects) stick) to) cold) metal) surfaces.) Do) not) touch) refrigerated)
surfaces)with)wet)or)damp)hands.)
NOTES:
Do!not!use!razor!blades!or!other!sharp!instruments,!which!can!
scratch!the!appliance!surface!when!removing!adhesive!labels.!Any!
glue!left!from!tape!or!labels!can!be!removed!with!a!mixture!of!warm!
water!and!mild!detergent,!or,!touch!the!glue!residue!with!the!sticky!side!of!tape!
you!have!already!removed.!Do)not)remove)the)certification/serial)plate)or),)
lighting)instructions)or)CO)warning)label.)

UNIQUE UGP- 22 DV
34
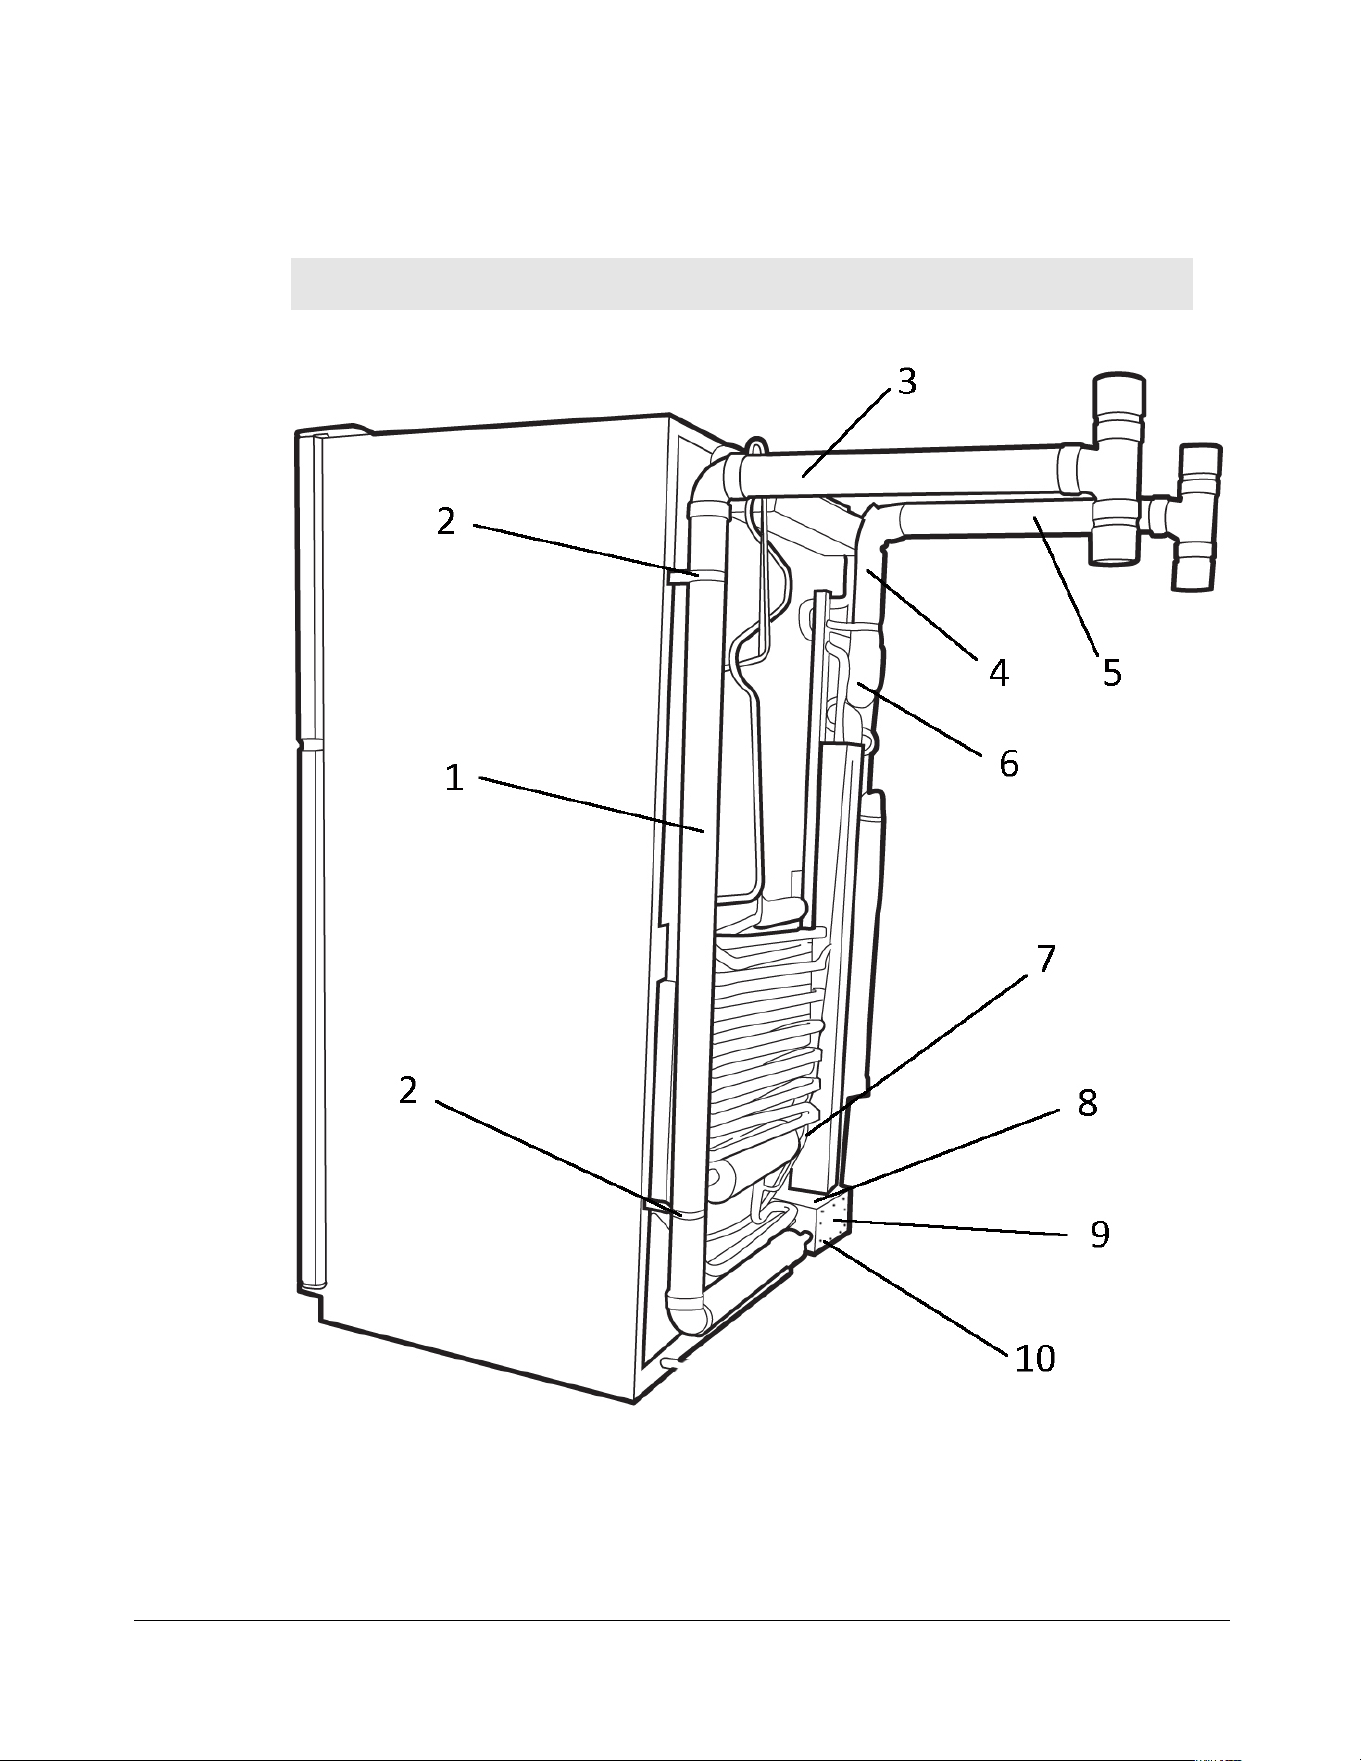
Parts Diagram and List
Interior of Fridge
Chapter
8
UNIQUE UGP- 22 DV
35
UNIQUE UGP- 22 DV
36
UNIQUE UGP- 22 DV
37
Burner Train Assembly
UGP- 22)
UNIQUE UGP- 22 DV
38
UNIQUE UGP-22!!Fridge&!
Item#
PART#
DESCRIPTION
1
UGP22-01
FREEZER DOOR GASKET - WHITE
1
UGP22-02
FREEZER DOOR GASKET – BLACK
1A
UGP22-03
FRIDGE DOOR GASKET - WHITE
1A
UGP22-04
FRIDGE DOOR GASKET - BLACK
2
UGP22-05
PLUG, WHITE
2
UGP22-06
PLUG, BLACK
3
UGP22-07
FREEZER DOOR - WHITE
3
UGP22-08
FREEZER DOOR - STAINLESS STEEL
3
UGP22-09
FREEZER DOOR – BLACK
4
UGP22-10
CAP, WHITE
4
UGP22-11
CAP, BLACK
5
UGP22-12
HANDLE, SCREW
6
UGP22-13
HANDLE, SCREW
7
UGP22-14
FREEZER/FRIDGE DOOR HANDLES – WHITE
7
UGP22-15
FREEZER/FRIDGE HANDLES – BLACK
7
UGP22-16
FREEZER/FRIDGE HANDLES – STAINLESS STEEL
8
UGP22-17
SET SCREW
9
UGP22-18
DOOR STOP – WHITE - FREEZER
9
UGP22-19
DOOR STOP – BLACK - FREEZER
9A
UGP22-20
DOOR STOP – WHITE - FRIDGE
9A
UGP22-21
DOOR STOP – BLACK - FRIDGE
10
UGP22-22
DOOR PLUG - WHITE
10
UGP22-23
DOOR PLUG – BLACK
10
UGP22-24
DOOR PLUG - GRAY
UNIQUE UGP- 22 DV
39
Item#
PART#
DESCRIPTION
11
UGP22-25
FRIDGE DOOR - WHITE
11
UGP22-26
FRIDGE DOOR - STAINLESS STEEL
11
UGP22-27
FRIDGE DOOR – BLACK
12
UGP22-28
SCREW
13
UGP22-29
FRIDGE DOOR RACK – TOP & LOWER
14
UGP22-30
FRIDGE DOOR RACK – MIDDLE
15
UGP22-31
DAIRY COVER, (ALL MODELS)
16
UGP22-32
FREEZER DOOR RACKS
17
UGP22-33
SCREW FREEZER AND FRIDGE HANDLES
18
UGP22-34
TRIM SHELF REAR
19
UGP22-35
GLASS SHELF
20
UGP22-36
TRIM SHELF FRONT
21
UGP22-37
FRAME - SHELF
22
UGP22-38
FRAME SHELF – HOLDS MEAT DRAWER
23
UGP22-39
HANGER SCREWS
24
UGP22-40
HANGER RAILS – MEAT DRAWER
25
UGP22-41
MEAT DRAWER
26
UGP22-42
LIGHT SOCKET
27
UGP22-43
LED BULB
28
UGP22-44
LIGHT SWITCH
29
UGP22-45
COVER – CRISPER PAN
30
UGP22-46
INSERT PAN COVER GLASS
31
UGP22-47
RH HUMIDITY CONTROL
32
UGP22-48
LH HUMIDITY CONTROL
33
UGP22-49
CRISPER DRAWERS
34
UGP22-50
HINGE COVER - WHITE
UNIQUE UGP- 22 DV
40
Item#
PART#
DESCRIPTION
34
UGP22-51
HINGE COVER - BLACK
35
UGP22-52
TOP HINGE SCREWS
36
UGP22-53
TOP HINGE
37
UGP22-54
CORNER TRIM - WHITE
37
UGP22-55
CORNER TRIM - BLACK
38
UGP22-56
MIDDLE HINGE SHIM
39
UGP22-57
NYLON WASHER
40
UGP22-58
MIDDLE HINGE PIN
41
UGP22-59
MIDDLE HINGE - CHROME
41
UGP22-60
MIDDLE HINGE - BLACK
42
UGP22-61
MIDDLE HINGE SCREWS
43
UGP22-62
BOTTOM HINGE PIN
44
UGP22-63
BOTTOM HINGE - CHROME
44
UGP22-63
BOTTOM HINGE - BLACK
45
UGP22-64
BOTTOM HINGE SCREWS
46
UGP22-65
GRILL - WHITE
46
UGP22-66
GRILL - BLACK
47
UGP22-67
ROLLER ASSEMBLY - FRONT
48
UGP22-68
RIVET – FLAT HEAD
49
UGP22-69
ROLLER - REAR
50
UGP22-70
PLUG - WHITE
50
UGP22-71
PLUG - BLACK
51
UGP-9RV-SS0
CO DETECTOR 9RV SSO
52
QMP-INTERRUPTER
BODY
INTERRUPTER BLOCK FOR CO-MONITORED FRIDGES
53
QMP-18-FET
MOSFET ASSY - FOR CO-MONITORED MODELS
54
UGP18-51
BURNER BRACKET
UNIQUE UGP- 22 DV
41
Item#
PART#
DESCRIPTION
55
UGP18-52
BURNER TUBE
56
UGP18-53
ELECTRODE WITH WIRE
57
UGP18-54
ORIFICE
58
UGP18-50
THERMOCOUPLE
59
UGP1518-5
INLET GAS TUBE
60
UGP1518-4
OUTLET GAS TUBE
61
UGP18-56
PEIZO IGNITOR
62
UGP18-57
FLAME INDICATOR
63
UGP1518-9
SAFETY VALVE
64
UGP1518-2
KNOB, THERMOSTAT
65
UGP1518-1
ON/OFF VALVE
66
UGP1518-6
INLET FITTING
67
UGP1518-8
PIPE – ON/OFF VALVE TO THERMOSTAT CONTROL
68
UGP1518-7
THERMOSTAT CONTROL
69
UGPSPBLOCK
SINGLE PRONG INTERRUPTER BLOCK
70
UGP1518-3
OUTLET FITTING
UNIQUE UGP- 22 DV
42
Venting Component Parts List – UGP 22 DV
UNIQUE UGP- 22 DV
43
Unique UGP-22 DV
Venting Parts List
Item!#)
Description)
Part#)
1!
Fresh!Air!Vent!Assembly!!
UGP-DV15SA04!
2!
Fresh!Air!Mounting!Bracket!
UGP-DV1518DVU09!
3!
Fresh!Air!Exterior!Vent!Assembly!
UGP-DV18SA06!
4!
Insulated!Chimney!
UGP18SA01!
5!
Flue!Exhaust!Vent!Assembly!
UGP-DV18SA05!
6!
Chimney!Insulation!Wrap!-!part!of!Chimney!
Assembly!
N/A!
7!
Condensate!Hose!52”!
UGPDVU13!
8!
Burner!Box!Assembly!
UGPDV18SA02!
9!
Burner!Box!Lid!Assembly!includes!Screws!
UGPDV18SA03!
10!
Cover!Plate!Screws!–!Part!of!Burner!Box!Lid!
Assembly!
N/A!
Misc.!Parts!
Not!shown!
Silicone!–!High!Temp!–!seals!fresh!air!and!flue!
connections!
UGP-HTSilicone!

UNIQUE UGP- 22 DV
44
UNIQUE UGP-22
5 YEAR LIMITED WARRANTY*
)
Unique#Gas#Products#Ltd.#warrants!that!this!UNIQUE!refrigerator!is!free!from!defects!in!ma terial!
and!workmanship!under!normal!usage!and!service!under!the!following!terms:!
!
1. This!W arranty!is!made!only!to!the!first!purchaser!(”original!purchaser”)!who!acquires! this!
refrigerator!for!h is/h er!own!use!and!will!b e!honored!by!Unique# Gas#Products# Ltd.# and!by!
the!Seller.!
2. Any! part! of! this! refrigerator! returned! to! the! Seller!or! Unique# Gas# Products#Ltd.,! w h ic h !
upon! examination! is! determined! by! them! to! have! been! defective! in! material! or!
workmanship,! will! at! their! option! be! either! repaired! or! replaced! un der! this! warranty,!
without!charge!for!materials/parts.!(customer!is!responsible!for!labour)!
3. The! obligation! to!repair! or!replace!d efective!parts!will! apply!only! to!parts! returned!within!
one!year!of!the!date!of!purchase!and!w ill!c on s tit ut e !the!Selle rs!sole!o b liga tio n !under!this!
Warranty.! The! cooling! system! (coil)! is! warranted! for! a! total! of! five! years! and! will! be!
replaced! at! no! charg e! by! Unique# Gas# Products# Ltd.# and! the! Seller! (labour! and!
transportation !cha rges!w ill!be!the!resp onsibility!of!the!owner).!Coils!replaced!during!the!
initial!five-year!period!will!be!warranted!only!for!the!remaining!portion.!
!
The! Seller!will! have!no!obligation! under!this!warranty!with!respect!to!conditions! u nrelated!to!the!
material! or! workmanship! of! this! refrig e ra to r.! Such! unrelated ! condition s ! include! without !
limitation :!
!
a) faulty!installation!(or!venting)!and !damage!resulting !there from;!not!installed!by !Seller!!
b) the!need!for!normal!ma inten an ce !of!this!refrige rato r!(includ ing!the !clean ing !of!the !Burn er,!
Venturi,!orifice,!flue!tubes!and!assurance!of!proper!propane!gas!pressure);!
c) any!accidents!to!or!misuse!of!any!part!of!this!refrigerator!and!any!alteration!thereof!by!
anyone!other!than!the!Seller!or!its!authorized!representative.!
!
This!UNIQUE!Refrigerator!must#be!serviced!regularly!as!outlined!in!the!O wner’s!Manual.!Unique#
Gas#Products# Ltd.# th e!seller!will! n ot!be!liable!for!direct!or!indirect!loss!of!foods!c au sed !by!fa ilure!
in! o p e ra tio n .! In! case! of! damage ,! the! own er! mu st ! provid e ! proof! of! purcha s e,! Mo d el,! and! Serial!
Number!to!the!Seller!or!Unique#Gas#Products#Ltd.#
#
"*Due!to!remote!locations,!it!is!the!customer's!responsibility!to!bring!items!to!dealer!for!review.!