
ENGLISH_index
Safety and Reference
OWNER’S MANUAL
www.lg.com
Copyright © 2024 LG Electronics Inc.
All Rights Reserved.
LED TV*
Please read this manual carefully
before operating your set and retain it
for future reference.
* LG LED TV applies LCD screen with LED backlights.
The model and serial number of the product are
located on the back and on one side of the product.
Record them below in case you ever need service.
Model
Serial No.
Printed in Korea
*MFL720617662408REV05*
LG Customer Information Center
For inquires or comments, visit www.
lg.com or call;
1-888-542-2623 CANADA
Register your product Online!
www.lg.com
43UT7000PUA
43UT7550AUA
43UT7590PUA
43UT8000AUA
43UT8000PUA
43UT9000PUA
50UT7000PUA
50UT7550AUA
50UT8000AUA
50UT8000PUA
50UT8050AUA
50UT9000PUA
55UT7000PUA
55UT7550AUA
55UT8000AUA
55UT8000PUA
55UT8050AUA
55UT9000PUA
65UT7000PUA
65UT7550AUA
65UT8000AUA
65UT8000PUA
65UT8050AUA
65UT9000PUA
70UT7550AUA
70UT8000AUA
70UT8000PUA
70UT8050AUA
75UT7000PUA
75UT7550AUA
75UT7590PUA
75UT8000AUA
75UT8000PUA
75UT8050AUA
75UT9000PUA
86UT7550AUA
86UT7590PUA
86UT8000AUA
86UT8000PUA
43QNED80TUA
43QNED80TUC
50QNED80TUC
50QNED85TUA
55QNED80TUC
55QNED85TAA
55QNED85TUA
55QNED85TYA
65QNED80TAC
65QNED80TUA
65QNED80TUC
65QNED85TAA
65QNED85TUA
65QNED85TYA
65QNED90TAA
65QNED90TUA
75QNED80TAC
75QNED80TUC
75QNED85TAA
75QNED85TUA
75QNED85TYA
75QNED90TAA
75QNED90TUA
75QNED99TUA
86QNED80TUC
86QNED85TUA
86QNED90TAA
86QNED90TUA
86QNED99TUA

2
Important Safety Instruction
• Read these instructions.
• Keep these instructions.
• Heed all warnings.
• Follow all instructions.
• Do not use this apparatus near water.
• Clean only with dry cloth.
• Do not block any ventilation openings. Install in accordance with the manufacturer’s instructions.
• Do not install near any heat sources such as radiators, heat registers, stoves, or other apparatus (including amplifiers) that produce heat.
• Do not defeat the safety purpose of the polarized or grounding-type plug. A polarized plug has two blades with one wider than the other. A grounding type
plug has two blades and a third grounding prong. The wide blade or the third prong are provided for your safety. If the provided plug does not fit into your
outlet, consult an electrician for replacement of the obsolete outlet.
• Protect the power cord from being walked on or pinched particularly at plugs, convenience receptacles, and the point where they exit from the apparatus.
• Only use attachments/accessories specified by the manufacturer.
• Use only with the cart, stand, tripod, bracket, or table specified by the manufacturer, or sold with the apparatus. When a cart is used, use caution when
moving the cart/apparatus combination to avoid injury from tip-over.
• Unplug this apparatus during lightning storms or when unused for long periods of time.
• Refer all servicing to qualified service personnel. Servicing is required when the apparatus has been damaged in any way, such as power-supply cord or
plug is damaged, liquid has been spilled or objects have fallen into the apparatus, the apparatus has been exposed to rain or moisture, does not operate
normally, or has been dropped.
Before reading this manual
• Read this manual thoroughly before operating your TV, and keep it for future reference.
• On the website you can download the manual including installation, using, troubleshooting, specifications, license etc and view its contents on your PC or
mobile device.
• User Guide : For more information about this TV, read the USER GUIDE embedded in the product. (Depending upon model)
- To open the USER GUIDE → [ ] → [Support] → [User Guide]
Optional Extras
• Optional extras can be changed or modified for quality improvement without any notification. Contact your dealer for buying these items. These devices
work only with certain models.
• The model name or design may be changed due to the manufacturer’s circumstances or policies.
• Magic Remote Control :
Check whether your TV model supports Bluetooth in the Wireless Module Specification to verify whether it can be used with the Magic Remote.
• A cable to connect antennas and external devices must be purchased separately.
Note
• Product specifications or contents of this manual may be changed without prior notice due to upgrade of product functions.
• The items supplied with your product may vary depending upon the model.
• Image shown may differ from your TV.
By using this product, you agree that all disputes between you and LG arising out of or relating in any way to this product (including but not limited to warranty
disputes) shall be resolved through binding arbitration on an individual basis, unless the laws of your province or territory do not permit that, or, in other
jurisdictions, if you choose to opt out. For further clarity, this arbitration requirement is not applicable to consumers residing in Ontario. Additional information
regarding the terms of the arbitration agreement (including details on the procedure for resolving disputes) is available www.lg.com/ca_en/arbitration (Canada)
and/or your warranty.

3
Warning! Safety instructions
CAUTION
RISK OF ELECTRIC SHOCK
DO NOT OPEN
CAUTION: TO REDUCE THE RISK OF ELECTRIC SHOCK DO NOT REMOVE COVER (OR BACK). NO USER SERVICEABLE PARTS INSIDE. REFER TO QUALIFIED SERVICE
PERSONNEL.
The symbol is intended to alert the user to the presence of uninsulated dangerous voltage within the product’s enclosure that may be of sufficient
magnitude to constitute a risk of electric shock to persons.
The symbol is intended to alert the user to the presence of important operating and maintenance (servicing) instructions in the literature
accompanying this apparatus.
WARNING: TO REDUCE THE RISK OF FIRE AND ELECTRIC SHOCK, DO NOT EXPOSE THIS PRODUCT TO RAIN OR MOISTURE.
• TO PREVENT THE SPREAD OF FIRE, KEEP CANDLES OR OTHER ITEMS WITH
OPEN FLAMES AWAY FROM THIS PRODUCT AT ALL TIMES.
• Do not place the TV and/or remote control in the following
environments:
- Keep the product away from direct sunlight.
- An area with high humidity such as a bathroom.
- Near any heat source such as stoves and other devices that produce
heat.
- Near kitchen counters or humidifiers where they can easily be exposed
to steam or oil.
- An area exposed to rain or wind.
- Do not expose to dripping or splashing and do not place objects filled
with liquids, such as vases, cups, etc. on or over the apparatus (e.g., on
shelves above the unit).
- Near flammable objects such as gasoline or candles, or expose the TV
to direct air conditioning.
- Do not install in excessively dusty places.
Otherwise, this may result in fire, electric shock, combustion/explosion,
malfunction or product deformation.
• Ventilation
- Install your TV where there is proper ventilation. Do not install in a
confined space such as a bookcase.
- Do not install the product on a carpet or cushion.
- Do not block or cover the product with cloth or other materials while
unit is plugged in.
• Take care not to touch the ventilation openings. When watching the TV
for a long period, the ventilation openings may become hot.
• Protect the power cord from physical or mechanical abuse, such as being
twisted, kinked, pinched, closed in a door, or walked upon. Pay particular
attention to plugs, wall outlets, and the point where the cord exits the
device.
• Do not move the TV whilst the Power cord is plugged in.
• Do not use a damaged or loosely fitting power cord.
• Be sure to grasp the plug when unplugging the power cord. Do not pull
on the power cord to unplug the TV.
• Do not connect too many devices to the same AC power outlet as this
could result in fire or electric shock.
• Disconnecting the Device from the Main Power
- The power plug is the disconnecting device. In case of an emergency,
the power plug must remain readily accessible.
• Do not let your children climb or cling onto the TV. Otherwise, the TV
may fall over, which may cause serious injury.
• Outdoor Antenna Grounding (Can differ by country):
- If an outdoor antenna is installed, follow the precautions below.
An outdoor antenna system should not be located in the vicinity of
overhead power lines or other electric light or power circuits, or where
it can come in contact with such power lines or circuits as death or
serious injury can occur.
Be sure the antenna system is grounded to provide some protection
against voltage surges and built-up static charges.
Section 810 of the National Electrical Code (NEC) in the U.S.A. provides
information with respect to proper grounding of the mast and
supporting structure, grounding of the lead-in wire to an antenna
discharge unit, size of grounding conductors, location of antenna
discharge unit, connection to grounding electrodes and requirements
for the grounding electrode.
Antenna grounding according to the National Electrical Code, ANSI/
NFPA 70
• Never touch this apparatus or antenna during a lightning storm. You may
be electrocuted.
• Make sure the power cord is connected securely to the TV and wall socket
if not secured damage to the Plug and socket may occur and in extreme
cases a fire may break out.
• Do not insert metallic or inflammable objects into the product. If a
foreign object is dropped into the product, unplug the power cord and
contact the customer service.
• Do not touch the end of the power cord while it is plugged in. You may
be electrocuted.

4
• If any of the following occur, unplug the product immediately
and contact your local customer service.
- The product has been damaged.
- If water or another substance enters the product (like an AC adapter,
power cord, or TV).
- If you smell smoke or other odors coming from the TV
- When lightning storms or when unused for long periods of time.
Even the TV is turned off by remote control or button, AC power source is
connected to the unit if not unplugged in.
• Do not use high voltage electrical equipment near the TV (e.g., a bug
zapper). This may result in product malfunction.
• Do not attempt to modify this product in any way without written
authorization from LG Electronics. Accidental fire or electric shock
can occur. Contact your local customer service for service or repair.
Unauthorized modification could void the user’s authority to operate
this product.
• Use only an authorized attachments / accessories approved by LG
Electronics. Otherwise, this may result in fire, electric shock, malfunction,
or product damage.
• Never disassemble the AC adapter or power cord. This may result in fire
or electric shock.
• Handle the adapter carefully to avoid dropping or striking it. An impact
could damage the adapter.
• To reduce the risk of fire or electrical shock, do not touch the TV with wet
hands. If the power cord prongs are wet or covered with dust, dry the
power plug completely or wipe dust off.
• Batteries
- Store the accessories (battery, etc.) in a safe location out of the reach
of children.
- Do not short circuit, disassemble, or allow the batteries to overheat.
Do not dispose of batteries in a fire. Batteries should not be exposed
to excessive heat.
- Caution: Risk of fire or explosion if the battery is replaced by an
incorrect type.
• Moving
- When moving, make sure the product is turned off, unplugged, and
all cables have been removed. It may take 2 or more people to carry
larger TVs. Do not press or put stress on the front panel of the TV.
Otherwise, this may result in product damage, fire hazard or injury.
• Keep the packing anti-moisture material or vinyl packing out of the
reach of children.
• Do not allow an impact shock, any objects to fall into the product, and do
not drop anything onto the screen.
• Do not press strongly upon the panel with a hand or a sharp object such
as a nail, pencil, or pen, or make a scratch on it. It may causedamage
to screen.
• Cleaning
- When cleaning, unplug the power cord and wipe gently with a soft/
dry cloth. Do not spray water or other liquids directly on the TV. Do
not clean your TV with chemicals including glass cleaner, any type of
air freshener, insecticide, lubricants, wax (car, industrial), abrasive,
thinner, benzene, alcohol etc., which can damage the product and/
or its panel. Otherwise, this may result in electric shock or product
damage.
Installation
Lifting and moving the TV
When moving or lifting the TV, read the following to prevent the TV from
being scratched or damaged and for safe transportation regardless of its type
and size.
• It is recommended to move the TV in the box or packing material that
the TV originally came in.
• Before moving or lifting the TV, disconnect the power cord and all cables.
• When holding the TV, the screen should face away from you to avoid
damage.
• Hold the top and bottom of the TV frame firmly. Make sure not to hold
the transparent part, speaker, or speaker grille area.
• Use at least two people to move a large TV.
• When transporting the TV, do not expose the TV to jolts or excessive
vibration.
• When transporting the TV, keep the TV upright; never turn the TV on its
side or tilt towards the left or right.
• When handling the TV, be careful not to damage the protruding buttons.
• Avoid touching the screen at all times, as this may result in damage to
the screen.
• Do not place the product on the floor with its front facing down without
padding. Failure to do so may result in damage to the screen.
• When attaching the stand to the TV set, place the screen facing down on
a cushioned table or flat surface to protect the screen from scratches.
Mounting on the Table
1 Lift and tilt the TV into its upright position on a table.
• Leave a minimum of 10 cm (4 inches) space from the wall for proper
ventilation.
2 Connect the power cord to a wall outlet.
5
• Do not apply foreign substances (oils, lubricants, etc.) to the screw parts
when assembling the product. (Doing so may damage the product.)
• Do not use any unapproved items to ensure the safety and lifespan of
the product.
• Any damages or injuries by using unapproved items are not covered by
the warranty.
• If you install the TV on a stand, you need to take actions to prevent the
product from overturning. Otherwise, the product may fall over, which
may cause injury.
• When assembling the stand, ensure that all of the provided screws are
attached. If the screws are not fully tightened, the product may tilt or
tip over, resulting in damage. Tightening the screws with excessive force
may cause them to come off due to abrasion of the screw joint.
Securing TV to the Wall
1 Insert and tighten the eye-bolts or TV brackets and bolts on the back of
the TV.
• If there are bolts inserted at the eye-bolts position, remove the bolts
first.
2 Mount the wall brackets with the bolts to the wall. Match the location of
the wall bracket and the eye-bolts on the rear of the TV.
3 Connect the eye-bolts and wall brackets tightly with a sturdy rope or
cable. Make sure to keep the rope parallel to the flat surface.
• Use a platform or cabinet that is strong and large enough to support the
TV securely.
• Brackets, bolts, and ropes are optional. You can obtain additional
accessories from your local dealer.
Mounting to the Wall
An optional wall mount can be used with your LG Television. Consult with
your local dealer for a wall mount that supports the VESA standard used by
your TV model. Carefully attach the wall mount bracket at the rear of the TV.
Install the wall mount bracket on a solid wall perpendicular to the floor. If
you are attaching the TV to other building materials, please contact qualified
personnel to install the wall mount. Detailed instructions will be included
with the wall mount. We recommend that you use an LG brand wall mount.
The LG wall mount is easy to adjust or to connect the cables. When you do
not use LG’s wall mount bracket, use a wall mount bracket where the device
is adequately secured to the wall with enough space to allow connectivity to
external devices. If you are using a non-adjustable mount, attach the mount
to the wall. Attach the cables to the TV first, then attach the TV to the mount.
• Remove the stand before installing the TV on a wall mount by
performing the stand attachment in reverse.
• For more information of screws and wall mount bracket, refer to manual
included in the separately purchased wall mount.
• If you intend to mount the product to a wall, attach VESA standard
mounting interface (optional parts) to the back of the product. When you
install the set to use the wall mounting bracket (optional parts), fix it
carefully so as not to drop.
• When mounting a TV on the wall, make sure not to install the TV by
hanging the power and signal cables on the back of the TV.
• Do not install this product on a wall if it could be exposed to oil or oil
mist. This may damage the product and cause it to fall.
• When installing the wall mounting bracket, it is recommended to cover
the stand hole using tape, in order to prevent the influx of dust and
insects, (Depending upon model).
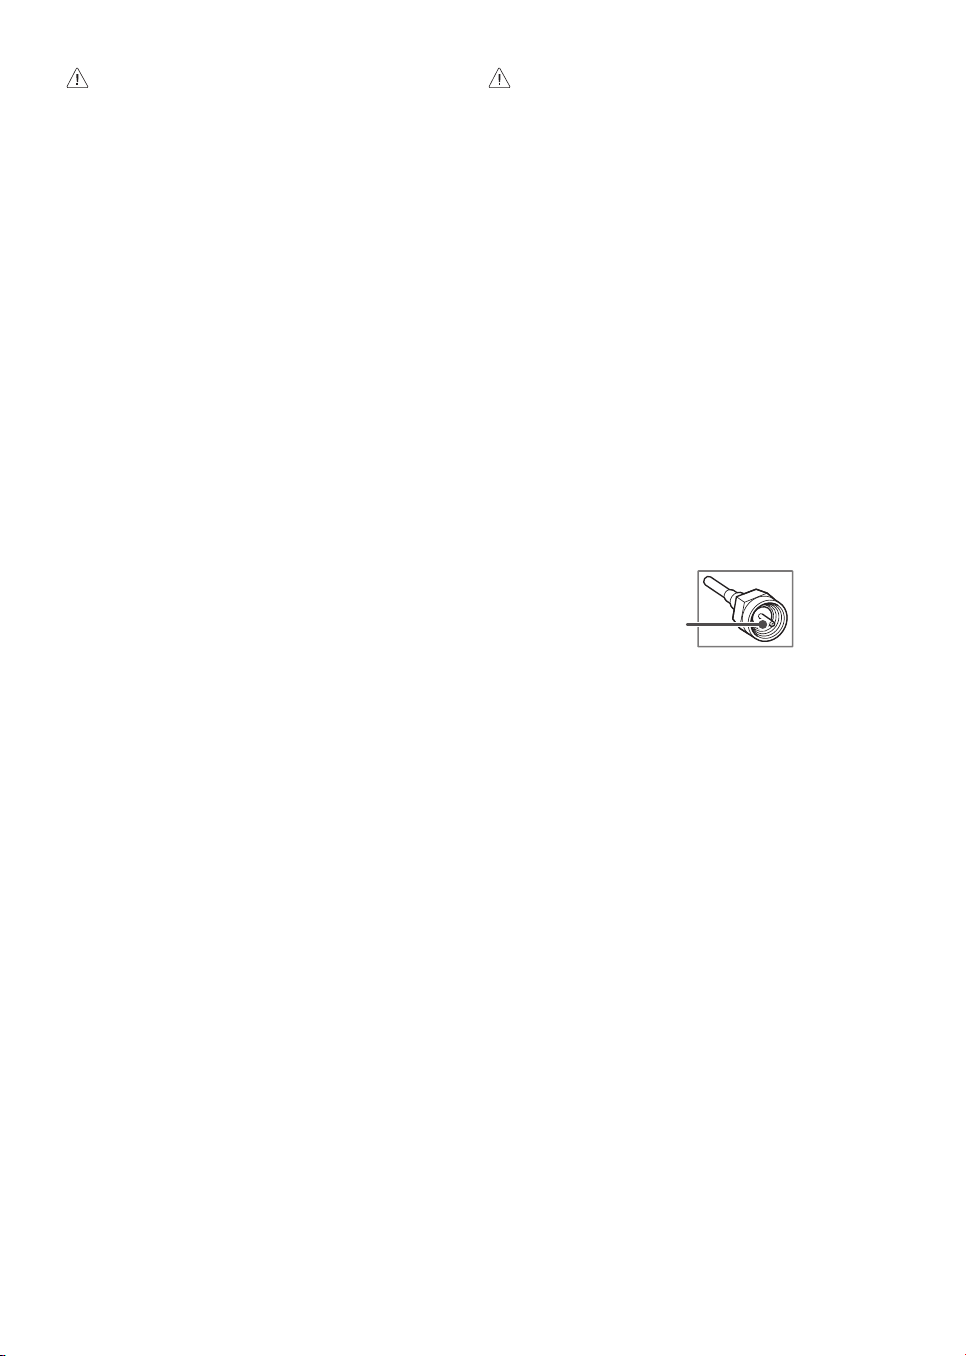
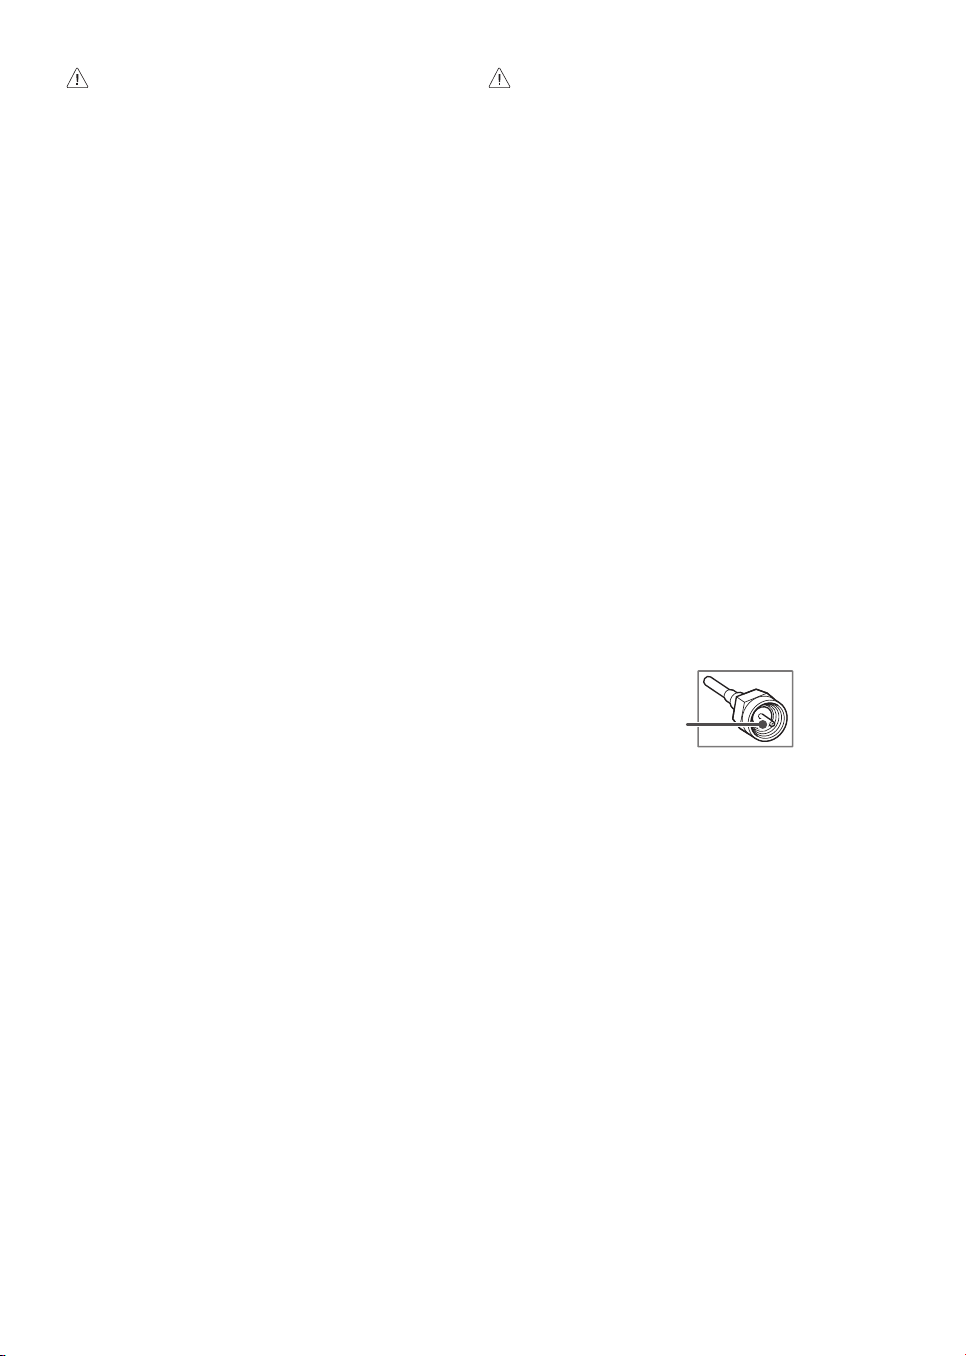
Antenna/Cable
Connect an antenna, cable, or cable box to watch TV while referring to the
following. The illustrations may differ from the actual items and an RF cable
is optional.
Copper wire
• Make sure not to bend the copper wire of the RF cable.
• Complete all connections between devices, and then connect the power
cord to the power outlet to prevent damage to your TV.
• Use a signal splitter to use 2 TVs or more.
• DTV Audio Supported Codec: MPEG, Dolby Digital
• This TV cannot receive Ultra HD (3840 x 2160 pixels) broadcasts directly
because the related standards have not been confirmed (Depending
upon country).
6
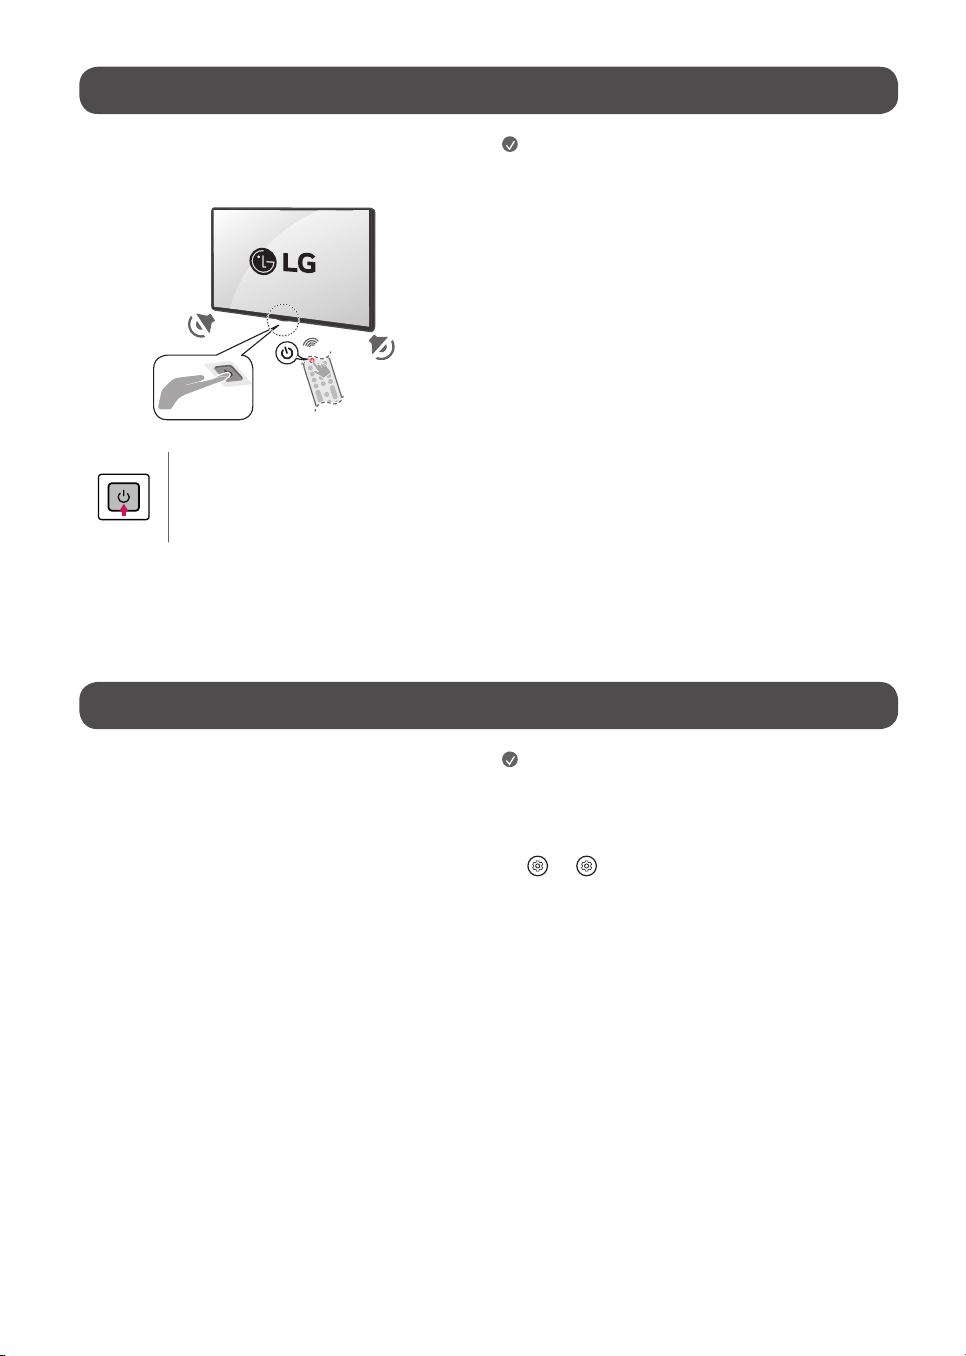
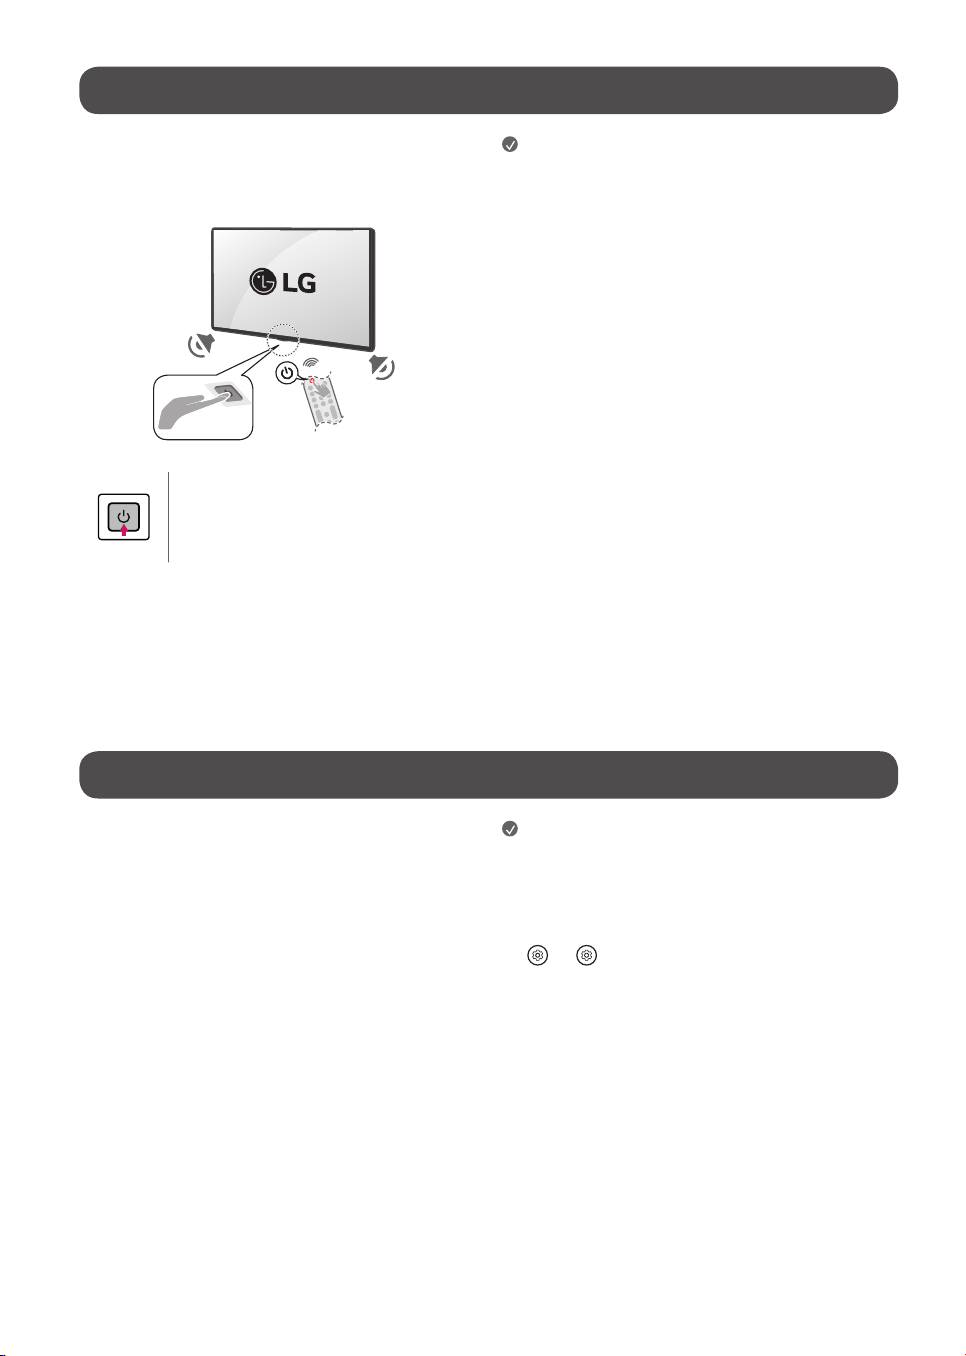
Starting TV
Turning on the TV
You can simply operate the TV functions, using the button.
Power On (Press)
Power Off
1)
(Press and Hold)
Menu Control (Press
2)
)
Menu Selection (Press and Hold
3)
)
1) All running apps will close.
2) You can access and adjust the menu by pressing the button when TV is on.
3) You can use the function when you access menu control.
Note
• When the TV is turned on for the first time after being shipped from the
factory, initialization of the TV may take approximately one minute.
• Your TV’s OSD (On Screen Display) may differ slightly from that shown in
this manual (Depending upon model).
• The device must be easily accessed to a location outlet near the access.
Some devices are not made by turning on / off button, turning off the
device and unplugging the power cord (Depending upon model).
Connections
You can connect various external devices to the TV. For more information on
external device’s connection, refer to the manual provided with each device.
HDMI
• When connecting the HDMI cable, the product and external devices
should be turned off and unplugged.
• Supported HDMI Audio format (Depending upon model):
True HD (48kHz),
Dolby Digital / Dolby Digital Plus (32kHz / 44.1kHz / 48kHz),
PCM (32kHz / 44.1kHz / 48kHz / 96kHz / 192kHz),
DTS (44.1kHz / 48kHz / 88.2kHz / 96kHz),
DTS-HD (44.1kHz / 48kHz / 88.2kHz / 96kHz / 176.4kHz / 192kHz)
Note
• If the device connected to Input Port also supports HDMI Deep Color,
your picture may be clearer. However, if the device doesn’t support it, it
may not work properly. In that case, change the TV’s [HDMI Deep Color]
setting to off (Depending upon model).
•
→ [ ] → [General] → [External Devices] → [HDMI Settings]
→ [HDMI Deep Color] (Depending upon model).
• Use a certified cable with the HDMI logo attached. If you do not use a
certified HDMI cable, the screen may not display or a connection error
may occur.
• Recommended HDMI cable types (3m (9.84feet) or less)
- Ultra High Speed HDMI
®
/™ cable
7
USB
Some USB Hubs may not work. If a USB device connected through a USB Hub
is not detected, connect it directly to the USB port on the TV. (Depending
upon model)
Note
• For an optimal connection, HDMI cables and USB devices should have
bezels less than 10mm (0.39inches) thick and 18mm (0.7inches)
width. (Depending upon model)
• Use an extension cable that supports if the USB cable or USB
flash drive does not fit into your TV’s USB port.
IR Blaster
Control the set-top box (cable/satellite/IP/OTT), Blu-ray/DVD player,
soundbar, game consoles, etc., using the IR Blaster (Depending upon country)
(Depending upon model).
Note
• Connect the IR Blaster cable to the TV’s IR Blaster port.
• Use universal control settings to control the device.
• Secure the IR Blaster with the 3M tape provided.
• In order to control external devices through "Room to Room Share" and
"Hands-free Voice Control", an IR blaster connection is required.
External Devices
Supported external devices are: Blu-ray player, HD receivers, DVD players,
VCRs, audio systems, USB storage devices, PC, gaming devices, and other
external devices. For more information on external device’s connection, refer
to the manual provided with each device.
Note
• The external device connections shown may differ slightly from
illustrations in a manual.
• In PC mode, there may be noise associated with the resolution, vertical
pattern, contrast or brightness. If noise is present, change the PC output
to another resolution, change the refresh rate to another rate or adjust
the brightness and contrast on the [Picture] menu until the picture is
clear. Depending upon the graphics card, some resolution settings may
not allow the image to be positioned on the screen properly.
• When connecting to a wired LAN, use a CAT 7 cable with high-speed
Internet transmission. (Only when port is provided.)
• The TV may be capable of operating without a set-top-box from a
multichannel video programming distributor (MVPD).
Remote RS-232C setup
To obtain the RS-232C external control setup information, please visit www.
lg.com. Download and read the manual, (Depending upon model).
• Do not drop the product or let it fall over when connecting external
devices. Otherwise, this may result in injury or damage to the product.
• When connecting external devices such as video game consoles, make
sure the connecting cables are long enough. Otherwise, the product may
fall over, which may cause injury or damage the product.

8
Specications
Product specifications may be changed without prior notice due to upgrade of product functions.
Estimated yearly energy consumption indicated on the FTC label is measured in accordance with the Test Procedures for Television Sets (USA only).
The actual energy consumption depends on the usage environment (The content watched, TV settings, etc.).
• For information of the power supply and power consumption, refer to the label attached to the product.
- The typical power consumption is measured in accordance with IEC 62087 or each country’s energy regulations.
* On some models, the label is inside the external device connection terminal cover.
* Depending upon the model or country, the typical power consumption may not be on label.
Power requirement AC 120V~ 50/60Hz
(Depending upon country)
Broadcasting Specifications
Television system Terrestrial / Cable / Satellites Digital TV
External antenna impedance 75 Ω
• Certain 8K input/decoding standards may not be supported. An additional device may be necessary to support certain 8K standards. Upscaled and enhanced
8K images will vary depending upon the source content (Depending upon model).
Environment Condition
Operating Temperature 0°C to 40°C (32°F to 104°F) Storage Temperature -20°C to 60°C (-4°F to 140°F)
Operating Humidity Less than 80% Storage Humidity Less than 85%
Conditions for Wall Mount Installation
Tilt Angle 0° - 15°
* This specification range applies to TV wall mounts when adjusting for proper viewing angle.
9
Product Information
Open Source Software Notice Information
To obtain the source code that is contained in this product, under GPL, LGPL, MPL, and other open source licenses that have the obligation to disclose source code,
and to access all referred license terms, copyright notices and other relevant documents please visithttps://opensource.lge.com.
LG Electronics will also provide open source code to you on CD-ROM for a charge covering the cost of performing such distribution (such as the cost of media,
shipping, and handling) upon email request to opensource@lge.com.
This offer is valid to anyone in receipt of this information for a period of three yearsafter our last shipment of this product.
Licenses
(Magic Remote supported models only)
10
Troubleshooting
In TV / HDMI input, press the button on the remote control three times to display the model name and serial number on the screen.
Cannot control the TV with
the remote control.
• Check if anything such as tape has been placed over the receiver.
• Check if there is any obstacle between the product and the remote control.
• Replace the batteries with new fresh ones.
No image display and no
sound is produced.
• Check if the product is turned on.
• Check if the power cord is connected to a wall outlet.
• Check if there is a problem in the wall outlet by connecting other products.
The TV turns off suddenly. • Check the power control settings. The power supply may be interrupted.
• Check if the auto-off function is activated on the settings related time.
• The auto-off function may have worked. This product is equipped with an auto-off function that automatically
turns off the power if the remote control is not used for 15 minutes without an input signal.
Abnormal Display • If the product feels cold to the touch, there may be a small “flicker” when it is turned on. This is normal, there is
nothing wrong with product.
• This panel is an advanced product that contains millions of pixels. You may see tiny black dots and/or brightly
colored dots (red, blue or green) at a size of 1ppm on the panel. This does not indicate a malfunction and does not
affect the performance and reliability of the product. This phenomenon also occurs in third-party products and is
not subject to exchange or refund.
• You may find different brightness and color of the panel depending upon your viewing position(left/right/
top/down). This phenomenon occurs due to the characteristic of the panel. It is not related with the product
performance, and it is not malfunction.
• Avoid touching the screen or holding your finger(s) against it for long periods of time. Doing so may produce some
temporary distortion effects on the screen.
• Displaying a still image for a prolonged period of time may cause an image sticking. Avoid displaying a fixed image
on the TV screen for a extended length of time.
Generated Sound • Cracking noise A cracking noise that occurs when watching or turning off the TV is generated by plastic thermal
contraction due to temperature and humidity. This noise is common for products where thermal deformation is
required.
• Electrical circuit humming/panel buzzing A low level noise is generated from a high-speed switching
circuit, which supplies a large amount of current to operate a product. It varies depending upon the product. This
generated sound does not affect the performance and reliability of the product.
• When cleaning the product, be careful not to allow any liquid or foreign objects to enter the gap between the upper, left or right side of the panel and the
guide panel, (Depending upon model).
• Make sure to wring any excess water or cleaner from the cloth.
• Do not spray water or cleaner directly onto the TV screen.
• Make sure to spray just enough of water or cleaner onto a dry cloth to wipe the screen.

11
Regulatory
(1)
(2)
(3)
(4)
NOTE TO CABLE/TV INSTALLER
(For Canada)
This reminder is provided to call the CATV system installer’s attention to Article 820-40 of the National Electric Code (U.S.A.). The code provides guidelines for
proper grounding and, in particular, specifies that the cable ground shall be connected to the grounding system of the building, as close to the point of the cable
entry as practical.
12
WARNING! (STABILITY HAZARD)
A television set may fall, causing serious personal injury or death. Many injuries, particularly to children, can be avoided by taking simple precautions such as:
- ALWAYS use cabinets or stands or mounting methods recommended by the manufacturer of the television set.
- ALWAYS use furniture that can safely support the television set.
- ALWAYS ensure the television set is not overhanging the edge of the supporting furniture.
- ALWAYS educate children about the dangers of climbing on furniture to reach the television set or its controls.
- ALWAYS route cords and cables connected to your television so they cannot be tripped over, pulled or grabbed.
- NEVER place a television set in an unstable location.
- NEVER place the television set on tall furniture (for example, cupboards or bookcases) without anchoring both the furniture and the television set to a
suitable support.
- NEVER place the television set on cloth or other materials that may be located between the television set and supporting furniture.
- NEVER place items that might tempt children to climb, such as toys and remote controls, on the top of the television or furniture on which the television
is placed.
If the existing television set is going to be retained and relocated, the same considerations as above should be applied.
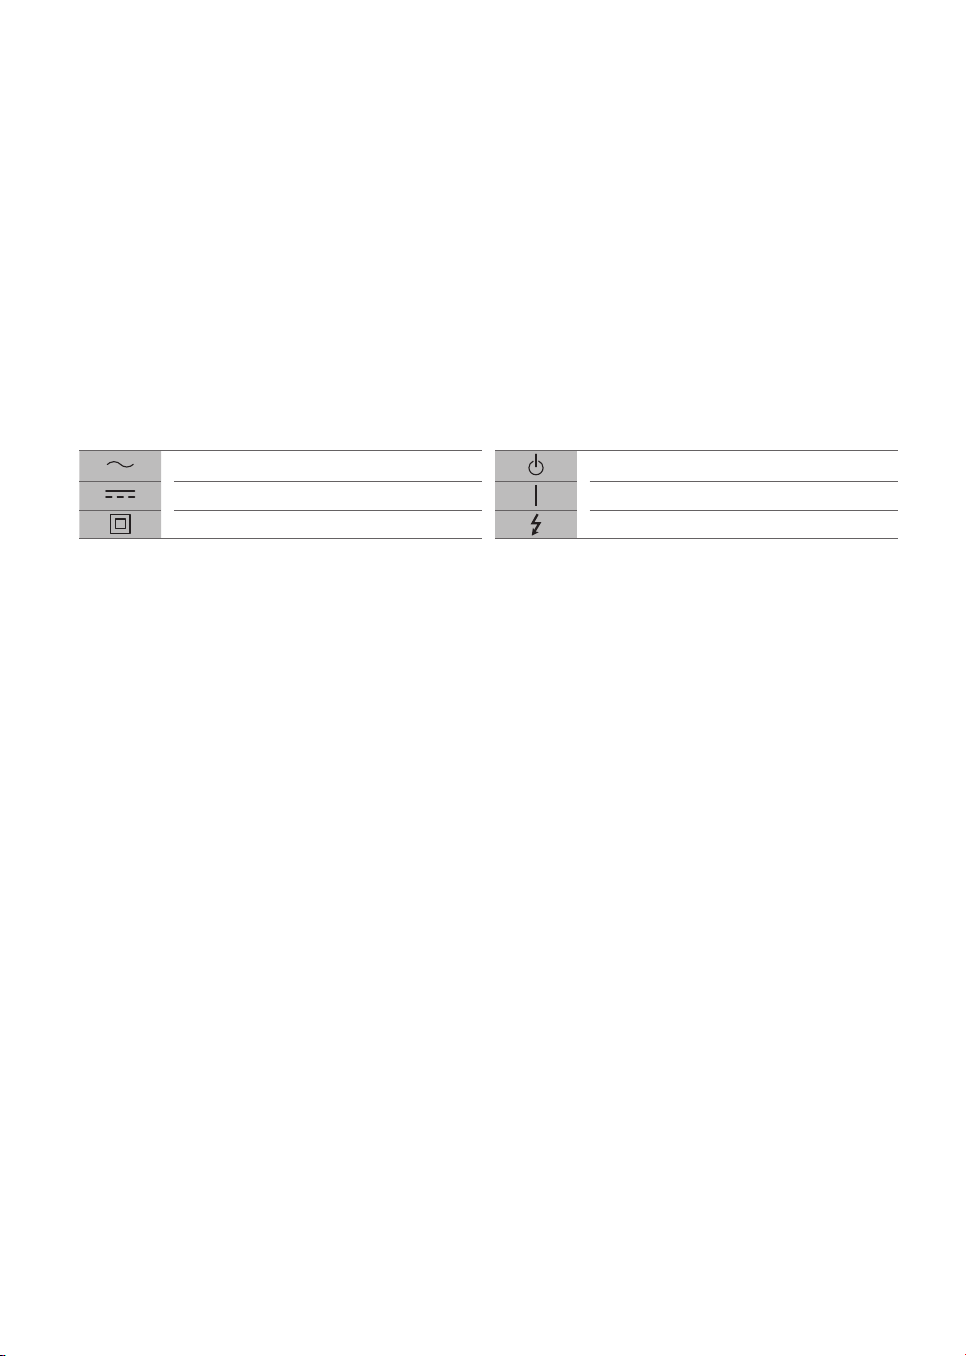
Symbols
Refers to alternating current (AC). Refers to stand-by.
Refers to direct current (DC). Refers to “ON” (power).
Refers to class II equipment. Refers to dangerous voltage.

FRANÇAIS
Sécurité et références
MANUEL D’UTILISATION
www.lg.com
Copyright © 2024 LG Electronics inc.
Tous droits réservés.
TÉLÉVISEUR À DEL*
Veuillez lire ce manuel attentivement
avant d’utiliser votre appareil et
conservez-le pour pouvoir vous y
reporter ultérieurement.
* La mention « Téléviseur à DEL de LG » s’applique à
l’écran ACL avec rétroéclairage à DEL.
Les numéros de modèle et de série du produit sont
situés à l’arrière et sur l’un de ses côtés. Inscrivez-les
ci-dessous au cas où vous auriez besoin d’un service
d’entretien ou de réparation.
Modèle
Numéro de série
Imprimé en Corée
Service à la clientèle LG
Pour toute question ou tout commentaire,
visitez le www.lg.com ou appelez :
1-888-542-2623 CANADA
Enregistrez votre produit en ligne!
www.lg.com
43UT7000PUA
43UT7550AUA
43UT7590PUA
43UT8000AUA
43UT8000PUA
43UT9000PUA
50UT7000PUA
50UT7550AUA
50UT8000AUA
50UT8000PUA
50UT8050AUA
50UT9000PUA
55UT7000PUA
55UT7550AUA
55UT8000AUA
55UT8000PUA
55UT8050AUA
55UT9000PUA
65UT7000PUA
65UT7550AUA
65UT8000AUA
65UT8000PUA
65UT8050AUA
65UT9000PUA
70UT7550AUA
70UT8000AUA
70UT8000PUA
70UT8050AUA
75UT7000PUA
75UT7550AUA
75UT7590PUA
75UT8000AUA
75UT8000PUA
75UT8050AUA
75UT9000PUA
86UT7550AUA
86UT7590PUA
86UT8000AUA
86UT8000PUA
43QNED80TUA
43QNED80TUC
50QNED80TUC
50QNED85TUA
55QNED80TUC
55QNED85TAA
55QNED85TUA
55QNED85TYA
65QNED80TAC
65QNED80TUA
65QNED80TUC
65QNED85TAA
65QNED85TUA
65QNED85TYA
65QNED90TAA
65QNED90TUA
75QNED80TAC
75QNED80TUC
75QNED85TAA
75QNED85TUA
75QNED85TYA
75QNED90TAA
75QNED90TUA
75QNED99TUA
86QNED80TUC
86QNED85TUA
86QNED90TAA
86QNED90TUA
86QNED99TUA

2
Consignes de sécurité importantes
• Lisez ces consignes.
• Conservez ces consignes.
• Soyez attentif à tous les avertissements.
• Suivez toutes les consignes.
• N’utilisez pas cet appareil près de l’eau.
• Nettoyez l’appareil uniquement avec un chiffon sec.
• Ne bloquez pas les ouvertures d’aération. Installez l’appareil en respectant les consignes du fabricant.
• N’installez pas l’appareil près de sources de chaleur comme les radiateurs, les bouches de chaleur, les fours et tout autre appareil (y compris les
amplificateurs) produisant de la chaleur.
• Ne contournez pas la fonctionnalité sécuritaire de la fiche polarisée ou de mise à la terre. Une fiche polarisée est munie de deux lames, dont l’une est plus
large que l’autre. Une fiche de mise à la terre comporte deux lames et une broche de mise à la terre. La lame plus large ou la broche de mise à la terre sont
fournies pour votre sécurité. Si la fiche fournie ne s’insère pas dans votre prise, consultez un électricien pour remplacer votre prise.
• Protégez le cordon d’alimentation de manière à ce qu’il ne soit ni piétiné ni pincé, particulièrement près de la fiche, des prises de courant et du point de
sortie de l’appareil.
• N’utilisez que les articles ou les accessoires recommandés par le fabricant.
• Utilisez uniquement avec une table, un chariot, un socle, un trépied ou un support recommandé par le fabricant ou vendu avec l’appareil. Si vous déplacez
l’appareil à l’aide d’un chariot, faites preuve de prudence afin de prévenir les blessures causées par un basculement.
• Débranchez cet appareil pendant les orages électriques ou lorsqu’il n’est pas utilisé pendant de longues périodes.
• Confiez l’ensemble des réparations à du personnel qualifié. Une intervention est nécessaire dans les cas suivants: si la fiche ou le cordon d’alimentation est
endommagé, si un liquide a été renversé sur l’appareil ou si des objets sont tombés dans l’appareil, si l’appareil a été exposé à la pluie ou à l’humidité, s’il ne
fonctionne pas normalement ou s’il est tombé.
Avant de lire ce manuel
• Veuillez lire ce manuel attentivement avant d’utiliser votre téléviseur et conservez-le pour pouvoir vous y reporter ultérieurement.
• Sur le site Web, vous pouvez télécharger le manuel qui comprend des renseignements sur l’installation, l’utilisation, le dépannage, les caractéristiques,
la licence,etc., et consulter son contenu sur votre ordinateur ou votre appareil mobile.
• Guide d’utilisation : Pour obtenir de plus amples renseignements sur ce téléviseur, lisez le GUIDE D’UTILISATION fourni avec le produit (selon le modèle).
- Pour ouvrir le GUIDE D’UTILISATION → [ ] → [Assistance] → [Guide d’utilisation].
Articles supplémentaires offerts en option
• Les articles supplémentaires offerts en option peuvent être remplacés ou modifiés à des fins d’amélioration de la qualité, sans préavis. Communiquez avec
votre détaillant pour vous procurer ces articles. Ces dispositifs ne fonctionnent qu’avec certains modèles.
• Le nom ou la conception du modèle peuvent être modifiés selon les conditions ou les politiques du fabricant.
• Télécommande Magic:
Vérifiez si le modèle de votre téléviseur prend en charge la technologie Bluetooth dans la section Caractéristiques techniques du module sans fil pour
confirmer qu’il peut être utilisé avec la télécommandeMagic.
• Un câble pour connecter des antennes et des périphériques externes doit être acheté séparément.
Remarques
• Les caractéristiques du produit ou le contenu de ce manuel peuvent être modifiés sans préavis à des fins de mise à niveau des fonctionnalités du produit.
• Les articles fournis avec votre produit peuvent varier selon le modèle.
• L’image présentée peut ne pas correspondre à votre téléviseur.
En utilisant ce produit, vous acceptez que tous les différends entre vous et LG découlant de ce produit ou s’y rapportant de quelque façon que ce soit (y compris,
mais sans s’y limiter, les différends relatifs à la garantie) soient résolus par arbitrage exécutoire, sur une base individuelle, à moins que les lois de votre province
ou territoire ne le permettent pas ou, dans le cas d’autres juridictions, si vous choisissez de vous retirer. Précisons que cette disposition d’arbitrage ne s’applique
pas aux consommateurs qui résident en Ontario. Des renseignements supplémentaires sur les modalités de la convention d’arbitrage (y compris les détails sur la
procédure de résolution des différends) sont accessibles à l’adresse www.lg.com/ca_fr/arbitrage (Canada), ou dans votre document de garantie.
3
Avertissements! Consignes de sécurité
MISE EN GARDE
RISQUE DE DÉCHARGE ÉLECTRIQUE
NE PAS OUVRIR
MISE EN GARDE : AFIN DE RÉDUIRE LE RISQUE DE DÉCHARGE ÉLECTRIQUE, NE RETIREZ PAS LE COUVERCLE (OU LE PANNEAU ARRIÈRE). AUCUNE PIÈCE POUVANT
ÊTRE RÉPARÉE PAR L’UTILISATEUR NE SE TROUVE À L’INTÉRIEUR DE L’APPAREIL. CONFIEZ L’ENTRETIEN DE CET APPAREIL À DU PERSONNEL QUALIFIÉ.
Ce symbole a pour fonction d’alerter l’utilisateur de la présence d’une tension dangereuse non isolée à l’intérieur du boîtier de l’appareil qui pourrait
être d’une puissance suffisante pour causer une décharge électrique.
Ce symbole vise à alerter l’utilisateur de la présence de consignes d’utilisation et d’entretien importantes dans la documentation accompagnant
l’appareil.
AVERTISSEMENT: AFIN DE RÉDUIRE LE RISQUE D’INCENDIE ET DE DÉCHARGE ÉLECTRIQUE, N’EXPOSEZ PAS CE PRODUIT À LA PLUIE OU À L’HUMIDITÉ.
• POUR ÉVITER LA PROPAGATION DES FLAMMES, MAINTENEZ À TOUT
MOMENT CE PRODUIT LOIN DES BOUGIES OU D’AUTRES ÉLÉMENTS À
FLAMMES NUES.
• N’installez pas le téléviseur ni la télécommande dans les
environnements suivants:
- En exposition directe à la lumière du soleil.
- Dans une zone avec une forte humidité comme une salle de bains.
- À proximité d’une source de chaleur comme une cuisinière et tout
autre appareil produisant de la chaleur.
- À proximité des comptoirs de cuisine ou des humidificateurs où ils
peuvent facilement être exposés à de la vapeur ou à de l’huile.
- Dans une zone exposée à la pluie ou au vent.
- Dans une zone présentant un risque de suintement ou d’éclaboussure.
Évitez de poser des objets contenant du liquide(p. ex. vase, tasse) sur
l’appareil ou au-dessus de celui-ci(p.ex.sur une tablette).
- À proximité d’objets inflammables comme de l’essence ou des bougies,
ou en exposition directe à un système de climatisation.
- Dans un endroit très poussiéreux.
Cela pourrait entraîner des risques d’incendie, de décharge électrique,
de combustion, d’explosion, de mauvais fonctionnement ou d’altération
du produit.
• Aération
- Installez votre téléviseur à un endroit où l’aération est suffisante.
Ne l’installez pas dans un espace restreint comme une bibliothèque.
- N’installez pas le produit sur un tapis ou un coussin.
- N’obstruez pas les ouvertures de l’appareil et ne le recouvrez pas avec
du tissu ou tout autre matériau lorsqu’il est branché.
• Prenez soin de ne pas toucher aux ouvertures d’aération. Lorsque le
téléviseur fonctionne pendant une longue période, les ouvertures
d’aération peuvent devenir chaudes.
• Protégez le cordon d’alimentation contre les dommages physiques ou
mécaniques. Veillez notamment à ce qu’il ne soit pas tordu, déformé,
pincé, coincé dans une porte ou piétiné. Soyez particulièrement attentif
aux fiches, aux prises de courant murales et à l’emplacement de sortie du
cordon sur l’appareil.
• Ne déplacez pas le téléviseur lorsque le cordon d’alimentation est
branché.
• N’utilisez pas un cordon d’alimentation endommagé ou desserré.
• Assurez-vous de bien saisir la fiche lorsque vous débranchez le
cordon d’alimentation. Ne tirez pas sur le cordon d’alimentation pour
débrancher le téléviseur.
• Ne branchez pas trop d’appareils dans une même prise électrique c.a.,
car cela pourrait causer un incendie ou une décharge électrique.
• Débranchement de l’appareil de la source d’alimentation
principale
- La fiche d’alimentation permet de débrancher l'appareil. La fiche
d’alimentation doit rester accessible en tout temps afin de pouvoir
débrancher l’appareil en cas d’urgence.
• Ne laissez pas vos enfants grimper sur le téléviseur ou s’agripper dessus.
Autrement, le téléviseur pourrait tomber et causer des blessures graves.
• Mise à la terre d’antennes extérieures (peut varier selon le pays) :
- Si une antenne extérieure est installée, prenez les précautions
ci-dessous. Un système d’antennes extérieures ne devrait pas se
trouver à proximité des lignes aériennes d’électricité, d’autres circuits
électriques d’éclairage ou d’alimentation, ou à un endroit où il peut
entrer en contact avec de telles lignes électriques ou de tels circuits
d’alimentation; cela pourrait entraîner de graves blessures ou la mort.
Assurez-vous que le système d’antennes est mis à la terre afin qu’il
soit protégé dans une certaine mesure contre les surtensions et les
accumulations d’électricité statique.
L’article810 du Code national de l’électricité (NEC) des États-Unis
fournit des renseignements relatifs à la procédure conforme de mise
à la terre du mât et de la structure d’appui ainsi que de mise à la terre
du câble de connexion au dispositif de décharge de l’antenne, en plus
de renseignements relatifs au format des conducteurs de terre, à la
position du dispositif de décharge de l’antenne, au branchement des
électrodes de masse et aux exigences de mise à la terre de l’électrode.
Mise à la terre de l’antenne selon le Code national de l’électricité,
ANSI/NFPA70.
• Ne touchez jamais cet appareil ou l’antenne en cas d’orage. Vous pourriez
recevoir une décharge électrique.
• Assurez-vous que le cordon d’alimentation est correctement branché
au téléviseur et à la prise murale. Sinon, la fiche et la prise peuvent être
endommagées, et, dans des cas extrêmes, un incendie peut se produire.
• N’insérez pas d’objets métalliques ou inflammables dans le produit.
Si un corps étranger tombe dans l’appareil, débranchez le cordon
d’alimentation et communiquez avec le service à la clientèle.
• Ne touchez pas l’extrémité du cordon d’alimentation lorsqu’il est
branché. Vous pourriez recevoir une décharge électrique.

4
• Si l’une des situations énoncées ci-dessous se produit,
débranchez immédiatement le produit et communiquez avec le
service à la clientèle de votre région.
- Si le produit a été endommagé.
- Si de l’eau ou une autre substance s’infiltre dans le produit (dans
l’adaptateur c.a., le cordon d’alimentation ou le téléviseur).
- Si une odeur de fumée ou une odeur étrange se dégage du téléviseur.
- En cas d’orage ou de périodes d’inutilisation prolongées.
Si elle n’est pas débranchée, la source d’alimentation électrique reste
connectée à l’appareil, même lorsque le téléviseur a été éteint au moyen
de la télécommande ou du bouton.
• N’utilisez pas d’appareils électriques à haute tension à proximité du
téléviseur (p.ex. tue-mouches électrique). Cela pourrait entraîner un
mauvais fonctionnement de l’appareil.
• Ne tentez en aucun cas de réaliser des modifications sur cet appareil
sans avoir obtenu l’autorisation écrite de LGElectronics. Cela pourrait
entraîner des risques d’incendie ou de décharge électrique. Si vous
désirez effectuer un entretien ou une réparation, communiquez avec le
service à la clientèle de votre région. Une modification non autorisée
pourrait entraîner la révocation de l’autorisation d’utiliser cet appareil.
• N’utilisez que des pièces supplémentaires ou des accessoires approuvés
par LGElectronics. Sinon, cela pourrait entraîner des risques d’incendie,
de décharge électrique, de mauvais fonctionnement ou d’altération du
produit.
• Ne démontez jamais l’adaptateur c.a. ou le cordon d’alimentation.
Cela peut provoquer un incendie ou une décharge électrique.
• Manipulez l’adaptateur avec soin pour éviter de l’échapper ou de le
frapper contre d’autres objets. Un impact pourrait l’endommager.
• Pour réduire les risques d’incendie ou de décharge électrique, ne touchez
pas le téléviseur si vous avez les mains mouillées. Si les broches de la
fiche du cordon d’alimentation sont mouillées ou couvertes de poussière,
séchez ou époussetez la fiche soigneusement.
• Piles
- Rangez les accessoires (piles ou autres) dans un lieu sûr et hors de la
portée des enfants.
- Ne court-circuitez pas les piles, ne les démontez pas et ne les laissez
pas surchauffer. Ne jetez pas les piles dans le feu. Les piles ne doivent
pas être exposées à une chaleur excessive.
- Mise en garde : Il existe un risque d’incendie ou d’explosion si les piles
sont remplacées par un type de pile incompatible.
• Déplacement
- Lorsque vous déplacez l'appareil, assurez-vous qu’il est éteint et
débranché et que tous les câbles ont été retirés. La présence d’au
moins deux personnes peut être requise pour déplacer un téléviseur
de grande taille. N’exercez aucune pression sur le panneau avant du
téléviseur. Cela pourrait endommager le produit ou entraîner des
risques d’incendie ou de blessures.
• Conservez le matériel d’emballage anti-humidité ou l’emballage en
vinyle hors de la portée des enfants.
• Évitez de heurter l’appareil et assurez-vous qu’aucun objet ne tombe
dans celui-ci ou n’entre en contact avec l’écran.
• N’appuyez pas fortement sur l’écran avec votre main ou un objet pointu
(p. ex. ongle, crayon, stylo) et évitez de rayer l’écran. Cela pourrait
l’endommager.
• Nettoyage
- Lors du nettoyage, débranchez le cordon d’alimentation et essuyez
l’appareil à l’aide d’un chiffon doux et sec. Ne vaporisez pas d’eau ou
d’autres liquides directement sur le téléviseur. Ne nettoyez pas votre
téléviseur à l’aide de produits chimiques qui peuvent l’endommager
ou endommager son panneau, y compris du nettoyant pour vitres,
tout type de purificateur d’air, de l’insecticide, du lubrifiant, de la cire
(pour voiture ou industrielle), des nettoyants abrasifs, du diluant,
du benzène, de l’alcool, etc. Cela pourrait entraîner des risques de
décharge électrique ou endommager le produit.
Installation
Soulèvement et déplacement du
téléviseur
Lorsque vous désirez déplacer ou soulever le téléviseur, lisez tout d’abord ce qui
suit pour éviter de rayer ou d’endommager le téléviseur ainsi que pour effectuer un
transport sécuritaire sans égard au type ni à la taille du téléviseur.
• Il est recommandé de déplacer le téléviseur en utilisant la boîte ou le
matériel d’emballage d’origine.
• Avant de déplacer ou de soulever le téléviseur, débranchez le cordon
d’alimentation et tous les câbles.
• Lorsque vous manipulez le téléviseur, veillez à ce que l’écran ne soit pas
orienté vers vous pour éviter de l’endommager.
•
Tenez fermement le haut et le bas du cadre du téléviseur. Assurez-vous de ne
pas tenir la partie transparente, le haut-parleur ou la grille du haut-parleur.
• La présence d’au moins deux personnes est requise pour déplacer un
téléviseur de grande taille.
• Lorsque vous transportez le téléviseur, évitez de l’exposer à des chocs ou
à des vibrations excessives.
• Lorsque vous transportez le téléviseur, maintenez-le à la verticale; ne le
tournez jamais sur le côté et ne le penchez ni à gauche ni à droite.
• Lors de la manipulation du téléviseur, veillez à ne pas endommager les
boutons en saillie.
• Évitez de toucher l’écran, car cela pourrait l’endommager.
• Ne déposez pas le produit sur le plancher si la partie avant n’est pas
posée sur une surface coussinée. Cela pourrait endommager l’écran.
• Pour fixer le socle au téléviseur, placez l’écran face contre une table ou
une surface plane matelassée afin de le protéger contre les rayures.
Installation sur une table
1 Soulevez et placez le téléviseur en position verticale sur une table.
• Laissez un espace d’au moins 10cm (4po) entre le mur et le téléviseur
pour assurer une aération adéquate.
2 Branchez le cordon d’alimentation à une prise murale.
5
• Lors de l’assemblage du produit, n’utilisez pas de substances étrangères
(huiles, lubrifiants, etc.) sur les vis. (Cela peut endommager le produit.)
• Afin de garantir la sécurité et la durée de vie de l’appareil, n’utilisez pas
de composants non approuvés.
• Tout dommage ou toute blessure résultant de l’utilisation d’un
composant non approuvé n’est pas couvert par la garantie.
• Si vous installez le téléviseur sur un socle, vous devez prendre les
mesures nécessaires pour éviter qu’il ne se renverse. Autrement, le
produit pourrait tomber et causer des blessures.
• Lors de l’assemblage du socle, assurez-vous d’utiliser toutes les vis
fournies. Si les vis ne sont pas bien serrées, le produit peut s’incliner ou
basculer vers l’avant et subir des dommages. Si vous serrez les vis trop
fort, elles risquent de se desserrer en raison de l’abrasion du joint des vis.
Fixation du téléviseur au mur
1 Insérez et serrez les boulons à œil ou les supports et les boulons à l’arrière
du téléviseur.
• Si des boulons sont déjà insérés dans les emplacements des boulons à
œil, retirez-les d’abord.
2 Installez les supports de fixation murale au mur à l’aide des boulons.
À l’arrière du téléviseur, alignez les boulons à œil sur les emplacements
correspondants du support de fixation murale.
3 Fixez fermement les boulons à œil aux supports de fixation murale à l’aide
d’une corde solide. Veillez à ce que la corde soit parallèle à la surface du
téléviseur.
• Utilisez une plateforme ou un meuble suffisamment solide et grand pour
soutenir le téléviseur de manière sécuritaire.
• Les supports, les boulons et les cordes ne sont pas fournis. Vous pouvez
vous procurer des accessoires supplémentaires auprès de votre détaillant
local.
Installation sur un mur
Un support de fixation murale offert en option peut être utilisé pour installer
votre téléviseur de LG. Consultez votre détaillant local afin de trouver un
support de fixation murale qui correspond aux normes VESA de votre modèle
de téléviseur. Fixez soigneusement le support de fixation murale au dos de
votre téléviseur. Installez-le sur un mur solide qui est perpendiculaire au sol.
Si vous installez le téléviseur sur des matériaux de construction autres que
ceux indiqués dans cette section, veuillez faire appel à du personnel qualifié
pour installer le support de fixation murale. Des directives détaillées seront
comprises avec le support de fixation murale. Nous vous recommandons
d’utiliser un support de fixation murale de marque LG. Le support de fixation
murale de LG est facile à ajuster, et les câbles s’y branchent aisément.
Si vous n’utilisez pas un support de fixation murale de LG, utilisez un
support permettant de poser l’appareil au mur de façon sécuritaire et offrant
suffisamment d’espace pour la connexion de périphériques externes. Si vous
utilisez un support de fixation non réglable, installez-le sur le mur. Branchez
d’abord les câbles sur le téléviseur, puis placez le téléviseur sur le support.
• Avant d’installer le téléviseur sur un support de fixation murale, retirez
son socle en suivant la procédure inverse de son installation.
• Pour obtenir de plus amples renseignements sur les vis et le support de
fixation murale, consultez le manuel fourni avec le support de fixation
murale acheté séparément.
• Si vous avez l’intention d’installer le produit sur un mur, fixez l’interface
de fixation VESA (pièces en option) à l’arrière du produit. Si vous
souhaitez fixer l’appareil à un mur à l’aide d’un support de fixation
murale (pièces en option), fixez-le soigneusement pour qu’il ne tombe
pas.
• Lors de l’installation du téléviseur au mur, assurez-vous de ne pas le
suspendre à l’aide du câble de signal ou du cordon d’alimentation qui se
trouve à l’arrière du téléviseur.
• N’installez pas le téléviseur sur un mur où il pourrait être exposé à de
l’huile ou à un brouillard d’huile. Cela peut endommager le produit et
provoquer sa chute.
• Lors de l’installation du support de fixation murale, il est recommandé de
couvrir les orifices de fixation du socle avec du ruban adhésif pour éviter
l’intrusion de poussière ou d’insectes (selon le modèle).
Antenne/câble
Pour regarder la télévision, raccordez le téléviseur à une antenne, au câble
ou à un décodeur de câblodistribution en vous reportant aux instructions
suivantes. Les illustrations peuvent différer des articles réels, et l’utilisation
d’un câble RF est facultative.
Fil de cuivre
• Assurez-vous de ne pas plier le fil de cuivre du câbleRF.
• Pour éviter d’endommager votre téléviseur, faites d’abord toutes les
connexions entre les appareils, puis branchez le cordon d’alimentation
dans la prise d’alimentation.
• Utilisez un dispositif d’aiguillage de signaux pour utiliser deux téléviseurs
ou plus.
• Codecs audio TVN pris en charge : MPEG, Dolby Digital
• Ce téléviseur ne peut pas recevoir de contenu diffusé en
Ultra-HD(3840x2160pixels) directement parce que les normes
correspondantes n’ont pas été confirmées (selon le pays).
6
Démarrage du téléviseur
Mise sous tension du téléviseur
Vous pouvez simplement utiliser les fonctions du téléviseur à l’aide du
bouton.
Mise sous tension (appuyez)
Mise hors tension
1)
(maintenez enfoncé)
Commande du menu (appuyez
2)
)
Sélection du menu (maintenez enfoncé
3)
)
1) Toutes les applications actives seront fermées.
2) Vous pouvez accéder au menu et le régler en appuyant sur le bouton
lorsque le téléviseur est allumé.
3) Vous pouvez utiliser cette fonction lorsque vous accédez à la commande
du menu.
Remarques
• Lorsque le téléviseur est allumé pour la première fois après sa sortie de
l’usine, son initialisation peut prendre environ une minute.
• L’affichage à l’écran de votre téléviseur peut différer légèrement des
illustrations du présent manuel (selon le modèle).
• L’appareil doit être branché près d’une prise électrique facilement
accessible. Certains appareils ne doivent pas être allumés ou éteints au
moyen d’un bouton, mais en éteignant l’appareil et en débranchant le
cordon d’alimentation (selon le modèle).
Connexions
Vous pouvez connecter différents périphériques externes sur le téléviseur.
Pour obtenir plus de renseignements sur la connectivité des périphériques
externes, consultez le manuel fourni avec chaque appareil.
HDMI
• Lors de la connexion du câble HDMI, l’appareil et les périphériques
externes doivent être éteints et débranchés.
• Formats audio HDMI pris en charge (selon le modèle):
True HD (48kHz),
Dolby Digital / Dolby Digital Plus (32kHz / 44,1kHz / 48kHz),
PCM (32kHz / 44,1kHz / 48kHz / 96kHz / 192kHz),
DTS (44,1kHz / 48kHz / 88,2kHz / 96kHz),
DTS-HD (44,1kHz / 48kHz / 88,2kHz / 96kHz / 176,4kHz / 192kHz)
Remarques
• Si l’appareil branché au port d’entrée prend également en charge le
mode HDMI Deep Color, l’image pourrait être plus claire. Par contre, si
l’appareil ne le prend pas en charge, ce mode pourrait ne pas fonctionner
correctement. Dans ce cas, désactivez le paramètre [HDMI Deep Color] du
téléviseur (selon le modèle).
•
→ [ ] → [Général] → [Appareils externes] →
[Paramètres HDMI] → [HDMI Deep Color] (selon le modèle).
• Utilisez un câble certifié portant le logo HDMI. Si vous n’utilisez pas un
câble HDMI certifié, l’image peut ne pas s’afficher, ou un problème de
connexion peut se produire.
• Type de câble HDMI recommandé (3m (9,84pi) ou moins) :
- Câble HDMI
®
/™ ultra-haute vitesse
7
USB
Certains concentrateurs USB pourraient ne pas fonctionner. Si un
dispositifUSB connecté à l’aide d’un concentrateur USB n’est pas détecté,
connectez-le directement au port USB du téléviseur (selon le modèle).
Remarques
• Pour que la connexion soit optimale, les connecteurs des câbles
HDMI et des dispositifs USB devraient avoir un rebord de moins de
10mm (0,39po) d’épaisseur et de moins de 18 mm (0,7po) de largeur
(selon le modèle).
• Si le câble ou la clé USB ne rentre pas dans le port USB du téléviseur,
servez-vous d’un câble de rallonge compatible avec .
Émetteur infrarouge
Commandez le décodeur (câble/satellite/IP/télévision par contournement),
le lecteur Blu-ray/DVD, la barre de son, les consoles de jeu, etc., en utilisant
l’émetteur infrarouge (selon le pays et les modèles).
Remarques
• Connectez le câble de l’émetteur infrarouge au port de l’émetteur
infrarouge situé sur le téléviseur.
• Utilisez les paramètres de commande universelle pour commander
l’appareil.
• Fixez l’émetteur infrarouge à l’aide du ruban 3M fourni.
•
Afin de commander des périphériques externes par l’intermédiaire des
fonctionnalités « Partage entre pièces » et « Contrôle vocal mains libres »,
une connexion à l’émetteur infrarouge est requise.
Périphériques externes
Les périphériques externes suivants sont pris en charge: lecteurs Blu-ray,
récepteurs HD, lecteurs DVD, magnétoscopes, systèmes audio, dispositifs de
stockage USB, ordinateurs, consoles de jeu et autres périphériques externes.
Pour obtenir plus de renseignements sur la connectivité des périphériques
externes, consultez le manuel fourni avec chaque appareil.
Remarques
• La connexion au périphérique externe peut différer légèrement des
illustrations présentées dans le manuel.
• En mode ordinateur, il peut y avoir du bruit associé à la résolution, au
motif vertical, au contraste ou à la luminosité. S’il y a du bruit, changez
la résolution de la sortieordinateur ou la fréquence de rafraîchissement,
ou réglez la luminosité et le contraste dans le menu [Image] pour obtenir
une image nette. Selon votre carte graphique, il est possible que certains
réglages de résolution ne permettent pas le positionnement correct de
l’image sur l’écran.
• Lorsque vous vous connectez à un réseau local câblé, utilisez un
câbleCAT7 avec une transmission Internet haute vitesse. (Uniquement
lorsqu’un port est fourni.)
• Il est possible que le téléviseur fonctionne sans décodeur à partir d’un
distributeur multicanal de programmes audiovisuels (MVPD).
Configuration de la télécommande
RS-232C
Pour obtenir les instructions de configuration de la télécommande
externeRS-232C, rendez-vous au www.lg.com. Téléchargez et lisez le manuel
(selon le modèle).
• Ne laissez pas le produit tomber ou basculer lorsque vous connectez
des périphériques externes. Sinon, cela peut entraîner des blessures ou
endommager le produit.
• Lorsque vous connectez des périphériques externes comme des
consoles de jeu vidéo, assurez-vous que les câbles de connexion sont
suffisamment longs. Autrement, le produit pourrait tomber, ce qui
pourrait entraîner des blessures ou endommager le produit.

8
Caractéristiques techniques
Les caractéristiques techniques sont susceptibles d’être modifiées sans préavis en raison de la mise à niveau des fonctions du produit.
La consommation d’énergie annuelle estimée indiquée sur l’étiquette FTC est mesurée conformément aux procédures de test pour les téléviseurs
(États-Unis seulement).
La consommation d’énergie réelle dépend de l’environnement d’utilisation (le contenu visionné, les réglages du téléviseur, etc.).
• Pour obtenir des renseignements sur l’alimentation et la consommation d’énergie, consultez l’étiquette apposée sur le produit.
- La consommation électrique typique est mesurée conformément à la norme CEI62087 ou aux réglementations énergétiques de chaque pays.
* Sur certains modèles, l’étiquette se trouve à l’intérieur du couvercle du terminal de connexion du périphérique externe.
* En fonction du modèle ou du pays, la consommation électrique typique peut ne pas être indiquée sur l’étiquette.
Alimentation 120 V c.a.~ 50/60Hz
(Selon le pays)
Caractéristiques de diffusion
Système télévisuel Téléviseur à transmission numérique terrestre / par câble / par satellite
Impédance de l’antenne externe 75 Ω
• Certaines normes de décodage/d’entrée 8K peuvent ne pas être prises en charge. Un appareil supplémentaire peut être nécessaire pour prendre en charge
certaines normes8K. Les images de haute qualité et optimisées au format 8K varient en fonction du contenu source (selon le modèle).
Conditions de l’environnement
Température de fonctionnement De 0 °C à 40 °C (de 32 °F à 104 °F) Température d’entreposage De -20°C à 60°C (de -4°F à 140°F)
Humidité de fonctionnement Moins de 80 % Humidité d’entreposage Moins de 85%
Conditions relatives à l’installation d’un support mural
Angle d’inclinaison De 0° à 15°
* Cette spécification s’applique uniquement aux produits dont l’angle de montage mural est réglable.
9
Renseignements sur le produit
Renseignements sur l’avis de logiciel libre
Pour obtenir le code source conformément aux dispositions de la licence publique générale, de la licence publique générale limitée, de la licence publique Mozilla
et de toute autre licence régissant les logiciels à code source libre contenus dans ce produit et exigeant la divulgation du code source, visitez le site https://
opensource.lge.com. En plus du code source, toutes les dispositions de licence, les avis de droits d’auteurs et autres documents pertinents peuvent aussi être
consultés..
LG Electronics mettra également à votre disposition le code source libre sur CD-ROM pour un prix couvrant le coût de la distribution (coût du support, de
l’expédition et de la manutention) sur simple demande par courriel à l’adresse opensour[email protected].
Cette offre est valable pour une période de trois ans après notre dernière expédition de ce produit et s’applique à toute personne ayant reçu ces renseignements.
Licences
(Uniquement pour les modèles prenant en charge la télécommande
Magic)
10
Dépannage
Dans l’entrée TV/HDMI, appuyez trois fois sur le bouton de la télécommande pour afficher le nom du modèle et le numéro de série à l’écran.
La télécommande ne
fonctionne pas.
• Assurez-vous que rien n’a été placé sur le récepteur (p. ex. ruban adhésif).
• Vérifiez qu’aucun obstacle n’empêche la communication entre l’appareil et la télécommande.
• Remplacez les piles par des piles neuves.
Le téléviseur ne produit
pas d’images ni de son.
• Vérifiez que l’appareil est allumé.
• Vérifiez que le cordon d’alimentation est branché dans une prise murale.
• Vérifiez que la prise murale fonctionne en y branchant d’autres appareils.
Le téléviseur s’éteint
brusquement.
• Vérifiez les réglages de l’alimentation. Il y a peut-être eu une interruption de l’alimentation.
• Vérifiez si la fonctionnalité d’arrêt automatique est activée dans les réglages liés à l’heure.
• La fonction d’arrêt automatique peut avoir fonctionné. Le produit est doté d’une fonction d’arrêt automatique qui
éteint automatiquement l’appareil si la télécommande n’est pas utilisée au bout de 15 minutes d’inactivité.
L’affichage est anormal. • Si le produit est froid au toucher, il peut y avoir un léger scintillement lors de la mise sous tension. C’est normal;
l’écran n’est pas défectueux.
• Cet écran est un produit de haute technologie qui contient des millions de pixels. De petits points noirs ou de
couleur brillante (rouge, bleu ou vert) d’une taille de 1 ppm peuvent apparaître sur l’écran. Cela n’indique pas un
mauvais fonctionnement et ne nuit aucunement à la performance ni à la fiabilité de l’appareil. Ce phénomène se
produit également chez des produits tiers et ne fait pas l’objet d’échange ni de remboursement.
• La luminosité et la couleur de l’écran peuvent être différentes en fonction de la position à partir de laquelle vous
regardez l’écran (gauche/droite/haut/bas). Ce phénomène se produit en raison des caractéristiques de l’écran.
Cela n’est pas lié à la performance de l’appareil et ne constitue pas un mauvais fonctionnement.
• Évitez de toucher l’écran ou de mettre vos doigts dessus pendant une longue période. Cela pourrait produire un
effet de distorsion à l’écran.
• L’affichage d’une image fixe pendant une longue période peut entraîner la rémanence de l’image. Évitez de laisser
une image fixe affichée à l’écran pendant une période prolongée.
Des sons se produisent • Craquement : un craquement survenant pendant le fonctionnement ou la mise hors tension du téléviseur est le
résultat d’une contraction thermique du plastique causée par la chaleur ou l’humidité. Ce bruit est courant dans les
produits où une déformation thermique est requise.
• Bourdonnement du circuit ou du panneau électrique: un bruit très faible est produit par un circuit
commutateur haute vitesse fournissant une grande quantité de courant pour faire fonctionner un appareil.
Il varie selon l’appareil. Ce son ne nuit aucunement à la performance ni à la fiabilité de l’appareil.
• Lorsque vous nettoyez le produit, assurez-vous de ne laisser aucun liquide ou corps étranger pénétrer entre les parties du haut, de gauche ou de droite du
panneau et le guide (selon le modèle).
• Assurez-vous d’essorer l’excès d’eau ou de produit de nettoyage du chiffon.
• Ne vaporisez pas d’eau ni de produit nettoyant directement sur l’écran du téléviseur.
• Assurez-vous de vaporiser juste assez d’eau ou de nettoyant sur un chiffon sec pour nettoyer l’écran.

11
Réglementation
Avis d’Industrie Canada
(Pour le Canada)
[Pour la fonction sans fil (WLAN, Bluetooth, etc.)]
L’émetteur/récepteur exempt de licence contenu dans le présent appareil est conforme aux CNR d’Innovation, Sciences et Développement économique Canada
applicables aux appareils radio exempts de licence. L’exploitation est autorisée aux deux conditions suivantes :
(1) L’appareil ne doit pas produire de brouillage;
(2) L’appareil doit accepter tout brouillage radioélectrique subi, même si le brouillage est susceptible d’en compromettre le fonctionnement.
Avis d’Industrie Canada sur l’exposition aux rayonnements
(Pour le Canada)
[Pour la fonction sans fil (WLAN, Bluetooth, etc.)]
Cet appareil est conforme aux limites d’exposition aux rayonnements d’Industrie Canada pour un environnement non contrôlé. Cet appareil doit être installé de
façon à garder une distance minimale de 20cm (7,8po) entre la source de rayonnement et votre corps.
REMARQUE: LE FABRICANT N’EST PAS RESPONSABLE DES INTERFÉRENCES RADIOÉLECTRIQUES CAUSÉES PAR DES MODIFICATIONS NON AUTORISÉES APPORTÉES À
CET APPAREIL. DE TELLES MODIFICATIONS POURRAIENT ANNULER L’AUTORISATION ACCORDÉE À L’UTILISATEUR DE FAIRE FONCTIONNER L’APPAREIL.
Exigences du CNR-247
(Pour le Canada)
[Pour les produits ayant la fonction sans fil utilisant des bandes de fréquences de 5 GHz]
(1) Les dispositifs fonctionnant dans la bande de 5 150 à 5 250 MHz sont réservés uniquement pour une utilisation à l’intérieur afin de réduire les risques de
brouillage préjudiciable aux systèmes de satellites mobiles utilisant les mêmes canaux;
(2) Pour les dispositifs munis d’antennes amovibles, le gain maximal d’antenne permis pour les dispositifs utilisant les bandes de 5 250 à 5 350 MHz et de
5470 à 5 725 MHz doit être conforme à la limite de la p.i.r.e;
(3) Pour les dispositifs munis d’antennes amovibles, le gain maximal d’antenne permis (pour les dispositifs utilisant la bande de 5 725 à 5 850 MHz) doit être
conforme à la limite de la p.i.r.e. spécifiée, selon le cas;
(4) [pour des dispositifs fonctionnant dans la bande de 5 250 à 5 350 MHz ayant une p.i.r.e. de plus de 200 mW] , les types d’antennes (s’il y en a plusieurs),
les numéros de modèle de l’antenne et les pires angles d’inclinaison nécessaires pour rester conforme à l’exigence de la p.i.r.e. applicable au masque
d’élévation, énoncée à la CNR-247 section 6.2.2.3, doivent être clairement indiqués.
Les utilisateurs doivent également savoir que les radars de grande puissance sont attribués en tant qu’utilisateurs principaux (c’est-à-dire les utilisateurs
prioritaires) des bandes de 5 250 à 5 350 MHz et de 5 650 à 5 850 MHz et que ces radars peuvent causer des interférences avec les appareils LE-LAN et/ou les
endommager.
REMARQUE À L’INTENTION DE L’INSTALLATEUR DU TÉLÉVISEUR/CÂBLE
(Pour le Canada)
Cette remarque a pour but d’attirer l’attention des installateurs de réseaux câblés sur l’article 820-40 du Code national de l’électricité (NEC) des États-Unis.
Ce code donne des lignes directrices concernant la mise à la terre appropriée de tels réseaux et, en particulier, il précise que le câble doit être relié à l’installation
de mise à la terre du bâtiment, et ce, aussi près que possible de son point d’entrée.
12
AVERTISSEMENTS! (DANGERS LIÉS À LA STABILITÉ)
Le téléviseur pourrait tomber et causer des blessures importantes, pouvant aller jusqu’à la mort. De nombreuses blessures, en particulier chez les enfants,
peuvent être évitées en prenant des précautions simples comme les suivantes:
- TOUJOURS utiliser des meubles, des supports ou des méthodes de montage recommandés par le fabricant du téléviseur.
- TOUJOURS utiliser des meubles qui peuvent supporter le téléviseur en toute sécurité.
- TOUJOURS s’assurer que le téléviseur ne dépasse pas le bord du meuble qui le soutient.
- TOUJOURS sensibiliser les enfants aux dangers que représente le fait de grimper sur un meuble pour atteindre le téléviseur ou ses commandes.
- TOUJOURS acheminer les cordons et les câbles reliés au téléviseur de façon à ce qu’on ne puisse pas trébucher dessus, tirer dessus ou les saisir.
- Ne JAMAIS placer un téléviseur dans un endroit instable.
- Ne JAMAIS placer le téléviseur sur un meuble élevé (une armoire ou une bibliothèque, par exemple) sans ancrer le meuble et le téléviseur à un support
adéquat.
- Ne JAMAIS placer le téléviseur sur un tissu ou tout autre matériau inséré entre le téléviseur et le meuble qui le soutient.
- Ne JAMAIS placer d’objets, tels que des jouets et des télécommandes, qui peuvent donner envie aux enfants de grimper sur le téléviseur ou sur le meuble
sur lequel le téléviseur est placé.
Si le téléviseur actuel doit être déplacé, les mêmes précautions s’appliquent.
Symboles
Fait référence au courant alternatif (c.a.). Fait référence à la mise en veille.
Fait référence au courant continu (c.c.). Fait référence à la mise en marche (alimentation).
Fait référence à un équipement de classe II. Fait référence à une tension dangereuse.

OWNER’S MANUAL
EXTERNAL CONTROL
DEVICE SETUP
Please read this manual carefully before operating the set and retain it for
future reference.
www.lg.com
P/NO : MFL71445401 (1901-REV00)
2
ENG
ENGLISH
2
KEY CODES
KEY CODES
• This feature is not available for all models.
Code
(Hexa)
Function Note
Code
(Hexa)
Function Note
00 CH +, PR + R/C Button 53 List R/C Button
01 CH -, PR - R/C Button 5B Exit R/C Button
02 Volume + R/C Button 60 PIP(AD) R/C Button
03 Volume - R/C Button 61 Blue R/C Button
06 > (Arrow Key / Right Key) R/C Button 63 Yellow R/C Button
07 < (Arrow Key / Left Key) R/C Button 71 Green R/C Button
08 Power R/C Button 72 Red R/C Button
09 Mute R/C Button 79 Ratio / Aspect Ratio R/C Button
0B Input R/C Button 91 AD (Audio Description) R/C Button
0E SLEEP R/C Button 9E LIVE MENU R/C Button
0F TV, TV/RAD R/C Button 7A User Guide R/C Button
10 - 19 * Number Key 0 - 9 R/C Button 7C Smart / Home R/C Button
1A Q.View / Flashback R/C Button 7E SIMPLINK R/C Button
1E FAV (Favorite Channel) R/C Button 8E ►►(Forward) R/C Button
20 Text (Teletext) R/C Button 8F ◄◄(Rewind) R/C Button
21 T. Opt (Teletext Option) R/C Button AA Info R/C Button
28 Return (BACK) R/C Button AB Program Guide R/C Button
30 AV (Audio / Video) Mode R/C Button B0 ►(Play) R/C Button
39 Caption/Subtitle R/C Button B1 ꕗ (Stop / File List) R/C Button
40 Λ
(Arrow Key / Cursor Up)
R/C Button B5 RECENT R/C Button
41
V (Arrow Key / Cursor
Down)
R/C Button BA
ꕘ (Freeze / Slow Play /
Pause)
R/C Button
42 My Apps R/C Button BB Soccer R/C Button
43 Menu / Settings R/C Button BD ꔄ (REC) R/C Button
44 OK / Enter R/C Button DC 3D R/C Button
45 Q.Menu R/C Button 99 AutoConfig R/C Button
4C List, - R/C Button 9F App / * R/C Button
4D PICTURE R/C Button 9B TV / PC R/C Button
52 SOUND R/C Button
* Key code 4C (0x4C) is available on ATSC/ISDB models which use major/minor channel.
(For South Korea, Japan, North America, Latin America except Colombia models)
3
ENGENGLISH
3
EXTERNAL CONTROL DEVICE SETUP
EXTERNAL CONTROL DEVICE SETUP
• Image shown may differ from your TV.
Connect the USB to Serial(RS-232C) converter/RS-232C(Serial) input jack to an external control device
(such as a computer or an A/V control system) to control the product’s functions externally.
Note: The type of control port on the TV can be different between model series.
* Please be advised that not all models support this type of connectivity.
* Cable is not provided.
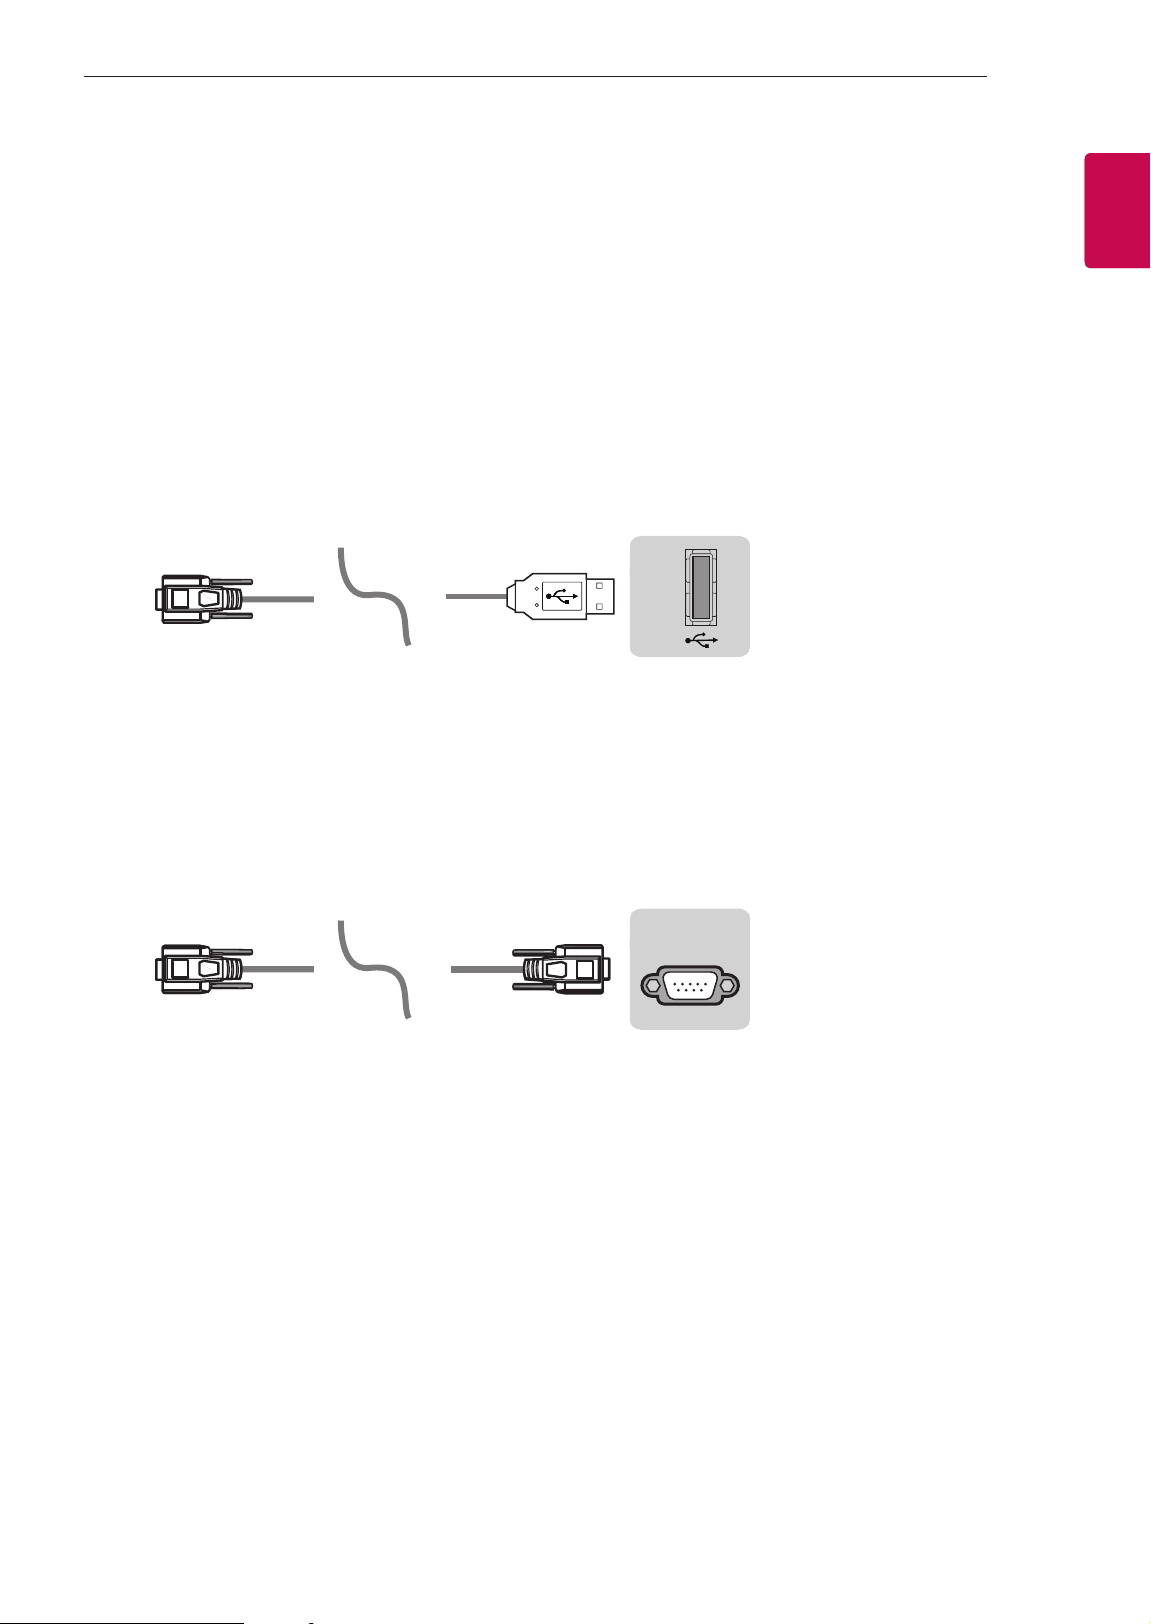
USB to Serial(RS-232C) converter with USB Cable
USB Type
USB IN
(TV)
(PC )
(PC
)
RS-232C IN
(CONTROL & SERVICE)
(TV)
(TV)
(PC )
(TV)
(PC )
SERVICE ONLY
RS-232C IN
(CONTROL & SERVICE)
RS-232C IN
(CONTROL & SERVICE)
1
3
2
1
3
2
• LGTV supports PL2303 chip-based (Vendor ID : 0x0557, Product ID : 0x2008) USB to serial(RS-232C)
converter which is not made nor provided by LG.
• It can be purchased from computer stores that carry accessories for IT support professionals.
RS-232C(Serial) With RS-232C(Serial) Cable
DE9 (D-Sub 9pin) Type
• You need to purchase the RS-232C (DE9, D-Sub 9pin female-to-female type) to RS-232C(Serial) cable
required for the connection between the PC and the TV, which is specified in the manual.
USB IN
(TV)
(PC
)
(PC )
RS-232C IN
(CONTROL & SERVICE)
(TV)
(TV)
(PC )
(TV)
(PC )
SERVICE ONLY
RS-232C IN
(CONTROL & SERVICE)
RS-232C IN
(CONTROL & SERVICE)
1
3
2
1
3
2
The connection interface may differ from your TV.
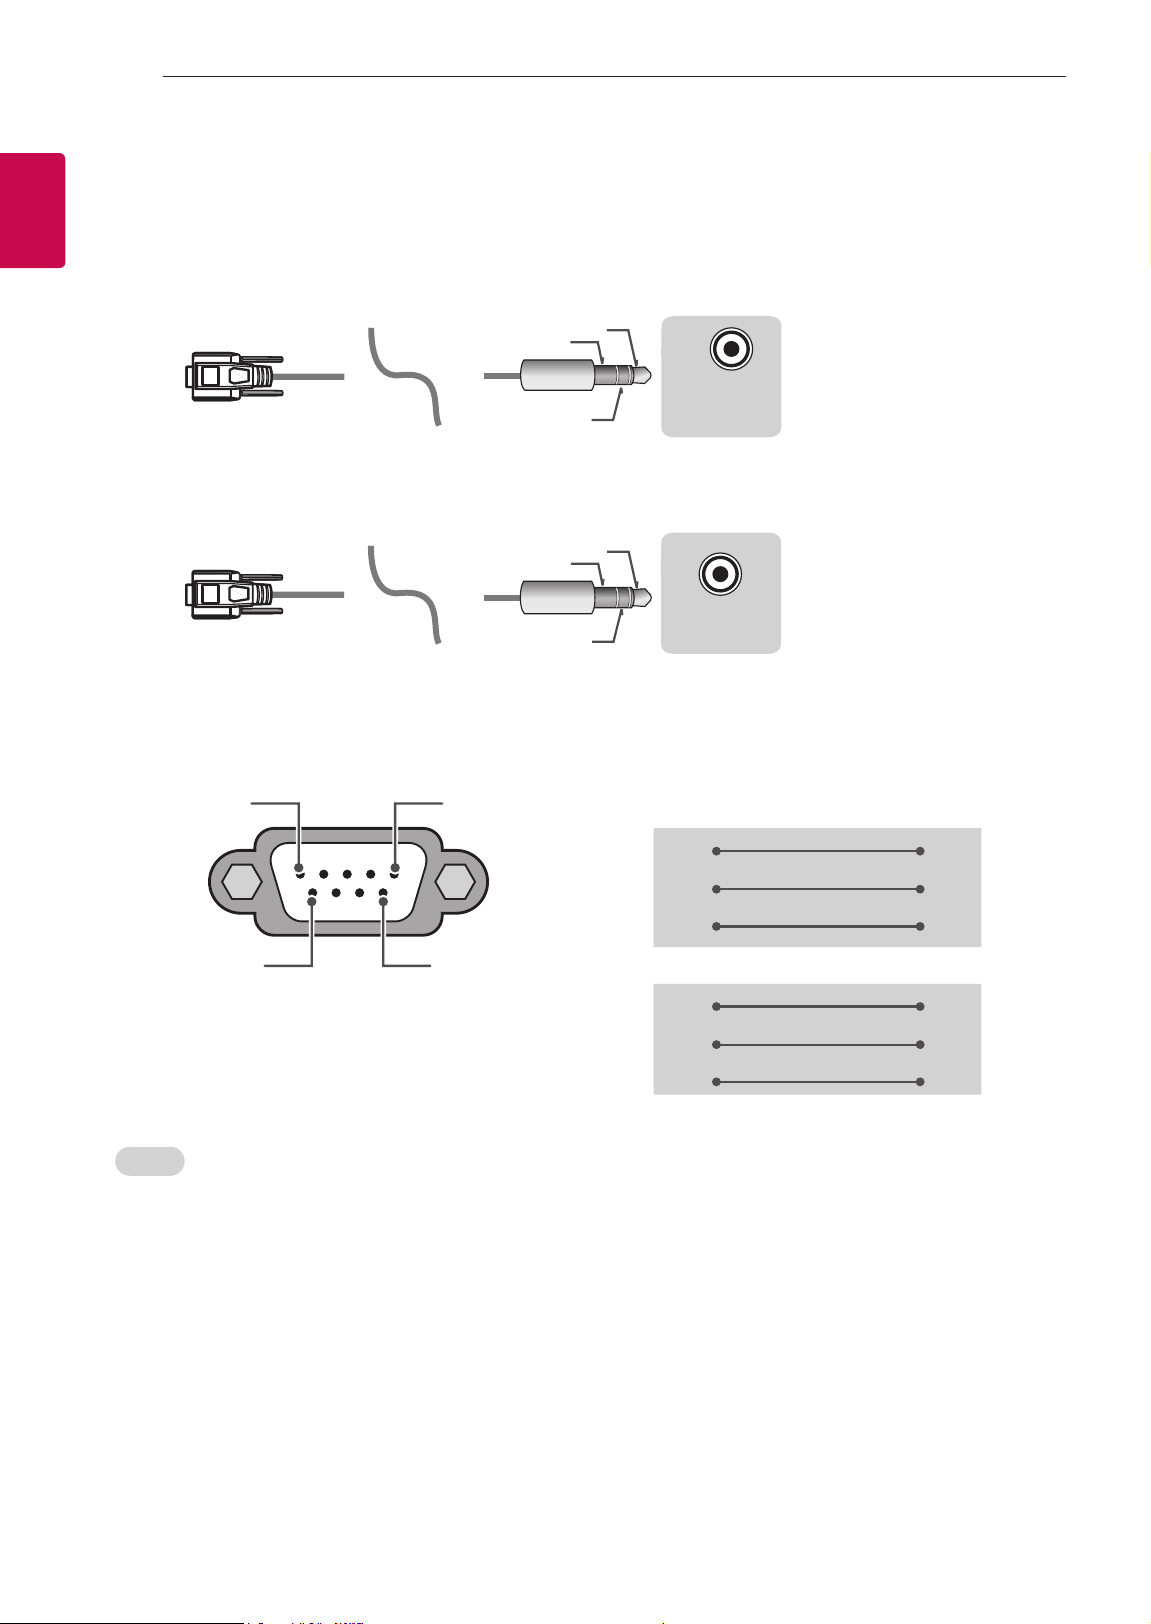
4
ENG
ENGLISH
4
EXTERNAL CONTROL DEVICE SETUP
Phone jack Type
• You need to purchase the phone-jack to RS-232 cable required for the connection between the PC and
the TV, which is specified in the manual.
* For other models, connect to the USB port.
* The connection interface may differ from your TV.
USB IN
(TV)
(PC )
(PC )
RS-232C IN
(CONTROL & SERVICE)
(TV)
(TV)
(PC
)
(TV)
(PC )
SERVICE ONLY
RS-232C IN
(CONTROL & SERVICE)
RS-232C IN
(CONTROL & SERVICE)
1
3
2
1
3
2
- or
USB IN
(TV)
(PC )
(PC )
RS-232C IN
(CONTROL & SERVICE)
(TV)
(TV)
(PC )
(TV)
(PC
)
SERVICE ONLY
RS-232C IN
(CONTROL & SERVICE)
RS-232C IN
(CONTROL & SERVICE)
1
3
2
1
3
2
Customer Computer RS-232C configurations
3-Wire Configurations(Not standard)
1
6
5
9
PC TV
RXD 2 2 TXD
TXD 3 1 RXD
GND 5 3 GND
OR
RXD 3 2 TXD
TXD 2 1 RXD
GND 5 3 GND
D-Sub 9 Phone
RS-232C
(Serial port)
Set ID
For Set ID number, see "Real Data Mapping" on p.6
1. Press SETTINGS to access the main menus.
2. Press the Navigation buttons to scroll to (*General → About this TV or OPTION) and press OK.
3. Press the Navigation buttons to scroll to SET ID and press OK.
4. Scroll left or right to select a set ID number and select CLOSE. The adjustment range is 1-99.
5. When you are finished, press EXIT.
* (Depending on model)
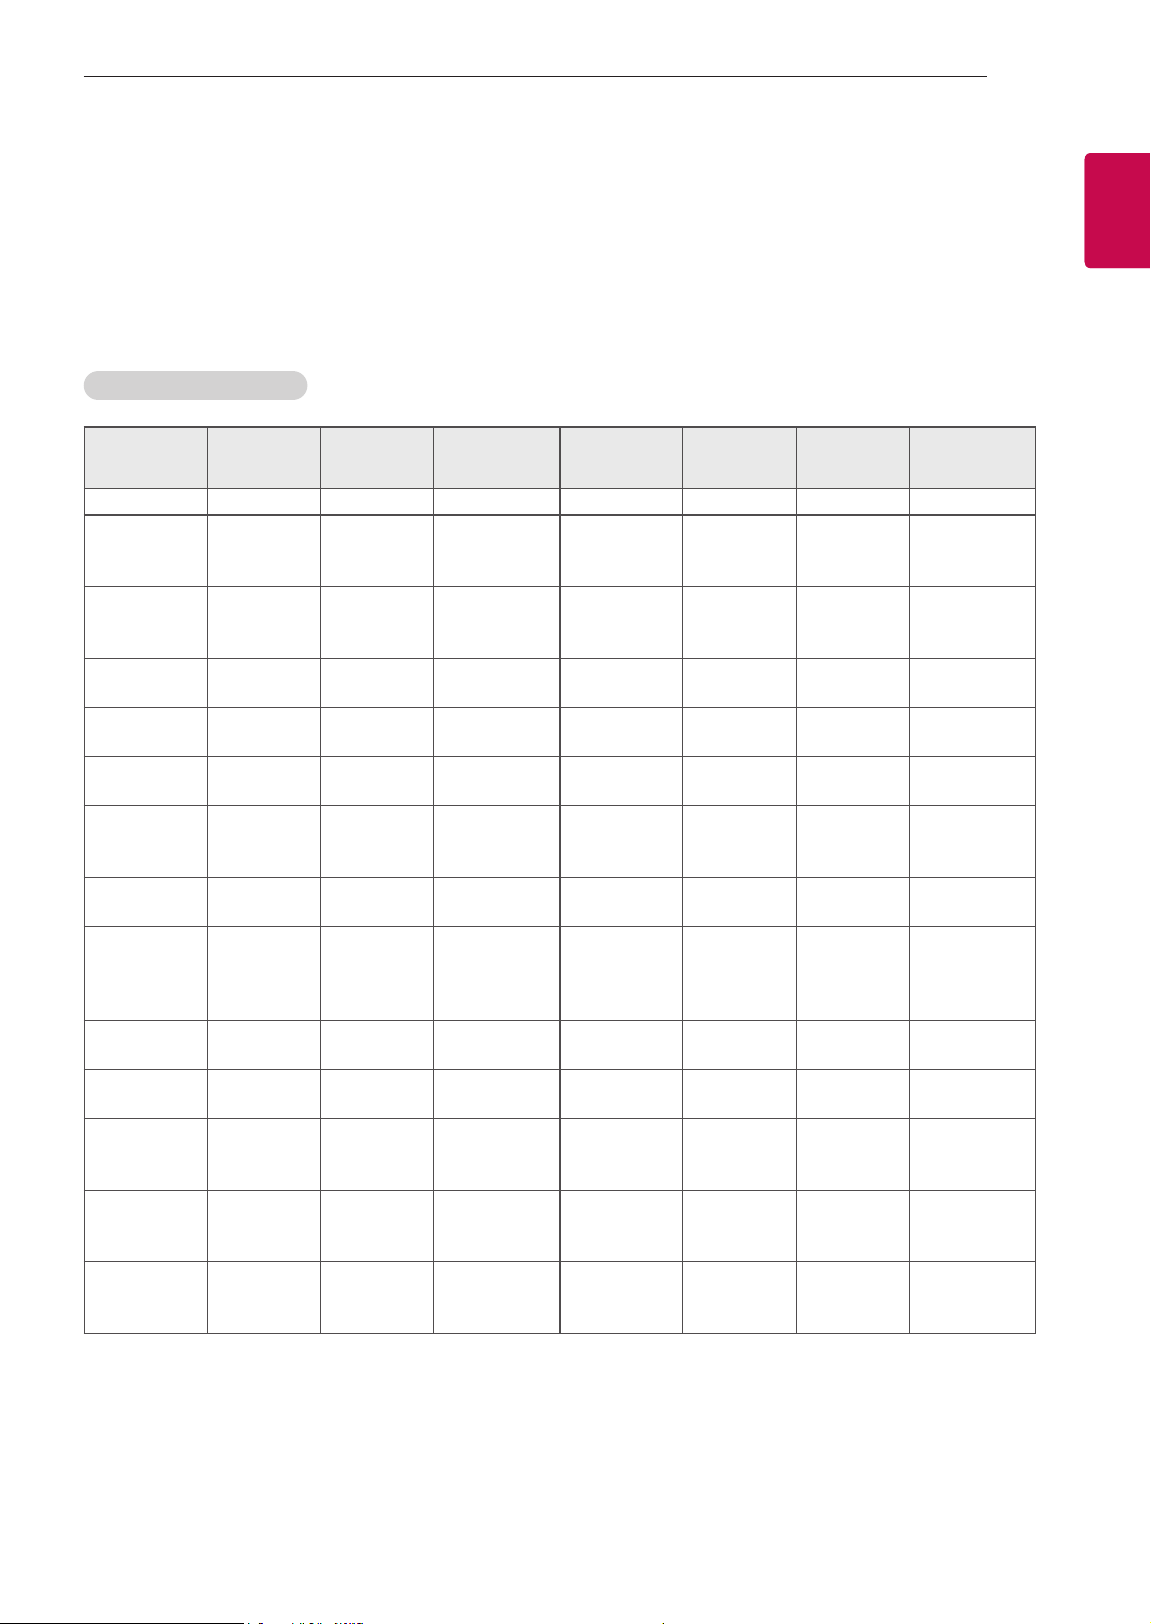
5
ENGENGLISH
5
EXTERNAL CONTROL DEVICE SETUP
Communication Parameters
• Baud rate : 9600 bps (UART)
• Data length : 8 bits
• Parity : None
• Stop bit : 1 bit
• Communication code : ASCII code
• Use a crossed (reverse) cable.
Command reference list
(Depending on model)
COMMAND1 COMMAND2
DATA
(Hexadecimal)
COMMAND1 COMMAND2
DATA
(Hexadecimal)
01. Power* k a 00 to 01 15. Balance k t 00 to 64
02. Aspect
Ratio
k c (p.7)
16. Color
(Colour)
Temperature
x u 00 to 64
03. Screen
Mute
k d (p.7)
17. ISM
Method (Only
Plasma TV)
j p (p.8)
04. Volume
Mute
k e 00 to 01 18. Equalizer j v (p.9)
05. Volume
Control
k f 00 to 64
19. Energy
Saving
j q 00 to 05
06. Contrast k g 00 to 64
20. Tune
Command
m a (p.9)
07.
Brightness
k h 00 to 64
21. Channel
(Programme)
Add/Del(Skip)
m b 00 to 01
08. Color/
Colour
k i 00 to 64 22. Key m c Key Codes
09. Tint k j 00 to 64
23. Control
Backlight,
Control Panel
Light
m g 00 to 64
10.
Sharpness
k k 00 to 32
24. Input
select (Main)
x b (p.11)
11. OSD
Select
k l 00 to 01
25. 3D (Only
3D models)
x t (p.11)
12. Remote
Control Lock
Mode
k m 00 to 01
26. Extended
3D (Only 3D
models)
x v (p.12)
13. Treble k r 00 to 64
27. Auto
Configure
j u (p.12)
14. Bass k s 00 to 64
* Note: During playing or recording media, all commands except Power (ka) and Key (mc) are not
executed and treated as NG.
With RS232C cable, TV can communicate "ka command" in power-on or power-off status. but with
USB-to-Serial converter cable, the command works only if TV is on.

6
ENG
ENGLISH
6
EXTERNAL CONTROL DEVICE SETUP
Transmission / Receiving Protocol
Transmission
[Command1][Command2][ ][Set ID][ ][Data][Cr]
[Command 1] : First command to control the TV. (j, k, m or x)
[Command 2] : Second command to control the TV.
[Set ID] : You can adjust the [Set ID] to choose desired monitor ID number in option menu.
Adjustment range in TV is 1 to 99. If [Set ID] value is selected to ‘0’, every connected set
can be controlled.
* [Set ID] is indicated as decimal (1 to 99) on menu and as Hexadecimal (0x00 to 0x63) on
transmission/receiving protocol.
[DATA] : To transmit command data (hexadecimal). Transmit ‘FF’ data to read status of command.
[Cr] : Carriage Return - ASCII code ‘0x0D’
[ ] : Space – ASCII code ‘0x20’
OK Acknowledgement
[Command2][ ][Set ID][ ][OK][Data][x]
* The set transmits ACK (acknowledgement) based on this format when receiving normal data. At this time,
if the data is data read mode, it indicates present status data. If the data is data write mode, it returns the
data of the PC computer.
Error Acknowledgement
[Command2][ ][Set ID][ ][NG][Data][x]
* The set transmits ACK (acknowledgement) based on this format when receiving abnormal data from
non-viable functions or communication errors.
Data 00: Illegal Code
Real data mapping (Hexadecimal b Decimal)
* When you enter the [data] in hexadecimal, refer to following conversion table.
* Channel Tune (ma) Command uses two-byte hexadecimal value([data]) to select channel number.
00 : Step 0 32 : Step 50 (Set ID 50) FE : Step 254
01 : Step 1 (Set ID 1) 33 : Step 51 (Set ID 51) FF : Step 255
... ... ...
0A : Step 10 (Set ID 10) 63 : Step 99 (Set ID 99) 01 00 : Step 256
... ... ...
0F : Step 15 (Set ID 15) C7 : Step 199 27 0E : Step 9998
10 : Step 16 (Set ID 16) C8 : Step 200 27 0F : Step 9999
... ... ...

7
ENGENGLISH
7
EXTERNAL CONTROL DEVICE SETUP
* Commands may work differently depending on model and signal.
01. Power (Command: k a)
► To control Power *On or Off of the set.
Transmission[k][a][ ][Set ID][ ][Data][Cr]
Data 00 : Power Off 01 : *Power On
Ack [a][ ][Set ID][ ][OK/NG][Data][x]
► To Show TV is Power On or *Off
Transmission [k][a][ ][Set ID][ ][FF][Cr]
Ack [a][ ][Set ID][ ][OK][Data][x]
* Similarly, if other functions transmit ‘FF’ data
based on this format, Acknowledgement feedback
presents status about each function.
02. Aspect Ratio (Command: k c)
(Main Picture Size)
► To adjust the screen format. (Main picture format)
You can also adjust the screen format using the
Aspect Ratio in the Q.MENU. or PICTURE menu.
Transmission [k][c][ ][Set ID][ ][Data][Cr]
Data 01 : Normal screen
(4:3)
02 : Wide screen
(16:9)
04 : Zoom
05 : Zoom 2
(Latin America
except Colombia
Only)
06 : Set by Program/
Original
07 : 14:9
(Europe, Colombia, Mid-East,
Asia except South Korea and
Japan)
09 : * Just Scan
0B : Full Wide
(Europe, Colombia, Mid-
East, Asia except South
Korea and Japan)
10 to 1F : Cinema Zoom 1 to 16
0c : 21:9 (Depending on model)
Ack [c][ ][Set ID][ ][OK/NG][Data][x]
* Using the PC input, you select either 16:9 or 4:3
screen aspect ratio.
* In DTV/HDMI/Component mode (high-definition),
Just Scan is available.
* Full wide mode may work differently based on
model and is supported for DTV fully, and ATV,
AV partially.
03. Screen Mute (Command: k d)
► To select screen mute on/off.
Transmission [k][d][ ][Set ID][ ][Data][Cr]
Data 00 : Screen mute off (Picture on)
Video mute off
01 : Screen mute on (Picture off)
10 : Video mute on
Ack [d][ ][Set ID][ ][OK/NG][Data][x]
* In case of video mute on only, TV will display On
Screen Display(OSD). But, in case of Screen mute
on, TV will not display OSD.
04. Volume Mute (Command: k e)
► To control volume mute on/off.
You can also adjust mute using the MUTE button
on remote control.
Transmission [k][e][ ][Set ID][ ][Data][Cr]
Data 00 : Volume mute on (Volume off)
01 : Volume mute off (Volume on)
Ack [e][ ][Set ID][ ][OK/NG][Data][x]
05. Volume Control (Command: k f)
► To adjust volume.
You can also adjust volume with the volume
buttons on remote control.
Transmission [k][f][ ][Set ID][ ][Data][Cr]
Data Min : 00 to Max : 64
Ack [f][ ][Set ID][ ][OK/NG][Data][x]
06. Contrast (Command: k g)
► To adjust screen contrast.
You can also adjust contrast in the PICTURE
menu.
Transmission [k][g][ ][Set ID][ ][Data][Cr]
Data Min : 00 to Max : 64
Ack [g][ ][Set ID][ ][OK/NG][Data][x]
07. Brightness (Command: k h)
► To adjust screen brightness.
You can also adjust brightness in the PICTURE
menu.
Transmission [k][h][ ][Set ID][ ][Data][Cr]
Data Min : 00 to Max : 64
Ack [h][ ][Set ID][ ][OK/NG][Data][x]

8
ENG
ENGLISH
8
EXTERNAL CONTROL DEVICE SETUP
08. Color/Colour (Command: k i)
► To adjust the screen Color(Colour).
You can also adjust colour in the PICTURE menu.
Transmission [k][i][ ][Set ID][ ][Data][Cr]
Data Min : 00 to Max : 64
Ack [i][ ][Set ID][ ][OK/NG][Data][x]
09. Tint (Command: k j)
► To adjust the screen tint.
You can also adjust tint in the PICTURE menu.
Transmission [k][j][ ][Set ID][ ][Data][Cr]
Data Red : 00 to Green : 64
Ack [j][ ][Set ID][ ][OK/NG][Data][x]
10. Sharpness (Command: k k)
► To adjust the screen sharpness.
You can also adjust sharpness in the PICTURE
menu.
Transmission [k][k][ ][Set ID][ ][Data][Cr]
Data Min : 00 to Max : 32
Ack [k][ ][Set ID][ ][OK/NG][Data][x]
11. OSD Select (Command: k l)
► To select OSD (On Screen Display) on/off when
controlling remotely.
Transmission [k][l][ ][Set ID][ ][Data][Cr]
Data 00 : OSD off 01 : OSD on
Ack [l][ ][Set ID][ ][OK/NG][Data][x]
12. Remote control lock mode (Command: k m)
► To lock the front panel controls on the monitor and
remote control.
Transmission [k][m][ ][Set ID][ ][Data][Cr]
Data 00 : Lock off 01 : Lock on
Ack [m][ ][Set ID][ ][OK/NG][Data][x]
* If you are not using the remote control, use this
mode.
When main power is off & on (plug-off and plug-in,
after 20 - 30 seconds), external control lock is
released.
* In the standby mode (DC off by off timer or ‘ka’,
‘mc’ command), and if key lock is on, TV will not
turn on by power on key of IR & Local Key.
13. Treble (Command: k r)
► To adjust treble.
You can also adjust in the AUDIO menu.
Transmission [k][r][ ][Set ID][ ][Data][Cr]
Data Min : 00 to Max : 64
Ack [r][ ][Set ID][ ][OK/NG][Data][x]
* (Depending on model)
14. Bass (Command: k s)
► To adjust Bass.
You can also adjust in the AUDIO menu.
Transmission [k][s][ ][Set ID][ ][Data][Cr]
Data Min : 00 to Max : 64
Ack [s][ ][Set ID][ ][OK/NG][Data][x]
* (Depending on model)
15. Balance (Command: k t)
► To adjust balance.
You can also adjust balance in the AUDIO menu.
Transmission [k][t][ ][Set ID][ ][Data][Cr]
Data Min : 00 to Max : 64
Ack [t][ ][Set ID][ ][OK/NG][Data][x]
16. Color(Colour) Temperature (Command: x u)
► To adjust colour temperature. You can also adjust
Color(Colour) Temperature in the PICTURE menu.
Transmission [x][u][ ][Set ID][ ][Data][Cr]
Data Min : 00 to Max : 64
Ack [u][ ][Set ID][ ][OK/NG][Data][x]
17. ISM Method (Command: j p) (Only Plasma TV)
► To control the ISM method. You can also adjust
ISM Method in OPTION menu.
Transmission [j][p][ ][Set ID][ ][Data][Cr]
Data Min : 02: Orbiter
08: Normal
20: Color(Colour) Wash
Ack [p][ ][Set ID][ ][OK/NG][Data][x]
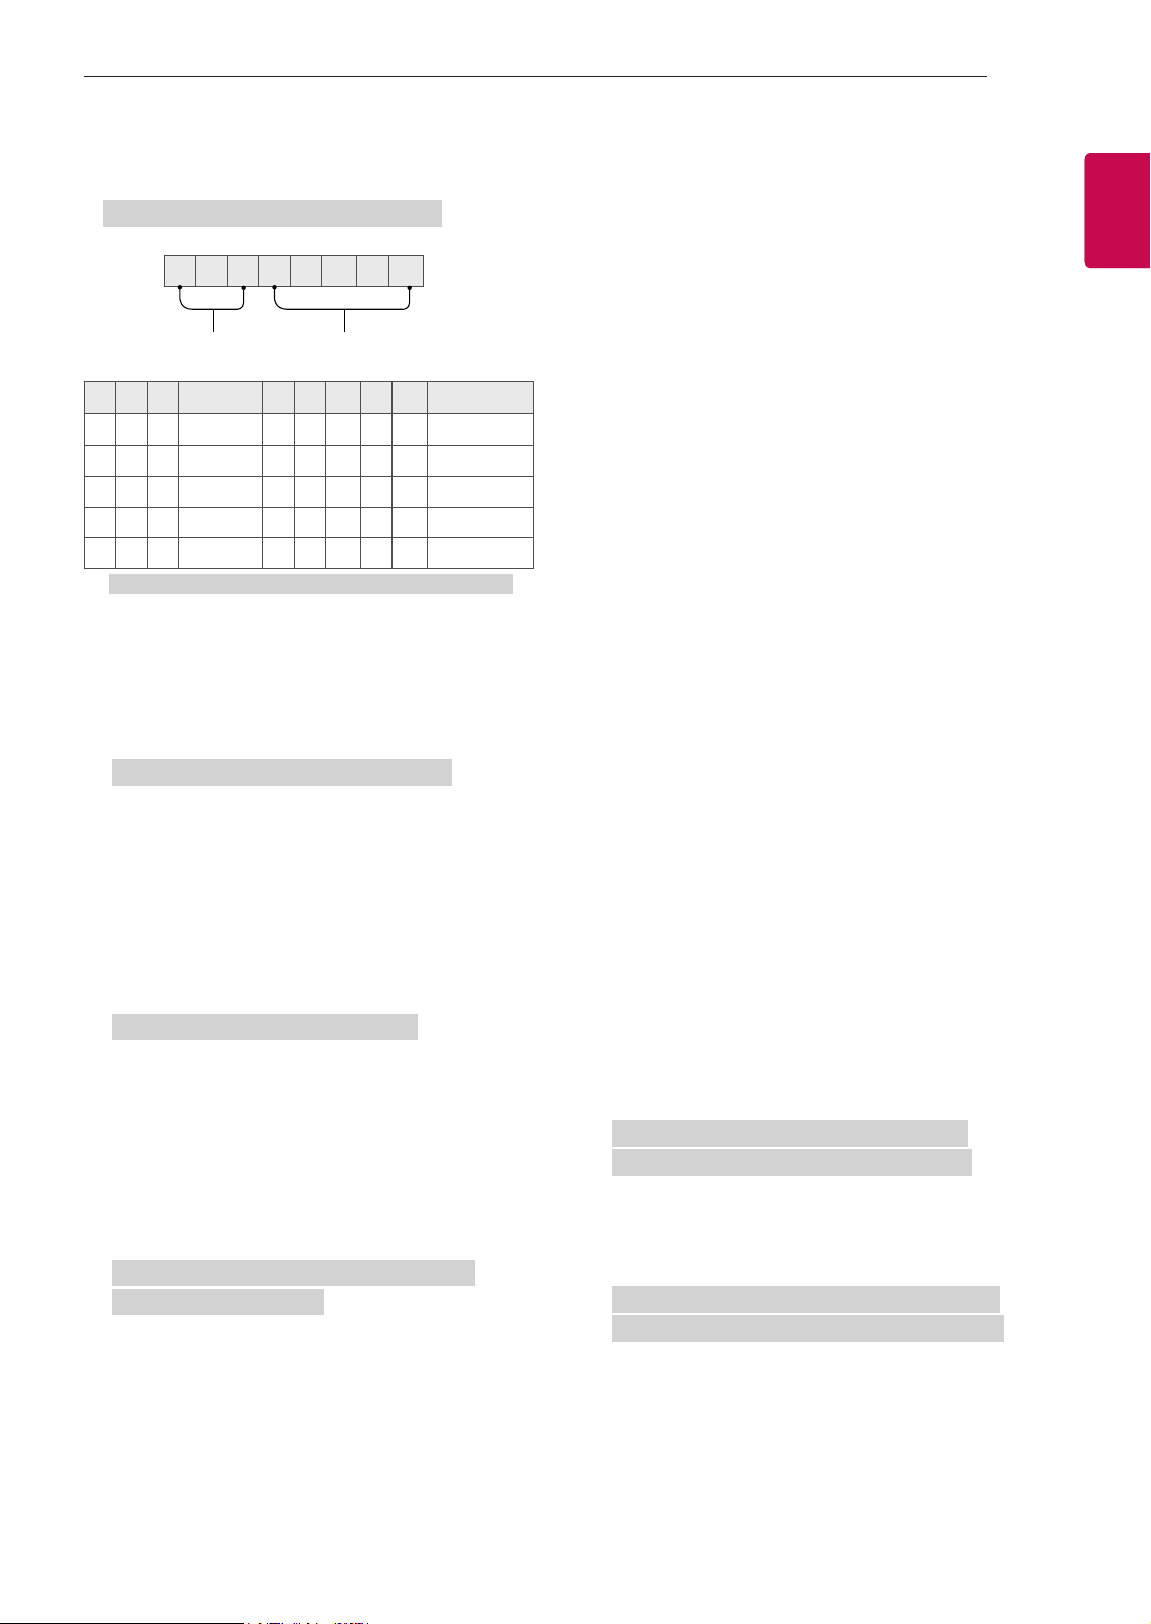
9
ENGENGLISH
9
EXTERNAL CONTROL DEVICE SETUP
18. Equalizer (Command : j v)
► Adjust EQ of the set.
Transmission [j][v][ ][Set ID][ ][Data][Cr]
0 0 0 0 0 0 0 0
MSB
Frequency Data
LSB
7 6 5
Frequency
4 3 2 1 0 Step
0 0 0
1st Band
0 0 0 0 0
0(decimal)
0 0 1
2nd Band
0 0 0 0 1
1(decimal)
0 1 0
3rd Band
... ... ... ... ...
...
0 1 1
4th Band
1 0 0 1 1
19(decimal)
1 0 0
5th Band
1 0 1 0 1
20(decimal)
Acknowledgement [v][ ][Set ID][ ][OK/NG][Data][x]
* It depends on model, and can adjust when sound
mode is EQ adjustable value.
19. Energy Saving (Command: j q)
► To reduce the power consumption of the TV. You
can also adjust Energy Saving in PICTURE menu.
Transmission [j][q][ ][Set ID][ ][Data][Cr]
Data
00 : Off
01 : Minimum
02 : Medium
03 : Maximum
04 : Auto (For LCD TV / LED TV) /
Intelligent sensor (For PDP TV)
05 : Screen off
* (Depending on model)
Ack [q][ ][Set ID][ ][OK/NG][Data][x]
20. Tune Command (Command: m a)
* This command may work differently depending on
model and signal.
• For Europe, Mid-East, Colombia, Asia except
South Korea and Japan Model
► Select channel to following physical number.
Transmission [m][a][ ][Set ID][ ][Data 00][ ]
[Data 01][ ][Data 02][Cr]
* Analog Antenna/Cable
[Data 00][Data 01] Channel Data
Data 00 : High byte channel data
Data 01 : Low byte channel data
- 00 00 ~ 00 C7 (Decimal : 0 ~ 199)
Data 02 : Input Source (Analog)
- 00 : Antenna TV (ATV)
- 80 : Cable TV (CATV)
* Digital Antenna/Cable/Satellite
[Data 00][Data 01]: Channel Data
Data 00 : High Channel data
Data 01 : Low Channel data
- 00 00 ~ 27 0F (Decimal: 0 ~ 9999)
Data 02 : Input Source (Digital)
- 10 : Antenna TV (DTV)
- 20 : Antenna Radio (Radio)
- 40 : Satellite TV (SDTV)
- 50 : Satellite Radio (S-Radio)
- 90 : Cable TV (CADTV)
- a0 : Cable Radio (CA-Radio)
* Tune Command Examples:
1. Tune to the Analog antenna (PAL) Channel 10.
Set ID = All = 00
Data 00 & 01 = Channel Data is 10 = 00 0a
Data 02 = Analog Antenna TV = 00
Result = ma 00 00 0a 00
2. Tune to the digital antenna (DVB-T) Channel 01.
Set ID = All = 00
Data 00 & 01 = Channel Data is 1 = 00 01
Data 02 = Digital Antenna TV = 10
Result = ma 00 00 01 10
3. Tune to the satellite (DVB-S) Channel 1000.
Set ID = All = 00
Data 00 & 01 = Channel Data is 1000 = 03 E8
Data 02 = Digital Satellite TV = 40
Result = ma 00 03 E8 40
Ack [a][ ][Set ID][ ][OK][Data 00][Data 01]
[Data 02][x][a][ ][Set ID][ ][NG][Data 00][x]
• For South Korea, North/Latin America except
Colombia Model
► To tune channel to following physical/major/minor
number.
Transmission [m][a][ ][0][ ][Data00][ ][Data01]
[ ][Data02][ ][Data03][ ][Data04][ ][Data05][Cr]
Digital channels have a Physical, Major, and Minor
channel number. The Physical number is the actual
digital channel number, the Major is the number that
the channel should be mapped to, and the Minor is
the sub-channel. Since the ATSC tuner automatically
maps the channel from the Major / Minor number,
the Physical number is not required when sending a
command in Digital.

10
ENG
ENGLISH
10
EXTERNAL CONTROL DEVICE SETUP
* Analog Antenna/Cable
Data 00 : Physical Channel Number
- Antenna (ATV) : 02~45 (Decimal: 2 ~ 69)
- Cable (CATV) : 01, 0E~7D (Decimal : 1, 14~125)
[Data 01 ~ 04]: Major/Minor Channel Number
Data 01 & 02: xx (Don't care)
Data 03 & 04: xx (Don't care)
Data 05: Input Source (Analog)
- 00 : Antenna TV (ATV)
- 01 : Cable TV (CATV)
* Digital Antenna/Cable
Data 00 : xx (Don't care)
[Data 01][Data 02]: Major Channel Number
Data 01 : High byte Channel Data
Data 02 : Low byte Channel Data
- 00 01 ~ 27 0F (Decimal: 1 ~ 9999)
[Data 03][Data 04]: Minor Channel Number
Data 03 : High byte Channel Data
Data 04 : Low byte Channel Data
Data 05 : Input Source (Digital)
- 02 : Antenna TV (DTV) – Use Physical Channel
Number
- 06 : Cable TV (CADTV) – Use Physical Channel
Number
- 22 : Antenna TV (DTV) – Don’t Use Physical
Channel Number
- 26 : Cable TV (CADTV) - Don’t Use Physical
Channel Number
- 46 : Cable TV (CADTV) – Use Physical/Major
Channel Number Only (One Part Channel)
- 66 : Cable TV (CADTV) – Use Major Channel
Number Only (One Part Channel)
- 0b : Cable DTV Plus – Use Physical Channel
Number
- 2b : Cable DTV Plus – Don’t Use Physical
Channel Number
- 4b : Cable DTV Plus – Use Physical/Major
Channel Number Only (One Part Channel)
- 6b : Cable DTV Plus – Use Major Channel
Number Only (One Part Channel)
Two bytes are available for each major and minor
channel data, but usually the low byte is used alone
(high byte is 0).
* Tune Command Examples:
1. Tune to the Analog cable (NTSC) channel 35.
Set ID = All = 00
Data 00 = Channel Data is 35 = 23
Data 01 & 02 = No Major = 00 00
Data 03 & 04 = No Minor = 00 00
Data 05 = Analog Cable TV = 01
Total = ma 00 23 00 00 00 00 01
2. Tune to the digital antenna (ATSC) channel 30-3.
Set ID = All = 00
Data 00 = Don’t know Physical = 00
Data 01 & 02 = Major is 30 = 00 1E
Data 03 & 04 = Minor is 3 = 00 03
Data 05 = Digital Antenna TV = 22
Total = ma 00 00 00 1E 00 03 22
Ack [a][ ][Set ID][ ][OK][Data 00][Data 01]
[Data 02][Data 03][Data 04][Data 05]
[x][a][ ][Set ID][ ][NG][Data 00][x]
• For Japan Model
► To tune channel to following physical/major/minor
number.
Transmission [m][a][ ][0][ ][Data00][ ][Data01]
[ ][Data02][ ][Data03][ ][Data04][ ][Data05][Cr]
* Digital Antenna/Satellite
Data 00: xx (Don't care)
[Data 01][Data 02]: Major Channel Number
Data 01: High byte Channel Data
Data 02: Low byte Channel Data
- 00 01 ~ 27 0F (Decimal: 1 ~ 9999)
[Data 03][Data 04]: Minor/Branch Channel Number
(Don’t care in Satellite)
Data 03: High byte Channel Data
Data 04: Low byte Channel Data
Data 05 : Input Source (Digital/Satellite for Japan)
- 02 : Antenna TV (DTV)
- 42 : Antenna TV (DTV) – Use Physical/Major
Channel Number Only (One Part Channel)
- 62 : Antenna TV (DTV) – Use Major Channel
Number Only (One Part Channel)
- 07 : BS (Broadcasting Satellite)
- 08 : CS1 (Communication Satellite 1)
- 09 : CS2 (Communication Satellite 2)
* Tune Command Examples:
1
Tune to the digital antenna (ISDB-T) channel 17-1
.
Set ID = All = 00
Data 00 = Don’t know Physical = 00
Data 01 & 02 = Major is 17 = 00 11
Data 03 & 04 = Minor/Branch is 1 = 00 01
Data 05 = Digital Antenna TV = 02
Total = ma 00 00 00 11 00 01 02

11
ENGENGLISH
11
EXTERNAL CONTROL DEVICE SETUP
2. Tune to the BS (ISDB-BS) channel 30.
Set ID = All = 00
Data 00 = Don’t know Physical = 00
Data 01 & 02 = Major is 30 = 00 1E
Data 03 & 04 = Don’t Care = 00 00
Data 05 = Digital BS TV = 07
Total = ma 00 00 00 1E 00 00 07
* This feature is varied based on the model.
Ack [a][ ][Set ID][ ][OK][Data 00][Data 01]
[Data 02][Data 03][Data 04][Data 05]
[x][a][ ][Set ID][ ][NG][Data 00][x]
21. Channel(Programme) Add/Del(Skip)
(Command: m b)
► To skip current channel(programme) for next time.
Transmission [m][b][ ][Set ID][ ][Data][Cr]
Data 00 : Del(ATSC,ISDB)/Skip(DVB) 01 : Add
Ack [b][ ][Set ID][ ][OK/NG][Data][x]
* Set the saved channel status to del(ATSC, ISDB)/
skip(DVB) or add.
22. Key (Command: m c)
► To send IR remote key code.
Transmission [m][c][ ][Set ID][ ][Data][Cr]
Data Key code - p.2.
Ack [c][ ][Set ID][ ][OK/NG][Data][x]
23. Control Backlight (Command: m g)
• For LCD TV / LED TV
► To control the backlight.
Transmission [m][g][ ][Set ID][ ][Data][Cr]
Data Min : 00 to Max : 64
Ack [g][ ][Set ID][ ][OK/NG][Data][x]
Control Panel Light (Command: m g)
• For Plasma TV
► To control the panel light.
Transmission [m][g][ ][Set ID][ ][Data][Cr]
Data Min : 00 to Max : 64
Ack [g][ ][Set ID][ ][OK/NG][Data][x]
24. Input select (Command: x b)
(Main Picture Input)
► To select input source for main picture.
Transmission [x][b][ ][Set ID][ ][Data][Cr]
Data
00 : DTV
02 : Satellite DTV
ISDB-BS (Japan)
03 : ISDB-CS1 (Japan)
04 : ISDB-CS2 (Japan)
11 : CATV
01 : CADTV
10 : ATV
20 : AV or AV1 21 : AV2
40 : Component1
60 : RGB
41 : Component2
90 : HDMI1
92 : HDMI3
91 : HDMI2
93 : HDMI4
Ack [b][ ][Set ID][ ][OK/NG][Data][x]
* This function depends on model and signal.
25. 3D(Command: x t) (only 3D models)
(Depending on model)
► To change 3D mode for TV.
Transmission [x][t][ ][Set ID][ ][Data 00][ ][Data 01]
[ ][Data 02][ ][Data 03][Cr]
* (Depending on model)
Data Structure
[Data 00] 00 : 3D On
01 : 3D Off
02 : 3D to 2D
03 : 2D to 3D
[Data 01] 00 : Top and Bottom
01 : Side by Side
02 : Check Board
03 : Frame Sequential
04 : Column interleaving
05 : Row interleaving
[Data 02] 00 : Right to Left
01 : Left to Right
[Data 03] 3D Effect(3D Depth): Min : 00 - Max : 14
(*transmit by Hexadecimal code)
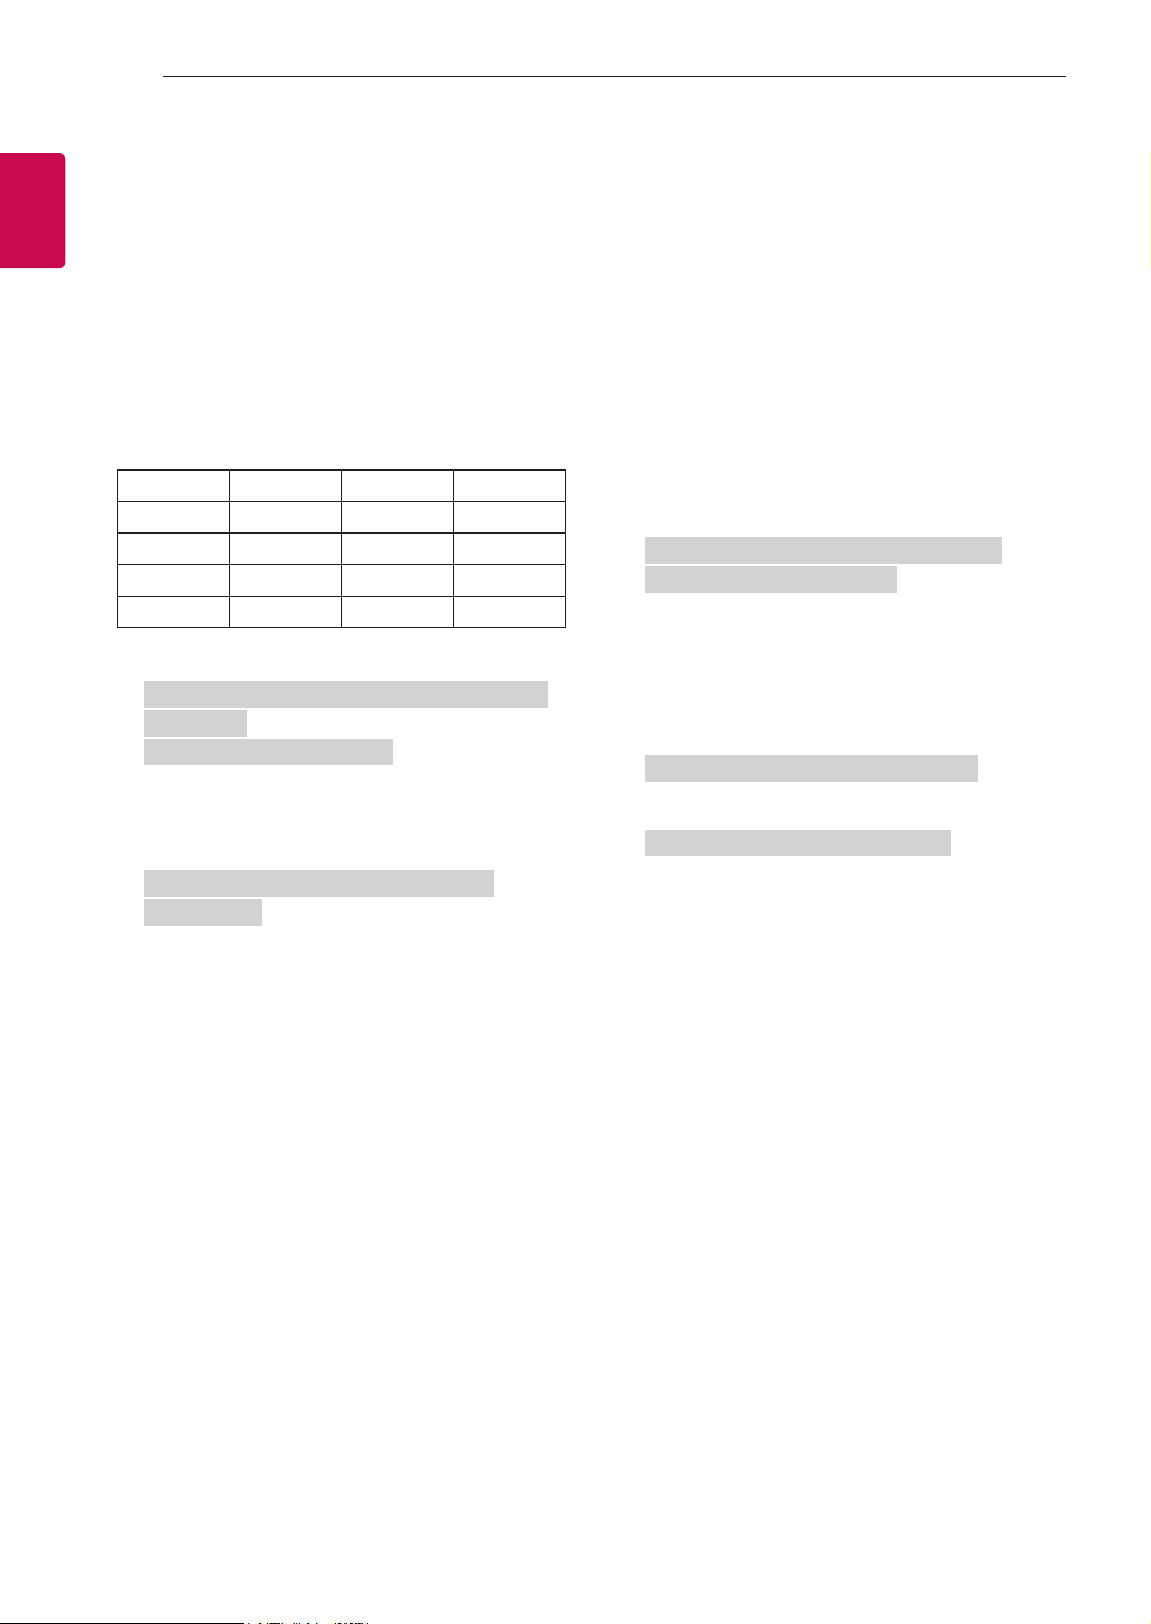
12
ENG
ENGLISH
12
EXTERNAL CONTROL DEVICE SETUP
* [Data 02], [Data 03] functions depend on model
and signal.
* If [Data 00] is 00 (3D On), [Data 03] has no
meaning.
* If [Data 00] is 01 (3D off) or 02 (3D to 2D), [Data
01], [Data 02] and [Data 03] have no meaning.
* If [Data 00] is 03 (2D to 3D), [Data 01] and
[Data 02] have no meaning.
* If [Data 00] is 00 (3D On) or 03 (2D to 3D), [Data
03] works when 3D Mode (Genre) is manual only.
* All 3D pattern options ([Data 01]) may not be
available according to broadcasting/video signal.
[Data 00] [Data 01] [Data 02] [Data 03]
00 O O O
01 X X X
02 X X X
03 X O O
X : don’t care
Ack [t][ ][Set ID][ ][OK][Data00][Data01][Data02]
[Data03][x]
[t][ ][Set ID][ ][NG][Data00][x]
26. Extended 3D(Command: x v) (only 3D models)
(Depending on model)
► To change 3D option for TV.
Transmission [x][v][ ][Set ID][ ][Data 00][ ]
[Data 01][Cr]
[Data 00] 3D option
00 : 3D Picture Correction
01 : 3D Depth (3D Mode is Manual Only)
02 : 3D Viewpoint
06 : 3D Color Correction
07 : 3D Sound Zooming
08 : Normal Image View
09 : 3D Mode (Genre)
[Data 01] It has own range for each 3D option
determined by [Data 00].
1) When [Data 00] is 00
00 : Right to Left
01 : Left to Right
2) When [Data 00] is 01, 02
Data Min: 0 - Max: 14 (*transmit by Hexadecimal
code)
Data value range(0 - 20) converts Viewpoint range
(-10 - +10) automatically (Depending on model)
* This option works when 3D Mode (Genre) is manual
only.
3) When [Data 00] is 06, 07
00 : Off
01 : On
4) When [Data 00] is 08
00 : Revert to 3D video from 3D-to-2D
converted 2D video
01 : Change 3D video to 2D video, except
2D-to-3D video
* If conversion condition doesn’t meet, command is
treated as NG.
5) When [Data 00] is 09
00 : Standard
02 : Cinema
04 : Manual
01 : Sport
03 : Extreme
05 : Auto
Ack [v][ ][Set ID][ ][OK][Data00][Data01][x]
[v][ ][Set ID][ ][NG][Data00][x]
27. Auto Configure (Command: j u)
(Depending on model)
► To adjust picture position and minimize image
shaking automatically. It works only in RGB (PC)
mode.
Transmission [j][u][ ][Set ID][ ][Data][Cr]
Data 01 : To set Auto Configure
Ack [u][ ][Set ID][ ][OK/NG][Data][x]