Loading ...
Loading ...
Loading ...
●
For the device with scker or , pay aenon to the following cauons: CAUTION: Hot
parts! Do not touch. Burned ngers when handling the parts. Wait one-half hour aer switching
o before handling the parts.
●
If the device needs to be installed on the wall or ceiling,
1. Install the device according to the instrucons in this manual.
2. To prevent injury, this device must be securely aached to the installaon surface in
accordance with the installaon instrucons.
●
Under high working temperature (40 °C (104 °F) to 55 °C (131 °F)), the power of some power
adapters may decrease.
●
Make sure that the power has been disconnected before you wire, install, or disassemble the
device.
●
If the device needs to be wired by yourself, select the corresponding wire to supply power
according to the electric parameters labeled on the device. Strip o wire with a standard wire
stripper at corresponding posion. To avoid serious consequences, the length of stripped wire
shall be appropriate, and conductors shall not be exposed.
●
If smoke, odor, or noise arises from the device, immediately turn o the power, unplug the
power cable, and contact the service center.
HDD Installaon
If your device does not support HDD hot swapping, disconnect the power from the device before
installing a hard disk drive (HDD). A factory recommended HDD should be used for this installaon.
Bracket Installaon
Bracket installaon is applicable when it requires to remove the device cover, and install HDD on
the internal bracket.
Steps
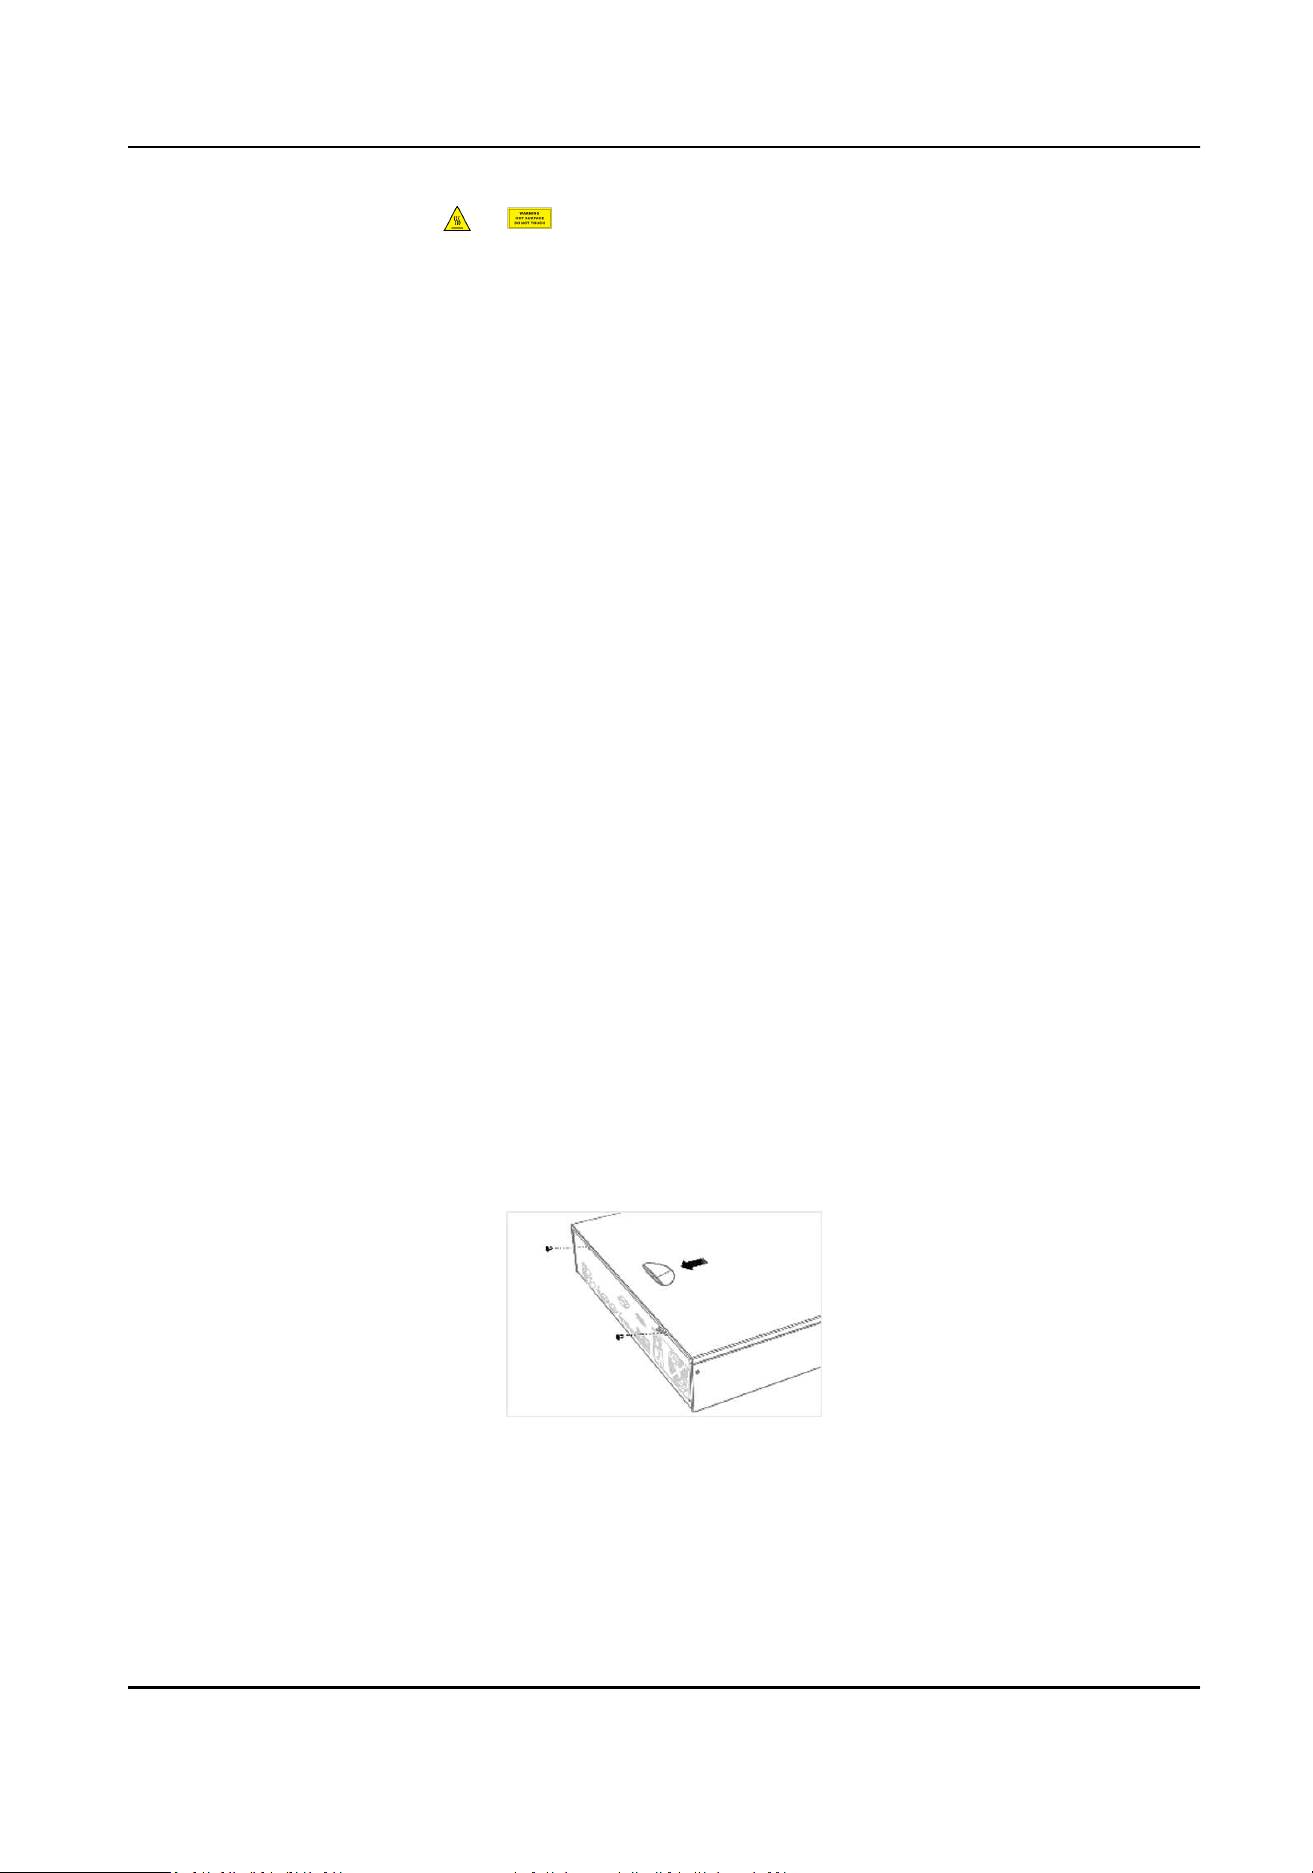
1.
Unfasten screws on the back, and push the cover backwards to remove the cover.
Figure 1-1 Remove Cover
2.
Fix the HDD on the bracket with screws.
Digital Video Recorder User Manual
x
Loading ...
Loading ...
Loading ...