Loading ...
Loading ...
Loading ...

4
PLASTICIZER WARNING
CAUTION: To prevent Plasticizers from migrating to the nish of the counter top
or table top or other furniture, place NON-PLASTIC coasters or place mats
between the appliance and the nish of the counter top or table top. Failure to do
so may cause the nish to darken; permanent blemishes may occur or stains can
appear.
Before Using For The First Time
Please check all packaging material carefully before discarding. Many accessory parts are contained within
the packaging material. Before using your Single-Serve Coffee Maker, clean the entire appliance according
to the cleaning instructions. Wash the reusable brew cup and cup holder in warm, soapy water, rinse
thoroughly and dry. If desired, wipe the exterior of the coffee maker with a soft, damp cloth. Note: Do not
wash any parts in the dishwasher and do not immerse the coffee maker in water or any other liquid. This
may permanently damage the product and void the warranty.
To remove any manufacturing residues that may reside in the appliance, we recommend running at least
one full brew cycle of water and discarding the water when complete.
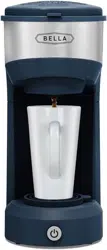
Using Your Single-Serve Coffee Maker
1. Place the appliance on dry, level, heat-resistant surface, away from
any edge.
2. Plug cord into a 120-volt, AC electric outlet only.
3. Press the lid release button (Figure 1) in to open the cover.
4. Using the cup you’re brewing into, add cold water to the reservoir.
Note: The maximum capacity of the Single-Serve Coffee Maker is
14 uid oz. (1¾ cups). Never put more than this amount into the
reservoir or the water will overow.
5. Position the cup holder (Figure 2) in place. Add a K-cup or the
reusable brew cup (Figure 3) with coffee grounds. Be sure that the
“front” arrow faces the front of the coffee maker. Press down on
the cover to lock in place. The cover will not lock if the reusable brew
cup is not inserted properly.
Caution: Piercer is sharp, do not touch.
6. Center a cup on the drip tray. Note: Make sure the cup is suitable
for hot liquids.
7. Press the power button. The light will illuminate. The coffeemaker
and light will turn off automatically at the end of the brew cycle.
Do not remove the cup before the coffeemaker has turned off.
K-CUP BREWING – Any standard K-Cup will work.
Place the cup holder in the coffee maker. Place a K-Cup into the cup holder.
Using the cup you’re brewing into (maximum 14 oz.), add cold water to
the reservoir. Close and lock the cover, then center a heat-safe cup on
the drip tray and press the power button. Brewing will be complete
in under 5 minutes.
GROUND COFFEE BREWING - Use standard, drip grind coffee.
Place the cup holder in the coffee maker. Add two heaping tablespoons
of grounds into the reusable brew cup, then close and place into the cup
holder. Using the cup you’re brewing into (maximum 14 oz.), add cold
water to the reservoir. Close and lock the cover, then center a heat-safe cup on the drip tray and press
the power button. Brewing will be complete in under 5 minutes.
Note: Adjust the amount of grounds to taste.
HOT WATER ONLY
The Single-Serve Coffee Maker can be used to heat water for tea or instant ciders, hot chocolates,
oatmeals, soups, etc. Using the cup you’re brewing into (maximum 14 oz.), add cold water to the reservoir.
Close and lock the cover. Place the instant mix, per package directions, in a heat-safe cup, then center
on the drip tray and press the power button. When the brewing is complete, approximately 5 minutes,
stir the contents.
Note: Adjust the amounts to taste.
A small amount of smoke and/or odor may occur upon heating due to the release of manufacturing oils –
this is normal. Some minor expansion/contraction sounds may occur during heating and cooling –
this is normal.
Figure 2
Figure 1
Figure 3
17359 -17429_ BELLA_ Dual Brew IM R2.indd 417359 -17429_ BELLA_ Dual Brew IM R2.indd 4 2021-07-21 10:50 AM2021-07-21 10:50 AM
Loading ...
Loading ...
Loading ...
