
Loading ...
Loading ...
Loading ...
62
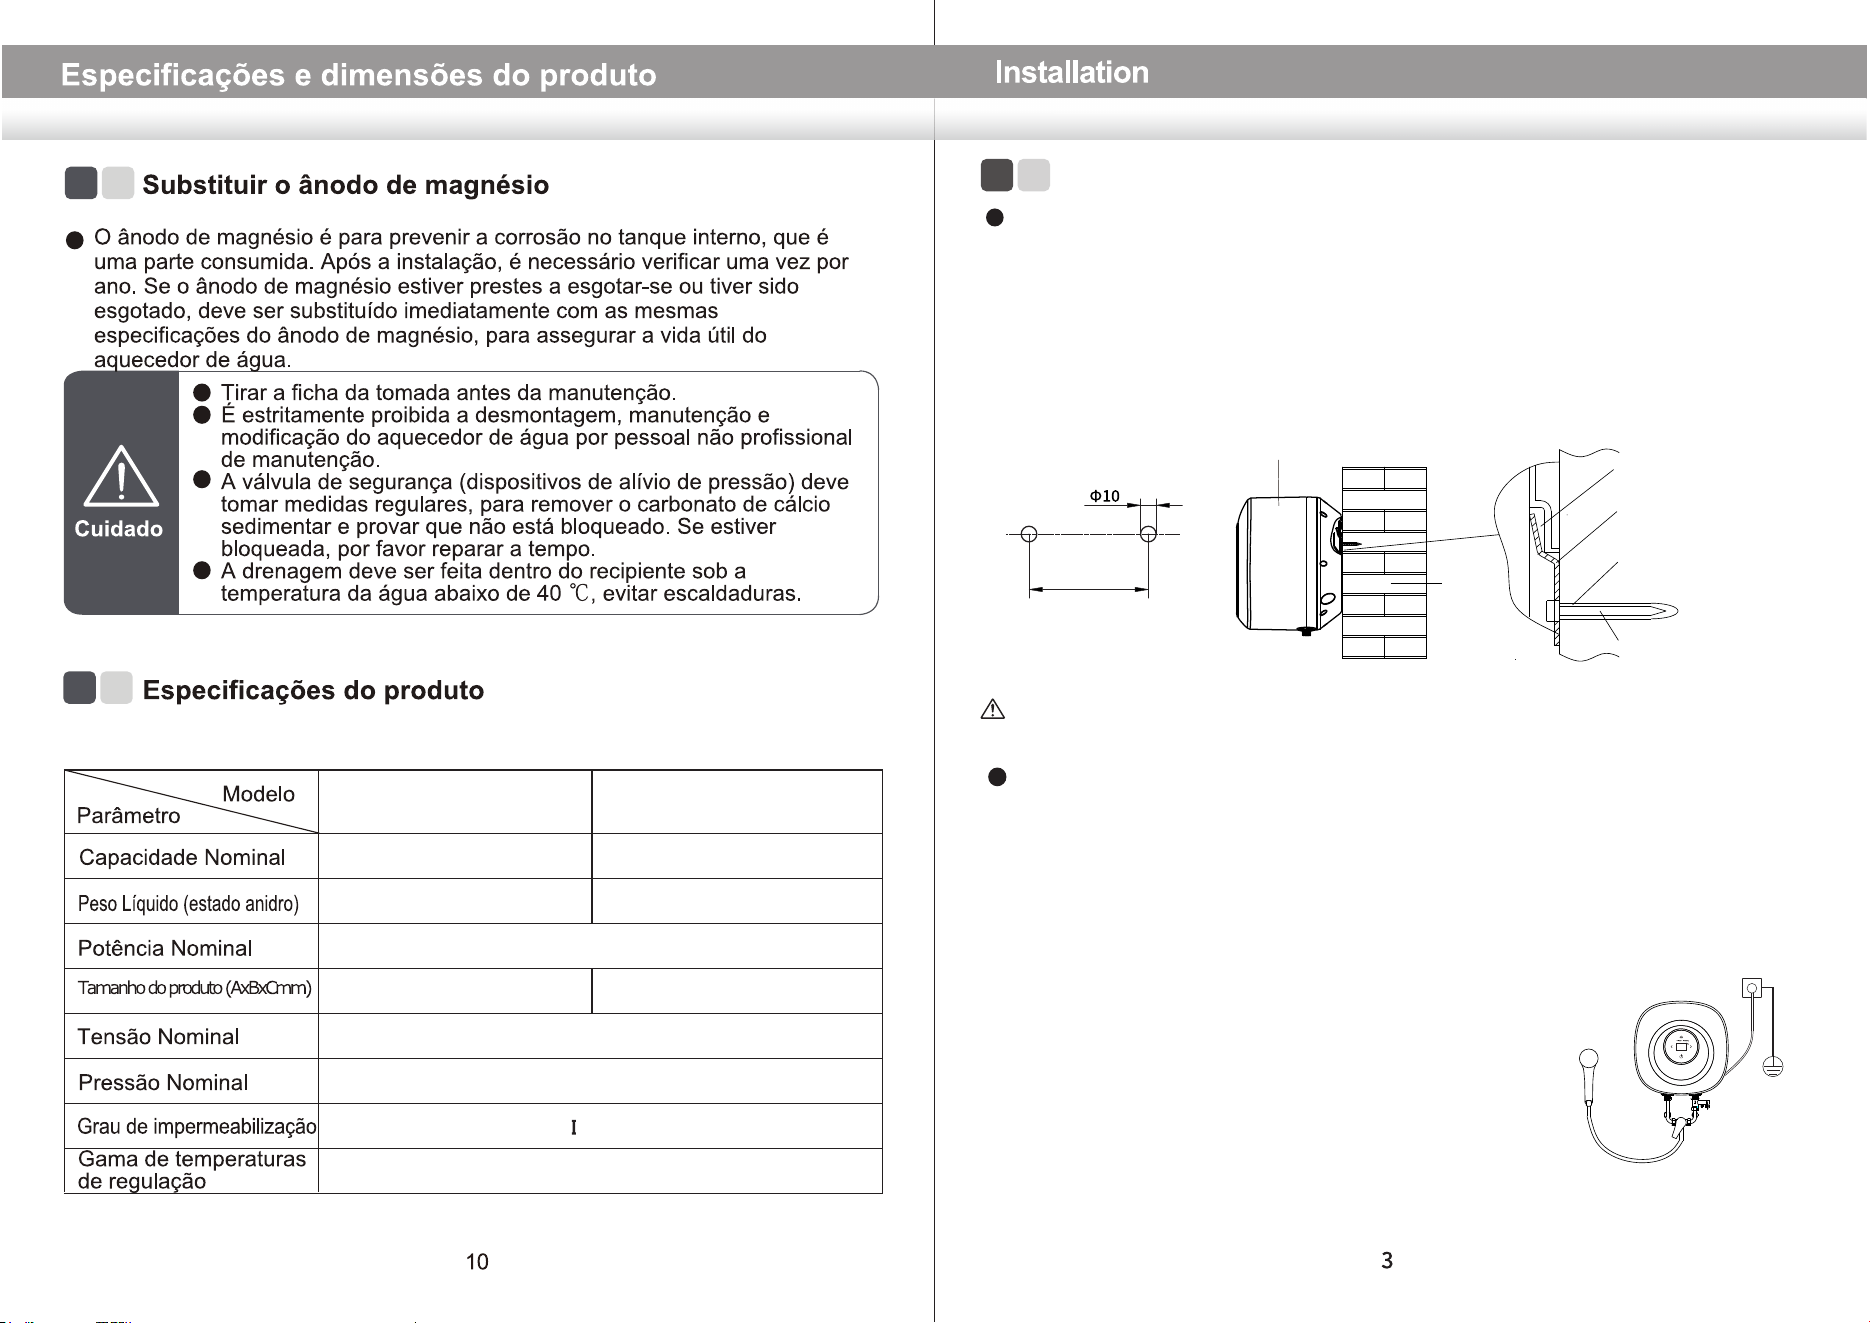
Equipment installation
① After the installation position of the appliance is determined, drill two holes with
a spacing of 62mm and a diameter of φ10mm in the horizontal direction of the wall
according to the size as shown in the following figure, and the hole depth shall not
be less than 70mm. Insert two plastic expansion tubes into the hole, and secure
the host mounting plate with fastening screws.
② Align the two hanging holes on the back of the appliance with the two hooks of
the hanging plate and pull down with force to make the hanging holes hang into the
hook.
Install the wall hole
Water Heater
Wall
Hanging Hole
Water Heater Bracket
Fastening Screw
Plastic Expansion Tube
Warning: The appliance must be hung securely to prevent personal injury and
property damage from falling.
Tube Connection
The specification of inlet and outlet water interface of this appliance is GI/2.
Connect pipes according to the following figure.
① Connect the gasketed safety valve attached to the inlet port of the appliance
with the arrow pointing in the direction of flow.
② Insert the drain pipe into the bottom of the
safety valve outlet, the other end of the continuous
downward to the safe drainage (such as into the
floor drain), the drain pipe should be unobstructed
installation, and the safety valve outlet is connected
with the atmosphere.
③ When the water inlet pressure is more than 0.55
MPa, an additional safety valve should be added
on the water inlet pipe.
Methods of Installation
(Take the above sink water heater installation diagram as an example)
15L
8kg11.2kg
30 to 80℃
28L
380x380x325mm440x440x390mm
220-240V~ / 50-60Hz
0.75MPa
PX4
1500W
CTWG15CD
CTWG30CD
Loading ...
Loading ...
Loading ...