Looking for help?
Contact us to get expert support.
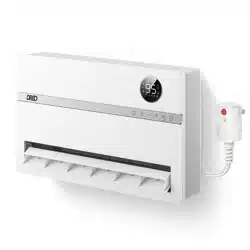
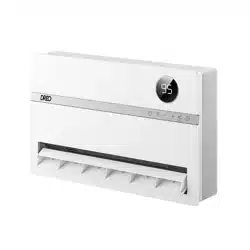
DR-HSH009S
www.dreo.com
Mon - Fri, 9:00 am-5:00 pm PST/PDT
support@dreo.com (888) 290-1688 www.dreo.com
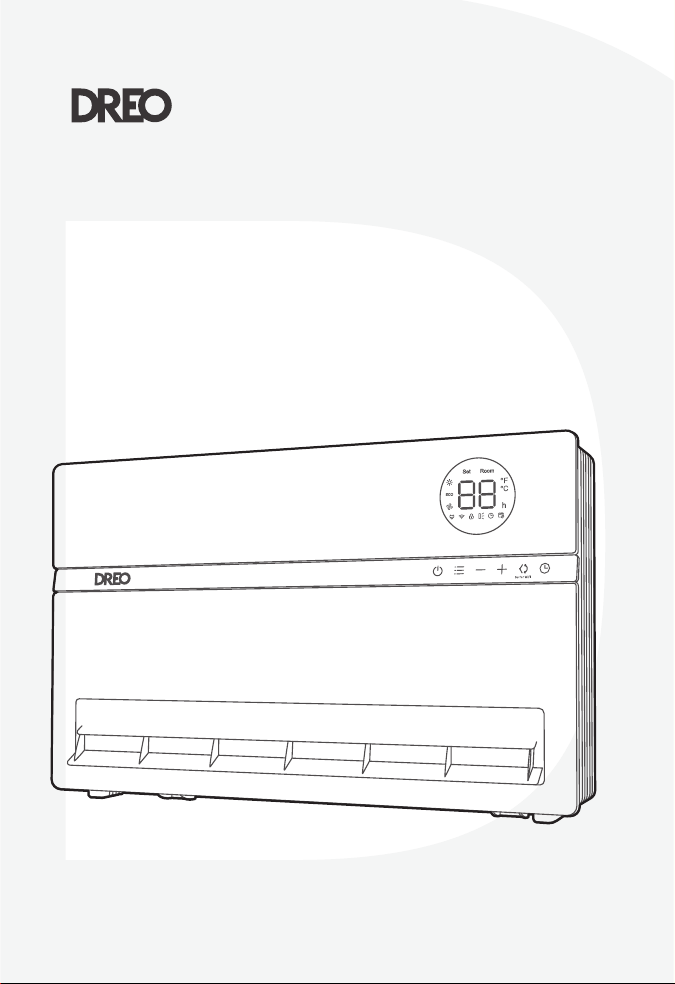
Smart Oil-Filled
Heater
USER MANUAL

Thanks for
Choosing
DREO!
@
Dreo
Your support means the world to us. We
hope you enjoy our product as much as
we did creating it.
EXTEND YOUR
WARRANTY FOR FREE
Scan or visit dreo.com/warranty
To extend your warranty for free by registering your product. If
you have any product issues, we always stand ready to help.
support@dreo.com
www.dreo.com
Mon - Fri, 9:00 am-5:00 pm PST/PDT
(888) 290-1688
IMPORTANT SAFETY
INSTRUCTIONS
GENERAL SAFETY
1
2
CONTENTS
01
01
02
IMPORTANT SAFETY
INSTRUCTIONS
2-4
KNOWING YOUR
HUMIDIFIER
5-7
03 04
USING YOUR
HUMIDIFIER
8-12
CLEANING AND
MAINTENANCE
13-14
05
TROUBLESHOOTING
15-18
When using electrical appliances, basic
precautions should always be followed to
reduce the risk of fire, electric shock, and
injury to persons and hyperthermia,
including the following:
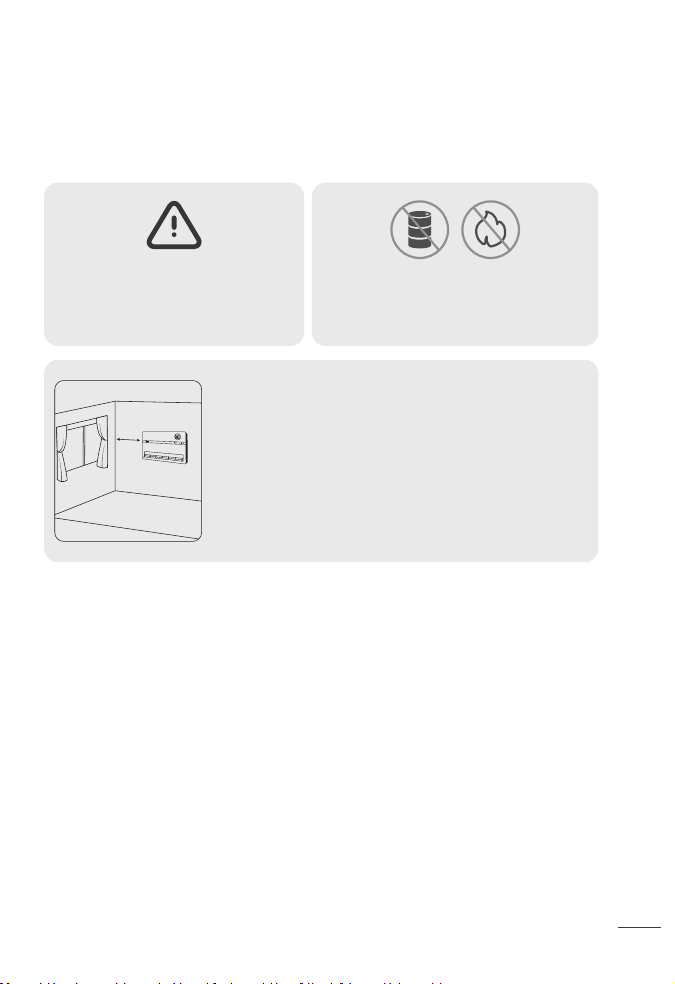
Do not use the fan heater near
flammables and combustibles.
CAUTION - High temperature,
keep electrical cords, drapery
and other furnishing at least 3
feet (0.9 m) from the front of
the heater and away from the
side and rear.
>0.9ft
Read all instructions before installing or using this heater.
This heater is hot when in use. To avoid burns, do not let bare skin touch hot surfaces. Keep
combustible materials, such as furniture, pillows, bedding, papers, clothes, etc. And
curtains at least 3 feet (0.9m) from the front of the heater and keep them away from the
sides (restrictions apply to location dedicated heaters only).
Extreme caution is necessary when any heater is used by or near children or invalids and
whenever the heater is left operating and unaended.
Do not operate any heater after it malfunctions. Disconnect power at service panel and
have heater inspected by a reputable electrician before reusing.
To disconnect the heater, turn controls to o, and turn o power to heater circuit at main
disconnect panel (or operate internal disconnect switch if provided).
CAUTION: TO PREVENT ELECTRIC SHOCK, MATCH WIDE BLADE OF PLUG TO WIDE SLOT AND
FULLY INSERT.
In order to avoid overheating, do not cover the heater. It cannot be used in a wardrobe.
1.
2.
3.
4.
5.
6.
7.
IMPORTANT SAFETY
INSTRUCTIONS
GENERAL SAFETY
1
2
CONTENTS
01
01
02
IMPORTANT SAFETY
INSTRUCTIONS
2-4
KNOWING YOUR
HUMIDIFIER
5-7
03 04
USING YOUR
HUMIDIFIER
8-12
CLEANING AND
MAINTENANCE
13-14
05
TROUBLESHOOTING
15-18
When using electrical appliances, basic
precautions should always be followed to
reduce the risk of fire, electric shock, and
injury to persons and hyperthermia,
including the following:
Do not use the fan heater near
flammables and combustibles.
CAUTION - High temperature,
keep electrical cords, drapery
and other furnishing at least 3
feet (0.9 m) from the front of
the heater and away from the
side and rear.
>0.9ft
Read all instructions before installing or using this heater.
This heater is hot when in use. To avoid burns, do not let bare skin touch hot surfaces. Keep
combustible materials, such as furniture, pillows, bedding, papers, clothes, etc. And
curtains at least 3 feet (0.9m) from the front of the heater and keep them away from the
sides (restrictions apply to location dedicated heaters only).
Extreme caution is necessary when any heater is used by or near children or invalids and
whenever the heater is left operating and unaended.
Do not operate any heater after it malfunctions. Disconnect power at service panel and
have heater inspected by a reputable electrician before reusing.
To disconnect the heater, turn controls to o, and turn o power to heater circuit at main
disconnect panel (or operate internal disconnect switch if provided).
CAUTION: TO PREVENT ELECTRIC SHOCK, MATCH WIDE BLADE OF PLUG TO WIDE SLOT AND
FULLY INSERT.
In order to avoid overheating, do not cover the heater. It cannot be used in a wardrobe.
1.
2.
3.
4.
5.
6.
7.

CAUTION: Whenever the heater is left operating unaended, caution may be necessary if
children or invalids are nearby.
The appliance should not be used by children or persons with reduced physical, sensory or
mental capabilities, or lack of experience and knowledge, unless they have been given
supervision or instruction.
Do not insert or allow foreign objects to enter any ventilation or exhaust opening as this
may cause an electric shock or fire, or damage the heater.
Do not operate the outlet fin manually as this may cause malfunction and risk of fire.
Always use the control panel, remote control or the Dreo app to change the blowing angle.
Unsupervised children should be instructed not to play with the appliance.
Do not let children operate the appliance through the Dreo app.
To prevent a possible fire, do not block air intakes or exhaust in any manner.
Do not operate any heater with a damaged cord or plug or after the heater malfunctions,
has been dropped or damaged in any manner. Discard heater, or return to an authorized
service facility for examination and/or repair.
If the supply cord is damaged, it must be replaced by the manufacturer, its service agent,
or similarly qualified persons in order to avoid hazard.
A heater has hot and arcing or sparking parts inside. Do not use it in areas where gasoline,
paint, or flammable vapors or liquids are used or stored.
There is a thermostat limiter inside the heater. When the inner temperature over-heats or
abnormal heating occurs, the heater will automatically cut o power supply to avoid risk of
fire or damage to the heater.
Use this heater only as described in this manual. Any other use not recommended by the
manufacturer may cause fire, electric shock, or injury to persons.
This heater may include audible or visual alarm to warn that parts of the heater are geing
excessively hot. If the alarm sounds (or illuminates), immediately turn the heater o and
inspect for any objects on or adjacent to the heater that may have blocked the airflow or
otherwise caused high temperatures to have occurred. DO NOT OPERATE THE HEATER
WITH THE ALARM SOUNDING (OR ILLUMINATING).
The output of this heater may vary and its temperature may become hot enough to burn
exposed skin. Use of this heater is not recommended for persons with a high sensitivity to
heat or an inability to react to avoid burns.
Do not aempt to modify or repair the product by yourself. Doing so could void the
warranty and cause damage or personal injury. Only a repair technician may disassemble
or repair this product.
Make sure that no pieces of polystyrene or other packaging material have been left
between elements of the appliance. It may be necessary to pass over the appliance with a
vacuum cleaner.
If the machine is not working as it should, has received a sharp blow, has been dropped,
damaged, left outdoors, or dropped into water, do not use and contact Customer Support.
Do not run the cord under carpeting. Do not cover the cord with throw rugs, runners, or
similar coverings. Do not route cord under furniture or appliances. Place the cord away
from high traic areas. Place the cord where it will NOT cause tripping hazard.
Extreme caution is necessary when any heater is used by or near children or invalids and
whenever the heater is left operating and unaended.
This heater is intended for use as WALL MOUNTED heater only. Failure to properly secure
the heater to a flat, level and vertical wall may result in heater malfunction and/or property
damage.
This heater is not intended for use in bathrooms, laundry areas and similar indoor
locations. Never locate heater where it may fall into a bathtub or other water container.
CAUTION - High temperature, keep electrical cords, drapery, and other furnishings at least
3 feet (0.9m) from the front of the heater and away from the side and rear.
Voltage protection: This heater is intended for 120V outlets only. If heater is plugged in a
240V outlet by mistake, the PCBA will cut o the heating immediately, it will show a “UH”
error code, and the heater must be unplugged. The heater will function properly when
plugged in the right voltage.
8.
9.
10.
11.
12.
13.
14.
15.
16.
17.
18.
19.
20.
28.
29.
30.
26.
27.
21.
22.
23.
24.
25.
SAVE THESE INSTRUCTIONS
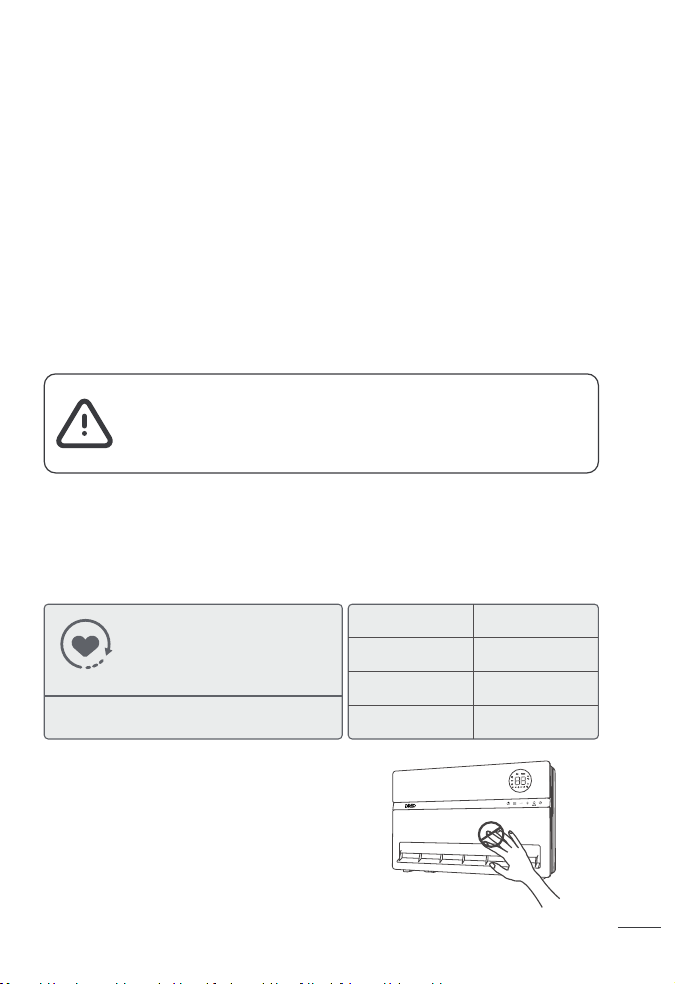
Gentle Reminder:
HOT SURFACE
THE FRONT SURFACE CAN BE VERY HOT DURING
USE.
DO NOT TOUCH WHEN IN USE.
Check the appliance reglarly and
refer to TROUBLESHOOTING or
contact our customer support if
it shows any of the following
signs:
- Power cord or plug is damaged.
- Loud noise, unusual smell or excessive heat.
Model
Rated Power
Input
Remote Control
Baery
DR-HSH009S
1500W
120V~60Hz
AAA, 1.5V
FOR HOUSEHOLD USE ONLY
READ AND SAVE THESE
INSTRUCTIONS
Hyperthermia can result in death in infants or others
Use caution to avoid overheating individuals
Read and follow all instructions before use
WARNING - Risk of Heat Stroke (Hyperthermia)
3
4
CAUTION: Whenever the heater is left operating unaended, caution may be necessary if
children or invalids are nearby.
The appliance should not be used by children or persons with reduced physical, sensory or
mental capabilities, or lack of experience and knowledge, unless they have been given
supervision or instruction.
Do not insert or allow foreign objects to enter any ventilation or exhaust opening as this
may cause an electric shock or fire, or damage the heater.
Do not operate the outlet fin manually as this may cause malfunction and risk of fire.
Always use the control panel, remote control or the Dreo app to change the blowing angle.
Unsupervised children should be instructed not to play with the appliance.
Do not let children operate the appliance through the Dreo app.
To prevent a possible fire, do not block air intakes or exhaust in any manner.
Do not operate any heater with a damaged cord or plug or after the heater malfunctions,
has been dropped or damaged in any manner. Discard heater, or return to an authorized
service facility for examination and/or repair.
If the supply cord is damaged, it must be replaced by the manufacturer, its service agent,
or similarly qualified persons in order to avoid hazard.
A heater has hot and arcing or sparking parts inside. Do not use it in areas where gasoline,
paint, or flammable vapors or liquids are used or stored.
There is a thermostat limiter inside the heater. When the inner temperature over-heats or
abnormal heating occurs, the heater will automatically cut o power supply to avoid risk of
fire or damage to the heater.
Use this heater only as described in this manual. Any other use not recommended by the
manufacturer may cause fire, electric shock, or injury to persons.
This heater may include audible or visual alarm to warn that parts of the heater are geing
excessively hot. If the alarm sounds (or illuminates), immediately turn the heater o and
inspect for any objects on or adjacent to the heater that may have blocked the airflow or
otherwise caused high temperatures to have occurred. DO NOT OPERATE THE HEATER
WITH THE ALARM SOUNDING (OR ILLUMINATING).
The output of this heater may vary and its temperature may become hot enough to burn
exposed skin. Use of this heater is not recommended for persons with a high sensitivity to
heat or an inability to react to avoid burns.
Do not aempt to modify or repair the product by yourself. Doing so could void the
warranty and cause damage or personal injury. Only a repair technician may disassemble
or repair this product.
Make sure that no pieces of polystyrene or other packaging material have been left
between elements of the appliance. It may be necessary to pass over the appliance with a
vacuum cleaner.
If the machine is not working as it should, has received a sharp blow, has been dropped,
damaged, left outdoors, or dropped into water, do not use and contact Customer Support.
Do not run the cord under carpeting. Do not cover the cord with throw rugs, runners, or
similar coverings. Do not route cord under furniture or appliances. Place the cord away
from high traic areas. Place the cord where it will NOT cause tripping hazard.
Extreme caution is necessary when any heater is used by or near children or invalids and
whenever the heater is left operating and unaended.
This heater is intended for use as WALL MOUNTED heater only. Failure to properly secure
the heater to a flat, level and vertical wall may result in heater malfunction and/or property
damage.
This heater is not intended for use in bathrooms, laundry areas and similar indoor
locations. Never locate heater where it may fall into a bathtub or other water container.
CAUTION - High temperature, keep electrical cords, drapery, and other furnishings at least
3 feet (0.9m) from the front of the heater and away from the side and rear.
Voltage protection: This heater is intended for 120V outlets only. If heater is plugged in a
240V outlet by mistake, the PCBA will cut o the heating immediately, it will show a “UH”
error code, and the heater must be unplugged. The heater will function properly when
plugged in the right voltage.
8.
9.
10.
11.
12.
13.
14.
15.
16.
17.
18.
19.
20.
28.
29.
30.
26.
27.
21.
22.
23.
24.
25.
SAVE THESE INSTRUCTIONS
Gentle Reminder:
HOT SURFACE
THE FRONT SURFACE CAN BE VERY HOT DURING
USE.
DO NOT TOUCH WHEN IN USE.
Check the appliance reglarly and
refer to TROUBLESHOOTING or
contact our customer support if
it shows any of the following
signs:
- Power cord or plug is damaged.
- Loud noise, unusual smell or excessive heat.
Model
Rated Power
Input
Remote Control
Baery
DR-HSH009S
1500W
120V~60Hz
AAA, 1.5V
FOR HOUSEHOLD USE ONLY
READ AND SAVE THESE
INSTRUCTIONS
Hyperthermia can result in death in infants or others
Use caution to avoid overheating individuals
Read and follow all instructions before use
WARNING - Risk of Heat Stroke (Hyperthermia)
3
4
5mm
THE HEATER MUST BE PROPERLY INSTALLED BEFORE IT IS USED.
CAUTION: YOUR HEATER MUST BE INSTALLED ON A WALL. DO NOT PROP THE HEATER UP
AGAINST OBJECTS OR USE THE HEATER WITH THE GRILL PLACED VERTICALLY.
SETTING UP YOUR HEATER
Installation Instructions
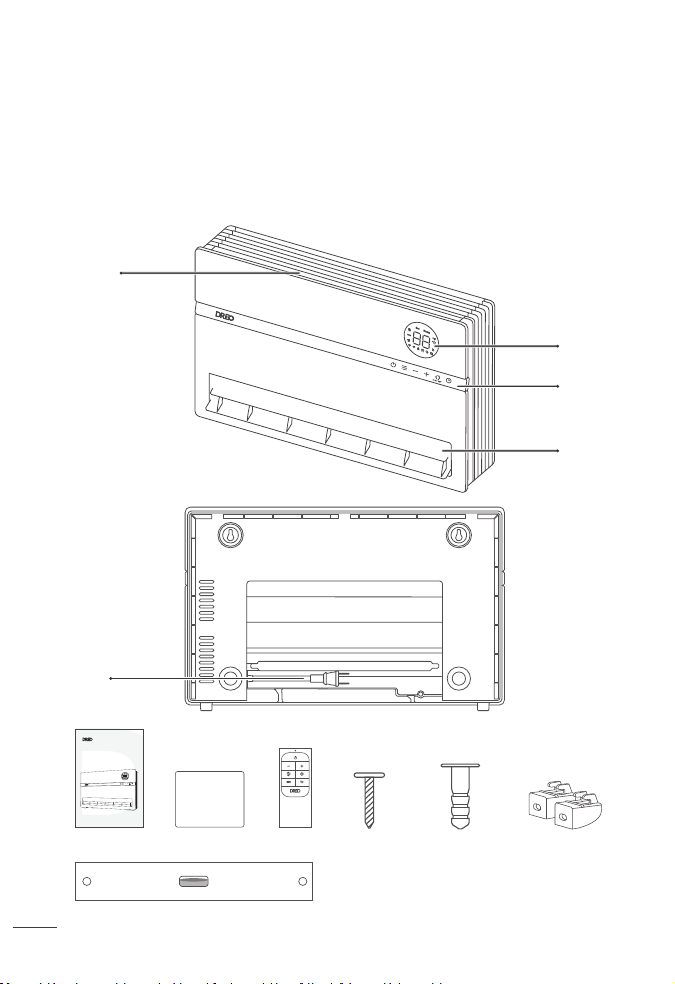
KNOWING YOUR
HEATER
02
4x Wall Anchors4x Screws
1x drilling guideline with level
x2 Base Anchors
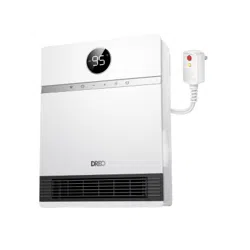
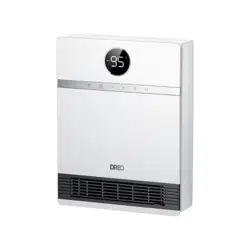
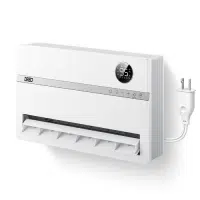
Power & Plug
Air Inlet/ Filter
Package Contents
LED Display
Control Panel
Outlet Fin
Smart Oil-Filled
Heater
USER MANUAL
Quick Start
Guide
Tools needed for installation:
3/16” Philips screwdriver.
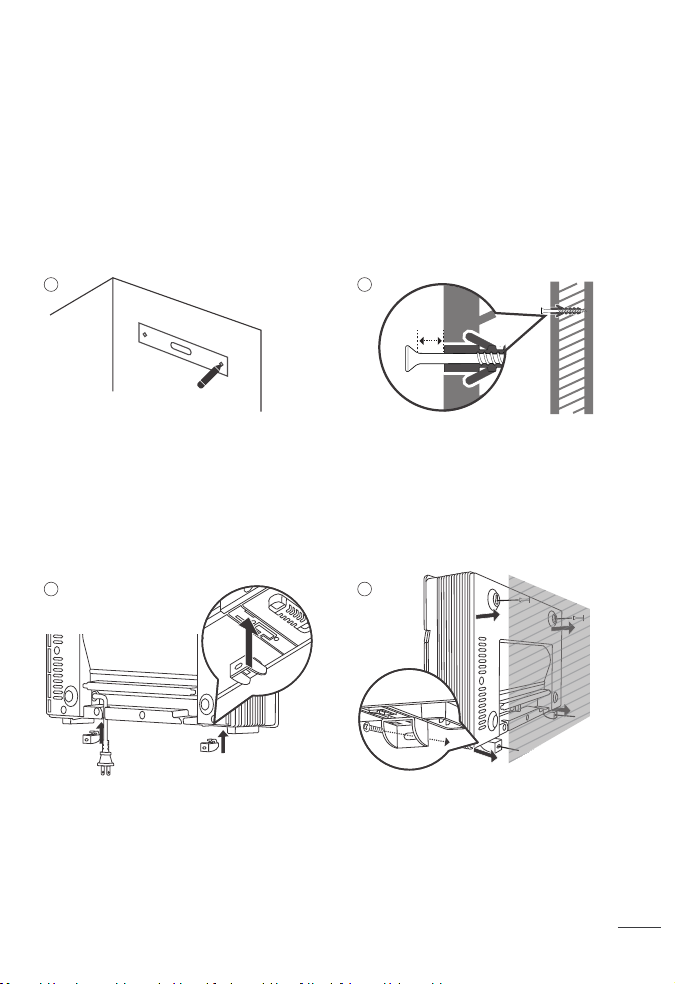
Using the level template, mark the position
of the top screws on the wall where you
want to install the heater.
Screw the top anchors into the wall at the
marked locations. Make sure to use the
right type of anchors for your type of wall.
Note: Install the heater at least 1.64 feet(0.5m)
height, and 3 feet (0.9m) away from curtains
and other objects.
Unfold the power cord from the back (It is
recommended to let the power cord be too
loose or tight between the outlet and the
heater), and aach the base anchors into
the boom of the heater.
Hang the heater onto the top 2 screws.
Make sure the heater is firmly hanged. Then
screw the boom anchors to secure the
heater onto the wall.
Note: Leave at least a 5mm distance between
the wall and the top of the screw.
1
3 4
2
5
6
5mm
THE HEATER MUST BE PROPERLY INSTALLED BEFORE IT IS USED.
CAUTION: YOUR HEATER MUST BE INSTALLED ON A WALL. DO NOT PROP THE HEATER UP
AGAINST OBJECTS OR USE THE HEATER WITH THE GRILL PLACED VERTICALLY.
SETTING UP YOUR HEATER
Installation Instructions
KNOWING YOUR
HEATER
02
4x Wall Anchors4x Screws
1x drilling guideline with level
x2 Base Anchors
Power & Plug
Air Inlet/ Filter
Package Contents
LED Display
Control Panel
Outlet Fin
Smart Oil-Filled
Heater
USER MANUAL
Quick Start
Guide
Tools needed for installation:
3/16” Philips screwdriver.
Using the level template, mark the position
of the top screws on the wall where you
want to install the heater.
Screw the top anchors into the wall at the
marked locations. Make sure to use the
right type of anchors for your type of wall.
Note: Install the heater at least 1.64 feet(0.5m)
height, and 3 feet (0.9m) away from curtains
and other objects.
Unfold the power cord from the back (It is
recommended to let the power cord be too
loose or tight between the outlet and the
heater), and aach the base anchors into
the boom of the heater.
Hang the heater onto the top 2 screws.
Make sure the heater is firmly hanged. Then
screw the boom anchors to secure the
heater onto the wall.
Note: Leave at least a 5mm distance between
the wall and the top of the screw.
1
3 4
2
5
6
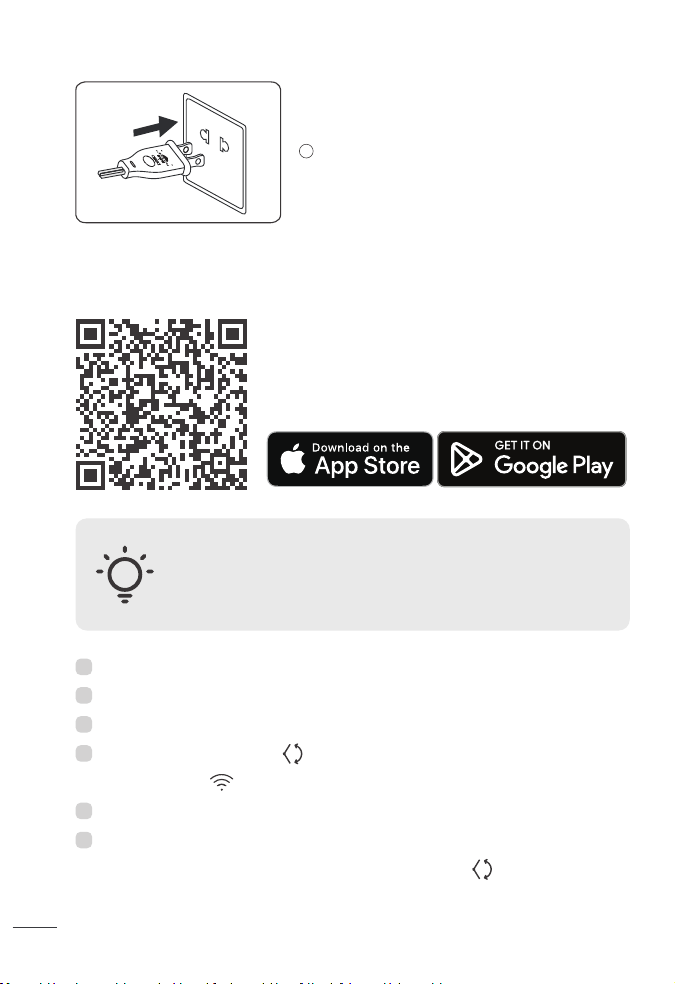
Launch Dreo and sign in or create an account by following in-app instructions.
Enable Bluetooth on your mobile device and plug in your fan.
Tap + Add Device and select the fan you want to link.
Hold the Swing Control buon for 5s to start WiFi connection seings.
(Tip: The WiFi icon will keep flashing when pairing.)
Follow in-app instructions to complete WiFi connection.
You’re now ready to control the appliance on your app.
(Tip: To restart connection seings, hold the Oscillation buon again for 5 seconds.)
CONNECTING TO YOUR HEATER
Control Panel
USING YOUR HEATER
03
Before connecting the appliance to your mobile device,
please scan the QR code on the left or go to the app store
and search “Dreo”, then select and download the app.
CAUTION: Moving the outlet fin manually could lead to
malfunction and risk of fire.
Always use the control panel, remote control or the Dreo app to
change the blowing angle.
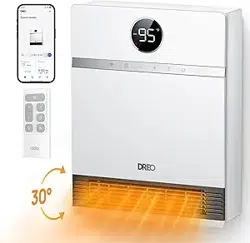
You can use the Dreo app to connect your smart heater to Amazon Alexa
or Google Assistant.
Please follow the in-app instructions to set up your voice assistant.
Note: You must create a Dreo account to access voice assistants.
This device includes the radio transmiing module whose
CMIIT ID is FCC ID: 2A3SYMBL01.
Plug-in the heater.
5
1
2
3
5
6
4
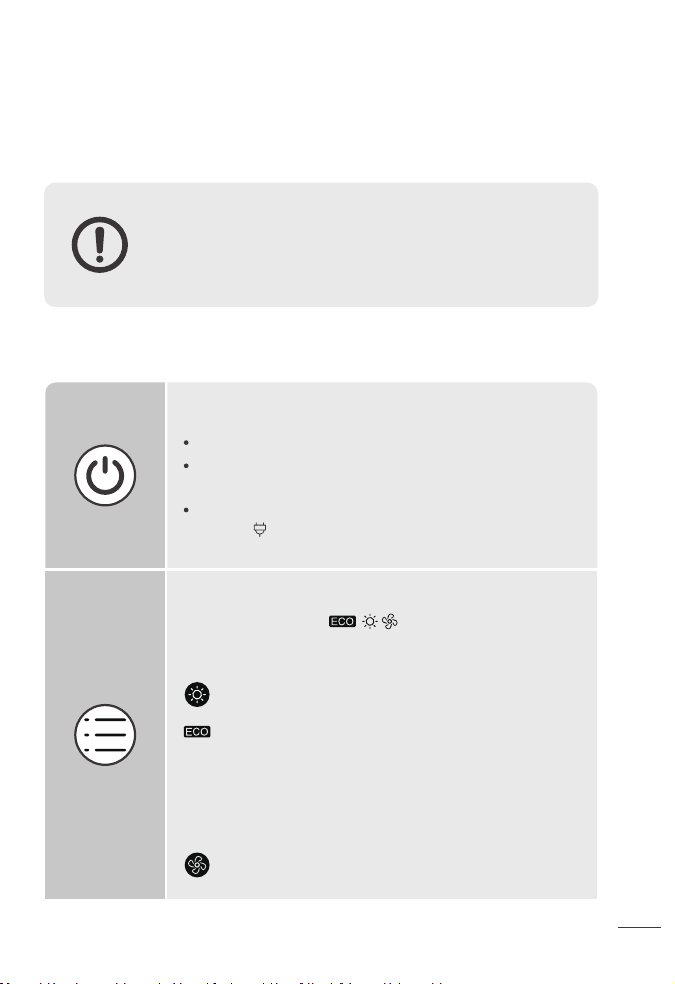
Touch to turn the heater on or o.
Long press for 10s to restore factory seings.
Note:
When the heater is plugged into the electric outlet, the power
indicator will light in red.
Power On/O
7
8
Touch to cycle through .
Temperature Calibration
Long press for 5s to calibrate the temperature.
Mode Seings
The heater will automatically select its optimal heating power,
depending on the dierence between the set temperature
(41-95°F) and ambient temperature.
Note:
- When activating ECO Mode, the display will flash the target
temperature, after 3 seconds of inactivity, it will go back to
ambient temperature.
Fan Only.
Power Heat with three heating levels:
H1(900W), H2(1300W), H3(1500W).
Launch Dreo and sign in or create an account by following in-app instructions.
Enable Bluetooth on your mobile device and plug in your fan.
Tap + Add Device and select the fan you want to link.
Hold the Swing Control buon for 5s to start WiFi connection seings.
(Tip: The WiFi icon will keep flashing when pairing.)
Follow in-app instructions to complete WiFi connection.
You’re now ready to control the appliance on your app.
(Tip: To restart connection seings, hold the Oscillation buon again for 5 seconds.)
CONNECTING TO YOUR HEATER
Control Panel
USING YOUR HEATER
03
Before connecting the appliance to your mobile device,
please scan the QR code on the left or go to the app store
and search “Dreo”, then select and download the app.
CAUTION: Moving the outlet fin manually could lead to
malfunction and risk of fire.
Always use the control panel, remote control or the Dreo app to
change the blowing angle.
You can use the Dreo app to connect your smart heater to Amazon Alexa
or Google Assistant.
Please follow the in-app instructions to set up your voice assistant.
Note: You must create a Dreo account to access voice assistants.
This device includes the radio transmiing module whose
CMIIT ID is FCC ID: 2A3SYMBL01.
Plug-in the heater.
5
1
2
3
5
6
4
Touch to turn the heater on or o.
Long press for 10s to restore factory seings.
Note:
When the heater is plugged into the electric outlet, the power
indicator will light in red.
Power On/O
7
8
Touch to cycle through .
Temperature Calibration
Long press for 5s to calibrate the temperature.
Mode Seings
The heater will automatically select its optimal heating power,
depending on the dierence between the set temperature
(41-95°F) and ambient temperature.
Note:
- When activating ECO Mode, the display will flash the target
temperature, after 3 seconds of inactivity, it will go back to
ambient temperature.
Fan Only.
Power Heat with three heating levels:
H1(900W), H2(1300W), H3(1500W).
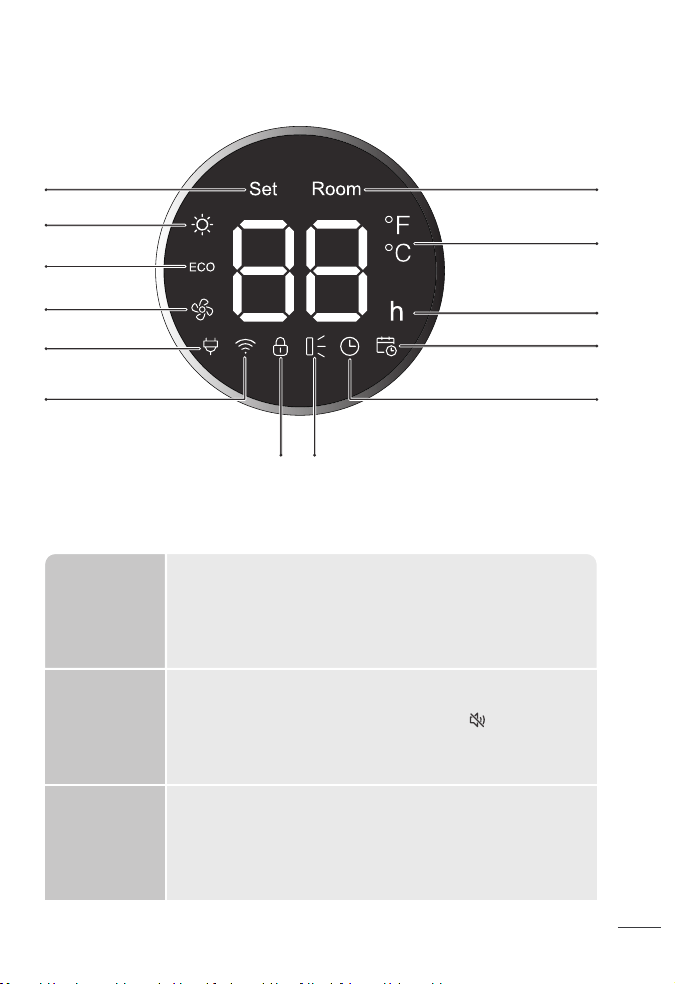
LED Display
More Features
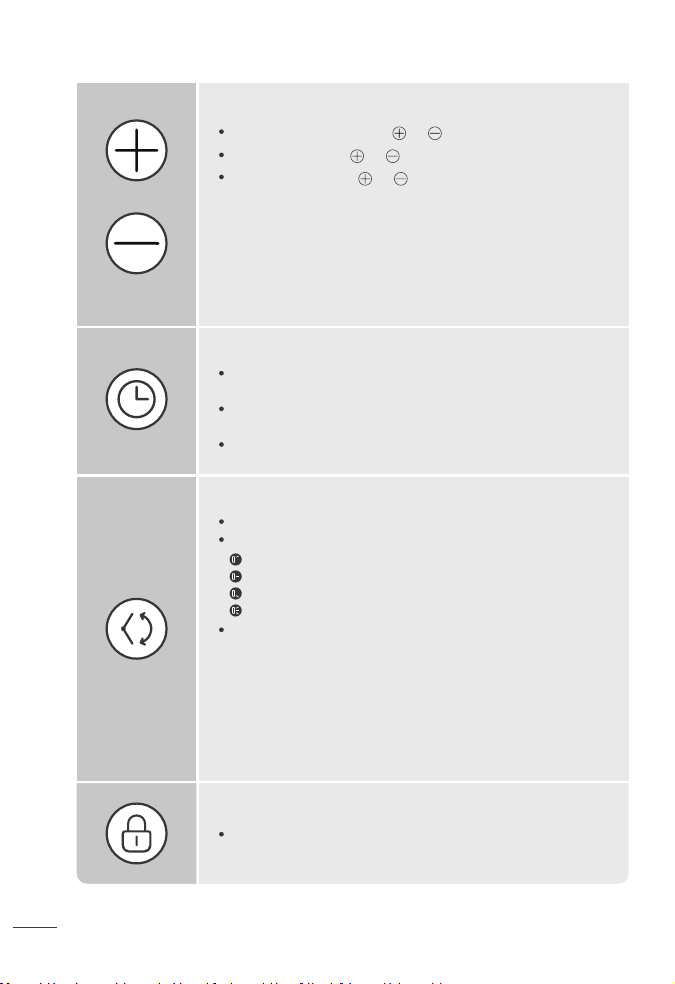
In Power Heat mode, touch or to adjust the heating level.
In ECO mode, touch or to adjust the set temperature.
In Timer mode, touch or to set the timer between (1-24h).
Heat Level/ Temperature
Note:
In ECO mode, the heater will flash the ℉/℃ indicator light and turn
o automatically when the set temperature has been reached. If
your heater turns o frequently, please raise the set temperature
or switch to Power Heat mode.
In ECO mode, the heater will flash the ℉/℃ indicator light and turn
o automatically when the set temperature has been reached. If
your heater turns o frequently, please raise the set temperature
or switch to Power Heat mode.
In low light conditions, the Led lights will automatically turn o. You
may press any buon in the control panel, remote control or app to
turn lights back on.
Note: This feature can be turned on/o from the Dreo app.
Opening doors or windows could lead to heat escaping the room
and temperature drops. The heater will send a notification when
your room temperature quickly drops.
Note: This feature is deactivated by default, you may activate it in
the Dreo app. This function deactivates when you restore WiFi
seings.
You can turn o the beep sounds by touching on your remote
control, or in the seings of your Dreo app.
Display Auto
Dimming
Temperature
drop
notifications
Mute/Unmute
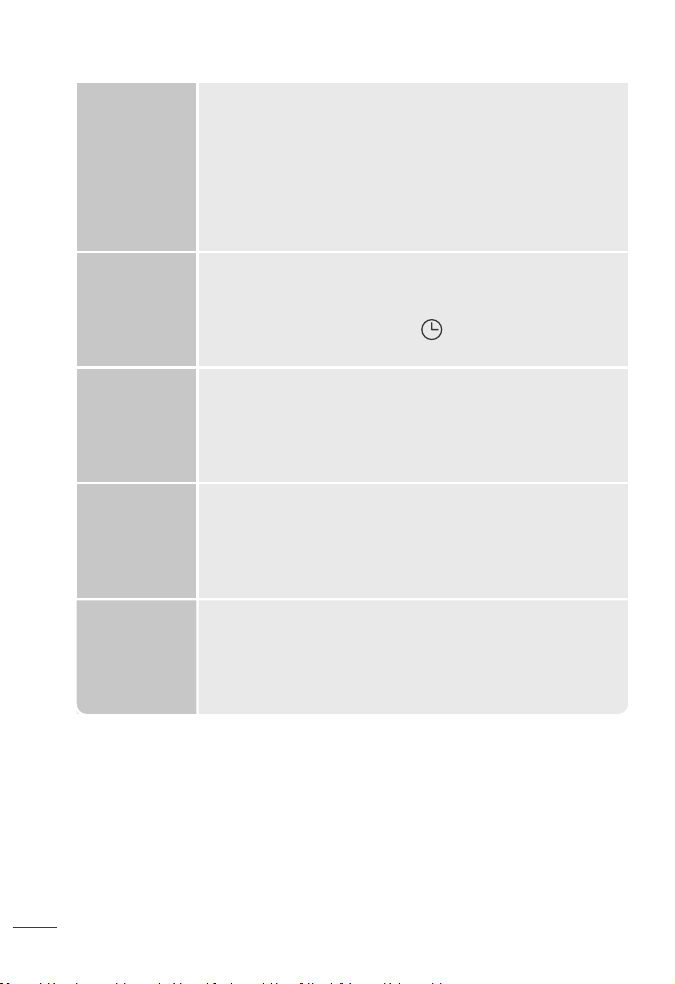
Timer
When the heater is on, touch to set a timer (0-24h). After the
timer ends, the heater will turn o automatically.
To cancel, press the timer buon again or set the timer to “”
hour.
Long press for 3s to deactivate the schedule function.
Swing Control
Long press + and - for 3s (Led display will show a countdown) to
activate/deactivate Child Lock.
Child Lock
60°
90°
120°
Oscillation
Caution: Moving the outlet fin manually could lead to malfunction
and risk of fire.
Note: When turning o the heater, it will continue to blow air for
30s to close the air outlet.
Touch to change air blowing angle from 120/90/60/Oscillation.
The Led Display indicates the angle of swing angle accordingly:
Long press for 5s to enter WiFi pairing mode (Led WiFi indicator
will flash and a countdown will be shown on the display while long
pressing.)
Target temperature
indicator
Room temperature
indicator
Hour indicator
Power Heat
Temperature unit
(Use the Dreo app to switch to °C)
Schedule indicator
Timer indicator
ECO Mode
Plugged in
WiFi Indicator
Child Lock Indicator Swing angle
Fan Only
9
10
LED Display
More Features
In Power Heat mode, touch or to adjust the heating level.
In ECO mode, touch or to adjust the set temperature.
In Timer mode, touch or to set the timer between (1-24h).
Heat Level/ Temperature
Note:
In ECO mode, the heater will flash the ℉/℃ indicator light and turn
o automatically when the set temperature has been reached. If
your heater turns o frequently, please raise the set temperature
or switch to Power Heat mode.
In ECO mode, the heater will flash the ℉/℃ indicator light and turn
o automatically when the set temperature has been reached. If
your heater turns o frequently, please raise the set temperature
or switch to Power Heat mode.
In low light conditions, the Led lights will automatically turn o. You
may press any buon in the control panel, remote control or app to
turn lights back on.
Note: This feature can be turned on/o from the Dreo app.
Opening doors or windows could lead to heat escaping the room
and temperature drops. The heater will send a notification when
your room temperature quickly drops.
Note: This feature is deactivated by default, you may activate it in
the Dreo app. This function deactivates when you restore WiFi
seings.
You can turn o the beep sounds by touching on your remote
control, or in the seings of your Dreo app.
Display Auto
Dimming
Temperature
drop
notifications
Mute/Unmute
Timer
When the heater is on, touch to set a timer (0-24h). After the
timer ends, the heater will turn o automatically.
To cancel, press the timer buon again or set the timer to “”
hour.
Long press for 3s to deactivate the schedule function.
Swing Control
Long press + and - for 3s (Led display will show a countdown) to
activate/deactivate Child Lock.
Child Lock
60°
90°
120°
Oscillation
Caution: Moving the outlet fin manually could lead to malfunction
and risk of fire.
Note: When turning o the heater, it will continue to blow air for
30s to close the air outlet.
Touch to change air blowing angle from 120/90/60/Oscillation.
The Led Display indicates the angle of swing angle accordingly:
Long press for 5s to enter WiFi pairing mode (Led WiFi indicator
will flash and a countdown will be shown on the display while long
pressing.)
Target temperature
indicator
Room temperature
indicator
Hour indicator
Power Heat
Temperature unit
(Use the Dreo app to switch to °C)
Schedule indicator
Timer indicator
ECO Mode
Plugged in
WiFi Indicator
Child Lock Indicator Swing angle
Fan Only
9
10
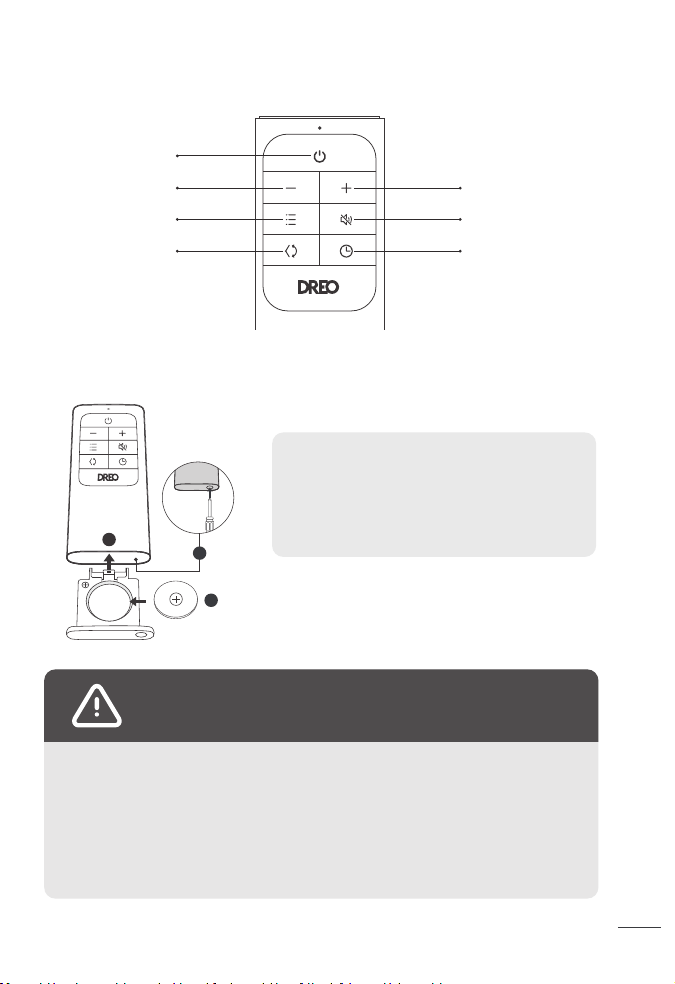
Remote Control
Baery Replacement
You can activate/deactivate this function in the Dreo app.
The heater will automatically heat up when room temperature
drops below 45°F mode to prevent freezing conditions.
The LED display will show “AF” when activated.
Anti-frost temperatures can be adjusted in the Dreo app.
Note: This function deactivates when you restore WiFi or factory
seings.
Anti-frost
Mode
Schedule
Overheat
Protection
Plug Overheat
Protection
Thermostat
Calibration
Only available through the Dreo app.
Schedule lets you set specific mode seings and with time and
dates to automate your heating.
To turn o this function long press 3s, restore WiFi or restore
factory seings.
When the fin is working abnormally, the appliance will stop heating
to avoid risks of fire (See troubleshooting page XX.)
This appliance has a safety plug to prevent fire accidents, if the
plug protection is triggered the appliance will stop heating, display
will show “PP”, and send a notification to your smartphone, in this
case refer to troubleshooting (page XX).
This thermostat comes with a built-in thermostat to read room
temperatures. If desired, the thermostat on the heater can be
calibrated to match your HVAC system using the Dreo app.
Power On/O
Heat/ Temp/Time -
Power Heat Mode
Swing Control
Heat/Temp/Time +
Mute
Timer
CR2025 3V
1
2
3
Note: If the indicator on the remote control
doesn’t turn on anymore, please consider
replacing the baery.
Press the locking buon to pop out the baery
holder.
Replace with the same baery type with the (+)
side facing up.
Push in the holder until securely locked into
place
1.
2.
3.
Chemical Burn Hazard.
Keep baeries away from children.
WARNING
This product contains a lithium buon/coin cell baery. If a new or used lithium buon/coin
cell baery is swallowed or enters the body, it can cause severe internal burns and can lead to
death in as lile it can cause severe internal burns and can lead to death in as lile the baery
compartment does not close securely, stop using the product, remove the baery, and keep it
away from children. If you think baeries might have been swallowed or placed inside any part
of the body, seek immediate medical aention.
The baeries must be disposed of properly, including keeping them away from children. Even
used cells may cause injury.
11
12
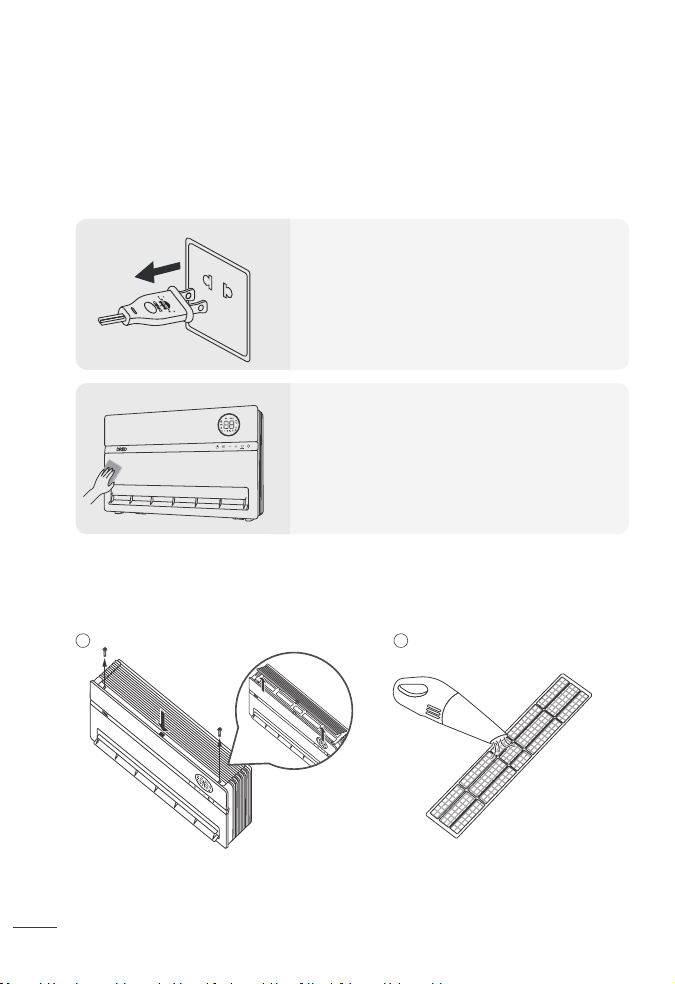
Filter Cleaning
Recommended once every month.
Cleaning and Maintenance
CLEANING AND
MAINTENANCE
04
Unscrew both sides and press the
center to remove the air inlet cover.
Rinse the air inlet cover and the filter
with lukewarm water.
DO NOT unscrew
the unit.
DO NOT use cleaning
agents.
DO NOT use abrasive
scrubbers.
Put the filter back in place, then match the
tabs in the cover with the cavities in the
heater, than press the center and screw
both sides to replace the cover.
Clean the surface of the air inlet
cover and the filter with a handheld
vacuum cleaner.
Always turn o and unplug before
cleaning.
Outer Surface
Use a soft, dry cloth to gently wipe clean
the outer surface.
Note: Do not move the outlet fin while
cleaning.
Note: Let the filter dry properly before
placing it back on the heater.
1
2
3 4
ATTENTION
Fire or electrical shock hazard. DO NOT immerse the
main unit in water. NEVER allow water to get inside the
heater.
Except for cleaning, any servicing should be performed
by an authorized service representative.
Store in a cool, dry area and keep the cable out of
high-traic areas to avoid tripping hazards.
13
14
Troubleshooting
TROUBLESHOOTING
05
15
16
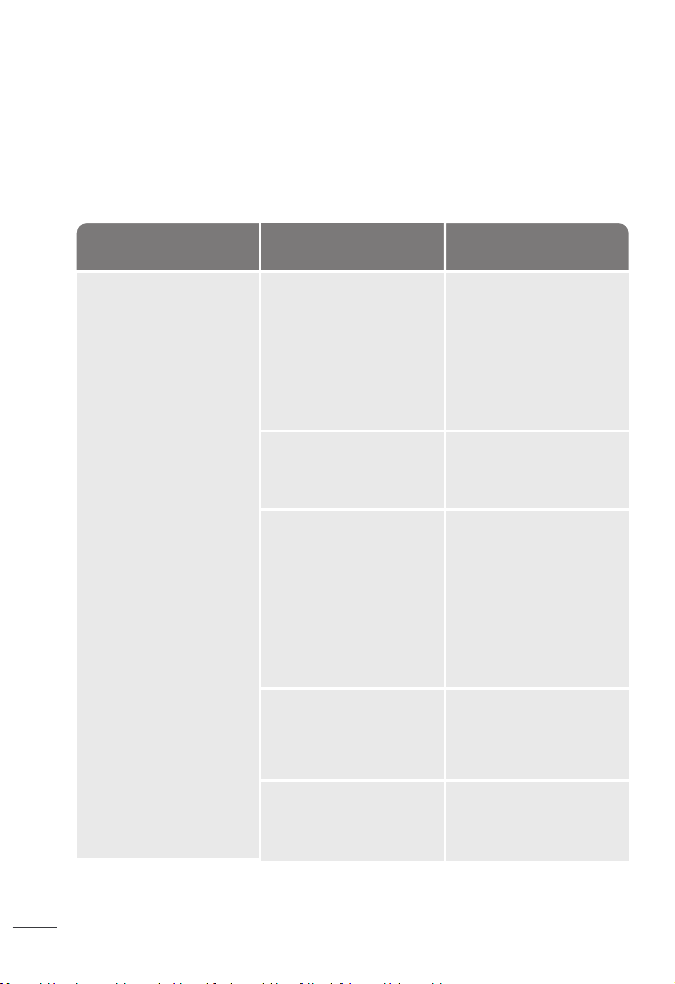
Problem Possible Causes Solution
Malfunction codes on
LED display
Heater does not start
The heater suddenly
stops during heating.
The heater doesn’t
raise temperature
If your problem is not listed or still persists, contact our Customer Support (see page XX).
F1 - Outlet Fin Protection
Error
PP - Plug overheat
protection
The heater surpassed
the Overheat
protection.
No power is passing
through the unit.
The set temperature is
lower than the ambient
temperature.
Ensure that the
temperature is set to be
higher than the ambient
temperature.
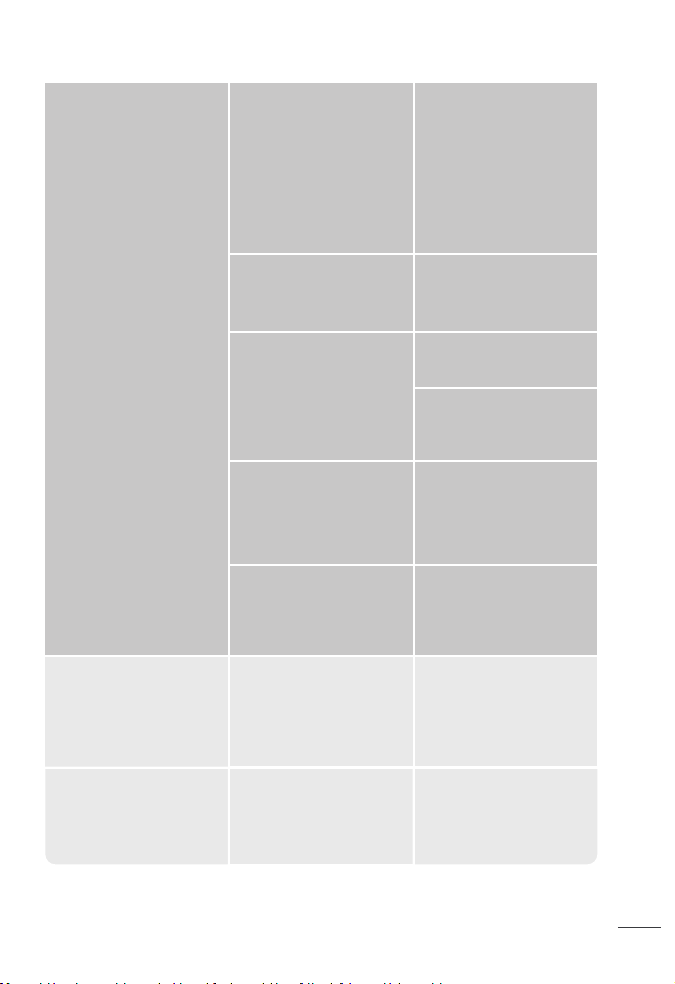
The temperature
exceeds the threshold
of the thermal cuto.
In ECO mode, the heater
will turn o
automatically when the
set temperature has
been reached.
This is normal. If your
heater turns o
frequently, please raise
the set temperature or
switch to Power Heat
mode.
If you are farther away
from your heater, you
can raise the target
temperature or switch
to Power Heat mode.
Turn o and unplug the
unit. Allow it to cool and
plug into the electrical
outlet again.
Unplug it and make sure
the plug and socket are
not defective, then
reconnect and turn on
the appliance.
If there are any
abnormalities with the
plug, please contact
Customer Support.
Unplug the heater and
allow it to cool before
plugging it back again.
Remove any objects on
or near the heater.
Ensure that your circuit
breaker or fuse is
working properly.
Wait until the heater
cools down to re-start it.
Make sure the outlet fin is
working properly.
If the problem persist,
contact Customer
Support.
F2 - Overheat Protection
BP - Outlet Fin Deviation
Unplug and wait for it to
cool down before
plugging in again.
Make sure there are no
objects obstructing the
outlet fin, re-start the
appliance.
Do not manually adjust
the outlet fin angle.
If the problem persist,
contact Customer
Support.
E1 - Temperature sensor
open circuit
Unplug it from the power
source and contact
Customer Support.
E2 - Temperature
sensor short circuit
Unplug it from the power
source and contact
Customer Support.
ECO mode doesn’t reach
my target temperature.
Troubleshooting
TROUBLESHOOTING
05
15
16
Problem Possible Causes Solution
Malfunction codes on
LED display
Heater does not start
The heater suddenly
stops during heating.
The heater doesn’t
raise temperature
If your problem is not listed or still persists, contact our Customer Support (see page XX).
F1 - Outlet Fin Protection
Error
PP - Plug overheat
protection
The heater surpassed
the Overheat
protection.
No power is passing
through the unit.
The set temperature is
lower than the ambient
temperature.
Ensure that the
temperature is set to be
higher than the ambient
temperature.
The temperature
exceeds the threshold
of the thermal cuto.
In ECO mode, the heater
will turn o
automatically when the
set temperature has
been reached.
This is normal. If your
heater turns o
frequently, please raise
the set temperature or
switch to Power Heat
mode.
If you are farther away
from your heater, you
can raise the target
temperature or switch
to Power Heat mode.
Turn o and unplug the
unit. Allow it to cool and
plug into the electrical
outlet again.
Unplug it and make sure
the plug and socket are
not defective, then
reconnect and turn on
the appliance.
If there are any
abnormalities with the
plug, please contact
Customer Support.
Unplug the heater and
allow it to cool before
plugging it back again.
Remove any objects on
or near the heater.
Ensure that your circuit
breaker or fuse is
working properly.
Wait until the heater
cools down to re-start it.
Make sure the outlet fin is
working properly.
If the problem persist,
contact Customer
Support.
F2 - Overheat Protection
BP - Outlet Fin Deviation
Unplug and wait for it to
cool down before
plugging in again.
Make sure there are no
objects obstructing the
outlet fin, re-start the
appliance.
Do not manually adjust
the outlet fin angle.
If the problem persist,
contact Customer
Support.
E1 - Temperature sensor
open circuit
Unplug it from the power
source and contact
Customer Support.
E2 - Temperature
sensor short circuit
Unplug it from the power
source and contact
Customer Support.
ECO mode doesn’t reach
my target temperature.

Default 12-Month Warranty
Extend Your Warranty
FCC STATEMENT
We’re Here to Help!
DREO CUSTOMER
CARE
17
18
This appliance is covered by Dreo warranty for 12 months from the date of its original
purchase.
Extend your warranty by registering your new appliance on our website
hps://dreo.com/warranty.
We can only provide after-sales service for products that are sold by Dreo or Dreo authorized
retailers and distributors. If you have purchased the appliance from a dierent place, please
contact your seller for return and warranty issues.
This device complies with Part 15 of the FCC Rules.
This equipment has been tested and found to comply with the limits for a Consumer ISM
equipment, pursuant Part 15 of the FCC Rules. These limits are designed to provide
reasonable protection against harmful interference in a residential installation. This
equipment generates, uses and can radiate radio frequency energy and, if not installed and
used in accordance with the instructions, may cause harmful interference to radio
communications. However, there is no guarantee that interference will not occur in a
particular installation.
“Please note that changes or modifications of this product is not expressly approved by the
party responsible for compliance could void the user’s authority to operate the equipment.”
“If this equipment does cause harmful interference to radio or television reception, which
can be determined by turning the equipment o and on, the user is encouraged to try to
correct the interference by one or more of the following measures:
- Reorient or relocate the receiving antenna.
- Increase the separation between the equipment and receiver.
- Connect the equipment into an outlet on a circuit dierent from that to which the receiver
is connected.
- Consult the dealer or an experienced radio/TV technician for help.
The warranty will not apply in cases of:
Accident, misuse, or repairs performed by unauthorized personnel.
Any unit that has been tampered with or used for commercial purposes.
Normal wear and tear of wearable parts.
Use of force, damage caused by external influences.
Damage caused by non-observance of the User Manual, e.g. connection to an unsuitable
mains supply or noncompliance with the instructions.
Partially or completely dismantled appliances.
Defects caused by or resulting from damages from shipping or from repairs, service, or
alteration to the product or any of its parts that have been performed by a repair person not
authorized by Dreo.
1.
2.
3.
4.
5.
6.
7.
Rev_1.0_EN
MADE IN CHINA
Intertek
5020677
Shenzhen Hesung Innovation Technology Co., LTD
26F, Bldg A7, Creative City, Shenzhen, China
www.dreo.com
(888) 520-3736 Mon - Fri, 9:00 am-5:00 pm PST/PDT
support@dreo.com
Default 12-Month Warranty
Extend Your Warranty
FCC STATEMENT
We’re Here to Help!
DREO CUSTOMER
CARE
17
18
This appliance is covered by Dreo warranty for 12 months from the date of its original
purchase.
Extend your warranty by registering your new appliance on our website
hps://dreo.com/warranty.
We can only provide after-sales service for products that are sold by Dreo or Dreo authorized
retailers and distributors. If you have purchased the appliance from a dierent place, please
contact your seller for return and warranty issues.
This device complies with Part 15 of the FCC Rules.
This equipment has been tested and found to comply with the limits for a Consumer ISM
equipment, pursuant Part 15 of the FCC Rules. These limits are designed to provide
reasonable protection against harmful interference in a residential installation. This
equipment generates, uses and can radiate radio frequency energy and, if not installed and
used in accordance with the instructions, may cause harmful interference to radio
communications. However, there is no guarantee that interference will not occur in a
particular installation.
“Please note that changes or modifications of this product is not expressly approved by the
party responsible for compliance could void the user’s authority to operate the equipment.”
“If this equipment does cause harmful interference to radio or television reception, which
can be determined by turning the equipment o and on, the user is encouraged to try to
correct the interference by one or more of the following measures:
- Reorient or relocate the receiving antenna.
- Increase the separation between the equipment and receiver.
- Connect the equipment into an outlet on a circuit dierent from that to which the receiver
is connected.
- Consult the dealer or an experienced radio/TV technician for help.
The warranty will not apply in cases of:
Accident, misuse, or repairs performed by unauthorized personnel.
Any unit that has been tampered with or used for commercial purposes.
Normal wear and tear of wearable parts.
Use of force, damage caused by external influences.
Damage caused by non-observance of the User Manual, e.g. connection to an unsuitable
mains supply or noncompliance with the instructions.
Partially or completely dismantled appliances.
Defects caused by or resulting from damages from shipping or from repairs, service, or
alteration to the product or any of its parts that have been performed by a repair person not
authorized by Dreo.
1.
2.
3.
4.
5.
6.
7.
Rev_1.0_EN
MADE IN CHINA
Intertek
5020677
Shenzhen Hesung Innovation Technology Co., LTD
26F, Bldg A7, Creative City, Shenzhen, China
www.dreo.com
(888) 520-3736 Mon - Fri, 9:00 am-5:00 pm PST/PDT
Looking for help?
Contact us to get expert support.
DR-HSH009S
www.dreo.com
Mon - Fri, 9:00 am-5:00 pm PST/PDT
support@dreo.com (888) 290-1688 www.dreo.com
Smart Oil-Filled
Heater
USER MANUAL