User Manual
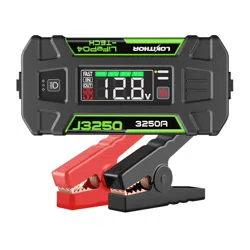
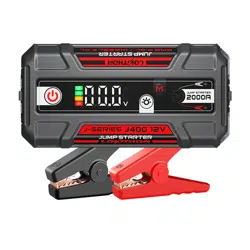
J400
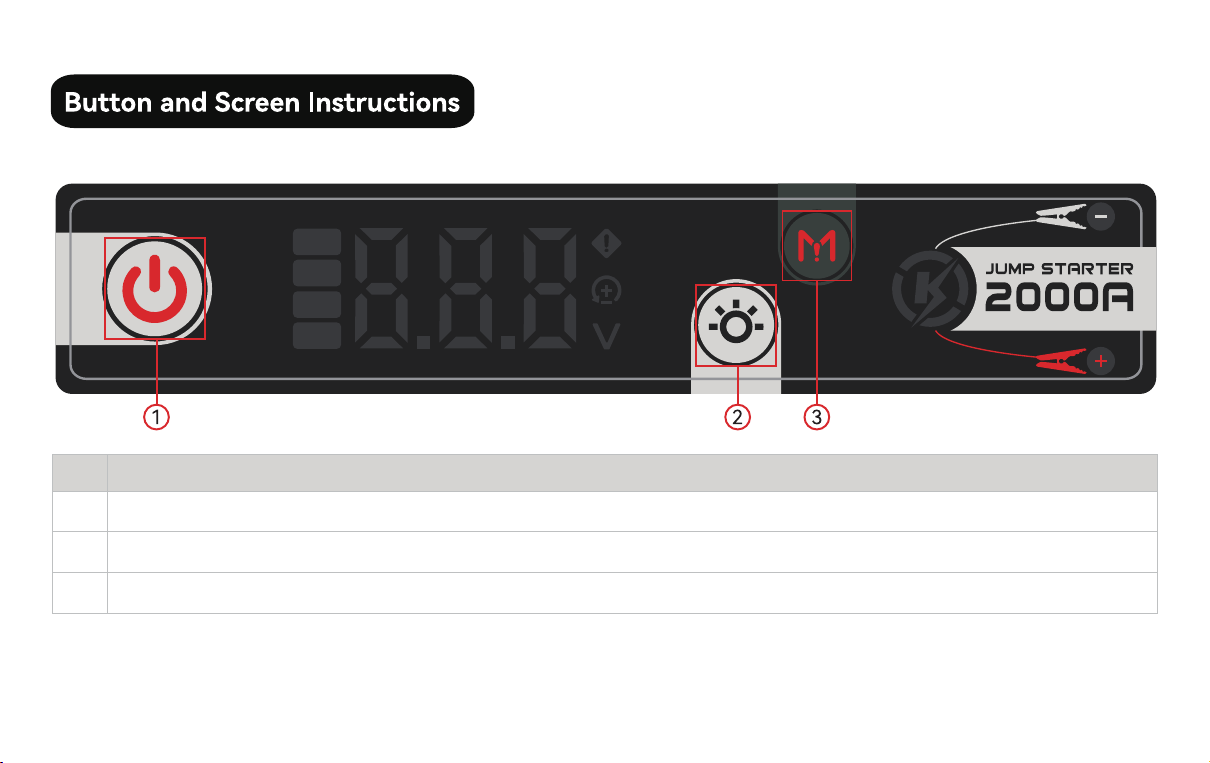
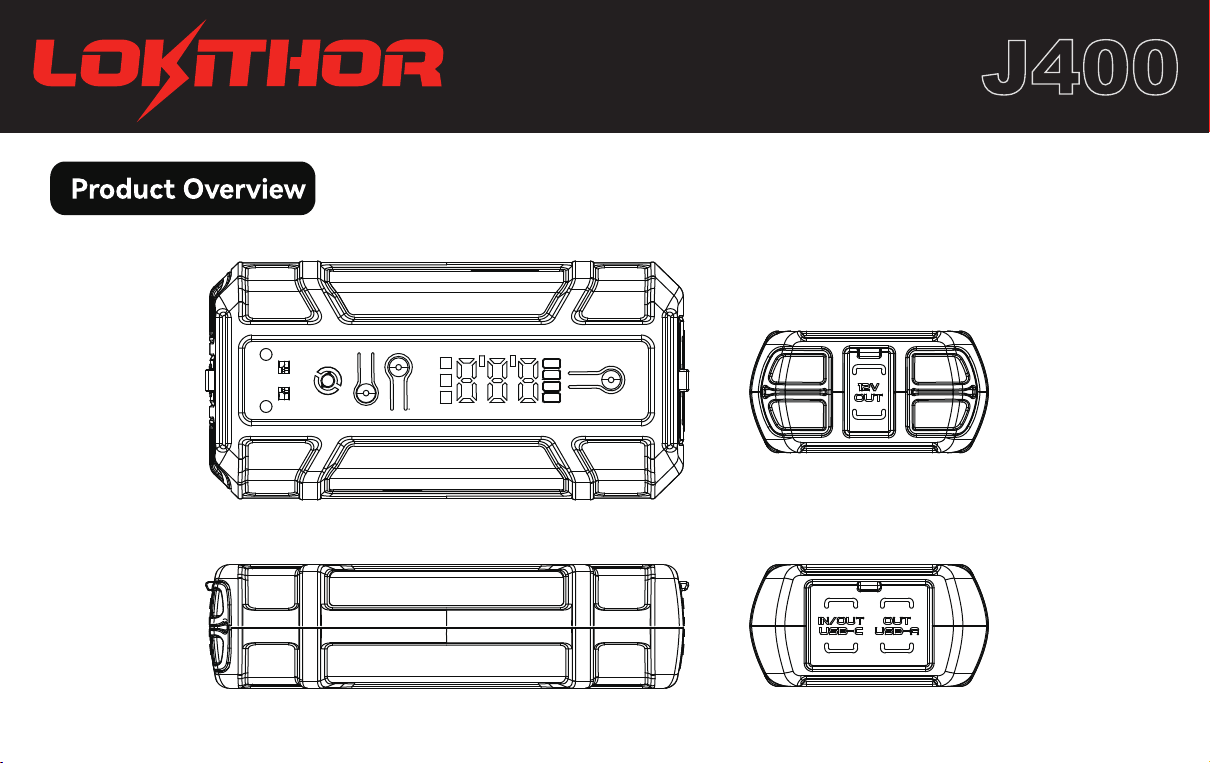
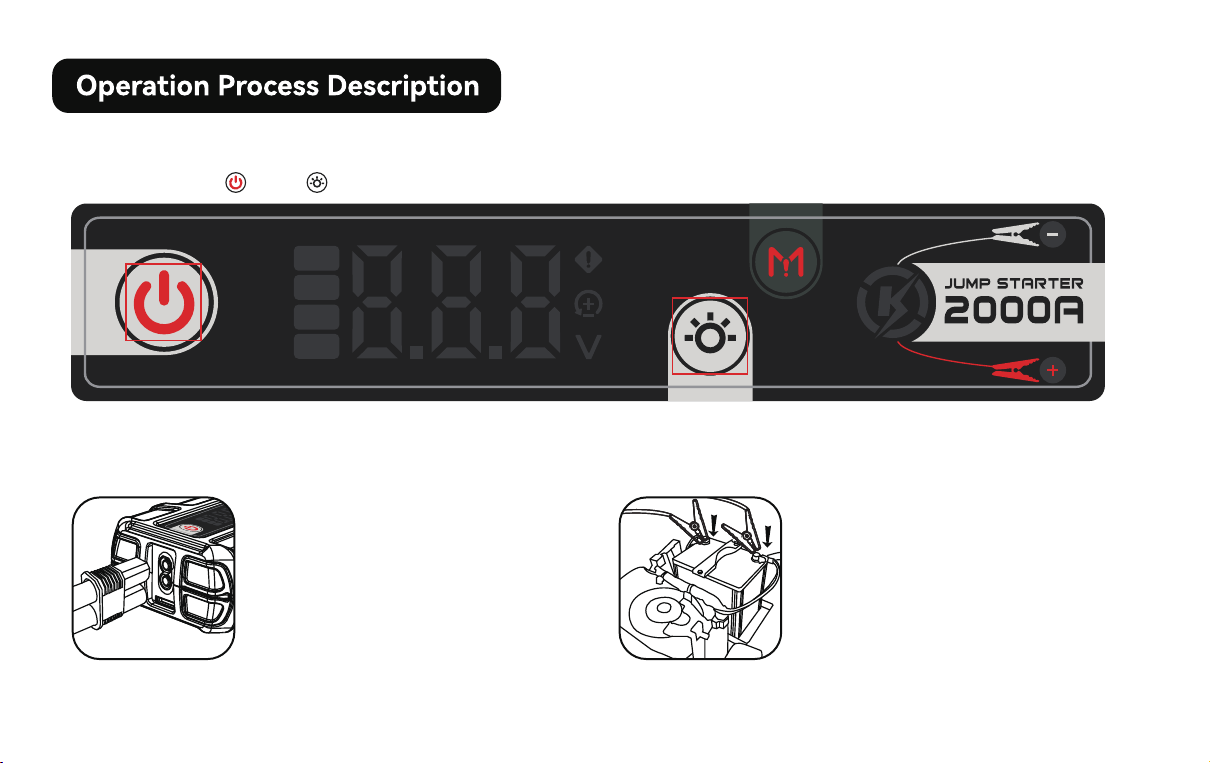
1. Button Introduction
NO
1
2
3
Function Description
Power button (sho press to turn on, long press for 2S to turn o)
Power LED & Light Mode button
Boost sta button (press and hold for 5S to turn on)
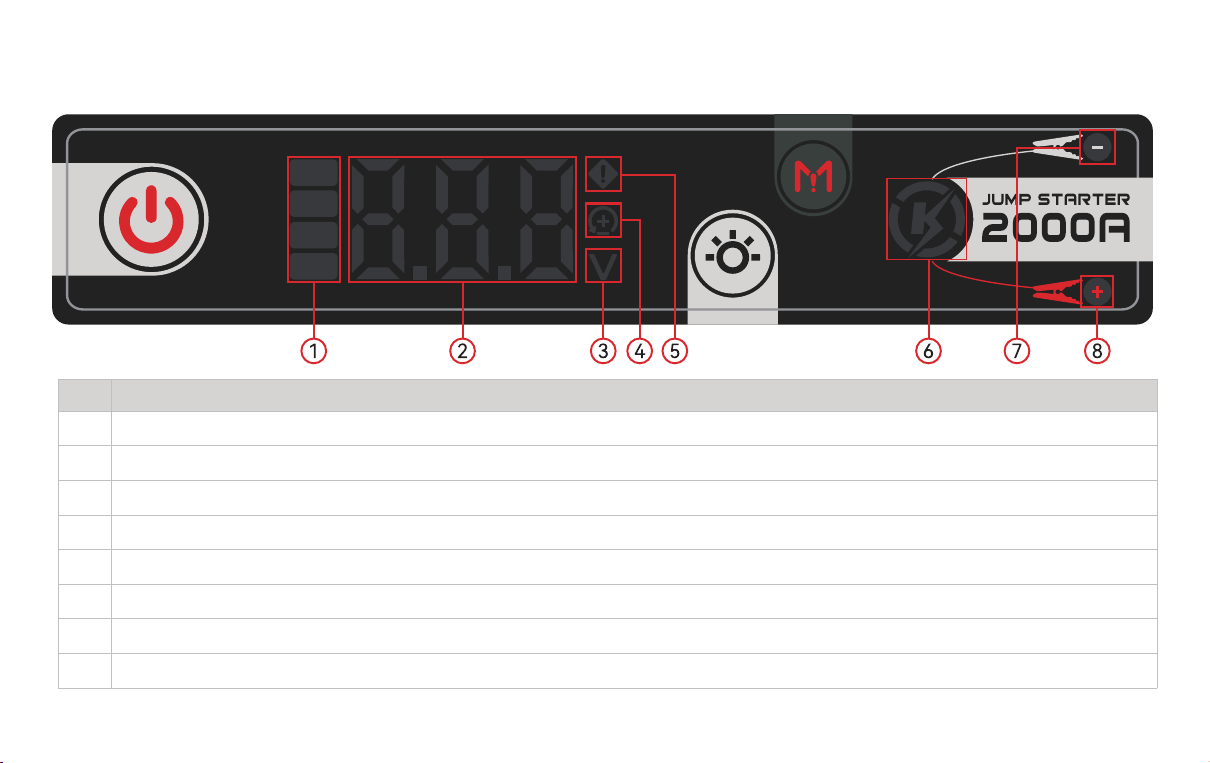
2. Screen Introduction
NO
1
2
3
4
5
6
7
8
Function Description
Batte LEDs
Digital display area
Voltage LED
Reverse polarity LED
Error LED
Ready to sta LED
Negative clip LED (Green LED: low connection impedance Yellow LED: high connection impedance)
Positive clip LED (Green LED: low connection impedance Yellow LED: high connection impedance)
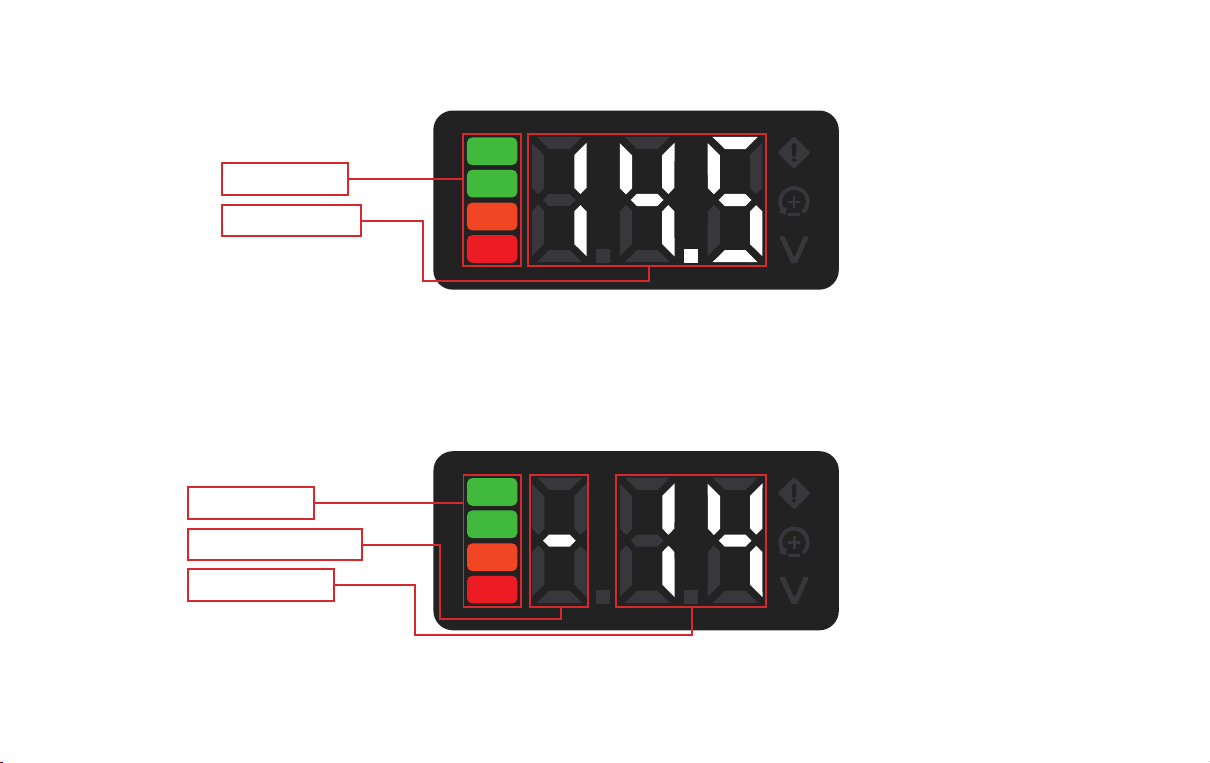
3. Charging display instructions
4. Discharge display instructions
Batte Power
Charging Power
Batte Power
Discharge Indication
Discharge Power
When the product is charging, the charging power will be displayed on the screen; the default charging power
unit is W, and the charging power unit is not displayed;
When the product is discharging via USB, the screen will display the discharge power and the discharge
symbol "—"; the default discharge unit is W, and the discharge power unit is not displayed;
1. How to wake up the J400?
2. How to use the jump start function?
2.1 Method 1: Normal Sta
2.1.2 Connect the positive and
negative poles of the product
clamps clamp to the positive and
negative poles of the car batte
respectively, and ensure that the
connections are good;
2.1.1 Inse the product clamps
clip into the EC5 sta po of the
product;
Sho press the " " or " "
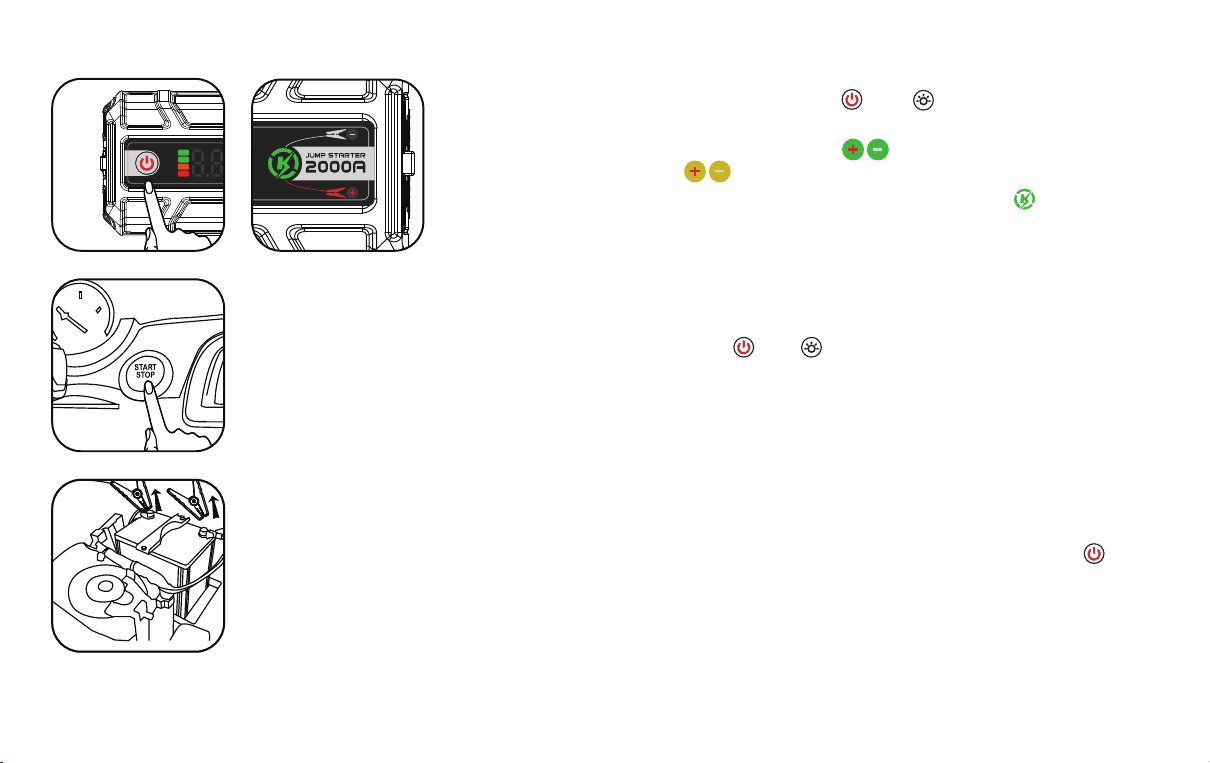
2.1.3 Wake up the J400, sho press the " " or " ". If the detection meets
the automatic sta, it will enter the 10-second clamp connection status
detection countdown (at this time, if the is green, it is the best
connection status, if the is yellow, it is not the best connection status,
but it can also be staed) After the countdown is over, the on the display
panel ashes, and the actual voltage of the car batte is displayed at the
same time. At this time, the car can be staed.
2.1.4 If the car stas successfully, sho press the" " or" " to exit the sta function, and
then disconnect the product clamps clip; in most cases, the vehicle will sta successfully
immediately during the rst sta operation. If the sta fails, please check the contact of the
product clamps clip location, and then t again, no more than 5 consecutive stas within 15
minutes;
2.1.5 After using the product, remove the product clamps clip and press and hold the " " for
2 seconds to shut down the product. If the product is not operated for 60 seconds, the
product will automatically shut down;

2.2 Method 2: Boost Sta
IfJ400cannotstayourvehiclewhenthebatteofJ400islessthan2bars,
pleasechargeitfullyandttojumpstayourvehicleagain.
(Safety reminder: Some safety protection mechanisms are invalid in this mode, so you need to use it with caution.
Be sure to prevent the positive and negative poles from being sho-circuited, otherwise it will cause a
sho-circuit accident. You must check the operating instructions in the manual before operating)
When the automatic sta function fails, you can use the manual emergency sta function after checking the
operating specications in the manual.
2.2.1 Inse the product clamps clip into the EC5 sta po of the product;
2.2.2 Connect the negative electrode of the product clip to the negative electrode of the car batte. After waking
the product, press and hold the" " for 5 seconds.Enter the boost sta mode, (in the boost sta mode, the
contact impedance detection can not be used, and the is ashing yellow), at this time, the on the main
inteace is always on, indicating that the product clamp output has been turned on.Connect the positive electrode
of the product clip to the positive electrode of the car batte.
2.2.3 . At this time, the positive and negative voltages of the jump staer and the car are displayed in parallel, and
the car can be staed; sho press the " " or " " to exit.
3. Jump Clamp Connection Status Display
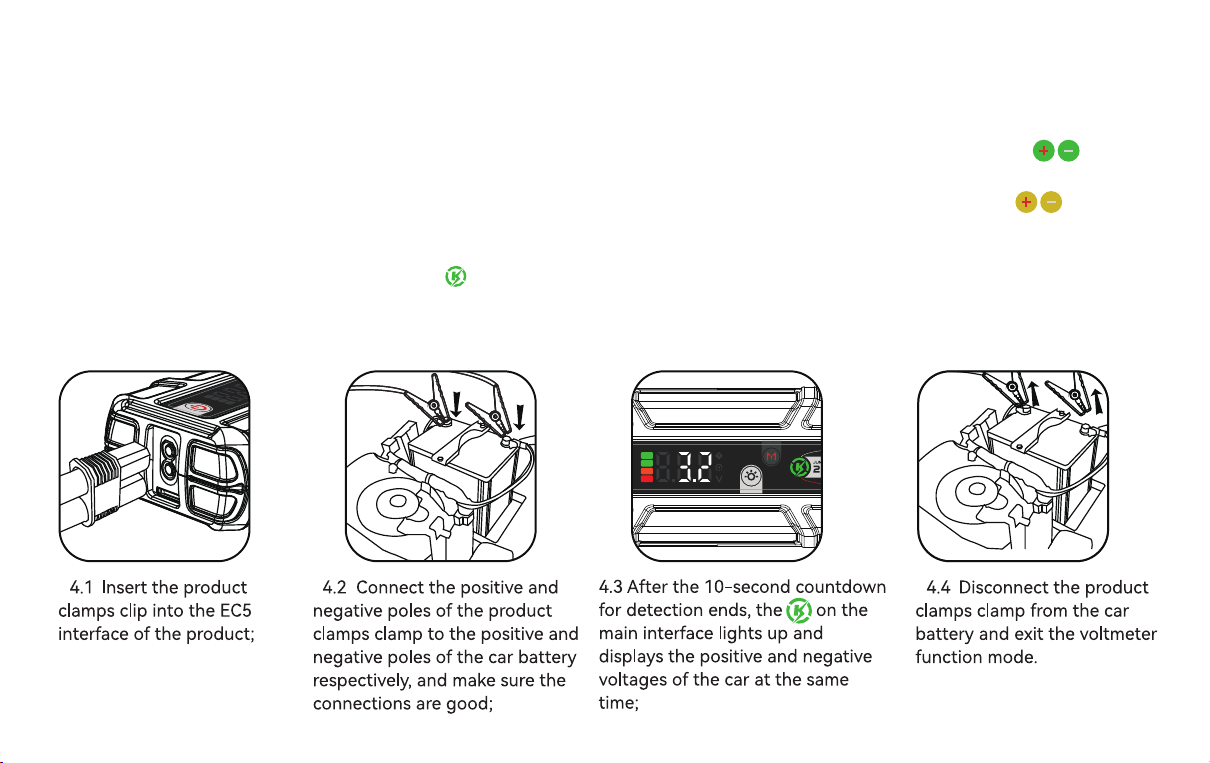
4. How to use the voltmeter function?
- In normal sta mode, after the product clamps clip are connected to the car batte, it will enter a 10-second
detection countdown;
- If the connection impedance of the product clamps clamp is low, the corresponding product clamps will be
green;
- If the connection impedance of the product clamps clip is high, the corresponding product clamps will be
yellow;
- The product clamps clamp connection status can be adjusted during the 10-second countdown;
In boost sta mode, the product clamps displays green by default.

5. How to use LED lights?
5.1 Press and hold the " " for 1S, the LED light will light up;
5.2 Press the " " repeatedly to switch modes: steady on, strobe, SOS, and o;
5.3 Press and hold the " " for 2 seconds to force the LED light o.
6.1 Tool preparation: power adapter (PD2.0/PD3.0 protocol power adapter), USB-C to USB-C cable, USB-A to
USB-C cable;
6.2 One end of the USB cable, A po, is connected to the power adapter, and the other end, C po, is connected
to the USB-C charging po of the product. The on the screen lights up, indicating that the product is charging
normally;
6.3 When the product is exhausted or has low batte, please charge it in time to prevent abnormal batte
undeoltage.
6.4 A long-term zero-batte state may cause the product to be unable to charge.
7. How to use 5V USB-A port to charge mobile phone?
7.1 Tool preparation: USB-A To USB-C cable, mobile phone
7.2 Connect the A po of the USB cable to the product and the C po to the Type-c charging po of the phone
to sta charging.
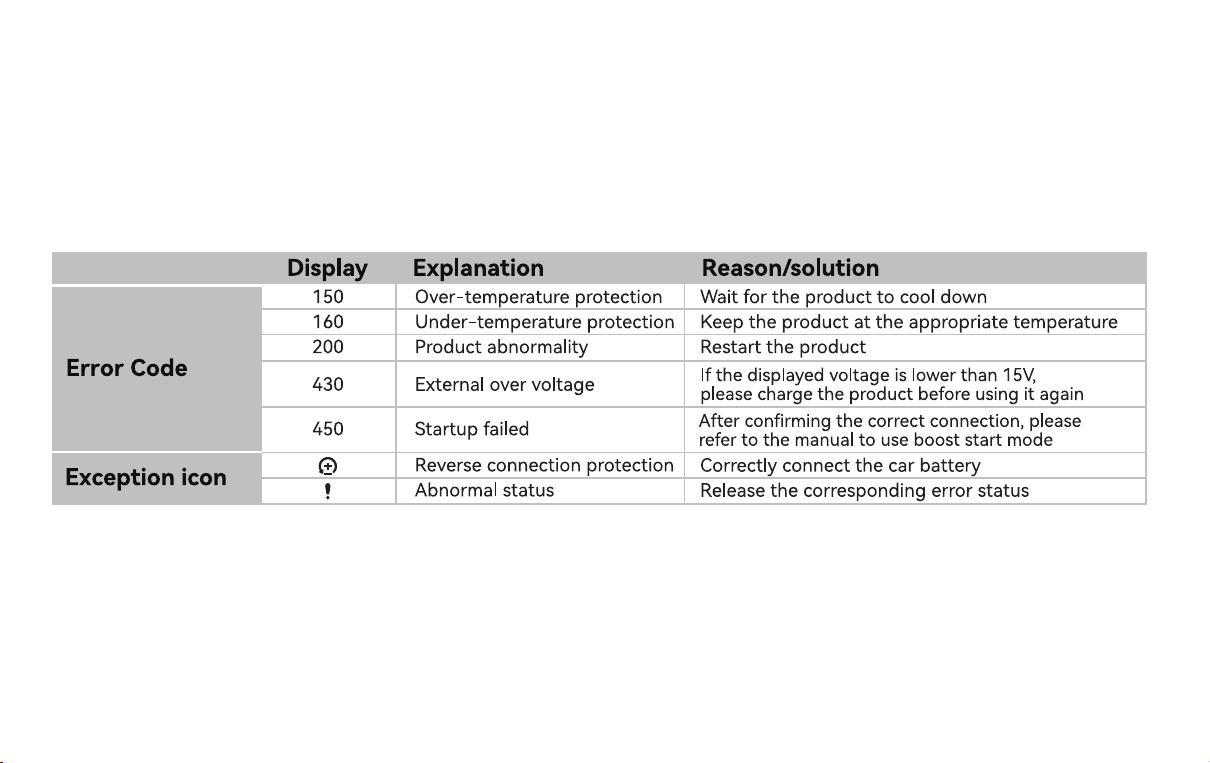
8. Error Code Display Description