Loading ...
Loading ...
Loading ...
AXIS T91A Series Installation Guide Page 11
ENGLISH
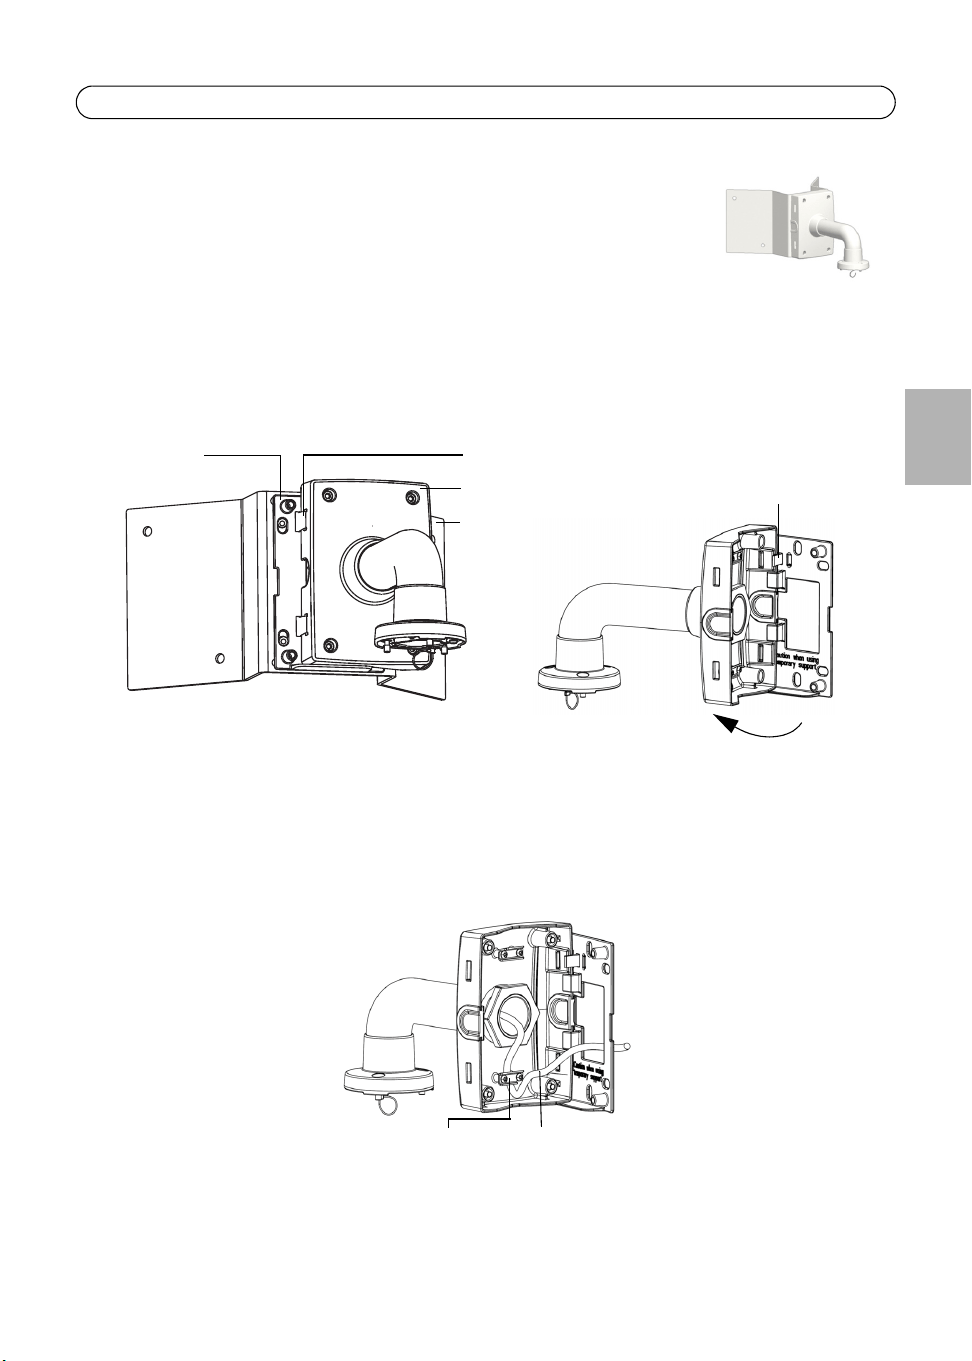
Install the AXIS T91A64 Corner Mount
1. Refer to
Hardware overview,
on page 4 for information on the supplied
parts.
2. Attach the corner bracket in the desired position using screws that are
appropriate for the wall material and the weight of the camera and
bracket.
3. Attach the bracket holder (not included) to the corner bracket using the
supplied screws.
4. The wall bracket (not included) can temporarily be hooked on the bracket holder, in order to
easily route the cable through the bracket:
Note:
The bracket holder and wall bracket (AXIS T91A61) are required for the installation but
must be purchased separately, see the table in
Package contents,
on page 3.
5. Route the necessary cables through the wall bracket, securing them in the cable holder.
6. Press the locking tab and unhook the wall bracket from the temporary position.
7. Use the Torx screws to secure the wall bracket to the bracket holder.
8. Refer to the Installation Guide for the network camera for instructions on how to attach the
camera to the bracket.
Tabs
Swing wall bracket
to the side for
temporary support
Slide bracket between the
tabs on the bracket holder
Locking tab
Wall bracket
Corner bracket
Bracket
holder
CableCable
holder
cam_IG.book Page 11 Friday, December 18, 2009 3:14 PM
Loading ...
Loading ...
Loading ...