Loading ...
Loading ...
Loading ...
7
bl e n d I n g I n t h e fu l l SI z e co n ta I n e r (64 o u n c e /2.0 l)
CAUTION
To Avoid Possible Burns, Never Start on Speeds Above 1 when Processing Hot Liquids.
Escaping steam, splashes or contents may burn.
To secure the contents, lock the lid and lid plug securely in place prior to operating the blender.
Always start on Variable 1, then slowly increase to 10.
NEVER touch moving parts
Parts will become hot with extended use. DO NOT touch the drive socket in the blender base or the drive spline in the blade base
Note: The On/O switch is on the right hand side of the base.
1. Press the On/O switch to the On (I) position.
Three dashes (- - -) will display on the control panel if a container is not on the blender base. Once a container is placed, 0:00 will show on the
display.
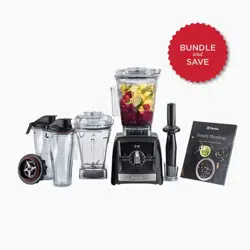
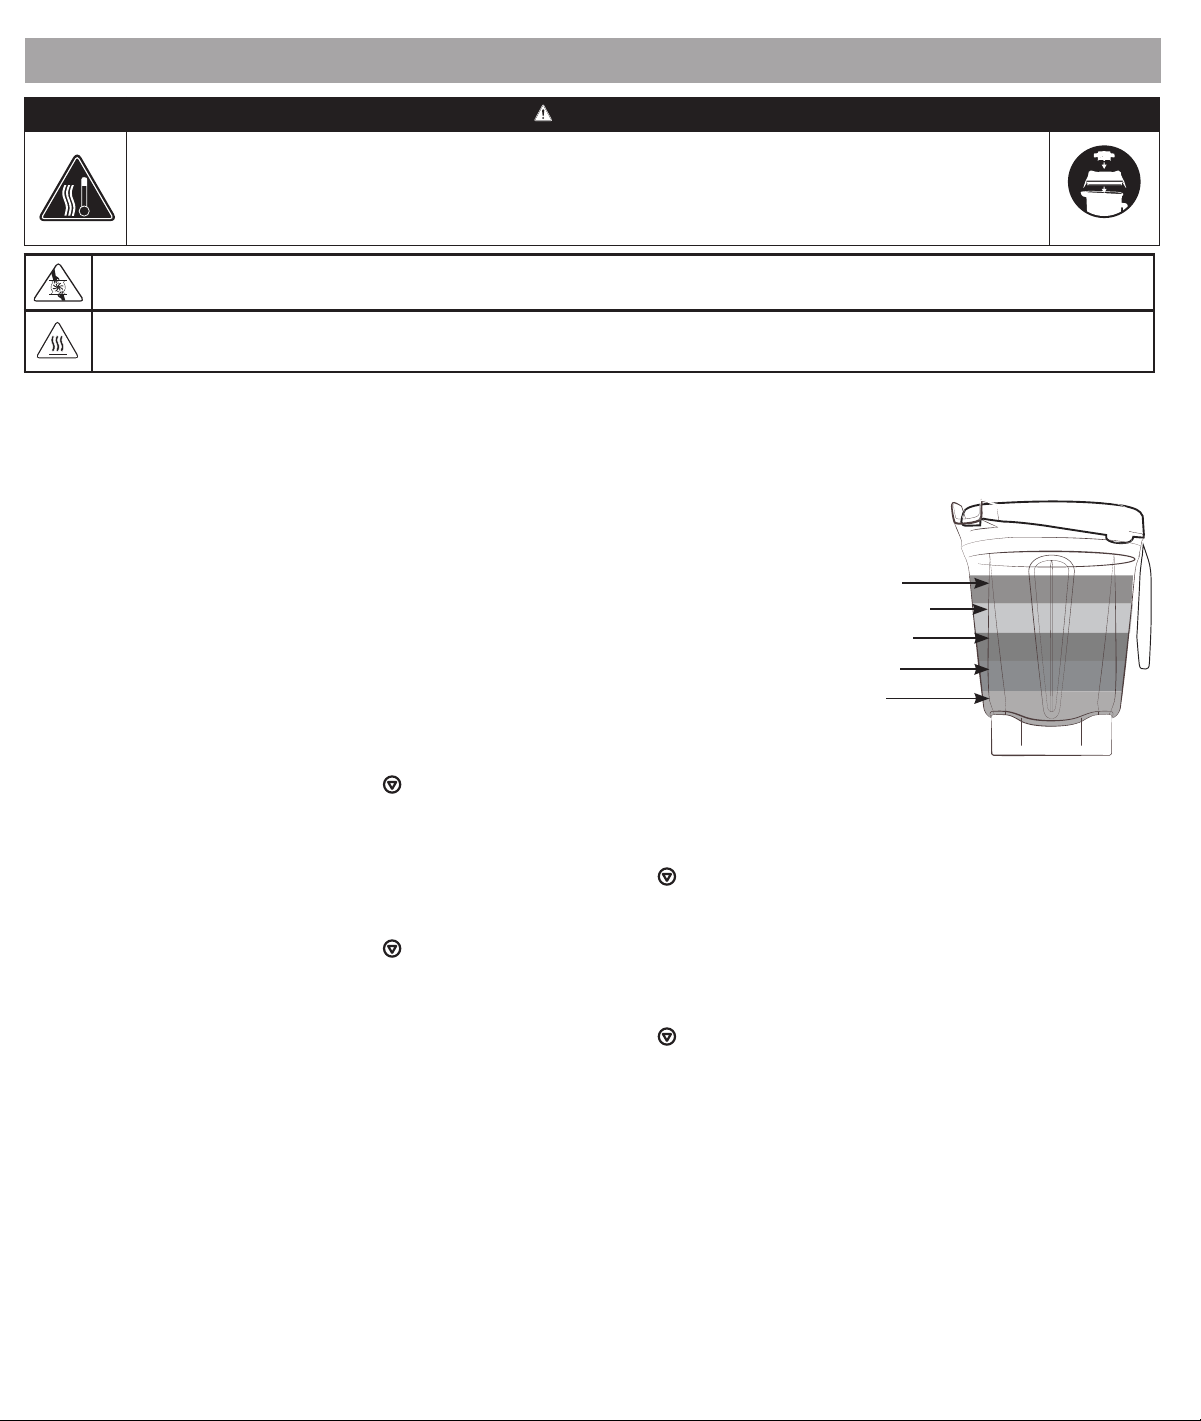
Liquids
Dry Goods
Leafy Greens
Fruits & Veggies
Ice & Frozen
Ingredients
2. Load your container according to the Vitamix recipe directions or the load order illustration
here.
IMPORTANT! Always use the lid and the lid plug on the Full-Size Containers when the machine
is in operation. Never operate the blender without checking to make sure that the lid and lid
plug are securely locked in place.
3. Put the lid onto the container.
a. Push down on the lid until the two tabs snap onto the lip of the container.
b. Insert the lid plug.
c. Turn the lid plug clockwise to lock.
4. Put the container onto the blender base. 0:00 will display when a container/cup is detected
and the blender is ready to operate.
5. Perform one of the following:
• To use variable speed:
a. Make sure that the standby symbol ( ) is lined up with the dot on the control panel. .Turn the variable speed dial clockwise to Variable
Speed 1.
b. Press Start/Stop. The blades will begin to turn and the timer will count the minutes and seconds that the blend has been processing.
c. Rotate the Variable Speed Dial between 1 and 10 during the blending cycle to increase or decrease the speed of the blades.
d. At the end of the blend, rotate the Variable Speed Dial back to standby ( ). Press Start/Stop.
• To use Programs:
Note: The soup program is not available for use with the cups.
a. Make sure that the standby symbol ( ) is lined up with the dot on the control panel. Rotate the dial clockwise to the appropriate icon for
the blend. (The program time will display on the control panel).
b. Press Start/Stop to start the program. (The blender will automatically stop at the end of the program.) Press Start/Stop at any time to
stop the program.
c. At the end of the blend, rotate the Variable Speed Dial back to standby ( )..
6. If the mixture stops circulating:
• Insert the tamper through the lid plug and stir until it ‘burps’. If this does not work, press the On/O switch to stop the motor. Remove the
container from the blender base and use a rubber spatula to press the air bubble away from the blades. Add liquid if necessary. Replace the lid
and lid plug. Return the container to the blender base and continue blending.
• If necessary, use a Vitamix Blade Scraper or spatula to remove salsa, jelly, jam, peanut butter, and other thick ingredients from under the
blades only after the blender has been turned o and the container has been removed from the motor base.
7. After blending, wait until the blades completely stop before removing the lid or removing container from the blender base.
Tips to prevent ‘overloading’ your blender:
• Process only Vitamix recipes when learning to use the blender.
• Do not process recipes at lower speeds than recommended.
• Do not process recipes at higher speeds than recommended.
• Do not process recipes for longer than recommended.
• Use your tamper to process thicker mixtures and keep ingredients moving around and through the blades.
Loading ...
Loading ...
Loading ...