T1 PRO
USER MANUAL
Thanks for your purchase from GRECELL.
For the best performance and safety purposes, please read this manual carefully
beforeuse. Please keep this manual for further reference.
CHARGE FIRST!
Please fully charge your new 2200W Power Station before first use.
Highly recommend charging 2200W Power Station when battery indicates less than 20%.
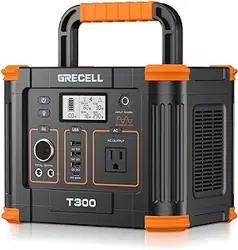
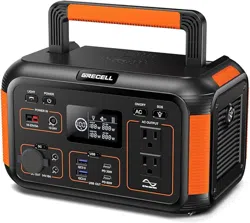
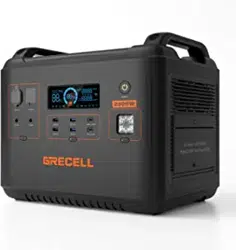
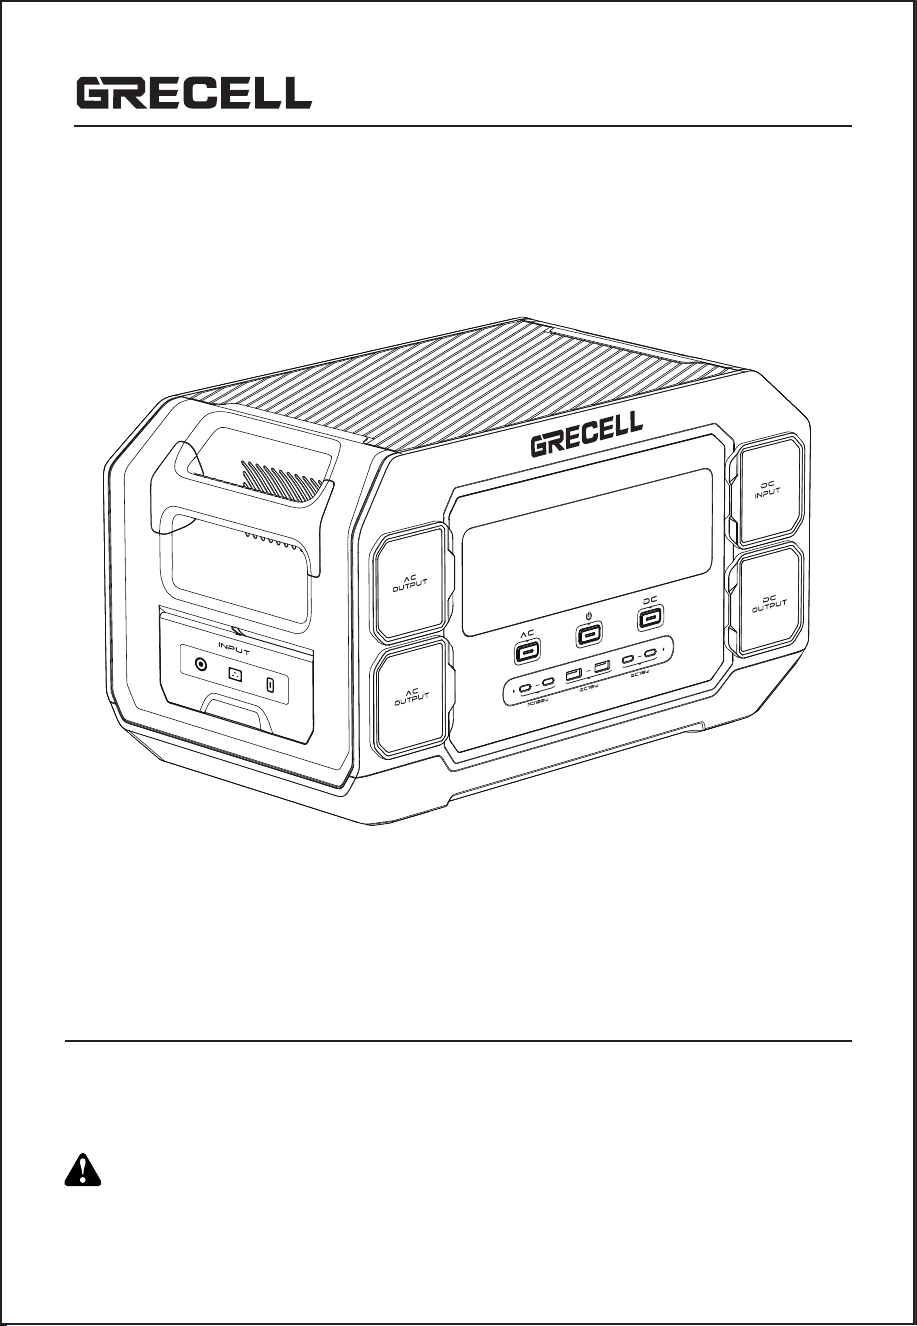
PRODUCT OVERVIEW
- 1 -
English
①
②
⑤
⑥
⑩
⑨
⑦
⑧
⑪
③
④
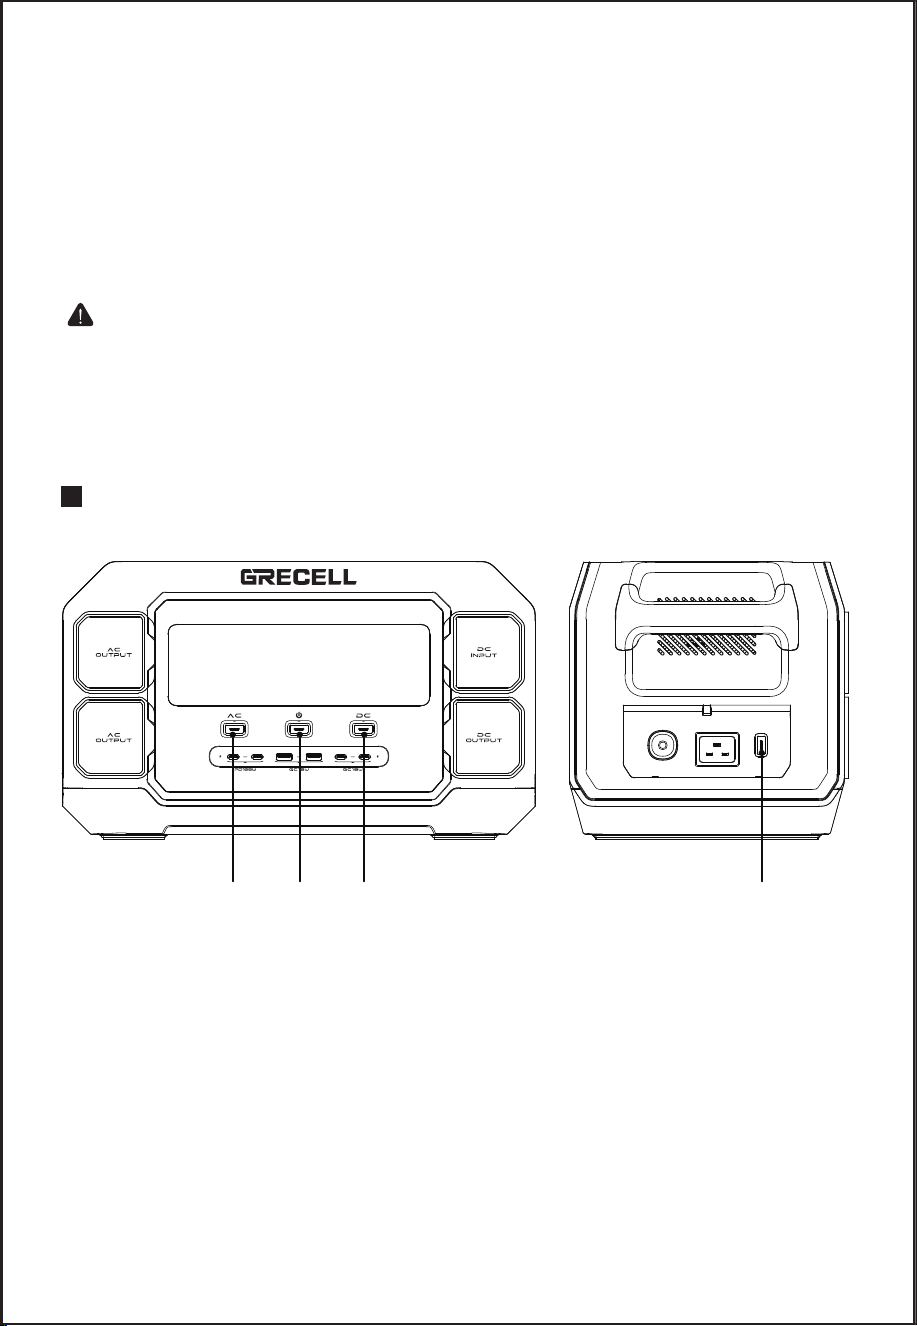
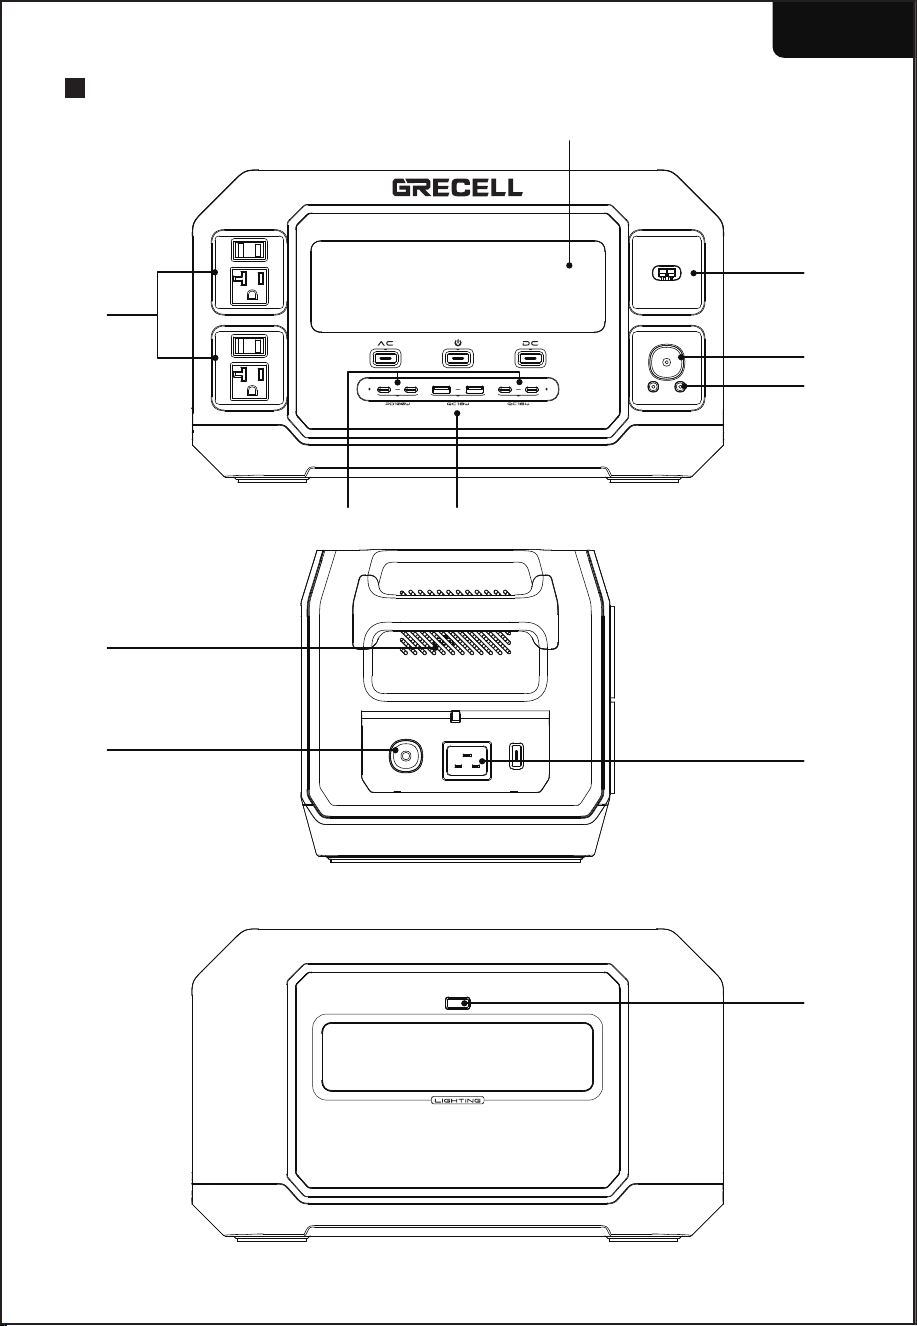
BUTTONS FUNCTION
- 2 -
①② ③ ④
①
②
③
④
⑤
⑥
LCD Screen Display
USB-C Outputs
USB-A Outputs
AC Outputs
Anderson Input
Car Outlet Output
①
②
③
④
Power On/Off Control Button/LCD Button
AC Control Button (50Hz/60Hz Switching Control)
DC Control Button
AC Input Button (600W/1200W Switching Control)
⑦
⑧
⑨
⑩
⑪
DC 55*25 Outputs
AC Input
Overload Protection
Air Intake Vent with Cooling Fans
LED Light
Reminder: If the battery with low power, please charge it before use.

- 3 -
Power On/Off Control Button/LCD Button
Long press the LCD button 3S to turn on/off the power station (other buttons
are valid only when the power station is turned on). Short press the LCD button
to turn on/off the LCD screen. Double click the LCD button to turn on/off ECO
mode. Long press the LCD button for 15S to reset the power station.
AC Control Button (50Hz/60Hz Switching Control)
1. Long press the AC button 2S to turn on/off the AC outputs.
2. Frequency Switching: In the open state, press and hold the AC button and
LCD button 3S at the same time to enter the 50Hz/60Hz frequency switching
state, 50Hz/60Hz icon flashing, click the AC button to switch 50Hz/60Hz
frequency, 5S no operation, AC switch to the set frequency.
3. In the AC output state, double-click the AC button to turn on/off the constant
power mode 2000W.
DC Control Button
Short press the DC button to turn on USB and DC, long press the DC button
2S to turn off USB and DC.
AC Input Button (600w/1200w Switching Control)
In the AC charging state, the default 600W, short press the AC input button to
switch the maximum input power 1200W (the button is invalid when there is no
charging).
Notice:
1. This product can be charged directly by the wall socket; please do not use
extension cords and cable taps.
2. When our product is charging, please do not plug other products in the same
socket. The current will be too high to bring damage to the cable and dire
risk. In a general household, when the same wiring exceeds 2200W, it will
activate the safety circuit breaker.
3. If the ambient temperature is too high or in the process of continuous
charging and discharging, the device may reach the set protection temperature
to enter the 2000W constant power output mode or enter the protection
mode due to the high temperature of the battery core, and then the normal
mode can be set when the temperature of the device is lowered.
●
●
●
●
- 4 -
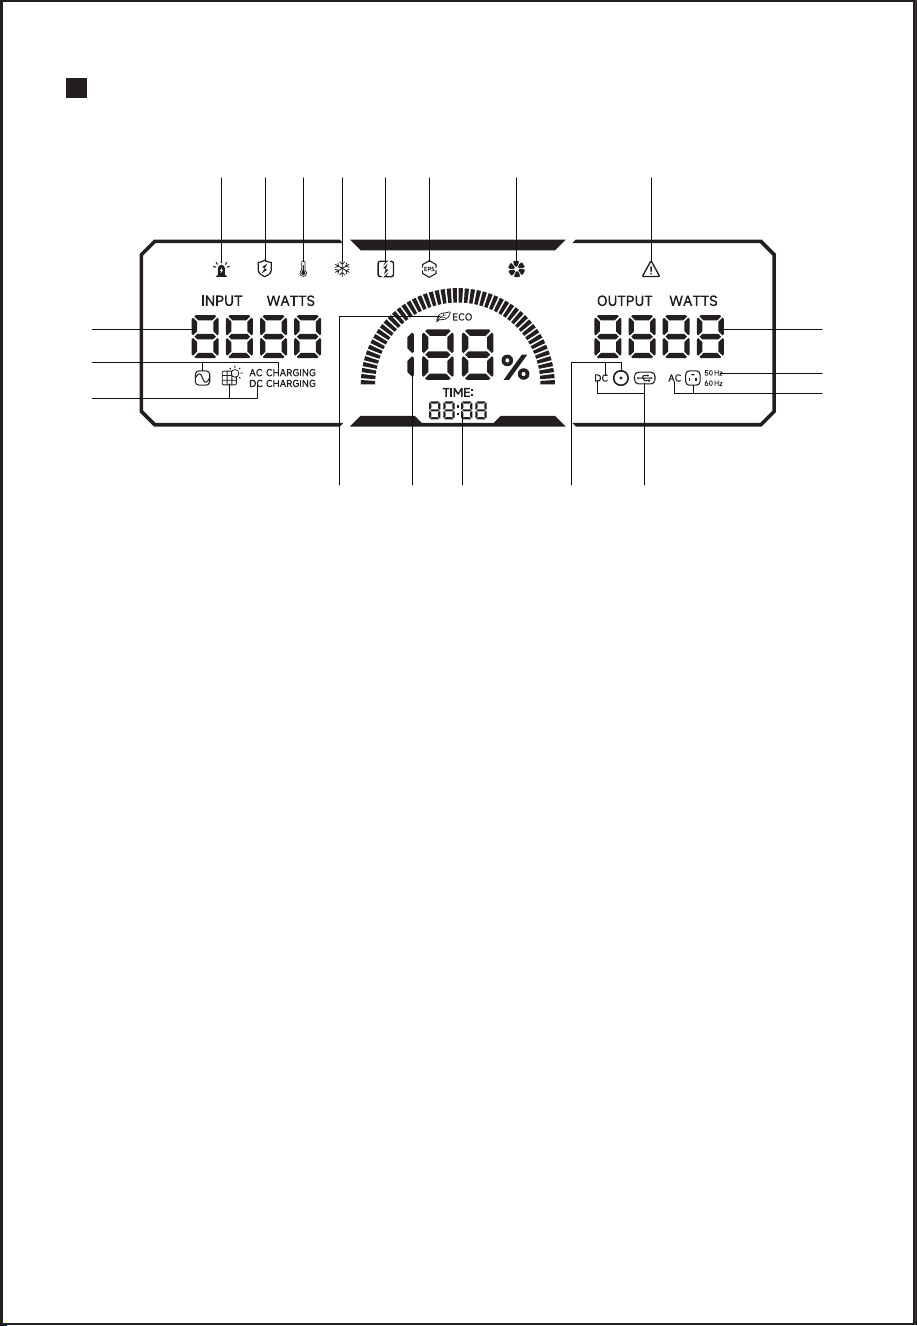
LCD FEATURES
Charging abnormality & warning
Trickle charge/Healthy charge
High temperature protection & warning
Low temperature protection & warning
Constant power mode
EPS mode
Fan status
Output abnormal protection & warning
Input power
AC charging status
DC Charging status
AC outlet auto reload
Battery level indicator
Charging time & available time
DC or car outlet output status
USB-A or USB-C output status
AC output status
50Hz or 60Hz AC output frequency
Output power
1
9
10
11
12 13 14 15 16
2 3 4 5 6 7 8
19
18
17
●
●
NOTE:
The LCD Screen will enter Sleep Mode after 60s of inactivity, and will Wake up
when inputting a charging cord or when any button is pressed.
When the battery level falls below 5%, "%" will flash.
1.
2.
3.
4.
5.
6.
7.
8.
9.
10.
11.
12.
13.
14.
15.
16.
17.
18.
19.
- 5 -
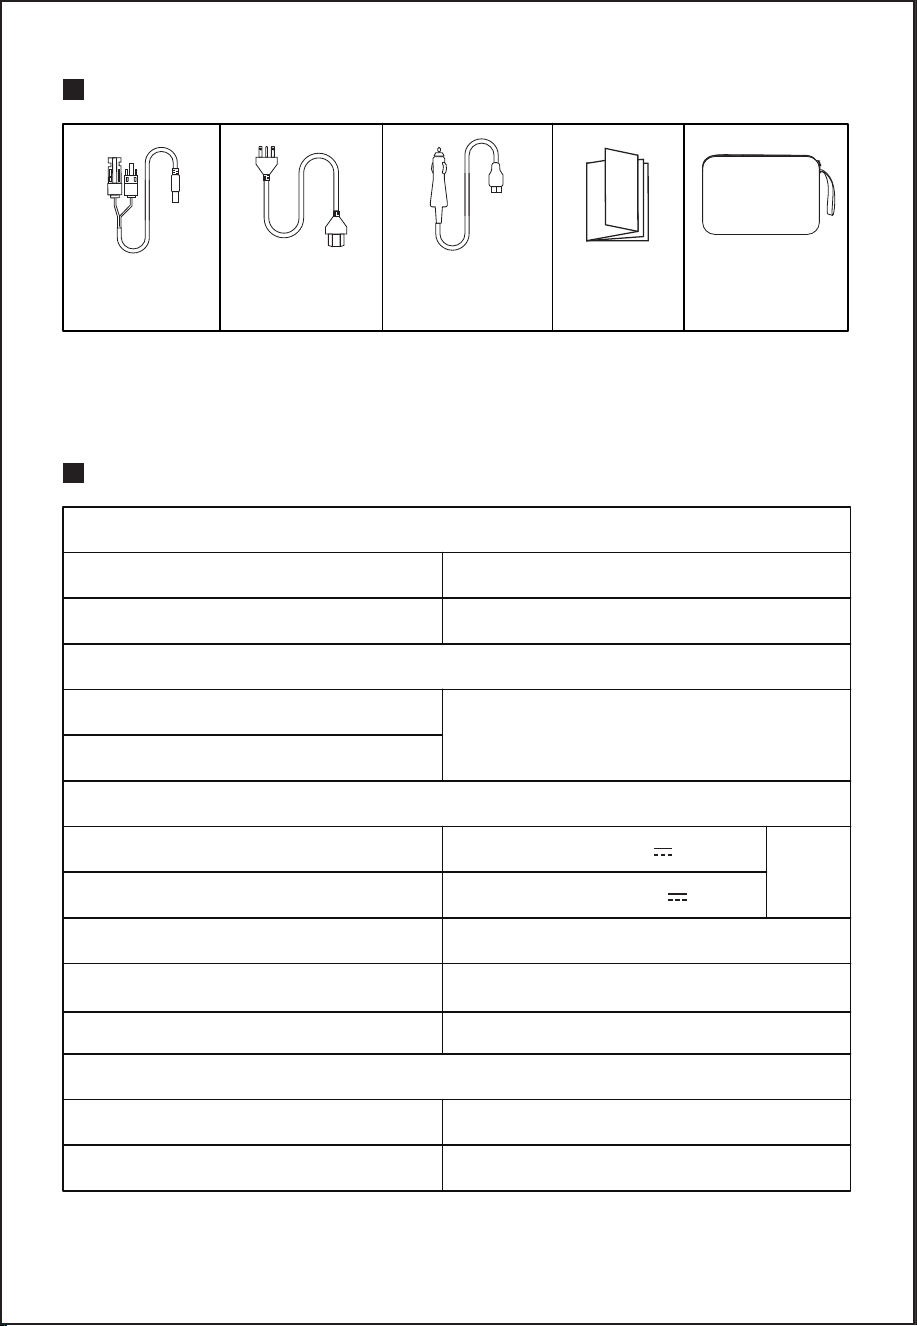
ACCESSORY LIST
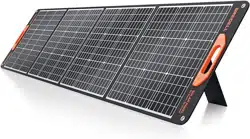
It is recommended to use 120W/200W/300W/400W/600W Solar Panels
(not included).
MC4 to Anderson
Cable
AC Charger Car Charger
User
Manual
Cable Storage
Bag
GENERAL SPECIFICATIONS
General Specs
Input
Output
Battery
Rated Capacity: 1126.4Wh (51.2V/22Ah/22000mAh)
Net Weight: about 15.8kg
Product Size: 39.6 x 23.45 x 23.36cm
Weight(including accessories): about 16.8kg
Recharging Input: AC100~120V,
50/60Hz 1200W Max
Battery Type: Lithium Iron Phosphate (LiFePo4)
Operating Temp: -10°C-40°C (14°F-104°F)
Charging Temp: 10°C-40°C (50°F-104°F)
Storage Temp: -20°C-60°C (-4°F-140°F)
Solar Charge Input: 12-60V/15A Max, 600W Max
Car Charger: 12/24V
AC Output Voltage: AC110V±10% - 50/60Hz
Rated Output Power: 2200W
Output Waveform: Pure Sine Wave
Overload Protection Power: 3600W
LED Light Output: 5W
Car Outlet Output: 13.3V 10A
DC 5.5*2.5 Output x 2: 13.3V 8A (each)
USB-C Output x 2: PD100W (each)
USB-A x2 I USB-C Output x 2: QC3.0 18W Max,
48W Total
Total
133W
Solar Panel (not included in the accessory) MC4 to Anderson
(included in the accessory)
+ +
- -
Device
Anderson port
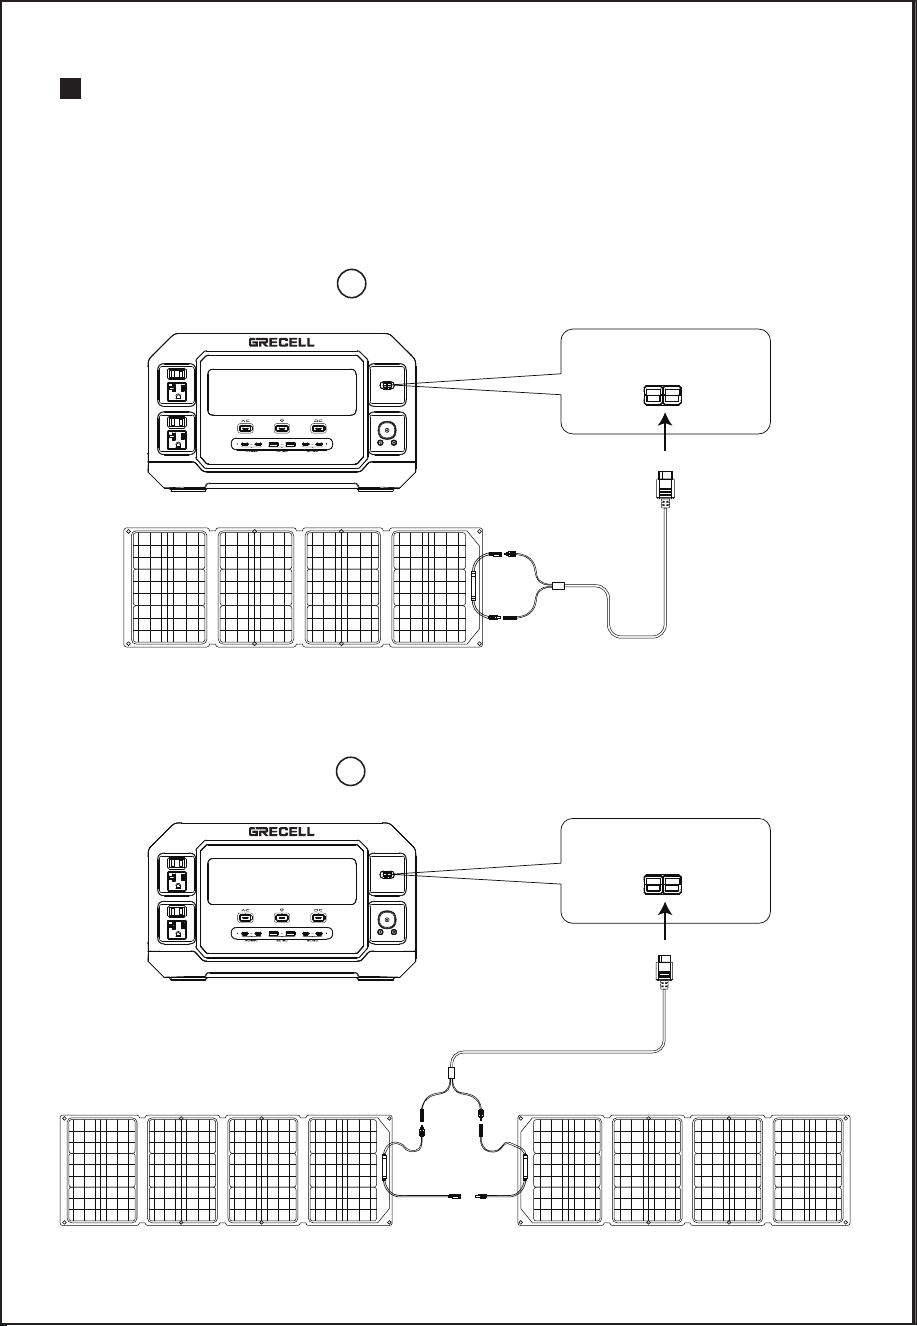
SOLAR PANEL CHARGING
Do not charge the unit via a solar panel that operates voltage exceeding 60V.
Support 600W max solar input (solar panels not included); the charging time
depends on the solar light intensity.
If the solar panels produce 600 watts of power then it can be fully charged within
2-3 hours.
Connecting Pattern 1
- 6 -
Solar Panel A(not included in the accessory) Solar Panel B (not included in the accessory)
MC4 to Anderson
(included in the accessory)
Device
+
-
+
-
+
-
Connecting Pattern 2
Anderson port
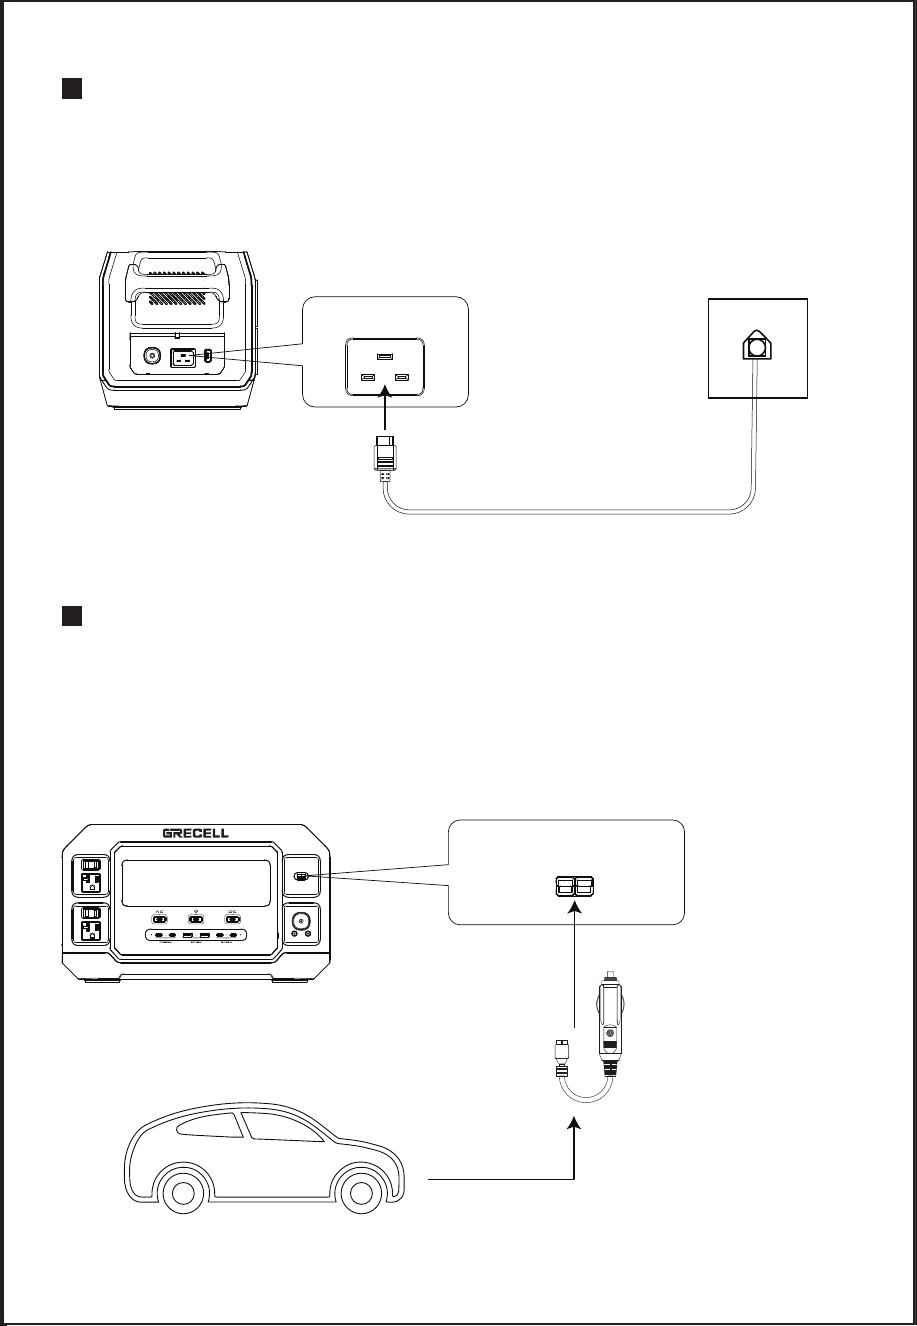
AC CHARGER CHARGING
Please use the AC charger that we provided to charge this unit.
It will be fully charged in about 125 minutes by a 600W AC input and in about 75
minutes by a 1200W AC input.
- 7 -
Device
Car charging cable
(included in the accessory)
CAR CHARGER CHARGING
Please use the car charger (12V) that we provided to charge this unit, and car
charging is usually low power of 90-120W, so the charging time will be long.
Charging time for 12V car charger is about 9-10 hours.
Charging time for 24V car charger is about 4.5-5.5 hours.
If you need a quick charge, it is recommended to use the AC adapter.
Anderson port
AC charging cable (included in the accessory)
Device
AC input
- 8 -
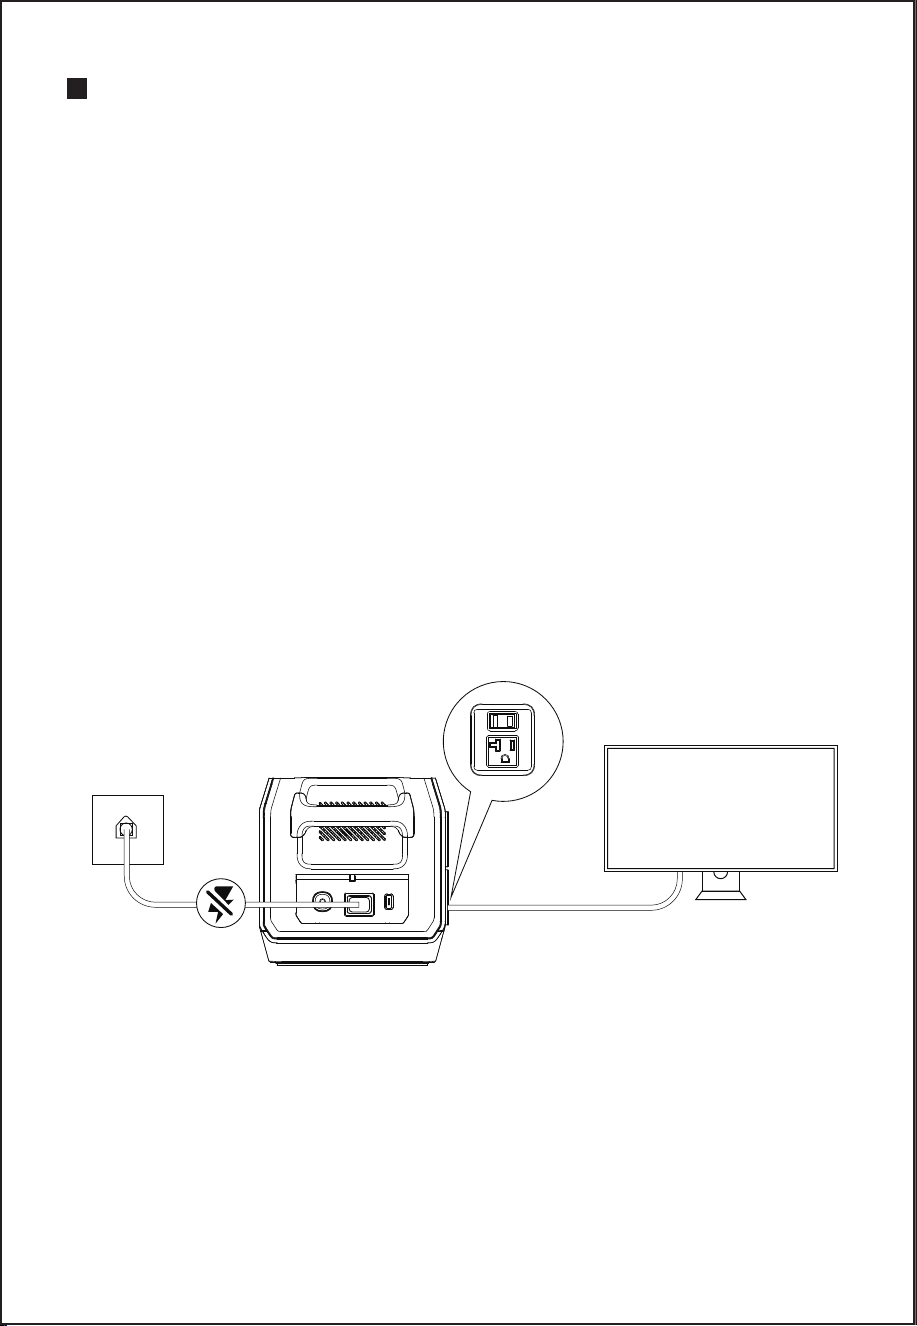
EPS Function
This product has the bypass mode, does not need to pass through the
battery, can directly output from the AC.
In EPS mode, when the AC input power of the mains is cut off due to a power
outage, the ac input power of the mains can be used in about automatic
switch to the product battery within 20 ms to ensure AC output.
EPS Connections
As shown in the figure below, connect the product between the socket on the
wall and the electrical appliances, and the power of the product is in the ON
state. When you turn on the power of the electrical appliances, it will directly
use the AC power of the power grid.
In this state, when the power grid is cut off, it will automatically switch to the
product’s internal battery to supply power.
※In EPS mode, when charging and discharging at the same time, AC is
straight through output, while charging power < 1200W;AC charging +AC
discharge total power ≤ 1920W.
EPS MODE
●
●
TV

OPERATING INSTRUCTIONS
Power Output Attention
Press output switch to select the desired outlet type. The output port must press
the corresponding button to activate the port. When activated, the LCD display
will turn on and provide detailed information about the charging output. When
no output is activated, the LCD screen will automatically turn off.
Cooling Fan
The equipment is designed with an internal cooling fan to ensure that the
product runs within the proper temperature range. When the device experiences
a high output load, it will automatically turn on the fan. During discharging and
charging, the fan may run intermittently to keep the internal temperature within
the operating range. When the AC circuit is activated, the fan is likely to start to
ensure normal operation.
● Fan on condition
The cell temperature is greater than 55°C±5°C or the AC output power is
greater than 1000W or the inverter radiator temperature is greater than
90°C±5°C.
Overload Protection (Rated Power Mode)
Rated power 2200W, Load ≤ 2200W for long-term operation.
2.45KW < load ≤ 2.88KW, enter overload protection after 5-10 seconds;
2.88KW < load ≤ 3.6KW, enter overload protection after 1-5 seconds;
load > 3.6KW, immediately enter overload protection.
After the overload is released, press the button to restore normal output.
Constant Power Mode
Basically compatible with 99% load < 2000W resistive equipment;
Does not support constant power when AC charging;
When Load > 2.0KW, enter constant power 2000±50W;
When Output voltage=90V±5V and power > 2100W, shutdown after 5-10S.
Power Saving Sleep Mode (ECO Mode)
When the output power of the device is less than 5W, the device will go into
hibernation after more than 8 hours, and the input can be "awakened" when the
input is charged or any button is pressed. When not in use, press the switch
button to turn off the output.
- 9 -

FAULT RESOLUTION
- 10 -
Fault Code
E1
E2
E3
E5
E6
E7
E9
E19
E21
E22
E23
DC and BMS communication
abnormality
DC main control and DC auxiliary
control communication abnormality
DC and inverter (AC)
communication abnormality
USB-A output abnormality
USB-C output abnormality
DC discharge abnormality
Lighting output abnormality
Abnormal car outlet output
Remove the load, check the load
specifications, and turn the output
back on
Remove the load, check the load
specifications, and turn the output
back on
Remove the load, check the load
specifications, and turn the output
back on
Remove the load, check the load
specifications, and turn the output
back on
BMS-Battery single unit
over-voltage
Remove the charger, insert the
load and discharge to recover the
voltage
BMS-Battery total voltage
over-voltage
Remove the charger, insert the
load and discharge to recover the
voltage
BMS-Battery single
undervoltage
Remove the load, plug in the
charger and charge to recover the
voltage
Reboot
Reboot
Reboot
Reboot
Fault Type Fault Release Operation

- 11 -
BMS-Battery total voltage
undervoltage
Remove the load, plug in the charger
and charge to recover the voltage
BMS-Charging overcurrent
protection
Check the charger specifications,
remove the charger
BMS-Discharge overcurrent
protection
Remove the load, check the load
specifications, plug in the charger
BMS-Discharging short circuit
Remove the load, check the load
specifications, Plug in the charger
BMS-High Charging temperature Wait for the temperature to normalize
BMS-Low Charging temperature Wait for the temperature to normalize
BMS-High Discharging temperature Wait for the temperature to normalize
BMS-Low Discharging temperature Wait for the temperature to normalize
BMS-High pcb temperature Wait for the temperature to normalize
BMS-Low pcb temperature Wait for the temperature to normalize
BMS-High MOS temperature Wait for the temperature to normalize
BMS-NTC failure After-sales service
BMS-AFE reference
voltage abnormality
After-sales service
Low grid voltage
Remove the charging cable, check the
grid specifications, reboot and charge
High grid voltage
Remove the charging cable, check the
grid specifications, reboot and charge
Low grid frequency
Remove the charging cable, check the
grid specifications, reboot and charge
High grid frequency
Remove the charging cable, check the
grid specifications, reboot and charge
Battery undervoltage
Remove the charger, insert the load
and discharge to recover the voltage
BMS-Charging short circuit
Check the charger specifications,
remove the charger
E24
E26
E27
E28
E29
E30
E31
E32
E33
E34
E35
E36
E40
E42
E50
E51
E52
E53
E56

- 12 -
High battery voltage
Remove the charger, plug in the
load and discharge until the voltage
is restored
Overload alarm
Remove the load, check the load
specifications, and turn the output back
on
PV over-voltage
Remove the charger, check the PV
panel specifications, turn on again and
charge
PV overcurrent
Remove the charger, check the PV
panel specifications, turn on again and
charge
Abnormal PV power mode
Inverter NTC abnormal
Remove the charger, check the PV
panel specifications, reboot and charge
PV charging software detection
timeout without normal charging
Remove the charger, check the PV
panel specifications, reboot and charge
AC connection abnormal
Remove the charger, check the charger
specifications, reboot and charge
Software detection startup
timeout
Remove the load, reboot
Inverter output short circuit
Remove the load, check the load
specifications, reboot
Low bus voltage Remove the load, reboot
High bus voltage Remove the load, reboot
Bus short circuit
Remove the load, check the
load specifications, reboot
Inverter overcurrent
Remove the load, check the load
specifications, Reboot
Reboot
E58
E59
E60
E61
E62
E74
E76
E77
E82
E83
E84
E85
E86
E87

- 13 -
Heat sink over temperature
Wait for normal the temperature,
Reboot
Battery discharge overcurrent
Remove the load, check the load
specifications, Reboot
Battery charging overcurrent
Remove the charger, check the charger
specifications, reboot and charge
Abnormal Inverter output
Remove the load, check the load
specifications, reboot
Inverter output always
overloaded
Remove the load, check the load
specifications, reboot
Abnormal Input relay
Remove the charger, check the charger
specifications, reboot and charge
Fan failure Remove the load, reboot
E89
E90
E91
E93
E94
E95
E96
Please contact our after-sales service to deal with it if the fault is not lifted
after operation.
●
TROUBLE SHOOTING
The device does not discharge
① Check whether the connecting wire has been inserted in right place;
② Check whether the total output power exceeds the rated output power;
③ Check whether the temperature of the equipment is too high.
The device is not charging
① Confirm that the AC socket on the wall and the AC charging cable are fully
inserted into the AC input terminal;
② Confirm whether the battery pack wiring is in good condition and whether the
switch of the battery pack is turned on;
③ The device cannot be charged immediately after it is discharged. Please put
it aside for an hour and try again, because it may enter the over-temperature
protection.

- 14 -
WARNING
Please avoid using the product near high temperatures, high humidity, direct sun
environment, and fireplace. Excessive temperature will lead to reduced service life,
overheating and fire. Extremely cold conditions below the specified storage range
can also impair the performance and service life of the equipment.
Please keep away from corrosive chemicals and gases.
Do not disassemble or modify this product; it will cause malfunction and fire.
Please discard or recycle the product according to the methods prescribed by local
laws.
Be careful not to drop the product from a high place and give the product a strong
impact.
Keep or use the product in a place out of the reach of children.
Please use our company's genuine accessories. The damage caused by
non-genuine supplements cannot be repaired free of charge.
Please leave a space of about 30cm away from the side suction and exhaust ports
not to affect the product's heat dissipation.
When not using this product, please turn off the power and unplug the power cord.
Please avoid storing the product in a place exposed to direct sunlight with high
temperature and humidity.
For long-term storage, please consume power from full power to no power once
every three months and then recharge to about 50%. Keep it indoors, at normal
temperature, and the maximum storage time shall not exceed 6 months.
Please do not use this product and its accessory cables and connecting equipment
when there is a defect.
Please do not store the product for a long time in highly high and low-temperature
places such as in the car and the field warehouse to avoid shortening the battery life.
EQUIPMENT CLEANING
Equipment Cleaning
Please make sure that the device is disconnected from all input power and
output devices. Wipe with a clean, dry, non-soft cotton cloth. Remove all any
foreign objects, dirt or other obstructions on the vents on both sides.
While cleaning foreign objects in the side vents, do not allow debris, dirt or other
blockage to enters the equipment.
Do not use corrosive cleaners or solvents.
Do not use compressed air to clean the side cooling vents, as it will cause
foreign particles to enter the interior and cause a short circuit.
Note: To avoid the risk of electric shock, do not use metal objects to clean the
ports.

- 15 -
A photovoltaic panel as input for charging the internal battery shall be provided
with an inverter and/or a charge controller in accordance with UL 1741 or UL
62109-1; The external power supply shall be a power source in accordance with
the Standard UL 60950-1 and CAN/CSA C22.2 No. 60950-1, or UL 1310 and
No. 1, CAN/CSA C22.2 No. 223, or No.1, CAN/CSA C22.2 No. 223; A
vehicle adapter that complies with the enclosure and input contacts requirements
in the Standard for Vehicle Battery Adapters, UL 2089, and Power Supplies,
CAN/CSA C22.2 No. 107.1. The connector plug shall incorporate a fuse or other
protective device having a current rating not greater than 15 A.
INSTRUCTIONS PERTAINING TO RISK OF FIRE, ELECTRIC SHOCK, OR
INJURY TO PERSONS.
IMPORTANT SAFETY INSTRUCTIONS
1. WARNING – When using this product, basic precautions should always be
followed, including the following:
a) Read all the instructions before using the product.
b) To reduce the risk of injury, close supervision is necessary when the product
is used near children.
c) Do not put fingers or hands into the product.
d) Use of an attachment not recommended or sold by power pack manufacturer
may result in a risk of fire, electric shock, or injury to persons.
e) To reduce the risk of damage to the electric plug and cord, pull the plug rather
than the cord when disconnecting the power pack.
f) Do not use a battery pack or appliance that is damaged or modified.
Damaged or modified batteries may exhibit unpredictable behavior resulting in
fire, explosion, or risk of injury.
g) Do not operate the power pack with a damaged cord or plug, or a damaged
output cable.
h) Do not disassemble the power pack, take it to a qualified service person
when service or repair is required. Incorrect reassembly may result in a risk of
fire or electric shock.
i) To reduce the risk of electric shock, unplug the power pack from the outlet
before attempting any instructed servicing.
j) WARNING – RISK OF EXPLOSIVE GASES.
1) To reduce the risk of battery explosion, follow these instructions and those
published by the battery manufacturer and manufacturer of any equipment you
intend to use in the vicinity of the battery. Review cautionary marking on these
products and on engines.
k) PERSONAL PRECAUTIONS
1) Have plenty of fresh water and soap nearby in case battery acid contacts
skin, clothing, or eyes.
NOTE

- 16 -
2) Wear complete eye protection and clothing protection. Avoid touching eyes
while working near the battery.
3) If battery acid contacts skin or clothing, wash immediately with soap and
water. If acid enters the eye, immediately flood the eye with running cold water
for at least 10 minutes and get medical attention immediately.
4) NEVER smoke or allow a spark or flame in the vicinity of the battery or
engine.
5) Be extra cautious to reduce the risk of dropping a metal tool onto the battery.
It might spark or short-circuit battery or other electrical parts that may cause an
explosion.
l) When charging the internal battery, work in a well-ventilated area and do not
restrict ventilation in any way.
m) Under abusive conditions, liquid may be ejected from the battery; avoid
contact. If contact accidentally occurs, flush with water. If liquid contacts eyes,
additionally seek medical help. Liquid ejected from the battery may cause
irritation or burns.
n) Do not expose a power pack to fire or excessive temperature. Exposure to
fire or temperature above 130°C may cause an explosion. The temperature of
130°C can be replaced by the temperature of 265°F.
o) Have servicing performed by a qualified repair person using only identical
replacement parts. This will ensure that the safety of the product is maintained.
SAVE THESE INSTRUCTIONS.

- 17 -
Do not place equipment and its accessories in the trash. Items must be properly
disposed of following local regulations. See www.epa.gov for additional
information.
DISPOSAL/RECYCLE
All GRECELL products come with a full 2-year limited warranty from the date of
purchase (accessories excluded). It will be out of guarantee if damaged due to
incorrect use or force majeure.
WARRANTY
This device complies with Part 15 of the FCC Rules. Operation is subject to the
following two conditions: (1) This device may not cause harmful interference,
and (2) this device must accept any interference received, including interference
that may cause undesired operation.
Warning: Changes or modifications not expressly approved by the party responsible
for compliance could void the user's authority to operate the equipment.
Note: This equipment has been tested and found to comply with the limits for a
Class B digital device, pursuant to Part 15 of the FCC Rules. These limits are
designed to provide reasonable protection against harmful interference in a
residential installation.
FCC Statement