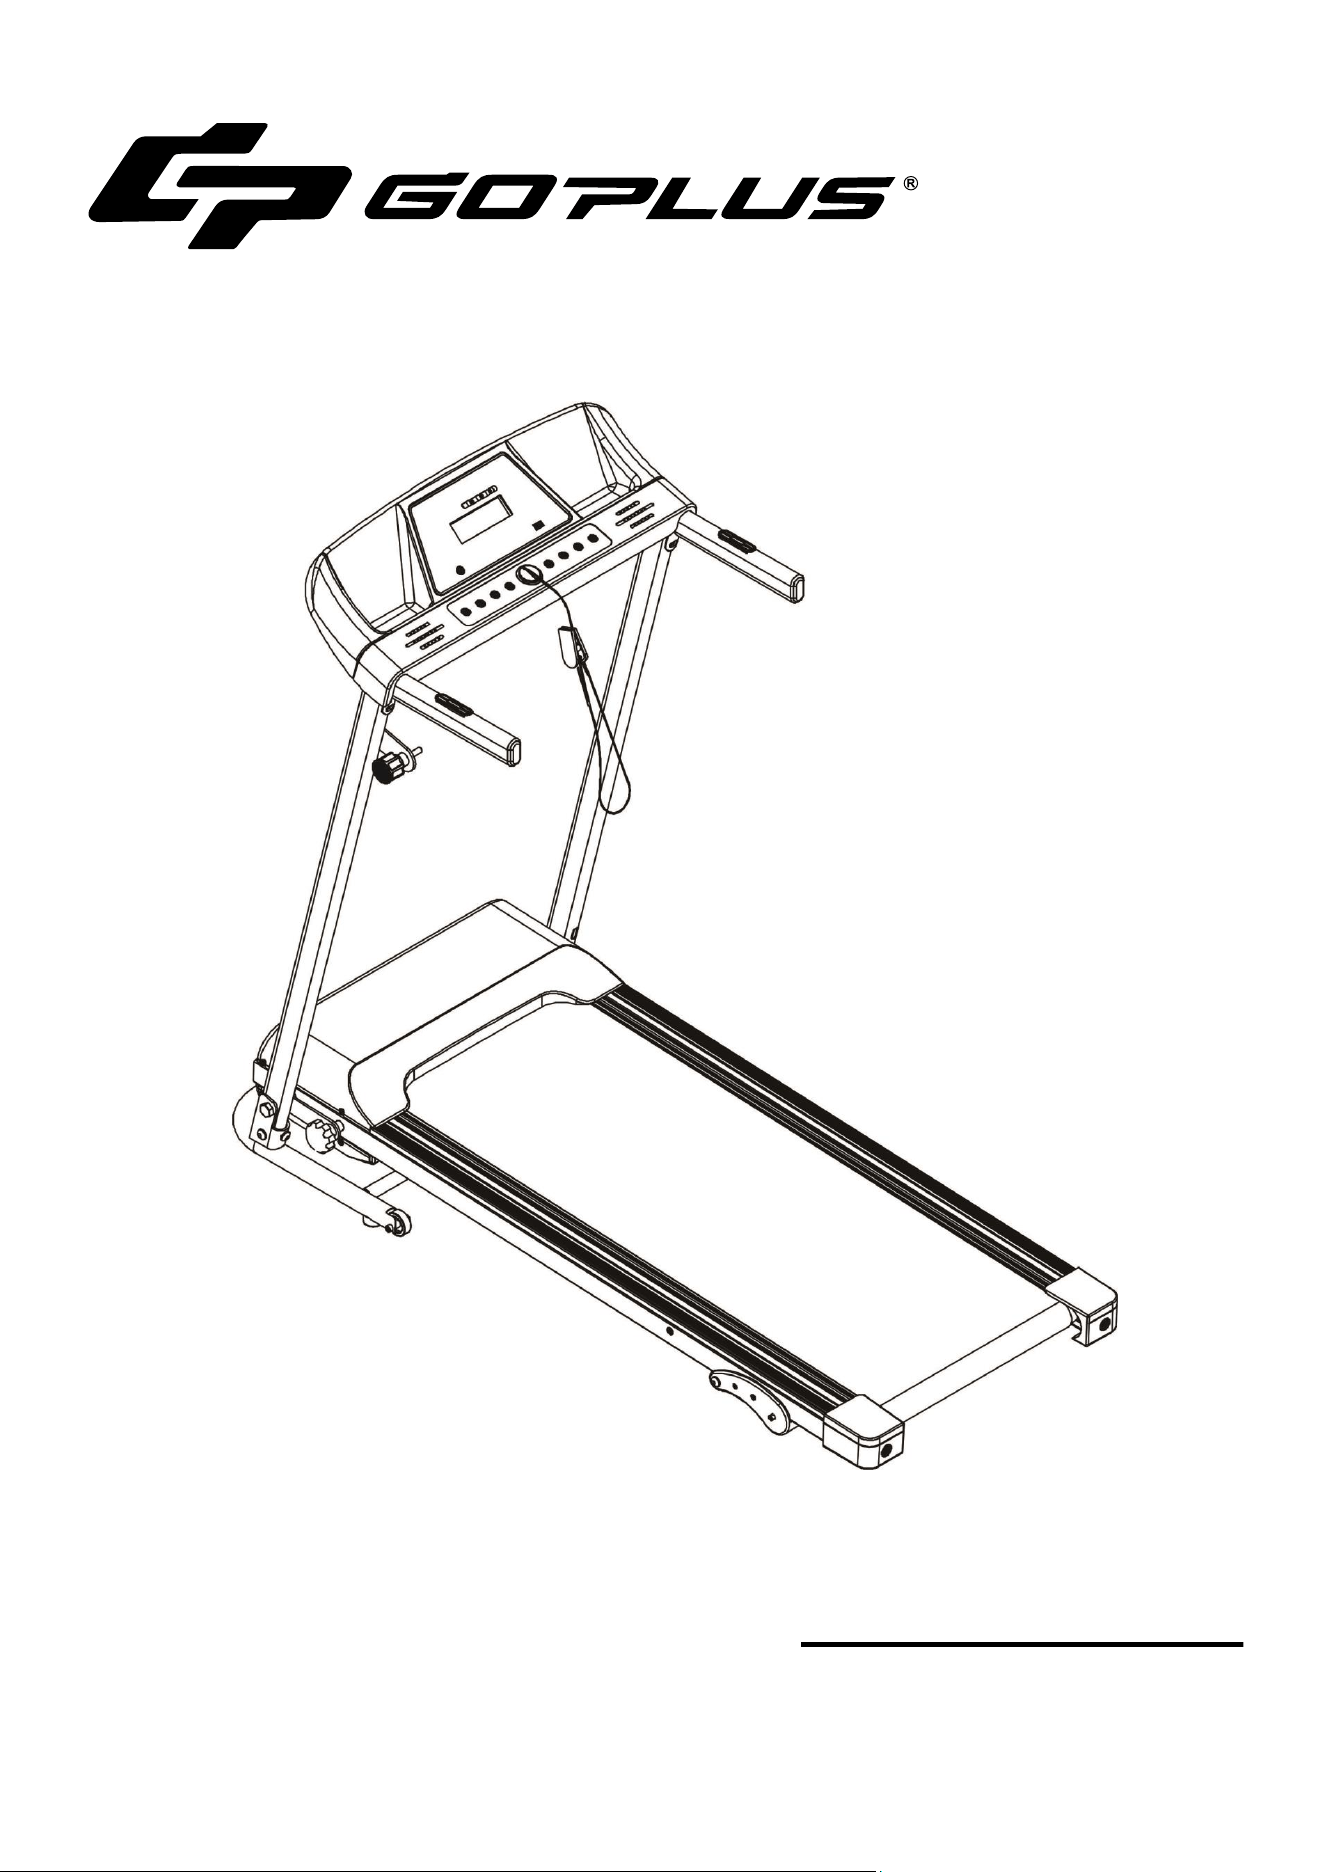
USER'S MANUAL
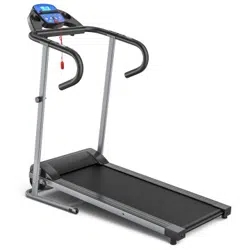
MOTORIZED TREADMILL
SP36921

1. CAUTION
To avoid any hurts, please read this manual carefully before using.
◼ For safety purpose, do not stand on running belt while start.
◼ Please stop immediately if you experience any kind pain, including but not limited to chest pains,
nausea, dizziness, or cramp.
◼ Please speed up slowly if needed.
◼ Adjustment of belt is prohibited during using.
◼ It is suggested to wear sports shoes while using this equipment.
◼ Children, the elder, the pregnant, and patients are prohibited from using this machine.
◼ Please clip the safety key on your clothing during using.
◼ Please firmly hold the handle bars during using.
2. SAFETY AND NOTIICE
◼ Please put the machine on flat ground. It is unsuitable to put the machine at following places:
① Outdoors.(The machine is specially designed for indoor use only)
② Slant ground or slant places on balcony.
③ Sunlight area or near heater.
④ Noisy places.
◼ The proper power for the machine is A.C 110V.
◼ Error may appear on display if the power is not stable. Please do not use the same socket
together with computer, air conditioner etc.
◼ It is suggested to wear sports shoes and gym suit while use the machine.
◼ Please speed up or speed down slowly.
◼ Make sure no child or other object is near while folding or unfolding the machine.
◼ The treadmill should not be located near water or wet object. Error or damage may be caused if
water or other liquids drop into the equipment.
3. CAUTION DURING USE
◼ If you do not feel well before using, please consult your doctor or coach.
◼ Please unplug the equipment when not in use.
◼ Please unplug the treadmill before cleaning, moving or change parts for the machine.
◼ Children, the elder and the pregnant are prohibited from using the machine. Patients should
consult their doctor before starting any exercise routine.
◼ Please place the machine on a level flat surface. There should be 2M of clearance behind the
treadmill.
◼ Do not start the machine when it is folded.
◼ Keep all electrical components, especially motor, power cord and plug, away from water or other
liquids.
◼ Do not wear clothes, such as long dress, that might catch on any part of the treadmill while using.
◼ Do not place the treadmill in area that will block any vent or air openings.
◼ Do not put any objects on the machine.
◼ Put away the plug from heated place or fire seat.
◼ Please switch off all functions and pull out plug after using.
◼ Do not stand on the belt while you’re preparing to use the treadmill.
◼ Do not disassemble the machine without consulting professional technicians.
◼ Please make sure the running belt is fastened before using.
4. TECHNICAL SPECIFICATION
Product name
Treadmill
Voltage
110V
Frequency
60Hz
Power
1HP
Speed
0.5-6.5MPH
Net weight
27.7KG
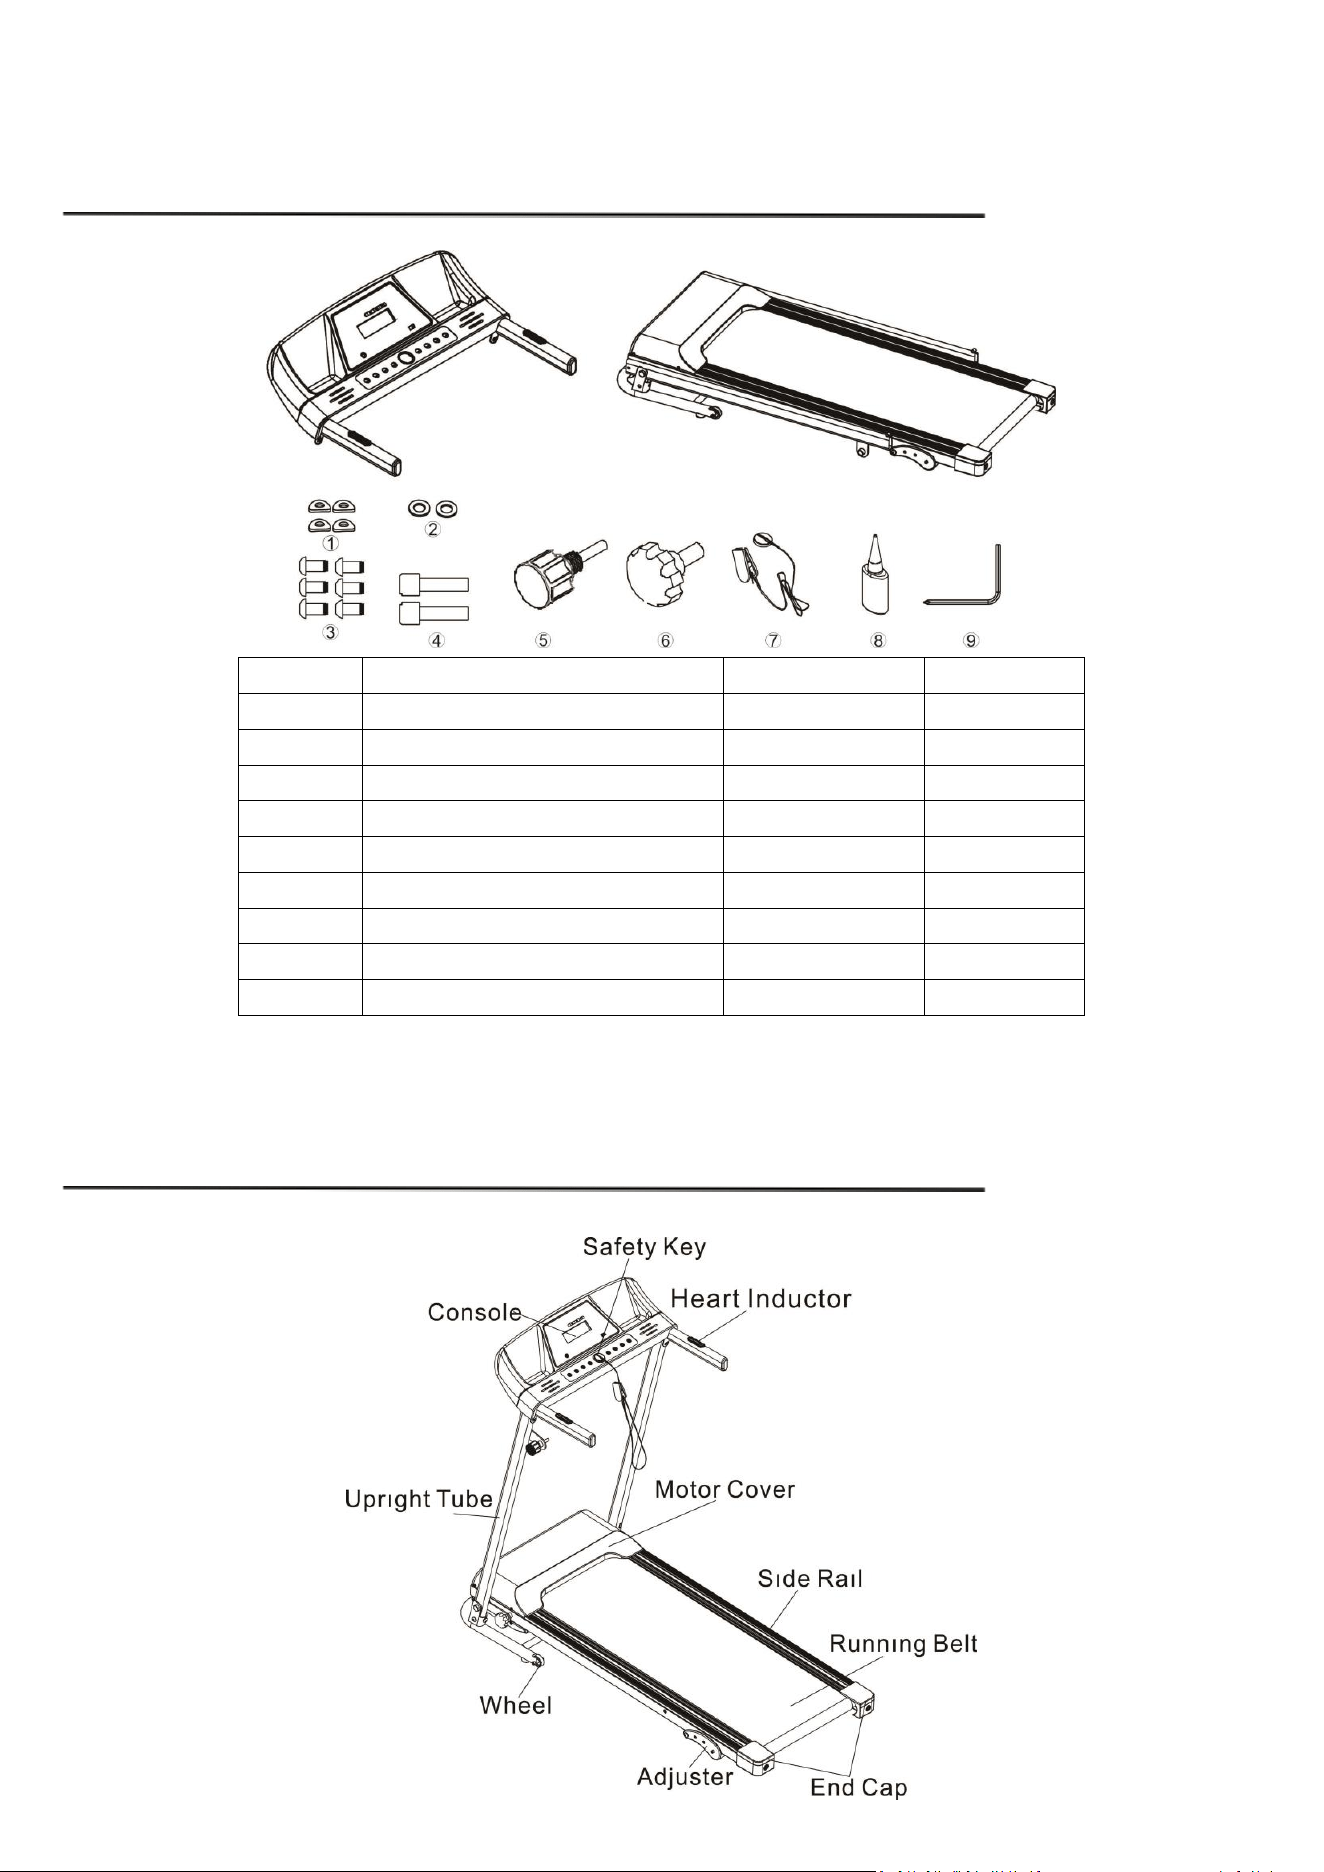
5. PRODUCT SPARE PARTS
Serial NO.
Part Name
qty
unit
1
Ф8 PAD
4
PCS
2
Ф8 WASHER
2
PCS
3
M8×16mm SCREW
6
PCS
4
M6×25mm SCREW
2
PCS
5
M16×30mm SIDE KNOB
1
PCS
6
M12×20mm LOCKING KNOB
1
PCS
7
SAFETY KEY
1
PCS
8
SILICON OIL
1
PCS
9
HEX KEY
1
PCS
6. PRODUCTS MAIN PARTS
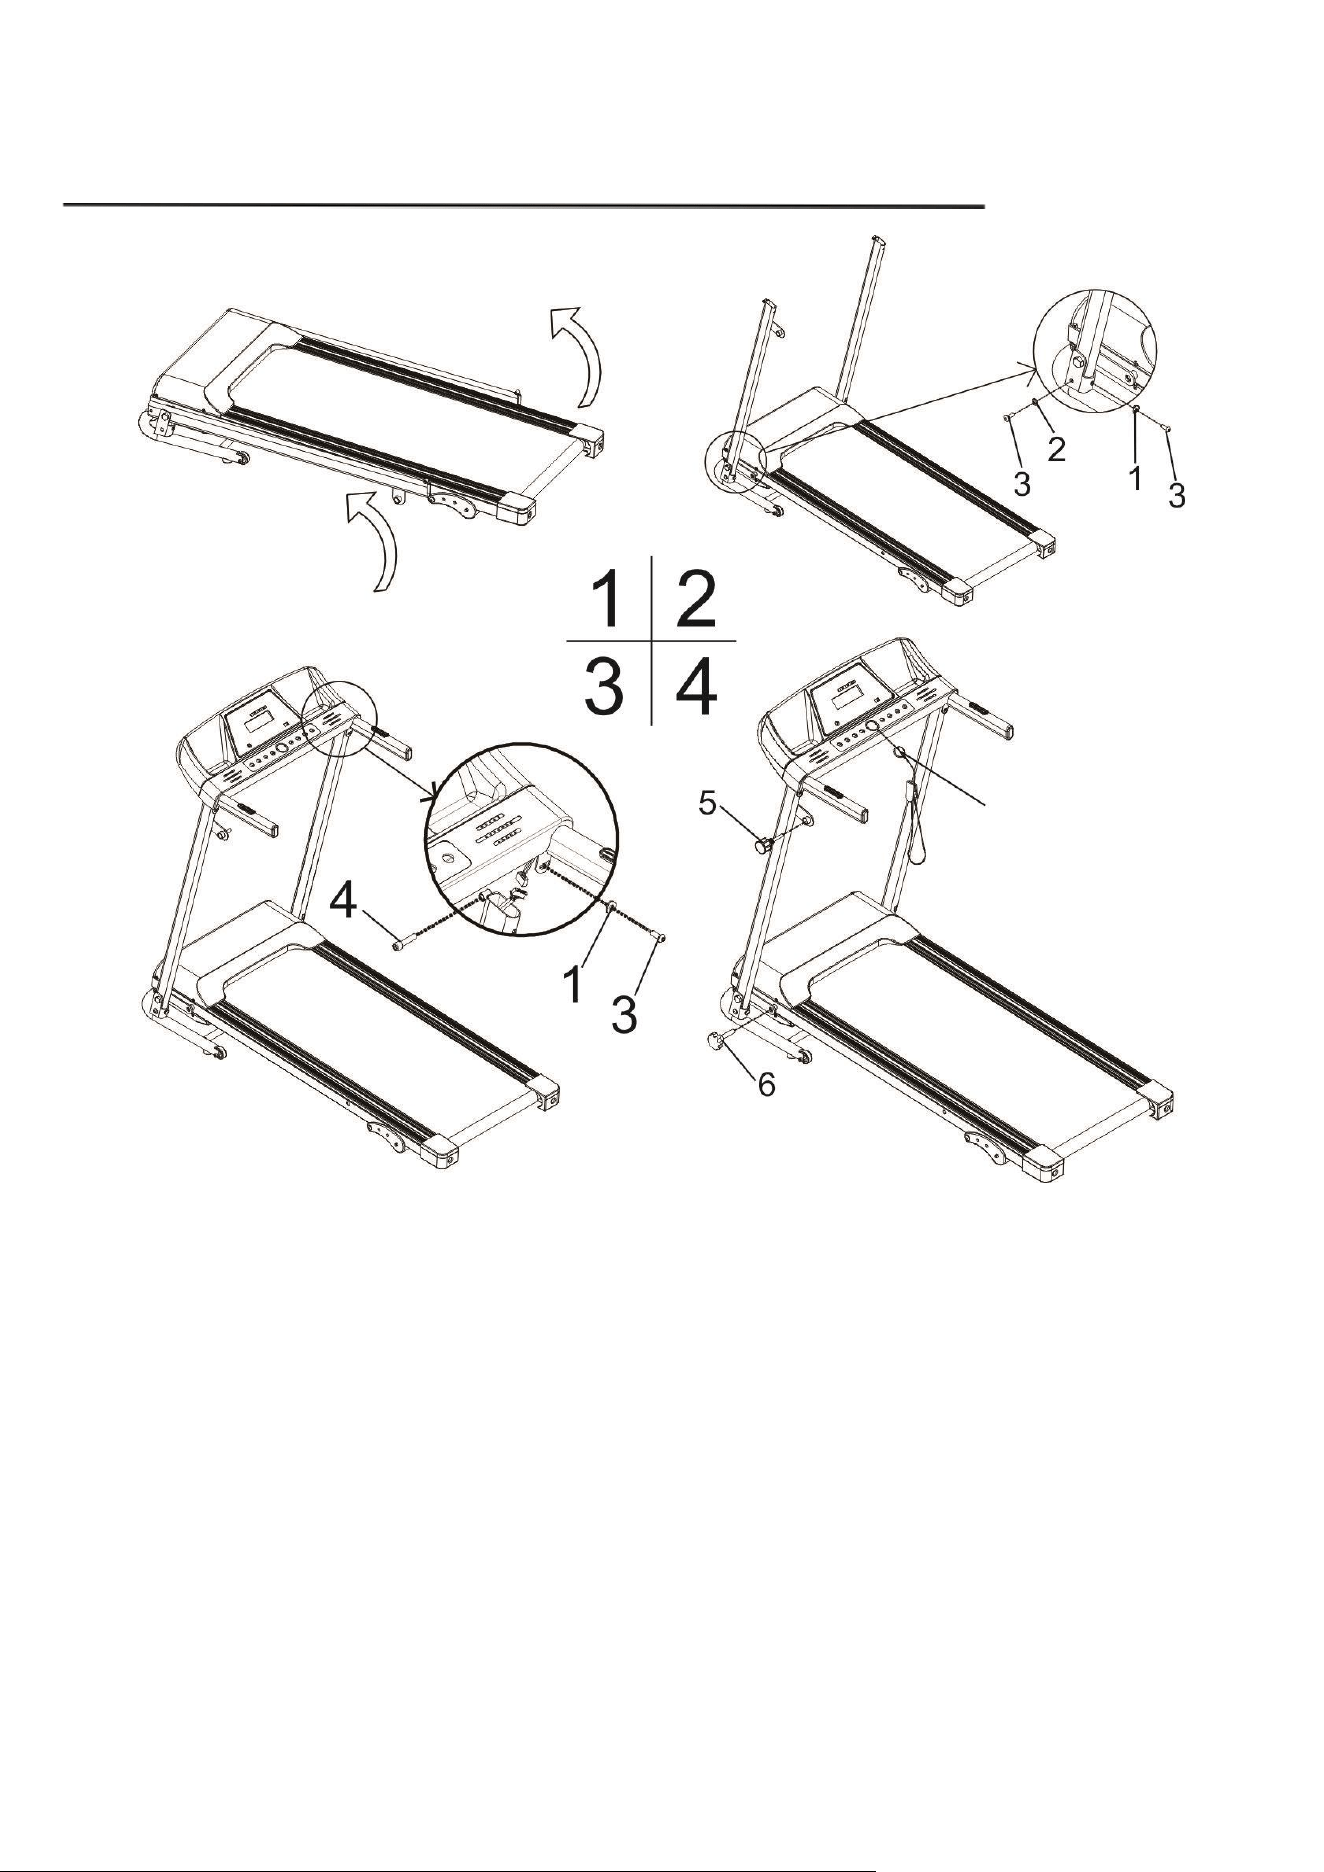
7. ASSEMBLY
1、Take out the treadmill from the carton.Unfold the upright tubes and secure one side with two part 3 screws,a part 2
washer and part 1 pad,repeat on the other side.
2、Join the connector from the control panel to the corresponding connector within the upright tube.Attach the
control panel to the upright tubes and secure with two part 4 screws and two part 3 screws and two part 1 pads.
3、Screw in the part 6 locking knob and screw in the part 5 side knob.
4、Place part 7 safety key.
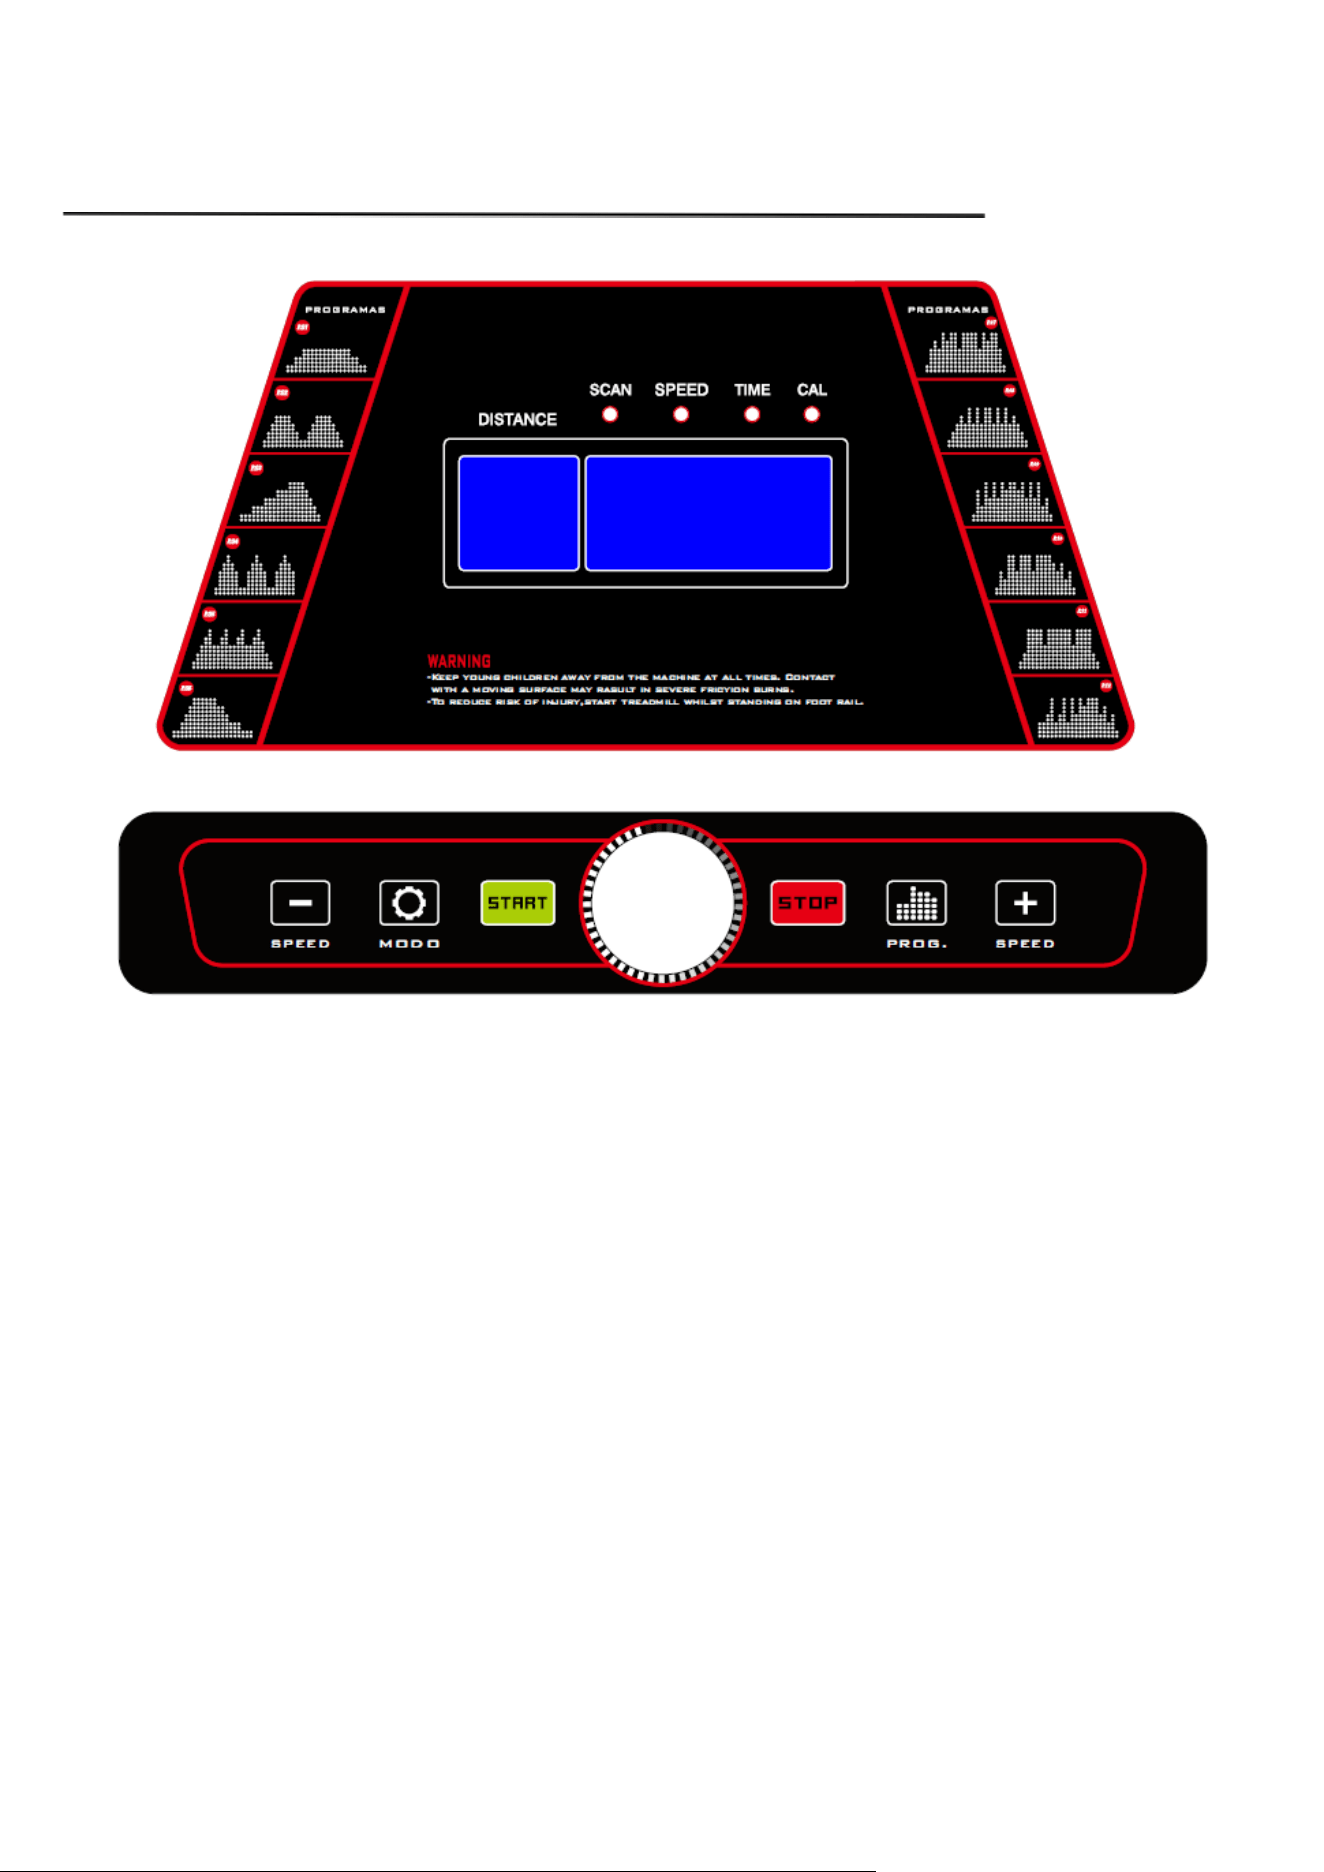
8. CONSOLE INSTRUCTON
1. Press "START" key, the machine will start by 0.5MPH after 3 seconds.
2. Press"+" key for speed up and "-" key for low down. The fastest speed is 6.5mph and lowest is
0.5mph.
3. Press "mode" key,the screen will show Speed、Time、Calories. And the scan light will light from
speed、time、calorie every 5 seconds.
4. Display monitor has 12 programs from P1-P12. While on standby, press “PROG” to set the
programs then press “START” to start the machine.
5. While the machine is in use and running, during the auto programs the (-) and (+) keys are not
available. If you want to stop the auto programs, select “STOP” or remove the safety key, then turn
on again or place safety key back on. Then select desired speed.
6. For emergency stop,please pull out the safety key. The machine will stop very slowly. Pull out
safety key and the screen will show “Err”, put it back and on it will show “OFF”.
7. Press "STOP" key to stop the machine after using.
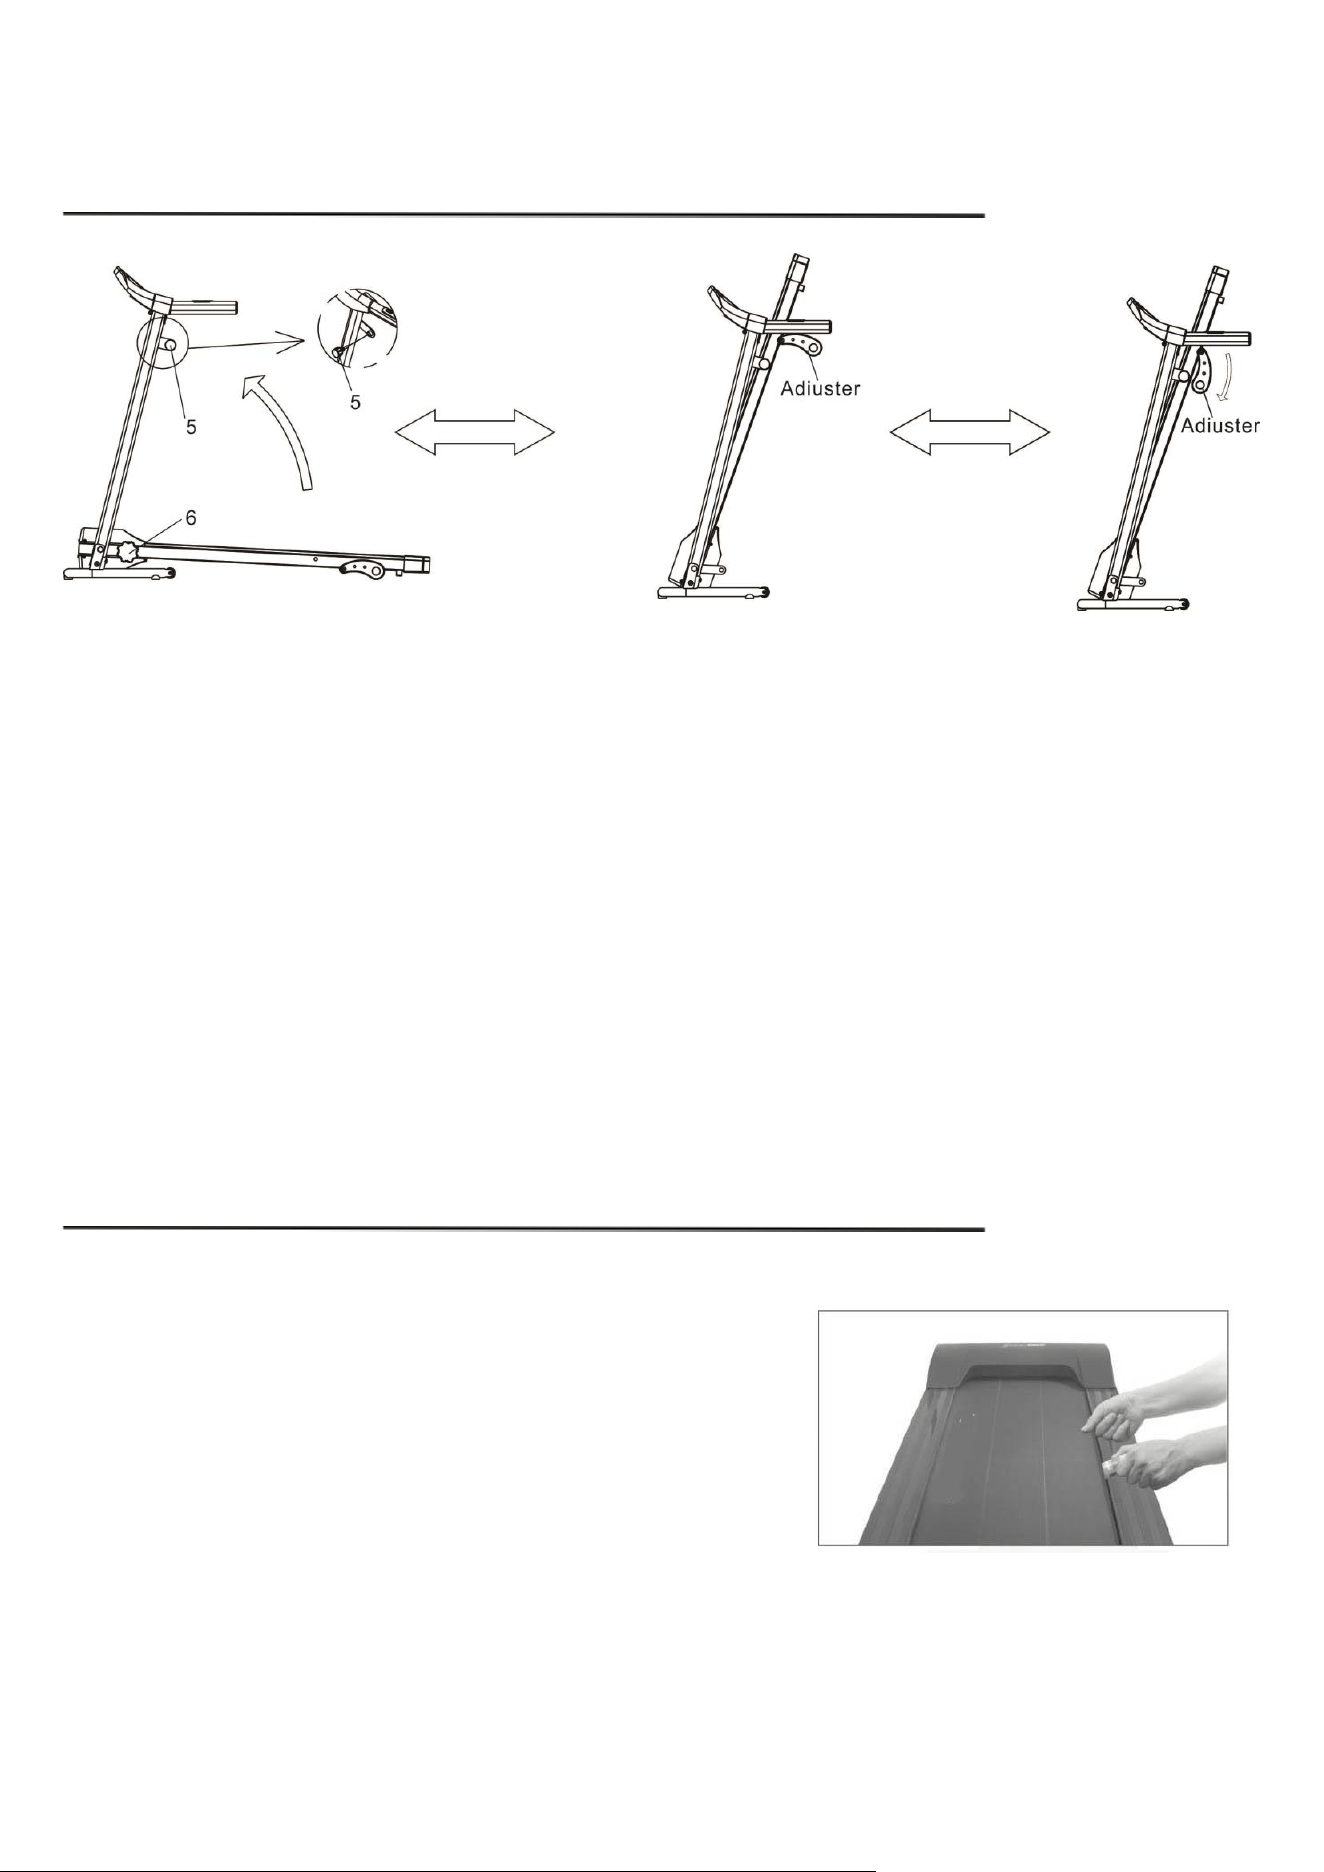
9. FOLDING UP AND SETTING DOWN
Fold:
Loosen the part 6 locking knob and pull down the adjuster, then lift up the running board to fold the
treadmill. Secure the frame to the running board by tightening the part 5 side knob on the left upright
tube.
Unfold:
Release the tension on the part 5 side knob and unfold the treadmill. Pull up the adjuster and tighten
the part 6 locking knob to lock the treadmill in place.
10. USAGE OF SILICONE OIL
Pull up the running belt slightly, apply silicone oil to the
backside of the belt and the top surface of the running deck.
Start the machine and keep it running for 3 minutes so that
the oil spread and even out. It is necessary to maintain your
treadmill like this every 30 working hours of the machine for optimal performance, which also helps
extend the service life of parts.
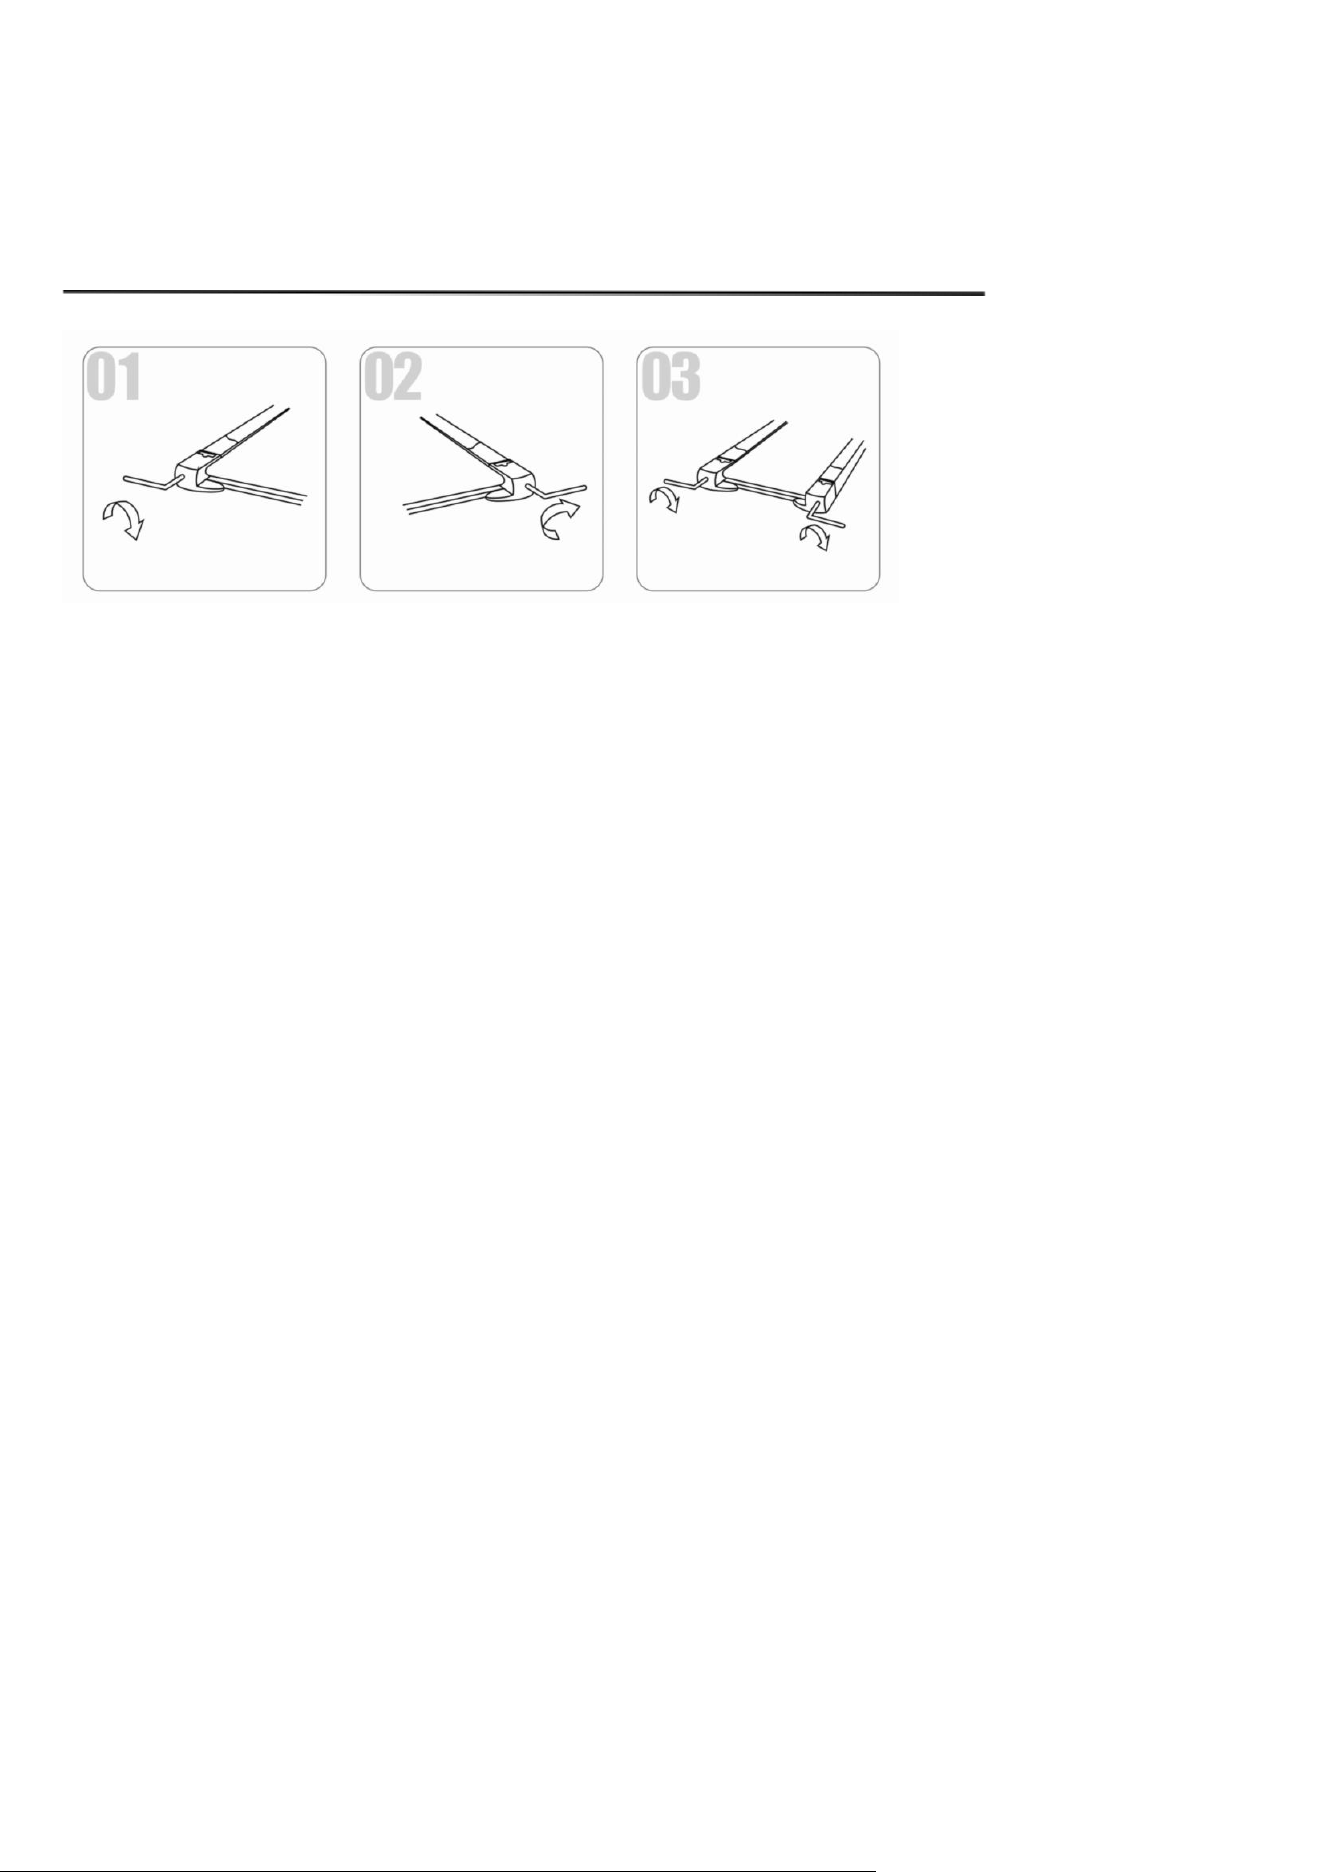
11. RUNNING BELT ADJUSTMENT
(1) Running belt deviate to left
Start the machine by speed at 2-3KM/H without loading, use Allen wrench to screw the bolt 1/4 turn
clockwise (see fig1). Keep the machine running without loading for 1-2 minutes to gauge. Repeat the
previous step if more adjustment is needed, until the belt moves to the center.
(2) Running belt deviate to right
Start the machine by speed at 2-3KM/H without loading, use Allen wrench screw the bolt 1/4 turn
clockwise (see fig2). Keep the machine running without loading for 1-2 minutes to gauge. Repeat the
previous step if more adjustment is needed, until the belt moves to the center.
(3) Running belt slipping
If the running surface becomes slipping, tighten bolts on both ends 1/2 turn clockwise (see fig3)
with Allen key. Repeat if necessary until the belt is properly adjusted.
(3) Running belt logjam
If the running belt is in dead condition, loosen bolts Allen wrench to make the screw 1/2 circle both
left and right till this logjam solved.

12. TROUBLE SHOOTING
Error Code
Meaning
Problem
Solution
Err(or E00)
No Safety key on Panel
Safety key is not on
the panel or it is not
properly put on
1. Put safety key in the yellow area of panel
2. Err(or E00) still shows or there is no function,
change the computer screen/display monitor.
E2
Control Board Error
Control board is
broken or pseudo
soldering on control
board
Replace control board
E4
Control Board Error
Control board is
broken
Replace control board
E5
Overcurrent Protection
Control board short
circuit or motor
blocked
1. Open the motor cover and check whether the
motor is blocked. Remove the block if yes.
2. Replace the control board if it’s not blocked,
or the error still shows.
E6
Motor Error
Motor broken or motor
line fall off
1. Open the motor cover and check whether the
motor is broken or whether the motor wire is
connected to control board properly. Reconnect
the wire is recommended.
2. Replace the control board if the error still
shows.
E7
Communication
Failures
Wires from the control
board to panel board
are broken or not
properly connected
1. Make sure the wires from the control board
and panel board are connected securely and not
damaged.
2. Replace the control board if the error still
shows.
E8
Overload Protection
Excess of electricity or
user exceeded max
load weight
1. Make sure the user does not exceed max
weight capacity.
2. Reconnect power and re-start the machine.
3. Replace the control board if the error code still
shows.