Loading ...
Loading ...
Loading ...

21
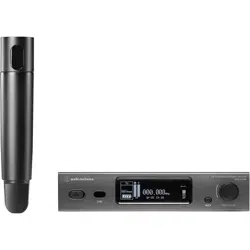
Setting ATW-R3210N
Setting network
By connecting a receiver to a Windows PC/Mac, you can monitor and
control the status of the receivers and the transmitters using a
dedicated application, Wireless Manager.
Setting the receiver's ID No.
1. From the menu screen, turn the control dial, select [NETWORK]
and then press the control dial.
2. Turn the control dial, select [DEVICE ID] and then press the
control dial.
3. Turn the control dial, select the device ID and then press the
control dial.
• The setting is complete.
Setting the IP
1. From the menu screen, turn the control dial, select [NETWORK]
and then press the control dial.
2. Turn the control dial, select [IP SETTING] and then press the
control dial.
3. Select an item you want to set and press the control dial.
IP Mode Set how to obtain IP addresses.
[Auto]: IP addresses are automatically
assigned.
[Static]: Set to use the specified static IP
addresses.
IP Address* Specify static IP addresses.
Subnet Mask* Set the subnet mask.
Gateway* Set the gateway.
*This item can be set only when [IP Mode] is set to [Static].
4. Set each item.
Setting the remote control
1. From the menu screen, turn the control dial, select [NETWORK]
and then press the control dial.
2. Turn the control dial, select [REMOTE CTRL] and then press the
control dial.
3. Select an item you want to set and press the control dial.
Port Set the IP port number.
Notification Receive notifications from the receiver.
LVL Notify* Set whether to include the AF and RF level
in the notification from the receiver during
remote control.
Multicast Port* Set the port number for multicast.
Multicast IP* Set the address for multicast.
*This item can be set only when [Notification] is set to [ON].
4. Set each item.
Setting the log message
Set whether to send the log message to the Syslog server.
1. From the menu screen, turn the control dial, select [NETWORK]
and then press the control dial.
2. Turn the control dial, select [SYSLOG] and then press the control
dial.
3. Turn the control dial, select [On] or [Off] and then press the
control dial.
• The setting is complete.
• Syslog is a standard for transferring log messages across IP networks. It
is used for administration of computer systems and security monitoring.
Setting automatic detection by the application
1. From the menu screen, turn the control dial, select [NETWORK]
and then press the control dial.
2. Turn the control dial, select [DISCOVERY] and then press the
control dial.
3. Turn the control dial, select [On] or [Off] and then press the
control dial.
• The setting is complete.
Setting NTP
Set the NTP (Network Time Protocol).
1. From the menu screen, turn the control dial, select [NETWORK]
and then press the control dial.
2. Turn the control dial, select [NTP] and then press the control
dial.
3. Select an item you want to set and press the control dial.
NTP Set whether to enable or disable the NTP
(Network Time Protocol).
Server address*
1
Set the NTP server address.
Port*
1
Set the NTP port number.
Time Zone*
1
Set the time difference from the UTC
(Coordinated Universal Time).
DST*
1
Turn on/off the daylight saving time.
Date*
2
Set the starting/ending date of daylight
saving time.
Time*
2
Set the starting/ending time of daylight
saving time.
*1 This item can be set only when [NTP] is set to [ON].
*2 This item can be set only when [DST] is set to [ON].
4. Set each item.
Loading ...
Loading ...
Loading ...
