
Loading ...
Loading ...
Loading ...
Part 1 – Introduction
13
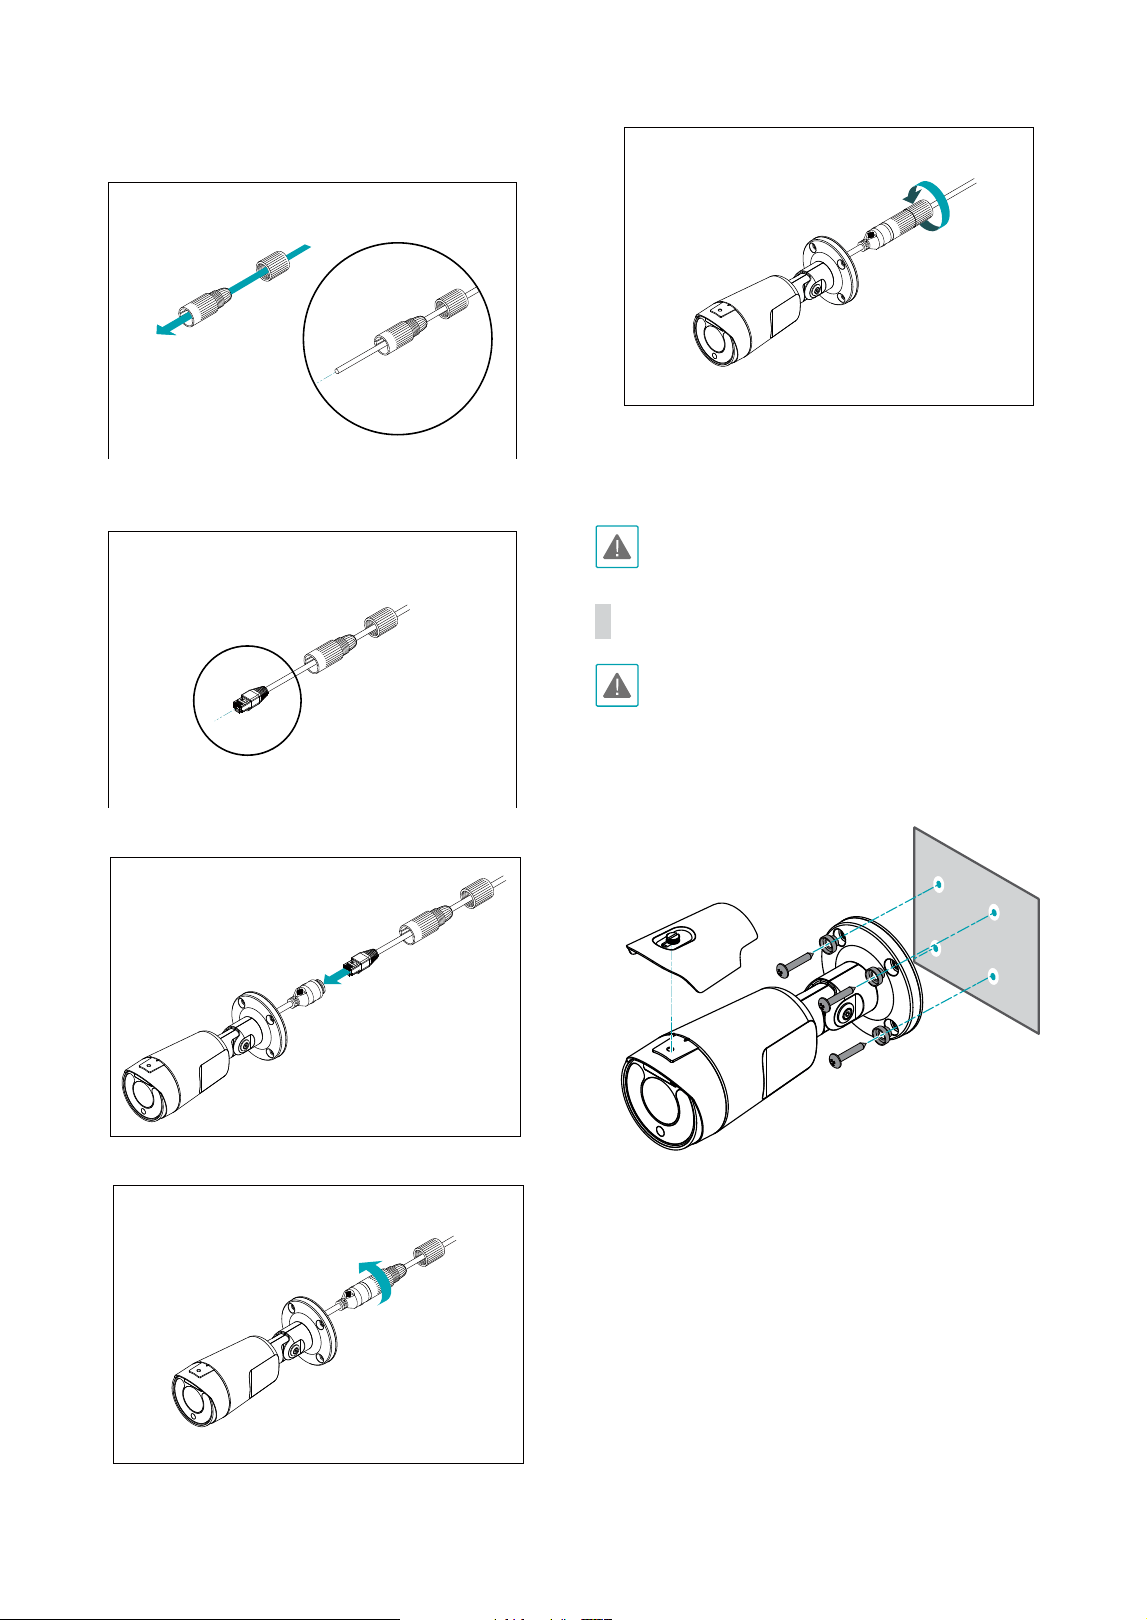
1
Insert a round rubber ring (silicone rubber) into the
RJ45 jack.
1
2
3
4
5
6
RJ45 waterproof rubber ring
RJ45 modular jack
RJ45 connector protect cover
cable waterproof rubber ring
(The waterproof rubber ring is fastened to the connector protect cover.)
RJ45 connector back cover
2
Insert the network cable into the waterproof cap,
rubber bushing, and waterproof cap body in order.
1
2
3
4
5
6
RJ45 waterproof rubber ring
RJ45 modular jack
RJ45 connector protect cover
cable waterproof rubber ring
(The waterproof rubber ring is fastened to the connector protect cover.)
RJ45 connector back cover
3
Plug in the network cable.
1
2
3
4
5
6
RJ45 waterproof rubber ring
RJ45 modular jack
RJ45 connector protect cover
cable waterproof rubber ring
(The waterproof rubber ring is fastened to the connector protect cover.)
RJ45 connector back cover
4
Connect the plug terminal to the RJ45 jack.
1
2
3
4
5
6
RJ45 waterproof rubber ring
RJ45 modular jack
RJ45 connector protect cover
cable waterproof rubber ring
(The waterproof rubber ring is fastened to the connector protect cover.)
RJ45 connector back cover
5
Push the waterproof cap body and cap into the RJ45
jack and rotate it.
1
2
3
4
5
6
RJ45 waterproof rubber ring
RJ45 modular jack
RJ45 connector protect cover
cable waterproof rubber ring
(The waterproof rubber ring is fastened to the connector protect cover.)
RJ45 connector back cover
6
Lock the waterproof cap into the waterproof cap
body.
Not pulling the cable back may cause water to seep in
and damage the product.
Installation
• Check the wall or ceiling to see if it needs to be
reinforced. The camera may fall o if the wall or
ceiling is not strong enough to support its weight.
• Install the camera in a shaded area. If the camera
is installed in direct sunlight, it may be aected
adversely.
1
Screw the camera sun shield to the camera using the
screw and rubber provided with the camera.
2
Screw the bottom cover to the wall or ceiling by
using screws(4) and bushings(4) provided with the
camera.
Loading ...
Loading ...
Loading ...