Loading ...
Loading ...

3
Specifications
Ambient operating
temperature:
–50 °C to +60 °C {–58 °F to +140 °F}
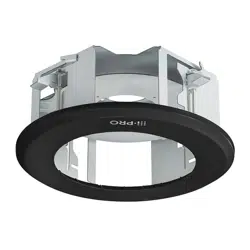
Dimensions: ø328 mm × 153 mm (H)* {ø12-29/32 inches × 6-1/32 inches}
*Including decorative cover thickness: 17.5 mm {11/16 inches}
Mass: Approx. 2.0 kg {4.42 lbs}
Finish: Main body: Surface treatment steel sheet
Decorative cover:
ABS resin i-PRO white <WV-QEM506-W>
Black <WV-QEM506-B>
Precautions for installation
In order to prevent injury, the product must be securely mounted to the ceiling
according to the Installation Guide.
This product is designed to be used indoors.
This product is not operable outdoors. Do not expose this product to direct sunlight for hours
and do not install the product near a heater or an air conditioner. Otherwise, it may cause
deformation, discoloration and malfunction. Keep this product away from water and moisture.
Installation area for this product
Make sure that the installation area is strong enough to hold
the total weight of the camera assembly before installation.
The installation area shall have 165 mm {6-1/2 inches} or
more space behind the ceiling.
The thickness of the ceiling board for installation can range
between 9mm {11/32inches} and 40mm {1-9/16inches}.
Make sure to remove this product if it will no
longer be used.
165mm
{6-1/2inches}
or more
Ceiling board: between
9mm {11/32inches} and
40mm {1-9/16inches}
Standard Accessories
Safety wire* .......................................... 1 pc.
Safety wire angle* ................................. 1 pc.
Fixing screw for attachment plate (M4 × 8 mm
{5/16 inches}) ........5 pcs. (of them, 1 for spare)
Template ............................................... 1 pc.
Decorative cover ................................... 1 pc.
* The product is shipped in a state where the safety wire is attached to the safety wire angle.
Other items that are needed (not included)
Anchor bolt (M10)* .............................. 2 pcs. Nut (M10) .......................................... 6 pcs.
* One anchor is used for securing the mounting chassis, and the other anchor is used for
connecting the safety wire. (See Step2)
IMPORTANT
• Prepare anchor bolts according to the material and strength of the area where the prod-
uct is to be installed. The pull-out strength of the anchor bolt shall be more than 5 times
of the total weight of the installed devices (including the camera body, ceiling mount
bracket, anchor bolts, and all other parts).
Loading ...
Loading ...
Loading ...
