1
3139 115 2xxx1
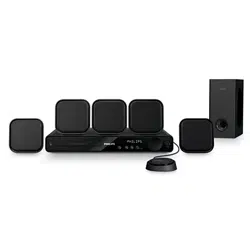
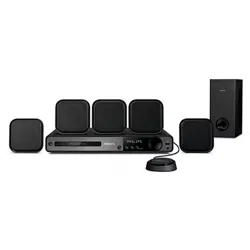
DVD HOME THEATER SYSTEM
HTS3050
Thank you for choosing Philips.
Need help fast?
Read your Quick Use/Start Guide and/or User Manual first for quick
tips that make using your Philips product more enjoyable.
If you have read your instructions and still need assistance,
you may access our online help at www.philips.com/support
User Manual 6
Manual de Instrucciones 46
001-045-hts3050-16-Eng2 4/1/06, 3:48 PM1
2
3139 115 2xxx1
CAUTION
Use of controls or adjustments or
performance of procedures other than
herein may result in hazardous
radiation exposure or other unsafe
operation.
ATENCIÓN
El uso de mando o ajustes o la ejecucción
de métodos que no sean los aquí descritos
puede ocasionar peligro de exposición a
radiación.
Important notes for users in the
U.K.
Mains plug
This apparatus is fitted with an approved 13
Amp plug. To change a fuse in this type of plug
proceed as follows:
1 Remove fuse cover and fuse.
2 Fix new fuse which should be a BS1362 5 Amp,
A.S.T.A. or BSI approved type.
3 Refit the fuse cover.
If the fitted plug is not suitable for your socket
outlets, it should be cut off and an appropriate
plug fitted in its place.
If the mains plug contains a fuse, this should
have a value of 5 Amp. If a plug without a fuse
is used, the fuse at the distribution board
should not be greater than 5 Amp.
Note: The severed plug must be disposed of to
avoid a possible shock hazard should it be
inserted into a 13 Amp socket elsewhere.
How to connect a plug
The wires in the mains lead are coloured with
the following code: blue = neutral (N),
brown = live (L).
¶ As these colours may not correspond with the
colour markings identifying the terminals in
your plug, proceed as follows:
– Connect the blue wire to the terminal
marked N or coloured black.
– Connect the brown wire to the terminal
marked L or coloured red.
– Do not connect either wire to the earth
terminal in the plug, marked E (or e) or
coloured green (or green and yellow).
Before replacing the plug cover, make certain
that the cord grip is clamped over the sheath
of the lead - not simply over the two wires.
Copyright in the U.K.
Recording and playback of material may
require consent. See Copyright Act 1956 and
The Performer’s Protection Acts 1958 to 1972.
001-045-hts3050-16-Eng2 13/1/06, 9:12 AM2

English
Español
3
3139 115 23271
Index
English ----------------------------------------- 6
Español -------------------------------------- 46
001-045-hts3050-16-Eng2 4/1/06, 3:13 PM3
4
3139 115 2xxx1
CAUTION
VISIBLE AND INVISIBLE LASER
RADIATION WHEN OPEN AVOID
EXPOSURE TO BEAM
ADVARSEL
SYNLIG OG USYNLIG
LASERSTRÅLING VED ÅBNING
UNDGÅ UDSÆTTELSE FOR STRÅLING
VARNING
SYNLIG OCH OSYNLIG
LASERSTRÅLNING NÄR DENNA DEL
ÄR ÖPPNAD BETRAKTA EJ STRÅLEN
VARO!
AVATTAESSA OLET ALTTIINA
NÄKYVÄLLE JA NÄKYMÄTTÖMÄLLE
LASER SÄTEILYLLE. ÄLÄ KATSO
SÄTEESEEN
VORSICHT
SICHTBARE UND UNSICHTBARE
LASERSTRAHLUNG WENN
ABDECKUNG GEÖFFNET NICHT DEM
STRAHL AUSSETSEN
ATTENTION
RAYONNEMENT LASER VISIBLE ET
INVISIBLE EN CAS D’OUVERTURE
EXPOSITION DANGEREUSE AU
FAISCEAU
LASER
Type Semiconductor laser
GaAlAs
Wave length 650~660 nm (DVD)
784~796 nm (CD)
Output Power 7 mW (DVD)
10 mW (VCD/CD)
Beam divergence 60 degree
This product complies with the radio
interference requirements of the
European Community.
Manufactured under license from Dolby
Laboratories. “Dolby”, “Pro Logic” and
the double-D symbol are trademarks of
Dolby Laboratories.
This DVD system is in
conformity with the EMC
directive and low-voltage
directive.
For Customer Use:
Read carefully the information located at
the bottom of your DVD system and
enter below the Serial No. Retain this
information for future reference.
Model No. DVD VIDEO HTS3050
Serial No. _______________
DivX
®
, DivX Certified, and
associated logos are
trademarks of
DivXNetworks, Inc and are
used under license.
As an ENERGY STAR
®
partner;
Philips has determined that this
product meets the ENERGY STAR
®
guidelines for energy efficiency.
Microsoft, Windows Media, and the
Windows logo are trademarks, or
registered trademarks of Microsoft
Corporation in the United States
and/or other countries
001-045-hts3050-16-Eng2 4/1/06, 3:13 PM4
5
3139 115 2xxx1
Language Code
Abkhazian 6566
Afar 6565
Afrikaans 6570
Amharic 6577
Arabic 6582
Armenian 7289
Assamese 6583
Avestan 6569
Aymara 6589
Azerhaijani 6590
Bahasa Melayu 7783
Bashkir 6665
Belarusian 6669
Bengali 6678
Bihari 6672
Bislama 6673
Bokmål, Norwegian 7866
Bosanski 6683
Brezhoneg 6682
Bulgarian 6671
Burmese 7789
Castellano, Español 6983
Catalán 6765
Chamorro 6772
Chechen 6769
Chewa; Chichewa; Nyanja 7889
9072
Chuang; Zhuang 9065
Church Slavic; Slavonic 6785
Chuvash 6786
Corsican 6779
Česky 6783
Dansk 6865
Deutsch 6869
Dzongkha 6890
English 6978
Esperanto 6979
Estonian 6984
Euskara 6985
6976
Faroese 7079
Français 7082
Frysk 7089
Fijian 7074
Gaelic; Scottish Gaelic 7168
Gallegan 7176
Georgian 7565
Gikuyu; Kikuyu 7573
Guarani 7178
Gujarati 7185
Hausa 7265
Herero 7290
Hindi 7273
Hiri Motu 7279
Hrwatski 6779
Ido 7379
Interlingua (International)7365
Interlingue 7365
Inuktitut 7385
Inupiaq 7375
Irish 7165
Íslenska 7383
Italiano 7384
Ivrit 7269
Japanese 7465
Javanese 7486
Kalaallisut 7576
Kannada 7578
Kashmiri 7583
Kazakh 7575
Kernewek 7587
Khmer 7577
Kinyarwanda 8287
Kirghiz 7589
Komi 7586
Korean 7579
Kuanyama; Kwanyama 7574
Kurdish 7585
Lao 7679
Latina 7665
Latvian 7686
Letzeburgesch; 7666
Limburgan; Limburger 7673
Lingala 7678
Lithuanian 7684
Luxembourgish; 7666
Macedonian 7775
Malagasy 7771
Magyar 7285
Malayalam 7776
Maltese 7784
Manx 7186
Maori 7773
Marathi 7782
Marshallese 7772
Moldavian 7779
Mongolian 7778
Nauru 7865
Navaho; Navajo 7886
Ndebele, North 7868
Ndebele, South 7882
Ndonga 7871
Nederlands 7876
Nepali 7869
Norsk 7879
Northern Sami 8369
North Ndebele 7868
Norwegian Nynorsk; 7878
Occitan; Provencal 7967
Old Bulgarian; Old Slavonic 6785
Oriya 7982
Oromo 7977
Ossetian; Ossetic 7983
Pali 8073
Panjabi 8065
Persian 7065
Polski 8076
Português 8084
Pushto 8083
Russian 8285
Quechua 8185
Raeto-Romance 8277
Romanian 8279
Rundi 8278
Samoan 8377
Sango 8371
Sanskrit 8365
Sardinian 8367
Serbian 8382
Shona 8378
Shqip 8381
Sindhi 8368
Sinhalese 8373
Slovensky 8373
Slovenian 8376
Somali 8379
Sotho; Southern 8384
South Ndebele 7882
Sundanese 8385
Suomi 7073
Swahili 8387
Swati 8383
Svenska 8386
Tagalog 8476
Tahitian 8489
Tajik 8471
Tamil 8465
Tatar 8484
Telugu 8469
Thai 8472
Tibetan 6679
Tigrinya 8473
Tonga (Tonga Islands) 8479
Tsonga 8483
Tswana 8478
Türkçe 8482
Turkmen 8475
Twi 8487
Uighur 8571
Ukrainian 8575
Urdu 8582
Uzbek 8590
Vietnamese 8673
Volapuk 8679
Walloon 8765
Welsh 6789
Wolof 8779
Xhosa 8872
Yiddish 8973
Yoruba 8979
Zulu 9085
001-045-hts3050-16-Eng2 4/1/06, 3:13 PM5

6
3139 115 2xxx1
English
Contents
Language Code ...................................... 5
General Information
Supplied accessories ................................... 8
Cleaning discs............................................... 8
Setup .............................................................. 8
Basic Connections
Step 1: Placing the speakers and
subwoofer ..................................................... 9
Step 2: Connecting to TV and the
speakers system......................................... 10
Step 3: Connecting FM/MW antennas ... 11
Step 4: Connecting the power cord ..... 11
Connection to External Devices
Connecting an audio/video device ........ 12
Main Unit ............................................... 13
Remote Control ......................... 14–15
Getting Started
Step 1: Inserting batteries into the
remote control .......................................... 16
Using the remote control to
operate the system .............................. 16
Step 2: Switching on the DVD system .. 16
Switching to Eco Power standby
mode ....................................................... 16
Step 3: Setting the TV ............................... 16
Selecting the matching colour
system ..................................................... 17
Setting the TV Display ......................... 17
Step 4: Setting language preferences ..... 18
On-Screen Display (OSD) language . 18
Audio, Subtitle and Disc menu
languages ................................................ 18
Disc Operations
Playable discs .............................................. 19
Playing discs ................................................ 19
Auto Eco Power standby mode ........ 20
Basic playback controls ............................ 20
Selecting various repeat/shuffle
functions ...................................................... 20
Other operations for video playback
(DVD/VCD/SVCD) ................................. 21
Using the Disc Menu (DVD only) .... 21
Viewing playback information............ 21
Advancing by frame ............................. 22
Resuming playback from the last
stopped point ........................................ 22
Zooming in ............................................ 22
Changing sound track language......... 22
Changing subtitle language
(DVD only) ............................................ 22
Preview Function (VCD/SVCD only)23
Playing MP3/Windows Media™ Audio/
JPEG disc..................................................... 24
Playing MP3 music and JPEG
picture simultaneously ........................ 24
Playing a picture disc (slide show) ......... 25
Preview Function.................................. 25
Zoom picture........................................ 25
Rotating/Fliping the picture................ 25
Supported JPEG picture formats ...... 25
Playing a DivX disc .................................... 26
001-045-hts3050-16-Eng2 4/1/06, 3:13 PM6

English
7
3139 115 2xxx1
Contents
DVD Setup Menu Options
Accessing General Setup Page ............... 27
Locking/Unlocking the disc
for viewing ............................................. 27
Dimming system’s display panel ........ 27
Programming disc tracks (not
for Picture CD/MP3) .......................... 28
OSD language ....................................... 28
Screen Saver – turning on/off ........... 29
DivX(R) VOD registration code ....... 29
Accessing Audio Setup Page ................... 30
Speakers Volume/Speakers Delay ...... 30
Night mode – turning on/off ............ 30
CD Upsampling .................................... 30
Accessing Video Setup Page .................... 31
TV Type ................................................... 31
TV Display ............................................. 31
Picture Setting................................ 31–32
Accessing Preference Setup Page .......... 32
Audio, Subtitle, Disc Menu ................. 32
Restricting playback by Parental
Control ................................................... 33
PBC (Playback Control)...................... 34
MP3/JPEG menu– turning on/off ..... 34
Changing the Password....................... 34
Setting the DivX Subtitle font ........... 35
Restoring to original settings ............ 35
Tuner Operations
Tuning to radio stations ........................... 36
Presetting radio stations.......................... 36
Using the Plug and Play ....................... 36
Automatic presetting .......................... 37
Manual presetting ................................. 37
Selecting a preset radio station ............. 37
Deleting a preset radio station .............. 37
Sound and Volume Controls
Individual speakers volume adjustment 38
Selecting surround sound........................ 39
Selecting digital sound effects ................. 39
Volume Control......................................... 39
Other Functions
Setting the Sleep timer ............................ 40
Specifications ...................................... 41
Troubleshooting ......................... 42–43
Glossary ............................................. 44–45
001-045-hts3050-16-Eng2 4/1/06, 3:13 PM7
8
3139 115 2xxx1
English
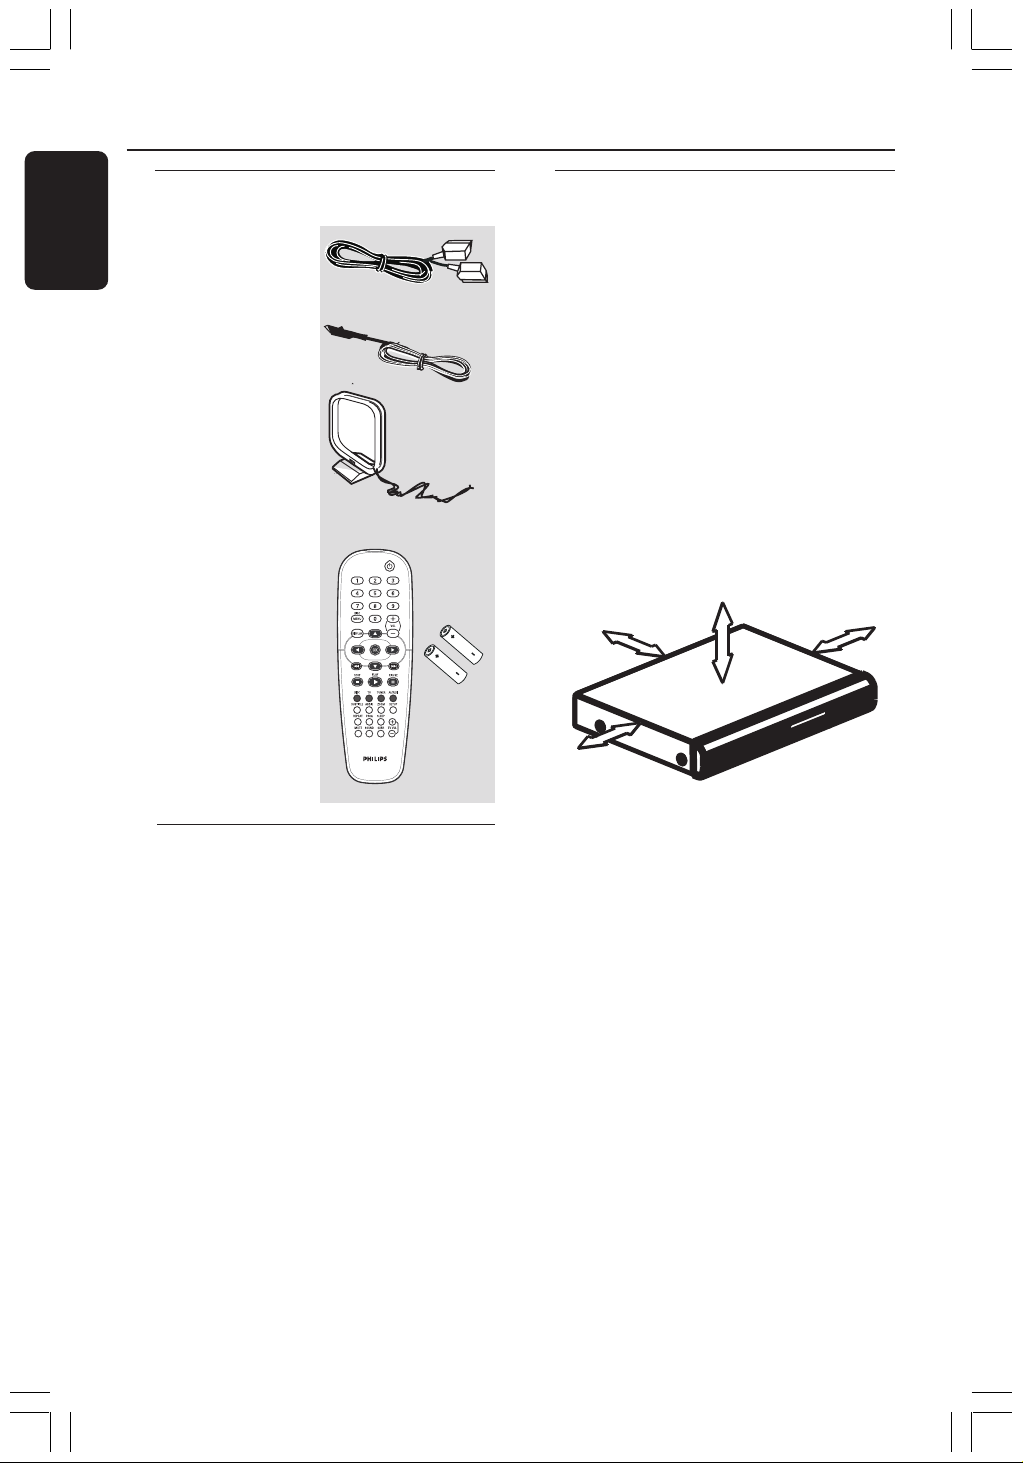
Supplied accessories
Scart cable (black)
FM wire antenna
MW loop antenna
Remote control
and two batteries
(12nc: 3139 258 70111)
Cleaning discs
To clean a disc, use a micro fibre cleaning
cloth and wipe the disc from the center
to the edge in a straight line.
CAUTION!
Do not use solvents such as benzene,
thinner, commercially available cleaners,
or anti-static sprays intended for discs.
Since the optical unit (laser) of the DVD
system operates at a higher power than
regular DVD or CD players, cleaning CDs
intended for DVD or CD players may
damage the optical unit (laser). Therefore,
refrain from using a cleaning CD.
General Information
Setup
Finding a suitable location
– Place the set on a flat, hard and stable
surface. Do not place the set on a carpet.
– Do not position the set on top of
other equipment that might heat it up
(e.g., receiver or amplifier).
– Do not put anything under the set
(e.g., CDs, magazines).
Space for ventilation
– Place the apparatus in a location with
adequate ventilation to prevent internal
heat build up. Allow at least 10 cm (4.5”)
clearance from the rear and the top of
the set and 5cm (2.3”) from the left and
right to prevent overheating.
10cm (4.5")
10cm (4.5")
5cm (2.3")
5cm (2.3")
Avoid high temperatures, moisture,
water and dust
– Apparatus shall not be exposed to
dripping or splashing.
– Do not place any sources of danger on
the apparatus (e.g., liquid filled objects,
lighted candles).
001-045-hts3050-16-Eng2 4/1/06, 3:14 PM8
English
9
3139 115 2xxx1
REAR RREAR L
FRONT RFRONT L
CENTER
SUBWOOFER
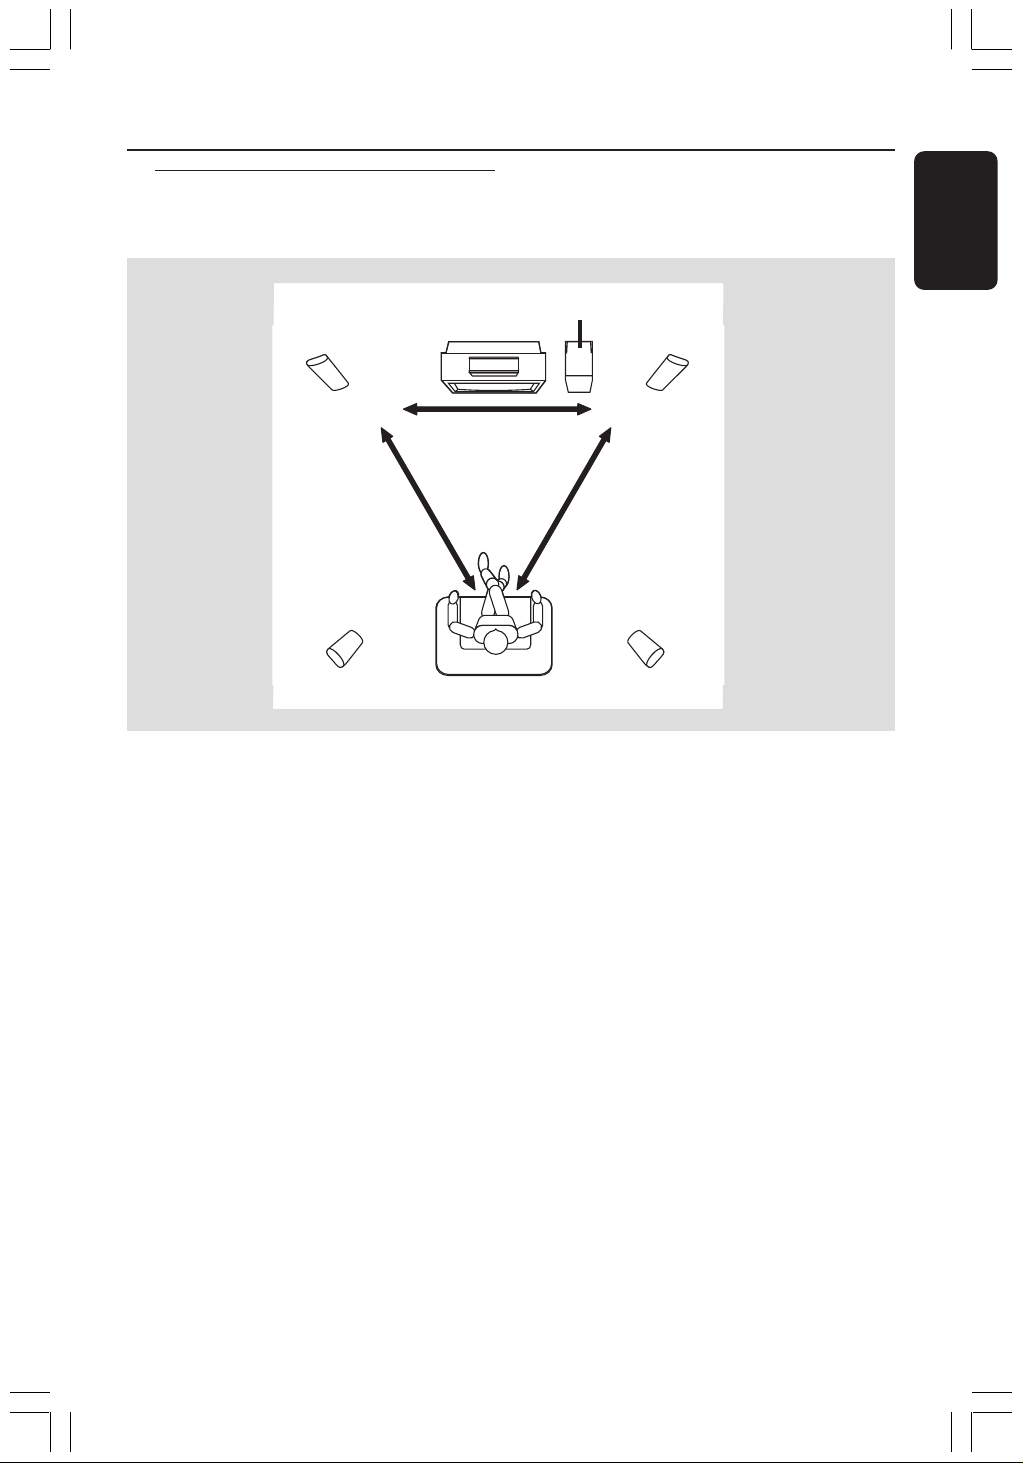
Basic Connections
For best possible surround sound, all the
speakers (except subwoofer) should be
placed at the same distance from the
listening position.
1 Place the front left and right speakers at
equal distances from the TV and at an
angle of approximately 45 degrees from
the listening position.
2 Place the centre speaker above the TV or
the DVD system so that the centre
channel’s sound is localised.
3 Place the rear speakers at normal
listening ear level facing each other or
hang on the wall.
4 Place the subwoofer on the floor near
the TV.
Step 1: Placing the speakers
and subwoofer
1
3
3
1
2
4
Helpful Hints:
– To avoid magnetic interference, do not
position the front speakers too close to your
TV.
– Allow adequate ventilation around the
DVD system.
001-045-hts3050-16-Eng2 4/1/06, 3:14 PM9
10
3139 115 2xxx1
English
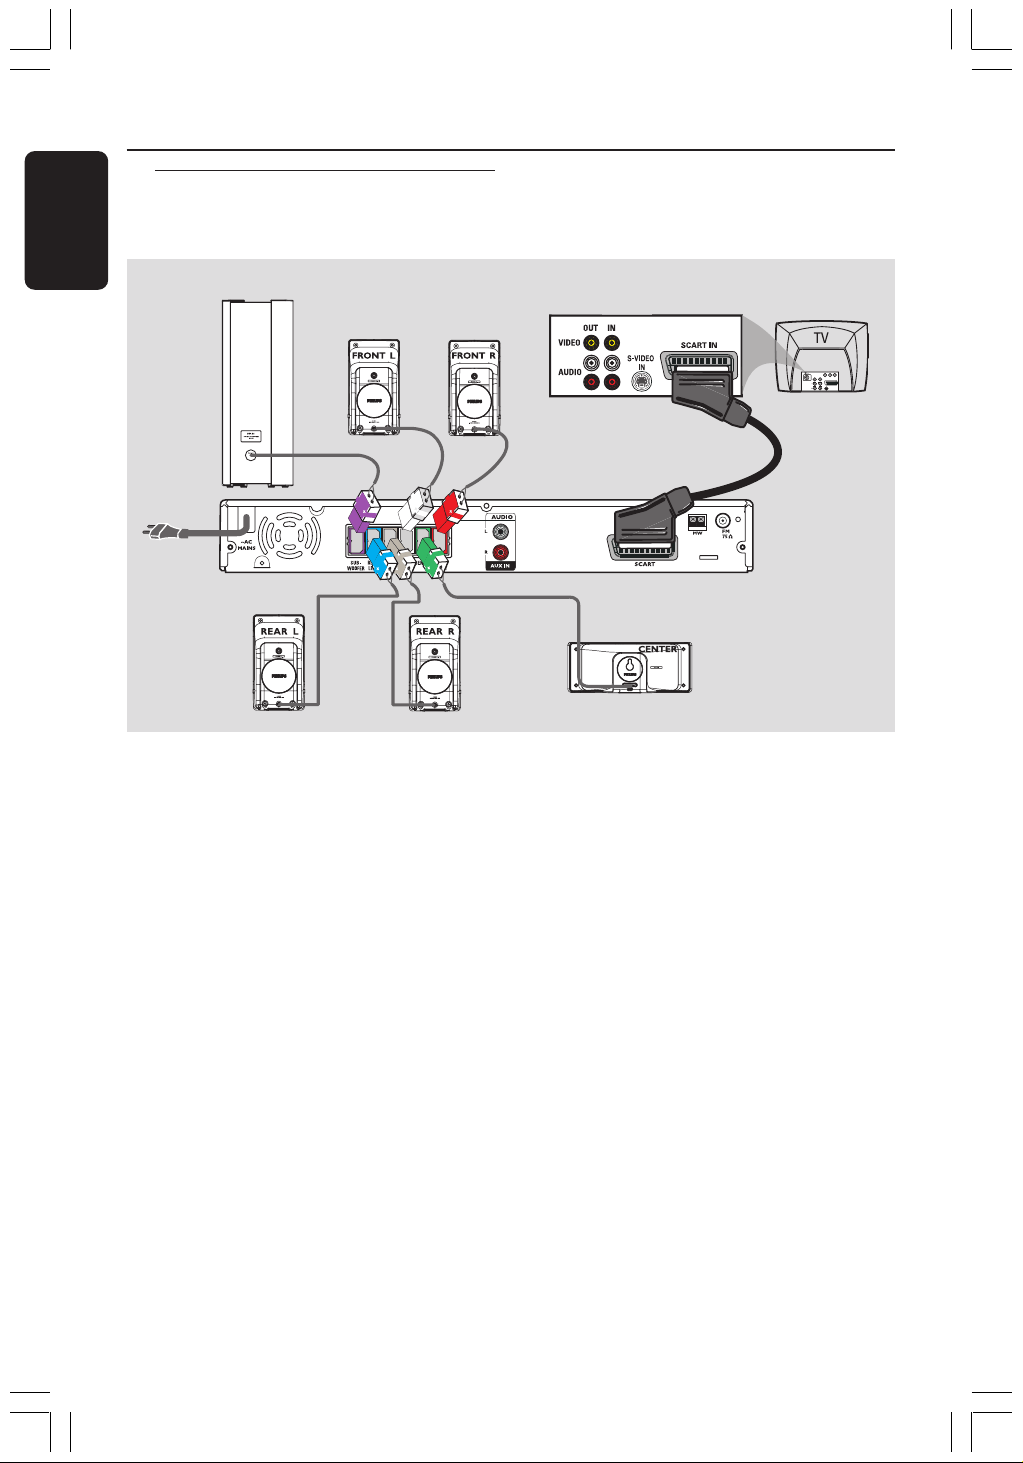
Basic Connections (continued)
IMPORTANT!
– Connect the DVD system directly
to the TV.
– Proceed to page 16 for setting up
the TV once you have completed
the connections.
1 Use the supplied scart video cable (black)
to connect the DVD system’s SCART
socket to the corresponding Scart input
socket on the TV.
2 Connect the supplied speakers system
using the fixed speaker cables by
matching the colours of the sockets and
speaker cables.
Step 2: Connecting to TV
and the speakers
system
Front Right
Speaker
Rear Right
Speaker
Rear Left
Speaker
Centre Speaker
Subwoofer
Front Left
Speaker
DVD System
1
Helpful Hints:
– Ensure that the speaker cables are
correctly connected. Improper connections
may damage the system due to a short-
circuit.
– To prevent unwanted noise, do not place
the subwoofer too close to the DVD system,
AC power adaptor, TV or other radiation
sources.
1
2
001-045-hts3050-16-Eng2 4/1/06, 3:14 PM10
English
11
3139 115 2xxx1
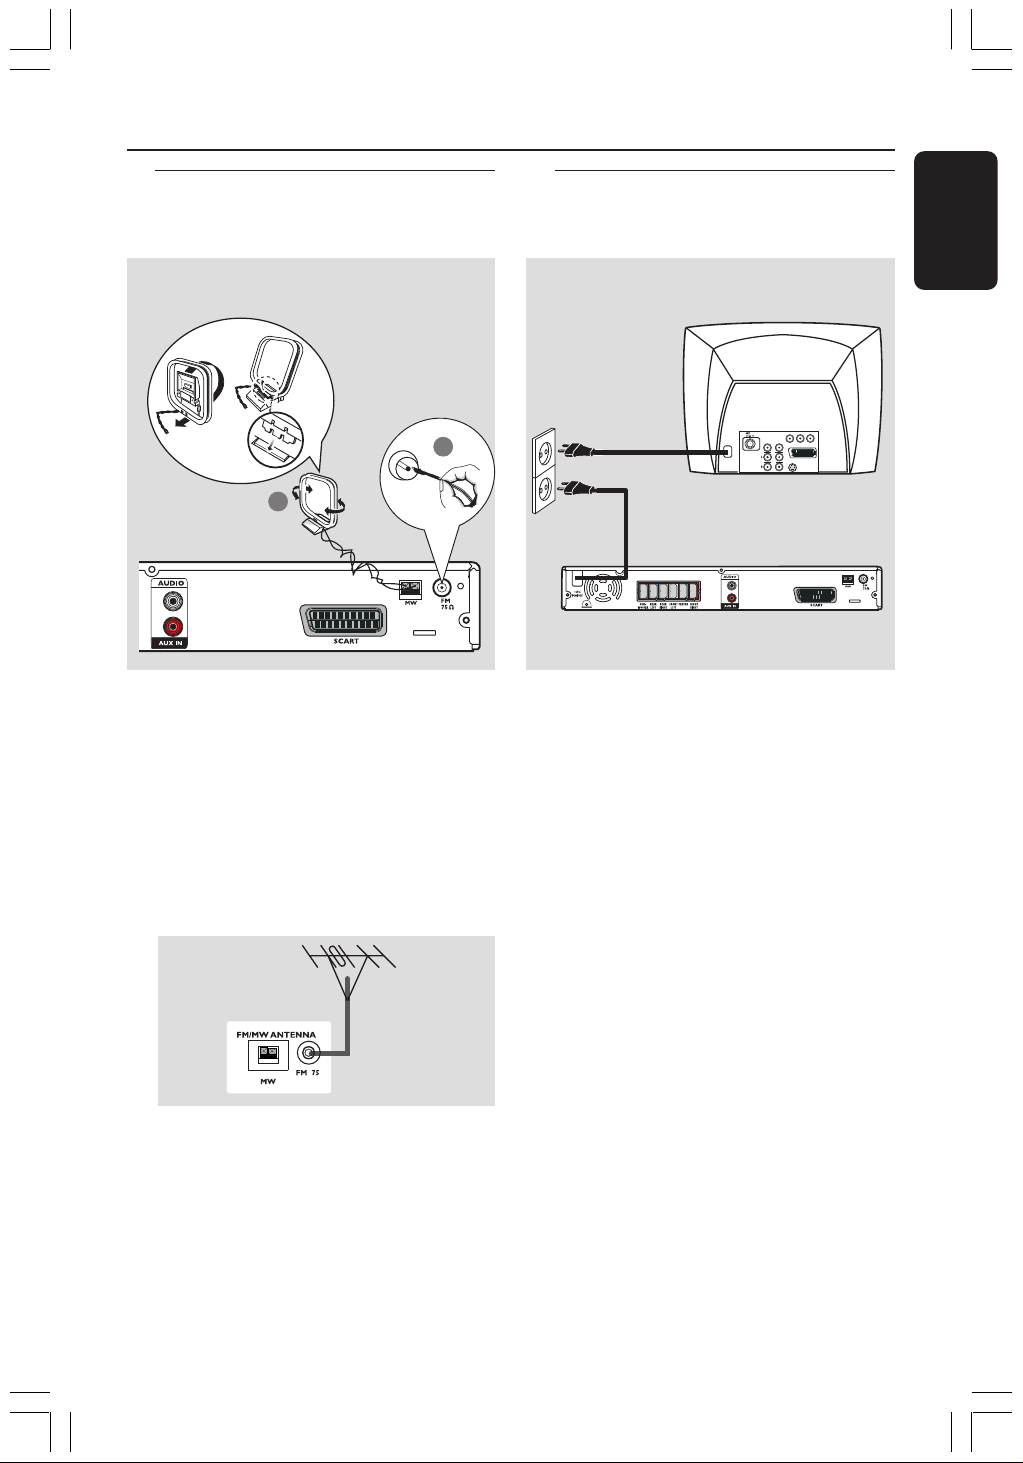
Basic Connections (continued)
1 Connect the supplied MW loop antenna
to the MW socket. Place the MW loop
antenna on a shelf, or attach it to a stand
or wall.
2 Connect the supplied FM antenna to the
FM socket. Extend the FM antenna and
fix its ends to the wall.
For better FM stereo reception, connect
an external FM antenna (not supplied).
Helpful Hints:
– Adjust the position of the antennas for
optimal reception.
– Position the antennas as far as possible
from your TV, VCR or other radiation source
to prevent unwanted interference.
After everything is connected
properly, plug the AC power cord
into the power outlet.
The red Eco Power LED on the DVD
system will light up. Never make or
change any connections with the power
switched on.
Helpful Hint:
– Refer to the type plate on the rear of the
subwoofer for identification and supply
ratings.
MW
antenna
fix the claw
into the slot
Step 3: Connecting FM/MW
antennas
FM
antenna
L
R
1
➠
2
Step 4: Connecting the
power cord
TV
L
R
DVD system
001-045-hts3050-16-Eng2 4/1/06, 3:14 PM11
12
3139 115 2xxx1
English
Connection to External Devices
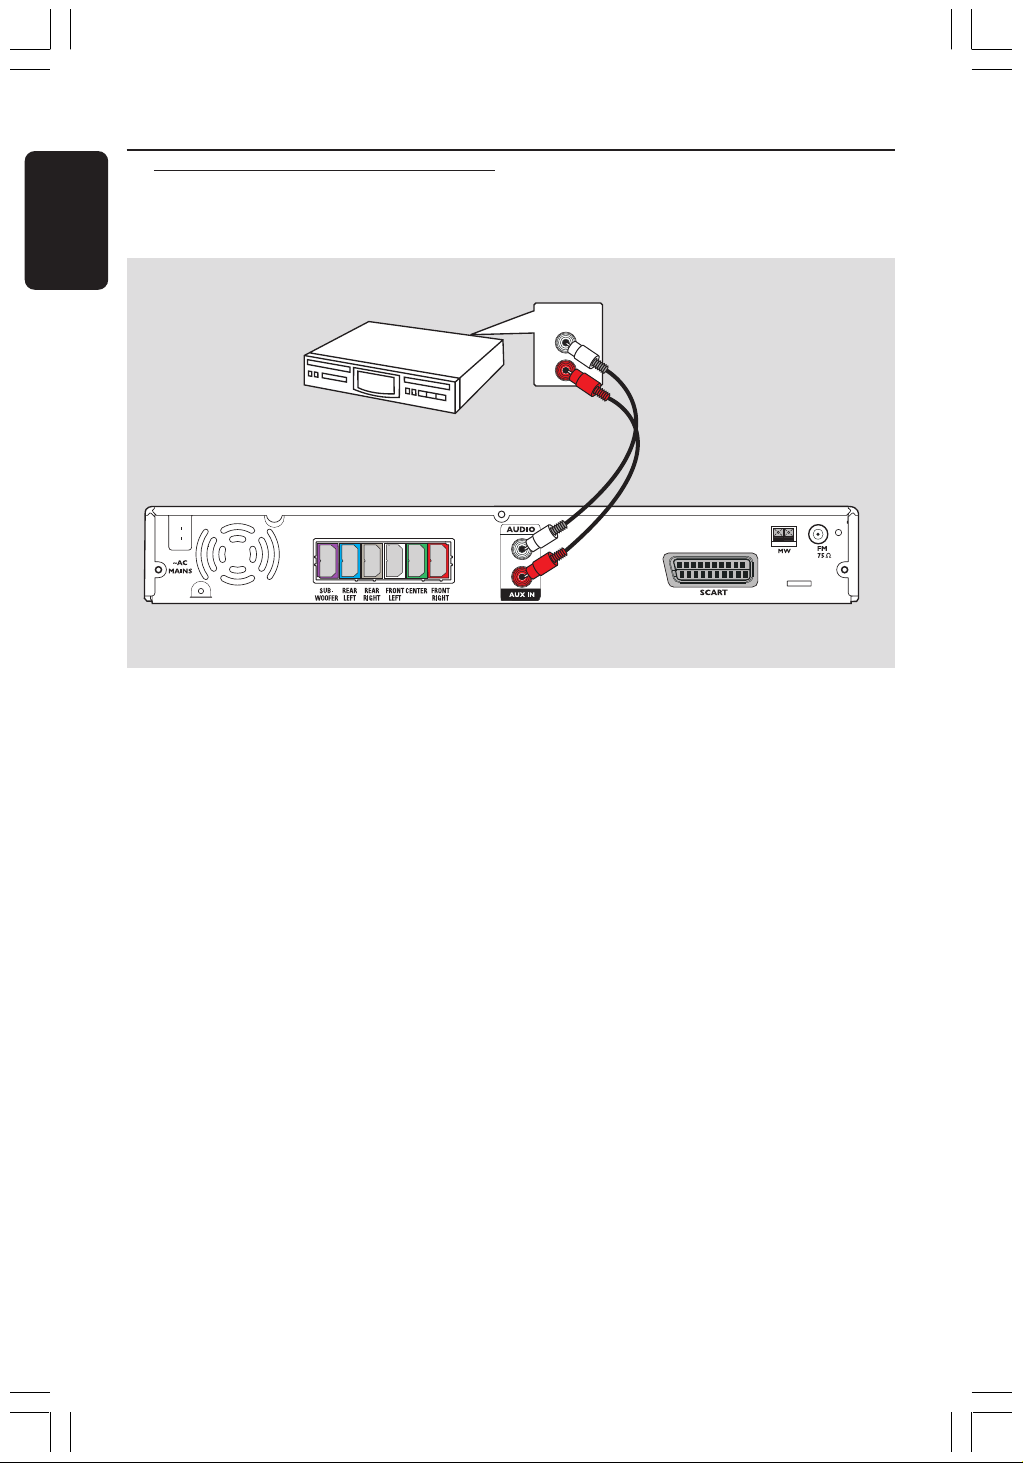
Connecting a audio/video
device
L
R
AUDIO OUT
Audio/Video
Device
DVD System
You can connect other audio/video device
to the DVD system in order to use the
Home Theatre Audio System’s surround
sound capabilities.
● Use an audio cable (red/white, not
supplied) to connect the DVD system’s
AUX IN (R/L) sockets to the AUDIO
OUT sockets on the audio/video device.
To listen to the sound, press AUX/DI to
select “AUX” as the source to play.
Helpful Hint:
– Always refer to the user manual of the
other devices for complete connection and
use details.
001-045-hts3050-16-Eng2 4/1/06, 3:14 PM12

English
13
3139 115 2xxx1
Main Unit
1 STANDBY ON (B)
– Switches to Eco Power standby mode, or
turns on the system.
2 Disc tray
3 OPEN CLOSE 0
– Opens/Closes the disc tray.
4 ECO POWER indicator
– Lights up when in Eco Power standby
mode.
5 iR
– Point the remote control towards this
sensor.
6 System display panel
7 VOLUME
– Adjusts the volume level.
1
2 3
6
4
7
8 9
0 !
5
8 SOURCE
– Selects the relevant active source mode:
DISC, TUNER (FM/MW), TV or AUX.
9 ÉÅ PLAY/PAUSE
– DISC: starts/pauses playback.
– TUNER: starts preset radio station
installation in Plug & Play mode.
0 S PREV / NEXT T
– DISC: *searches backward/forward or
selects a track.
– TUNER: selects a preset radio station.
! Ç STOP
– Exits an operation.
– DISC: stops playback.
– TUNER: hold down this button to erase
the current preset radio station.
* = Press and hold the button for more than two seconds.
001-045-hts3050-16-Eng2 4/1/06, 3:14 PM13
14
3139 115 2xxx1
English
Remote Control
* = Press and hold the button for more than two seconds.
1
2
3
4
5
6
7
8
9
0
!
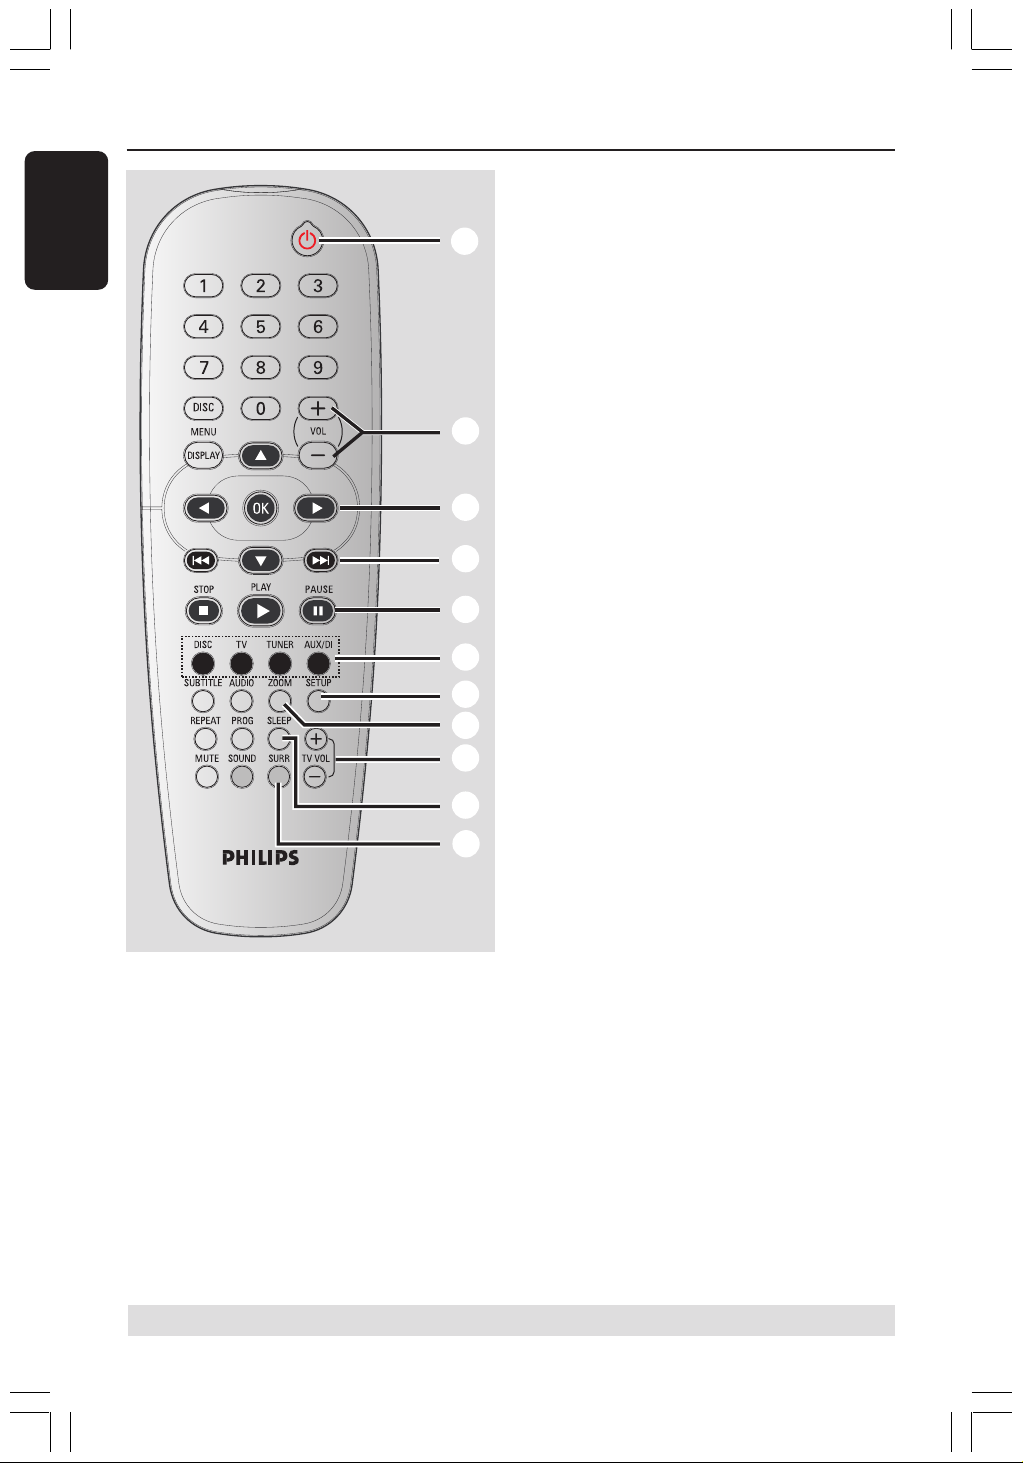
1 B
– Switches to Eco Power standby mode, or
turns on the system.
2 VOL +-
– Adjusts the volume level.
3 1 2 3 4
– DISC: selects movement direction in the
menu.
– TUNER: use 3 4 to start auto searching,
use 1 2 to tune the radio frequency up/
down.
4 S / T
– DISC: *searches backward/forward or
selects a track.
– TUNER: selects a preset radio station.
5 PAUSE Å
– DISC: pauses playback.
6 Source buttons
DISC : switches to DISC source mode.
TV: switches to TV source mode.
The sound from TV will come out
through the DVD system.
TUNER: toggles between FM and MW
band.
AUX/DI: switches to external mode.
7 SETUP
– DISC: enters or exits system setup menu.
8 ZOOM
– DISC: enlarges a picture on the TV screen.
9 TV VOL +-
– Adjusts TV volume (Philips TV only).
0 SLEEP
– Sets the sleep timer function.
! SURR
– Selects multichannel surround or stereo
mode.
001-045-hts3050-16-Eng2 4/1/06, 3:14 PM14

English
15
3139 115 2xxx1
Remote Control (continued)
* = Press and hold the button for more than two seconds.
@ Numeric Keypad (0-9)
– DISC: enters a track/title number.
– TUNER: enters the preset radio station
number.
# DISC MENU
– DISC: enters or exits disc contents menu.
For VCD, selects various preview
function.
$ DISPLAY
– DISC: displays the current status or disc
information.
% OK
– Confirms a selection.
^ PLAYÉ
– DISC: starts playback.
& STOPÇ
– Exits an operation.
– DISC: stops playback.
– DISC: holding down the button will open
or close the disc tray.
– TUNER: *erases a preset radio station.
* AUDIO
– DISC: selects an audio language (DVD/
VCD) or an audio channel.
( SUBTITLE
– DISC: selects a subtitle language.
) REPEAT
– DISC: selects various repeat modes;
switches repeat mode off.
¡ MUTE
– Mutes or restores the volume.
™ SOUND
– Selects a predefined sound effect.
£ PROG
– DISC: starts programming.
– TUNER: starts *automatic/ manual preset
programming.
@
#
$
%
^
&
)
(
*
£
¡
™
001-045-hts3050-16-Eng2 4/1/06, 3:14 PM15

16
3139 115 2xxx1
English
Getting Started
Step 1: Inserting batteries into
the remote control
1
3
2
1 Open the battery compartment.
2 Insert two batteries type R06 or AA,
following the indications (+-) inside
the compartment.
3 Close the cover.
CAUTION!
– Remove batteries if they are
exhausted or if the remote control
is not to be used for a long time.
– Do not use old and new, or
different types of batteries in
combination.
– Batteries contain hazardous
chemical substances, so they should
be disposed of properly.
Using the remote control to
operate the system
1 Aim the remote control directly at the
remote sensor (iR) on the front panel.
2 Select the source you wish to control by
pressing one of the source select buttons
on the remote control (for example TV,
TUNER).
3 Then select the desired function (for
example É,
S,
T).
Step 2: Switching on the
DVD system
● Press the SOURCE control to select :
DISC ™ FM ™ MW ™ TV ™ AUX
™ DISC ....
OR
Press DISC, TV, TUNER or AUX/DI on
the remote.
Switching to Eco Power standby
mode
● Press STANDBY ON (B).
➜ The display screen will go blank.
Step 3: Setting the TV
After connecting the DVD system to
your TV, you have to switch the TV to the
correct programme number for the input
socket (e.g. ‘EXT’, ‘0’, ‘AV’) in order to
view the playback from the DVD system.
1 Press SOURCE control until “DISC”
appears on the display panel.
2 Turn on the TV and set it to the correct
video-in channel. You should see the blue
DVD background screen on the TV.
➜ Usually this channel is between the
lowest and highest channels and may be
called FRONT, A/V IN, VIDEO. See your
TV manual for more details.
➜ Or, you may go to channel 1 on your
TV, then press the Channel down button
repeatedly until you see the Video In
channel.
➜ Or, the TV remote control may have a
button or switch that chooses between
different video modes.
001-045-hts3050-16-Eng2 4/1/06, 3:15 PM16
English
17
3139 115 2xxx1
Getting Started (continued)
Selecting the matching colour
system
The colour system of the DVD system,
DVD and TV should match. Only then will
it be possible to play a DVD on this
system. Before changing the TV system,
determine the colour system of your TV.
1 In disc mode, press SETUP.
2 Press 2 repeatedly to select { Video Setup
Page }.
3 Press 34 to highlight { TV Type }, then
press 2.
Video Setup Page
TV Type
TV Display
Picture Setting
PAL
NTSC
Multi
4 Press 34 to highlight one of the options
below:
{
PAL }
Select this if the connected TV has the PAL
colour system. It will change the video signal of
an NTSC disc and output it to PAL format.
{ NTSC }
Select this if the connected TV has the NTSC
colour system. It will change the video signal of
a PAL disc and output it to NTSC format.
{ Multi }
Select this if the connected TV is compatible
with both NTSC and PAL (multi-system).
The output format will be in accordance with
the video signal of the disc.
5 Select a setting and press OK.
➜ Follow the instructions shown on the
TV to confirm the selection (if any).
➜ If a blank/distorted TV screen appears,
wait for 15 seconds for the auto
recovery.
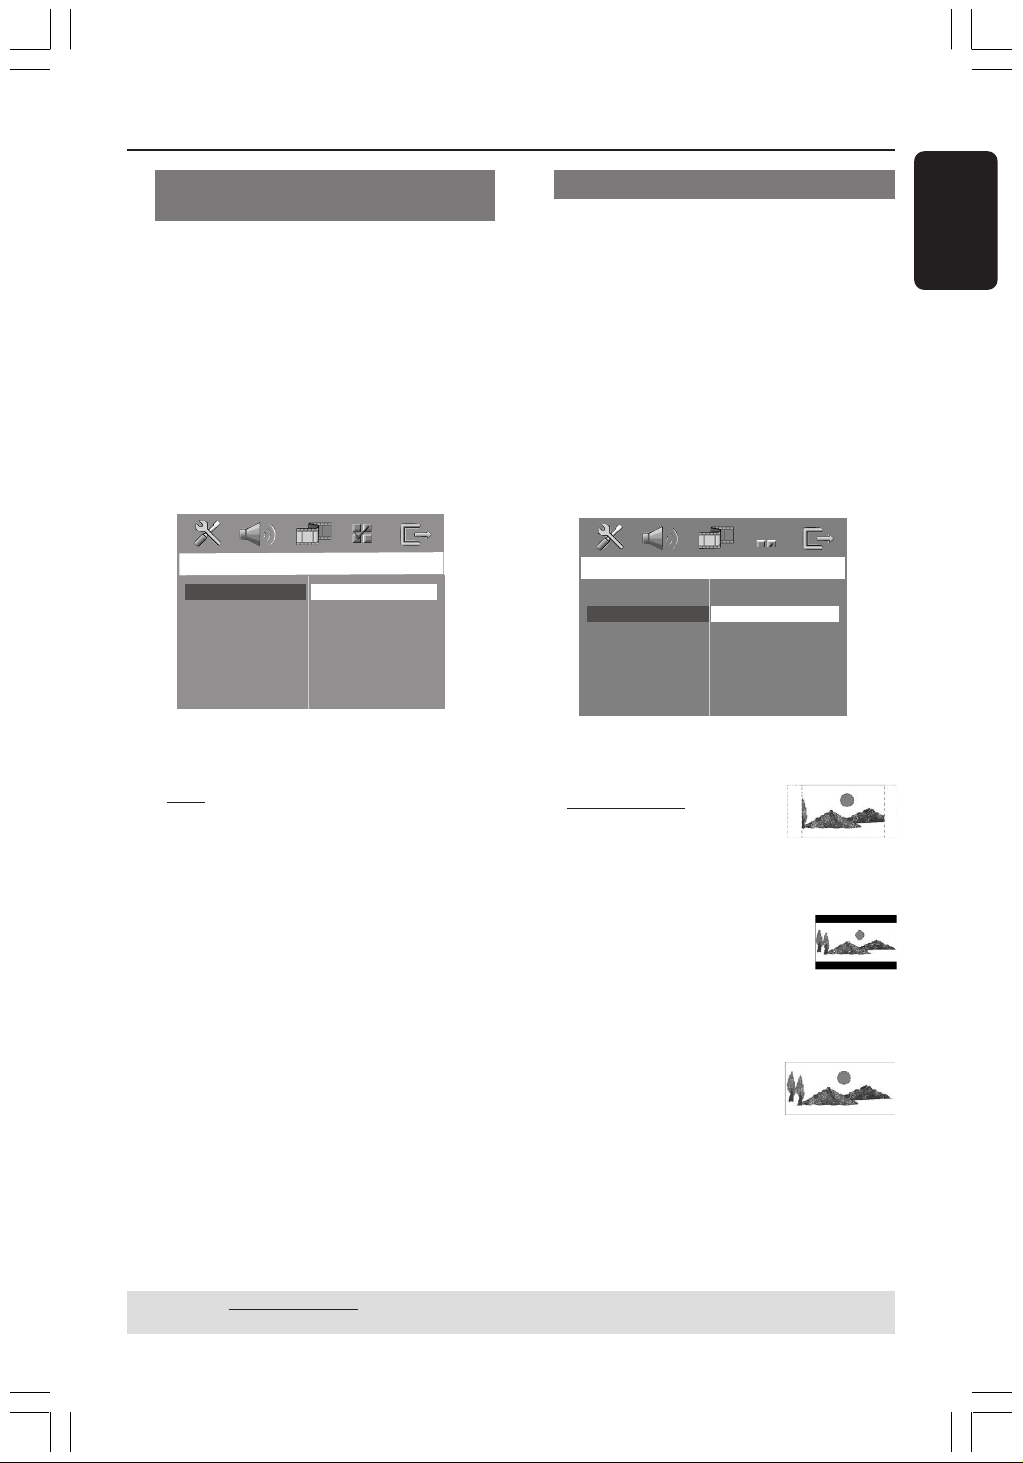
Setting the TV Display
Set the aspect ratio of the DVD system
according to the TV you have connected.
The format you select must be available
on the disc. If it is not, the setting for TV
display will not affect the picture during
playback.
1 In disc mode, press SETUP.
2 Press 2 repeatedly to select { Video Setup
Page }.
3 Press 34 to highlight { TV Display },
then press 2.
Video Setup Page
TV Type
TV Display
Picture Setting
4:3 Pan Scan
4:3 Letter Box
16:9 Wide Screen
4 Press 34 to highlight one of the options
below:
{
4:3 Pan Scan }
Select this if you have a
conventional TV and want
both sides of the picture to be trimmed or
formatted to fit your TV screen.
{ 4:3 Letter Box }
Select this if you have a
conventional TV. In this case, a
wide picture with black bands on the upper
and lower portions of the TV screen will be
displayed.
{ 16:9 Wide Screen }
Select this if you have a wide-
screen TV.
5 Select a setting and press OK.
TIPS: The underlined option is the factory default setting.
To return to the previous menu, press 1. To remove the menu, press SETUP.
001-045-hts3050-16-Eng2 4/1/06, 3:15 PM17
18
3139 115 2xxx1
English
Getting Started (continued)
Step 4: Setting language
preferences
You can select your preferred language
settings so that this DVD system will
automatically switch to the language for
you whenever you load a disc. If the
language selected is not available on the
disc, the disc’s default language will be
used instead.
The OSD (On-Screen Display) language
for the system menu will remain as you
set it, regardless of the default and
optional disc languages.
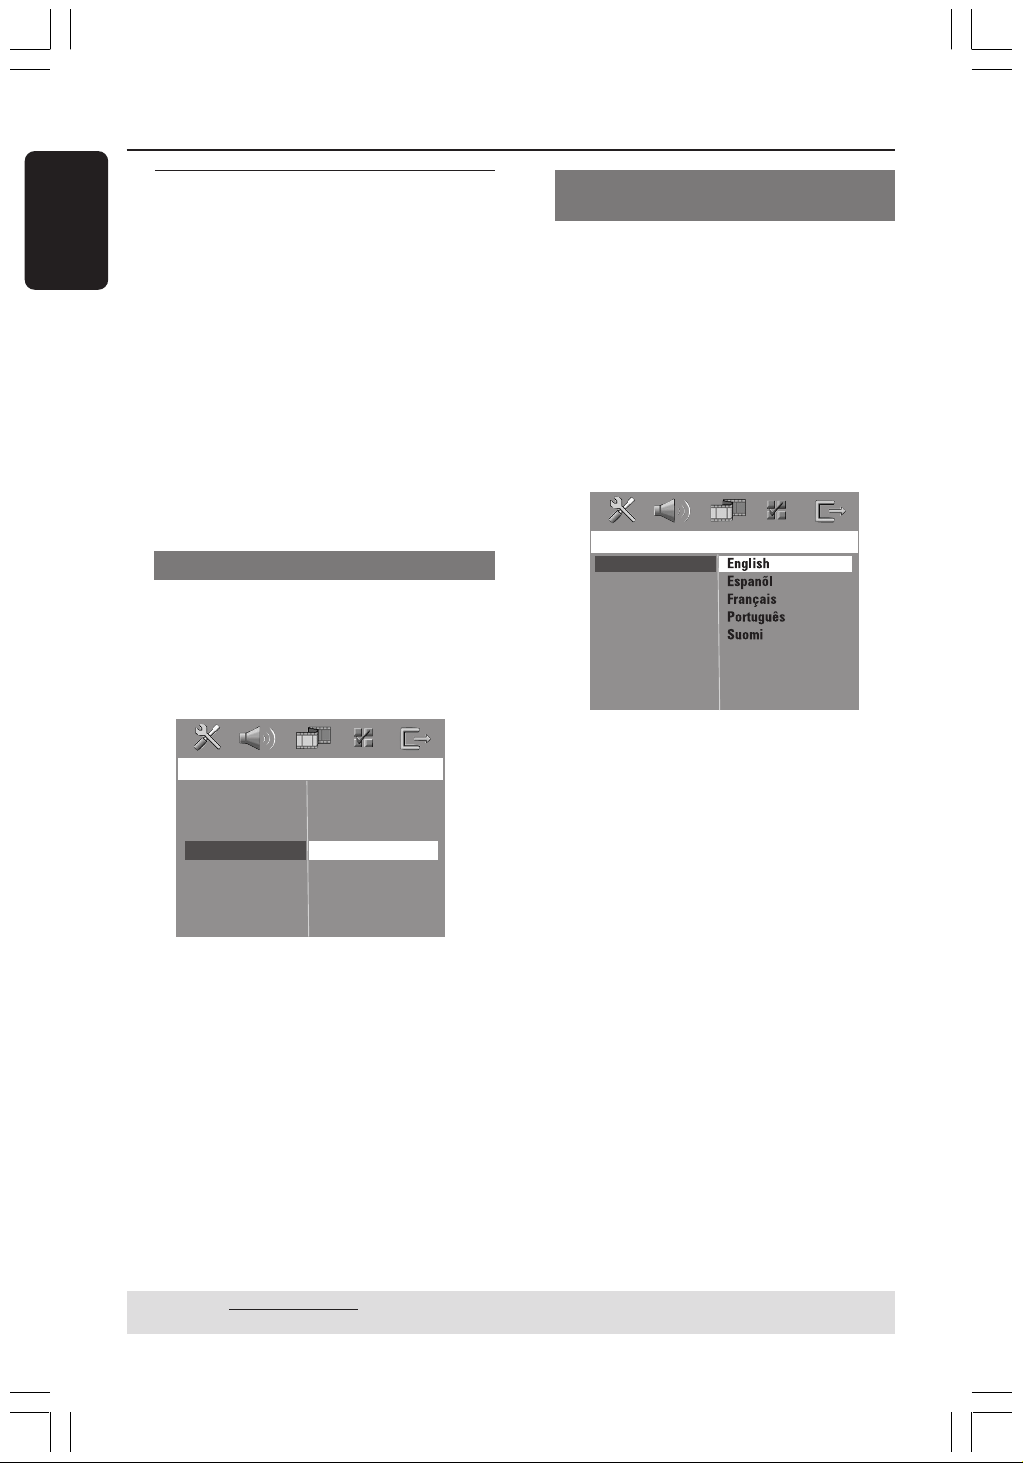
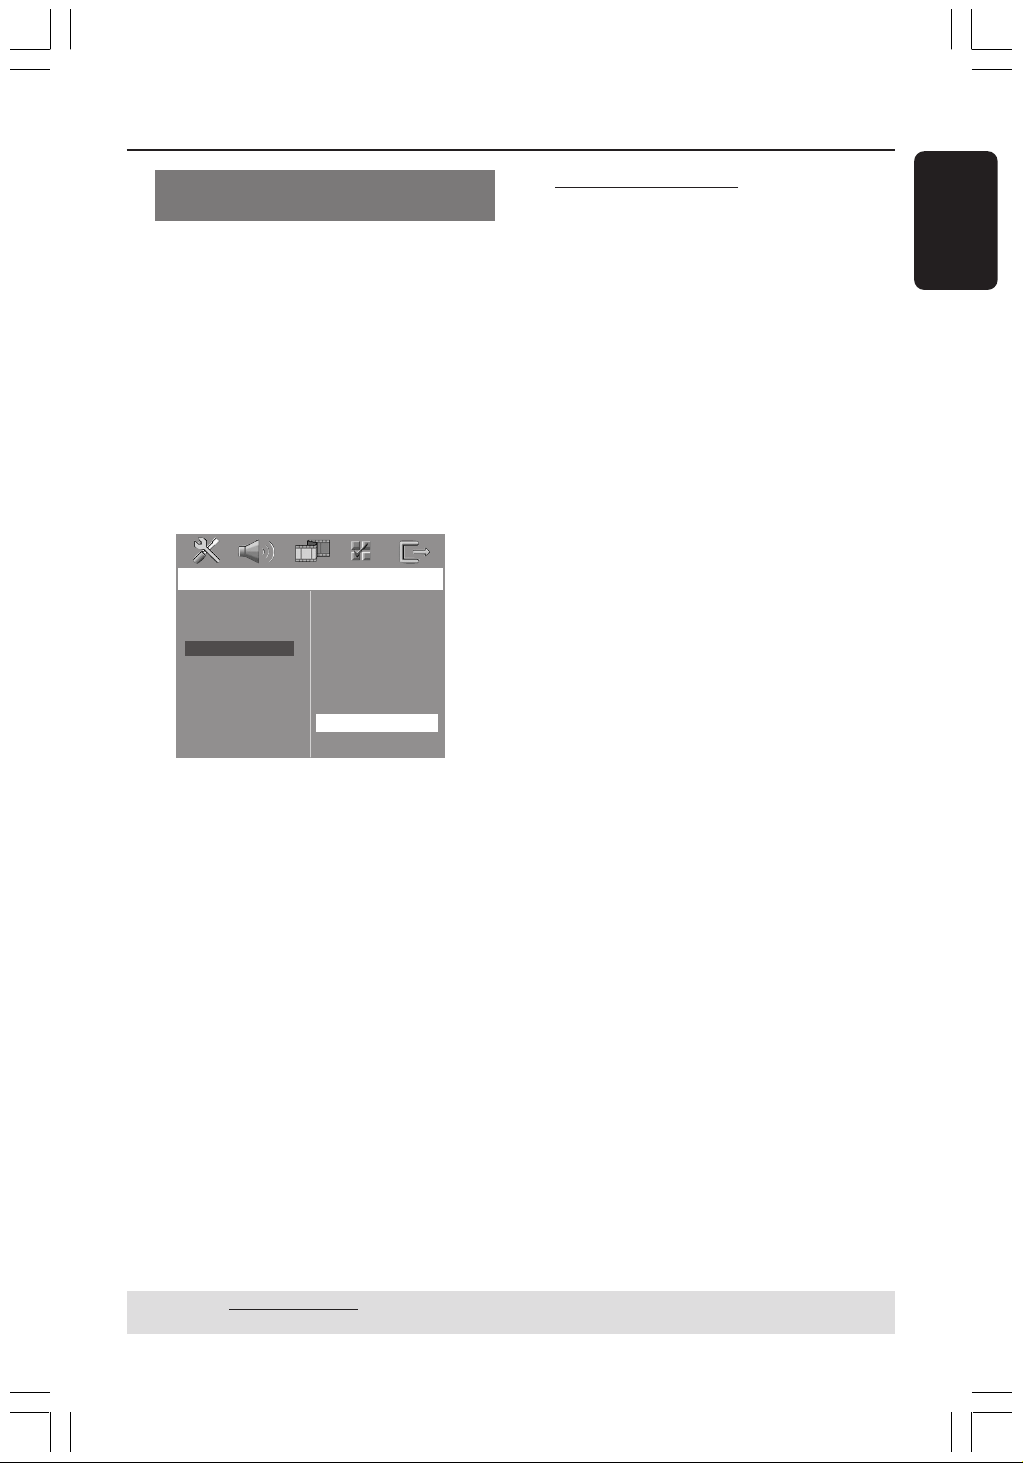
On-screen display (OSD) language
1 In disc mode, press SETUP.
2 Press 2 to select { General Setup Page }.
3 Press 34 to highlight { OSD Language },
then press 2.
G
e
n
e
r
a
l
S
e
tup
P
a
g
e
D
i
s
c
L
o
ck
D
i
s
p
l
a
y
D
i
m
P
r
og
r
a
m
O
S
D
L
a
ngu
a
g
e
S
c
r
ee
n
S
a
v
e
r
D
i
v
X
(
R
)
V
O
D
C
od
e
E
ng
li
s
h
E
s
p
a
n
õ
l
F
r
a
n
ç
a
i
s
P
o
r
t
ugu
ê
s
4 Press 34 to select a language and press
OK to confirm.
Audio, Subtitle and Disc menu
languages
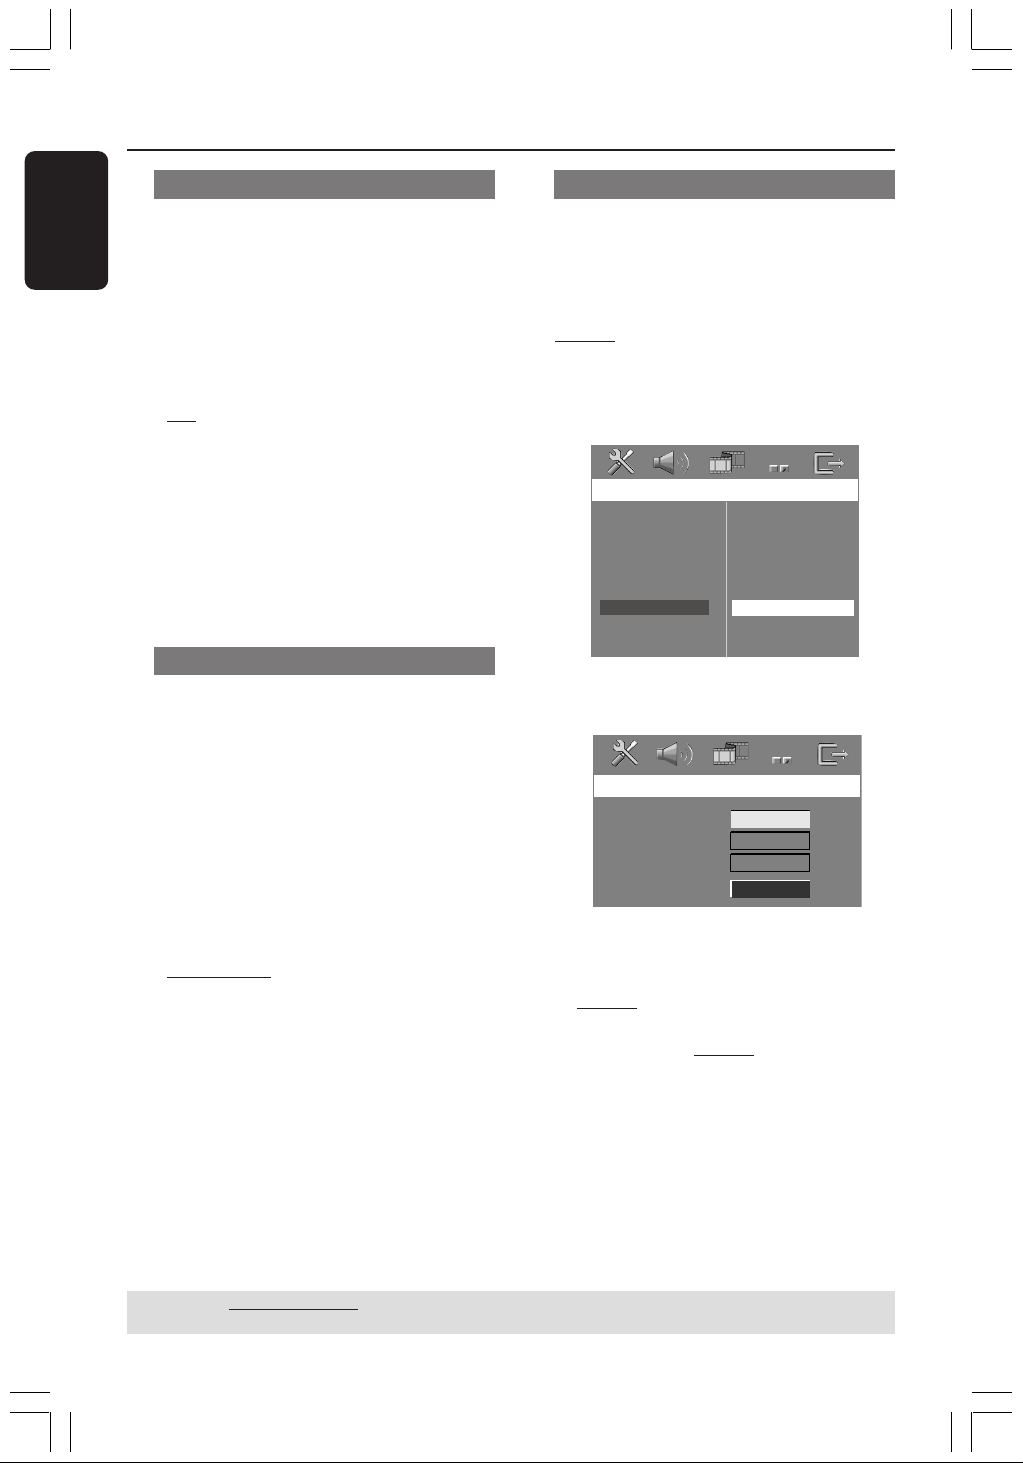
1 Press Ç twice to stop playback (if any),
then press SETUP.
2 Press 2 repeatedly to select
{ Preference Page }.
3 Press 34 to highlight one of the options
below, then press 2.
–{ Audio } (disc’s soundtrack)
–{ Subtitle } (disc’s subtitles)
–{ Disc Menu } (disc’s menu)
Preference Page
Audio
Subtitle
Disc Menu
Parental
PBC
MP3/JPEG Nav
Password
DivX Subtitle
Default
4 Press 34 to select a language and press
OK to confirm.
If the language you want is not in
the list, then select { Others }.
Use the numeric keypad (0-9) on the
remote to enter the 4-digit language code
‘XXXX’ (see page 5) and press OK to
confirm.
5 Repeat steps 3~4 for other settings.
TIPS: The underlined option is the factory default setting.
To return to the previous menu, press 1. To remove the menu, press SETUP.
001-045-hts3050-16-Eng2 4/1/06, 3:16 PM18
English
19
3139 115 2xxx1
Disc Operations
IMPORTANT!
– If the inhibit icon (ø or X) appears
on the TV screen when a button is
pressed, it means the function is not
available on the current disc or at
the current time.
– DVD discs and players are designed
with regional restrictions. Before
playing a disc, make sure the disc is
for the same zone as your player.
– Do not push on the disc tray or
put any objects other than discs on
the disc tray. Doing so may cause
the disc player to malfunction.
Playable discs
SUPER VIDEO
Your DVD home theatre system will
play:
– Digital Versatile Discs (DVDs)
– Video CDs (VCDs)
– Super Video CDs (SVCDs)
– Finalised DVD+Recordable[Rewritable]
(DVD+R[W])
– Audio Compact Discs (CDs)
– MP3 discs, Windows Media™ Audio discs,
picture (Kodak, JPEG) files on CD-R(W).
– JPEG/ISO 9660/UDF format
– Progressive JPEG
– JPEG resolution support up to
3072 x 2048
– Supported sampling frequencies :
32 kHz, 44.1 kHz, 48 kHz
– Supported Bit-rates : 32~256 (kbps),
variable bit rates
– DivX disc on CD-R[W]/DVD+R[W]:
– DivX 3.11, 4.x and 5.x
– GMC (Global Motion Compensation)
and QP (Quarter Pixel) not supported.
Region Codes
The regional code ‘X’ (denotes the
number) of this device is shown at
the back panel of this device. If
the DVD is marked with a
different region code, it cannot be played
on this device.
Helpful Hints:
– It may not be possible to play CD-R/RW or
DVD-R/RW in all cases due to the type of
disc or condition of the recording.
– If you are having trouble playing a certain
disc, remove the disc and try a different one.
Improperly formatted discs will not play on
this DVD system.
Playing discs
1 Press SOURCE control until “DISC”
appears on the display panel (or press
DISC on the remote).
2 Turn on the TV power and set to the
correct Video In channel. (See page 16
“Setting the TV”).
➜ You should see the blue DVD
background screen on the TV.
3 Press OPEN CLOSE 0 to open the
disc tray and load a disc, then press the
same button again to close the disc tray.
➜ Make sure the disc label is facing up.
For double-sided discs, load the side you
want to play facing up.
4 Playback will start automatically.
➜ If a disc menu shows on the TV, see
page 21 “Using the Disc Menu”.
➜ If the disc is locked by parental control,
you must enter your six-digit password.
(See pages 33-34).
TIPS: Some discs cannot be played on this DVD system due to the configuration and characteristics
of the disc, or due to the condition of recording and authoring software that was used.
ALL
X
001-045-hts3050-16-Eng2 4/1/06, 3:16 PM19

20
3139 115 2xxx1
English
Auto Eco Power standby mode
This is a power-saving feature, the system
will automatically switch to Eco Power
standby mode if you do not press any
buttons within 30 minutes after a disc has
stopped playing.
Basic playback controls
Pausing playback
● During playback, press 2; (or ; on the
remote).
➜ To resume normal playback,
press 2; (or PLAY B on the remote).
Selecting another track/chapter
● Press S / T or use the numeric
keypad (0-9) to key in a track/chapter
number.
➜ If repeat track mode is active, pressing
S / T will replay the same track/
chapter.
Searching backward/forward
● Press and hold S / T.
To resume normal playback, press 2; (or
PLAY B on the remote).
➜ While searching, pressing S / T
again will decrease/increase the search
speed.
Stopping playback
● Press Ç.
Disc Operations (continued)
Selecting various repeat/
shuffle functions
● While playing a disc, press REPEAT on
the remote repeatedly to choose a repeat
play mode.
DVD
™ RPT ONE (repeat chapter)
™ RPT TT (repeat title)
™ SHUFFLE (random play)
™ RPT SHF (repeat random play)
™ RPT OFF (exit repeat mode)
VCD/SVCD/CD
™ RPT ONE (repeat track)
™ RPT ALL (repeat disc)
™ SHUFFLE (random play)
™ RPT SHF (repeat random play)
™ RPT OFF (exit repeat mode)
MP3/DivX/Windows Media™ Audio
™ RPT ONE (repeat track)
™ RPT ALL/FLD (repeat folder)
™ SHUFFLE (random play)
™ RPT OFF (exit repeat mode)
Helpful Hint:
– VCDs do not allow repeat playback as
long as the PBC mode is switched on.
TIPS: The operating features described here might not be possible for certain discs.
Always refer to the instructions supplied with the discs.
001-045-hts3050-16-Eng2 4/1/06, 3:16 PM20
English
21
3139 115 2xxx1
Disc Operations (continued)
Other operations for video
playback (DVD/VCD/SVCD)
DISC MENU
DISPLAY
AUDIO
SUBTITLE
ZOOM
OK
PLAY
Using the Disc Menu (DVD only)
A menu may appear on the TV screen
once you load in the disc, depending on
the disc format.
To select a playback feature or item
● Use 1 2 3 4 keys or numeric keypad
(0-9) on the remote, then press OK to
start playback.
To access or remove the menu
● Press DISC MENU on the remote.
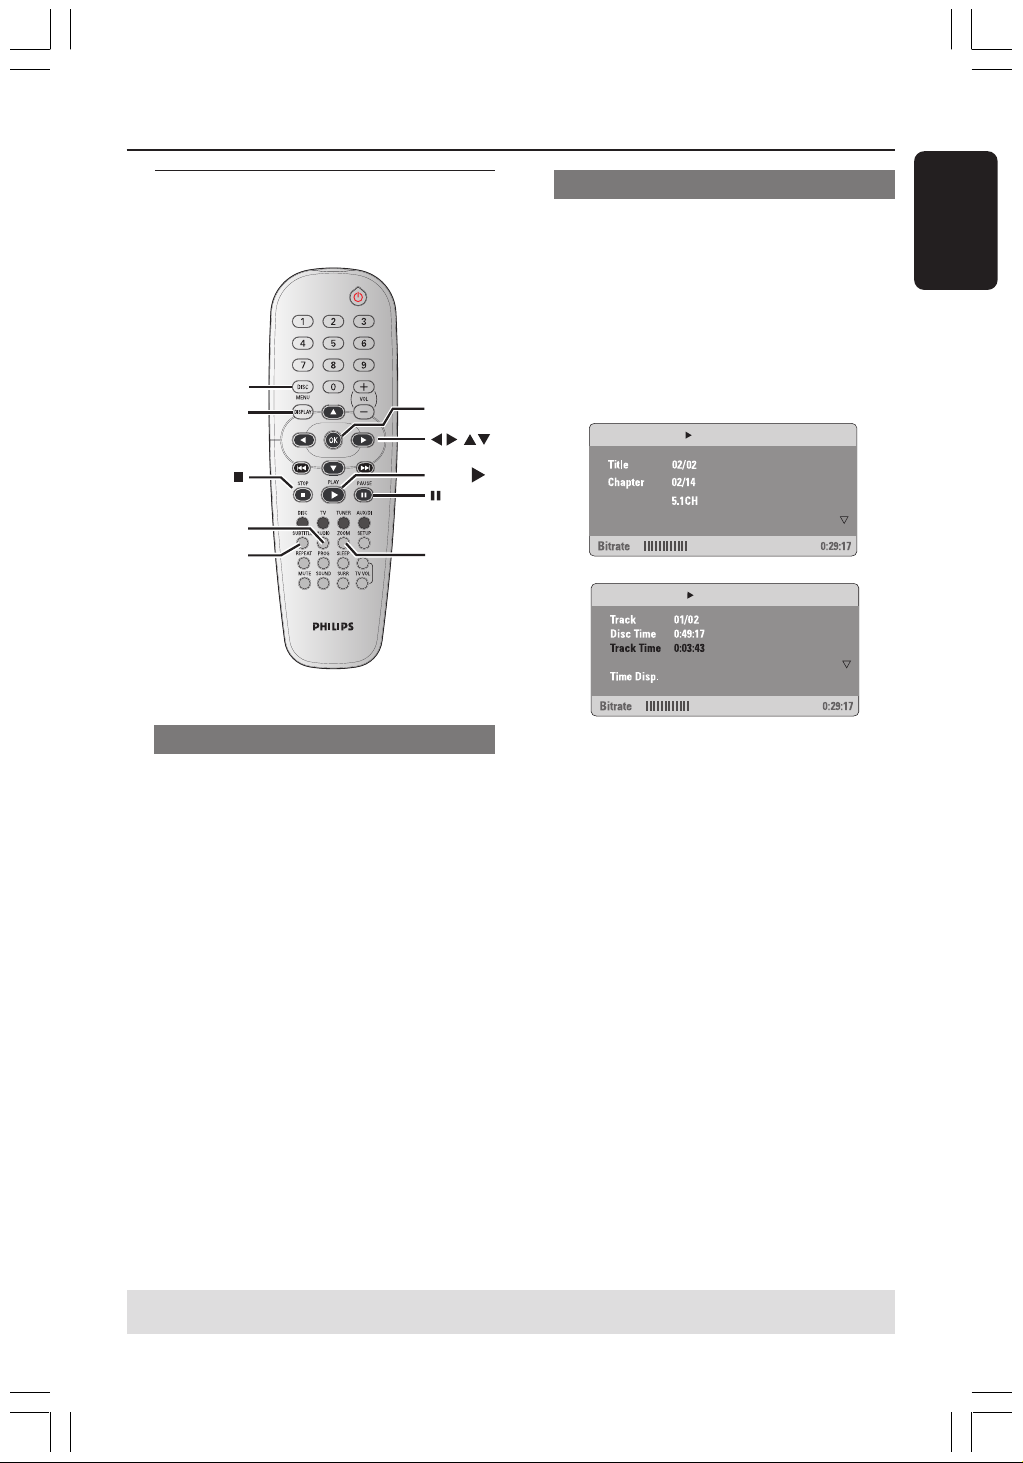
Viewing playback information
It will show the disc playback information
(for example, title or chapter number,
elapsed playing time, audio/subtitle
language), a number of operations can be
done without interrupting disc playback.
1 During playback, press DISPLAY.
➜ A list of available disc information
appears on the TV screen.
Menu
Title Elapsed
Subtitle
Audio
Off
Repeat
Off
Total Elapsed
Total Elapsed
Menu
2 Use 34 keys to view the information and
press OK to access.
3 Use the numeric keypad (0-9) to input
the number/time or use 34 keys to
make the selection, then press OK to
confirm.
➜ Playback will change to the chosen
time or to the selected title/chapter/
track.
TIPS: The operating features described here might not be possible for certain discs.
Always refer to the instructions supplied with the discs.
001-045-hts3050-16-Eng2 4/1/06, 3:16 PM21

22
3139 115 2xxx1
English
Disc Operations (continued)
Advancing by frame
1 During playback, press Å on the remote.
➜ Play will pause and sound will be
muted.
2 Press Å repeatedly to view the next
picture frame.
3 To resume normal playback, press
PLAY B.
Resuming playback from the last
stopped point
This DVD system able to resume disc
playback from its last stopped point (only
possible for the last 10 discs that
recorded without a menu).
1 Load one of the last played 10 discs.
2 While “LOADING” appears on the display
panel, press PLAY B (or 2;) to start
playback from the last stop point.
To cancel the resume mode
● In stop mode, press Ç again.
Zooming in
This function allows you to enlarge the
picture on the TV screen and to pan
through the enlarged picture.
1 During playback, press ZOOM
repeatedly to select a different zoom
factor.
➜ Use 1 2 3 4 keys to move through
the zoomed image.
➜ Playback will continue.
2 Press ZOOM repeatedly to return to
the original size.
Changing sound track language
This operation works only on DVDs with
multiple soundtrack languages, you can
change the language you want while
playing a DVD.
● Press AUDIO repeatedly to select the
available audio languages.
For VCD - changing the audio
channel
● Press AUDIO repeatedly to select the
available audio channels provided by the
disc (STEREO, MONO LEFT, MONO
RIGHT or MIX MONO).
Changing subtitle language (DVD
only)
This operation works only on DVDs with
multiple subtitle languages, you can
change the language you want while
playing a DVD.
● Press SUBTITLE repeatedly to select
different subtitle languages.
TIPS: The operating features described here might not be possible for certain discs.
Always refer to the instructions supplied with the discs.
001-045-hts3050-16-Eng2 4/1/06, 3:16 PM22
English
23
3139 115 2xxx1
Preview Function (VCD/SVCD only)
1 Press DISC MENU.
2 Use 34 keys to highlight { Track Digest },
{ Disc Interval } or { Track Interval }.
3 Press OK to open one option.
Select Digest Type:
Track Digest
Disc Interval
Track Interval
{ Track Digest }
This function will minimise the picture of
every track in order to display every six
of these tracks on the screen to help you
know the content of every track on the
disc.
{ Disc Interval }
This function is used to divide a disc into
six parts by regular intervals and display
them on one page to preview the whole
disc.
{ Track Interval }
This function is used to divide a single
track into six parts by regular intervals
and display them on one page to help you
preview the selected track.
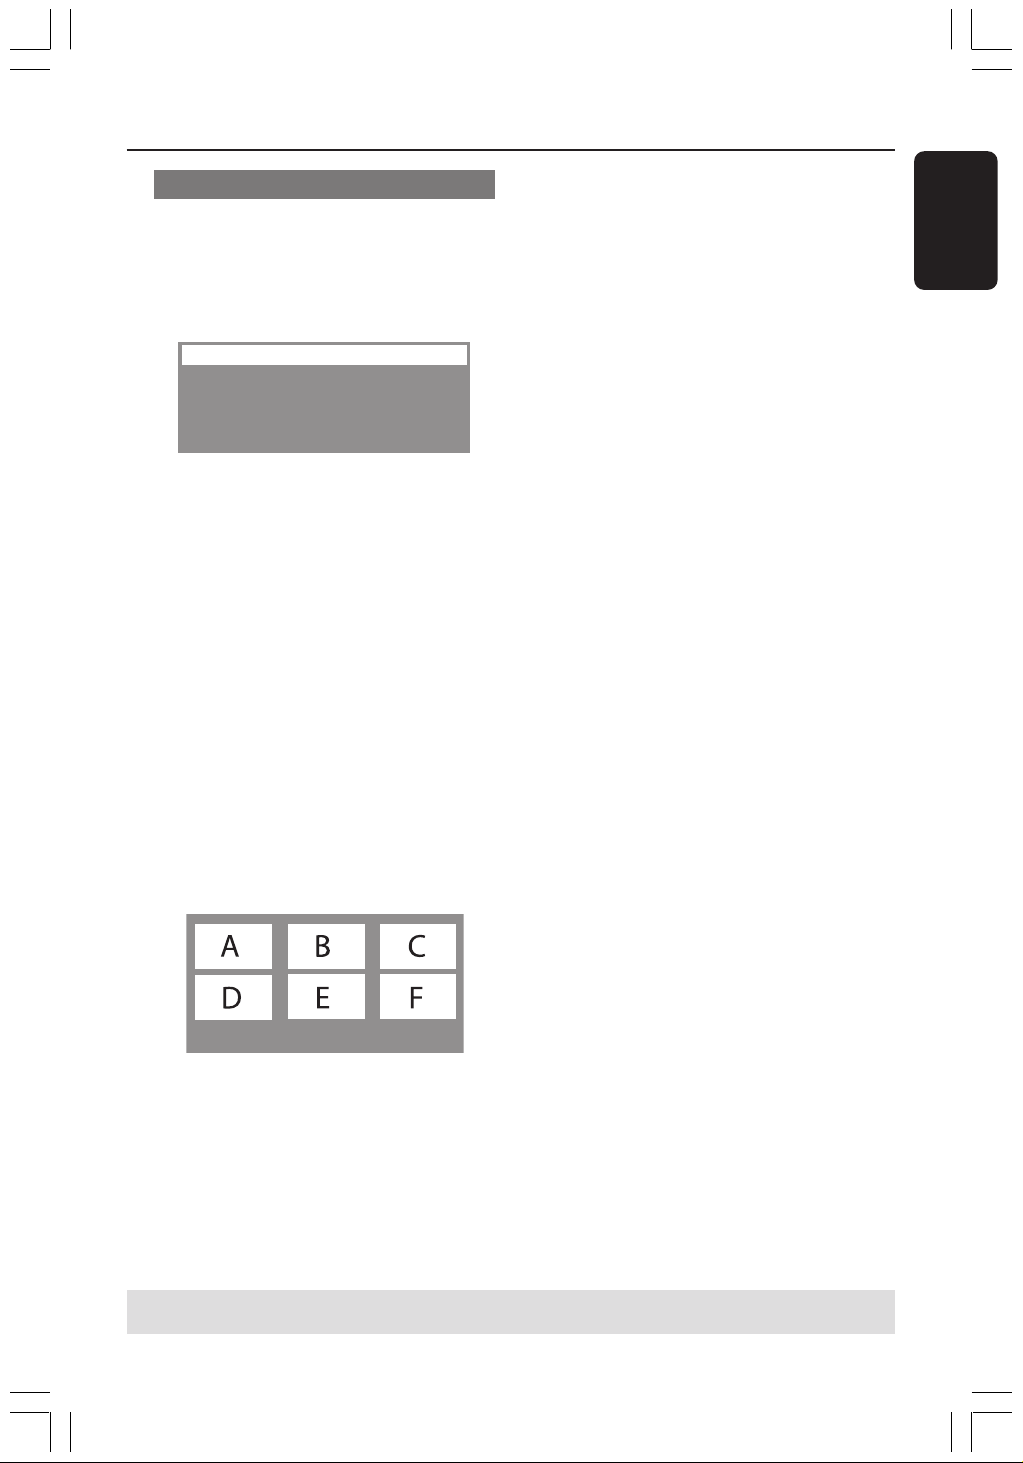
Exit Menu
01 02 03
04 05 06
(example for 6 thumbnail pictures display)
4 Use 1 2 3 4 keys to select a track.
5 Press S / T to open the previous
or next page.
6 Press OK to confirm.
To quit preview function
● Use 1 2 3 4 keys to highlight { Exit }
and press OK to confirm.
To return to preview menu
● Use 1 2 3 4 keys to highlight { Menu }
and press OK to confirm.
Disc Operations (continued)
TIPS: The operating features described here might not be possible for certain discs.
Always refer to the instructions supplied with the discs.
001-045-hts3050-16-Eng2 4/1/06, 3:17 PM23

24
3139 115 2xxx1
English
Disc Operations (continued)
Playing an MP3/Windows
Media™ Audio/JPEG disc
This DVD system can playback MP3,
Windows Media™ Audio, JPEG, VCD &
SVCD files on a personally recorded CD-
R/RW disc or commercial CD.
IMPORTANT!
You have to turn on your TV and set to
the correct Video In channel. (See page
16 “Setting the TV”).
1 Load a disc.
➜ The disc reading time may exceed 30
seconds due to the complexity of the
directory/file configuration.
➜ The disc menu appears on the TV
screen.
00:19 04:39 001/003
\MP3_files_128kbs
Previous
Picture 1
Picture 2
MP3 Music 1
MP3 Music 2
050 003 000
2 If the disc main menu contains various
folders, use 34 keys to select a desired
folder and press OK to open the folder.
3 Use 3 4 keys to select a track/file and
press OK to start playback.
➜ Playback will start from the selected
file and continue to the end of the folder.
During playback, you can;
● Press S / T to select another
track/file in the current folder.
● Press 1 / 2 to fast reverse/forward
search a music track.
● To select another folder from the current
disc, press 3 to return to the root menu,
then use 34 keys to make your selection
and press OK to confirm.
● Press REPEAT continuously to access
various play mode.
● Press Å to pause or PLAY B to
resume playback.
Playing MP3 music and JPEG
picture simultaneously
1 Load a MP3 disc that contains music and
pictures.
➜ The disc menu appears on the TV
screen.
2 Select an MP3 track and press 2; (or
PLAY B on the remote) to start playback.
3 During MP3 music playback, use 1 2 3 4
keys to select a picture folder from the
disc menu and press 2; (or PLAY B).
➜ The picture files will be played back
until the end of the folder.
4 To quit simultaneous playback, press
DISC MENU and followed by Ç.
Helpful Hints:
– It may not be possible to play certain
MP3/JPEG/DivX disc due to the configuration
and characteristics of the disc or condition of
the recording.
– It is normal to experience an occasional
“skip” while listening to your MP3 disc.
– It is normal to experience an occasional
pixelation during DivX playback due to poor
clarity of digital contents during internet
downloading.
– For multi-session discs with different
formats, only the first session will be available.
TIPS: Some discs cannot be played on this DVD system due to the configuration and characteristics
of the disc, or due to the condition of recording and authoring software that was used.
001-045-hts3050-16-Eng2 4/1/06, 3:17 PM24
English
25
3139 115 2xxx1
Disc Operations (continued)
Playing a picture disc (slide
show)
IMPORTANT!
You have to turn on your TV and set to
the correct Video In channel. (See page
16 “Setting the TV”).
● Load a Picture disc (Kodak Picture CD,
JPEG).
➜ For a Kodak disc, the slide show will
begin automatically.
➜ For a JPEG disc, the picture menu will
appear on the TV screen. Press 2;
(or PLAY B) to start the slide-show
playback.
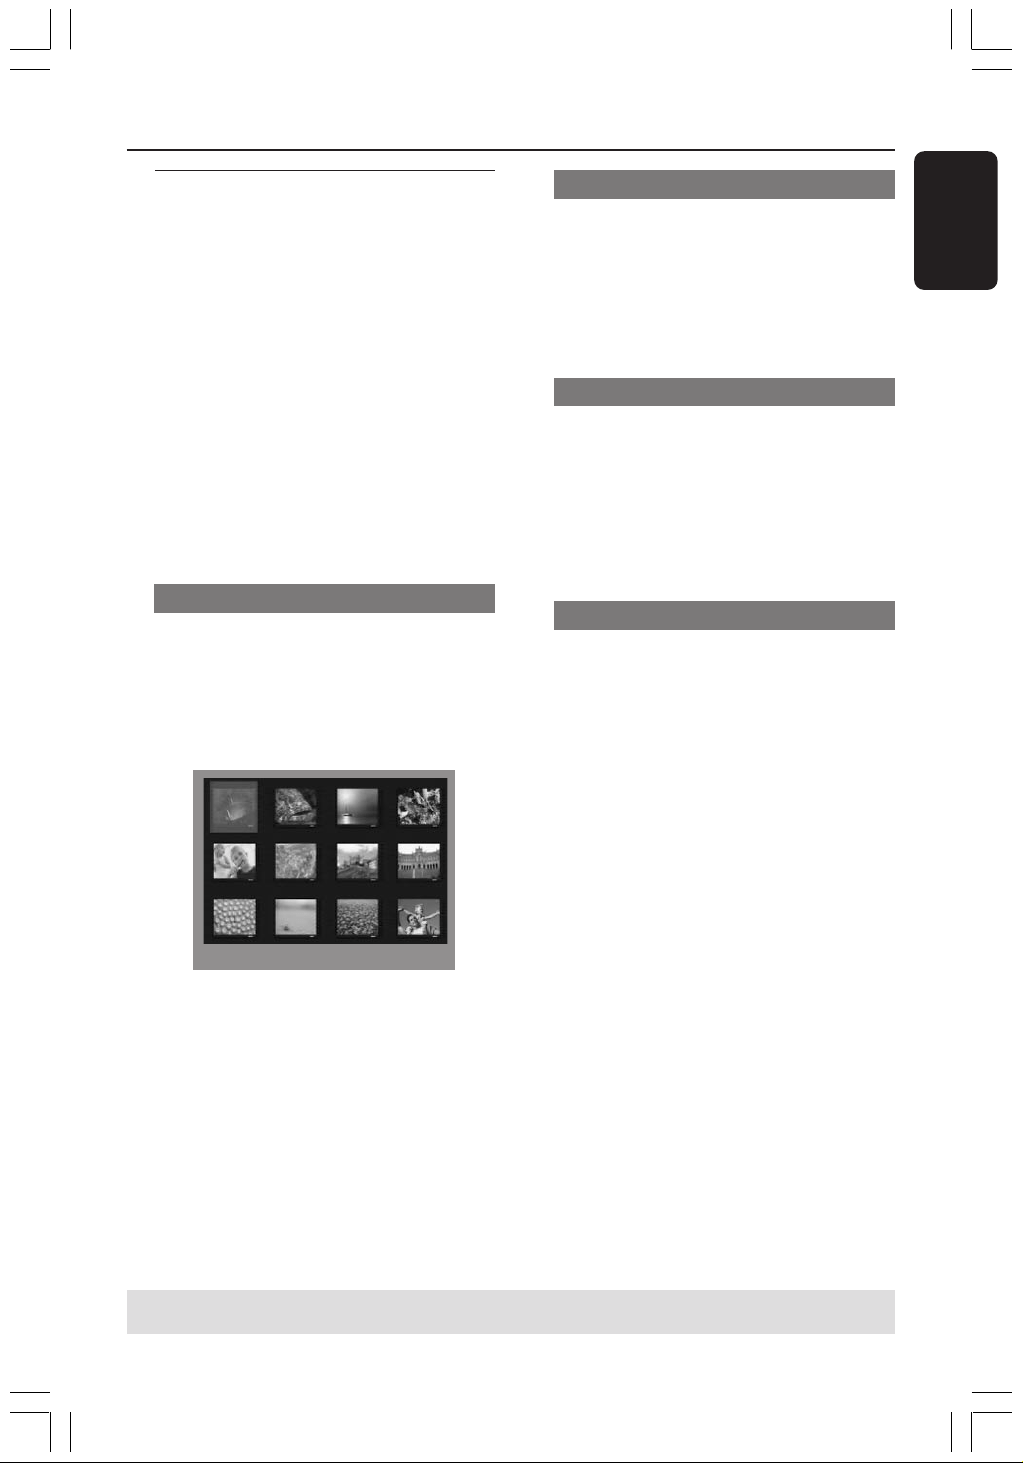
Preview Function
This function shows the content of the
current folder or the whole disc.
1 During playback, press Ç.
➜ 12 thumbnail pictures will appear on
the TV screen.
2 S T
2 Press S / T to display the other
pictures on the previous/next page.
3 Use 1 2 3 4 keys to highlight one of the
picture and press OK to start playback.
4 Press DISC MENU to return to Picture
CD menu.
Zoom picture
1 During playback, press ZOOM
repeatedly to select different zoom
factor.
2 Use 1 2 3 4 keys to move through the
zoomed image.
Rotating/Fliping the picture
● During playback, use 1 2 3 4 keys to
rotate/flip the picture on the TV screen.
3 : flip the picture vertically
4 : flip the picture horizontally
1 : rotate the picture anti-clockwise
2 : rotate the picture clockwise
Supported JPEG picture formats
File format:
– The file extension has to be '*.JPG' and
not '*.JPEG'.
– It can only display DCF-standard still
pictures or JPEG pictures e.g. TIFF. It
cannot play back moving pictures, Motion
JPEG, and other formats, or pictures in
formats other than JPEG, or pictures
associated with sound.
– It may require longer time for the
DVD system to display the disc content
on the TV due to the large number of
songs/pictures compiled into one disc.
TIPS: Some discs cannot be played on this DVD system due to the configuration and characteristics
of the disc, or due to the condition of recording and authoring software that was used.
001-045-hts3050-16-Eng2 4/1/06, 3:17 PM25

26
3139 115 2xxx1
English
Playing a DivX disc
This DVD system supports the playback
of DivX movie which you download from
your computer onto a CD-R/RW (see
page 29 for more information).
1 Load a DivX disc.
2 If the DivX movie contains external
subtitles, the subtitle menu will appear on
the TV for your selection.
● In this case, pressing SUBTITLE on the
remote control will turn on or off the
subtitle display.
3 Press 2; (or PLAY B) to start playback.
● If multilingual subtitles are embedded on
the DivX disc, you can press SUBTITLE
to change the subtitle language while
playing.
● During playback, pressing 1 / 2 will
perform fast reverse/forward search.
Helpful Hints:
– Subtitle files with the following filename
extensions (.srt, .smi, .sub, .ssa, .ass) are
supported but do not appear on the file
navigation menu.
– The subtitle filename has to be the same
as the filename of the movie.
– The subtitle can only be displayed up to
maximum of 45 characters.
Disc Operations (continued)
TIPS: Some discs cannot be played on this DVD system due to the configuration and characteristics
of the disc, or due to the condition of recording and authoring software that was used.
001-045-hts3050-16-Eng2 4/1/06, 3:17 PM26
English
27
3139 115 2xxx1
This DVD system setup is carried out via
the TV, enabling you to customise the
DVD system to suit your particular
requirements.
Accessing General Setup
Page
1 Press DISC and followed by SETUP on
the remote.
2 Use 1 2 keys to select ‘General Setup
Page’.
3 Press OK to confirm.
General Setup Page
Disc Lock
Display Dim
Program
OSD Language
Screen Saver
DIVX(R) VOD Code
DVD Setup Menu Options
TIPS: The underlined option is the factory default setting.
To return to the previous menu, press 1. To remove the menu, press SETUP.
Locking/Unlocking the disc for
viewing
Not all discs are rated or coded by the
disc maker. You can prevent a specific
disc from playing by locking the disc. Up
to 40 discs can be locked.
1 In ‘General Setup Page’, use 34 keys to
highlight { Disc Lock }, then press 2.
{ Lock }
Select this to block the playback of the current
disc. Subsequent access to a locked disc
requires six-digit password. The default
password is ‘136900’ (see page 34 “Changing
the password”).
{
Unlock }
Select this to unlock the disc and allow future
playback.
2 Use 34 keys to select a setting and press
OK to confirm.
Dimming system’s display panel
You can select different levels of
brightness for the DVD system display
screen.
1 In ‘General Setup Page’, use 34 keys to
highlight { Display Dim }, then press 2.
{
100% }
Select this for full brightness.
{ 70% }
Select this for medium brightness.
{ 40% }
Select this for the dimmest display.
2 Use 34 keys to select a setting and press
OK to confirm.
001-045-hts3050-16-Eng2 4/1/06, 3:17 PM27
28
3139 115 2xxx1
English
DVD Setup Menu Options (continued)
TIPS: The underlined option is the factory default setting.
To return to the previous menu, press 1. To remove the menu, press SETUP.
Programming disc tracks (not for
Picture CD/MP3)
You can play the contents of the disc in
the order you want by programming the
playing order of the tracks. Up to 20
tracks can be stored.
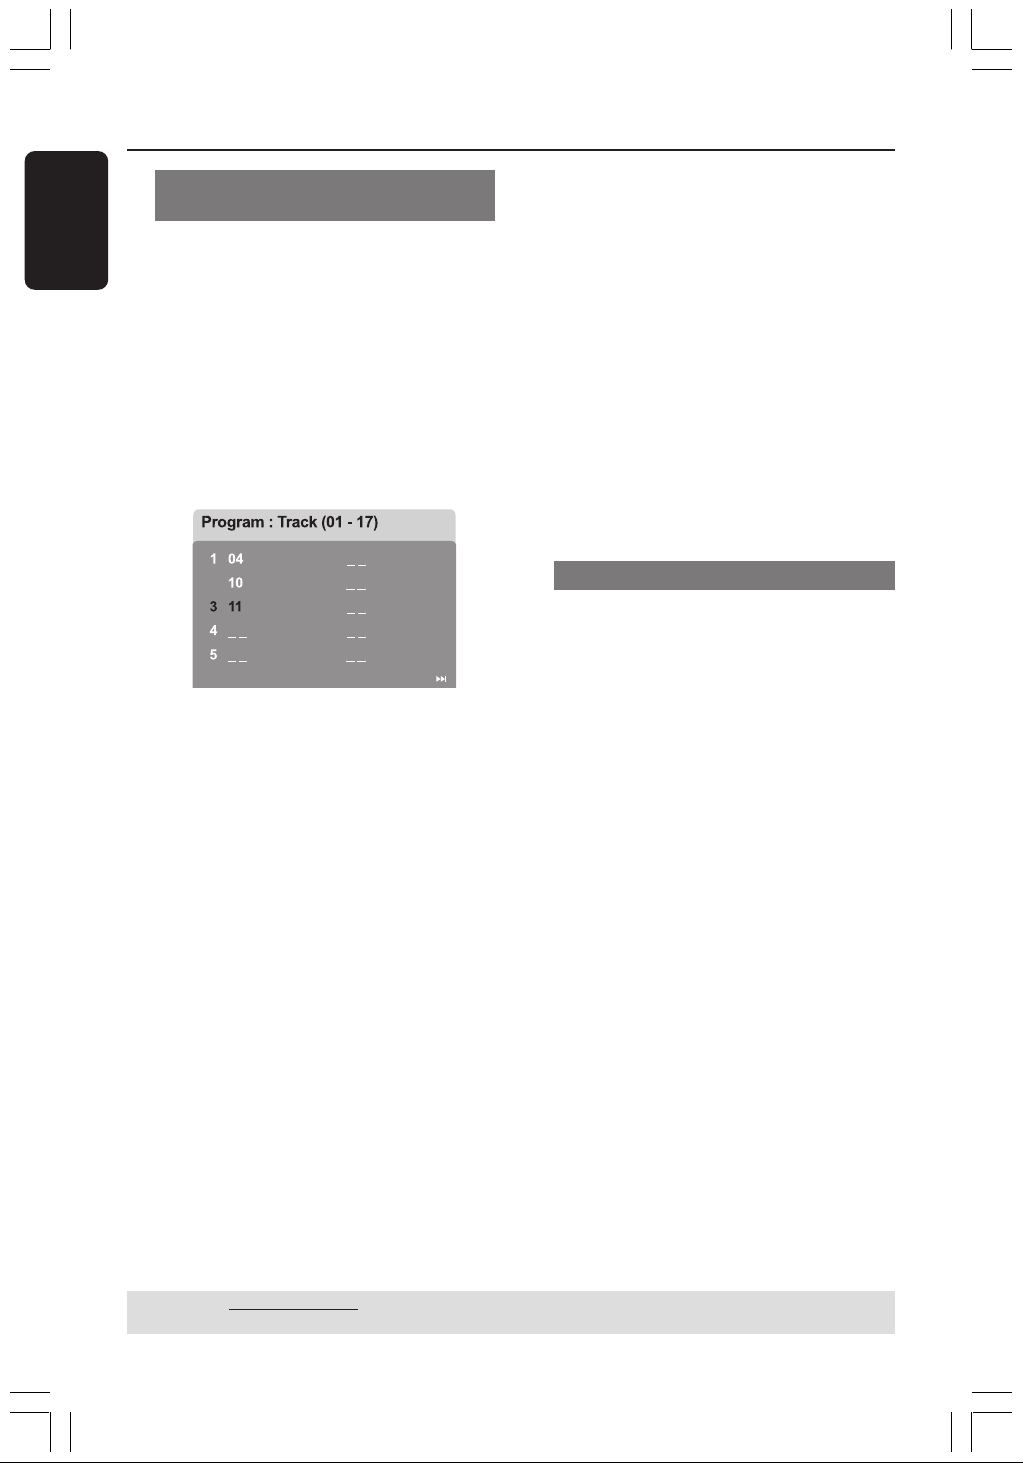
1 Press PROG on the remote.
OR
In ‘General Setup Page’, use 34 keys to
highlight { Program }, then press 2 to
select { Input Menu }.
2 Press OK to confirm.
2
6
7
8
9
10
Exit Start Next
To programme your favourite tracks/
chapter
3 Use the numeric keypad (0-9) to enter
a valid track/chapter number.
4 Use 1 2 3 4 keys to move the cursor to
the next position.
➜ If the total programme tracks are
more than ten, press T to open the
next page and proceed with programming
or,
➜ Use 1 2 3 4 keys to highlight
{ Next } on the programme menu, then
press OK.
5 Repeat steps 3~4 to input another
track/chapter number.
If you want to remove a track
6 Use 1 2 3 4 keys to move the cursor to
the track you want to remove.
7 Press OK to remove this track from the
programme menu.
To start programme playback
8 Use 1 2 3 4 keys to highlight { Start }
on the programme menu, then press OK.
➜ Playback will start with the selected
tracks under the programmed sequence.
To exit programme playback
9 Use 1 2 3 4 keys to highlight { Exit } on
the programme menu, then press OK.
OSD Language
This menu contains various language
options for the language displayed on the
screen. For details, see page 18.
001-045-hts3050-16-Eng2 4/1/06, 3:17 PM28

English
29
3139 115 2xxx1
DVD Setup Menu Options (continued)
Screen Saver - turning on/off
The screen saver will help prevent
damage to your TV display device.
1 In ‘General Setup Page’, use 34 keys to
highlight { Screen Saver }, then press 2.
{
On }
Select this if you wish to turn off the TV screen
when play is stopped or paused for more than
15 minutes.
{ Off }
Select this to disable the screen saver function.
2 Use 34 keys to select a setting and press
OK to confirm.
DivX
®
VOD registration code
Philips provide you the DivX
®
VOD
(Video On Demand) registration code
that allows you to rent and purchase
videos using the DivX
®
VOD service.
For more information, visit us at
www.divx.com/vod.
1 In ‘General Setup Page’, use 34 keys to
highlight { DIVX(R) VOD Code }, then
press 2.
➜ The registration code will appear.
2 Press OK to exit.
3 Use the registration code to purchase or
rent the videos from DivX
®
VOD service
at www.divx.com/vod. Follow the
instructions and download the video
from your computer onto a CD-R/RW
for playback on this DVD system.
Helpful Hint:
– All the downloaded videos from DivX
®
VOD can only be played back on this DVD
system.
TIPS: The underlined option is the factory default setting.
To return to the previous menu, press 1. To remove the menu, press SETUP.
001-045-hts3050-16-Eng2 4/1/06, 3:17 PM29
30
3139 115 2xxx1
English
DVD Setup Menu Options (continued)
TIPS: The underlined option is the factory default setting.
To return to the previous menu, press 1. To remove the menu, press SETUP.
Accessing Audio Setup Page
1 Press DISC and followed by SETUP on
the remote.
2 Use 1 2 keys to select ‘Audio Setup
Page’.
3 Press OK to confirm.
Audio Setup Page
Speakers Volume
Speakers Delay
Night Mode
CD Upsampling
Speakers Volume/Speakers Delay
These menus contain speaker setup
options that allow you to adjust the
individual speakers volume and distance.
For details, see page 38.
Night Mode - turning on/off
When night mode is activated, the high
volume outputs are softened and low
volume outputs are brought upward to
an audible level (for DVD only). It is
useful for watching action movies without
disturbing others at night.
1 In ‘Audio Setup Page’, use 34 keys to
highlight { Night Mode }, then press 2.
{ On }
Select this to level out the volume.
{
Off }
Select this when you want to enjoy the
surround sound with its full dynamic range.
2 Use 34 keys to select a setting and press
OK to confirm.
CD Upsampling
This feature allows you to convert your
music CD to a higher sampling rate using
sophisticated digital signal processing for
better sound quality.
Make sure that the DVD system is in
Stereo mode in order to access the
CD upsampling option.
1 In ‘Audio Setup Page’, use 34 keys to
highlight { CD Upsampling }, then press
2.
{ Off }
Select this to disable CD-upsampling.
{ 88.2 kHz (X2) }
Select this to convert the sampling rate of the
CDs twice higher than the original.
2 Use 34 keys to select a setting and press
OK to confirm.
Helpful Hint:
– If you press SURR button on the remote
control to select “Multi-Channel” mode, it will
disable the CD upsampling feature.
001-045-hts3050-16-Eng2 4/1/06, 3:17 PM30
English
31
3139 115 2xxx1
DVD Setup Menu Options (continued)
TIPS: The underlined option is the factory default setting.
To return to the previous menu, press 1. To remove the menu, press SETUP.
Accessing Video Setup Page
1 Press DISC and followed by SETUP on
the remote.
2 Use 1 2 keys to select ‘Video Setup Page’.
3 Press OK to confirm.
Video Setup Page
TV Type
TV Display
Picture Setting
TV Type
This menu contains the options for
selecting the colour system that matches
the connected TV. For details, see page
17.
TV Display
This menu contains the options for
setting the aspect ratio of the DVD
system according to the connected TV.
For details, see page 17.
Picture Setting
This DVD system provides three
predefined sets of picture colour settings
and one personal setting which you can
define yourself.
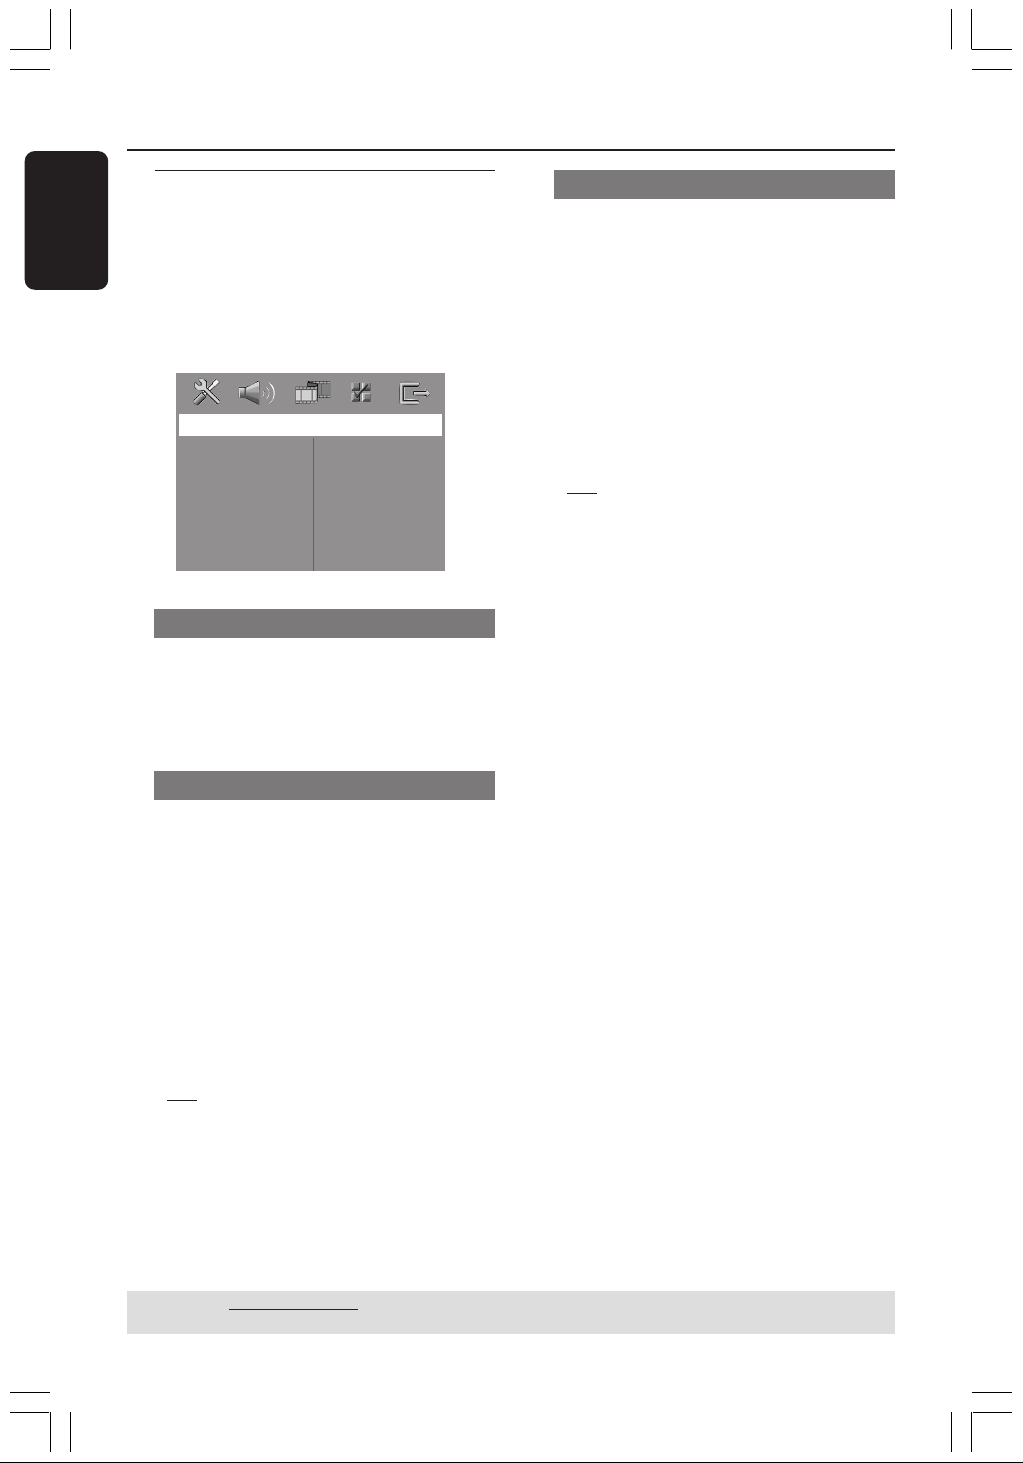
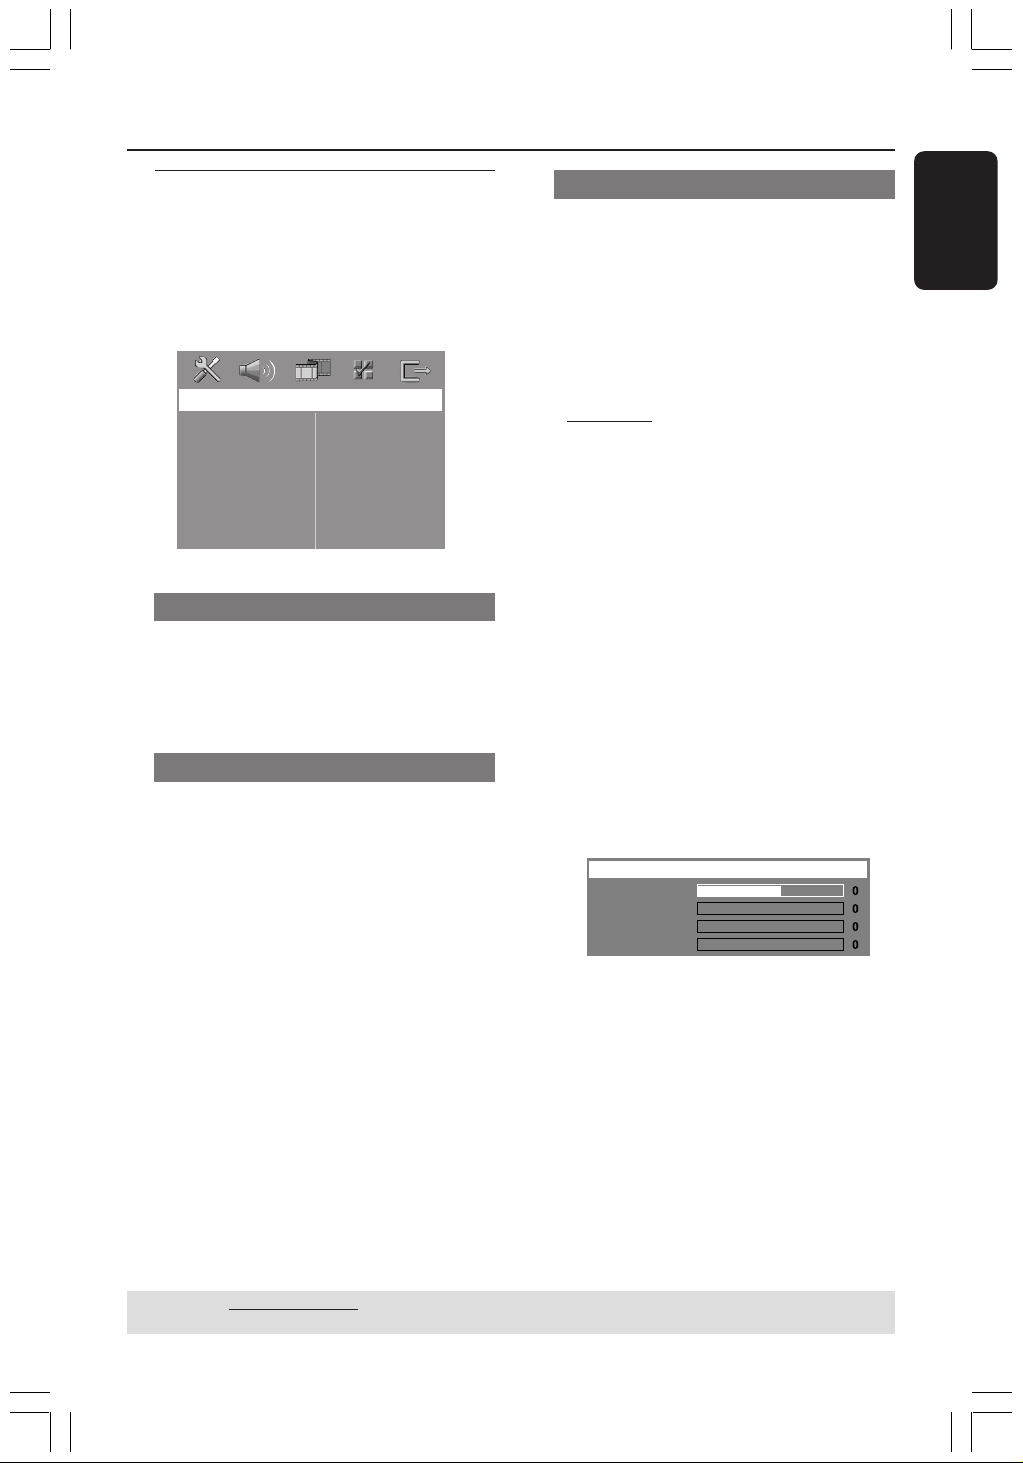
1 In ‘Video Setup Page’, use 34 keys to
highlight { Picture Setting }, then press
2.
{
Standard }
Select this for original colour setting.
{ Bright }
Select this for vibrant colour setting.
{ Soft }
Select this for warm colour setting.
{ Personal }
Select this to personalise your picture colour
by adjusting the brightness, contrast, tint and
colour (saturation).
2 Use 34 keys to select a setting and press
OK to confirm.
3 If you select { Personal }, then proceed
to steps
4~7.
➜ The ‘Personal picture setup’ menu
appears.
Brightness
Contrast
Tint
Color
Personal Picture Setup
001-045-hts3050-16-Eng2 4/1/06, 3:18 PM31

32
3139 115 2xxx1
English
DVD Setup Menu Options (continued)
TIPS: The underlined option is the factory default setting.
To return to the previous menu, press 1. To remove the menu, press SETUP.
4 Press 34 to highlight one of the
following options.
{ Brightness }
Increase this value to brighten the picture
colour or vice versa. Choose zero (0) for the
average setting.
{ Contrast }
Increase this value to sharpen the picture
colour or vice versa. Choose zero (0) to
balance the contrast.
{ Tint }
Increase or decrease this value to change the
colour phase of the picture. Choose zero (0)
for the average setting.
{ Color }
Increase this value to enhance the picture
colour or vice versa. Choose zero (0) to
balance the colour.
5 Use 1 2 keys to adjust the setting that
best suit your personal preference.
6 Repeat steps 4~5 to adjust other
settings.
7 Press OK to confirm.
Accessing Preference Setup
Page
1 Press Ç twice to stop playback (if any),
then press SETUP.
2 Use 1 2 keys to select the ‘Preference
Page’.
3 Press OK to confirm.
Preference Page
Audio
Subtitle
Disc Menu
Parental
PBC
MP3/JPEG Nav
Password
DivX Subtitle
Default
Audio, Subtitle, Disc Menu
These menus contain various language
options for audio, subtitle and disc menu
that may be recorded on the DVD. For
details, see page 18.
001-045-hts3050-16-Eng2 4/1/06, 3:18 PM32
English
33
3139 115 2xxx1
DVD Setup Menu Options (continued)
TIPS: The underlined option is the factory default setting.
To return to the previous menu, press 1. To remove the menu, press SETUP.
Restricting playback by Parental
Control
Some DVDs may have a parental level
assigned to the complete disc or to
certain scenes on the disc. This feature
lets you set a playback limitation level.
The rating levels are from 1 to 8 and are
country dependent. You can prohibit the
playing of certain discs that are not
suitable for your children, or have certain
discs played with alternative scenes.
1 In ‘Preference Page’, use 34 keys to
highlight { Parental }, then press 2.
Preference Page
1 Kid Safe
2 G
3 PG
4 PG 13
5 PGR
6 R
7 NC 17
8 Adult
Audio
Subtitle
Disc Menu
Parental
PBC
MP3/JPEG Nav
Password
DivX Subtitle
Default
2 Use 34 keys to highlight a rating level for
the disc inserted and press OK.
3 Use the numeric keypad (0-9) to enter
the six-digit password (see page 34
“Changing the password”).
➜ DVDs that are rated above the level
you selected will not play unless you
enter your six-digit password.
Rating explanations
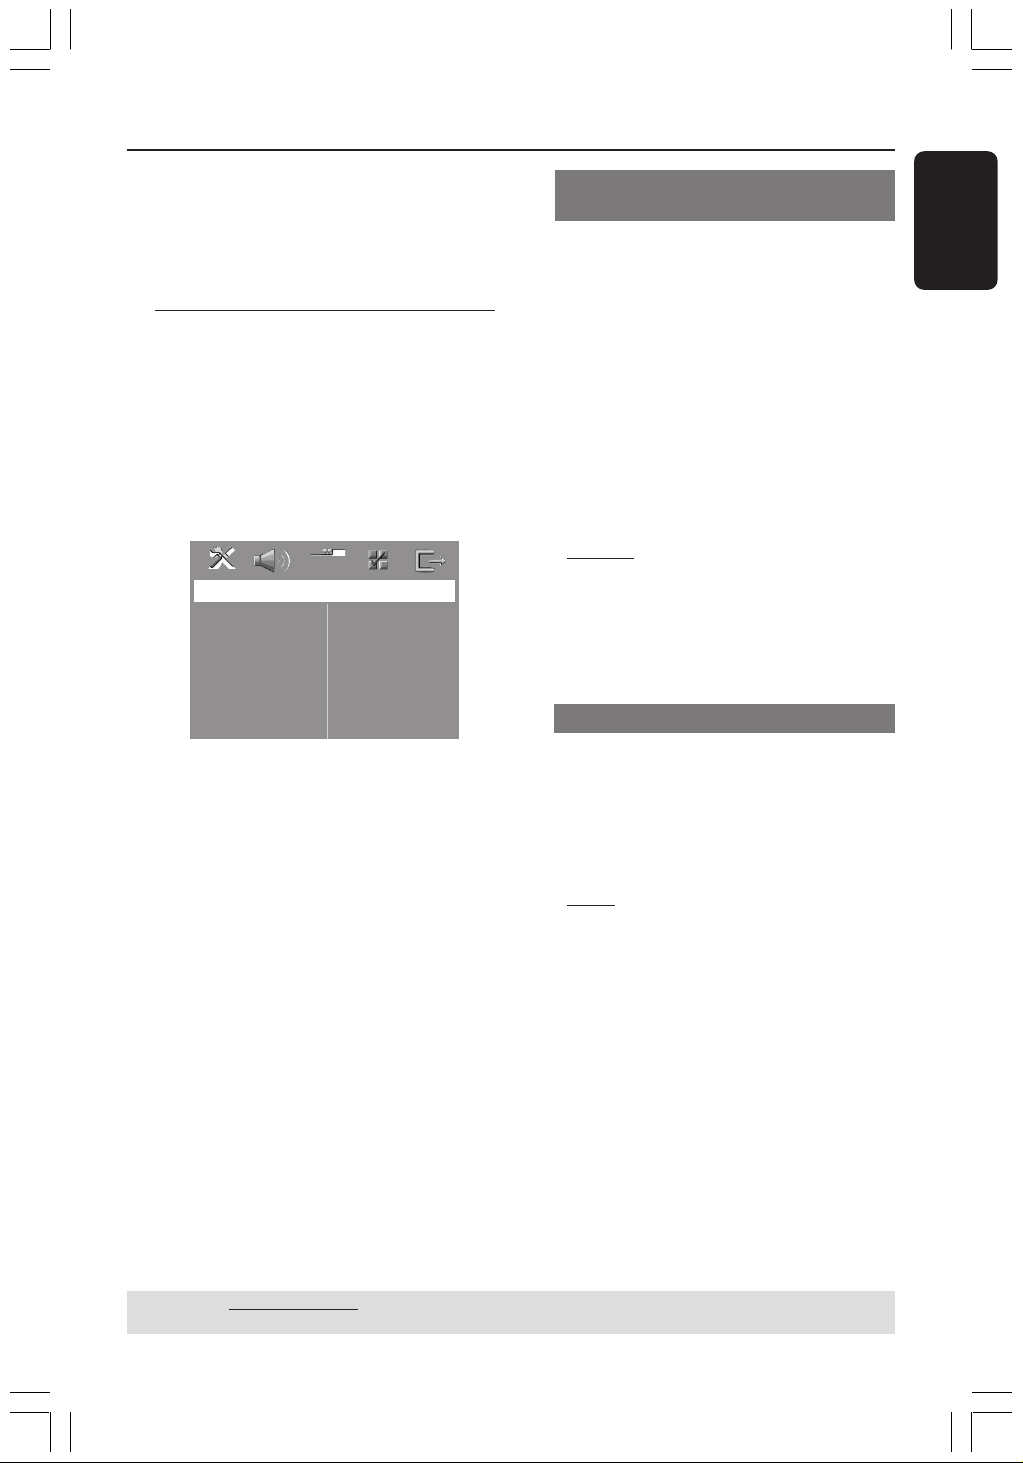
1Kid Safe – 2 G
– General Audience; recommended as
acceptable for viewers of all ages.
3 PG
– Parental Guidance suggested.
4 PG13
– Material is unsuitable for children under the
age of 13.
5 PGR – 6 R
– Parental Guidance - Restricted;
recommended that parents restrict children
under the age of 17 from viewing or allow
them to view only when supervised by a
parent or adult guardian.
7 NC-17
– No children under the age of 17; not
recommended viewing for children under the
age of 17.
8 Adult
– Mature material; should be viewed only by
adults due to graphic sexual material, violence
or language.
Helpful Hints:
– VCD, SVCD, CD have no level indication, so
parental control has no effect on these type
of discs. This also applies to most illegal
DVDs.
– Some DVDs are not encoded with a rating
though the movie rating may be printed on
the Disc cover. The rating level feature does
not prohibit play of such Discs.
001-045-hts3050-16-Eng2 4/1/06, 3:18 PM33
34
3139 115 2xxx1
English
DVD Setup Menu Options (continued)
TIPS: The underlined option is the factory default setting.
To return to the previous menu, press 1. To remove the menu, press SETUP.
PBC (Playback Control)
PBC (Playback Control) allows you to
play Video CDs interactively, following the
menu on the display. This feature is
available only on Video CD 2.0 with
playback control (PBC) feature.
1 In ‘Preference Page’, use 34 keys to
highlight { PBC }, then press 2.
{
On }
Select this if you wish to display the index
menu once you load in the VCD.
{ Off }
Select this to skip the index menu and start
playback directly.
2 Use 34 keys to select a setting and press
OK to confirm.
MP3/JPEG Menu - turning on/off
MP3/JPEG Navigator can be set only if the
disc is recorded with a menu. It allows
you to select different display menus for
easy navigation.
1 In ‘Preference Page’, use 34 keys to
highlight { MP3/JPEG Nav }, then press
2.
{ Without Menu }
Select this to display all the files contained in
the MP3/Picture CD.
{
With Menu }
Select this to display only the folder menu of
the MP3/Picture CD.
2 Use 34 keys to select a setting and press
OK to confirm.
Changing the Password
The same password is used for both
Parental Control and Disc Lock. Enter
your six-digit password to play a
prohibited disc or if prompted for a
password. The default password is
136900.
1 In ‘Preference Page’, use 34 keys to
highlight { Password }, then press 2 to
select { Change }.
Preference Page
Change
Audio
Subtitle
Disc Menu
Parental
PBC
MP3/JPEG Nav
Password
DIVX Subtitle
Default
2 Press OK to enter the ‘Password Change
Page’.
Change Password
Old Password
New Password
Confirm PWD
OK
3 Use the numeric keypad (0-9) to enter
your old six-digit password.
➜ When doing this for the first time, key
in ‘
136900’.
➜ If you forget your old six-digit
password, key in ‘
136900’.
4 Enter the new six-digit password.
5 Enter the new six-digit password a
second time to confirm.
➜ The new six-digit password will now
take effect.
6 Press OK to confirm.
001-045-hts3050-16-Eng2 4/1/06, 3:18 PM34

English
35
3139 115 2xxx1
DVD Setup Menu Options (continued)
TIPS: The underlined option is the factory default setting.
To return to the previous menu, press 1. To remove the menu, press SETUP.
Setting the DivX Subtitle font
You can set the font type that supports
the recorded DivX subtitle.
1 In ‘Preference Page’, use 34 keys to
highlight { DIVX Subtitle }, then press
2.
{
Standard }
Select this to display a standard list of Roman
subtitle fonts provided by this DVD system.
{ Others}
Select this to display other subtitle fonts.
2 Use 34 keys to select a setting and press
OK to confirm.
Restoring to original settings
You can reset all the system menu
options and your personal settings to the
factory defaults, except your password
for Parental Control and Disc Lock.
1 In ‘Preference Page’, use 34 keys to
highlight { Default }, then press 2 to
select { Reset }.
2 Press OK to confirm.
➜ All settings will now reset to factory
defaults.
001-045-hts3050-16-Eng2 4/1/06, 3:18 PM35

36
3139 115 2xxx1
English
IMPORTANT!
Make sure the FM and MW
antennas are connected.
Tuning to radio stations
1 Press TUNER on the remote (or press
SOURCE control at the front panel) to
select “FM” or “MW”.
2 Press 3 / 4 briefly on the remote.
➜ The display panel will show "SEARCH"
until a radio station with sufficient signal
strength is found.
3 Repeat step 2 if necessary until you find
the desired radio station.
4 To tune to a weak station, press 1 / 2
briefly and repeatedly until an optimal
reception is found.
Presetting radio stations
You can store up to 40 FM and 20 MW
preset radio stations in the memory.
Helpful Hints:
– The system will exit presetting mode if no
button is pressed within 20 seconds.
– If no valid frequency is detected during
Plug and Play,"PLEASE CHECK FM/MW
ANTENNA" appears.
Using the Plug and Play
Plug and Play allows you to store all
available radio stations automatically.
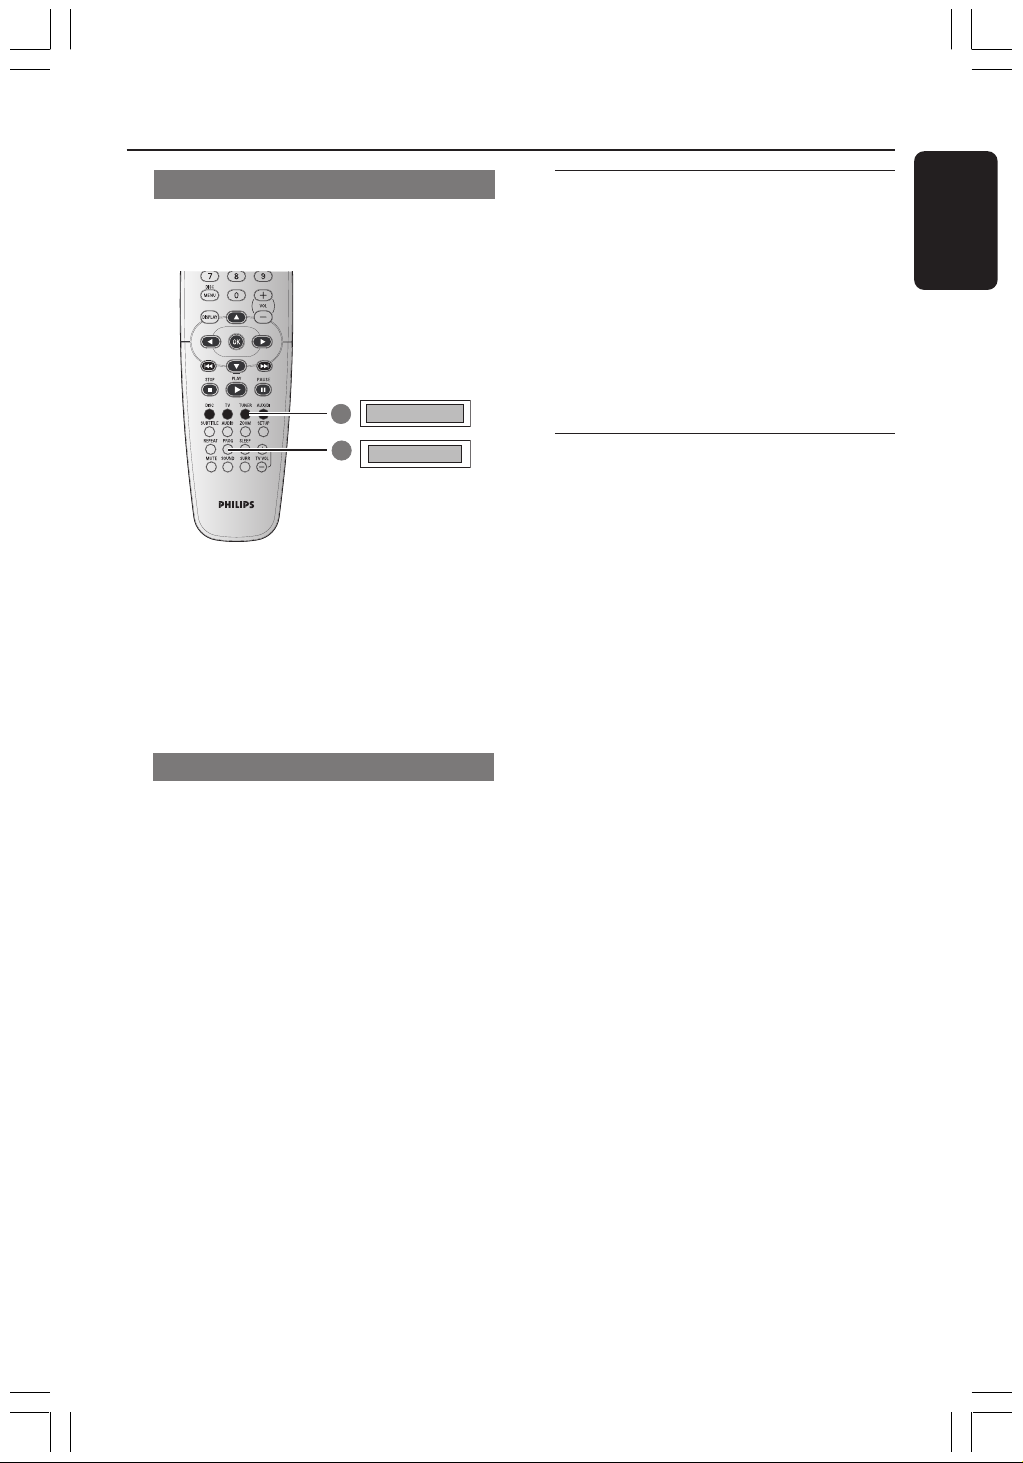
1
AUTO INSTALL..
START..
2
1 For first time setup, press TUNER.
➜ "AUTO INSTALL PRESS PLAY"
appears.
2 Press PLAY B until "START ..." appears
on the display panel.
➜ The system will start searching from
FM band and followed by MW band.
All the available radio stations with strong
signal strength will be stored
automatically.
➜ Once complete, the last tuned radio
station will play.
Tuner Operations
DVD system’s
display panel
001-045-hts3050-16-Eng2 4/1/06, 3:19 PM36
English
37
3139 115 2xxx1
Automatic presetting
Use automatic presetting to store or
reinstall all the preset radio stations.
1
FM / MW
START..
2
1 Press TUNER on the remote to select
“FM” or “MW”.
2 Press and hold PROG until "START ..."
appears.
➜ All the former presets will be
overwritten.
Manual presetting
Use manual presetting to store only your
favourite radio stations.
1 Tune to your desired radio station (see
“Tuning to radio stations”).
2 Press PROG.
3 Press S / T to select a preset
number that you want to store the
current radio station.
4 Press PROG again to store.
Selecting a preset radio
station
● Press TUNER on the remote, then press
S / T to select a preset number
(or use the numeric keypad on the
remote).
➜ The waveband, preset number followed
by radio frequency will appear.
Deleting a preset radio
station
1 In tuner mode, press S / T on the
remote to select a preset radio station.
2 Press and hold 9 until “FM/MW X
DELETED” appears.
➜ “X” is the preset number.
➜ The radio station continues to play but
has been deleted from the preset list.
➜ The rest of the preset radio station
number remain unchanged.
Tuner Operations (continued)
DVD system’s
display panel
001-045-hts3050-16-Eng2 4/1/06, 3:19 PM37
38
3139 115 2xxx1
English
Sound and Volume Controls
Individual speakers volume
adjustment
You can adjust the delay times (centre,
rear speakers and subwoofer only) and
volume level for individual speakers.
These adjustments let you optimise the
sound according to your surroundings
and setup.
IMPORTANT!
Press SURR button on the remote
to select Multi-channel surround
mode before adjusting the speaker
settings.
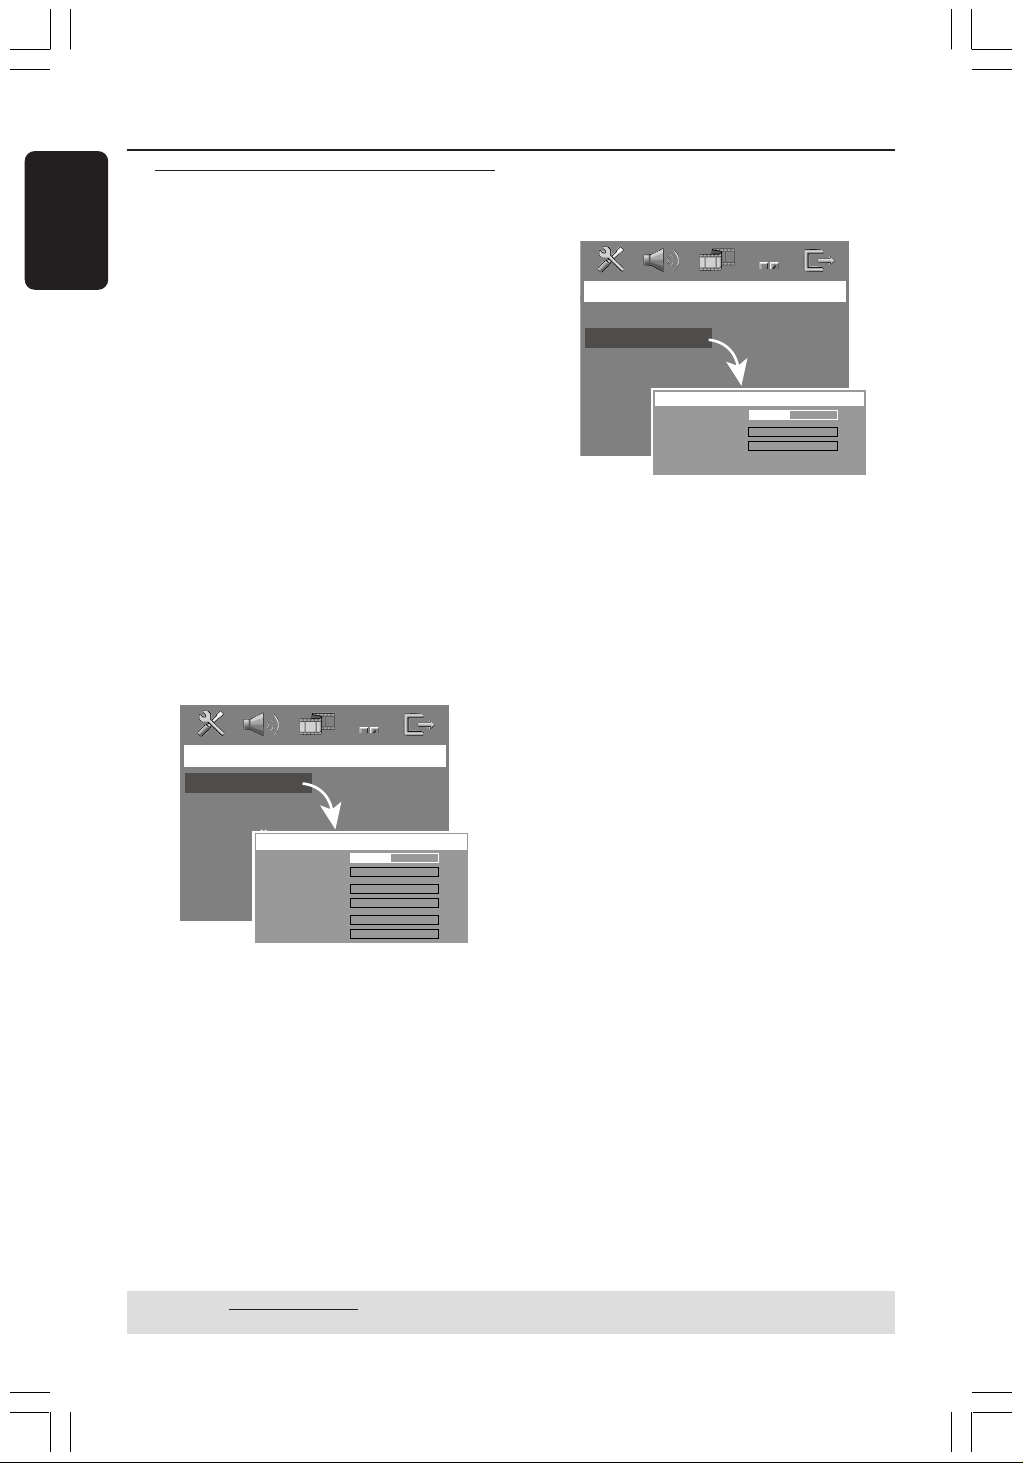
1 Press Ç twice to stop playback (if any),
then press SETUP.
2 Press 2 repeatedly to select { Audio
Setup Page }.
3 Use 34 keys to highlight { Speakers
Volume }, then press 2.
Audio Setup Page
Speakers Volume
Speakers Delay
Night Mode
CD Upsampling
Front Left
Front Right
Center
Subwoofer
Rear Left
Rear Right
0dB
0dB
+3dB
+3dB
+3dB
+3dB
Speakers Level Setup
4 Use 1 2 keys to set the volume level for
each speaker (-6dB ~ +6dB).
5 Press OK to confirm.
6 Use 34 keys to highlight { Speakers
Delay }, then press 2.
Audio Setup Page
Speakers Volume
Speakers Delay
Night Mode
CD Upsampling
Center
Rear Left
Rear Right
Speakers Distance Setup
0ms
0ms
0ms
7 Use 1 2 keys to set the delay times for
centre and rear speakers that best suit
your surround sound needs.
8 Press OK to confirm.
Helpful Hints:
– A 1ms increase/decrease of delay time is
equivalent to 30cm change in distance.
– Use the longer delay time settings when
the rear speakers are closer to the listener
than the front speakers.
– The test tone will be automatically
generated to help you judge the sound level
of each speaker.
TIPS: The underlined option is the factory default setting.
To return to the previous menu, press 1. To remove the menu, press SETUP.
001-045-hts3050-16-Eng2 4/1/06, 3:19 PM38

English
39
3139 115 2xxx1
Selecting surround sound
● Press SURR on the remote to select :
MULTI-CHANNEL or STEREO.
➜ The availability of the various surround
sound modes depends on the number of
speakers used and the sound available on
the disc.
➜ The centre and surround speakers
operate only in Multi-channel surround
mode.
➜ The available output modes for Multi-
channel include: Dolby Digital and Dolby
Pro Logic II.
➜ Stereo broadcasts or recordings will
produce some surround channel effects
when played in a surround mode.
However, mono (single channel sound)
sources will not produce any sound from
the surround speakers.
Helpful Hints:
– You are not able to select the surround
sound mode if the system setup menu is
turned on.
– Ensure that the audio output of the disc is
set to Dolby Digital if there is no sound
output on yur speakers during playback.
Selecting digital sound effects
Select a preset digital sound effects that
matches your disc’s content or that
optimises the sound of the musical style
you are playing.
● Press SOUND to select the available
sound effect.
When playing movie discs or in TV mode,
you can select :
CONCERT, DRAMA, ACTION or SCI-FI.
When playing music discs or while in
TUNER or AUX/DI mode, you can select :
ROCK, DIGITAL, CLASSIC or JAZZ.
Helpful Hint:
– For flat sound output, select CONCERT or
CLASSIC.
Volume control
● Adjust VOLUME control (or press
VOL +/- on the remote) to increase
or decrease the volume level.
➜ "VOL MIN" is the minimum volume
level and “VOL MAX” is the maximum
volume level.
To turn off the volume temporarily
● Press MUTE on the remote.
➜ Playback will continue without sound
and "MUTE" appears.
➜ To restore the volume, press MUTE
again, or increase the volume level.
Sound and Volume Controls (continued)
001-045-hts3050-16-Eng2 4/1/06, 3:19 PM39

40
3139 115 2xxx1
English
Other Functions
Setting the Sleep timer
The sleep timer enables the system to
switch to Eco Power standby mode
automatically at a preset time.
● Press SLEEP on the remote repeatedly
until it reaches the desired preset turn-off
time.
➜ The selections are as follows (time in
minutes):
15 ™ 30 ™ 45 ™ 60 ™ OFF ™ 15…
➜ ‘SLEEP’ icon will show on the display
panel if sleep mode is active.
➜ Before the system switches to Eco
Power standby mode, a countdown of 10
seconds is displayed.
"SLEEP10" ™ "SLEEP 9".... ™
"SLEEP1" ™ "STANDBY"
To cancel the sleep timer
● Press SLEEP repeatedly until "OFF"
appears or press the STANDBY ON
(B) button.
001-045-hts3050-16-Eng2 4/1/06, 3:19 PM40

English
41
3139 115 2xxx1
AMPLIFIER SECTION
Output power 200 W total power
- Front 25 W / channel
- Rear 25 W / channel
- Centre 50 W
- Subwoofer 50 W
Frequency Response 20 Hz – 20 kHz / –3 dB
Signal-to-Noise Ratio > 65 dB (CCIR)
Input Sensitivity
- AUX In 1000 mV
TUNER SECTION
Tuning Range FM 87.5 – 108 MHz (50 kHz)
MW 531 – 1602 kHz (9 kHz)
26 dB Quieting Sensitivity FM 20 dB
MW 4 µV/m
Image Rejection Radio FM 25 dB
MW 28 dB
IF Rejection Ratio FM 60 dB
MW 45 dB
Signal-to-Noise Ratio FM 60 dB
MW 40 dB
AM Suppression Ratio FM 30 dB
Harmonic Distortion FM Mono 3%
FM Stereo 3%
MW 5%
Frequency Response FM 180 Hz – 10 kHz / ±6 dB
Stereo Separation FM 26 dB (1 kHz)
Stereo Threshold FM 23.5 dB
DISC SECTION
Laser Type Semiconductor
Disc Diametre 12cm / 8cm
Video Decoding MPEG-1 / MPEG-2 /
DivX 3.11, 4.x & 5.x
Video DAC 12 Bit
Signal System PAL / NTSC
Video Format 4:3 / 16:9
Video S/N 74 dB
Composite Video Output 1.0 Vp-p, 75 Ω
Audio DAC 24 Bits / 96 kHz
Frequency Response 4 Hz – 20 kHz (44.1 kHz)
4 Hz – 22 kHz (48 kHz)
4 Hz – 44 kHz (96 kHz)
Specifications
MAIN UNIT
Power Supply Rating 220 - 240V; 50 Hz
Power Consumption 70 W
Eco Standby power < 0.5 W
Dimensions (w x h x d) 360 mm x 54 mm x 324 mm
Weight 2.7 kg
FRONT AND REAR SPEAKERS
System 2-way, closed box system
Impedance 4 Ω
Speaker drivers 1 x 76mm (3”) woofer
Frequency response 120 Hz – 20 kHz
Dimensions (w x h x d) 94 mm x 175 mm x 65 mm
Weight 0.40 kg/each
CENTRE SPEAKER
System 2-way, closed box system
Impedance 8 Ω
Speaker drivers 1 x 76mm (3”) woofer
Frequency response 120 Hz – 20 kHz
Dimensions (w x h x d) 225 mm x 94 mm x 75 mm
Weight 0.68 kg
SUBWOOFER
Impedance 8 Ω
Speaker drivers 152 mm (6”) woofer
Frequency response 30 Hz – 120 Hz
Dimensions (w x h x d) 360 mm x 340 mm x 130 mm
Weight 3.92 kg
Specifications subject to change without prior
notice
001-045-hts3050-16-Eng2 4/1/06, 3:19 PM41

42
3139 115 2xxx1
English
WARNING
Under no circumstances should you try to repair the system yourself, as this will
invalidate the warranty. Do not open the system as there is a risk of electric shock.
If a fault occurs, first check the points listed below before taking the system for repair. If
you are unable to remedy a problem by following these hints, consult your dealer or
Philips for help.
Problem Solution
Troubleshooting
No power.
No picture.
Completely distorted picture
or black/white picture.
The aspect ratio of the screen
cannot be changed even though
you have set the TV display.
No sound or distorted sound.
Cannot activate some features
such as Angles, Subtitles, or
multi-language Audio.
Not able to select some Items
in the setup/system menu.
– Check if the AC power cord is properly connected.
– Press the STANDBY ON on the front of the DVD system to
turn on the power.
– Refer to your TV’s manual for correct Video In channel selection.
Change the TV channel until you see the DVD screen.
– Press DISC on the remote control.
– If this happens when you are changing the setting of the ‘TV
TYPE’, wait for 15 seconds for auto recovery.
– Check the video connection.
– Sometimes a small amount of picture distortion may appear.
This is not a malfunction.
– Clean the disc.
– The aspect ratio is fixed on the DVD disc.
– Depending on the TV, it may not be possible to change the
aspect ratio.
– Adjust the volume.
– Check the speaker connections and settings.
– Make sure that the audio cables are connected and press the
SOURCE button to select the correct input source (TV or
AUX/DI, for example) to choose the equipment that you want
to hear through the DVD system.
– Ensure that the audio broadcast is set to Dolby Digital.
– The features may not be available on the DVD.
– Changing the language for the sound or subtitle is prohibited
on this DVD.
– Press STOP button twice before selecting the setup/system
menu.
– Depending on the disc availability, some menu items cannot be
selected.
Need Help? Visit us at www.philips.com/support
001-045-hts3050-16-Eng2 5/1/06, 8:34 AM42

English
43
3139 115 2xxx1
Troubleshooting (continued)
The DVD system does not
start playback.
There is no sound from the
centre and surround speakers.
Radio reception is poor.
The remote control does not
function properly.
Unable to play DivX movies.
The DVD system does not
work.
– Insert a readable disc with the playback side facing down. The
DVD+R/CD-R must be finalised.
– Check the disc type, colour system (PAL or NTSC) and region
code.
– Check for any scratches or smudges on the disc.
– Press SETUP to turn off the setup menu screen.
– You may need to enter the password in order to change the
parental control rating level or to unlock the disc for playback.
– Moisture may have condensed inside the system. Remove the
disc and leave the system turned on for about an hour.
– Make sure the centre and surround speakers are connected
correctly.
– Press SURR button to select a correct surround sound setting.
– Make sure the source you are playing is recorded or broadcast
in surround sound (Dolby Digital, etc.).
– If the signal is too weak, adjust the antenna or connect an
external antenna for better reception.
– Increase the distance between the system and your TV or VCR.
– Tune in to the correct frequency.
– Place the antenna further away from any equipment that may be
causing the interference.
– Select the source (DISC or TUNER, for example) before
pressing the function button (É, S,
T).
– Reduce the distance between the remote control and the
system.
– Replace the batteries with new ones.
– Point the remote control directly toward the IR sensor.
– Check that the batteries are loaded correctly.
– Check that the DivX file is encoded in ‘Home Theatre’ mode
with DivX 5.x encoder.
– Disconnect the power cord from the power outlet for a few
minutes. Reconnect the power cord and try to operate again as
usual.
Need Help? Visit us at www.philips.com/support
Problem Solution
001-045-hts3050-16-Eng2 5/1/06, 8:34 AM43

44
3139 115 2xxx1
English
Analogue: Sound that has not been turned
into numbers. Analogue sound varies, while
digital sound has specific numerical values.
These sockets send audio through two
channels, the left and right.
AUDIO OUT Jacks: Red and white jacks
on the back of the DVD System that send
audio to another system (TV, Stereo, etc.).
Aspect ratio: The ratio of vertical and
horizontal sizes of a displayed image. The
horizontal vs. vertical ratio of conventional
TVs. is 4:3, and that of wide-screens is 16:9.
Bit Rate: The amount of data used to hold
a given length of music; measured in kilobits
per second, or kbps. Or, the speed at which
you record. Generally, the higher the bit rate,
or the higher the recording speed, the better
the sound quality. However, higher bit rates
use more space on a Disc.
Chapter: Sections of a picture or a music
piece on a DVD that are smaller than titles.
A title is composed of several chapters. Each
chapter is assigned a chapter number
enabling you to locate the chapter you want.
Disc menu: A screen display prepared for
allowing selection of images, sounds, subtitles,
multi-angles, etc recorded on a DVD.
DivX 3.11/4.x/5.x: The DivX code is a
patent-pending, MPEG-4 based video
compression technology, developed by
DivXNetworks, Inc., that can shrink digital
video to sizes small enough to be
transported over the internet, while
maintaining high visual quality.
Dolby Digital: A surround sound system
developed by Dolby Laboratories containing
up to six channels of digital audio (front left
and right, surround left and right, centre and
subwoofer).
Dolby Surround Pro Logic II: It is an
improved matrix decoding technology that
provides better spatiality and directionality
on Dolby Surround programme material;
provides a convincing three-dimensional
soundfield on convertional stereo music
recordings; and is ideally suited to bring the
surround experience to automotive sound.
While conventional surround programming is
fully campatible with Dolby Surround Pro
Logic II decoders, soundtracks will be able to
be encoded specifically to take full advantage
of Pro Logic II playback, including separate
left and right surround channels. (Such
material also compatible with conventional
Pro Logic decoders).
JPEG: A very common digital still picture
format. A still-picture data compression
system proposed by the Joint Photographic
Expert Group, which features small decrease
in image quality in spite of its high
compression ratio.
MP3: A file format with a sound data
compression system. “MP3” is the
abbreviation of Motion Picture Experts
Group 1 (or MPEG-1) Audio Layer 3. By
using the MP3 format. One CD-R or CD-RW
can contain about 10 times more data then a
regular CD.
Multichannel: DVDs are formatted to have
each sound track constitute one sound field.
Multichannel refers to a structure of sound
tracks having three or more channels.
Parental control: Limits Disc play
according to the age of the users or the
limitation level in each country. The
limitation varies from disc to disc; when it is
activated, playback will be prohibited if the
software’s level is higher than the user-set
level.
Glossary
001-045-hts3050-16-Eng2 4/1/06, 3:20 PM44

English
45
3139 115 2xxx1
Playback control (PBC): Refers to the
signal recorded on video CDs or SVCDs for
controlling playback. By using menu screens
recorded on a Video CD or SVCD that
supports PBC, you can enjoy interactive
playback and searching.
Region code: A system allowing discs to be
played only in the region designated. This unit
will only play discs that have compatible
region codes. You can find the region code of
your unit by looking on the product label.
Some discs are compatible with more than
one region (or ALL regions).
Surround: A system for creating realistic
three-dimensional sound fields full of realism
by arranging multiple speakers around the
listener.
Title: The longest section of a movie or
music feature on DVD. Each title is assigned
a title number, enabling you to locate the title
you want.
VIDEO OUT jack: Yellow jack on the back
of the DVD system that sends the DVD
picture video to a TV.
Glossary (continued)
001-045-hts3050-16-Eng2 4/1/06, 3:20 PM45

46
Español
Contenido
Código de idioma................................... 5
Información general
Accesorios suministrados ................................ 48
Limpieza de discos ............................................. 48
Instalación ............................................................ 48
Conexiones básicas
Paso 1: Colocación de los altavoces
y el subwoofer .................................................... 49
Paso 2: Conexión al TV y sistema de
altavoces ............................................................... 50
Paso 3: Conexión de las antenas
FM/MW ................................................................ 51
Paso 4: Conexión del cable de
alimentación ........................................................ 51
Conexión con dispositivos
externos
Conexión a un dispositivo de audio/vídeo ... 52
Panel frontal.............................................. 53
Control remoto ............................... 54-55
Cómo empezar
Paso 1: Colocación de las pilas en
el control remoto .............................................. 56
Utilización del control remoto para
hacer funcionar el sistema .......................... 56
Paso 2: Encendido del sistema de DVD ........ 56
Conmutación al modo de espera
Eco Power ...................................................... 56
Paso 3: Configuración del televisor ................ 56
Selección del sistema de color
correspondiente ........................................... 57
Configuración del formato de pantalla
del televisor ................................................... 57
Paso 4: Ajuste de la preferencia de
idioma ................................................................... 58
Configuración del idioma visualizado
en pantalla ...................................................... 58
Configuración del idioma Audio,
Subtítulos y Menú de disco ........................ 58
Operaciones de disco
Discos que pueden reproducirse ................... 59
Reproducción de discos ................................... 59
Modo de espera Eco Power
automático ...................................................... 60
Controles de reproducción básicos............... 60
Selección de diversas funciones de
reproducción repetida/aleatoria ..................... 60
Otras operaciones de reproducción
de vídeo (DVD/ VCD/SVCD) .......................... 61
Utilización del menú del disco
(DVD solamente) ......................................... 61
Visualización de la información de
reproducción ................................................. 61
Avance por cuadros ..................................... 62
Reanudación de la reproducción a
partir del punto en que se paró ................ 62
Zoom de ampliación .................................... 62
Cambio del idioma de la banda
sonora ............................................................. 62
Cambio del idioma de subtítulos
(DVD solamente) ......................................... 62
Función de vista previa (VCD/SVCD
solamente) ...................................................... 63
Reproducción de disco MP3/ Windows
Media™ Audio,/ JPEG ........................................ 64
Reproducción de música MP3 e
imágenes JPEG simultáneamente .............. 64
Reproducción de un disco de imágenes
(presentación de diapositivas) ......................... 65
Función de vista previa ................................ 65
Ampliación de imagen/zoom ...................... 65
Rotación/inversión de las imágenes .......... 65
Formatos de imagen JPEG
compatibles .................................................... 65
Reproducción de un disco DivX .................... 66

Español
47
Contenido
Opciones de menú de
configuración del sistema
Acceso a General Setup Page
(Página de configuración general) ................... 67
Bloqueo/desbloqueo del DVD para
su reproducción ............................................ 67
Atenuación del brillo de la pantalla
del sistema...................................................... 67
Programa (excepto CD-Picture/
MP3) ................................................................ 68
Configuración del idioma visualizado
en pantalla ...................................................... 68
Protector de pantalla – activación/
desactivación.................................................. 69
Código de registro VOD DivX
®
........................... 69
Acceso a la página de configuración
de sonido (Audio Setup Page) ......................... 70
Speakers Volume/Speakers Delay
(Volumen de los altavoces/Retardo
de los altavoces)............................................ 70
Modo nocturno – activación/
desactivación.................................................. 70
CD Upsampling ............................................. 70
Acceso a la página de configuración
de vídeo (Video Setup Page) ........................... 71
Tipo TV ........................................................... 71
Pantalla TV ...................................................... 71
Ajuste del imagen ................................... 71-72
Acceso a la página de preferencias
(Preference) ......................................................... 72
Configuración del idioma Audio,
Subtítulos y Menú de disco ........................ 72
Restricción de la reproducción
estableciendo el nivel parental................... 73
PBC: PLayback Control (Control de
reproducción ) .............................................. 74
Navegador MP3/JPEG – activación/
desactivación.................................................. 74
Cambio de la contraseña ............................ 74
Ajuste de subtítulos DivX .......................... 75
Configuración predeterminada ................. 75
Operaciones de sintonizador
Sintonización de emisoras ................................ 76
Programación de emisoras
preestablecidas.................................................... 76
Utilización de Plug & Play ........................... 76
Programación automática de emisoras
preestablecidas .............................................. 77
Programación manual de emisoras
preestablecidas .............................................. 77
Selección de una emisora preestablecida ..... 77
Eliminación de una emisora de radio
presintonizada ..................................................... 77
Controles del sonido y del
volumen
Ajuste independiente del volumen
de los altavoces ................................................... 78
Selección de sonido envolvente ...................... 79
Selección de efectos de sonido digital........... 79
Control de volumen .......................................... 79
Otras funciones
Ajuste del temporizador de dormir .............. 80
Especificaciones ............................. 81
Resolución de problemas ....... 82-83
Glosario ................................................... 84-85
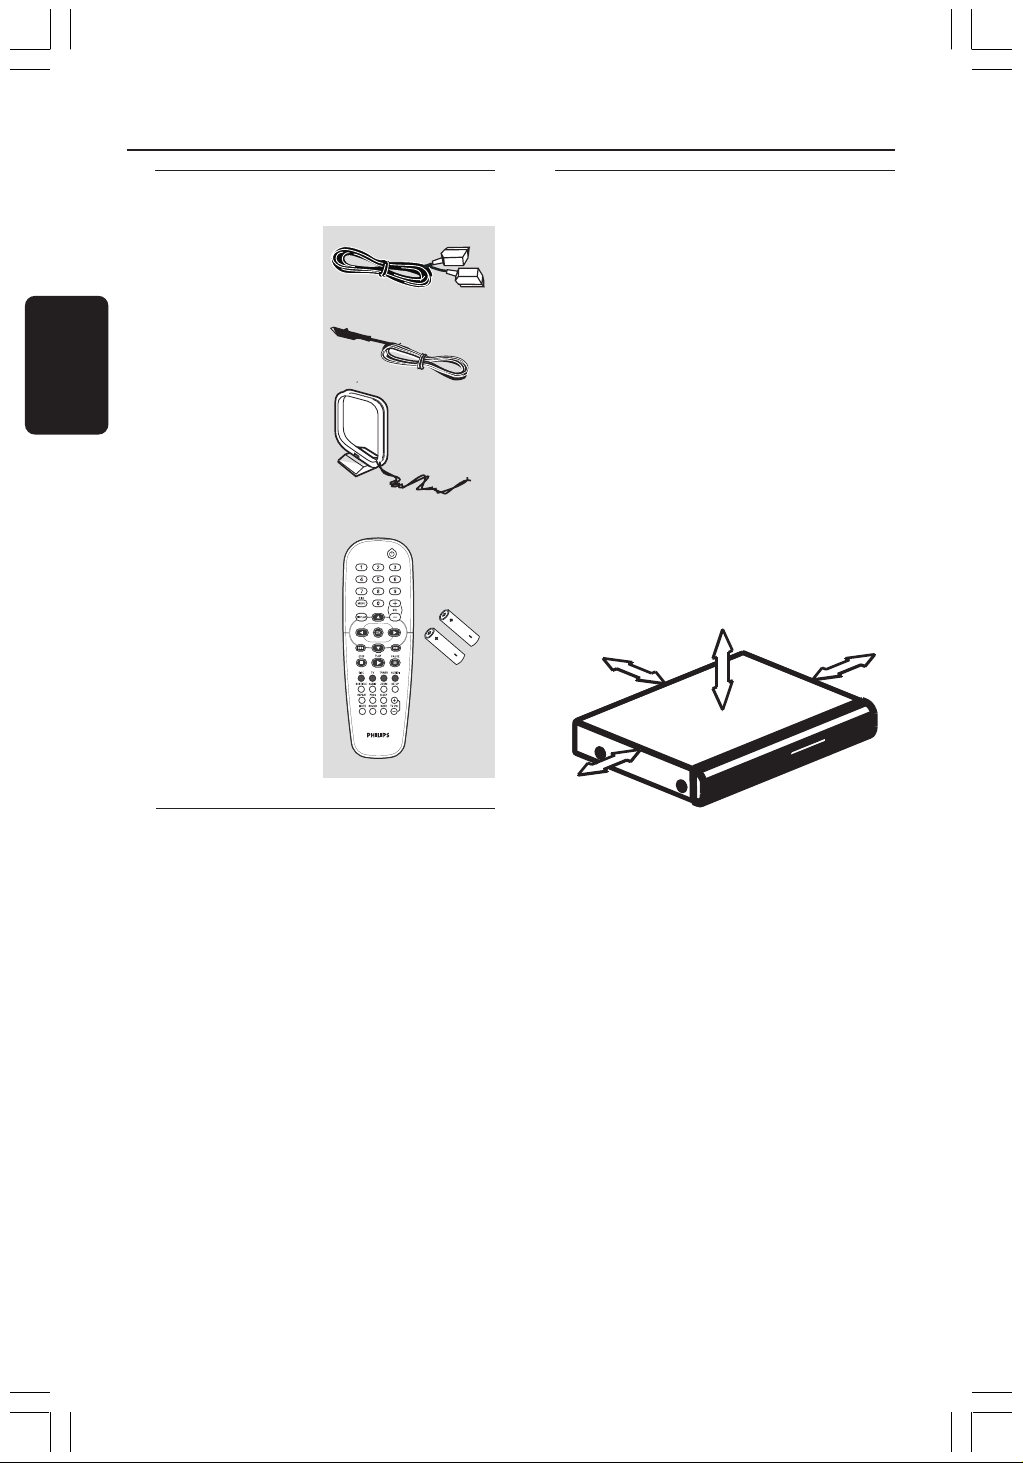
48
Español
Accesorios suministrados
Cable Scart
Cable de antena
FM
Antena de cuadro
MW
Control remoto y
2 pilas
(12nc: 3139 258 70111)
Limpieza de discos
Para limpiar un disco, pase un paño suave
desde el centro hasta el borde del disco en
línea recta.
PRECAUCIÓN
No utilice disolventes como benceno,
diluyentes, limpiadores disponibles en
comercios o pulverizadores antiestáticos para
discos.
Dado que la unidad óptica (láser) del sistema
DVD funciona con más potencia que los
reproductores de DVD o CD normales, los
CD de limpieza para estos reproductores
puede dañar la unidad óptica (láser). Por lo
tanto, absténgase de utilizar un CD limpiador.
Información general
Instalación
Cómo encontrar una ubicación
apropiada
– Coloque el aparato sobre una superficie
plana, resistente y estable. No coloque el
aparato sobre una alfombra.
– No coloque el aparato encima de otro
equipo que emita calor (por ejemplo, un
receptor o un amplificador).
– No ponga nada debajo del aparato (por
ejemplo, CD o revistas).
Espacio para la ventilación
– Coloque el aparato en un lugar con
ventilación suficiente para evitar su
calentamiento interno. Para evitar que se
recaliente el aparato, deje un espacio de al
menos 10 cm (4,5”) desde la parte posterior y
superior, así como 5 cm (2,3”) desde la parte
izquierda y derecha.
10cm (4.5")
10cm (4.5")
5cm (2.3")
5cm (2.3")
Evite altas temperaturas, humedad, agua
y polvo
– No exponga el aparato a goteos ni
salpicaduras.
– No coloque sobre el aparato objetos que
puedan suponer un peligro para el mismo (por
ejemplo, objetos que contengan líquido o velas
encendidas).
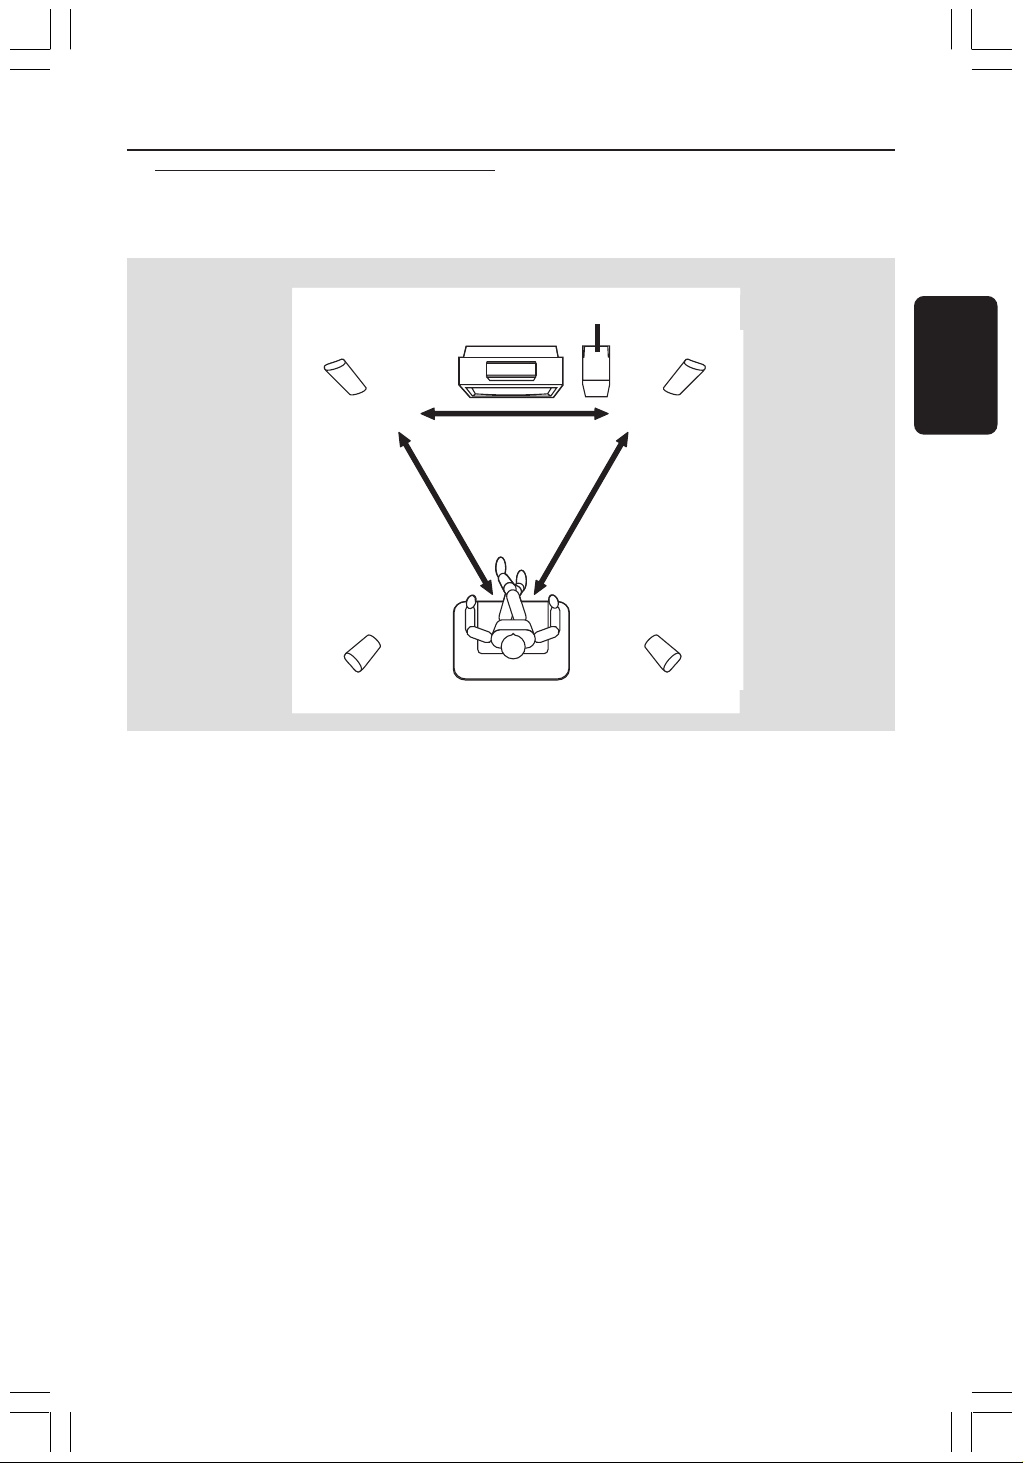
Español
49
REAR RREAR L
FRONT RFRONT L
CENTER
SUBWOOFER
Conexiones básicas
Para conseguir el mejor sonido envolvente
posible, todos los altavoces (excepto el
subwoofer) deben colocarse a la misma
distancia de la posición de escucha.
1 Coloque los altavoces delanteros izquierdo y
derecho a distancias iguales del televisor y a un
ángulo de aproximadamente 45 grados
respecto a la posición de escucha.
2 Coloque el altavoz central por encima del
televisor para que el sonido del canal central
esté localizado.
3 Coloque los altavoces de sonido envolvente al
nivel normal del oído del oyente, encarados entre
sí o montados en la pared.
4 Coloque el subwoofer en el suelo cerca del
televisor.
Paso 1: Colocación de los
altavoces y el
subwoofer
1
33
1
2
4
Consejos útiles:
– Para evitar interferencia magnética, no coloque
los altavoces delanteros demasiado cerca del
televisor.
– Permita ventilación adecuada alrededor del
sistema DVD.
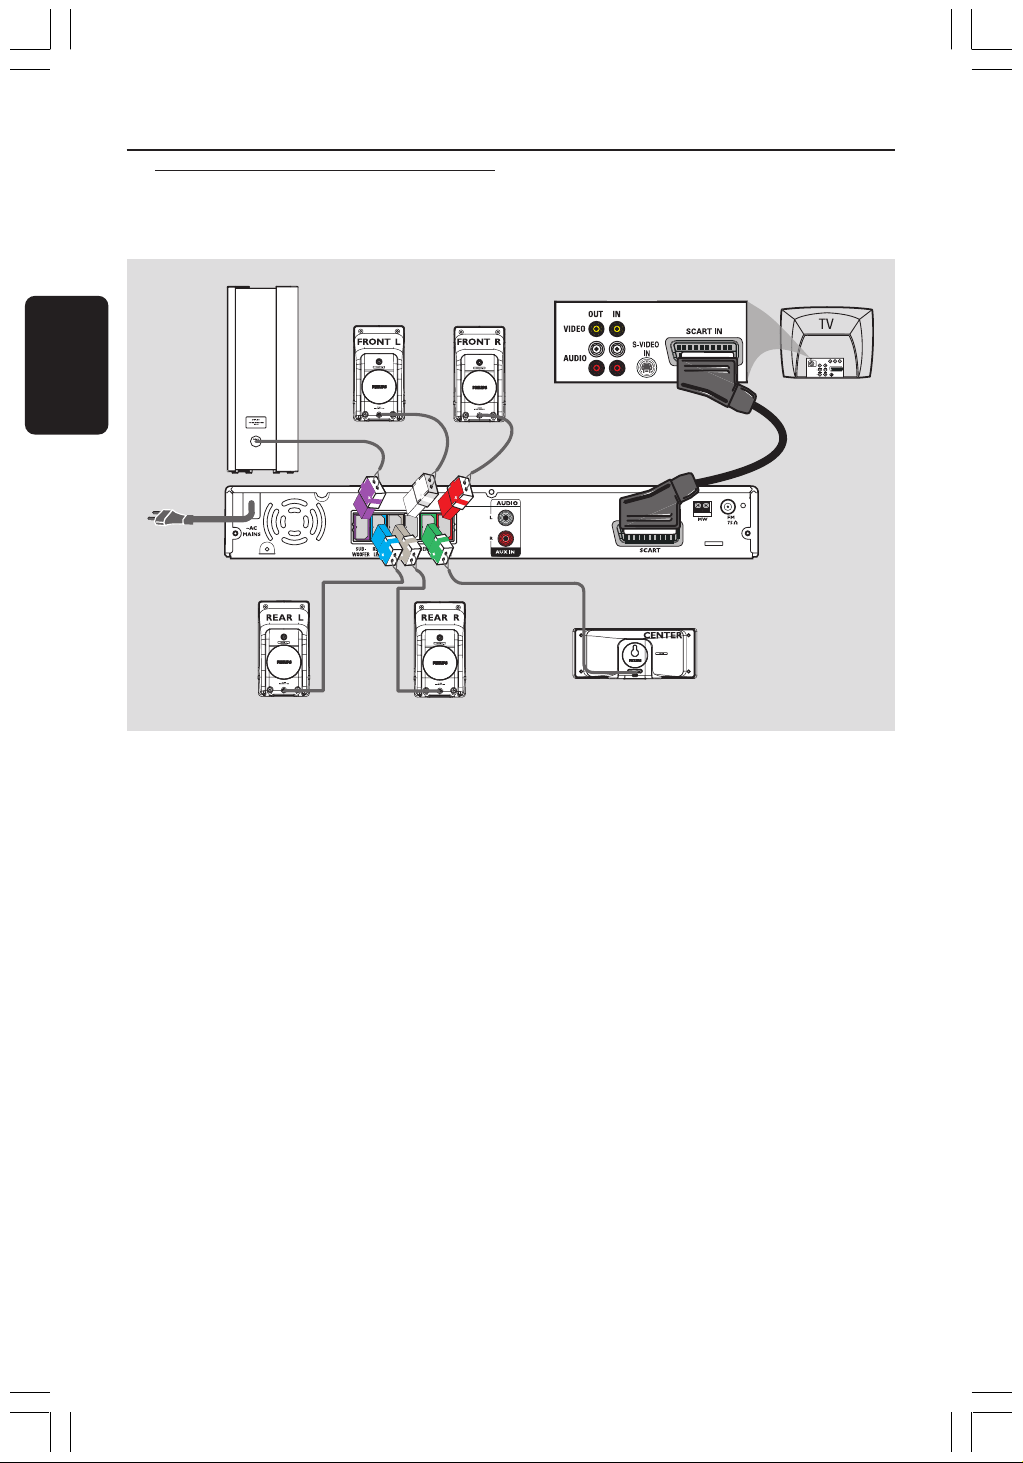
50
Español
Conexiones básicas (continuación)
¡IMPORTANTE!
– Conecte el sistema DVD directamente
al televisor.
– Continúe en la página 56 para
configurar el televisor cuando haya
finalizado las conexiones básicas.
1 Utilice el cable scart (negro) para conectar el
conector SCART del sistema DVD a los
correspondientes conectores de entrada scart
del televisor.
2 Conecte los sistemas de altavoces
suministrados utilizando los cables de altavoces
suministrados asegurándose de que los
conectores se conecten a cables de altavoces
de los mismos colores.
Paso 2: Conexión al TV y
sistema de altavoces
Altavoz delantero
(derecha)
Altavoz trasero
(derecho)
Altavoz trasero
(izquierdo)
Altavoz central
Subwoofer
Altavoz delantero
(izquierdo)
Sistema DVD
1
Consejos útiles:
– Asegúrese de que los cables de altavoz se
conecten correctamente. Las conexiones
incorrectas pueden dañar el sistema al causar
cortocircuitos.
– Para evitar ruido no deseado, no coloque el
subwoofer demasiado cerca del sistema de DVD,
del adaptador de alimentación CA, del televisor o
de otras fuentes de radiación.

Español
51
Conexiones básicas (continuación)
1 Conecte la antena de cuadro suministrada al
conector MW. Coloque la antena de cuadro
MW en un estante o fíjela en un soporte o
pared.
2 Conecte la antena FM suministrada al conector
FM. Extienda la antena FM y fije sus extremos
a la pared.
Para obtener una mejor recepción de FM en
estéreo, conecte una antena FM externa (no
suministrado).
Consejos útiles:
– Ajuste la posición de las antenas de modo que
se obtenga una recepción óptima.
– Posicione las antenas lo más lejos posible de un
televisor, VCR u otra fuente de radiación para
prevenir ruidos molestos.
antena
MW
fije la garra
en la ranura.
Paso 3: Conexión de las
antenas FM/MW
antena
FM
L
R
1
➠
2
Después de que todo esté conectado
correctamente, enchufe el cable de
alimentación de CA en el tomacorriente.
El indicador rojo Eco Power LED del sistema
de DVD se encenderá. No realice ni cambie
nunca conexiones con la corriente conectada.
Consejo útiles:
– Para ver los nominales eléctricos, consulte la
placa de especificaciones situada en la parte
posterior o en la base del sistema.
Paso 4: Conexión del cable de
alimentación
TV
L
R
Sistema DVD

52
Español
Conexión a un dispositivo de
audio/vídeo
Conexión con dispositivos externos
L
R
AUDIO OUT
Sistema DVD
Dispositivo de
Audio/Vídeo
Puede conectar otro dispositivo de audio/
vídeo al sistema de DVD para poder utilizar las
funciones de sonido Surround del sistema
Home Theatre.
● Utilice un cable de audio (rojo/blanco, no
suministrado) para conectar las tomas de
entrada AUX IN (R/L) del sistema de DVD a
las conexiones de salida de sonido AUDIO
OUT del dispositivo de audio/vídeo.
Para escuchar el sonido, pulse AUX/DI para
seleccionar “AUX” (Auxiliar) como la fuente de
reproducción.
Consejo útiles:
– Consulte siempre el manual del usuario del otro
equipo para obtener los detalles completos de
conexión y utilización.

Español
53
Panel frontal
1 STANDBY ON (B)
– Conmuta al modo de espera Eco Power
o activa el sistema.
2 Bandejas de disco
3 OPEN CLOSE 0
– Abre/cierra la bandeja de disco.
4 Indicador ECO POWER
– Se enciende en el modo de espera Eco Power.
5 iR
– Apunte el control remoto a este sensor.
6 Panel de visualización del sistema
7 VOLUME
– Ajusta el nivel del volumen.
8 SOURCE
– Selecciona el modo de fuente activa pertinente:
DISC, TUNER (FM/MW), TV o AUX/DI.
9 ÉÅ PLAY/PAUSE
– DISC: inicia/ hace una pausa en la
reproducción.
– TUNER: inicia la instalación de emisora
preestablecida en modo Plug & Play (solamente
en la unidad principal)
0 S PREV / NEXT T
– DISC: *realiza una búsqueda hacia atrás/delante
o selecciona una pista.
– TUNER: selecciona una presintonía de radio.
! Ç STOP
– Sale de una operación.
– DISC: detiene la reproducción.
– TUNER: mantenga pulsado este botón para
borrar la presintonía de radio actual.
1
2 3
6
4
7
8 9 0 !
5
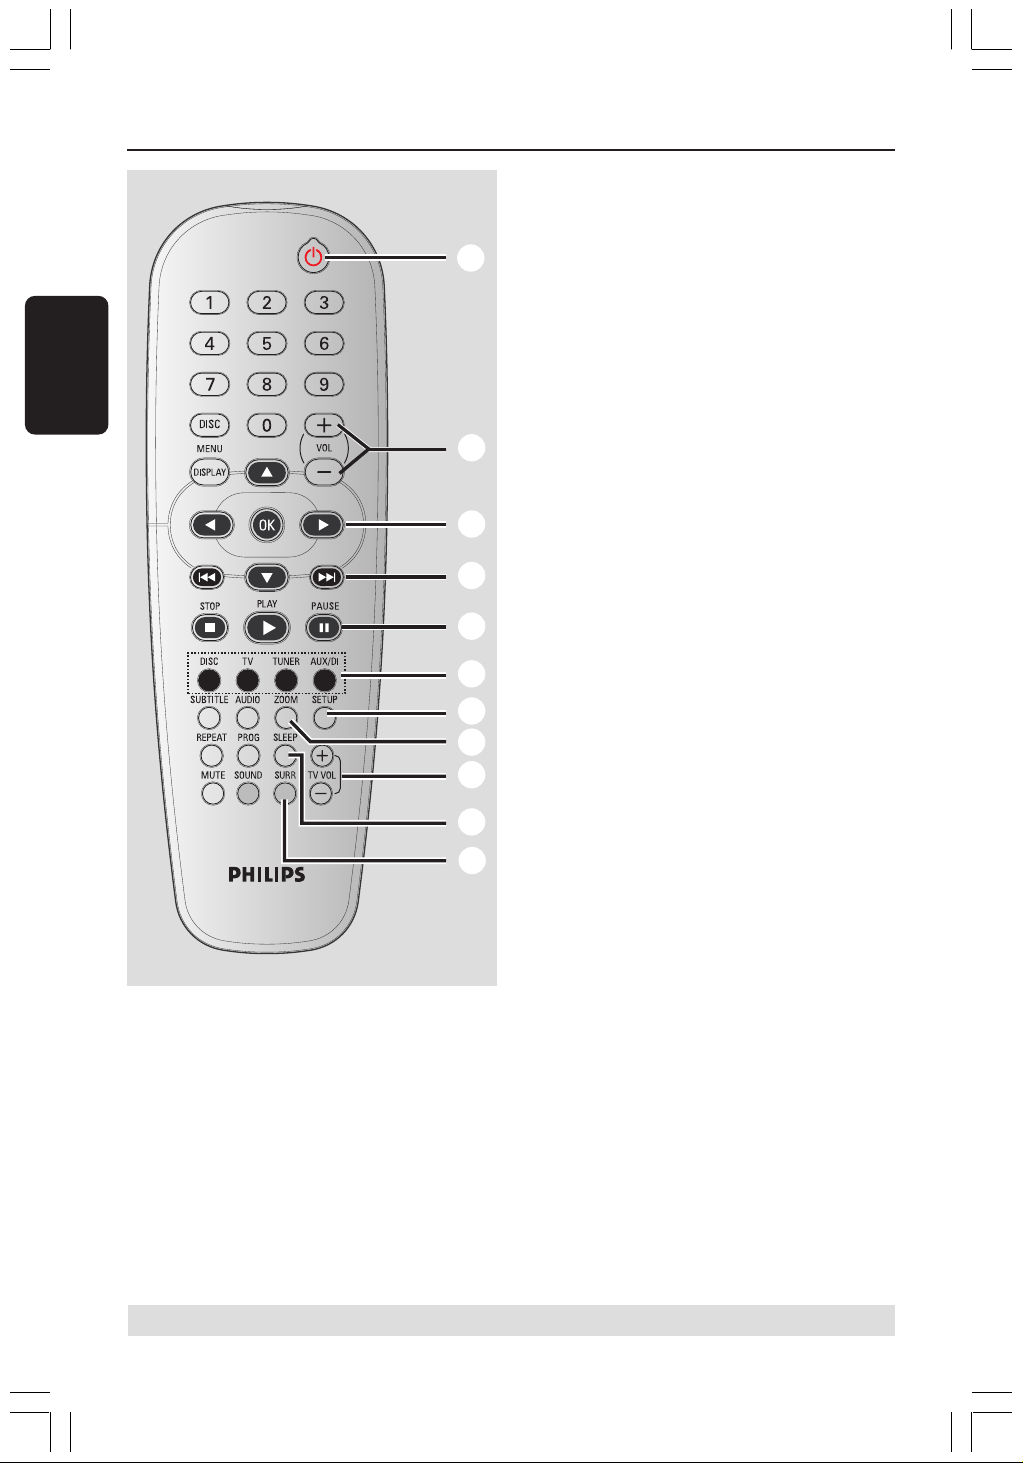
54
Español
Control remoto
* = Pulse y mantenga apretado el botón durante más de dos segundos.
1
2
3
4
5
6
7
8
9
0
!
1 B
– Activa el modo de espera de bajo consumo
Eco Power del sistema de DVD.
2 VOL +-
– Ajusta el nivel del volumen.
3 1 2 3 4
– DISC: selecciona la dirección de movimiento
en el menú.
– TUNER: utilice 34 para iniciar la búsqueda
automática, y 1 2 para sintonizar hacia arriba
o hacia abajo la frecuencia de radio.
4 S / T
– DISC: *realiza una búsqueda hacia atrás/delante
o selecciona una pista.
– TUNER: selecciona una presintonía de radio.
5 PAUSEÅ
– DISC: detiene/reanuda la reproducción.
6 Botones de fuente
DISC: conmuta al modo de DISC
TV: cambia a modo de fuente a TV.
El sonido del televisor se escuchará a través
del sistema de DVD.
TUNER: conmuta entre las bandas FM y MW.
AUX/DI: cambia al modo externo.
7 SETUP
– DISC: presenta o retira el menú de
configuración del sistema.
8 ZOOM
– DISC: aumenta una imagen en la pantalla del
televisor.
9 TV VOL +-
– Ajusta el volumen del televisor (Televisores
Philips solamente).
0 SLEEP
– Establece la función de temporizador de
dormir.
! SURR
– Selecciona sonido envolvente multicanal o
modo estéreo.
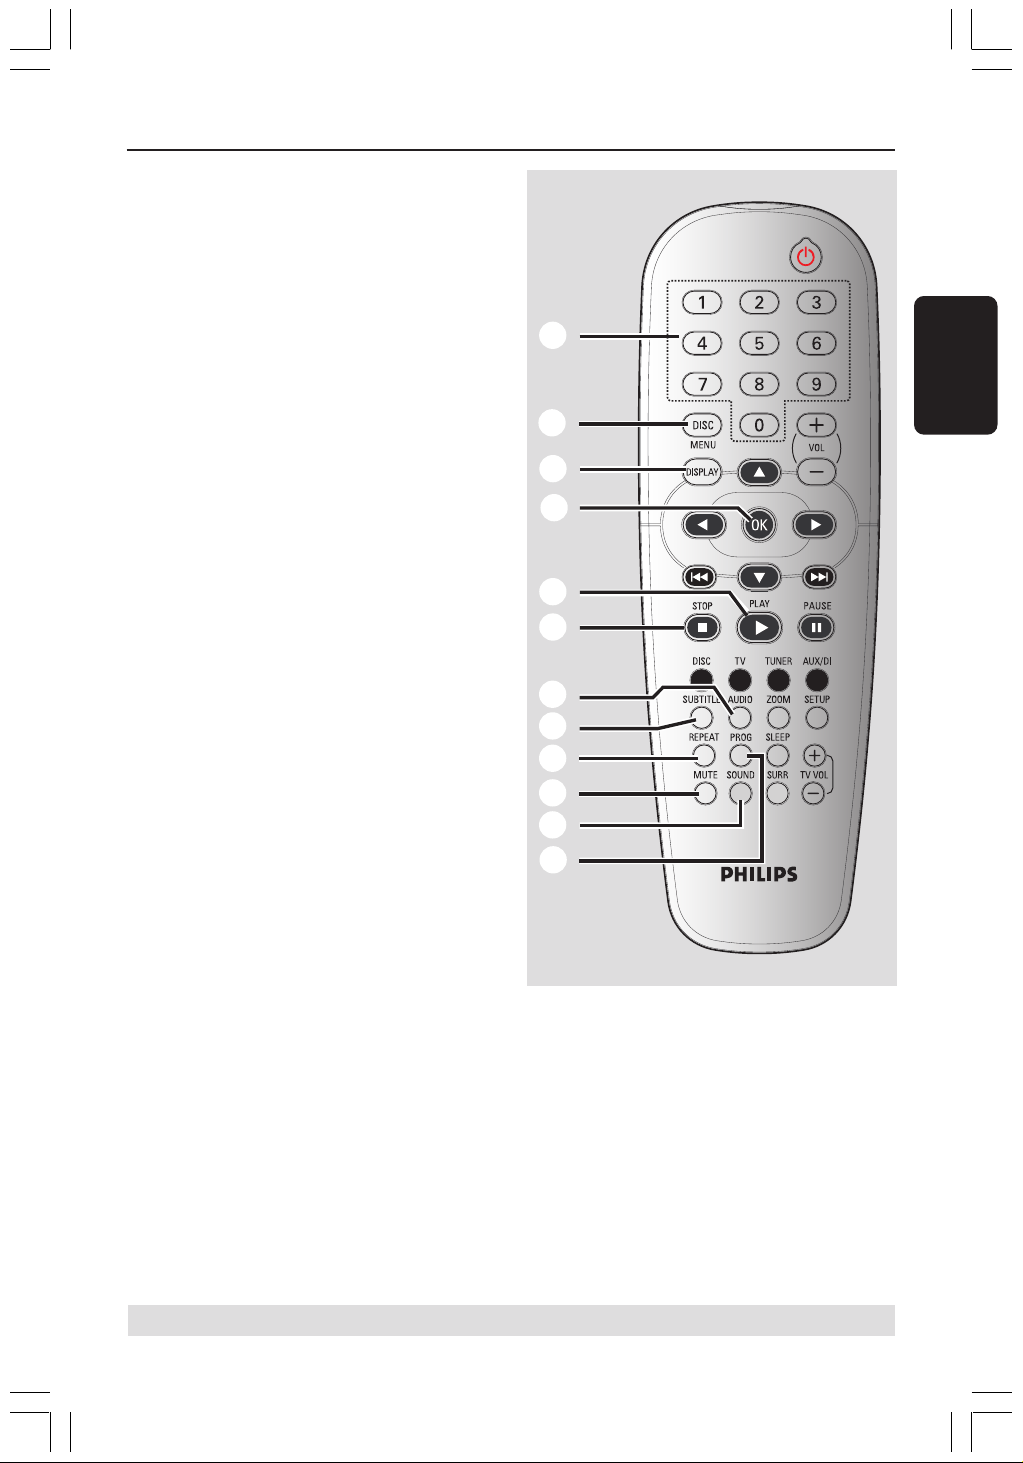
Español
55
Control remoto (continuación)
* = Pulse y mantenga apretado el botón durante más de dos segundos.
@ Teclado numérico (0-9)
– DISC: introduce un número de título/pista del
disco.
– TUNER: introduce un número de emisora
preestablecida.
# DISC MENU
– DISC: presenta o retira el menú del contenido
del disco.
Para discos VCD, permite seleccionar varias
funciones de vista previa.
$ DISPLAY
– DISC: muestra el estado actual o información
del disco.
% OK
– Confirma la selección.
^ PLAYÉ
– DISC: inicia la reproducción.
& STOP Ç
– Sale de una operación.
– DISC: detiene la reproducción.
– DISC: si mantiene el botón pulsado se abrirá o
cerrará la bandeja de discos.
– TUNER: selecciona una presintonía de radio.
* AUDIO
– DISC: selecciona un idioma de audio (DVD/
VCD) o un canal de audio.
( SUBTITLE
– DISC: selector del idioma de los subtítulos.
) REPEAT
– DISC: permite seleccionar diversos modos de
repetición o desactivar el modo de repetición.
¡ MUTE
– Interrumpe/reanuda la reproducción de sonido.
™ SOUND
– Selecciona un efecto de sonido.
£ PROG
– DISC: inicia la programación.
– TUNER: inicia *la programación automática/
manual de emisoras preestablecidas.
@
#
$
%
^
&
)
(
*
£
¡
™

56
Español
Cómo empezar
Paso 1: Colocación de las pilas
en el control remoto
1
3
2
1 Abra la tapa del compartimiento de las pilas.
2 Coloque dos pilas tipo R06 o AA, de acuerdo
con las indicaciones (+-) del interior del
compartimiento.
3 Cierre la tapa.
¡PRECAUCIÓN!
– Retire las pilas si están gastadas o si no
se utilizarán durante un periodo largo.
– No utilice pilas viejas y nuevas o
diferentes tipos de pilas en combinación.
– Las pilas contienen sustancias
químicas, por lo tanto deben desecharse
de la forma correcta.
Utilización del control remoto para
hacer funcionar el sistema
1 Apunte el control remoto directamente al
sensor remoto (iR) de la unidad principal.
2 Seleccione la fuente que desea controlar
pulsando una de las teclas de selección de
fuente del control remoto (por ejemplo TV,
TUNER).
3 Después seleccione la función deseada (por
ejemplo É,
S,
T).
Paso 2: Encendido del sistema
de DVD
● Pulse SOURCE para seleccionar:
DISC ™ FM ™ MW ™ TV ™ AUX
™ DISC ....
O bien
Pulse DISC, TV, TUNER o AUX/DI en el
control remoto.
Conmutación al modo de espera
Eco Power
● Pulse STANDBY ON (B).
➜ La pantalla se pone en blanco.
Paso 3: Configuración del
televisor
A fin de ver la reproducción del sistema de
DVD en la pantalla, una vez conectado dicho
sistema al televisor, encienda el televisor en el
número de programa correspondiente al
conector de entrada (por ejemplo, “EXT”, “0”,
“AV”).
1 Pulse SOURCE hasta que aparezca “DISC”
en el panel de visualización.
2 Encienda el televisor y póngalo al canal de
entrada de vídeo correcto. Debería verse la
pantalla de fondo azul de DVD de Philips en el
televisor.
➜ Normalmente estos canales están entre los
canales más altos y más bajos y pueden
llamarse FRONT, A/V IN o VIDEO. Para más
detalles, consulte el manual de su televisor.
➜ O, puede ir al canal 1 de su televisor y
después pulsar el botón de disminución de
número de canal hasta que vea el canal de
entrada de vídeo.
➜ O, el control remoto del televisor puede
tener un botón o un interruptor que
seleccione diferentes modos de vídeo.
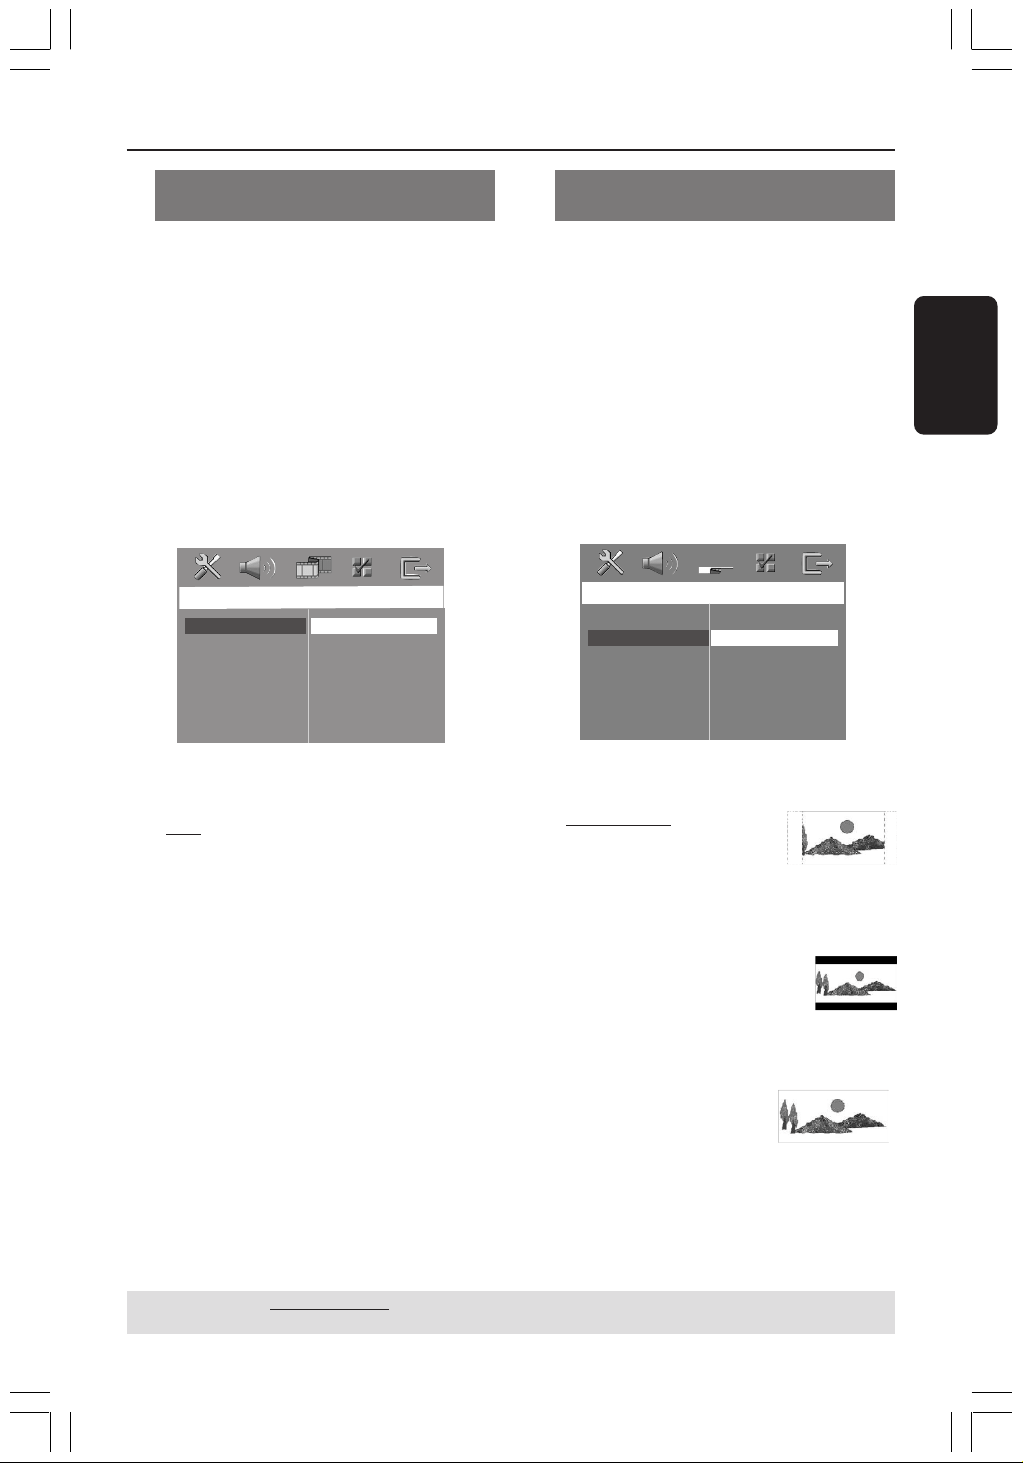
Español
57
Cómo empezar (continuación)
Selección del sistema de color
correspondiente
Para que un DVD pueda reproducirse en este
sistema DVD, el sistema de color del DVD, el
televisor y el sistema DVD deben ser
compatibles. Antes de cambiar el sistema de
TV, asegúrese de que su televisor sea
compatible con el sistema de color
seleccionado.
1 El modo de disco, pulse SETUP.
2 Pulse 2 repetidamente para seleccionar
‘Video Setup Page’ (Pág. config. vídeo).
3 Pulse 34 para seleccionar { TV Type } (Tipo
TV) y pulse 2.
Video Setup Page
TV Type
TV Display
Picture Setting
PAL
NTSC
Multi
4 Pulse 34 para resaltar una de las opciones
siguientes:
{
PAL }
Si el televisor conectado es un sistema PAL,
seleccione este modo. Cambiará la señal de
vídeo de un disco NTSC al formato PAL.
{ NTSC }
Si el televisor conectado es un sistema NTSC,
seleccione este modo. Cambiará la señal de
vídeo de un disco PAL al formato NTSC.
{ Multi }
Si el televisor conectado es compatible con
NTSC y PAL (multisistema), seleccione este
modo. El formato de salida estará de acuerdo
con la señal de vídeo del disco.
5 Seleccione un elemento y pulse OK para
confirmar.
➜ Siga las instrucciones mostradas en el
televisor para confirmar la selección (si las hay).
➜ Sí aparece una pantalla de TV en blanco/
distorsionada, espere 15 segundos a que se
realice la autorecuperación.
Configuración del formato de
pantalla del televisor
Seleccione el formato de pantalla en el
reproductor de DVD de acuerdo con el
televisor que tiene conectado.
El formato que usted selecciona debe estar
disponible en el disco. Si no lo ésta, los ajustes
del formato de pantalla del televisor no
afectarán la imagen durante la reproducción.
1 El modo de disco, pulse SETUP.
2 Pulse 2 repetidamente para seleccionar
‘Video Setup Page’(Pág. config. vídeo).
3 Pulse 34 para seleccionar { TV Display }
(Pantalla TV) y pulse 2.
Video Setup Page
TV Type
TV Display
Picture Setting
4:3 Pan Scan
4:3 Letter Box
16:9 Wide Screen
4 Pulse 34 para resaltar una de las opciones
siguientes:
{
4:3 Pan Scan }
(Panorámica)
Si tiene un televisor normal y
quiere que ambos lados de la
imagen se recorten o formateen para que ésta
encaje en la pantalla de su televisor.
{ 4:3 Letter Box } (Buzón)
Si tiene un televisor normal. En
este caso, se mostrara una imagen
amplia con bandas negras en las
partes superior e inferior de la pantalla del
televisor.
{ 16:9 Wide Screen }
Si tiene un televisor de
pantalla amplia.
5 Seleccione un elemento y pulse OK para
confirmar.
CONSEJOS: El ajuste subrayado es el ajuste predeterminado de fábrica.
Para volver al menú anterior, pulse 1. Para retirar el menú, pulse SETUP.

58
Español
Cómo empezar (continuación)
Paso 4: Ajuste de la
preferencia de idioma
Puede seleccionar sus ajustes de idioma
preferidos de forma que este sistema DVD
pase automáticamente al idioma seleccionado
cada vez que coloque un disco. Si el idioma
seleccionado no está disponible en un disco, en
lugar de él se utilizará el idioma por defecto
del disco.
El idioma en pantalla para el menú del sistema
seguirá siendo el establecido por usted, sean
cuales sean los idiomas de los diversos discos.
Configuración del idioma
visualizado en pantalla
1 El modo de disco, pulse SETUP.
2 Pulse 2 para seleccionar ‘General Setup Page’
(Pág. config. general).
3 Pulse 34 para seleccionar { OSD Language }
(Idioma menús) y pulse 2.
G
e
n
e
r
a
l
S
e
tup
P
a
g
e
D
i
s
c
L
o
ck
D
i
s
p
l
a
y
D
i
m
P
r
og
r
a
m
O
S
D
L
a
ngu
a
g
e
S
c
r
ee
n
S
a
v
e
r
D
i
v
X
(
R
)
V
O
D
C
od
e
E
ng
li
s
h
E
s
p
a
n
õ
l
F
r
a
n
ç
a
i
s
P
o
r
t
ugu
ê
s
4 Pulse 34 para seleccione un idioma y pulse
OK.
Configuración del idioma Audio,
Subtítulos y Menú de disco
1 Pulse Ç dos veces para detener la
reproducción (si está activada), y pulse SETUP.
2 Pulse 2 repetidamente para seleccionar
‘Preference Page’ (Pág de preferencias).
3 Pulse 34 para resaltar una de las opciones
siguientes a la vez, y pulse 2.
–{ Audio } (banda de sonido del disco)
–{ Subtitle } (Subtítulos del disco)
–{ DISC Menu } (menú de disco)
Preference Page
Audio
Subtitle
Disc Menu
Parental
PBC
MP3/JPEG Nav
Password
DivX Subtitle
Default
4 Pulse 34 para seleccione un idioma y pulse
OK.
Si el idioma que desea no está en la lista,
seleccione { Others }(Otros),
Utilice el Teclado numérico (0-9) del
control remoto para introducir el código de
idioma de 4 dígitos ‘XXXX’ (consulte la página
5 “Código de idioma”) y pulse OK para
confirmar.
5 Repita los pasos 3~4 para otros ajustes.
CONSEJOS: El ajuste subrayado es el ajuste predeterminado de fábrica.
Para volver al menú anterior, pulse 1. Para retirar el menú, pulse SETUP.

Español
59
Operaciones de disco
¡IMPORTANTE!
– Si el icono de inhibición (ø o X)
aparece en la pantalla del televisor
cuando se pulsa un botón, significa que la
función no está disponible en el disco
actual o en el momento actual.
– Los discos y reproductores de DVD
están diseñados con restricciones
regionales. Antes de reproducir un disco,
asegúrese de que el disco corresponde a
la misma zona que el reproductor.
– No haga presión en la bandeja de
discos ni coloque objetos que no sean
discos en la bandeja de discos. Si lo
hiciera, podría causar que el reproductor
funcionara mal.
Discos que pueden reproducirse
SUPER VIDEO
Su sistema de cinema casero DVD
reproducirá:
– Discos de Versatile Digital (DVDs)
– CDs de vídeo (VCDs)
– CDs Super Video (SVCDs)
– Discos de vídeo digital finalizados +
(DVD+R[W]) grabable[reescribible]
– Discos compactos (CDs)
– Discos MP3, Windows Media™ Audio,
Discos Picture (Kodak, JPEG) en CD-R(W):
– Formato JPEG/ISO 9660/UDF
– JPEG progresivo
– Compatibilidad de resolución JPEG de
hasta 3072 x 2048
– Frecuencias de muestreo soportadas:
32 kHz, 44,1 kHz, 48 kHz
– Velocidades en bits soportadas:
32~256 kbps, velocidades en bits variables
– Disco DivX
®
en CD-R[W] y DVD+R[W]:
– DivX 3,11, 4,x y 5,x
– GMC (Compensación de movimiento
global) y Q-Pel (Un cuarto de píxel) no
es compatible
Código de región
El código de región (la ‘X’ representa el
número del código correspondiente)
se muestra en el panel posterior de
este dispositivo.
Si el disco DVD tiene un código de
región diferente, no se puede reproducir en
este dispositivo.
Consejos útiles:
– Quizás no sea posible reproducir un CD-R/RW
o un DVD-R/RW en todos los casos debido al tipo
de disco o al estado de la grabación.
– Si tiene algún problema reproduciendo cierto
disco, retire el disco y pruebe uno diferente. Los
discos formateados incorrectamente no se
reproducirán en este sistema DVD.
Reproducción de discos
1 Pulse SOURCE hasta que aparezca “DISC”
en el panel de visualización (o DISC en el
control remoto).
2 Encienda televisor y seleccione el canal de
entrada de vídeo correcto. (Véase la página 56
“Configuración del televisor”).
➜ Debería verse la pantalla de fondo azul de
DVD en el televisor.
3 Pulse OPEN CLOSE 0 para abrir la bandeja
de disco y colocar un disco, después pulse el
mismo botón para cerrar la bandeja.
➜ Asegúrese de que la cara del disco que lleva
la etiqueta esté hacia arriba. Para discos de dos
caras, coloque hacia arriba la cara que quiere
reproducir.
4 La reproducción se inicia automáticamente.
➜ Si en el televisor aparece un menú del disco,
véase la página 61 “Utilización del menú del
disco”.
➜ Si el disco está bloqueado por control
parental, debe introducir su contraseña de
6-dígitos. (Véase las páginas 73-74).
CONSEJOS: No es posible reproducir algunos discos en este del sistema DVD debido a la configuración y
características del disco, o a las condiciones de grabación y el software de creación.
ALL
X

60
Español
Modo de espera Eco Power
automático
Es una función de ahorro de energía, por la
que el sistema pasará automáticamente al
modo de espera Eco Power si no se pulsa
ningún botón durante 30 minutos después de
que se haya terminado de reproducir un disco.
Controles de reproducción
básicos
Pausa en la reproducción
● Durante la reproducción de un disco, pulse 2;
(o Åen el control remoto).
➜ Para reanudar la reproducción normal,
vuelva a pulsar 2; (o PLAY 2 en el control
remoto).
Selección de otra pista/capítulo
● Pulse S / T o utilice el Teclado
numérico (0-9) para introducir un número
de pista/capítulo.
➜ Si la función de repetición está establecida,
al pulsarse S / T se volverá a reproducir
la misma pista/capítulo.
Búsqueda hacia atrás/delante
● Pulse y mantenga apretado S / T,
y pulse 2; (o PLAY 2 en el control remoto)
para reanudar la reproducción normal.
➜ Durante una búsqueda, al pulsarse
S / T de nuevo se aumentará la
velocidad de búsqueda.
Parada de la reproducción
● Pulse Ç.
Operaciones de disco (continuación)
Selección de diversas funciones
de reproducción repetida/
aleatoria
● Durante la reproducción de un disco, pulse
REPEAT continuamente para seleccionar un
modo de reproducción.
DVD
™ RPT ONE (repetición capítulo)
™ RPT TT (repetir título)
™ SHUFFLE (aleatoria)
™ RPT SHF (repetir reproducción aleatoria)
™ RPT OFF (salir del modo de repetición)
VCD/SVCD/CD
™ RPT ONE (repetición actual)
™ RPT ALL (repetición disco)
™ SHUFFLE (aleatoria)
™ RPT SHF (repetir reproducción aleatoria)
™ RPT OFF (salir del modo de repetición)
MP3/DivX/Windows Media™ Audio
™ RPT ONE (repetición actual)
™ RPT ALL/RPT FLD (repetición carpeta)
™ SHUFFLE (aleatoria)
™ RPT OFF (salir del modo de repetición)
Consejo útiles:
– Para un VCD, si el modo PBC está activado, la
repetición de reproducción no es posible.
CONSEJOS: No es posible reproducir algunos discos en este del sistema DVD debido a la configuración y
características del disco, o a las condiciones de grabación y el software de creación.
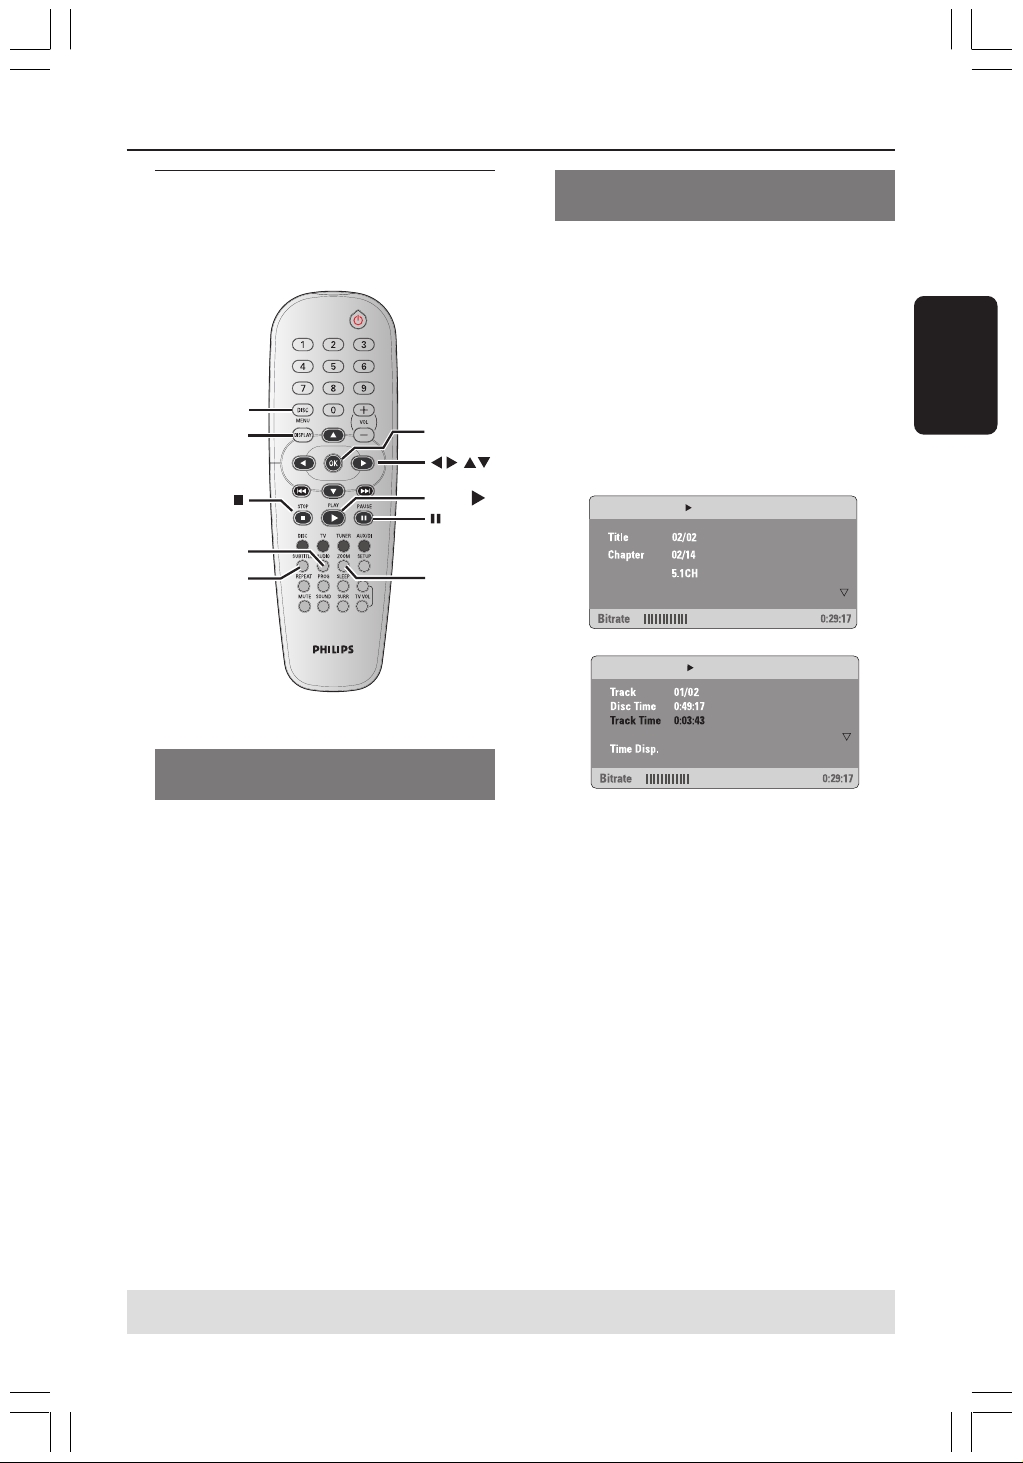
Español
61
Operaciones de disco (continuación)
Otras operaciones de
reproducción de vídeo (DVD/
VCD/SVCD)
DISC MENU
DISPLAY
AUDIO
SUBTITLE
ZOOM
OK
PLAY
Utilización del menú del disco
(DVD solamente)
Según el disco, en la pantalla del televisor puede
aparecer un menú cuando coloca el disco.
Para seleccionar una función o elemento
de reproducción
● Utilice las teclas 1 2 3 4 o el teclado
numérico (0-9) en el control remoto, y
después pulse OK para iniciar la reproducción.
Para acceder al menú o suprimirlo
● Pulse DISC MENU.
Visualización de la información de
reproducción
Muestra la información del disco y su estado
actual (por ejemplo, el título o número de
capítulo, el tiempo de reproducción
transcurrido, el idioma del sonido y de los
subtítulos). Hay una serie de operaciones que
se pueden realizar sin interrumpir la
reproducción del disco.
1 Durante la reproducción de un disco, pulse
DISPLAY.
➜ En la pantalla del televisor aparece una lista
de los datos disponibles en el disco.
Menu
Title Elapsed
Subtitle
Audio
Off
Repeat
Off
Total Elapsed
Total Elapsed
Menu
2 Pulse 34 para ver la información y pulse OK
para obtener acceso.
3 Utilice el teclado numérico (0-9) para
introducir el número/tiempo o pulse 34 para
realizar la selección y después pulse OK para
confirmarla.
➜ La reproducción cambiará al tiempo
escogido o al título/capítulo/pista seleccionada.
CONSEJOS: No es posible reproducir algunos discos en este del sistema DVD debido a la configuración y
características del disco, o a las condiciones de grabación y el software de creación.

62
Español
Operaciones de disco (continuación)
Avance por cuadros
1 Durante la reproducción, pulse Å en el
control remoto.
➜ Se realizará una pausa en la reproducción y
el sonido enmudecerá.
2 Pulse Å varias veces para ver la siguiente
imagen.
3 Para volver a la reproducción normal, pulse
PLAY 2.
Reanudación de la reproducción a
partir del punto en que se paró
Este sistema de DVD permite reanudar la
reproducción de los discos a partir del punto
en que se detuvieron por última vez (sólo es
posible para los 10 últimos discos que se
grabaron sin un menú).
1 Coloque uno de los últimos 10 discos.
2 Mientras “LOADING” (Cargando) aparece en la
pantalla de panel, pulse PLAY B (o 2;) para
iniciar la reproducción desde el último punto
de detención.
Para cancelar el modo de reanudación
● En modo de parada, vuelva a pulsar Ç.
Zoom de ampliación
Esta función le permite aumentar la imagen de
la pantalla del televisor y realizar una
panorámica a través de la imagen aumentada.
1 Durante la reproducción de un disco, pulse
ZOOM repetidamente para seleccionar un
factor de zoom diferente.
➜ Utilice las teclas 1 2 3 4 para ver el resto
de la imagen ampliada.
➜ La reproducción continuará.
2 Pulse ZOOM hasta restablecer el tamaño
original.
Cambio del idioma de la banda
sonora
Esta operación funciona solamente en DVDs
con idiomas múltiples de banda sonora, puede
cambiar el idioma durante la reproducción del
DVD.
● Pulse AUDIO repetidamente para seleccionar
diferentes idiomas de audio.
Para VCD – Cambio del canal de audio
● Pulse AUDIO para seleccionar los canales de
audio disponibles suministrados por el disco
(ESTÉREO, IZQ. MONO, DER. MONO o
MEZCLA-MONO).
Cambio del idioma de subtítulos
(DVD solamente)
Esta operación solamente funciona con DVDs
con idiomas de subtítulos múltiples, puede
cambiar el idioma durante la reproducción del
DVD.
● Pulse SUBTITLE repetidamente para
seleccionar diferentes idiomas de subtítulos.
CONSEJOS: No es posible reproducir algunos discos en este del sistema DVD debido a la configuración y
características del disco, o a las condiciones de grabación y el software de creación.
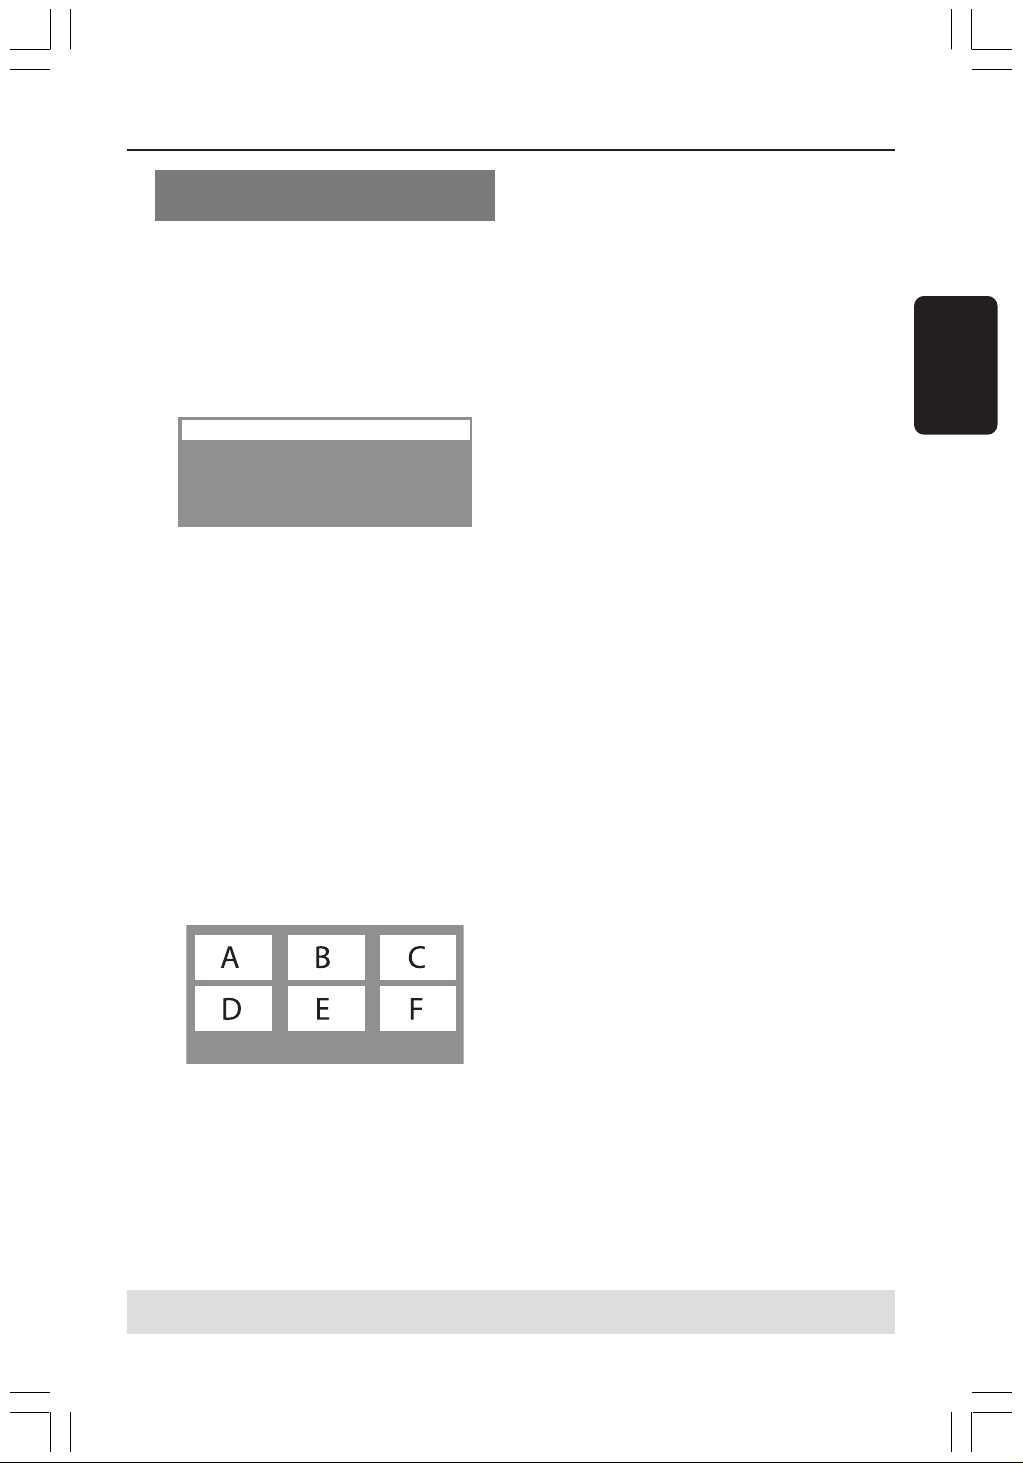
Español
63
Función de vista previa (VCD/
SVCD solamente)
1 Pulse DISC MENU.
2 Pulse 3 4 para resaltar { Track Digest }
(Recopilación de pistas), { Disc Interval }
(Intervalo de discos) o { Track Interval }
(Intervalo de pistas).
3 Pulse OK para abrir una de las opciones.
Select Digest Type:
Track Digest
Disc Interval
Track Interval
{ Track Digest } (Recopilación de pistas)
Esta función miniaturizará la imagen de cada
pista y las mostrará de seis en seis en la
pantalla para facilitar su reconocimiento.
{ Disc Interval } (Intervalo de discos)
Esta función se utiliza para dividir un disco en
seis partes a intervalos regulares para
visualizarlas en una página y disponer de una
visión previa de todo el disco.
{ Track Interval } (Intervalo de pistas)
Esta función se utiliza para dividir una pista en
seis partes a intervalos regulares para
visualizarlas en una página y disponer de una
visión previa de dicha pista.
Exit Menu
01 02 03
04 05 06
(ejemplo de visualización de 6 imágenes
miniatura)
4 Utilice las teclas 1 2 3 4 ara seleccionar una
pista.
5 Pulse S / T para abrir la página anterior
o siguiente.
6 Pulse OK para confirmar.
Para desactivar la función de vista previa
● Utilice las teclas 1 2 3 4 para resaltar
{ Exit } (Salir) y pulse OK para confirmar.
Para volver al menú de vista previa:
● Utilice las teclas 1 2 3 4 para resaltar
{ Menu } (Menú) y pulse OK para confirmar.
Operaciones de disco (continuación)
CONSEJOS: No es posible reproducir algunos discos en este del sistema DVD debido a la configuración y
características del disco, o a las condiciones de grabación y el software de creación.
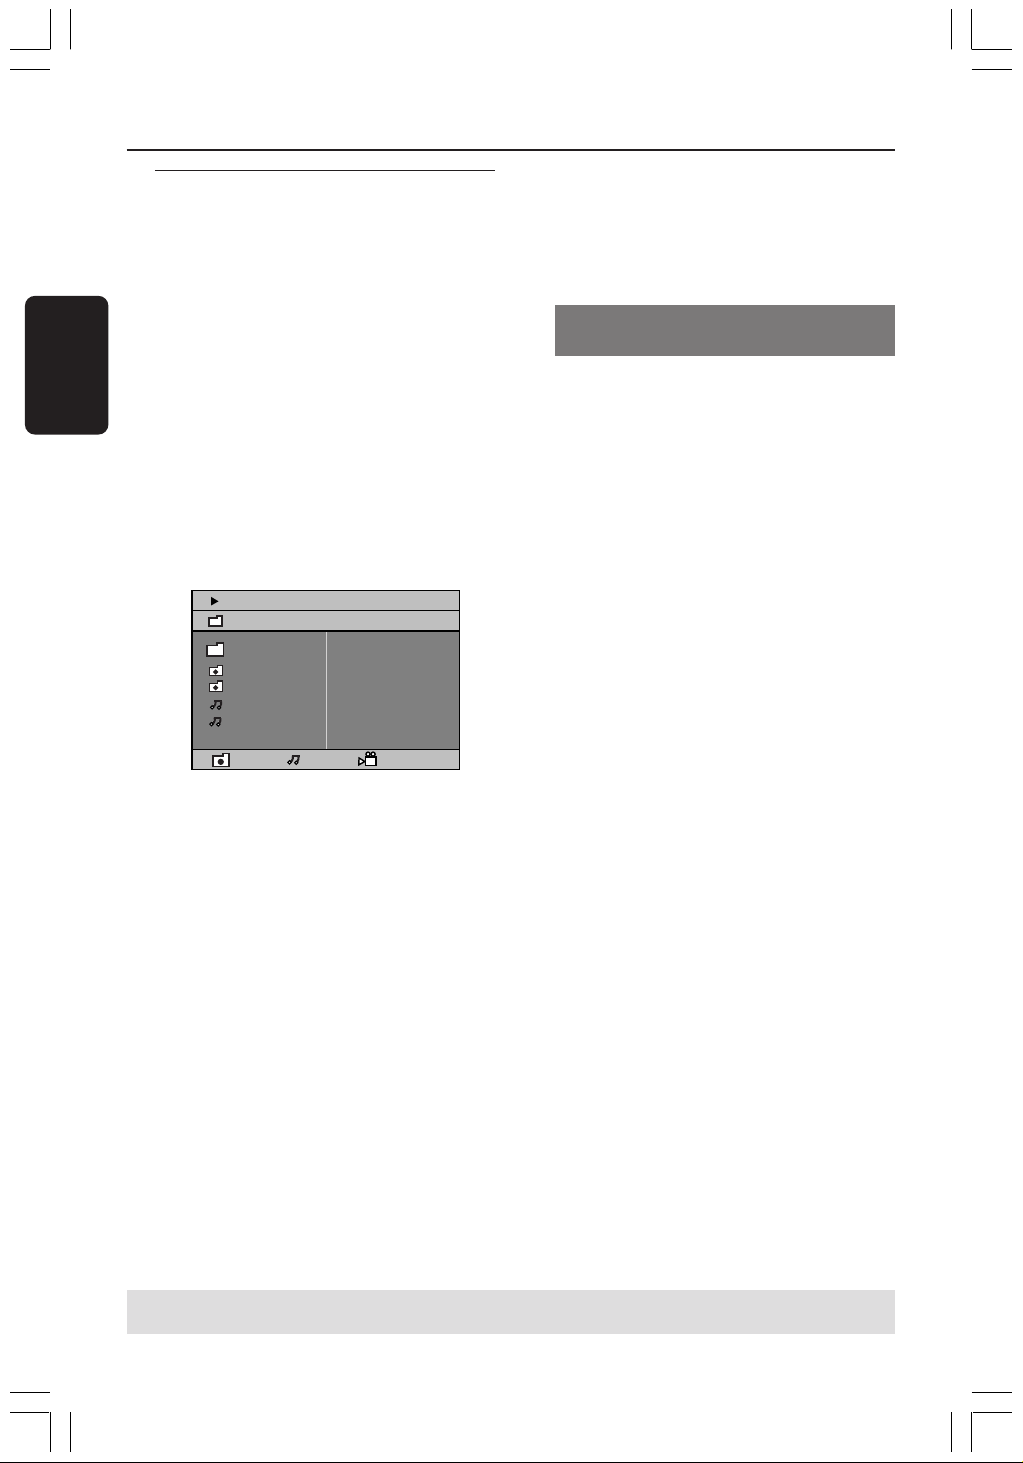
64
Español
Operaciones de disco (continuación)
Reproducción de disco MP3/
Windows Media™ Audio/JPEG/
Este reproductor puede reproducir ficheros
MP3, Windows Media™ Audio, JPEG, VCD y
SVCD en un disco CD-R/RW grabado
personalmente o en un CD comercial.
¡IMPORTANTE!
Tiene que encender el televisor y seleccionar
el canal de entrada de vídeo correcto. (Véase
la página 56
“Configuración del televisor”).
1 Inserte un disco.
➜ El tiempo de lectura del disco puede
exceder 30 segundos debido a la complejidad
de la configuración del directorio/fichero.
➜ El menú del disco aparece en la pantalla del
televisor.
00:19 04:39 001/003
\MP3_files_128kbs
Previous
Picture 1
Picture 2
MP3 Music 1
MP3 Music 2
050 003 000
2 Si el menú principal del disco contiene varias
carpetas, pulse 3 4 para seleccionar la carpeta
que desee y pulse OK para abrirla.
3 Pulse 3 4 para seleccionar una pista o archivo
y pulse OK para iniciar la reproducción.
➜ La reproducción se iniciará a partir del
archivo seleccionado y continuará hasta el final
de la carpeta.
Durante la reproducción, puede;
● Pulsar S / T para seleccionar otra pista/
archivo en la carpeta actual.
● Pulse 1 / 2 para realizar búsquedas rápidas de
una pista hacia atrás o hacia delante.
● Para seleccionar otra carpeta del disco actual,
pulse 3 para volver al menú raíz y después
pulse 3 4 para realizar su selección y pulse
OK para confirmar.
● Pulse REPEAT continuamente para acceder a
un ‘Modo de reproducción’ diferente.
● PulseÅ para pausar la reproducción o
PLAY 2 para reanudarla.
Reproducción de música MP3 e
imágenes JPEG simultáneamente
1 Coloque un disco MP3 que contenga música e
imágenes.
➜ El menú del disco aparece en la pantalla del
televisor.
2 Seleccione una pista MP3 y pulse 2;
(o PLAY 2 en el control remoto) para iniciar
la reproducción.
3 Durante la reproducción de música MP3,
utilice las teclas 1 2 3 4 para seleccionar una
carpeta de imágenes del menú del disco y
pulse 2; (o PLAY 2).
➜ Los archivos de imágenes se reproducirán
uno tras otro hasta el final de la carpeta.
4 Para parar la reproducción simultánea, pulse
DISC MENU y después Ç.
Consejos útiles:
– Quizás no sea posible reproducir ciertos discos
MP3/ JPEG/ DivX debido a la configuración y
características de los mismos o al estado de la
grabación.
– Es normal experimentar un “salto” ocasional
mientras se escuchan discos MP3.
– Es normal experimentar una pixelación
ocasional durante la reproducción del DivX debido
a la claridad del contenido digital durante la
descarga de Internet.
– Para discos de multisesión con diferentes
formatos, solamente estará disponible la primera
sesión.
CONSEJOS: No es posible reproducir algunos discos en este grabador de DVD debido a la configuración
y características del disco, o a las condiciones de grabación y el software de creación.

Español
65
Operaciones de disco (continuación)
Reproducción de un disco de
imágenes (presentación de
diapositivas)
¡IMPORTANTE!
Tiene que encender el televisor y seleccionar
el canal de entrada de vídeo correcto. (Véase
la página 56 “Configuración del televisor”).
● Coloque un disco de imágenes (CD Kodak
Picture, JPEG).
➜ Para un disco Kodak, se inicia la
reproducción de diapositivas.
➜ Para un disco JPEG, el menú de imágenes
aparece en la pantalla del televisor.
Pulse 2; ( o PLAY 2 en el control remoto)
para iniciar la muestra de diapositivas.
Función de vista previa
Esta función le permite conocer el contenido
de la carpeta actual o de todo el disco.
1 Durante la reproducción de un disco, pulse Ç.
➜ Aparecen miniaturas de 12 imágenes en la
pantalla del televisor.
2 S T
2 Pulse S / T para visualizar otras
imágenes o cambiar de página.
3 Utilice las teclas 1 2 3 4 para resaltar una de
ellas y pulse OK para reproducir.
4 Pulse DISC MENU para ir al menú de
CD-Picture.
Ampliación de imagen/zoom
1 Durante la reproducción de un disco, pulse
ZOOM repetidamente para seleccionar un
factor de zoom diferente.
2 Utilice las teclas 1 2 3 4 para ver la imagen
en zoom.
Rotación/inversión de las imágenes
● Durante la reproducción, utilice las teclas
1 2 3 4 para girar la imagen en la pantalla del
televisor.
botón 3: gira la imagen sobre el eje vertical.
botón 4: gira la imagen sobre el eje horizontal.
botón 1: gira la imagen en sentido antihorario.
botón 2: gira la imagen en sentido horario.
Formatos de imagen JPEG
compatibles
Formato de archivo:
– La extensión de archivo debe ser ‘*.JPG’ y
no ‘*.JPEG’.
– Sólo se pueden visualizar las imágenes fijas
DCF estándar o las imágenes JPEG como, por
ejemplo, las de extensión TIFF. No se pueden
reproducir imágenes en movimiento, Motion
JPEG y otros formatos o imágenes en formatos
distintos de JPEG o con sonido como, por
ejemplo, archivos AVI.
– Puede que pase más tiempo hasta que el
sistema de DVD muestre el contenido del
disco en el televisor, debido al gran número de
canciones/imágenes recopiladas en un disco.
CONSEJOS: No es posible reproducir algunos discos en este grabador de DVD debido a la configuración
y características del disco, o a las condiciones de grabación y el software de creación.

66
Español
Reproducción de un disco DivX
Este sistema de DVD puede reproducir discos
de película DivX descargados del ordenador al
reproductor de CD-R/RW (consulte la página
69 para obtener más información).
1 Cargue un disco DivX.
2 Si la película DivX contiene subtítulos
externos, el menú de subtítulos aparecerá en
el televisor para que realice la selección.
● En tal caso, si pulsa SUBTITLE en el control
remoto, se activarán o desactivarán los
subtítulos.
3 Pulse 2; ( o PLAY 2) para iniciar la
reproducción.
● Si se han incorporado subtítulos en varios
idiomas al disco DivX, utilice el botón
SUBTITLE para cambiar el idioma de los
subtítulos durante la reproducción de la
película.
● Durante la reproducción, si pulsa 1 / 2 se
iniciará una búsqueda rápida hacia atrás o hacia
adelante, respectivamente.
Consejos útiles:
– Se admiten los archivos de subtítulos con las
siguientes extensiones de nombre de archivo (.srt,
.smi, .sub, .ssa, .ass) pero no aparecen en el menú
de navegación del archivo.
– El nombre de archivo de subtítulos debe ser el
mismo que el nombre del archivo de película.
– Los subtítulos sólo pueden tener un máximo de
45 caracteres.
Operaciones de disco (continuación)
CONSEJOS: No es posible reproducir algunos discos en este grabador de DVD debido a la configuración
y características del disco, o a las condiciones de grabación y el software de creación.
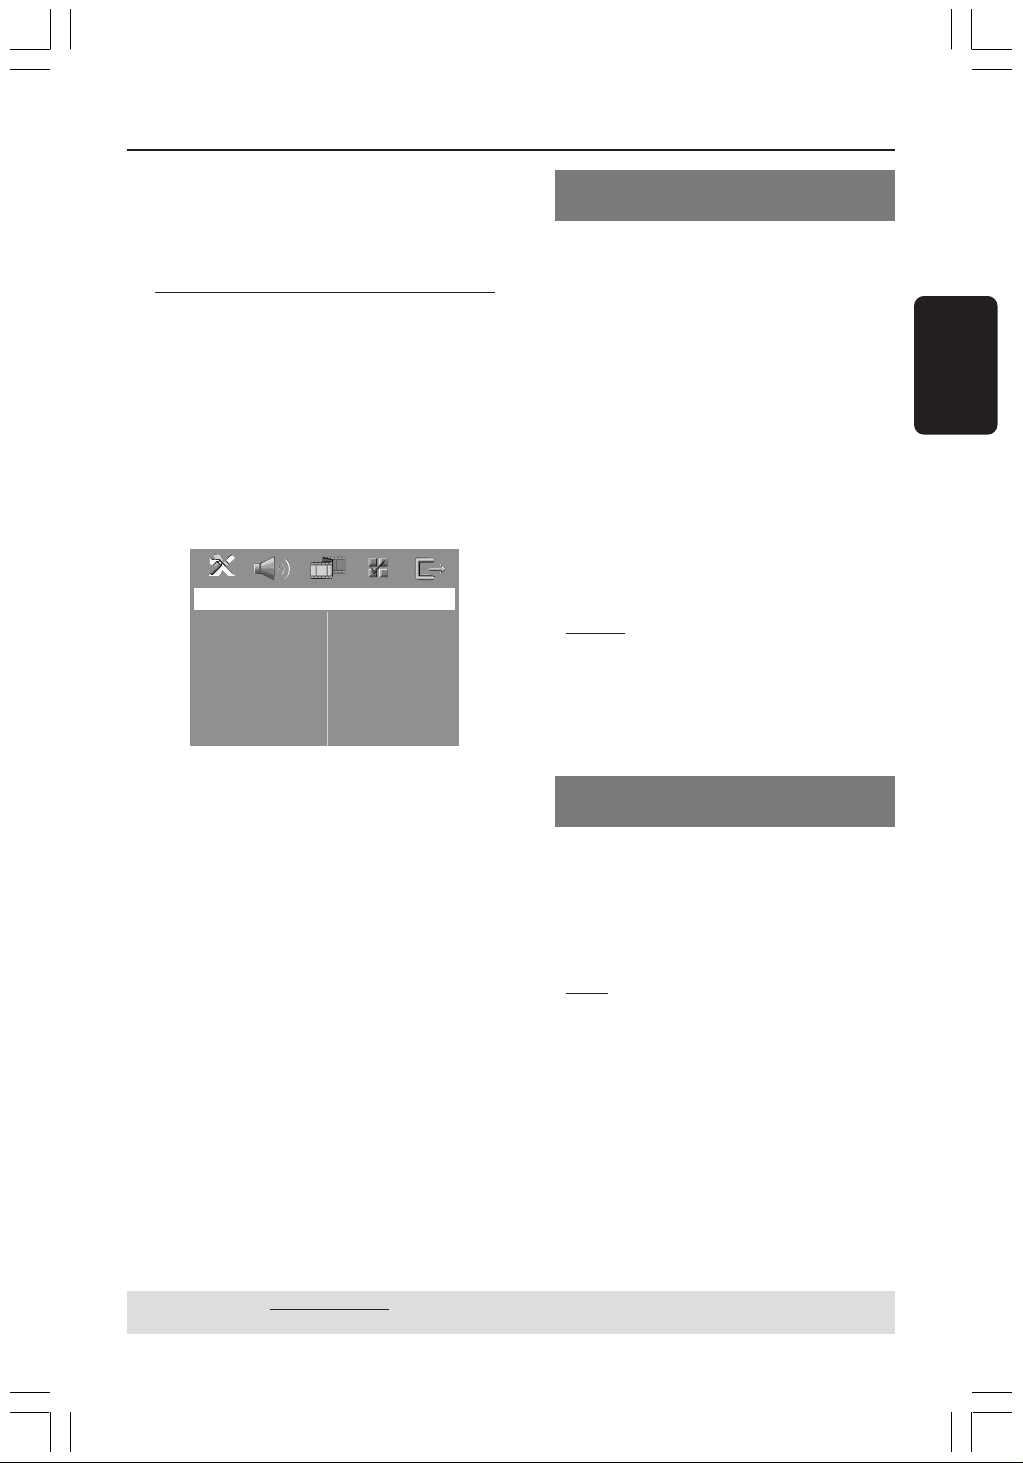
Español
67
Esta configuración de DVD se realiza a través
del televisor, permitiéndole personalizar el
sistema DVD de acuerdo con sus requisitos
particulares..
Acceso a General Setup Page
(Página de configuración
general)
1 Pulse DISC y, a continuación, SETUP en el
control remoto.
2 Pulse 1 2 para seleccionar ‘General Setup
Page’ (Pág. config. general).
3 Pulse OK para confirmar.
General Setup Page
Disc Lock
Display Dim
Program
OSD Language
Screen Saver
DIVX(R) VOD Code
Opciones de menú de configuración del sistema
CONSEJOS: El ajuste subrayado es el ajuste predeterminado de fábrica.
Para volver al menú anterior, pulse 1. Para retirar el menú, pulse SETUP.
Bloqueo/desbloqueo del DVD para
su reproducción
No todos los DVDs están clasificados o
codificados por el fabricante del disco. Puede
impedir que un DVD específico se reproduzca
bloqueando el DVD, o desbloquear el mismo
sea cual sea su clasificación. El sistema DVD
puede memorizar ajustes para 40 discos.
1 En ‘General Setup Page’ (Pág. config. general),
pulse 3 4 para resaltar { Disc Lock }
(Bloqueo Disco) y pulse 2.
{ Lock } (Bloquear)
Seleccione esto para bloquear la reproducción
del disco actual. El acceso posterior a un disco
bloqueado requiere una contraseña de seis
dígitos. La contraseña por defecto es ‘136900’
(Véase la página 114
“Cambio de la
contraseña”).
{
Unlock } (Desbloquear)
Seleccione esto para desbloquear el disco y
permitir la reproducción futura.
2 Pulse 3 4 para seleccionar un ajuste y pulse
OK para confirmar.
Atenuación del brillo de la pantalla
del sistema
Puede seleccionar diferentes niveles de brillo
para la pantalla.
1 En ‘General Setup Page’ (Pág. config. general),
pulse 3 4 para resaltar { Display Dim }
(Atenuar Pantalla), y pulse 2.
{
100% }
Seleccione esto para brillo máximo.
{ 70% }
Seleccione esto para brillo mediano.
{ 40% }
Seleccione esto para atenuar el brillo de la
pantalla.
2 Pulse 3 4 para seleccionar un ajuste y pulse
OK para confirmar.
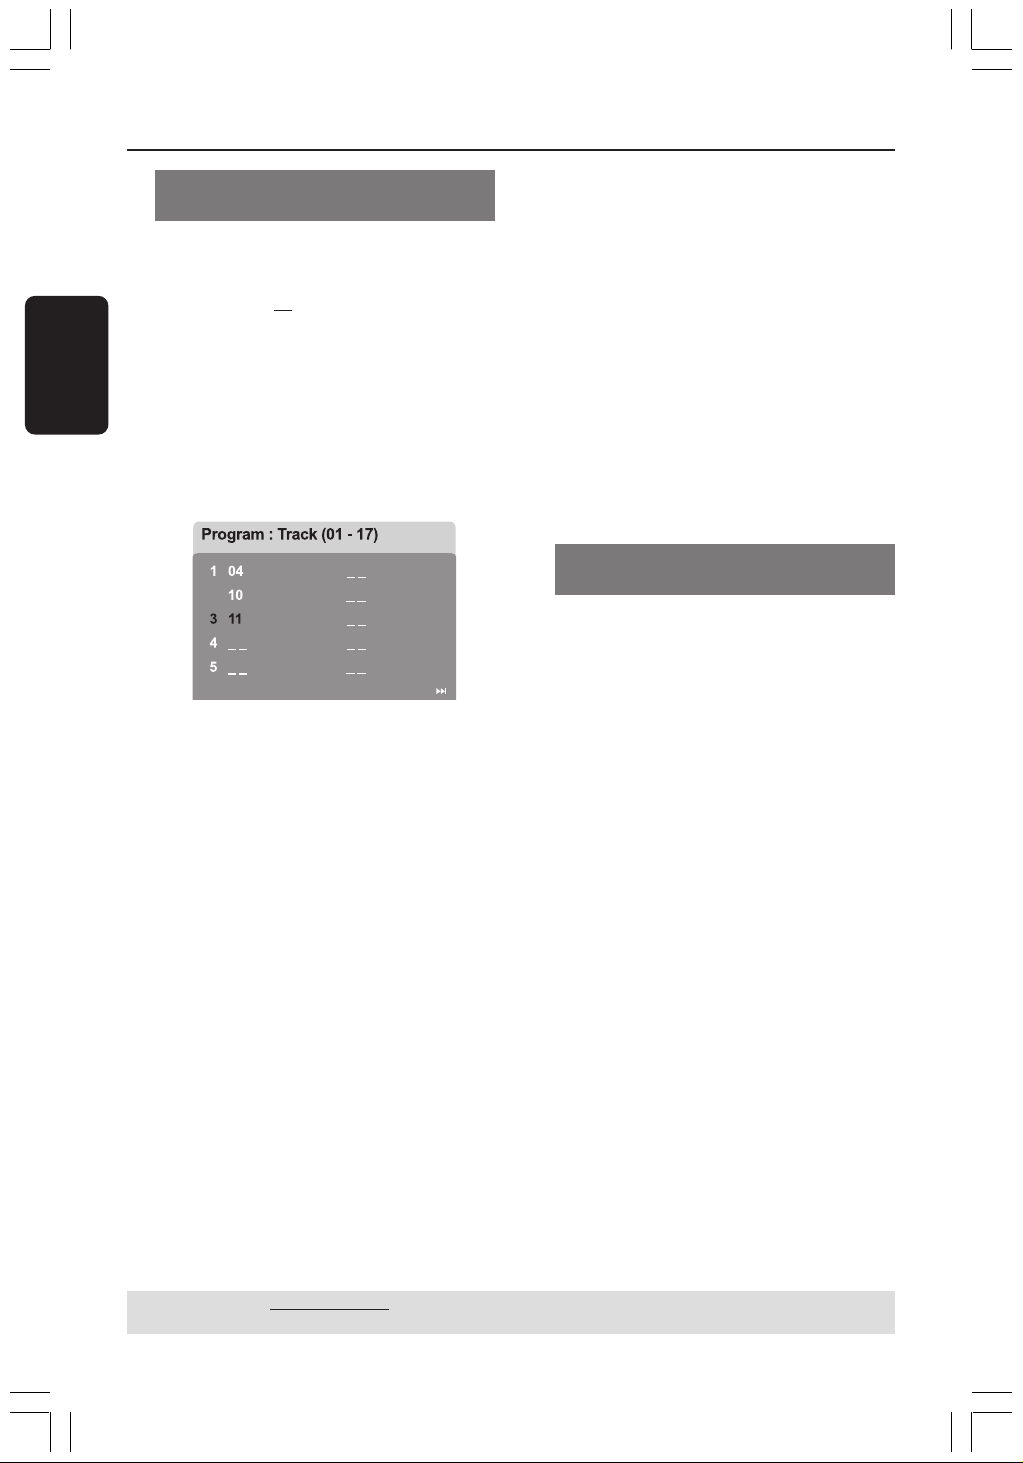
68
Español
Opciones de menú de configuración del sistema
CONSEJOS: El ajuste subrayado es el ajuste predeterminado de fábrica.
Para volver al menú anterior, pulse 1. Para retirar el menú, pulse SETUP.
Programa (excepto CD-Picture/
MP3)
Puede reproducir el contenido del disco en el
orden que quiera programando el orden de
reproducción de las pistas. Es posible
almacenar hasta
20 pistas.
1 Pulse PROG en el control remoto.
O
En ‘General Setup Page’ (Pág. config. general),
pulse 3 4 para resaltar { Program }
(Programa), después pulse 2 para seleccionar
{ Input Menu } (Menú Intro).
2 Pulse OK para confirmar.
2
6
7
8
9
10
Exit Start Next
Especifique la pista/capítulo deseada
3 Introduzca un número de pista/capítulo válido
con los botones Teclado numérico (0-9).
4 Utilice las teclas 1 2 3 4 para cambiar el
cursor de posición.
➜ Si el número de pista/capítulo es superior
al diez, pulse T para abrir la siguiente página
y continuar con la programación, o bien
➜ Utilice las teclas 1 2 3 4 para resaltar el
botón { Next } (Siguiente) y pulse OK.
5 Repita los pasos 3~4 para introducir otro
número de pista/capítulo.
Supresión de una pista/capítulo
6 Utilice las teclas 1 2 3 4 para situar el cursor
en la pista/capítulo que desea suprimir del
programa.
7 Pulse OK para confirmar la supresión
Reproducción de pista/capítulo
8 Utilice las teclas 1 2 3 4 para situar el cursor
sobre el botón { Start } (Inicio) y pulse OK.
➜ La unidad reproducirá las pista/capítulo
seleccionadas en el orden programado.
Para salir de la reproducción de programa
9 Utilice las teclas 1 2 3 4 para situar el cursor
sobre el botón { Exit } (Salir) y pulse OK.
Configuración del idioma
visualizado en pantalla
Este menú contiene varias opciones de idioma
en pantalla. Para detalles al respecto, consulte
la página 58.

Español
69
Opciones de menú de configuración del sistema
Protector de pantalla – activación/
desactivación
El protector de pantalla le ayudará a evitar
daños a la pantalla de su televisor.
1 En ‘General Setup Page’ (Pág. config. general),
pulse 3 4 para resaltar { Screen Saver }
(Prot. Pant.) y pulse 2.
{
On } (Activado)
Seleccione esto si desea apagar la pantalla del
televisor cuando la reproducción se detenga o
se interrumpa qerante más de 15 minutos.
{ Off } (Desactiv.)
Desactivación del protector de pantalla.
2 Pulse 3 4 para seleccionar un ajuste y pulse
OK para confirmar.
Código de registro VOD DivX
®
Philips le proporciona el código de registro de
vídeo bajo demanda (VOD) DivX
®
que le
permite alquilar y adquirir vídeos mediante el
servicio VOD DivX
®
. Si desea obtener más
información, visite www.divx.com/vod.
1 En ‘General Setup Page’ (Pág. config. general),
pulse 3 4 para resaltar { DIVX(R) VOD
Code } (CÓDIGO VOD DIVX(R)) y pulse 2.
➜ Aparecerá el código de registro.
2 Pulse OK para salir.
3 Utilice el código de registro para adquirir o
alquilar los vídeos del servicio VOD DivX
®
en
www.divx.com/vod. Siga las instrucciones y
descargue el vídeo en un CD-R/RW para su
reproducción en este sistema de DVD.
Consejo útiles:
– Los vídeos descargados de VOD DivX
®
sólo se
pueden reproducir en este sistema de DVD.
CONSEJOS: El ajuste subrayado es el ajuste predeterminado de fábrica.
Para volver al menú anterior, pulse 1. Para retirar el menú, pulse SETUP.
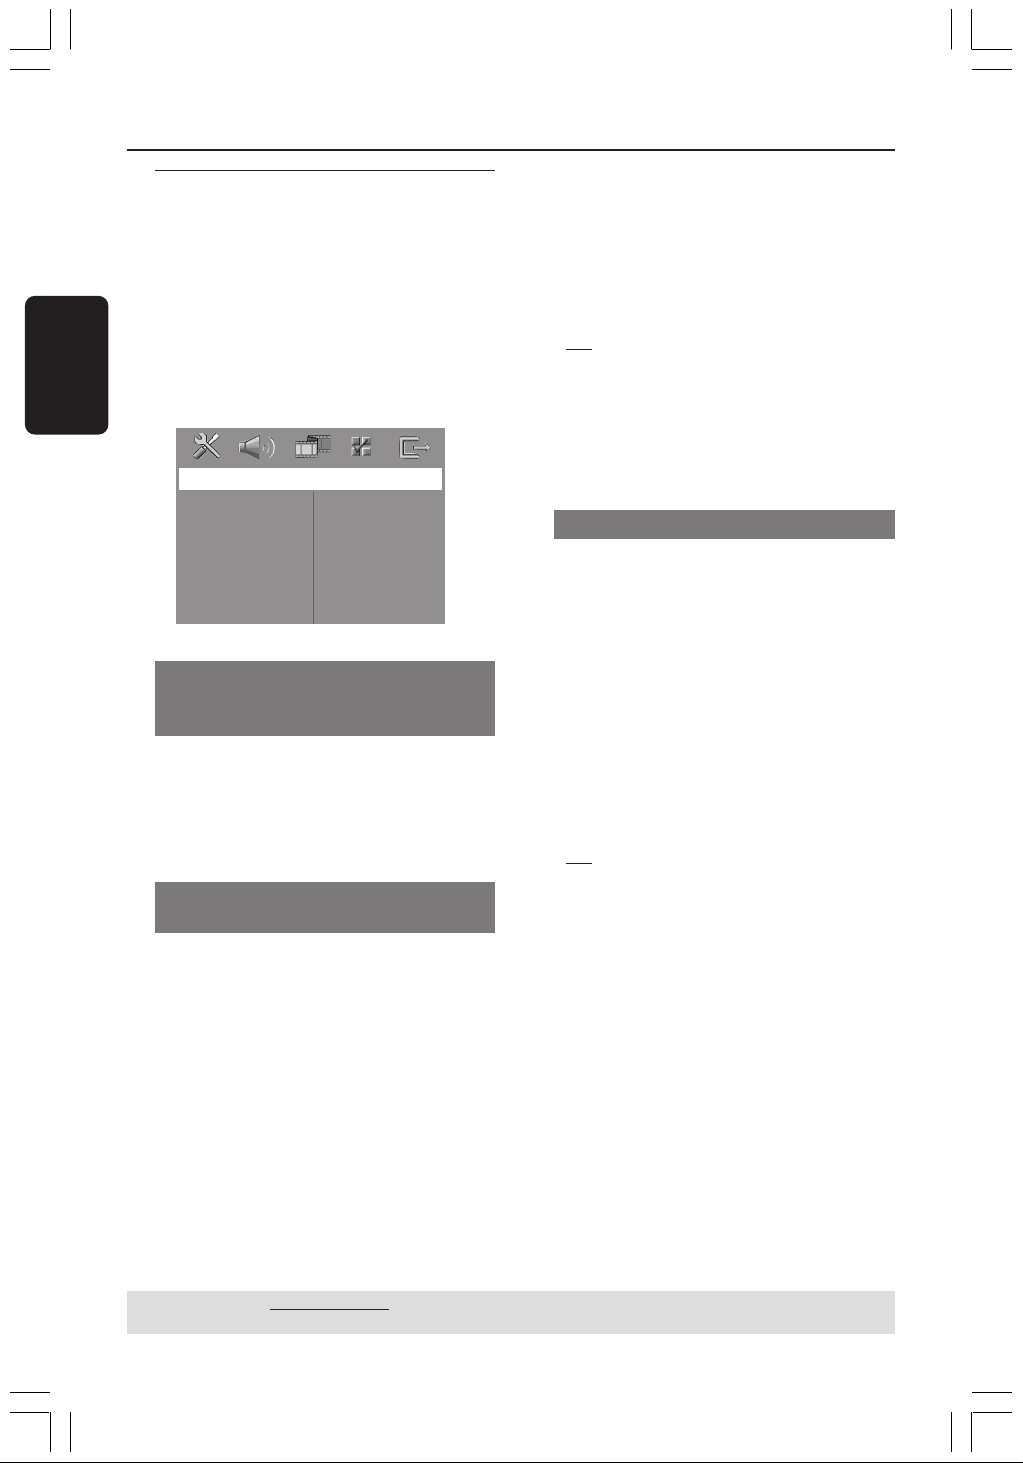
70
Español
CONSEJOS: El ajuste subrayado es el ajuste predeterminado de fábrica.
Para volver al menú anterior, pulse 1. Para retirar el menú, pulse SETUP.
Acceso a la página de
configuración de sonido (Audio
Setup Page)
1 Pulse DISC y, a continuación, SETUP en el
control remoto.
2 Pulse 1 2 para seleccionar ‘Audio Setup Page’
(Pág. config. audio).
3 Pulse OK para confirmar.
Audio Setup Page
Speakers Volume
Speakers Delay
Night Mode
CD Upsampling
Speakers Volume/Speakers Delay
(Volumen de los altavoces/Retardo
de los altavoces)
Estos menús contienen opciones de
configuración de los altavoces que permiten
ajustar el volumen y la distancia de los
altavoces individualmente. Para obtener más
información, consulte la página 78.
Modo nocturno – activación/
desactivación
Cuando el modo nocturno está activado, las
salidas de alto volumen se suavizan y las salidas
de bajo volumen se suben a un nivel audible.
(DVD solamente). Es útil para ver su película
de acción favorita sin molestar a otras
personas durante la noche.
1 En ‘Audio Setup Page’ (Pág. config. audio),
pulse 3 4 para resaltar { Night Mode }
(Modo Nocturno) y pulse 2.
{ On } (Activado)
Seleccione esta opción para equilibrar el
volumen.
{
Off } (Desactiv.)
Seleccione esta opción cuando quiera disfrutar
del sonido envolvente con su gama dinámica
completa.
2 Pulse 3 4 para seleccionar un ajuste y pulse
OK para confirmar.
CD Upsampling
Esta función le permite convertir su CD de
música a una frecuencia de muestreo más alta,
saltará utilizando un sofisticado procesamiento
de señales digitales para obtener una mejor
calidad de sonido.
Asegúrese de que el sistema de DVD
está en modo estéreo para poder
acceder a la opción de muestreo
ascendente de CD.
1 En ‘Audio Setup Page’ (Pág. config. audio),
pulse 3 4 para resaltar { CD Upsampling }
(Muestr. Asc.) y pulse 2.
{
Off } (Desactiv.)
Seleccione esto para desactivar el muestreo de
CD.
{ 88.2 kHz (X2) }
Seleccione esto para convertir la frecuencia de
muestreo de los CDs a un nivel el doble del
original.
2 Pulse 3 4 para seleccionar un ajuste y pulse
OK para confirmar.
Consejo útiles:
– Si pulsa el botón SURR del mando a distancia
para seleccionar el modo “Multicanal”, desactivará
la función de muestreo ascendente de CD.
Opciones de menú de configuración del sistema
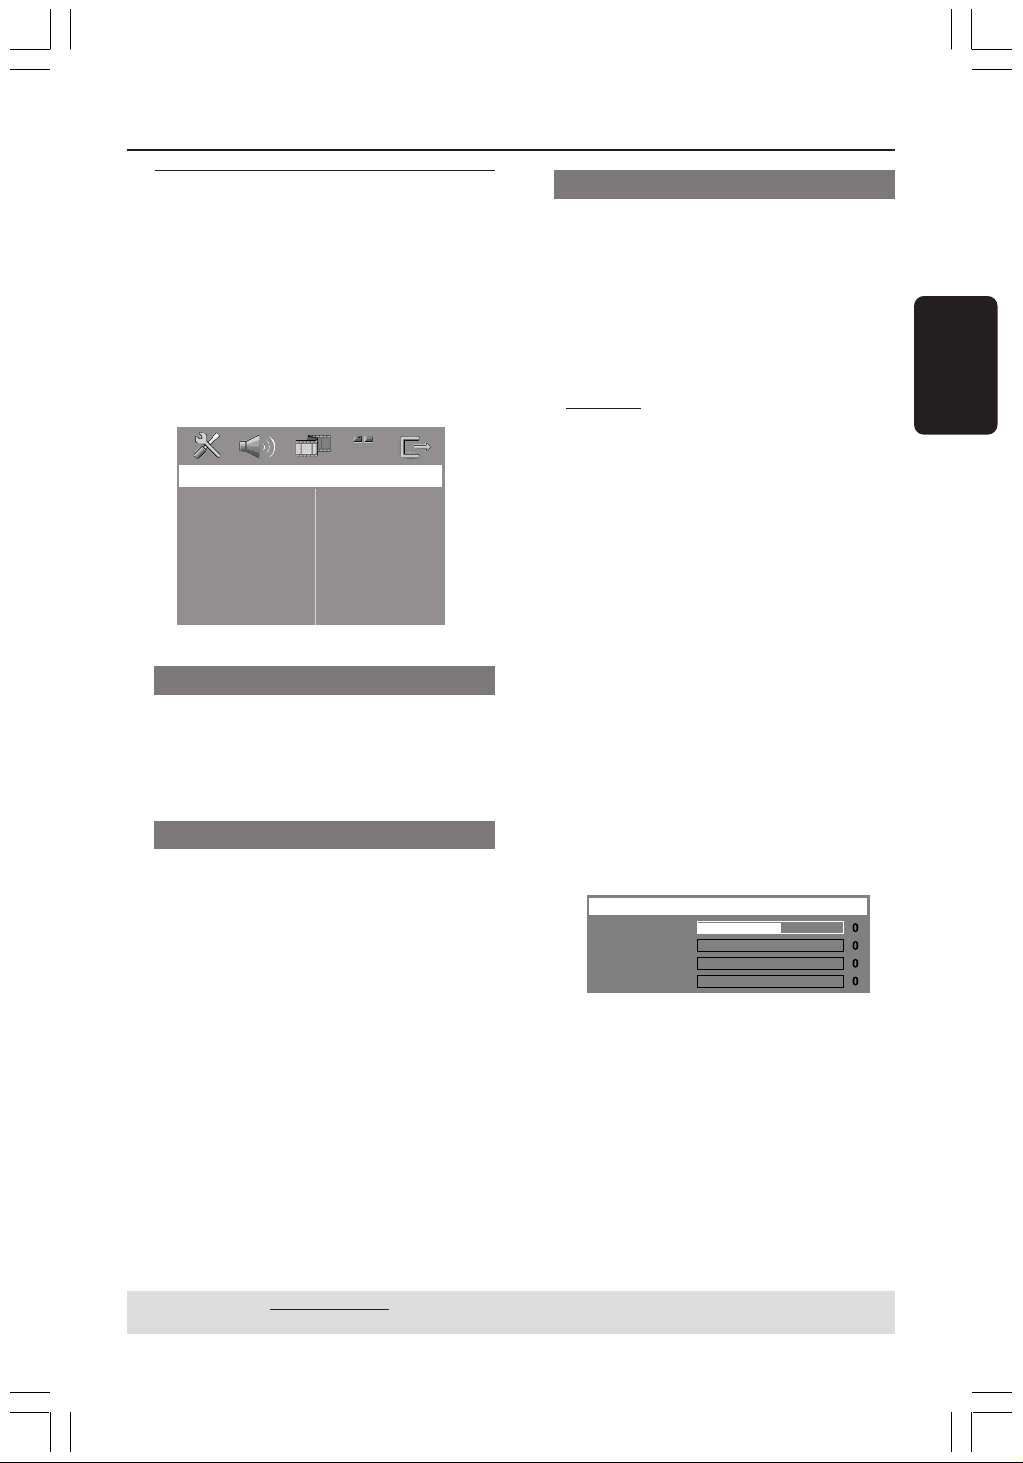
Español
71
Opciones de menú de configuración del sistema
CONSEJOS: El ajuste subrayado es el ajuste predeterminado de fábrica.
Para volver al menú anterior, pulse 1. Para retirar el menú, pulse SETUP.
Acceso a la página de
configuración de vídeo (Video
Setup Page)
1 Pulse DISC y, a continuación, SETUP en el
control remoto.
2 Pulse 1 2 para seleccionar ‘Video Setup Page’
(Pág. config. vídeo).
3 Pulse OK para confirmar.
Video Setup Page
TV Type
TV Display
Picture Setting
Tipo TV
Este menú contiene las opciones para
seleccionar el sistema de color que
corresponda al televisor conectado.
Para detalles al respecto, consulte la página 57
Pantalla TV
Este menú contiene las opciones de ajuste de
la relación de aspecto de la pantalla del sistema
DVD de acuerdo con el televisor conectado.
Para detalles al respecto, consulte la página 57.
Ajuste del imagen
Este sistema DVD proporciona tres juegos
predefinidos de ajustes de color de imágenes y
un ajuste personal que puede definir usted
mismo.
1 En ‘Video Setup Page’ (Pág. config. vídeo) pulse
3 4 para resaltar { Picture Setting } (Ajuste
Imagen) y pulse 2.
{
Standard } (Estándar)
Seleccione esta opción para obtener los
colores originales.
{ Bright } (Brillo)
Seleccione esta opción para obtener colores
intensos.
{ Soft } (Suave)
Seleccione esto para atenuar el brillo de la
imagen de TV.
{ Personal }
Seleccione esto para personalizar el color de
su imagen ajustando el brillo, el contraste, la
tonalidad y el color (saturación).
2 Pulse 34 para seleccionar un ajuste y pulse
OK para confirmar.
3 Si selecciona { Personal }, vaya a los pasos
4~7.
➜ Aparece el menú ‘Personal Picture Setup’
(Config Imagen Personal).
Brightness
Contrast
Tint
Color
Personal Picture Setup
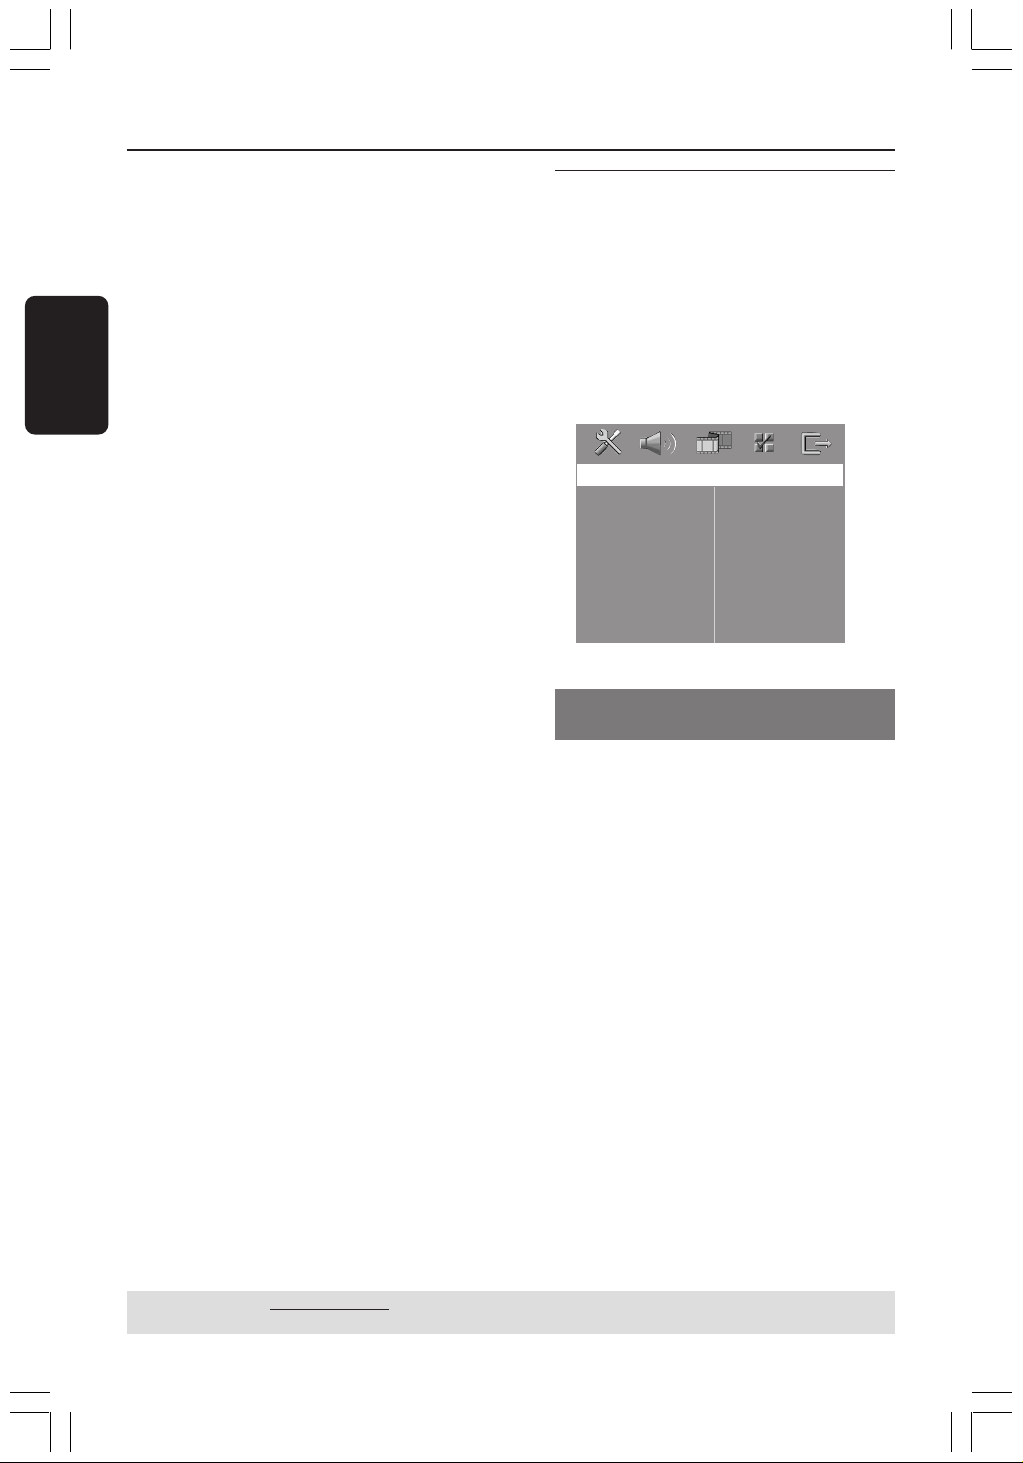
72
Español
Opciones de menú de configuración del sistema
CONSEJOS: El ajuste subrayado es el ajuste predeterminado de fábrica.
Para volver al menú anterior, pulse 1. Para retirar el menú, pulse SETUP.
4 Pulse 3 4 para resaltar una de las opciones
siguientes:
{ Brightness } (Brillo)
Aumentando el valor se aumenta el brillo de la
imagen y viceversa. Seleccione cero (0) para
poner el ajuste medio.
{ Contrast } (Contraste)
Aumentando el valor se aumenta la nitidez de
la imagen y viceversa. Seleccione cero (0) para
equilibrar el contraste.
{ Tint } (Tonalidad)
El aumento o disminución de este valor
cambiará la fase del color de la imagen.
{ Color } (Saturación)
Aumentando el valor mejorará el color en su
imagen y viceversa. Seleccione cero (0) para
equilibrar el color.
5 Pulse 1 2 para ajustar los valores de
parámetros más apropiados para su
preferencia personal.
6 Repita los pasos 4~5 para ajustar otras
funciones de colores.
7 Pulse OK para confirmar.
Acceso a la página de
preferencias (Preference)
1 Pulse Ç dos veces para detener la
reproducción (si está activada), y pulse
SETUP.
2 Pulse 1 2 para seleccionar ‘Preference Page’
(Pág de preferencias).
3 Pulse OK para confirmar.
Preference Page
Audio
Subtitle
Disc Menu
Parental
PBC
MP3/JPEG Nav
Password
DivX Subtitle
Default
Configuración del idioma Audio,
Subtítulos y Menú de disco
Estos menús contienen diversas opciones de
idioma para audio, subtítulos y menú de disco,
que pueden grabarse en el DVD. Para detalles
al respecto, consulte la página 58.
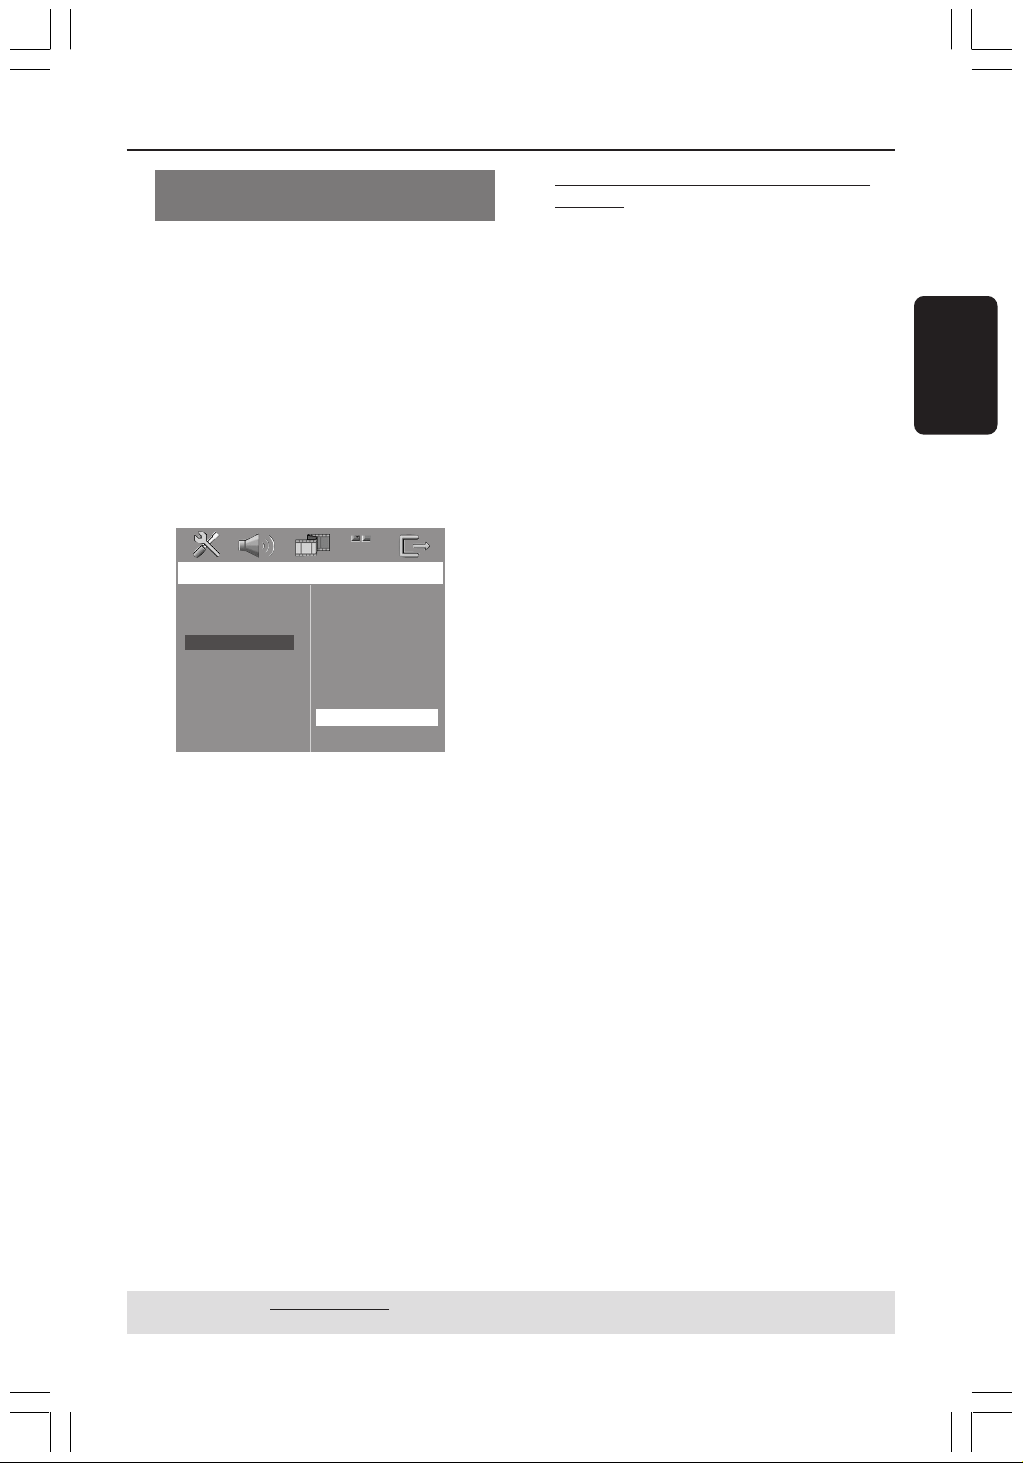
Español
73
Opciones de menú de configuración del sistema
CONSEJOS: El ajuste subrayado es el ajuste predeterminado de fábrica.
Para volver al menú anterior, pulse 1. Para retirar el menú, pulse SETUP.
Restricción de la reproducción
estableciendo el nivel parental
Algunos DVDs pueden tener un nivel parental
asignado al disco completo o a ciertas escenas
del disco. Esta función le permite establecer un
nivel de limitación de reproducción. Los niveles
de control parental son de 1 a 8 y dependen
del país. Puede prohibir la reproducción de
ciertos discos que no son apropiados para sus
niños o hacer que ciertos discos se
reproduzcan con escenas alternativas.
1 En ‘Preference Page’ (Pág de preferencias),
pulse 3 4 para resaltar { Parental } y pulse
2.
Preference Page
1 Kid Safe
2 G
3 PG
4 PG 13
5 PGR
6 R
7 NC 17
8 Adult
Audio
Subtitle
Disc Menu
Parental
PBC
MP3/JPEG Nav
Password
DivX Subtitle
Default
2 Pulse 3 4 para resaltar un nivel de control
para el disco insertado y pulse OK.
3 Utilice el teclado numérico (0-9) para
introducir el código de 6 dígitos (véase la
página 74 “Cambio de la contraseña”).
➜ Los DVDs que estén clasificados por
encima del nivel que ha seleccionado no se
reproducirán a menos que introduzca su
contraseña de seis dígitos y seleccione un nivel
de control más alto.
Explicaciones de los niveles de control
parental
1 Kid Safe – 2 G (1 Tolerado - 2G)
– Público general; se recomienda como apto
para todas las edades.
3 PG
– Se sugiere Guía parental.
4 PG13
– El material no es apto para menores de 13
años.
5 PGR – 6 R
– Parental Guidance (Guía parental) -
Restringido; se recomienda que los padres no
permitan que los menores de 17 vean este
material o que lo vean cuando están
supervisados por el padre o la madre o un
guardián adulto.
7 NC-17
– No apto para menores de 17 años; no se
recomienda para menores de 17 años.
8 Adult (8 adultos)
– Material para adultos; solamente debe ser
visto por adultos debido a material sexual
gráfico, violencia o lenguaje soez.
Consejos útiles:
– Los discos VCD, SVCD y CD no incluyen ninguna
calificación, por lo que el control infantil no
funciona con ellos, como tampoco con la mayoría
de los DVD ilegales.
– Algunos DVDs no están codificados con un nivel
de control parental aunque la clasificación de la
película está impresa en la funda del disco. La
función de control parental no funciona para
dichos discos.

74
Español
Opciones de menú de configuración del sistema
CONSEJOS: El ajuste subrayado es el ajuste predeterminado de fábrica.
Para volver al menú anterior, pulse 1. Para retirar el menú, pulse SETUP.
PBC: Playback Control (Control de
reproducción
PBC (Playback Control) permite reproducir
CD de vídeo de forma interactiva, siguiendo el
menú que aparece en pantalla. Esta
característica sólo está disponible para CD de
vídeo 2.0 con la función de control de
reproducción (PBC).
1 En ‘Preference Page’ (Pág de preferencias),
pulse 3 4 para resaltar { PBC } y pulse 2.
{
On } (Activado)
Seleccione esta opción si desea ver el menú de
índice una vez cargado el VCD.
{ Off } (Desactivado)
Seleccione esta opción para omitir el menú de
índice e iniciar directamente la reproducción.
2 Pulse 3 4 para seleccionar un ajuste y pulse
OK para confirmar.
Navegador MP3/JPEG – activación/
desactivación
MP3/JPEG Navigator sólo puede establecerse
si el disco se graba con un menú. Le permite
seleccionar diferentes menús de pantalla para
facilitar la navegación.
1 En ‘Preference Page’ (Pág de preferencias),
pulse 3 4 para resaltar { MP3/JPEG NAV }
(Nav. MP3/JPEG) y pulse 2.
{ Without Menu } (Sin Menú)
Seleccione esto para mostrar todos los
archivos guardados en el MP3/ Picture CD.
{
With Menu } (Con Menú)
Seleccione esto para mostrar solamente el
menú de carpeta del MP3/Picture CD.
2 Pulse 3 4 para seleccionar un ajuste y pulse
OK para confirmar.
Consejo útiles:
– Cuando cargue un disco SACD, esta función se
desactiva automáticamente.
Cambio de la contraseña
Se utiliza la misma contraseña para Control
infantil y Bloqueo disco. Introduzca su
contraseña de seis dígitos cuando se le indique
en la pantalla. La contraseña predeterminada es
136900.
1 En ‘Preference Page’ (Pág de preferencias),
pulse 3 4 para resaltar { Password }
(Contraseña), después pulse OK para
seleccionar { Change } (Cambiar).
Preference Page
Change
Audio
Subtitle
Disc Menu
Parental
PBC
MP3/JPEG Nav
Password
DIVX Subtitle
Default
2 Pulse OK para abrir la ‘Página Cambiar
Contraseña’.
Change Password
Old Password
New Password
Confirm PWD
OK
3 Utilice el Teclado numérico (0-9) para
introducir su antiguo código de 6 dígitos.
➜ Cuando realice esto por primera vez,
introduzca ‘
136900’.
➜ Si olvida su contraseña de seis dígitos,
introduzca ‘
136900’.
4 Introduzca el nuevo código de 6 dígitos.
5 Introduzca el nuevo código de 6 dígitos por
segunda vez para confirmar.
➜ El nuevo código de seis cifras quedará
activado.
6 Pulse OK para confirmar.

Español
75
Opciones de menú de configuración del sistema
CONSEJOS: El ajuste subrayado es el ajuste predeterminado de fábrica.
Para volver al menú anterior, pulse 1. Para retirar el menú, pulse SETUP.
Ajuste de subtítulos DivX
Establezca un tipo de fuente que admita los
subtítulos DivX grabados.
1 En ‘Preference Page’ (Pág de preferencias),
pulse 3 4 para resaltar { DIVX Subtitle }
(Subtítulos DivX) y pulse 2.
{
Standard }
Lista estándar de fuentes para subtítulos en
inglés proporcionadas por este reproductor de
DVD.
{ Others } (Otros)
Seleccione esta opción para mostrar los
subtítulos en fuentes otros.
2 Pulse 34 para seleccionar un ajuste y pulse
OK para confirmar.
Configuración predeterminada
Al seleccionar la función Predeterm. se
restaurarán todas las demás opciones y sus
ajustes personales a los ajustes
predeterminados en fábrica excepto por su
contraseña de Control infantil.
1 En ‘Preference Page’ (Pág de preferencias),
pulse 3 4 para resaltar { Default } (Por
Defecto), después pulse 2 para seleccionar
{ Reset } (Reiniciar).
2 Pulse OK para confirmar.
➜ Todos los elementos del menú de
configuración se restauran al ajuste por defecto.

76
Español
¡IMPORTANTE!
Asegúrese de que las antenas de FM y
MW estén conectadas.
Sintonización de emisoras
1 Pulse TUNER en el control remoto (o pulse
SOURCE en el panel delantero) para
seleccionar “FM” o “MW”.
2 Pulse 3 / 4 brevemente en el control remoto.
➜ La pantalla de panel mostrará "SEARCH"
(Búsqueda) hasta que se encuentre una
emisora de radio con la potencia de señal
suficiente.
3 Repita el paso 2 si es necesario hasta que
encuentre la emisora de radio que desee.
4 Para sintonizar una emisora débil, pulse
1 / 2 breve y repetidamente hasta que
encuentre una recepción óptima.
Programación de emisoras
preestablecidas
Puede almacenar hasta 40 FM y 20 MW
emisoras preestablecidas en la memoria.
Consejos útiles:
– El sistema saldrá del modo de programación de
emisoras preestablecidas si no se pulsa ningún
botón durante 20 segundos.
– Si no se detectan frecuencias de estéreo
durante Plug & Play, aparece "PLEASE CHECK
FM/ MW ANTENNA" (comprobar antena).
Utilización de Plug & Play
El sistema Plug & Play (enchufar y utilizar) le
permite almacenar automáticamente todas las
emisoras disponibles.
1
AUTO INSTALL..
START..
2
1 Si se trata de la primera configuración,
pulse TUNER.
➜ Aparece "AUTO INSTALL PRESS PLAY"
(instalación automática– pulse PLAY).
2 Pulse PLAYÉ hasta que aparezca "START ..."
(Iniciar) en la pantalla de panel.
➜ El sistema comenzará a buscar en la banda
FM y continuará con la banda MW.
Todas las emisoras de radio disponibles que
emitan con una señal lo suficientemente fuerte
quedarán almacenadas automáticamente.
➜ A continuación se reproducirá la última
emisora sintonizada.
Operaciones de sintonizador
Panel de visualización
del sistema DVD
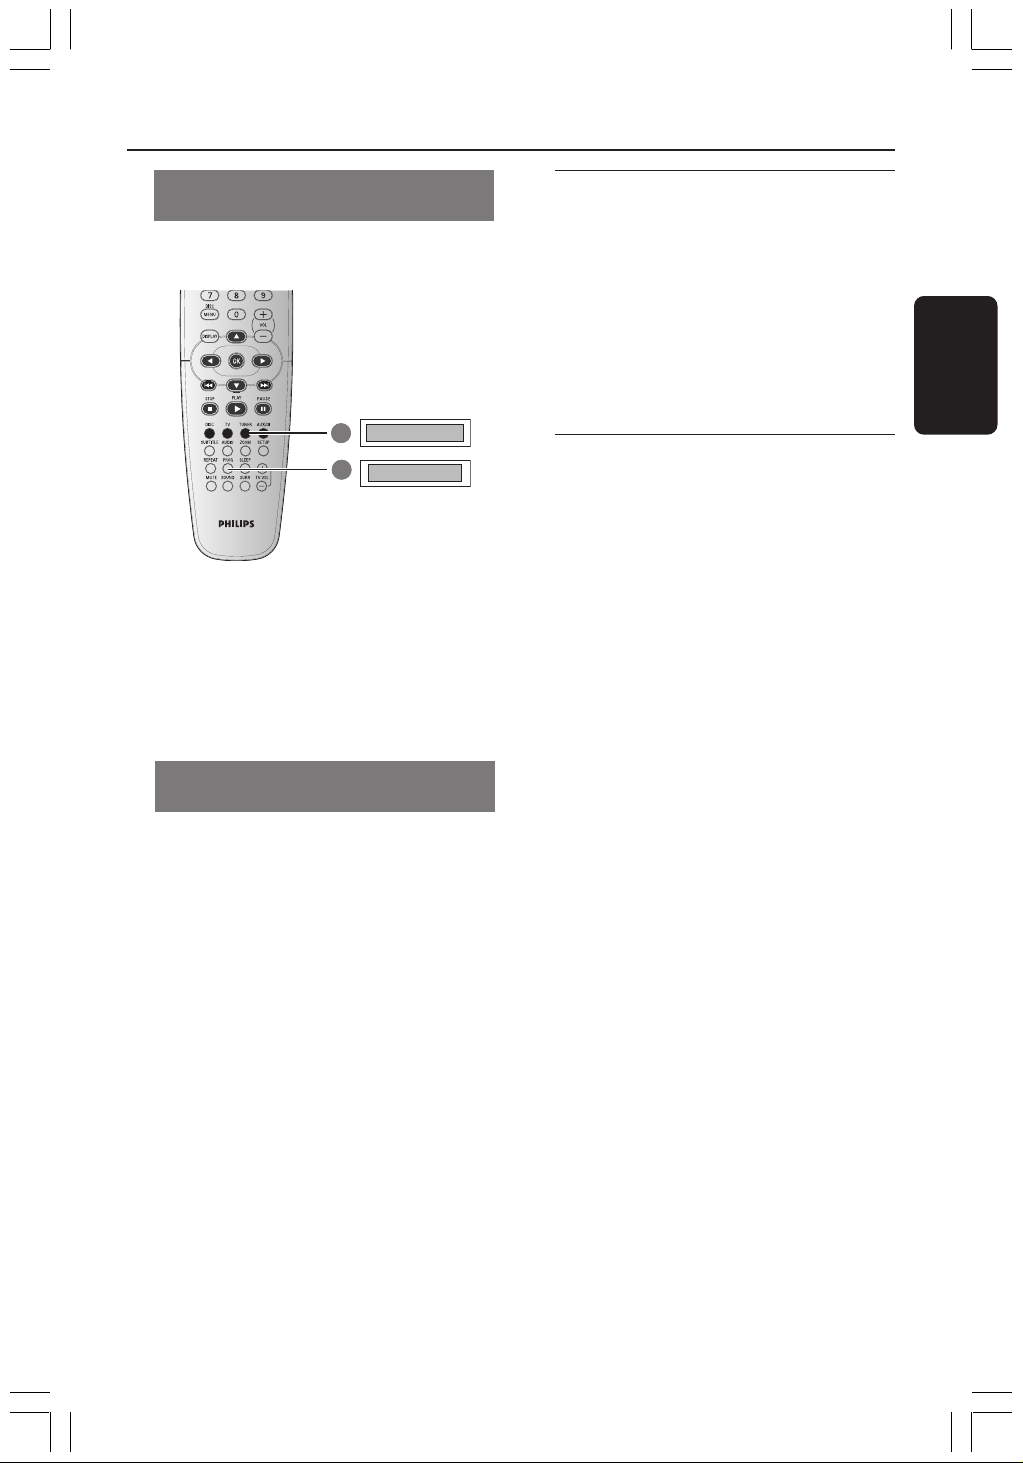
Español
77
Programación automática de
emisoras preestablecidas
Use el preajuste automático para almacenar o
reinstalar todas las presintonías de radio.
1
FM / MW
START..
2
1 Pulse el botón TUNER para seleccionar
“FM” o “MW”.
2 Pulse y mantenga apretado PROG hasta que
aparezca "START..." (Iniciar).
➜ Todas las emisoras preestablecidas
anteriores serán sustituidas.
Programación manual de emisoras
preestablecidas
Use el preajuste manual para almacenar sólo
sus emisoras de radio favoritas.
1 Sintonice su emisora deseada (consulte
“Sintonización de emisoras”).
2 Pulse PROG.
3 Pulse S / T para seleccionar el número
de presintonía en el que desea almacenar la
emisora de radio actual.
4 Pulse PROG de nuevo para almacenarla.
Selección de una emisora
preestablecida
● En el control remoto, pulse TUNER y, a
continuación, utilice S / T para
seleccionar un número de presintonía (o utilice
el teclado alfanumérico).
➜ Aparecerán la banda de onda y el número
de emisora preestablecida seguido de la
frecuencia radiofónica.
Eliminación de una emisora de
radio presintonizada
1 En el modo de sintonizador, pulse S / T
en el mando a distancia para seleccionar una
presintonía de radio.
2 Mantenga pulsado Ç hasta que aparezca
“FM/MW X DELETED” (FM/MW X Borrada).
➜ “X” es el número de presintonía.
➜ La emisora de radio continuará sonando,
pero se habrá borrado de la lista de
presintonías.
➜ El resto de los números de presintonía no
cambiará.
Operaciones de sintonizador (continuación)
Panel de visualización
del sistema DVD
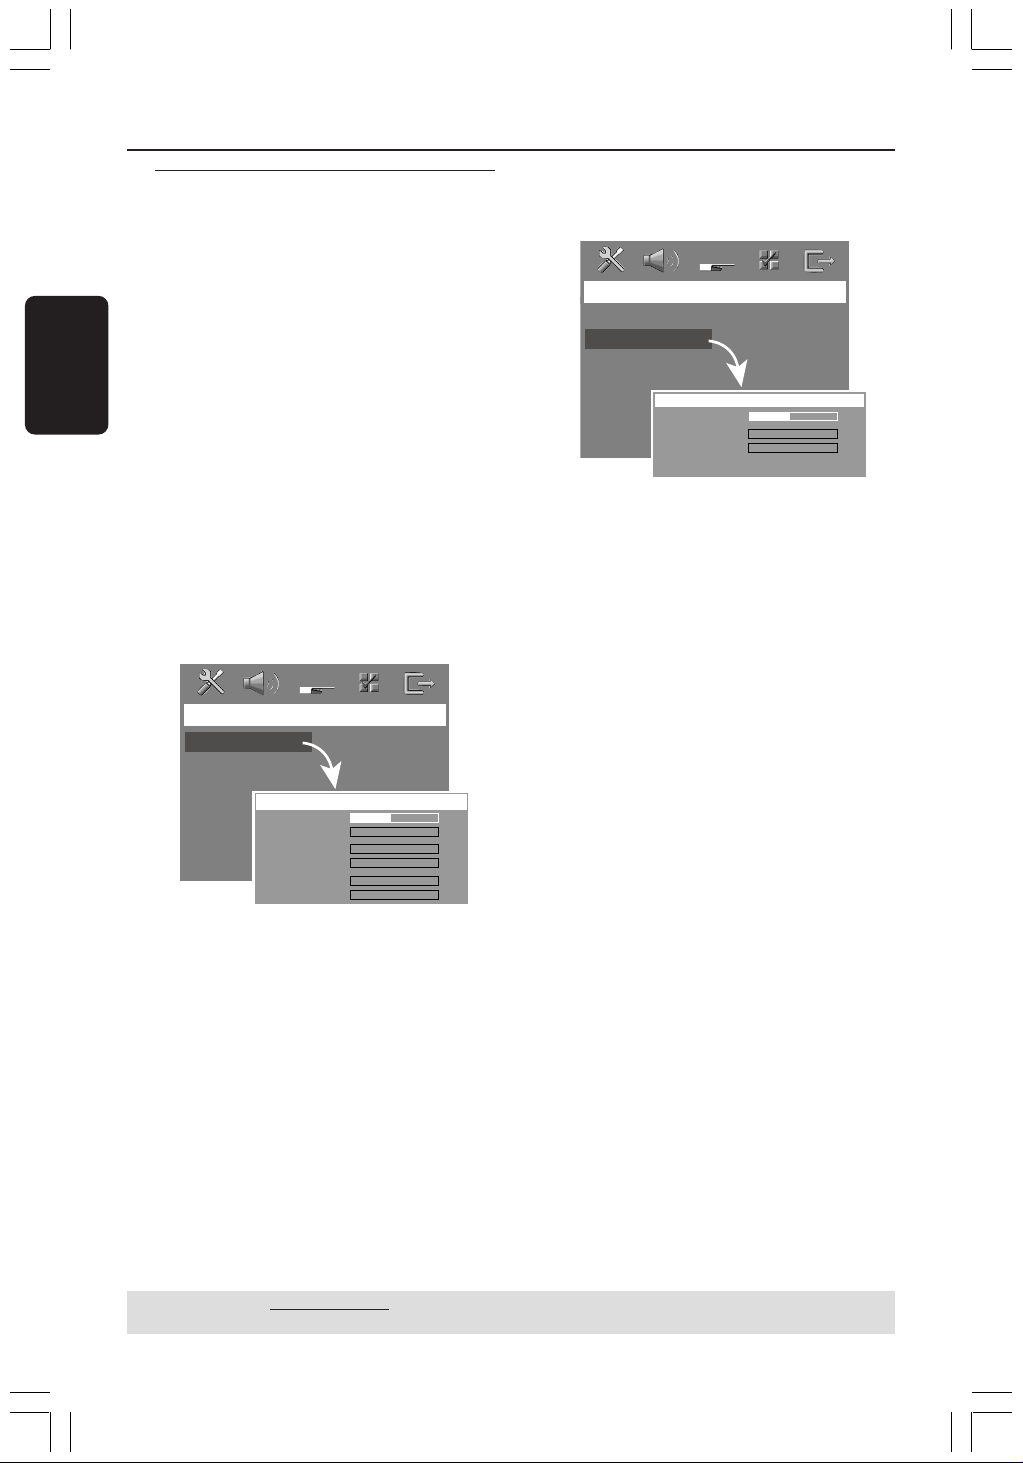
78
Español
Controles del sonido y del volumen
Ajuste independiente del
volumen de los altavoces
Puede ajustar el volumen y los tiempos de
demora (altavoces central y surround
solamente) para ajustes individuales.
Estos ajustes le permiten optimizar el sonido
de acuerdo con su entorno y configuración.
¡Importante!
Pulse el botón SURR del control remoto
para seleccionar el modo envolvente
multicanal antes de modificar los ajustes
del altavoz.
1 Pulse Ç dos veces para detener la
reproducción (si está activada), y pulse SETUP.
2 Pulse 2 repetidamente para seleccionar
‘Audio Setup Page ‘ (Pág. config. audio).
3 Pulse 3 4 para seleccionar { Speakers
Volume }(Volumen Altavoces) y pulse 2.
Audio Setup Page
Speakers Volume
Speakers Delay
Night Mode
CD Upsampling
Front Left
Front Right
Center
Subwoofer
Rear Left
Rear Right
0dB
0dB
+3dB
+3dB
+3dB
+3dB
Speakers Level Setup
4 Pulse 1 2 para establecer el volumen de cada
altavoz (-6dB ~ +6dB).
5 Pulse OK para confirmar.
6 Pulse 3 4 para resaltar { Speakers Delay }
(Retardo Altavoces) y pulse 2.
Audio Setup Page
Speakers Volume
Speakers Delay
Night Mode
CD Upsampling
Center
Rear Left
Rear Right
Speakers Distance Setup
0ms
0ms
0ms
7 Pulse 1 2 para establecer el tiempo de retardo
de los altavoces central y posteriores que
mejor se ajuste a sus necesidades de sonido
envolvente.
8 Pulse OK para confirmar.
Consejos útiles:
– Un tiempo de retardo de 1 ms equivale a un
cambio de distancia de 30 cm.
– Utilice los ajustes de demora más larga cuando
el altavoz esté más cerca del oyente que los
altavoces delanteros.
– La tonalidad de prueba se generará
automáticamente para ayudarle a juzgar el nivel
de sonido de cada altavoz.
CONSEJOS: El ajuste subrayado es el ajuste predeterminado de fábrica.
Para volver al menú anterior, pulse 1. Para retirar el menú, pulse SETUP.

Español
79
Selección de sonido envolvente
● Pulse SURR para seleccionar: MULTI-channel
(MULTICANAL) o STEREO (ESTÉREO).
➜ La disponibilidad de los diversos modos de
sonido envolvente depende del número de
altavoces utilizados y del sonido disponible en
el disco.
➜ Los altavoces central y surround (sonido
envolvente) funcionan solamente cuando el
sistema de cinema casero DVD está puesto al
modo Multicanal.
➜ Los modos de salida disponibles para el
modo Multicanal incluyen: Dolby Digital y
Dolby Pro Logic II.
➜ Las transmisiones radiofónicas o
grabaciones en estéreo producirán algunos
efectos de canal de sonido envolvente cuando
se reproduzcan en modo de sonido
envolvente. Sin embargo, las fuentes
monofónicas (sonido de un solo canal) no
producirán ningún sonido de los altavoces de
sonido envolvente.
Consejo útiles:
– No podrá seleccionar el modo de sonido
envolvente si el menú del sistema está activado.
– Asegúrese de que la salida de audio del disco
está establecida en Dolby Digital si no hay salida
de sonido de los altavoces durante la reproducción.
Selección de efectos de sonido
digital
Seleccione un efecto de sonido digital
preestablecido que corresponda al contenido
de su disco o que optimice el sonido del estilo
musical si está reproduciendo.
● Pulse SOUND para seleccionar el efecto de
sonido disponible.
Cuando reproduce discos de películas o en
modo de TV, puede seleccionar:
CONCERT, DRAMA, ACTION o SCI-FI.
Cuando reproduzca discos de música o
mientras esté en modo AUX/DI, puede
seleccionar:
ROCK, DIGITAL, CLASSIC o JAZZ.
Consejo útiles:
– Para una reproducción de sonido equilibrada,
seleccione CONCERT o CLASSIC.
Control de volumen
● Ajuste el control VOLUME (o pulse
VOL +/- en el control remoto) para
aumentar o reducir el nivel del sonido.
➜ "VOL MIN" es el nivel de volumen mínimo
y "VOL MAX" es el nivel de volumen máximo.
Para desactivar el volumen
temporalmente
● Pulse MUTE en el control remoto.
➜ La reproducción continuará sin sonido
mientras se muestra "MUTE" (sonido
enmudecido).
➜ Para restaurar el volumen, vuelva pulsar
MUTE o aumente el nivel del volumen.
Controles del sonido y del volumen (continuación)

80
Español
Otras funciones
Ajuste del temporizador de
dormir
El temporizador de dormir pone
automáticamente el sistema en el modo de
espera Eco Power a una hora preseleccionada.
● Pulse SLEEP repetidamente hasta que se
alcance la hora de desactivación preestablecida
deseada.
➜ Las opciones son las siguientes (tiempo en
minutos):
15 ™ 30 ™ 45 ™ 60 ™ OFF ™ 15…
➜ El icono de “SLEEP” aparecerá en la pantalla
de panel cuando el modo de suspensión esté
activo.
➜ Antes de que el sistema pase al modo de
espera Eco Power, aparece una cuenta atrás de
10 segundos.
"SLEEP10" ™ "SLEEP 9".... ™
"SLEEP1" ™ "STANDBY"
Para cancelar el temporizador de
dormir
● Pulse SLEEP repetidamente hasta que
aparezca "OFF" o pulse el botón STANDBY
ON (B).

Español
81
SECCIÓN DE AMPLIFICADOR
Potencia de salida 200 W
- Delantera 25 W / canal
- Trasero (Surround) 25 W / canal
- Central 50 W
- Subwoofer 50 W
Respuesta de frecuencia 20 Hz – 20 kHz / –3 dB
Relación señal-ruido > 65 dB (CCIR)
Sensibilidad de entrada
- Entrada AUX 1000 mV
SELECCIÓN DE SINTONIZADOR
Gama de sintonización FM 87,5 – 108 MHz
(Pasos de 50 kHz)
MW 531 – 1602 kHz
(Pasos de 9 kHz)
Sensibilidad de
silenciamiento 26 dB FM 20 dB
MW 4 µV/m
Relación de rechazo
de imagen FM 25 dB
MW 28 dB
Relación de rechazo de IF FM 60 dB
MW 45 dB
Relación señal-ruido FM 60 dB
MW 40 dB
Relación de supresión
de AM FM 30 dB
Distorsión armónica FM mono 3 %
FM estéreo 3 %
MW 5 %
Respuesta de frecuencia FM 180 Hz – 10 kHz / ±6 dB
Separación de estéreo FM 26 dB (1 kHz)
Umbral de estéreo FM 23,5 dB
SECCIÓN DE DISCO
Tipo de láser Semiconductor
Diámetro de disco 12 cm / 8 cm
Decodificación de vídeo MPEG-1 / MPEG-2 /
DivX 3.11, 4.x & 5.x
Video CDA 12 Bit
Sistema de señales PAL / NTSC
Formato de vídeo 4:3 / 16:9
Relación señal-ruido
de video 74 dB
Salida de vídeo compuesto 1,0 Vp-p, 75 Ω
Audio CDA 24 bits / 192 kHz
Respuesta de frecuencia 4 Hz – 20 kHz (44,1 kHz)
4 Hz – 22 kHz (48 kHz)
4 Hz – 44 kHz (96 kHz)
Especificaciones
UNIDAD PRINCIPAL
Tension d’alimentation 220 - 240V; 50 Hz
Consumo de corriente 70 W
Eco Standby Power <0,5 W
Dimensiones
(anch. x alt. x prof) 360 mm x 54 mm x 324 mm
Peso 2,7 kg
ALTAVOCES DELANTERA Y TRASERO
Sistema 2 vías, caja cerrada
Impedancia 4 Ω
Controladores del altavoz woofer de 1 x 76mm (3”)
Frecuencia de respuesta 120 Hz – 20 kHz
Dimensiones
(anch. x alt. x prof.) 94 mm x 175 mm x 65 mm
Peso 0,40 kg/cada uno
ALTAVOZ CENTRAL
Sistema 2 vías, caja cerrada
Impedancia 8 Ω
Controladores del altavoz woofer de 1 x 76mm (3”)
Frecuencia de respuesta 120 Hz – 20 kHz
Dimensiones
(anch. x alt. x prof.) 225 mm x 94 mm x 75 mm
Peso 0,68 kg
SUBWOOFER
Impedancia 8 Ω
Controladores del altavoz woofer de 1 x 152 mm (6”)
Frecuencia de respuesta 30 Hz – 120 Hz
Dimensiones
(anch. x alt. x prof.) 360 mm x 340 mm x 130 mm
Peso 3,92 kg
La especificaciones están sujetas a cambios sin
notificación previa

82
Español
ADVERTENCIA
No debe intentar reparar el sistema usted mismo bajo ninguna circunstancia, ya que esto
invalidaría la garantía. No abra el sistema ya que existe el riesgo de recibir una sacudida
eléctrica.
Si ocurre una avería, en primer lugar compruebe los puntos detallados a continuación
antes de llevar el sistema a que se repare. Si no puede juzgar un problema siguiendo
estos consejos, contacte con el vendedor del producto o a Philips para obtener ayuda.
Problema Solutión
Resolución de problemas
No recibe corriente.
No hay imagen.
Imagen completamente
distorsionada o en blanco y
negro.
El formato de la pantalla no
cambia aunque usted lo ha
establecido en el televisor.
No hay sonido o está
distorsionado.
No es posible activar algunas
funciones como Ángulos,
Subtítulos o Audio en varios
idiomas.
No se pueden seleccionar las
opciones del menú
– Compruebe que el cable de alimentación de CA está
conectado correctamente.
– Pulse STANDBY ON en la parte delantera del sistema DVD
para conectar la corriente.
– Consulte el manual de su televisor para informarse sobre la
correcta selección de canal de entrada de vídeo. Cambie el
canal de TV hasta que vea la pantalla DVD.
– Pulse DISC en el control remoto.
– Si esto ocurre cuando está cambiando el ajuste de ‘TIPO TV’,
espere 15 segundos a que se realice la autorecuperación.
– Compruebe la conexión de vídeo.
– A veces puede aparecer una pequeña distorsión en la imagen.
Esto no es una anomalía.
– Limpie el disco.
– El formato de pantalla es fijo en el disco DVD.
– Según el televisor, no le permite cambiar el formato de pantalla.
– Ajuste el volumen.
– Compruebe las conexiones y ajuste de los altavoces.
– Asegúrese de que los cables de sonido están conectados y
pulse el botón SOURCE para seleccionar la fuente de entrada
deseada (por ejemplo, TV o AUX/DI) a fin de elegir el equipo
que desea escuchar a través del sistema de DVD.
– Asegúrese de que la emisión de audio está establecida en
Dolby Digital.
– Es posible que las funciones no estén disponibles en el DVD.
– En el DVD está prohibido cambiar el idioma hablado o los
subtítulos.
– Pulse el botón STOP dos veces antes de seleccionar el menú
de configuración/ sistema.
– Según la disponibilidad ofrecida por el disco, algunos elementos
de menú no pueden seleccionarse.
Necesita ayuda? Visite la página www.philips.com/support

Español
83
Resolución de problemas (continuación)
El reproductor de DVD no
inicia la reproducción.
Los altavoces central y de
sonido envolvente no
producen sonido.
La recepción radiofónica es
mala.
El control remoto no funciona
correctamente.
Incapaz de reproducir
formato de fichero DivX.
El sistema DVD no funciona.
– Coloque un disco legible con la cara de reproducción hacia abajo.
El DVD+R/CD-R debe tener cerrada la sesión de grabación.
– Compruebe el tipo de disco, el sistema de colores y el código
regional.
– Compruebe si hay rayas o manchas en el disco.
– Pulse SETUP para desactivar la pantalla del menú de
configuración.
– Quizás necesite introducir la contraseña para cambiar el nivel
del control infantil o desbloquear el disco para su reproducción.
– Se ha condensado humedad en el interior del sistema. Retire el
disco y deje el sistema activado durante alrededor de una hora.
– Asegúrese de que los altavoces central y de sonido envolvente
estén conectados correctamente.
– Pulse SURR el botón para seleccionar un ajuste de sonido
envolvente correcto.
– Asegúrese de que la fuente que está recibiendo esté grabada o
transmitida en sonido envolvente (Dolby Digital, etc.).
– Si las señal es demasiado débil, ajuste la antena o conecte una
antena externa para obtener una recepción mejor.
– Aumente la distancia entre el sistema y su televisor o VCR.
– Sintonice la frecuencia correcta.
– Aparte la antena del equipo que causa el ruido.
– Seleccione la fuente (DISC o TUNER, por ejemplo) antes de
pulsar el botón de función (É, S,
T).
– Reduzca la distancia entre el control remoto y el sistema.
– Cambie las pilas.
– Apunte el control remoto directamente al sensor de IR.
– Compruebe que las pilas estén colocadas correctamente.
– Compruebe que el fichero DivX está codificado en modo de
‘Home Theater’ (Teatro casero) con el codificador DivX 5.x..
– Desconecte el cable de alimentación del tomacorriente durante
unos minutos. Vuelva a conectar el cable de alimentación y
vuelva a intentar utilizar el sistema.
Necesita ayuda? Visite la página www.philips.com/support
Problema Solutión

84
Español
Analógico: Sonido que no se ha convertido en
números. El sonido analógico varía, mientras que el
sonido digital tiene valores numéricos específicos.
Estos conectores envían sonido a través de dos
canales, el izquierdo y el derecho.
Relación de aspecto (formato de pantalla):
La relación de las dimensiones horizontal y vertical
de una imagen en pantalla. La relación entre las
dimensiones horizontal y vertical de televisores
convencionales es 4:3, y la de pantallas anchas es
16:9.
Conectores AUDIO OUT: Conectores en la
parte trasera del sistema DVD que envían sonido a
otros sistemas (televisor, equipo estéreo, etc.).
Velocidad en bits: La cantidad de datos utilizada
para retener una cantidad dada de música; se mide
en kilobits por segundo, o kbps. O, la velocidad a la
que se graba. Generalmente, cuanto más alta sea la
velocidad en bits, mejor será la calidad del sonido.
Sin embargo, las velocidades en bits más altas
ocupan más despacio en un disco.
Capítulo: Secciones de una imagen o una pieza
musical en un DVD que son más pequeñas que los
títulos. Un título está compuesto de varios
capítulos. Cada capítulo tiene asignado un número
de capítulo que permite localizarlo cuando se
desea.
Menú de disco: Una presentación en pantalla
preparada para permitir la selección de imágenes,
sonidos, subtítulos, ángulos múltiples etc. grabados
en un DVD.
DivX 3.11/4x/5x: El código DivX es una
tecnología de compresión de vídeo basada MPEG-
4 con patente pendiente, desarrollada por
DivXNetworks, Inc., que puede comprimir vídeo
digital a tamaños lo suficientemente pequeños
como para transportarse a través de Internet, al
mismo tiempo que mantienen una alta calidad
visual.
Dolby Digital: Un sistema de sonido envolvente
desarrollado por Dolby Laboratories que contiene
hasta seis canales de audio digital (delanteros
izquierdo y derecho, surround izquierdo y derecho
y central).
Dolby Surround Pro Logic II: Es una tecnología
mejorada de decodificación de matriz que
proporciona mejor espacialidad y direccionalidad
en el material de programa de Dolby Surround;
proporciona un convincente campo de sonido
tridimensional en grabaciones de música estéreo
convencionales; y es idónea para llevar la
experiencia de sonido envolvente a sistemas de
sonido de automóviles. Mientras que la
programación de sonido envolvente convencional
es completamente compatible con los
decodificadores Dolby Surround Pro Logic II, las
pistas de sonido pueden codificarse
específicamente para sacar el máximo partido de la
reproducción Pro Logic II, incluyendo canales de
sonido envolvente izquierdo y derecho. (Este
material también es compatible con
decodificadores Pro Logic convencionales).
JPEG: Un sistema de compresión de datos de
imágenes fijas propuesto por el Joint Photographic
Expert Group, que causa una pequeña reducción
en la calidad de imagen a pesar de su alta tasa de
comprensión.
MP3: Un formato de fichero con un sistema de
comprensión de datos de sonido. “MP3” es la
abreviatura de Motion Picture Experts Group 1 (o
MPEG-1) Audio Layer 3. Al utilizar el formato MP3,
un CD-R o CD-RW puede contener un volumen
de datos alrededor de 10 veces mayor que un CD
normal.
Multicanal: Se especifica que cada pista de sonido
del DVD constituye un campo de sonido.
Multicanal significa una estructura de pistas de
sonido que tienen tres o más canales.
Control parental: Una función del DVD que
limita la reproducción del disco según la edad de
los usuarios y de acuerdo con el nivel de limitación
establecido en cada país. La limitación varía entre
disco y disco; cuando está activada, se prohibirá la
reproducción si el nivel de limitación del software
es superior al nivel establecido por el usuario.
Glosario

Español
85
Playback control (PBC-Control de
reproducción): Se refiere a la señal grabada en
CDs de vídeo o SVCDs para controlar la
reproducción. Utilizando pantallas de menú
grabadas en un CD de vídeo o SVCD compatible
con PBC, puede disfrutar de software de equipo
interactivo así como de software que incorpora
una función de búsqueda.
Código regional: Un sistema que permite que
los discos se reproduzcan solamente en la región
designada de antemano. Esta unidad solamente
reproducirá discos que tengan códigos regionales
compatibles. Puede encontrar el código regional de
seguridad examinando el panel trasero. Algunos
discos son compatibles con más de una región (o
todas las regiones - ALL).
Surround (sonido envolvente): Un sistema que
permite crear campos de sonido tridimensionales
de gran realismo al colocar de forma planificada
varios altavoces alrededor del oyente.
Título: La sección más larga de una imagen o
pieza musical en un DVD, música, etc. en software
de vídeo, o el álbum entero en software de audio.
Cada título tiene asignado un número de título que
permite localizarlo cuando se desea.
Conector VIDEO OUT: El conector de la parte
trasera del sistema DVD que envía vídeo a un
televisor.
Glosario (continuación)
86
3139 115 2xxx1
English
Español
CLASS 1
LASER PRODUCT
Meet Philips at the Internet
http://www.philips.com/support
HTS3050
3139 245 22071
SgpJP-0601/16-2