
Loading ...
Loading ...
Loading ...
6
DETAILED SET UP
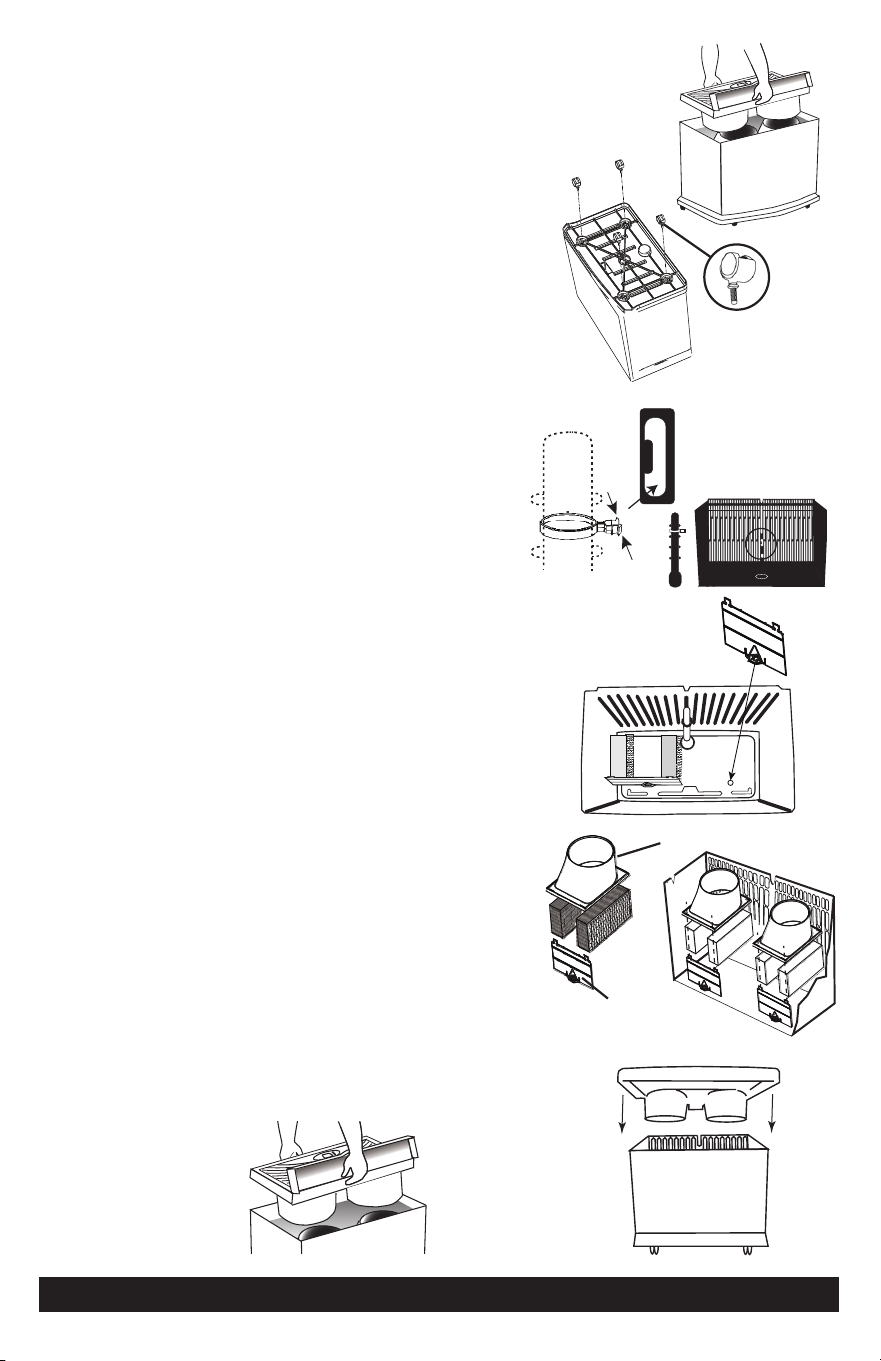
Unpack and assemble the unit
1. Open the carton and lift o the packing material
on top.
2. Using both hands, lift up the chassis (top section)
and carefully set it aside.
3. Remove the contents from inside the cabinet and
verify all parts are included:
• HDC411 Wick installed 2 pieces
in each wick assembly.
• Float and float retainer clip
• Parts kit bag contains:
• 4 casters
4. Turn the cabinet upside down and insert the casters
into each of four holes. Casters should be inserted
fully, so the stem shoulder is snuggly fitted reaching
the cabinet base
.
5. Set the cabinet right side up and install the float:
a. Place the retainer ring around the float be
tween the first and second bumbs.
b. Position the base of the float into the floor
socket.
c
. Pinch the retainer ring to insert the tab end of
the retainer ring into the lower portion of the cen-
ter slot of the back grid for normal operation.
6. Install wick assemblies
:
a. Locate the two mounting studs on the floor of
the cabinet. Snap the front wick plates onto
the studs.
b. Install wick sections, on the left and right side of
the wick plate. See illustrations.
c. Once the wick plates and wicks are installed,
place the top wick housings on each plate
and fasten by inserting the tabs on the plates
into the slots on the top wick housings.
Install the chassis
1. Place the chassis on the unit. Ensure the cord is
not trapped, when you replace the chassis.
NOTE: For easier placement, swivel the pivot lid up
and grasp the chassis in the center and place it on top
of the cabinet.
FOR HELP, CALL 1.800.547.3888 OR VISIT AIRCAREPRODUCTS.COM
INSERT RETAINER
CLIP INTO THE
CENTER SLOT
OF THE BACK.
TOP WICK HOUSING
FRONT
WICK
PLATE
Loading ...
Loading ...
Loading ...