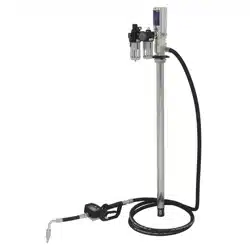
AIR OPERATED OIL DISPENSING PUMP
STATION
MODEL NO: AK4560D.V2
Thank you for purchasing a Sealey product. Manufactured to a high standard, this product will, if used according to these
instructions, and properly maintained, give you years of trouble free performance.
IMPORTANT: PLEASE READ THESE INSTRUCTIONS CAREFULLY. NOTE THE SAFE OPERATIONAL REQUIREMENTS, WARNINGS & CAUTIONS. USE
THE PRODUCT CORRECTLY AND WITH CARE FOR THE PURPOSE FOR WHICH IT IS INTENDED. FAILURE TO DO SO MAY CAUSE DAMAGE AND/OR
PERSONAL INJURY AND WILL INVALIDATE THE WARRANTY. KEEP THESE INSTRUCTIONS SAFE FOR FUTURE USE.
1. SAFETY
WARNING! Ensure health & safety, local authority, and general workshop practice regulations are strictly adhered to when using this
equipment.
9 Familiariseyourselfwithproductapplicationandlimitations,aswellasthespecicpotentialhazardspeculiartothisproduct.
9 Maintain the pump station in good condition (use an authorised service agent).
9 Replace or repair damaged parts. Use genuine parts only. Non authorised parts will invalidate the warranty.
9 Use only to pump lubricants up to SAE 150 viscosity.
9 Ensure safety eye protection, oil resistant gloves and protective clothing are worn when using this product.
9 Keep the work area clean, uncluttered and ensure there is adequate lighting.
9 Maintaincorrectbalanceandfooting.Ensuretheoorisnotslipperyandwearnonslipshoes.
9 Keep children and unauthorised persons away from the working area.
9 Afteruse,drainanyuidsfromtheequipmentbeforestorage.
9 Dispose of waste liquids in accordance with local authority regulations.
9 Disconnect air pressure from equipment when not in use.
8 DO NOT exceed the maximum air pressure of 115psi.
8 DO NOT pointthenozzleatpeopleoranimals.
8 DO NOT usetheequipmentnearopenames.
8 DO NOT smoke whilst using this equipment.
8 DO NOT usetoextractcorrosiveuids.
8 DO NOT dismantle, tamper with or adapt the pump for any purpose other
than for which it is designed.
8 DO NOT use the unit if it has been dropped or mishandled, check the unit
to ensure there is no damage.
9 Keep the pump clean and store in a safe dry, childproof location.
WARNING! DO NOT allowuncontrolleddischargeofuidsthuspolluting
the environment. All liquids must be disposed of according to local
authority regulations.
2. INTRODUCTION
Air operated 3:1 double acting pump for barrels or tanks with 2”BSP fittings.
Pump is supplied with air management system and connected to a 940mm
rigid suction probe with non-return valve. Features hose for attachment to
digital oil meter (Model No. AK4565D supplied) or to optional retractable hose
reel (Model No. AK4567D). Suitable for use with engine, hydraulic, synthetic,
gear and transmission oils up to SAE150.
3. SPECIFICATION
Model No: ..........................................................AK4560D.V2
Maximum Air Pressure: ................................................115psi
Maximum Flow Rate: ................................................ 12L/min
Maximum Output Pressure: ........................................ 350psi
Maximum Viscosity: .................................................. SAE150
OutletSize: ...............................................................1/2”BSP
Pump Ratio: ...................................................................... 3:1
Recommended Air Pressure: ........................................ 70psi
Digital Hose End Meter
Model: ..................................................................... AK4565D
Accuracy: ..................................................................+/- 0.5%
Inlet: .......................................................................... 1/2”BSP
Battery: ........................................ Lithium CR2 3V 1400mAH
AK4560D.V2 Issue 1 25/05/21
Original Language Version
© Jack Sealey Limited
Refer to
instructions
Wear eye
protection
Wear protective
gloves
Wear safety
footwear
Wear protective
clothing
g.1
4. ASSEMBLY
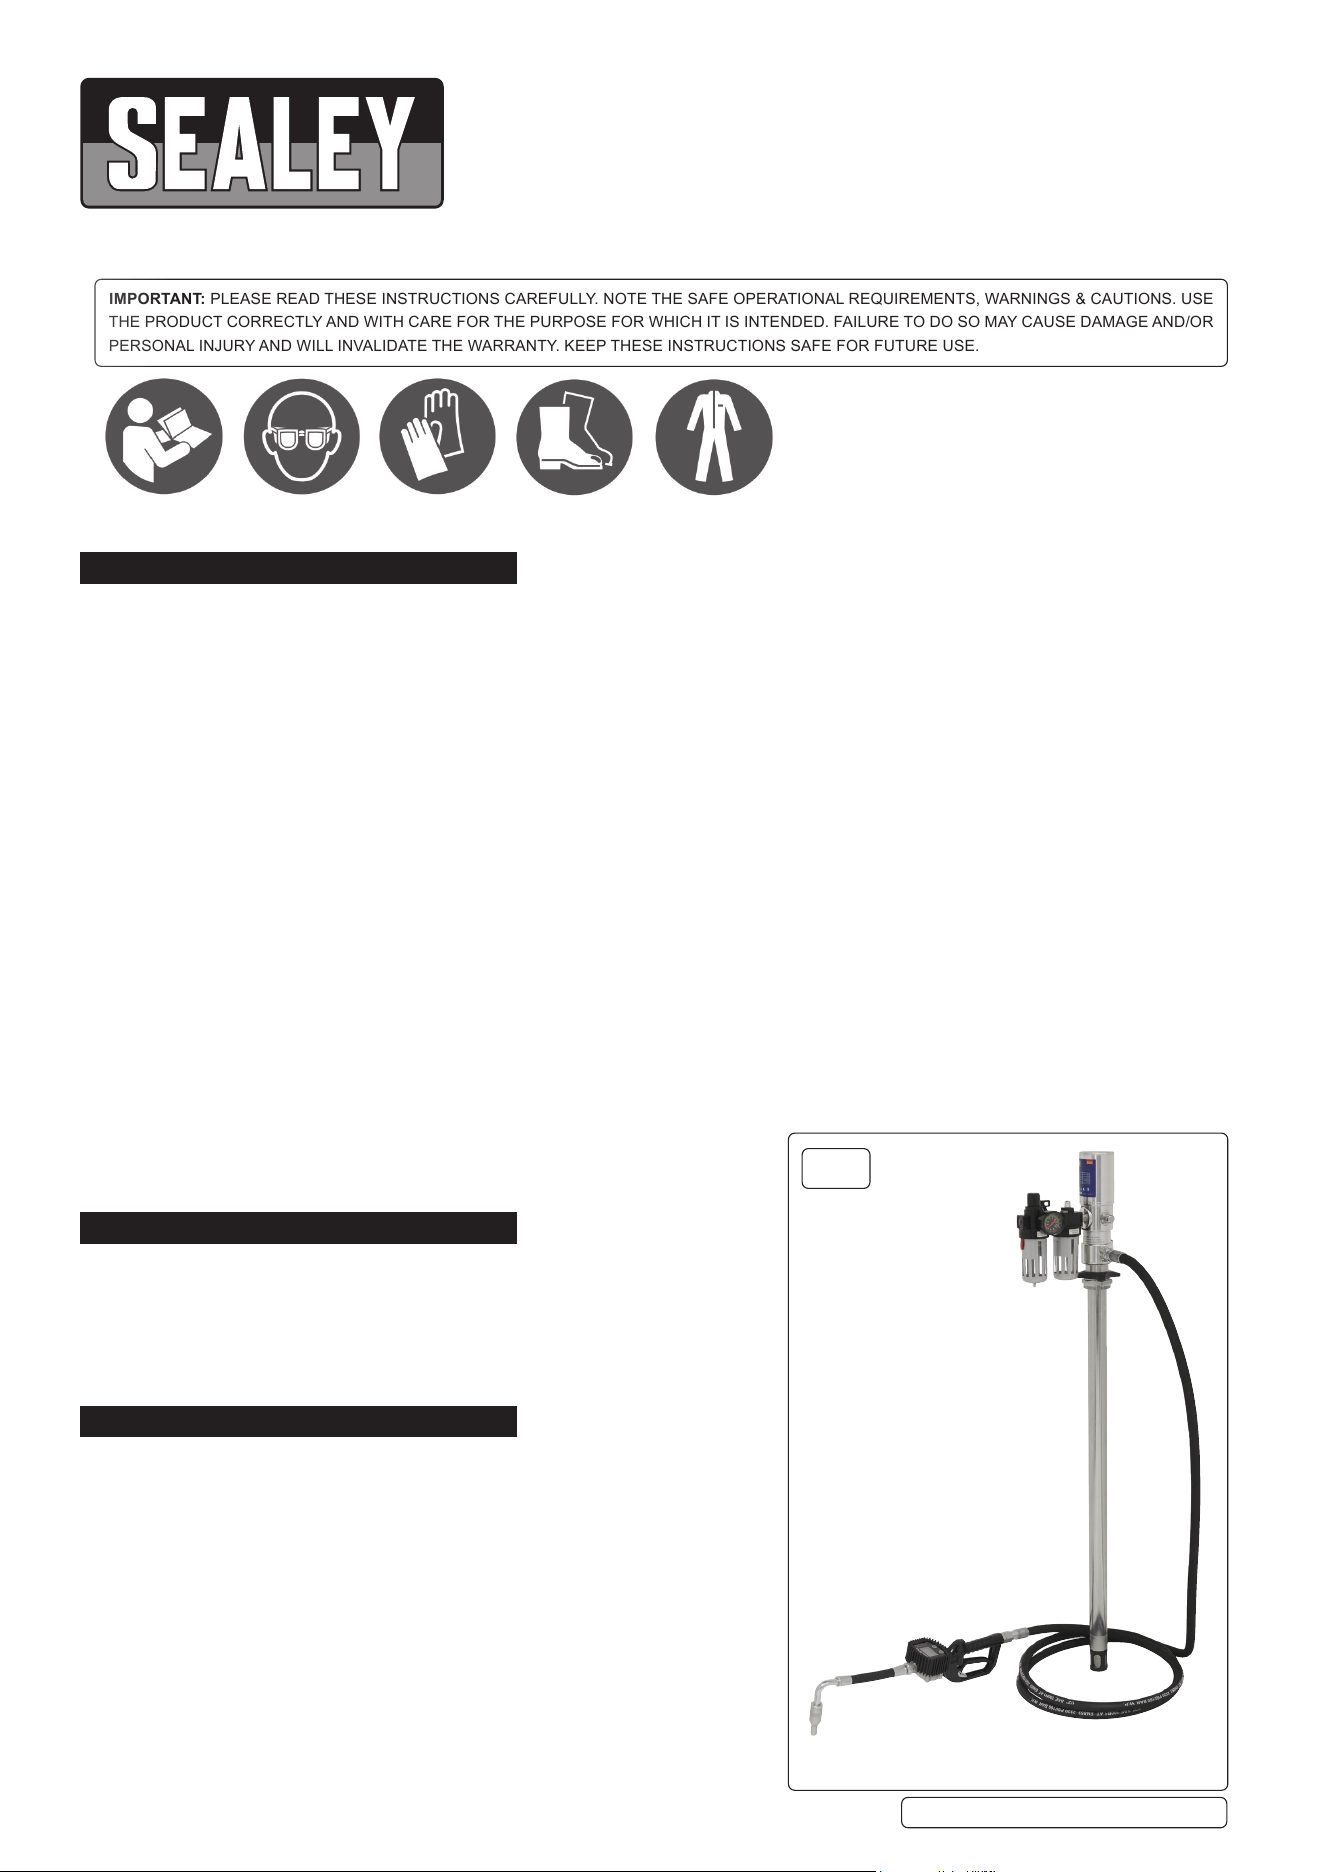
4.1. PUMP AND AIR REGULATOR/LUBRICATOR ASSEMBLY
4.1.1. Apply a small amount of liquid thread sealant onto the threads of the air inlet of the
pumpandattachtheairregulator/lubricator(g.2).
WARNING! DO NOT allow thread sealant to enter the pump.
4.1.2. Attach the outlet pipe to the male outlet thread on the pump and attach the
male threaded end of the pipe to the Digital Hose End Meter.
4.1.3. AttachthenozzlevalvepipeassemblytotheoutletoftheDigitalHoseEnd
Meter.
WARNING! DO NOT overtighten the swivel connections.
4.1.4. Slide the locking nut, locking ring and the barrel nut onto the pick up probe of
thepump(g.3),screwthelockingnutontothebarrelnuttolocktheassembly
to the pick up probe.
4.1.5. Insert the pump assembly into the support brackets on the trolley and hang the
meter onto the accessory support bracket.
4.2. PRE-OPERATION
4.2.1. Liftuptheknob(g.2A)ontheairregulatorandensurethatitiswoundfully
anti-clockwise.
4.2.2. Removethellerplug(g.2B)fromthelubricatorandllthelubricatorwitha
qualityairtooloil(SealeyATO1000S),retthellerplug.
4.2.3. Thelubricatorfeedissetwhentheunitisrunning,adjustthefeedknob(g.2C)
the drip rate can be seen through the sight glass of the dome. The rate of oil feed
willautomaticallyincreaseordecreaseinlinewiththeairow.
5. OPERATION
5.1. INSTALLING THE PUMP
5.1.1. Remove the bung from the 2”BSP opening of the drum.
5.1.2. Slackenothelockingnutonthepumpprobeandinsertthepumpintothedrumuntilthe
probe bottoms out,tightenthebarrelnutandthentightenthelockingnuttoxthepump
to the drum.
5.2. SETTING UP THE PUMP
5.2.1. Ensure that the air regulator valve is fully wound anti-clockwise and then connect the air
supply onto the quick release connector on the air regulator.
Lift the knob on the regulator and slowly turn clockwise until the recommended operating
pressure of 70psi is reached, push down on the regulator knob to lock the position.
NOTE: Check the system for leaks, should an air leak be discovered, release the pressure,
disconnect the air line and repair/replace the joint or seal before continuing.
5.3. OPERATING THE GUN
WARNING!Ensurethatthetriggerisnotdepressedbeforeopeningthenozzlevalve.
5.3.1. PresstheResetbuttonfor1sectozerothedisplay.
5.3.2. Withthenozzlepointingintothereceivingcontainer,openthenozzlevalveasshowning.4.
5.3.3. Depressthetriggeranddispensetheliquidtheamountdispensedisshownonthedisplay(g.5.4).
5.3.4. Releasetriggerandclosethenozzlevalve.
5.4. LCD INTERFACE USAGE
5.4.1. UserButtons(g.5)
1. LCD displays delivery volume and totals
2. Units: L, GAL, PT, QT
3. Two decimal place values
4. Low battery indicator
5. MOVE and RESET buttons
5.4.2. Displaykey(g.6)
1. Volume since last RESET
2. Battery state
3. Calibration mode indicator
4.Resettozeroindicator
5. Total register
6. Flow rate mode
7. Units (Lts/gall/pint/quart)
5.4.3. MOVE/RESETUsage(g.5.5)
MOVE key enters ‘calibration’ mode
RESET key for register and total
Bothkeyspressedenters‘conguration’mode
5.4.4. ToRESETcurrenttotal(g.7)
From standby press RESET
All segments light up
Current total resets to 0.00
A
B
C
Locking Nut
Lock Ring
Barrel Nut
AK4560D.V2 Issue 1 25/05/21
Original Language Version
© Jack Sealey Limited
g.4
g.2
g.3
g.6
g.5
g.7
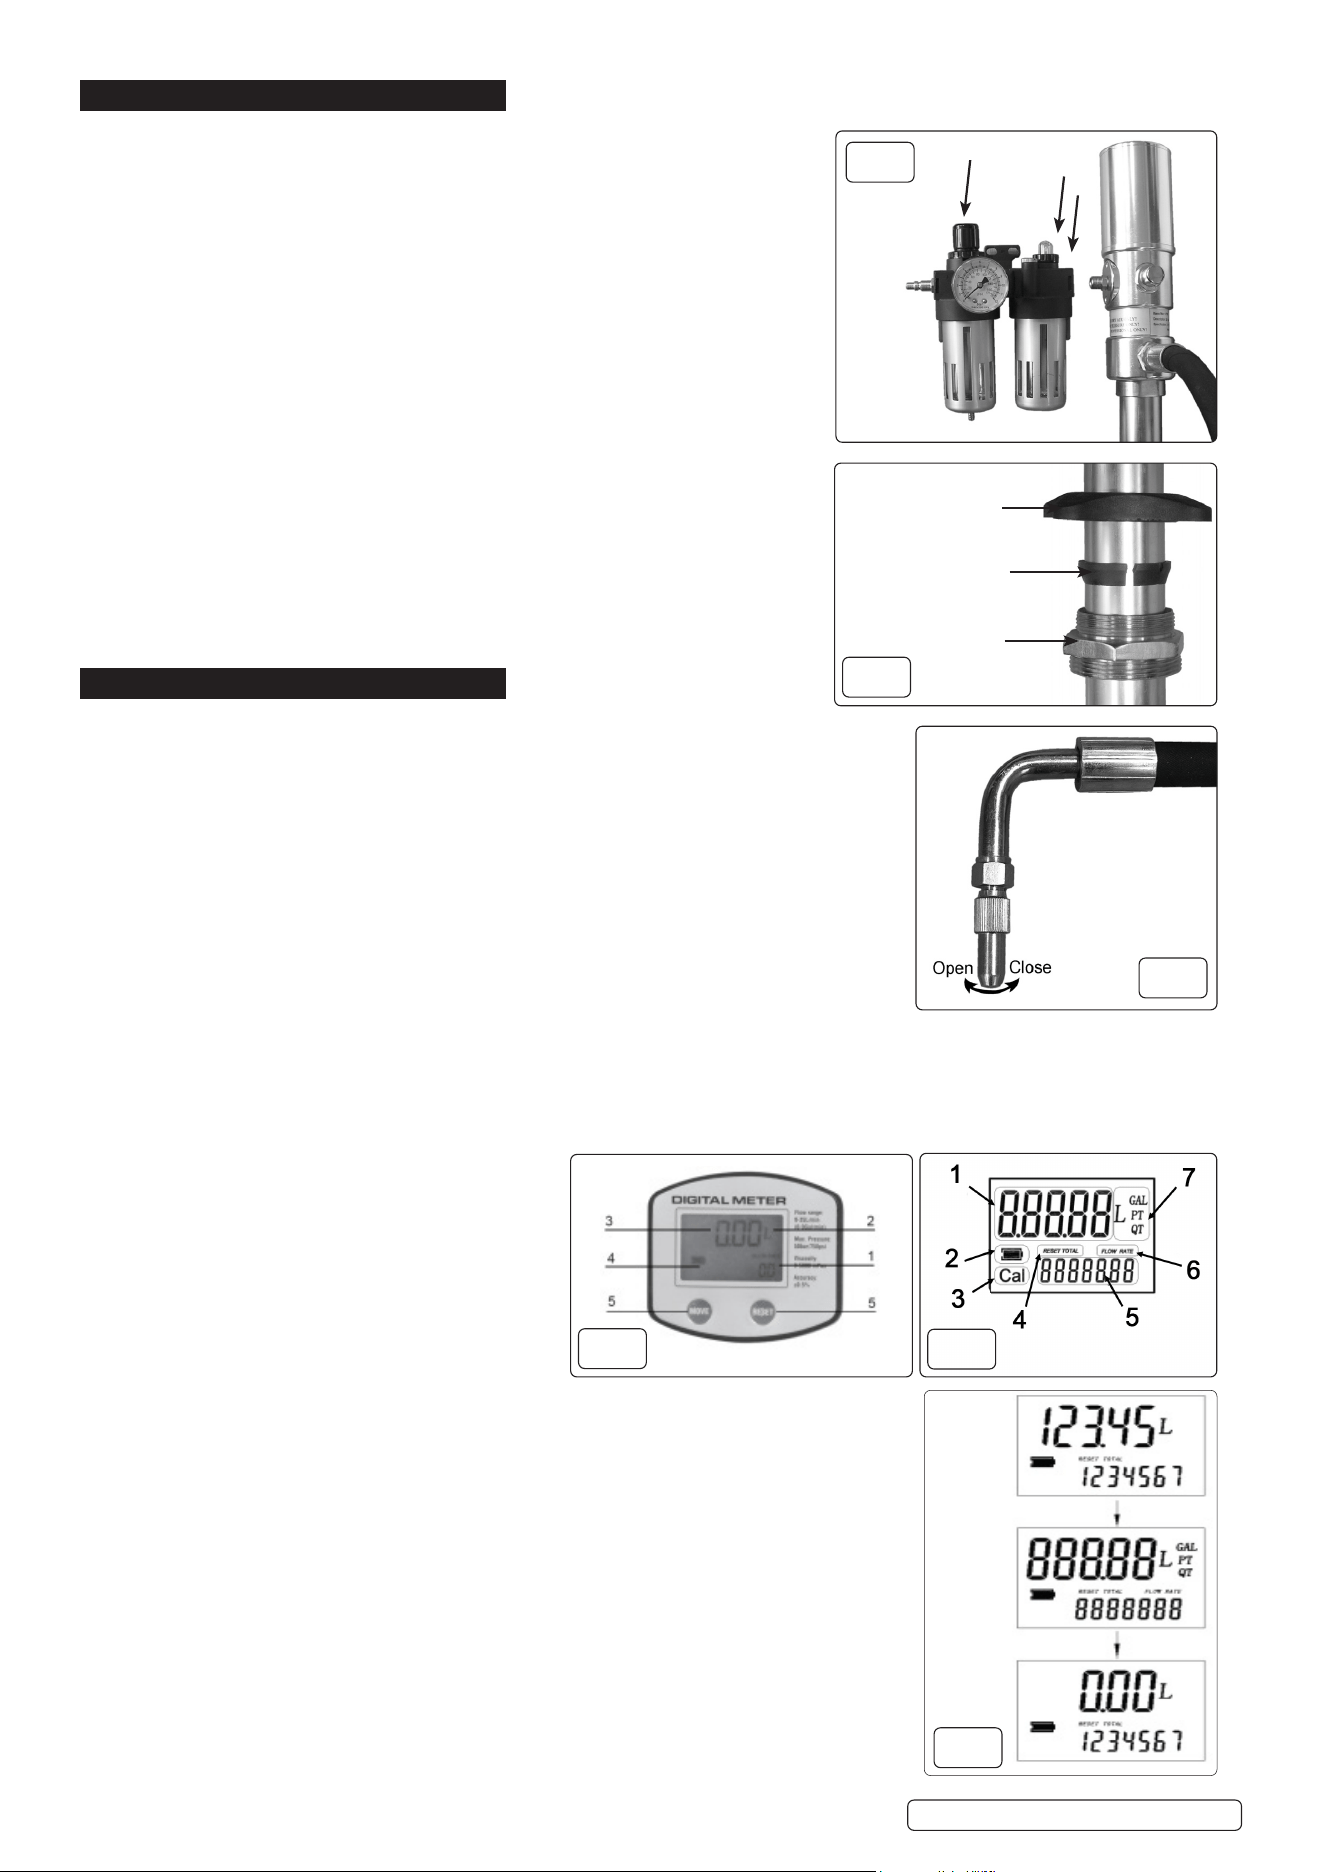
5.4.5. TodisplaycorrectionfactorandTotal(g.8)
Hold MOVE and RESET for 3 seconds
Value “1.4000” is correction factor.
”1234567” overall total
5.4.6. TochangeUnits(g.9)
Hold MOVE and RESET for several seconds
Area2ing.5showsunits
Press RESET to change units
PressandholdMOVEtoconrmchoice
5.5. DETERMINING THE CORRECTION FACTOR
5.5.1. Dispense at least 1 litre of liquid into a calibrated container.
5.5.2. Record the quantity of liquid in the container and record the quantity of
liquid dispensed as indicated on the meter display. Press the
Move+Resetbuttons(g.5.5andg.5.5)simultaneouslytodisplay
the current correction factor.
Qty Dispensed
Qty Indicated
x Current Correction Factor = New Correction Factor.
5.6. ALTERING CORRECTION FACTOR DIRECTLY
5.6.1. Waitformetertogotostandby(g.7).
5.6.2. Resettotal(5.2.4)g.8tozero.
5.6.3. PressandholdMOVEkeyuntilalldigitsilluminateanddisplayshows‘Cal’(g.9).
5.6.4. PressRESETtosetdigitvalues(fromrighttoleft)(g.10).
5.6.5. Once value is correct hold down MOVE key until Cal mode quits.
5.7. ALTERING CORRECTION FACTOR INDIRECTLY
5.7.1. Waitformetertogotostandby(g.10).
5.7.2. Resetthetotal(5.4.4)g.11tozero.
5.7.3. Dispense into measuring container (minimum 5 litres) and record.
5.7.4. If displayed value does not match actual measured value
press and hold MOVE key until each digit reads as per the
measured value. Press MOVE key to visit each digit in turn.
5.7.5. Once value is correct (i.e. matches measured value) press and
holdMOVEkeyuntilCalmodequits(g.11).
6. MAINTENANCE
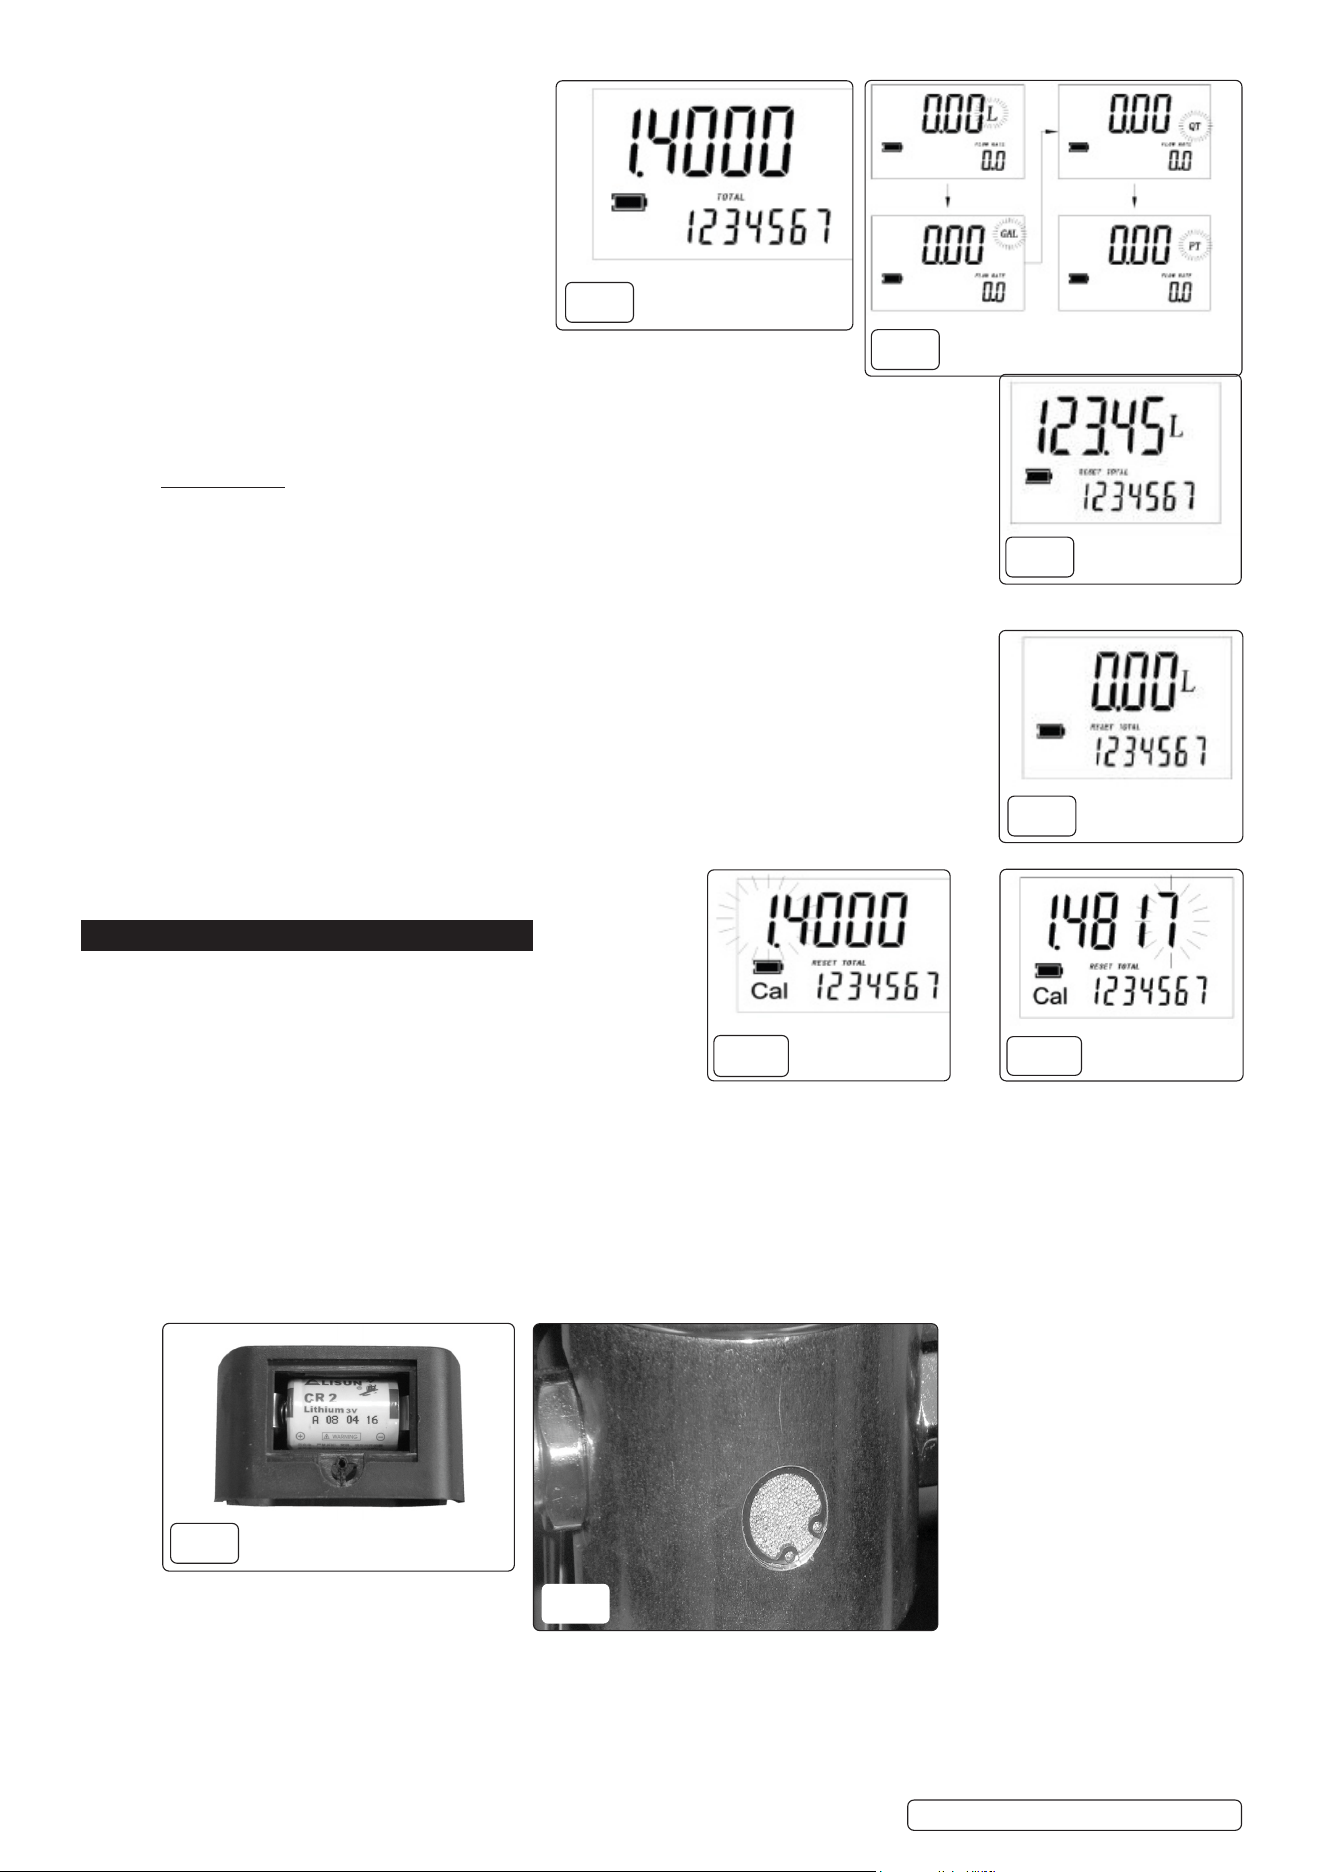
6.1. CHANGING THE DIGITAL METER BATTERY
6.1.1. Remove the rubber protective cover from the meter.
6.1.2. Remove the screw and cover from the side of the meter.
6.1.3. Removeandreplacebattery(g.14).
6.1.4. Replace cover and secure with screw.
6.1.5. Replace the protective rubber cover.
NOTE:IftheLCDdisplaydoesnotactivate,removethemeter,pressbutton1(g.5.5)torebootthemeter.
6.2. Before every use visually check the supply hose for damage and check all joints for leaks, any damaged component must be
replaced or leaks repaired before using.
6.3. Checkthenozzlevalveforleaks,ifitdoesnotseal,replacebeforeusing.
6.4. Drain air regulator water trap daily.
6.5. Top up lubricator as required, using a quality air tool oil.
6.6. Tochangethesilencer,removethecirclip(g.15)andremovetheoldsilencer,placeanewsilencerintotherecessandretthe
circlip.
NOTE: For any other maintenance and repairs the unit should be returned to your Sealey stockist.
g.8
g.9
g.11
g.10
g.14
g.15
AK4560D.V2 Issue 1 25/05/21
Original Language Version
© Jack Sealey Limited
g.12
g.13
Sealey Group, Kempson Way, Suffolk Business Park, Bury St Edmunds, Suffolk. IP32 7AR
01284 757500 01284 703534 sales@sealey.co.uk www.sealey.co.uk
ENVIRONMENT PROTECTION
Recycle unwanted materials instead of disposing of them as waste. All tools, accessories and packaging should be sorted, taken to
a recycling centre and disposed of in a manner which is compatible with the environment. When the product becomes completely
unserviceable and requires disposal, drain any fluids (if applicable) into approved containers and dispose of the product and fluids
according to local regulations.
WEEE REGULATIONS
Dispose of this product at the end of its working life in compliance with the EU Directive on Waste Electrical and Electronic Equipment
(WEEE). When the product is no longer required, it must be disposed of in an environmentally protective way. Contact your local solid
waste authority for recycling information.
BATTERY REMOVAL SEE SECTION 6
Under the Waste Batteries and Accumulators Regulations 2009, Jack Sealey Ltd are required to inform potential purchasers of products
containing batteries (as defined within these regulations), that they are registered with Valpak’s registered compliance scheme. Jack
Sealey Ltd Batteries Producer Registration Number (BPRN) is BPRN00705.
AK4560D.V2 Issue 1 25/05/21
Original Language Version
© Jack Sealey Limited
Note: It is our policy to continually improve products and as such we reserve the right to alter data, specifications and component parts without prior
notice. Please note that other versions of this product are available. If you require documentation for alternative versions, please email or call our
technicalteamontechnical@sealey.co.ukor01284757505.
Important: No Liability is accepted for incorrect use of this product.
Warranty: Guarantee is 12 months from purchase date, proof of which is required for any claim.