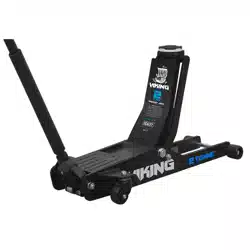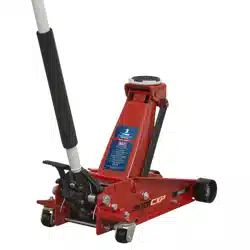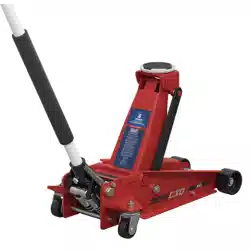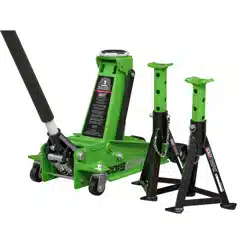
VIKING 3TONNE LOW ENTRY TROLLEY JACK
WITH ROCKET LIFT
MODEL NO: 3100TB
Thank you for purchasing a Sealey product. Manufactured to a high standard, this product will, if used according to these instructions,
and properly maintained, give you years of trouble free performance.
IMPORTANT: PLEASE READ THESE INSTRUCTIONS CAREFULLY. NOTE THE SAFE OPERATIONAL REQUIREMENTS, WARNINGS & CAUTIONS. USE
THE PRODUCT CORRECTLY AND WITH CARE FOR THE PURPOSE FOR WHICH IT IS INTENDED. FAILURE TO DO SO MAY CAUSE DAMAGE AND/OR
PERSONAL INJURY AND WILL INVALIDATE THE WARRANTY. KEEP THESE INSTRUCTIONS SAFE FOR FUTURE USE.
1. SAFETY
8 WARNING! Please note that the handle socket of this jack is retained under tension and must be released before
use. Caution should be taken when releasing, as the handle socket will suddenly raise to its upright position if not
controlled.
9 The user shall work only in accordance with this instruction manual.
9 The operator shall be provided with all necessary information about training and about pumping and translating
forces.
9 Ensure the jack is in sound condition and good working order. Take action for immediate repair or replacement of
damaged parts. Use genuine parts only. DO NOT modify the jack. The use of non-genuine parts may be dangerous
and will invalidate the warranty.
9 Locate the jack in a suitable, well lit working area.
9 Keep working area clean and tidy and free from unrelated materials. Use jack on level and solid ground, preferably
concrete. Avoid tarmacadam as jack may sink in.
9 Chock wheels of vehicle.
9 Ensure the vehicle handbrake is engaged, engine is switched o and transmission is in gear (or “PARK” if automatic).
9 Ensure minimum distance of 0.5m between vehicle and static objects such as doors, walls, etc. to allow for vehicle
tilting.
9 Ensure all non-essential persons keep a safe distance whilst the jack is in use.
9 Ensure there are no passengers in the vehicle.
9 It is necessary that the operator can watch the lifting device and the load during all movements.
9 Place jack under only those lifting points recommended by vehicle manufacturer (see vehicle handbook).
9 Check that the lifting point is stable and centred on the jack saddle.
9 Ensure the jack wheels are free to move and that there are no obstructions.
▲ DANGER: Use the jack for lifting only, NOT for supporting the lifted load.
9 Ensure there are no persons or obstructions beneath the vehicle before lowering.
9 It is not allowed to work under the raised load until it is secured by suitable means. Use suitable axle stands under the
vehicle before proceeding with any task.
9 Use a qualied person to lubricate and maintain the jack.
9 Ensure that only hydraulic jack oil is used in the jack.
8 DO NOT operate the jack if damaged.
8 DO NOT allow untrained persons to operate the jack.
8 DO NOT operate the jack when tired or under the inuence of drugs, alcohol or intoxicating medication.
8 DO NOT exceed the rated capacity of the jack.
8 DO NOT allow the vehicle to move during lifting or lowering, or use the jack to move the vehicle.
8 DO NOT jack vehicle if there is a risk of spillage of fuel, battery acid, or other dangerous substances.
8 DO NOT work under the vehicle until appropriately rated axle stands have been correctly positioned.
8 DO NOT use the jack for purposes other than that for which it is intended.
8 DO NOT top up hydraulic system with brake uid. Use hydraulic jack oil only. (Sealey Part No: HJO500MLS or HJO5LS)
8 DO NOT adjust the safety overload valve.
9 When not in use store jack, fully lowered, in a safe, dry, childproof area.
9 If more than 400N of eort is generated in lifting, the eorts shall be lowered by an additional person.
9 Jacks shall be maintained and repaired in accordance with the manufacturer’s instructions. Such maintenance and repair shall be
carried out by qualied persons.
9 No modications shall be carried out which adversely aect the compliance of the jack with the standard.
8 Check the state of the markings and that the markings remain as the initial one.
2. INTRODUCTION
Dual piece hydraulic unit with heavy base design and large jacking pad for greater load stability. Lift-and-twist dead man’s lowering mechanism
operates via T-shaped handle providing a smooth, controlled lowering of the load helping prevent accidental lowering. Rocket Lift feature
brings lifting arm into contact with jacking point with minimal pumps. Polyurethane wheels provide smoother manoeuvrability and help prevent
damage to workshop oor. Protective jack handle sleeve helps prevent accidental damage to car bodywork when pumping the handle. Foot
pedal for quick approach of the lifting saddle to the vehicle in conned spaces.
3100TB Issue 2 (1,4,6) 14/09/23
Original Language Version
© Jack Sealey Limited
Refer to
instructions
Wear safety
footwear
1 3 5
2 4 R
TJL3
Chock
wheels
Never
exceed
jack capacity
Close
Raise
Lower
Lift & twist
to lower
OR
Use on a hard level floor
Apply
handbrake
www.sealey.co.uk
Use suitable axle stands
X2
Raise
Includes removable rubber saddle pad and built-in tool tray for fasteners and tools. 3 Year Guarantee - 2nd & 3rd year subject to T&C’s and
registration on website (www.sealey.co.uk).
3. SPECIFICATION
Model ...........................................................................3100TB
Applicable Standard: ...................................................EN 1494
Capacity: ......................................................................3 Tonne
Consumable parts: .................................. Jack pad - 3100TB.A
Length: ..........................................................................700mm
Max. chassis height: ......................................................180mm
Min. saddle height: ..........................................................95mm
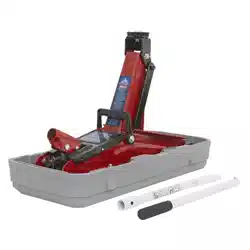
4. ASSEMBLY
WARNING! Before use ensure you have read, understood and applied Section 1 Safety precautions.
IMPORTANT: Before use, the operator is to visually inspect the jack for cracked welds, damaged or missing parts or hydraulic leaks.
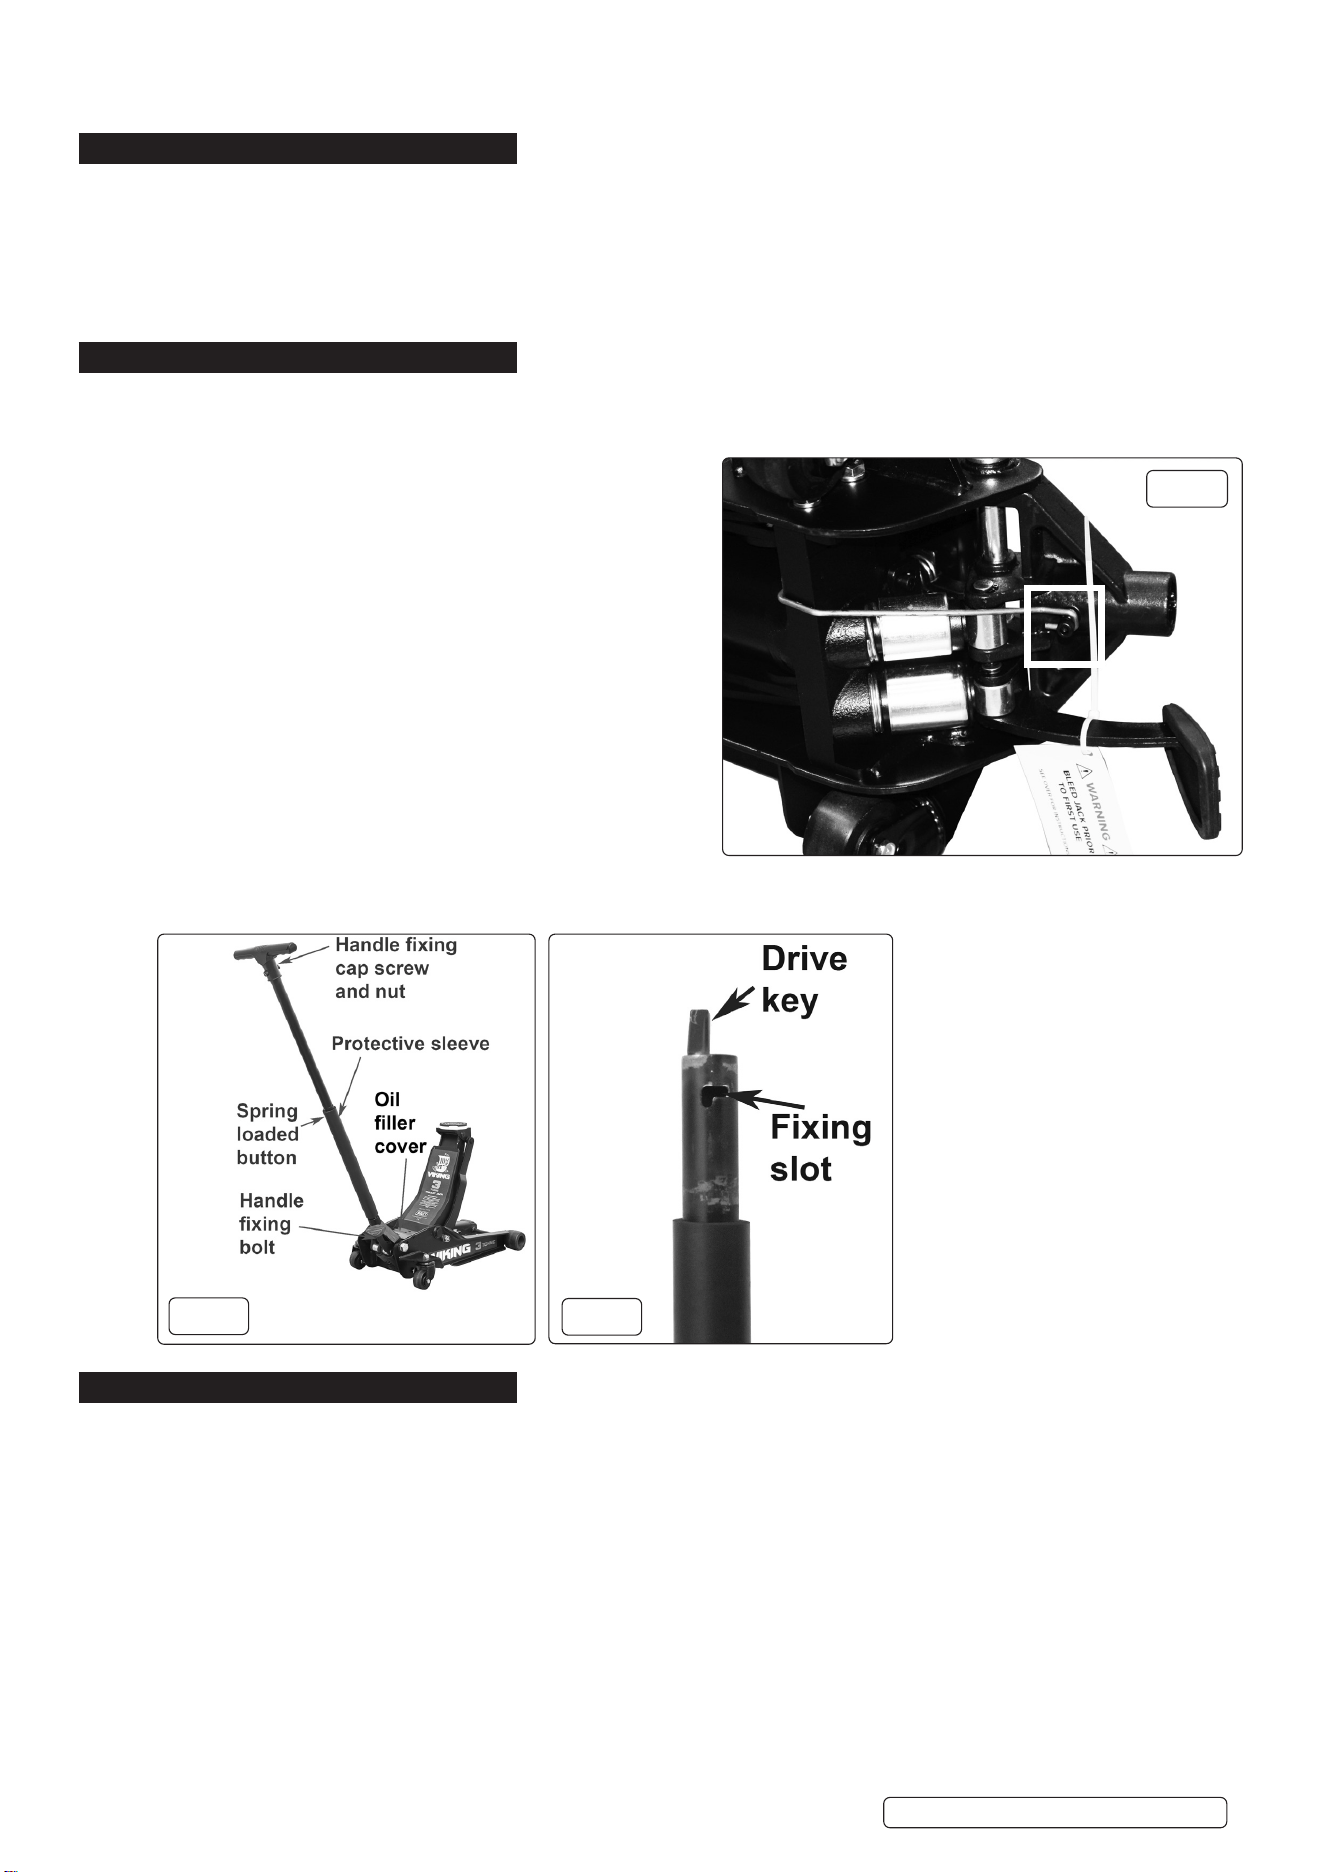
4.1. RELEASING THE RETAINING CLIP (FIG’s A & 1)
4.1.1. Seek assistance from a second person if required.
4.2. Line up the spring button in the upper part of the two piece handle
with the hole in the lower piece handle (g.1). Roll back protective
sleeve to expose it if required, and engage button into the
hole to fasten both halves together.
4.2.1. Fix the T bar handle to the top of the handle tube using the cap screw
and nut supplied (g.1).
4.2.2. The lower handle section slots into the cylinder drive mechanism.
Align the xing slot in the end of the shaft (g.2) with the threaded
hole in the mounting bracket.
4.2.3. Push down on the handle and hold down while unscrewing the handle
xing bolt (see g.A inside the white square) that is securing the
handle socket in the down position.
4.2.4. Remove the clip from the handle xing bolt and the lower chassis bar.
4.2.5. Gently, and in a controlled manner, slowly allow the handle and
handle socket to raise to their upright position.
4.2.6. Replace the handle xing bolt to secure the handle in the socket.
Use the M6 bolt and spring washer to fix the handle to the
pumping mechanism and tighten the bolt (fig.1).
4.2.7. Check engagement of the handle to the pumping mechanism and adjust it’s location if needed.
5. OPERATION
5.1. BEFORE FIRST USE
Before using the jack, purge hydraulic circuit in order to eliminate any possible air in the system by pulling the handle upwards and
turning it anti-clockwise. NOTE: The handle has a self-returning device (Dead Man principle) which requires the user to hold the
handle in position whilst in this position or lowering is taking place.
5.1.1. Whilst in this position, pump the jack several times to ensure internal lubrication and to bleed any accumulated air from it. At the end of
the last downward stroke shut the valve off again by rotating the handle clockwise.
5.2. GENERAL
WARNING! Before lifting ensure Section 1 Safety Instructions are read, understood and strictly followed.
5.2.1. Prepare the vehicle as mentioned in the safety instructions ensuring the ground on which the jack is to stand is level and solid (not
tarmacadam).
5.2.2. Position the jack saddle under the vehicle manufacturer’s recommended lifting point. (See vehicle handbook for details).
5.3. JACKING THE VEHICLE (fig.3)
5.3.1. Pull the handle upwards and turn the handle clockwise to close the valve. Commence pumping the handle up and down using
maximum strokes until the vehicle reaches the desired working height.
5.3.2. Using the foot pedal instead of the handle, the ‘Rocket Lift’ performance can be applied.
5.3.3. Should the jack become overloaded, a safety excess pressure valve will open, and stop the jack from lifting.
Original Language Version
© Jack Sealey Limited
fig.2
fig.A
fig.1
3100TB Issue 2 (1,4,6) 14/09/23

5.4. WEIGHT DISTRIBUTION
Up to 80% of the lifted load is carried by the front jack wheels placing exceptional stress on the point of contact with the supporting
floor. For this reason use on a hard level concrete surface only.
5.5. LOWERING THE LOAD (fig.3)
5.5.1. Pull the handle upwards and turn it anti-clockwise. NOTE: The handle has a self-returning device (Dead Man principle) which requires
the user to hold the handle in position whilst lowering is taking place. The rate of lowering is governed internally by the jack.
WARNING! Ensure there are no persons or obstacles beneath the vehicle, or in the path of its descent.
6. MAINTENANCE
IMPORTANT: Only fully qualified personnel should attempt maintenance or repair.
6.1. When the jack is not in use, the ram should be in its lowest position to minimise corrosion. Remove the handle to inactivate jack.
6.2. Keep the jack clean and lubricate all moving parts with oil on a regular basis.
6.3. To check the oil level, fully lower the jack. Remove the oil filler cover (fig.1) to expose the oil filler plug in the cylinder body (fig.4). The
correct oil level should be approximately 5mm below the filler opening. If oil level is low, fill as required. Pump unloaded jack 15 to 20
times to expel air and then refit plug and top cover.
NOTE: Use a good quality jack oil, such as SEALEY HYDRAULIC JACK OIL.
WARNING: DO NOT use brake fluid, or any fluid other than hydraulic jack fluid as this may cause serious damage to the jack and will
invalidate the warranty!
6.4. Before each use check for broken, cracked, bent, or loose parts, or any visible damage to welds, ram, pump, saddle, lifting arm, frame
and all parts including nuts, bolts, pins and other fasteners. If any suspect item is found remove jack from service and take necessary
action to remedy the problem. DO NOT use the jack if believed to have been subjected to abnormal load or shock. Inspect and take
appropriate action.
6.5. Every three months remove the locking rings on the caster wheels and lubricate the ball bearings with acid free grease.
6.6. After a year of extensive use, the oil should be replaced in order to extend the life of your jack. To drain the oil, remove the filler plug.
Make sure that no dirt is allowed to enter the hydraulic system’s oil. Dispose of oil according to local authority regulations.
6.7. Periodically check the pump piston and piston rod for signs of corrosion. Clean exposed areas with a clean oiled cloth.
IMPORTANT: NO RESPONSIBILITY IS ACCEPTED FOR INCORRECT USE OF THE JACK.
Hydraulic products are only repaired by local service agents. We have service/repair agents in all parts of the UK.
DO NOT RETURN JACKS TO US. Please telephone us on 01284 757500 to obtain the address and phone number of your local
agent. If jack is under guarantee please contact your stockist.
7. TROUBLESHOOTING
Problem Possible Cause Remedy
Jack will not lift the load Overloaded Be sure to use jack with adequate capacity
Oil level low Top up oil level
Release valve not correctly closed Check and close release valve
Air in system Check and close release valve and air vent (if tted) and pump
the handle 15 to 20 times. Close valve and re-try.
Piston rod not functioning Clean and replace oil
Packing worn or defective Replace packing
Jack does not lift high
enough or feels “spongy”
Oil level too high or too low Fill or remove excess oil
Worn Seals Return jack to local service agent
Air in system Open release valve and air vent (if tted) and pump the handle
15 to 20 times. Close valve and re-try
Release valve not closed Check and close release valve and re-try
Jack lifts poorly Pump packing or valves malfunctioning Replace packing and/or clean valves
Oil is dirty Replace oil
Air in the system Open release valve and air vent (if tted) and pump the handle
15 to 20 times. Close valve and re-try
fig.4
fig.3
Original Language Version
© Jack Sealey Limited
3100TB Issue 2 (1,4,6) 14/09/23
ENVIRONMENT PROTECTION
Recycle unwanted materials instead of disposing of them as waste. All tools, accessories and packaging should be sorted, taken to
a recycling centre and disposed of in a manner which is compatible with the environment. When the product becomes completely
unserviceable and requires disposal, drain any fluids (if applicable) into approved containers and dispose of the product and fluids
according to local regulations.
Note: It is our policy to continually improve products and as such we reserve the right to alter data, specifications and component parts without prior
notice. Important: No Liability is accepted for incorrect use of this product.
Warranty: 3 Year Guarantee - 2nd & 3rd year subject to T’s&C’s and registration on website (www.sealey.co.uk).
Sealey Group, Kempson Way, Suffolk Business Park, Bury St Edmunds, Suffolk. IP32 7AR
01284 757500 sales@sealey.co.uk www.sealey.co.uk
Jack lifts but will not hold
load
Release valve partially open Check and close release valve
Dirt on valve seats Lower jack, close release valve. Place foot on front wheel and
pull up lifting arm to it’s full height by hand. Open the release
valve to lower arm
Air in system Open release valve and air vent (if tted) and pump the handle
15 to 20 times. Close valve and re-try
Faulty Seals Replace packing or contact local service agent
Packing worn or defective Replace packing
Jack will not lower com-
pletely
Unit requires lubrication Oil all external moving parts
Piston rod bent or damaged Replace rod or contact local service agent
Jack frame/link system distorted due to over-
loading/poor positioning
Replace damaged parts or contact service agent
Air in system Open release valve and air vent (If tted) and pump the handle
15 to 20 times. Close valve and re-try
Release valve partially open Check and fully open release valve
Jack spring damaged Replace spring or contact service agent
Jack does not lower at all Release valve still closed Check and fully open release valve
Original Language Version
© Jack Sealey Limited
3100TB Issue 2 (1,4,6) 14/09/23