Loading ...
Loading ...
Loading ...
15Section 4— Product care
deck engaged for a minimum of two minutes,
allowing the underside of the deck to
thoroughly rinse.
9. Move the rider’s PTO into the disengaged (OFF)
position.
10. Turn the ignition key to the STOP
position to
turn the rider’s engine off.
11. Turn the water off and detach the hose coupler
from the water port on your deck’s surface.
Note: On 50” and 54” decks there are two water
ports; one on each side of the deck.
12. After cleaning your deck with the Smart Jet
system, return to the operator’s position and
engage the PTO. Keep the deck running for a
minimum of two minutes, allowing the underside
of the deck to thoroughly dry.
Cleaning the Rider
WARNING
If the rider has been recently run, the engine, muffler and
surrounding metal surfaces will be hot and can cause burns to
the skin. Let the engine cool for at least five minutes Exercise
caution to avoid burns.
Your rider should be cleaned after each use and under
certain conditions, i.e. dry conditions and/or mulching
situations, additional cleaning may be necessary.
One of the best ways to keep your rider running
efficiently and to reduce fire risk is to regularly
remove debris buildup from the rider. Follow the
recommendations below and contact your authorized
dealer with any questions.
• Allow the machine to cool in an open area
before cleaning.
• Do not use water on any part of the rider except
the underside of the cutting deck. Doing
so can cause damage to the rider’s spindle
bearings, electrical system and engine, leading
to premature failures. The use of compressed
air and/or leaf blower will help keep the rider
clean.
• Clean under the hood. Exhaust manifold,
around fuses, all wiring and harnesses, muffler
pipe, muffler shield, engine intake screens and
cooling fins, etc. See Figure 4-2.
Figure 4-2
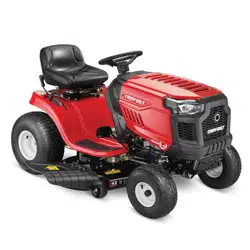
• Clean the top of the mower deck, under the
spindle covers and belt area. See Figure 4-3.
Figure 4-3
• Clean around and near the transmission, axle
and the fan area. See Figure 4-4.
Wheel Not Shown For Clarity
Figure 4-4
• Debris can accumulate anywhere on the rider,
especially on horizontal surfaces. Additional
cleaning may be necessary when mowing in dry
conditions or when mulching.
• Fuel leaks/spills, oil leaks/spills and excess
lubrication can also become collections sites for
debris. Immediate repair and cleaning up oil or
fuel spills can help reduce fire hazards.
• In addition to cleaning the rider before
operating and storing, do not attempt to mow
unusually tall grass (10” or higher), dry grass
(e.g., pasture) or piles of dry leaves. Dry grass
or leaves may contact the engine exhaust and/
or build up on the mower deck presenting a
potential fire hazard.
Cleaning Battery
Clean the battery by removing it from the rider and
washing with a baking soda and water solution. If
necessary, clean the battery terminals with a wire
brush to remove deposits. Coat terminals and exposed
wiring with a light coat of petroleum jelly or grease to
both terminals prevent corrosion.
Storing the Rider
• Allow the machine to cool in an open area
before storing.
• Do not park the rider near any flammable
materials (wood, cloth or chemicals) or any
open flames or other potential source of
ignition (furnace, water heater or any other type
of heater).
• Remove all combustible materials from the
rider before storing. Empty cargo boxes, grass
catchers or containers.
• Always shut off fuel flow when storing or
transporting if rider is equipped with a fuel
shutoff.
• Check the fuel system (lines, tank, cap and
fittings) frequently for cracks or leaks. Repair
and clean as necessary.
Engine
Refer to the Engine Operator’s Manual for engine
maintenance instructions.
Check engine oil level before each use as instructed in
the Engine Operator’s Manual. Follow the instructions
carefully.
Changing Engine Oil
Oil Drain Hose Models
WARNING
If the rider has been recently run, the engine, muffler and
surrounding metal surfaces will be hot and can cause burns to
the skin. Let the engine cool for at least five minutes Exercise
caution to avoid burns.
Note: The oil filter (if equipped) should be changed at
every oil change interval.
To complete the oil change, proceed as follows:
1. Run the engine for a few minutes to allow the
oil in the crankcase to warm. Warm oil will flow
more freely and carry away more of the engine
sediment which may have settled at the bottom
of the crankcase. Use care to avoid burns from
hot oil.
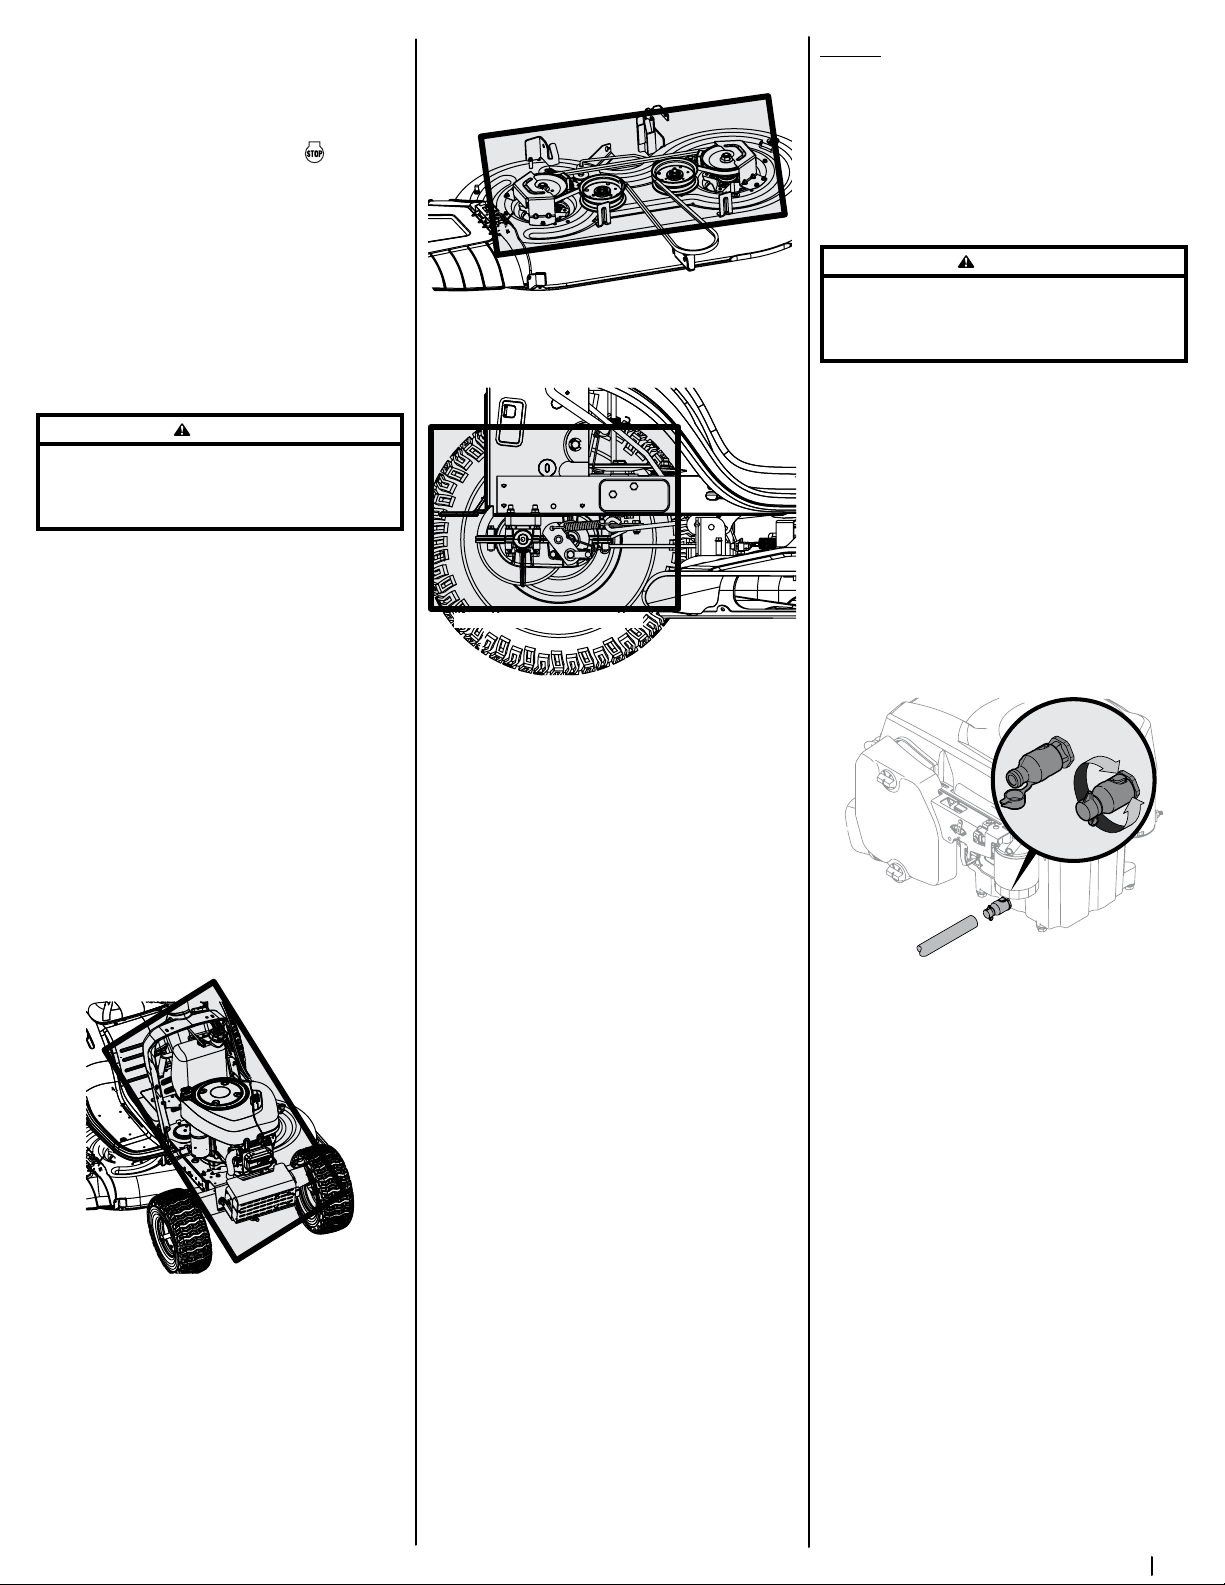
2. Open the rider’s hood and locate the oil drain
port on the left side of the engine.
3. Open the protective cap on the end of the oil
drain valve to expose the drain port. See inset
of Figure 4-5.
OPENED
CLOSED
Figure 4-5
4. Remove the oil fill cap/dipstick from the oil fill
tube.
5. Push the oil drain hose (provided) onto the oil
drain port. Route the opposite end of the hose
into an appropriate oil collection container with
at least a 2.5 quart capacity, to collect the used
oil.
6. Slightly push in on the oil drain valve and rotate
counter-clockwise to open and allow the flow
of oil. See Figure 4-5.
7. After the oil has finished draining, push the oil
drain valve back in and rotate into the locked
position. Re-cap the end of the oil drain valve to
keep debris from entering the drain port.
8. Replace the oil filter (if equipped) as instructed
in the Engine Operator’s Manual.
9. Refill the engine with new oil. Refer to the
Engine Operator’s Manual for information
regarding the proper quantity and viscosity of
engine oil.
Loading ...
Loading ...
Loading ...