Loading ...
Loading ...
Loading ...
11
EN
Preparation of the Chassis
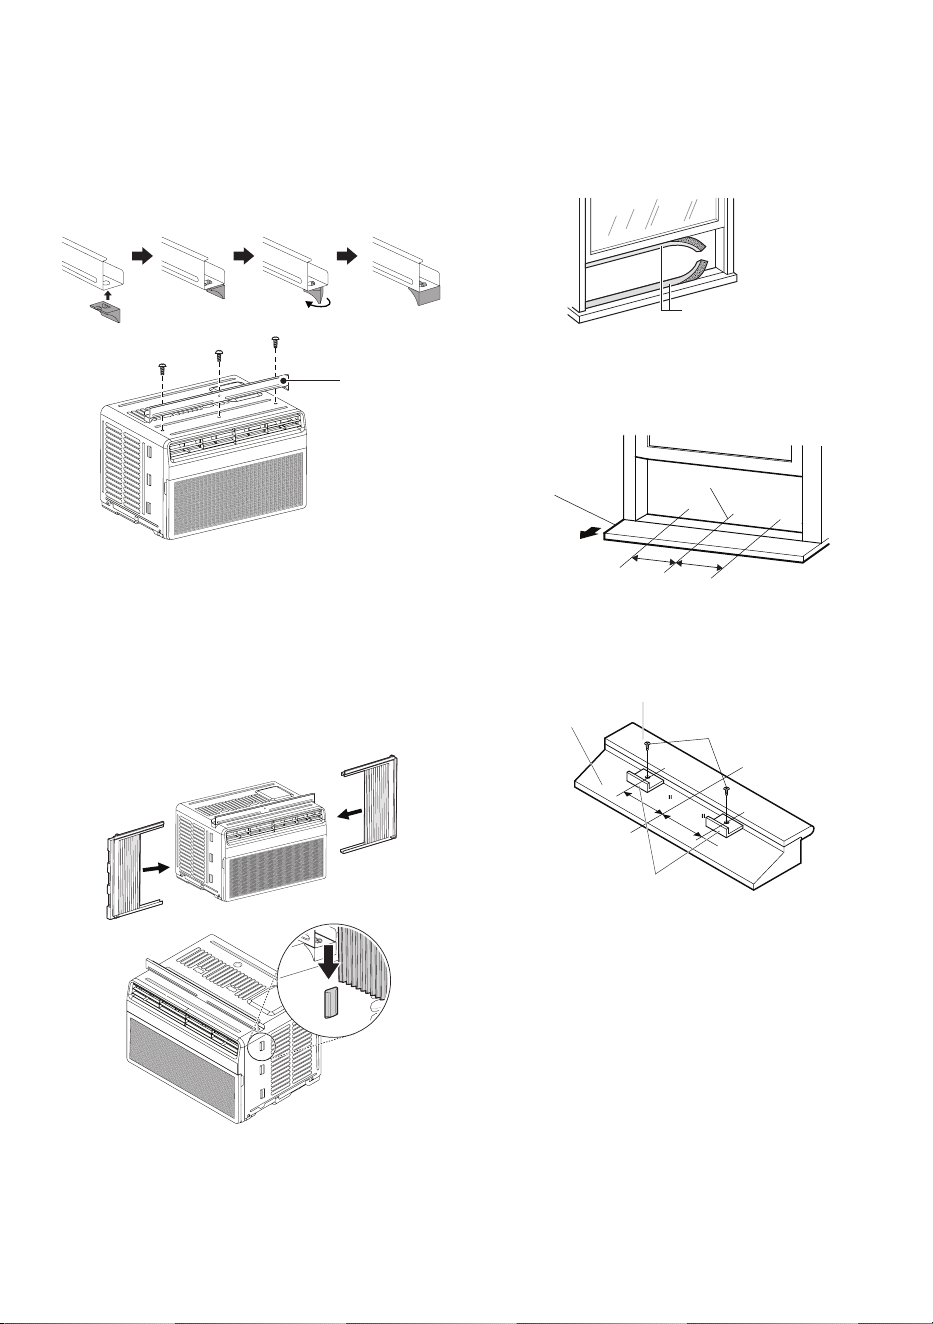
1
Assemble two supporters with upper guide.
Align holes between the upper guide and the
top of the cabinet and then install it with 3 type
A screws.
Upper GuideUpper Guide
Screws (Type A)Screws (Type A)
NOTE
• The feature may be changed according to the
type of model.
2
Extend the curtains in the curtain panels and
insert the edges into the brackets on either
side of the cabinet. Insert the top and bottom
rails on the curtain guides into the upper and
lower panel guides on the cabinet.
Right Right
Curtain Curtain
PanelPanel
Left Left
Curtain Curtain
PanelPanel
NOTE
• The feature may be changed according to the
type of model.
3
Cut the window sash seals to the proper
length. Peel off the backing and attach the
adhesive-backed foam to the underside of the
window sash and bottom of window frame.
Foam-PE Foam-PE
(Adhesive backed)(Adhesive backed)
4
Open the window and draw a center line on
the center of the inner sill. Then mark lines
7.5” to the left and right of the center line.
7.5"
7.5"
Inner SillInner Sill
Center LineCenter Line
Room SideRoom Side
5
Install the L bracket behind the inner window
sill, as shown. Use the 2 type A screws
provided.
7.5
7.5
Screws Screws
(Type A)(Type A)
Inner SillInner Sill
Center LineCenter Line
Outer SillOuter Sill
L BracketL Bracket
NOTE
• The bracket helps to hold unit securely in place.
Be sure to place bracket edge flush against
back of inner sill.
Loading ...
Loading ...
Loading ...