Loading ...
Loading ...
dioda typu LED z napisem “Power” zaświeci.
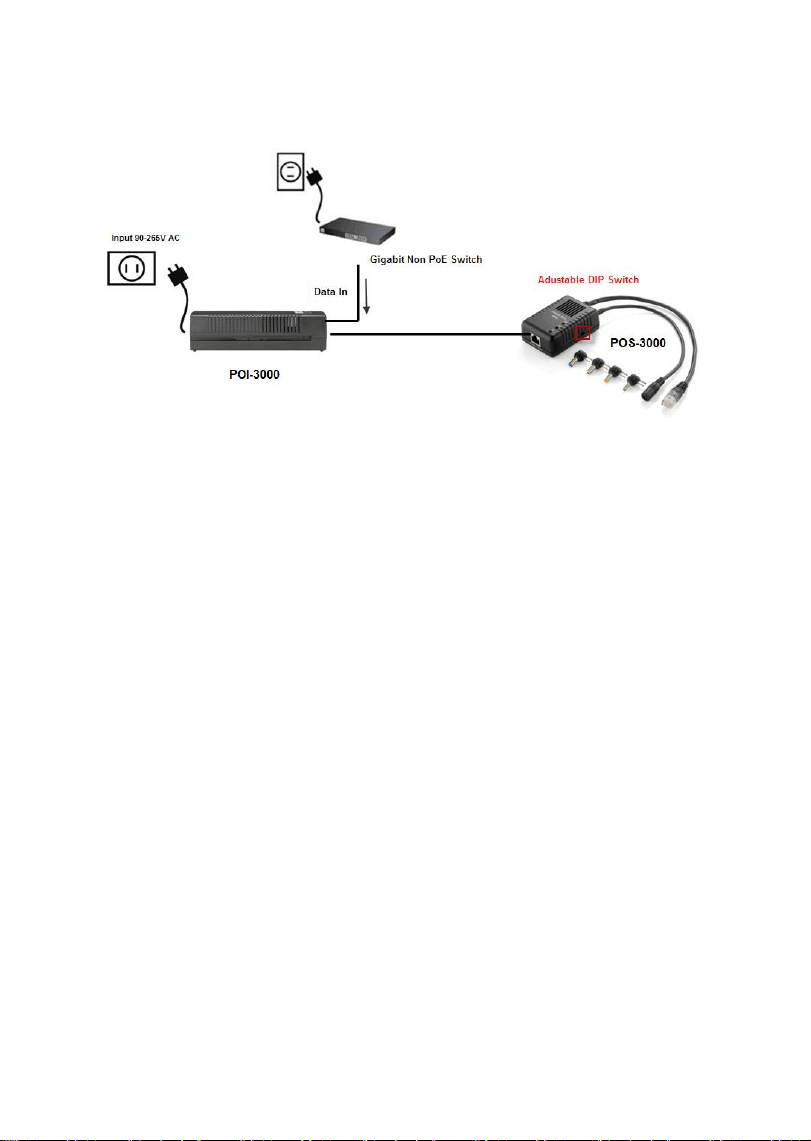
Connect "Data/In" port of Injector to Gigabit switch via Cat.5e/6/7 cable, and set the
correct voltage (5V, 9V or 12V) by adjustable DIP switch on the side of PoE Splitter.
(default setting 5V)
Schließen Sie das Netzkabel an den PoE-Injektor an und die "Power"-LED leuchtet auf.
Connectez le cordon d‟alimentation secteur sur l‟injecteur PoE, le voyant DEL "Power"
(Alimentation) s‟allume.
Conecte el cable de energía al inyector PoE, entonces deberá encenderse el LED
“Power”
Sluit het netsnoer aan op de PoE-injector. De LED "Power" (Voeding) zal oplichten.
Forbind AC strøm ledning til PoE injektor, og “Power” LED vil blive tændt.
Collegare il cavo d‟alimentazione CA all‟iniettore PoE ed il LED "Power" (Potenza) si
accenderà.
Σπλδέζηε ην θαιώδην ξεύκαηνο AC ηνπ PoE Injector ζηελ πξίδα, ην “Power” LED ζα
πξέπεη αλάςεη.
Ligue o cabo eléctrico AC ao injector PoE e o indicador LED "Power" (Energia)
ligar-se-á.
Anslut nätkabeln till PoE injektorn och ett eluttag. Lysdioden ‟Power‟ tänds.
Napajalni kabel AC priključite v PoE injektor in prižge se "Power" (Napajanje) LED.
透過 Cat.5/6/7 網路線連接網路電源供應器的 Data/in 埠到 Gigabit Switch 並借由網路電源
分岐器側邊的 Dip Switch 設定正確的電壓 (5V or 9V or 12V) (初始值 5V)。
AC 전원코드를 PoE injector 전원에 연결하면, 전원 LED 점등
Подключите кабель питания переменного тока к инжектору питания PoE, после чего
Step 2.
Loading ...
Loading ...
Loading ...