
TECH Ver. 7/16 PRINT Ver. 7/16
iHONK837
VEHICLE APPLICATION
Honda
2012 CIVIC
www.bestkits.com www.aampglobal.com www.aius.net
2500 East Francis Street Ontario, CA 91761, U.S.A.
Sales: (800) 477-2267
Intl: (727) 572-9255
Support: 888-228-5560
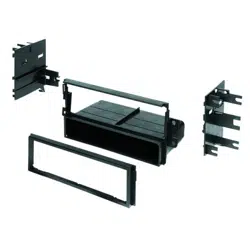
HONK837 Mounting Kit
DASH DISASSEMBLY INSTRUCTIONS
1. Remove small cover located under the HVAC (2 screws).
2. Remove the 2 screws holding the factory radio mounting brackets.
3. Carefully remove the factory dash panel located above the instrument cluster,
far enough to allow the factory radio to be removed.
4. Remove the factory radio.
2
3
DOUBLE DIN INSTALLATION INSTRUCTIONS
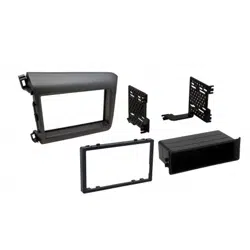
KIT PREPARATION
1. Attach the metal panel fastener clips (included with kit) (5) to each mounting
tab on the back side of the main panel.
2. Remove the 4 tabs shown (shaded) below from the trim ring.
1. Insert trim into the main frame.
2. Install brackets to rear of main frame (Do Not Overtighten)using 4 screws supplied
3. Insert ISO mountable radio between ISO mount brackets and loosely attach to sides
of radio using screws provided with radio when possible or screws supplied with kit.
4. Slide radio forward or backward for desired look and tighten screws.
5. Install clips provided with kit to lower bracket location. Once kit is installed use
the 5/8 screws also provided with the kit to securely mount the brackets to the
sub-dash(Suggested).
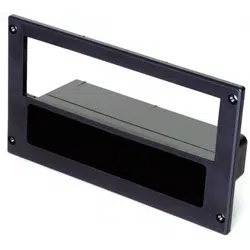
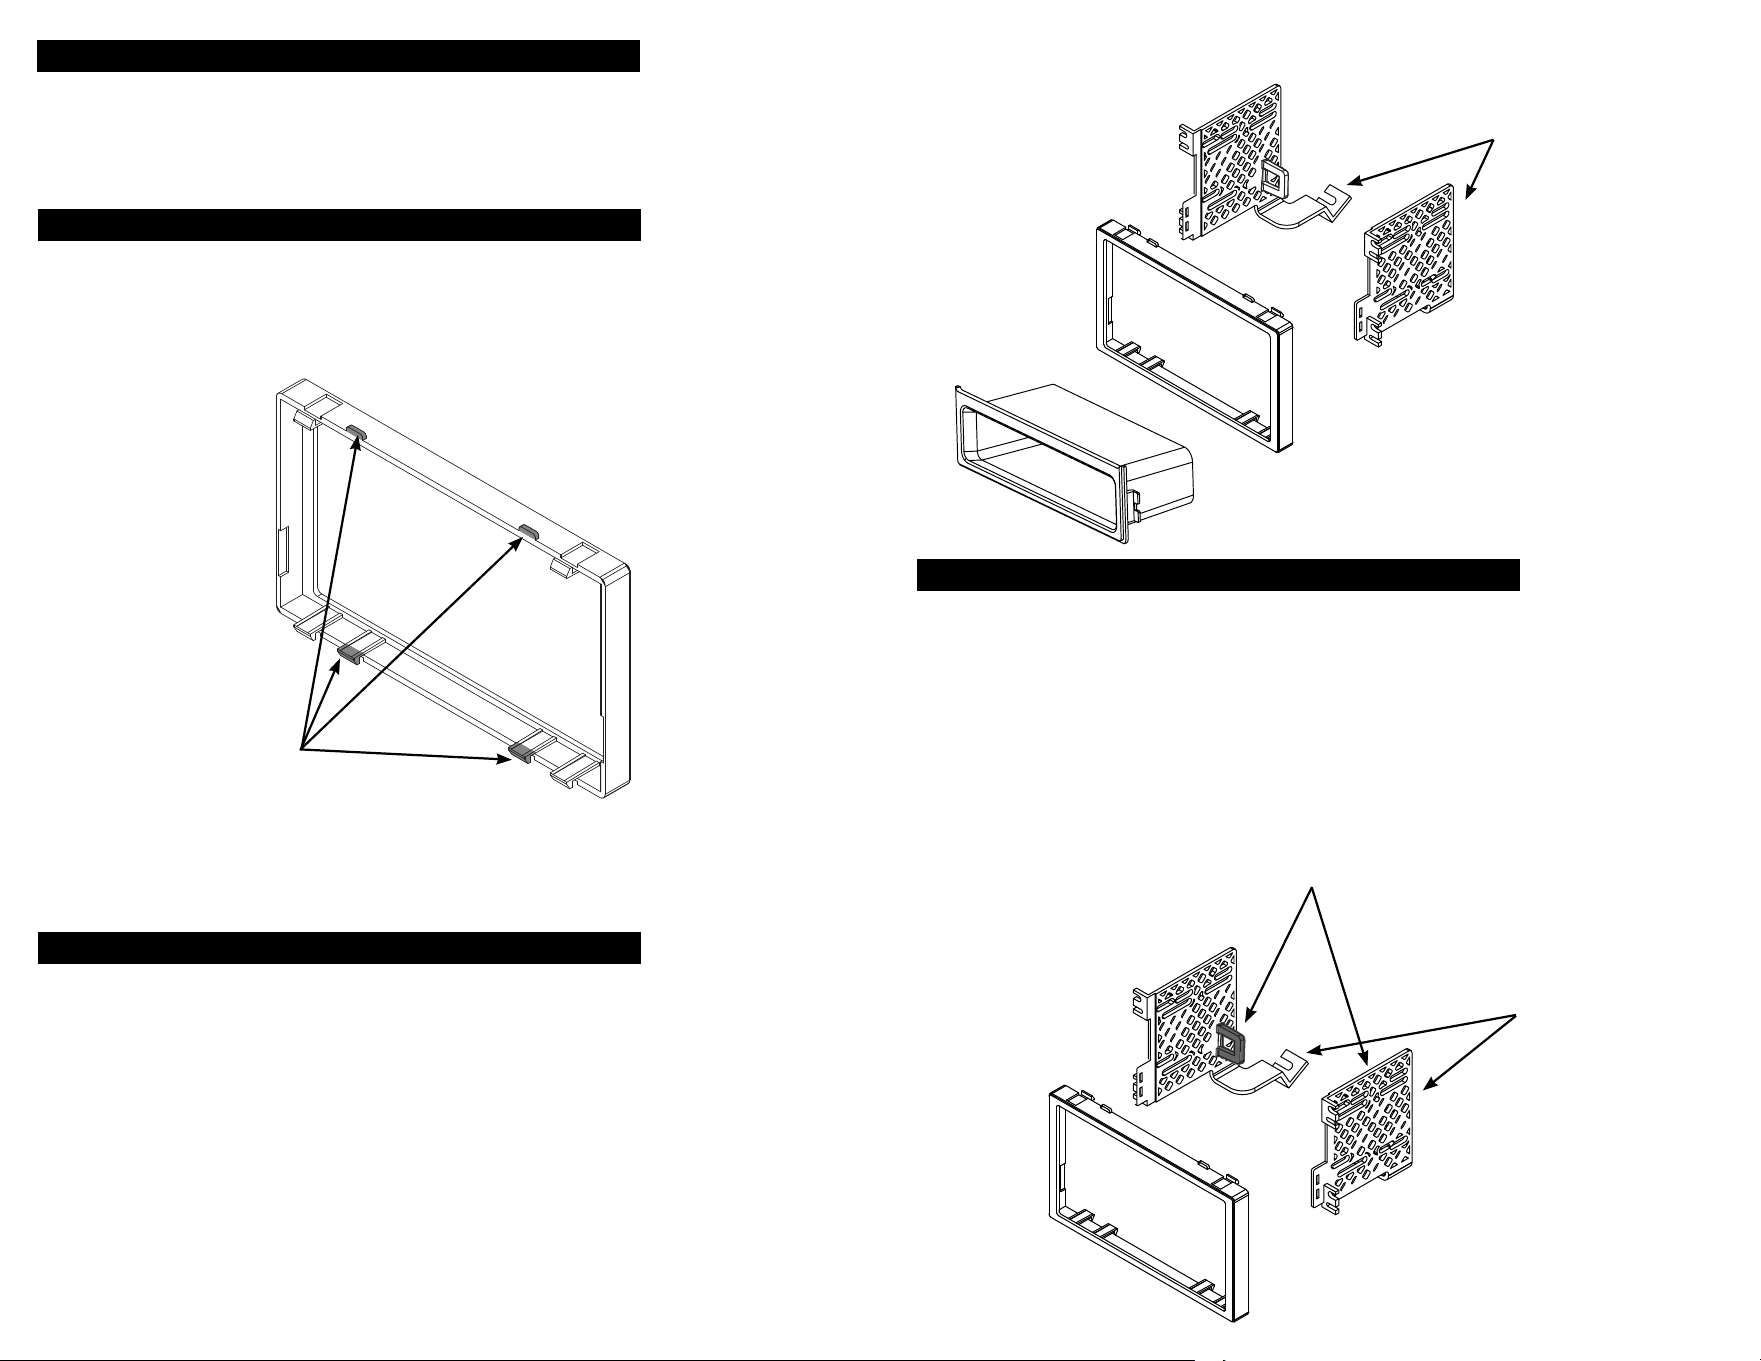
SINGLE ISO INSTALLATION INSTRUCTIONS
1. Insert pocket into lower section of kit from rear & lock into slots of mounting brackets.
2. Insert trim into the main frame.
3. Install brackets to rear of main frame (Do Not Overtighten)using 4 screws supplied
4. Insert ISO mountable radio between ISO mount brackets and loosely attach to sides
of radio using screws provided with radio when possible or screws supplied with kit.
5. Slide radio forward or backward for desired look and tighten screws.
6. Install clips provided with kit to lower bracket location. Once kit is installed use
the 5/8 screws also provided with the kit to securely mount the brackets to the
sub-dash(Suggested).
INSTALL CLIPS HERE ON BOTH
LEFT & RIGHT BRACKETS
(Flat side of the clip on the bottom)
Figure C
REMOVE SHADED TABS
ON BOTH LEFT
& RIGHT BRACKET
INSTALL CLIPS HERE ON BOTH
LEFT & RIGHT BRACKETS
(Flat side of the clip on the bottom)
Figure A
REMOVE ALL
4 SHADED BRACKETS
Figure B