Loading ...
Loading ...
Loading ...

6
Installations/Connections
Be sure to read "Precautions" and "Precautions for installation" before installation.
Read the operating instructions for the camera to be installed as well. The Operating Instructions mainly describe for installing a
network camera.
The basic flow of the installation operation is the same as the one for the color CCTV camera.
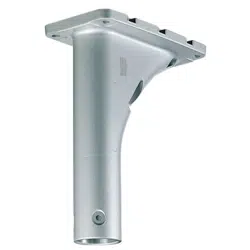
The flow of how to install the ceiling mount bracket is described as follows.
[1] How to detach the housing base (☞ 6 page)
Remove the housing base and attachment pipe from the camera body.
[2] Attaching the mount bracket (☞ 8 page)
■ When laying cables through the cable access hole (front) (☞ 8 page)
■ When laying cables after drilling a hole through the ceiling (☞ 10 page)
[3] Mounting of the camera body on the mount bracket (☞ 12 page)
Secure the camera body to the housing base.
[1] How to detach the housing base
Before attaching the camera to the ceiling mount bracket, detach the housing base and attachment pipe from the camera so
that installation and connections can be performed.
Step 1
Remove the fixing screws (3 pcs.*) that are securing the
housing base and the camera.
The removed screws will be required when attaching the
camera to the housing base. Use caution not to lose these
screws.
* Special screw (fixing screw): These screws are hexagon
screws. Use an hexagon wrench.
There are 2 types of wrenches to be used; one is hexago-
nal wrench "for M5" (WV-SW598) and the other is hexago-
nal wrench "for M6".
Refer to the Operating Instructions of the camera for the
wrench to be used, which depends on models.
(The illustration below shows the WV-SW598 network
camera.)
Protection cover
Fixing screws (3 pcs.)
Housing base
Camera
IMPORTANT:
• The protection cover attached to the camera unit shall
be removed after completion of the installation. (Only for
rain-wash coating model)
Step 2
To separate the housing base from the camera, turn the
housing base to the direction of the arrow as illustrated.
(Refer to the illustration in Step 1.)
Protection cover
Loading ...
Loading ...
Loading ...