English Tiếng Việt
Operating Instructions
Air Conditioner
Model No.
Indoor Unit Outdoor Unit
CS-PU9AKH-8
CS-PU12AKH-8
CS-PU18AKH-8
CU-RU9AKH
CU-RU12AKH
CU-RU18AKH
nanoe-G
ECO
Hướng dẫn sử dụng
Máy điều hòa không khí
2-10
Trước khi vận hành thiết bị, vui lòng đọc kỹ các hướng dẫn
vận hành này cùng với hướng dẫn an toàn (cuốn sách riêng)
và giữ lại để tham khảo cho những lần sau.
Trước khi lắp đặt, người lắp đặt phải:
Đọc hướng dẫn lắp đặt và yêu cầu khách hàng cất giữ bản
hướng dẫn để tham khảo sau này.
Gỡ điều khiển từ xa được đóng gói cùng với dàn lạ
nh.
Operating Instructions
Air Conditioner
12-20
Before operating the unit, please read these operating
instructions together with Safety Instructions (separate
booklet) thoroughly and keep them for future reference.
Before installation, the installer must:
Read the Installation Instructions, then request the customer
keep them for future reference.
Remove the remote control packed with the indoor unit.
ACXF55-37381
2
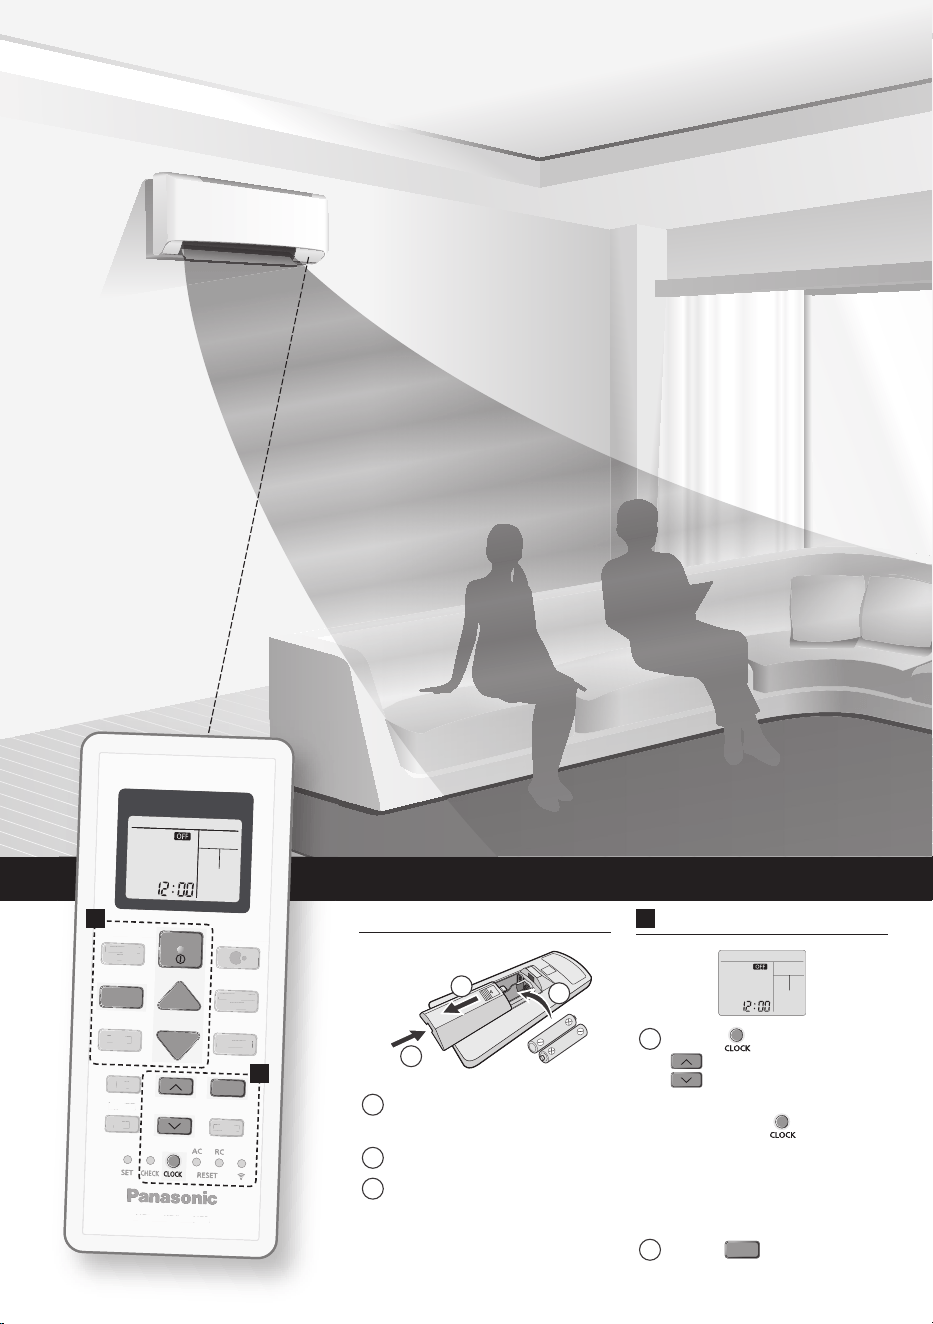
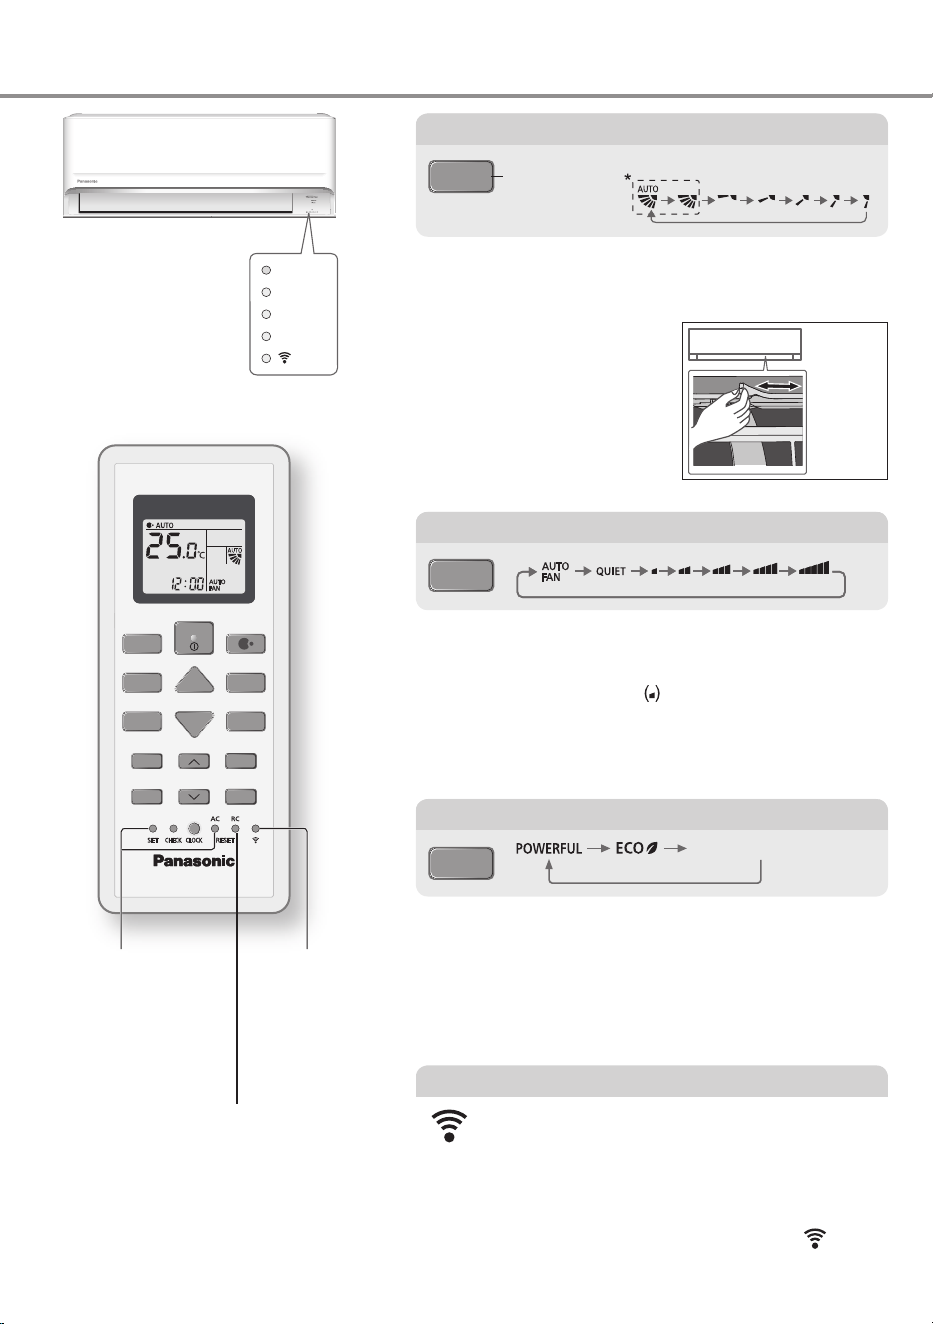
Hướng dẫn nhanh
ON
OFF
SET
TIMER
CANCEL
OFF/ON
AIR SWING
TEMP
OFF/ON
MODE
SLEEP
FAN SPEED/
QUIET
POWERFUL/
ECO
AIR CONDITIONER
ON
OFF
TIMER
CANCEL
AIR SWING
SLEEP
FAN SPEED/
QUIET
POWERFUL/
ECO
AIR CONDITIONER
B
A
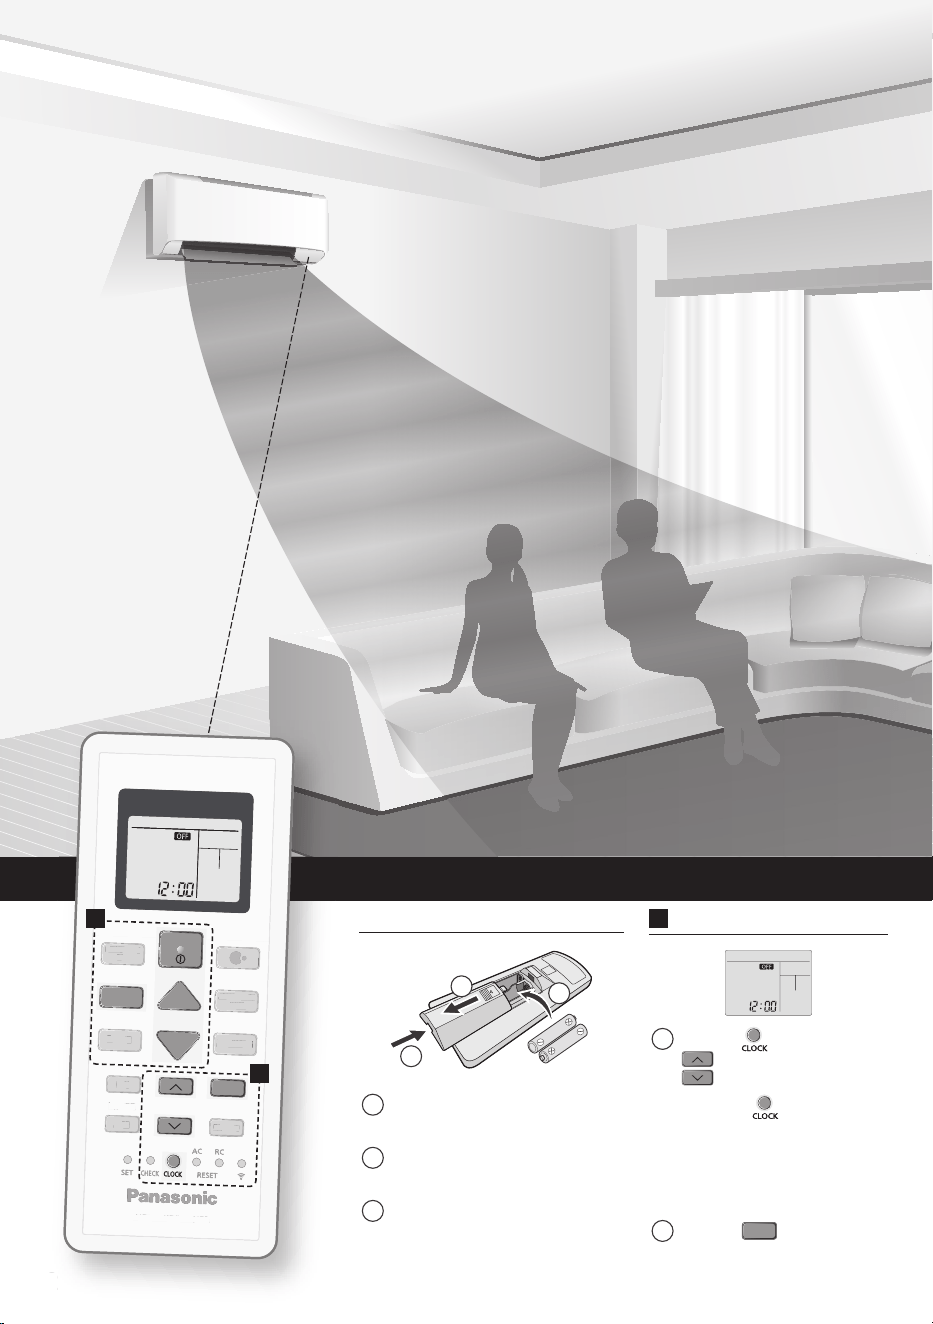
Sử dụng điều
khiển trong
khoảng 8m tính từ
bộ phận nhận tín
hiệu điều khiển từ
xa trên dàn lạnh.
Lắp pin
OPEN
2
3
1
1
Kéo nắp đậy lưng của
điều khiển.
2
Lắp pin AAA hoặc R03.
3
Đậy nắp.
A
Điều chỉnh đồng hồ
1
Nhấn
, sau đó nhấn
để cài đặt thời
gian.
• Nhấn nút trong
khoảng 5 giây để hiển
thị thời gian theo dạng
12 giờ (am/pm) hoặc
24 giờ.
2
Nhấn
SET
để xác nhận.
Một Network Adaptor (Bộ điều hợp mạng) tích hợp sẵn
cho phép bạn điều khiển hoạt động của điều hòa từ bất
kỳ đâu.
3
B
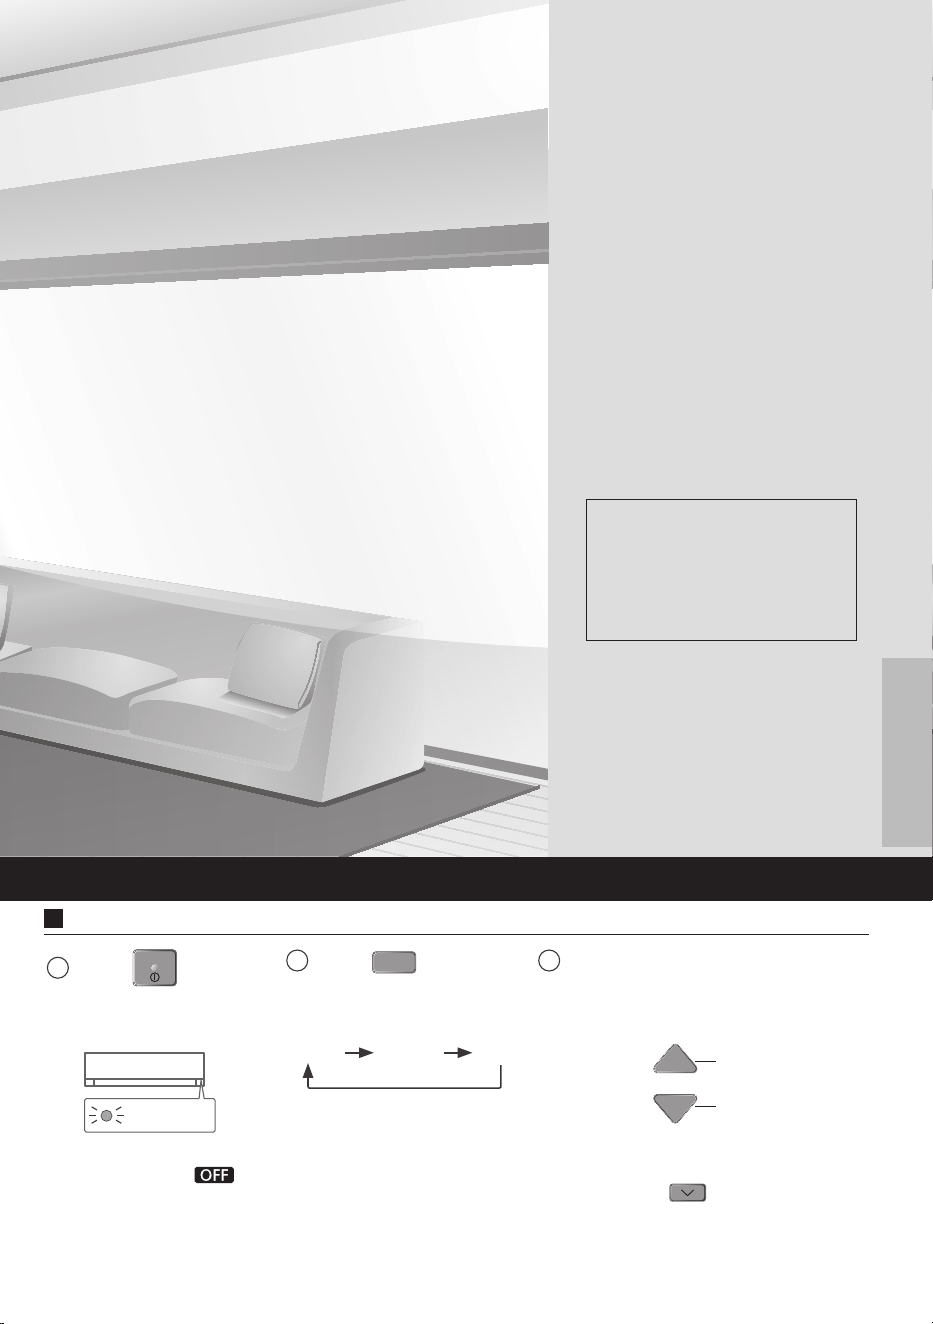
Các tính năng cơ bản
2
Nhấn
MODE
để chọn
chế độ mong muốn.
DRYAUTO COOL
1
Nhấn
OFF/ON
OFF/ON
để
khởi động/ngừng
hoạt động.
POWER
• Khi máy ON (BẬT),
biểu tượng
mất đi khỏi màn
hiển thị của điều
khiển từ xa.
3
Nhấn TEMP UP (TĂNG NHIỆT
ĐỘ), TEMP DOWN (GIẢM
NHIỆT ĐỘ) để chọn nhiệt độ
mong muốn.
TEMP
Lên
Xuống
Dãy nhiệt độ lựa chọn:
16.0 °C ~ 30.0 °C / 60 °F ~ 86 °F.
• Nhấn nút
trong khoảng 10
giây để hiển thị đơn vị nhiệt độ
là °C hoặc °F.
Mục Lục
Cách Sử dụng
…………………
4-5
Tìm Hiểu Thêm... .................6
Vệ sinh Máy Điều hòa
............
7
Những vấn đề thường
gặp
……………………………
8-10
Phụ kiện
• Điều khiển từ xa
• Pin AAA hoặc 2 pin R03
• Đế giữ điều khiển
• 2 ốc vít của đế giữ điều khiển
Nội dung trong hướng dẫn này chỉ mang
tính chất giải thích và có thể khác so với
máy thực. Nhà sản xuất có thể thay đổi
mà không báo trước.
Cảm ơn bạn đã lựa chọn Máy
điều hòa không khí Panasonic.
Tiếng Việt
4
Cách Sử dụng
Hướng lên/Hướng xuống:
• Không điều chỉnh cánh gió bằng tay.
*Xem mục “Tìm Hiểu Thêm…” để biết thêm chi tiết
Hướng nghiêng qua lại:
• Với hướng nghiêng, có thể
điều chỉnh thủ công như
hướng dẫn.
Thay đổi hướng gió
AIR SWING
Hướng lên/
Hướng xuống
nanoe-G
ECO
Hướng
nghiêng
qua lại
POWER
TIMER
nanoe-G
ECO
(đảo cánh gió)
Các đèn hiển thị
ON
OFF
SET
TIMER
CANCEL
OFF/ON
AIR SWING
TEMP
OFF/ON
MODE
SLEEP
FAN SPEED/
QUIET
POWERFUL/
ECO
AIR CONDITIONER
Không dùng
trong khi vận
hành bình
thường.
Nhấn để ON
(BẬT) hay
OFF (TẮT) tính
năng Wireless
LAN (LAN
Không dây).
Nhấn để khôi phục
lại các thiết lập gốc
của điều khiển.
POWERFUL:
Để đạt được nhiệt độ mong muốn nhanh chóng
• Chế độ này sẽ tự động dừng sau 4 giờ.
ECO:
• Để giảm lượng tiêu thụ điện và tiết kiệm năng lượng tốt
hơn mà không ảnh hưởng đến sự thoải mái.
Để chuyển giữa chế độ POWERFUL/ECO
POWERFUL/
ECO
(
7KLӃWOұSFKӃÿӝWKRiW
)
Để kết nối tới một mạng
• Nhấn để ON (BẬT) hay OFF (TẮT) tính năng
Wireless LAN (LAN Không dây).
• Để cài đặt hoạt động Mô-đun LAN Không dây, vui
lòng xem Sách Hướng dẫn Cài đặt.
• Nếu đèn LED Wireless LAN (LAN không dây)
nhấp nháy liên tục và bạn không muốn sử dụng
ứng dụng, hãy nhấn nút Wireless LAN để tắt.
Điều chỉnh TỐC ĐỘ QUẠT và chế độ YÊN TĨNH
FAN SPEED (TỐC ĐỘ QUẠT):
• Khi chọn chế độ AUTO FAN (QUẠT TỰ ĐỘNG), tốc độ
quạt sẽ được tự động điều chỉnh theo chế độ hoạt động.
• Chọn tốc độ quạt thấp nhất
để có chế độ hoạt động với
tiếng ồn thấp.
QUIET (YÊN TĨNH):
• Giảm tiếng ồn của luồng gió thổi.
FAN SPEED/
QUIET
5
Tiếng Việt
Xem mục “Tìm Hiểu Thêm…” để biết thêm chi tiết.
Ghi chú
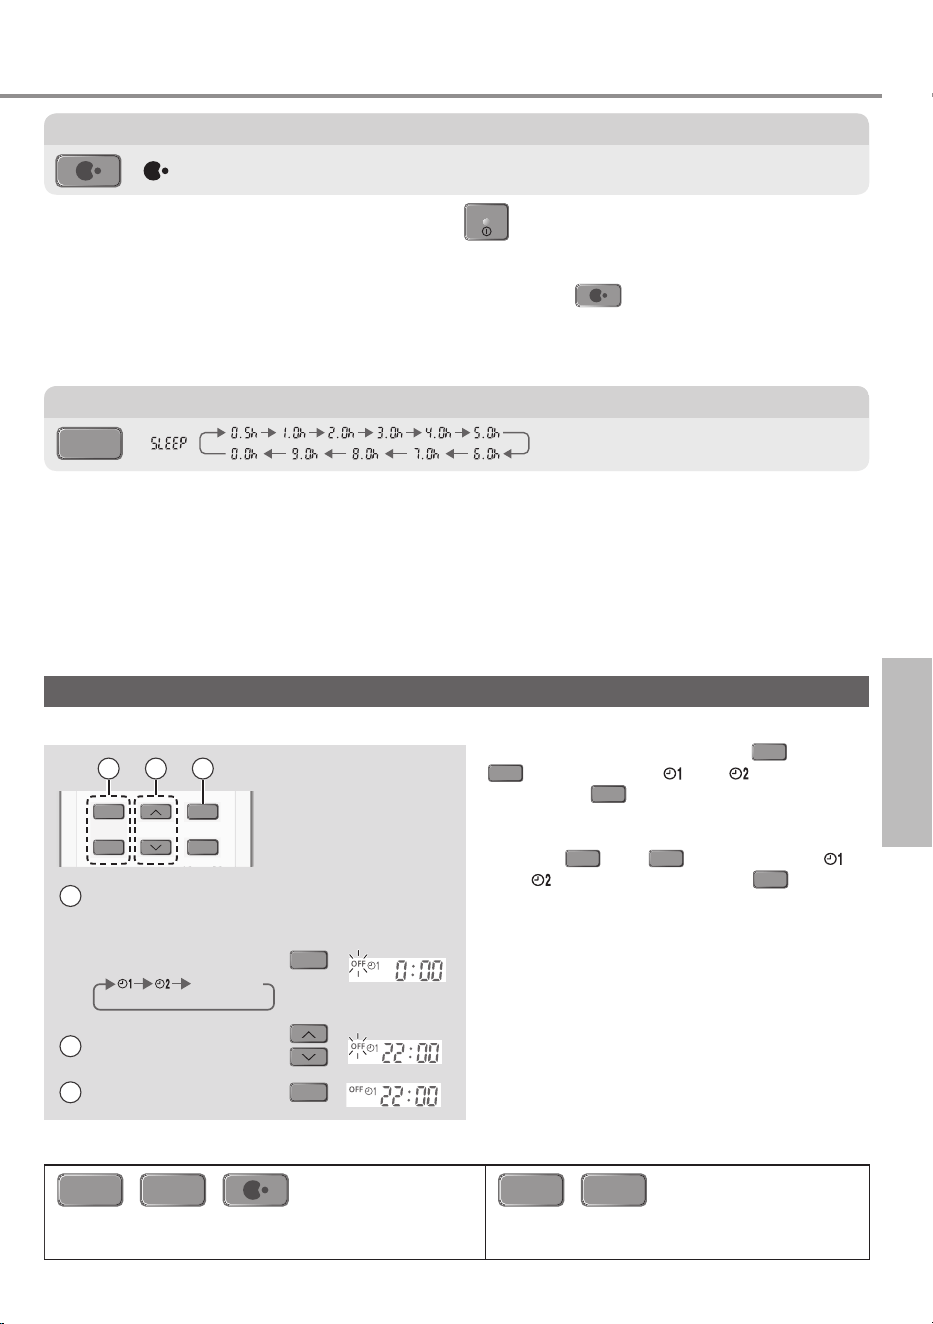
SLEEP
,
POWERFUL/
ECO
,
FAN SPEED/
QUIET
,
POWERFUL/
ECO
• Có thể được chọn cùng lúc.
• Có thể được kích hoạt ở mọi chế độ.
• Chế độ POWERFUL, QUIET hay FAN
SPEED không thể được chọn cùng lúc.
• Chức năng này sẽ mang lại cho bạn một môi trường thoải mái khi ngủ. Nó sẽ tự động điều chỉnh nhiệt
độ ngủ theo khung giờ trong suốt quá trình được kích hoạt.
• Đèn báo của dàn lạnh sẽ mờ dần đi khi chức năng này được kích hoạt. Không được sử dụng cách này
nếu độ sáng của đèn báo đã bị làm mờ đi.
• Hoạt động này sẽ được tích hợp với bộ hẹn giờ kích hoạt (0.5, 1, 2, 3, 4, 5, 6, 7, 8 hoặc 9 giờ).
• Chức năng này có thể được thiết lập cùng với chế độ hẹn giờ. Chức năng ngủ sẽ được ưu tiên hơn
chức năng hẹn giờ OFF (TẮT).
• Hoạt động này có thể được hủy bỏ bằng việc nhấn nút tương ứng cho đến khi đồng hồ hẹn giờ chỉ
0.0h.
Để tận hưởng cảm giác thoải mái tối đa khi ngủ
SLEEP
• nanoe
TM
-G bắt đầu tự động khi thiết bị được bật với
OFF/ON
OFF/ON
.
• Chế độ nanoe™-G cung cấp không khí sạch bằng cách tạo ra một lượng lớn ion âm và phân phối qua
luồng khí thải ra để giữ lại hoặc vô hiệu hóa nấm mốc, vi khuẩn hoặc vi rút.
• Chế độ này có thể được BẬT hoặc TẮT thủ công bằng cách nhấn .
• Chế độ này có thể được kích hoạt khi máy tắt. Trong trường hợp này, tốc độ của cánh đảo gió và quạt
sẽ hoạt động theo cài đặt của điều khiển từ xa.
• Nếu mất điện khi máy đang chạy, chế độ sẽ được phục hồi ngay khi có điện trở lại.
Để tận hưởng môi trường tươi mới hơn và sạch hơn
Cài đặt hẹn giờ
• Để hủy chế độ hẹn giờ, nhấn nút
ON
hoặc
OFF
để chọn thiết lập hoặc tương ứng,
sau đó nhấn
CANCEL
.
• Nếu chế độ hẹn giờ đã bị hủy bằng tay hoặc do
mất điện, bạn có thể khôi phục lại chế độ này.
Nhấn nút
ON
hoặc
OFF
để chọn thiết lập
hoặc tương ứng, sau đó nhấn
SET
.
• Cài đặt hẹn giờ gần nhất sẽ được hiển thị và sẽ
được kích hoạt sau đó.
• Chế độ hẹn giờ hoạt động theo cài đặt giờ trên
điều khiển từ xa và sẽ lặp lại hàng ngày khi giờ
hẹn đã được cài đặt. Để cài đặt giờ, xin vui lòng
xem phần Hướng dẫn.
Bạn có thể cài đặt hen giờ để bật hay tắt máy ở 2 thờ
i gian lập sẵn khác nhau.
ON
OFF
SET
TIMER
CANCEL
1 2 3
1
Chọn chế độ
TIMER ON (BẬT) hay
TIMER OFF (TẮT).
Ví dụ:
OFF (TẮT) lúc
22:00 giờ
• Mỗi lần bấm:
OFF
7KLӃWOұSFKӃ
ÿӝWKRiW
2
Chọn thời gian.
3
Xác nhận cài đặt.
SET
Cách Sử dụng
6
Tìm Hiểu Thêm...
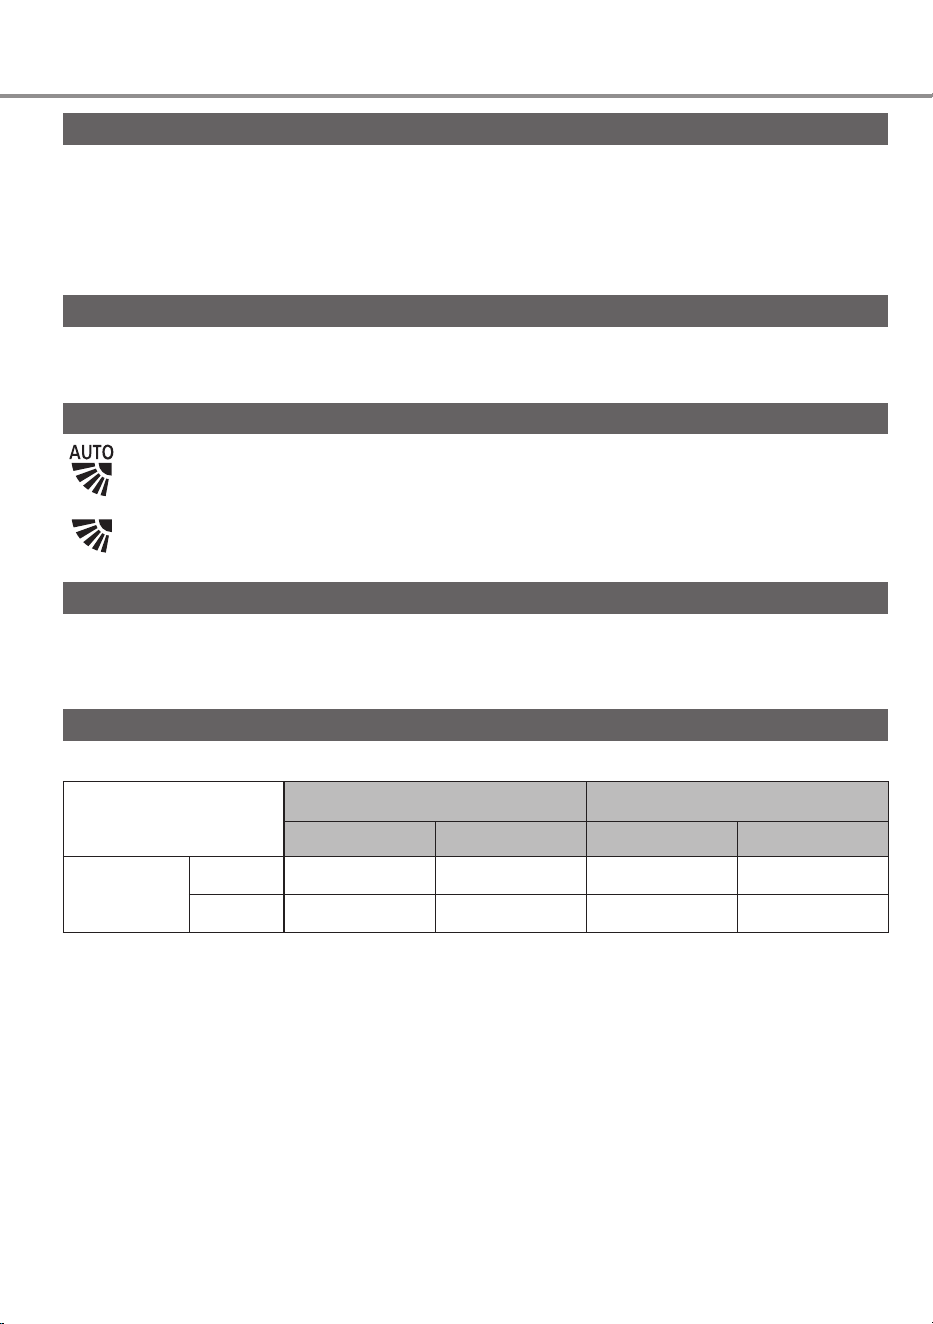
Chế độ hoạt động
AUTO (TỰ ĐỘNG) : Đèn báo POWER (NGUỒN) nhấp nháy lúc ban đầu.
Máy sẽ chọn chế độ hoạt động tùy theo nhiệt độ phòng.
COOL (LÀM LẠNH) : Đem lại sự làm mát dễ chịu một cách hiệu quả và phù hợp với nhu
cầu của bạn.
DRY (HÚT ẨM) : Quạt quay chậm để thổi gió mát nhẹ nhàng.
Cài đặt nhiệt độ ở chế độ tiết kiệm năng lượng
Bạn có thể tiết kiệm điện khi bật máy ở khoảng nhiệt độ khuyến khích.
COOL (LÀM LẠNH) : 26.0 °C ~ 28.0 °C / 79 °F ~ 82 °F.
Hướng gió
Ở chế độ COOL/DRY (LÀM LẠNH/HÚT ẨM):
Cánh đảo gió ngang được cố định ở giữa vị trí cài đặt.
Khi đạt được nhiệt độ, cánh đảo gió ngang sẽ tự động xoay lên/xuống.
Ở chế độ COOL/DRY (LÀM LẠNH/HÚT ẨM):
Cánh đảo gió ngang sẽ tự động di chuyển lên/xuống.
Điều khiển chế độ tự khởi động
Khi điện được khôi phục sau khi mất điện, các quá trình sẽ tự khởi động lại sau một khoảng
thời gian với chế độ hoạt động và hướng luồng không khí giống với như trước khi mất điện.
• Chế độ điều khiển này không áp dụng khi thiết bị được thiết lập ở chế độ HẸN GIỜ.
Điều kiện hoạt động
Sử dụng điều hòa trong dải nhiệt độ chỉ định trong bảng.
Nhiệt độ °C (°F)
Khối trong nhà Khối ngoài trời
DBT WBT DBT WBT
COOL
(LÀM LẠNH)
Tối đa 32 (89.6) 23 (73.4) 46 (114.8) 26 (78.8)
Tối thiểu 16 (60.8) 11 (51.8) 16 (60.8) 11 (51.8)
DBT: Nhiệt độ bầu khô, WBT: Nhiệt độ bầu ướt
n
a
n
oe
-G
E
CO
7
Tiếng Việt
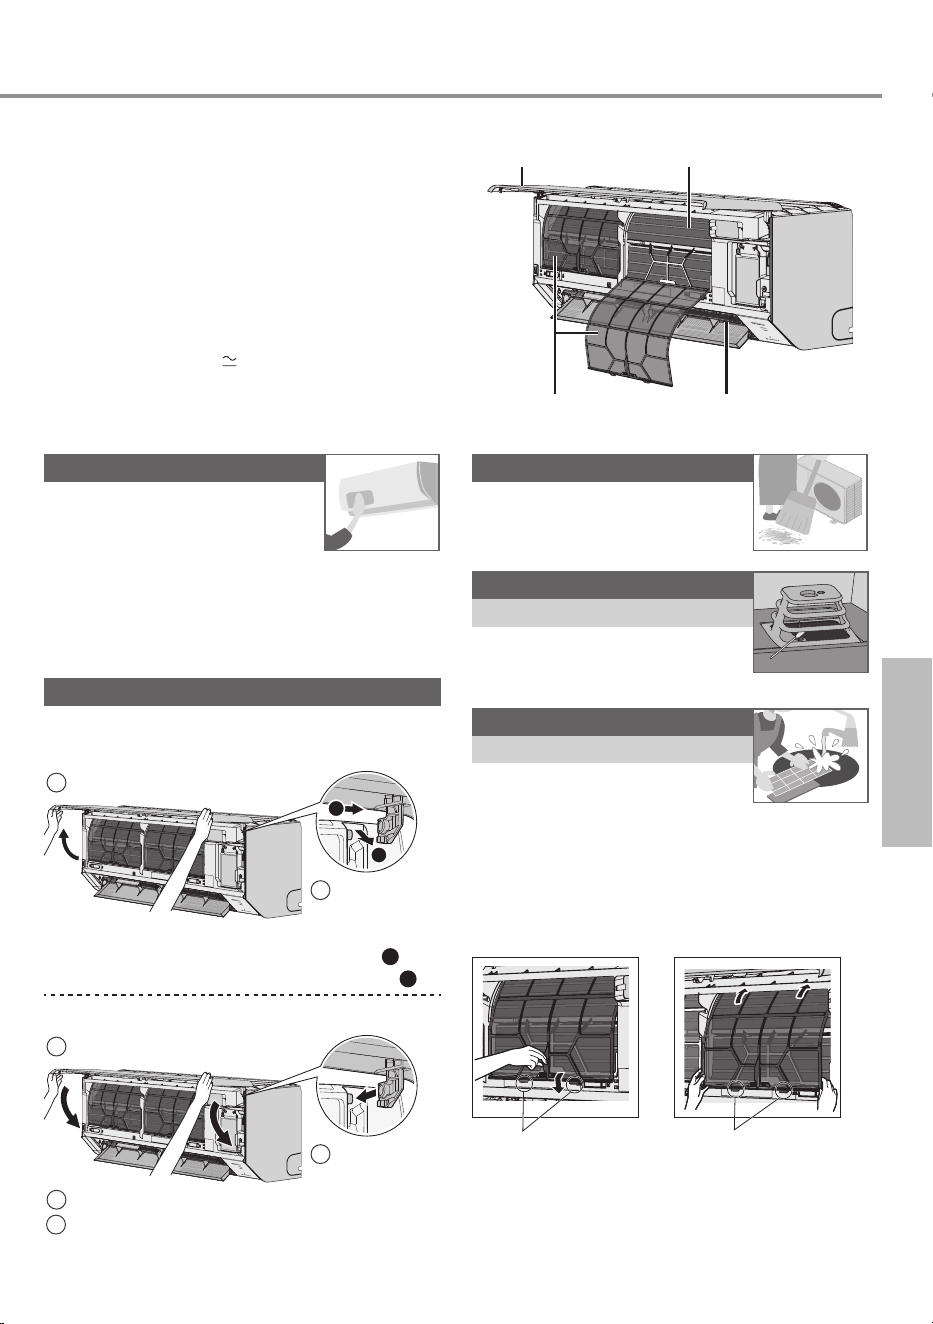
Vệ sinh Máy Điều hòa
Cần tiến hành vệ sinh và bảo dưỡng định
kỳ để đảm bảo máy hoạt động tối ưu.
Máy bẩn sẽ gây ra hỏng hóc và bạn có
thể thấy mã lỗi “H 99”. Liên hệ trạm bảo
hành ủy quyền để được trợ giúp.
• Trước khi vệ sinh, tắt điện nguồn và tháo
phích cắm.
• Không chạm tay vào lá nhôm vì lưỡi lá
nhôm sắc có thể gây tổn thương.
• Không dùng benzen, chất ăn mòn hoặc bộ
t
tẩy rửa.
• Chỉ dùng xà bông (
pH 7) hoặc chất tẩy
rửa trung tính.
• Không dùng nước nóng hơn 40 °C / 104 °F
để rửa.
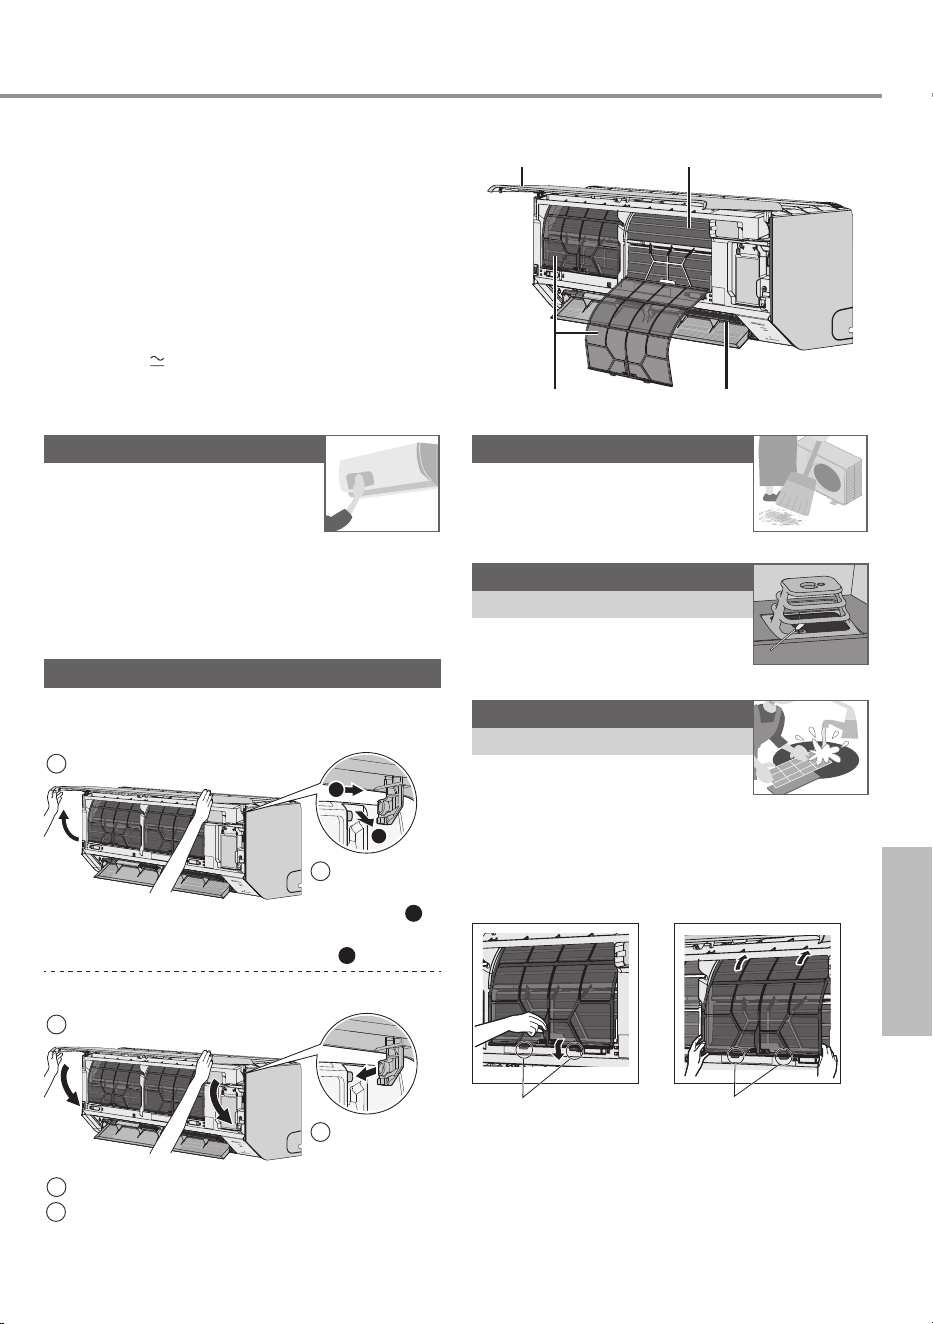
Khối trong nhà
Lá nhômMặt máy
Lưới lọc khí Nguồn phát nanoe
TM
-G
Khối ngoài trời
Dọn sạch rác xung quanh máy.
Làm sạch ống dẫn nước.
Nguồn phát nanoe
TM
-G
2 tuần một lần
• Lau sạch bằng vải bông khô.
• Không chạm vào trong khi
máy đang hoạt động.
Lưới lọc khí
2 tuần một lần
• Rửa/tráng lưới lọc nhẹ nhàng
với nước để tránh làm hư bề
mặt lưới lọc.
• Phơi khô lưới lọc trong bóng râm, tránh xa
lửa hoặc phơi trực tiếp dưới nắng.
• Thay lưới lọc khi bị hư.
Gỡ bỏ bộ lọc
không khí
Gắn bộ lọc
không khí
Gỡ khỏi máy Lắp vào thiết bị
Khối trong nhà
Hãy nhẹ tay khi xử lý bề mặt
thiết bị để tránh bị trầy xước
bởi các vật sắc nhọn hoặc thô
ráp (ví dụ: móng tay, dụng cụ,
nhẫn, v.v.). Lau nhẹ thiết bị
bằng khăn mềm ẩm.
Dàn trao đổi nhiệt và quạt cần được vệ sinh
định kỳ bởi đại lý ủy quyền.
Mặt máy
Rửa nhẹ nhàng và phơi khô.
Cách tháo gỡ mặt máy phía trước
nanoe-G
E
CO
2
Trượt tấm
che phía
trước sang
phải
A
và
kéo ra
B
.
1
Dựng lên.
B
A
Đóng lại cẩn thận
nanoe-G
E
C
O
2
Căn chỉnh
và đẩy vào.
1
Giữ nằm ngang.
3
Đóng xuống.
4
Nhấn cả hai đầu và điểm giữa của mặt
trước máy.
Tìm Hiểu Thêm... / Vệ sinh Máy Điều hòa
8
Những vấn đề thường gặp
Những hiện tượng sau không phải sự cố thuộc thiết bị.
Hiện tượng Nguyên nhân
Đèn POWER (NGUỒN) nhấp nháy trước khi
máy bật.
•
Đây là bước đầu để chuẩn bị cho hoạt động TIMER (HẸN
GIỜ) sau khi đã được cài đặt.
•
Khi chế độ hẹn giờ được ON (BẬT), máy có thể bật sớm
hơn (tới 15 phút) thời gian đã định để đạt được nhiệt độ
yêu cầu đúng thời gian đã định.
Đèn TIMER (HẸN GIỜ) luôn ON (BẬT).
•
Khi chế độ hẹn giờ (Timer) được cài đặt, chế độ hẹn giờ
(Timer) sẽ lặp lại hàng ngày.
Máy chậm hoạt động vài phút sau khi khởi
động lại.
•
Sự trì hoãn này nhằm bảo vệ máy nén.
Công suất làm lạnh giảm khi cài đặt tốc độ quạt
ở mức thấp nhất.
•
Tốc độ quạt thấp nhất để hoạt động ít tiếng ồn nên công
suất làm lạnh có thể giảm tùy theo điều kiện. Tăng tốc độ
quạt để tăng công suất.
Đôi khi quạt ở khối trong nhà ngừng lại ở chế
độ quạt tự động.
•
Giúp loại bỏ mùi trong phòng.
Phòng có mùi lạ.
•
Có thể do mùi ẩm thấp phát ra từ tường, thảm, đồ đạc
trong nhà hay quần áo.
Có tiếng crac trong khi máy chạy.
•
Thay đổi nhiệt độ khiến các bộ phận nở ra hay co lại.
Tiếng nước chảy trong khi máy chạy.
•
Môi chất lạnh chảy trong máy.
Sương phun ra từ khối trong nhà.
•
Trong quá trình làm lạnh, không khí lạnh tỏa ra có thể gây
nước ngưng tụ.
Khối ngoài trời có nước hoặc hơi nước thoát ra.
•
Ở chế độ làm lạnh, quá trình ngưng tụ xảy ra tại các ống
đồng lạnh và nước ngưng tụ có thể chảy từ khối ngoài trời.
Bạc màu ở một số linh kiện bằng nhựa.
•
Sự bạc màu tùy thuộc vào vật liệu được sử dụng trong các
linh kiện bằng nhựa. Quá trình này sẽ diễn ra nhanh hơn
khi tiếp xúc với nhiệt, ánh sáng mặt trời, tia cực tím, hoặc
các yếu tố môi trường.
Bụi có thể bám vào xung quanh bảng điều
khiển phía trước, lưới tản nhiệt và tường bao
quanh thiết bị sau khi sử dụng lâu dài.
•
Sự tích tụ bụi là do quá trình thanh lọc không khí ion âm từ
công nghệ nanoe
TM
-G. Lau sạch bui thường xuyên với một
miếng vải sạch ẩm.
Đèn báo mạng LAN không dây ON (BẬT) khi
máy OFF (TẮT).
•
Kết nối mạng LAN không dây với bộ định tuyến đã được
kích hoạt.
Kiểm tra các quy trình sau đây trước khi gọi bảo hành.
Hiện tượng Kiểm tra
Chế độ COOL (LÀM LẠNH) không hoạt động
hiệu quả.
•
Cài đặt nhiệt độ đúng quy cách.
•
Đóng hết cửa sổ và cửa ra vào.
•
Vệ sinh hoặc thay tấm lọc.
•
Gạt sạch mọi vật cản ở đường gió vào và đường gió ra.
Máy chạy ồn.
•
Kiểm tra xem máy có bị lắp đặt nghiêng không.
•
Mặt máy đóng đã khớp chưa.
Điều khiển từ xa không hoạt động.
(Đèn hiển thị mờ hoặc tín hiệu yếu.)
•
Kiểm tra pin được lắp đúng không.
•
Thay pin yếu.
Máy không hoạt động.
•
Kiểm tra xem cầu dao đóng không.
•
Kiểm tra xem có hẹn giờ tắt không.
Máy không nhận tín hiệu từ điều khiển từ xa.
•
Kiểm tra xem mắt nhận có bị chặn không.
•
Một số loại đèn huỳnh quang có thể ảnh hưởng tới việc
truyền tín hiệu điều khiển. Liên hệ trạm bảo hành ủy quyền
để được trợ giúp.
Đèn báo nanoe™-G ở khối trong nhà sẽ nhấp
nháy khi chế đố nanoe™-G được kích hoạt.
•
Dùng điều khiển từ xa để lấy mã lỗi và hỏi tư vấn đại lý ủy
quyền.
9
Tiếng Việt
Khi...
■Điều khiển bị mất hoặc không hoạt động
AUTO
OFF/ON
1. Nâng mặt trước.
2. Nhấn nút AUTO OFF/ON (TỰ ĐỘNG TẮT/BẬT) một lần để sử dụng ở
chế độ AUTO (TỰ ĐỘNG).
3. Để vận hành chế độ COOL (LÀM LẠNH) bắt buộc, nhấn nút AUTO
OFF/ON (TỰ ĐỘNG TẮT/BẬT) và giữ cho đến khi nghe 1 tiếng bíp, sau
đó thả tay. (Thao tác này sẽ do nhân viên bảo dưỡng thực hiện)
4. Nhấn nút AUTO OFF/ON (TỰ ĐỘNG TẮT/BẬT) lần nữa để tắ
t máy.
■Đèn chỉ báo quá sáng
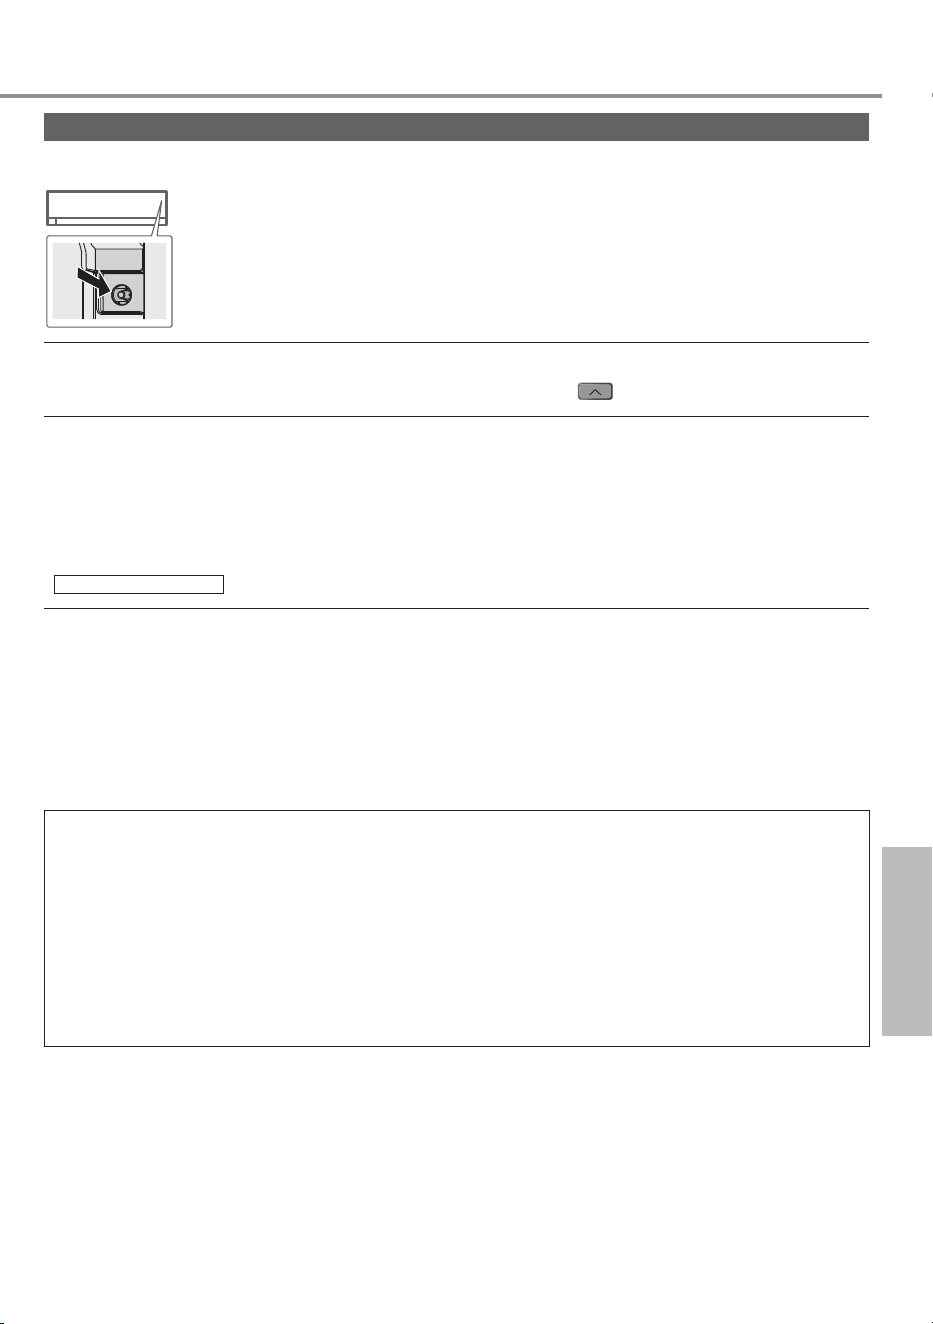
• Để giảm hoặc khôi phục độ sáng của đèn báo trên máy, nhấn
trên điều khiển và giữ
trong vòng 5 giây.
■ Kiểm tra máy sau một thời gian dài không sử dụng
• Kiểm tra pin trong điều khiển từ xa.
• Kiểm tra và đảm bảo không có vật thể lạ xung quanh các đường gió vào và đường gió ra.
• Sử dụng nút AUTO OFF/ON (TỰ ĐỘNG TẮT/BẬT) trên máy để chọn chế độ COOL (LÀM
LẠNH). Xem mục “Điều khiển từ xa bị mất hoặc có lỗi xảy ra” ở trên để biết thêm chi tiết.
Sau 15 phút hoạt động, nếu chênh lệch nhi
ệt độ giữa cửa gió vào và cửa gió ra như dưới
đây có nghĩa là máy hoạt động bình thường:
COOL (LÀM LẠNH): ≥ 8 °C / 14.4 °F
■ Máy sẽ không được sử dụng trong một thời gian dài
• Bật chế độ nanoe
TM
-G trong 2~3 giờ để loại bỏ hoàn toàn hơi ẩm còn sót lại bên trong máy.
Việc này giúp ngăn chặn sự phát triển của nấm mốc.
• Tắt điện nguồn và rút phích cắm khỏi máy.
• Tháo pin ra khỏi điều khiển từ xa.
ĐIỀU KIỆN KHÔNG ĐƯỢC TỰ SỬA CHỮA MÁY
TẮT NGUỒN ĐIỆN VÀ RÚT PHÍCH CẮM KHỎI MÁY. Sau đó liên hệ tới đai lý ủy quyền
trong các trường hợp sau:
• Có tiếng động khác thường khi máy đang hoạt động.
• Nước/vật lạ vào bên trong điều khiển từ xa.
• Nước đang rỉ ra từ khối trong nhà.
• Cầu dao thường xuyên bị ngắt.
• Dây nguồn nóng hơn bình thường.
• Công tắ
c hoặc nút bấm không hoạt động bình thường.
Những vấn đề thường gặp
10
Những vấn đề thường gặp
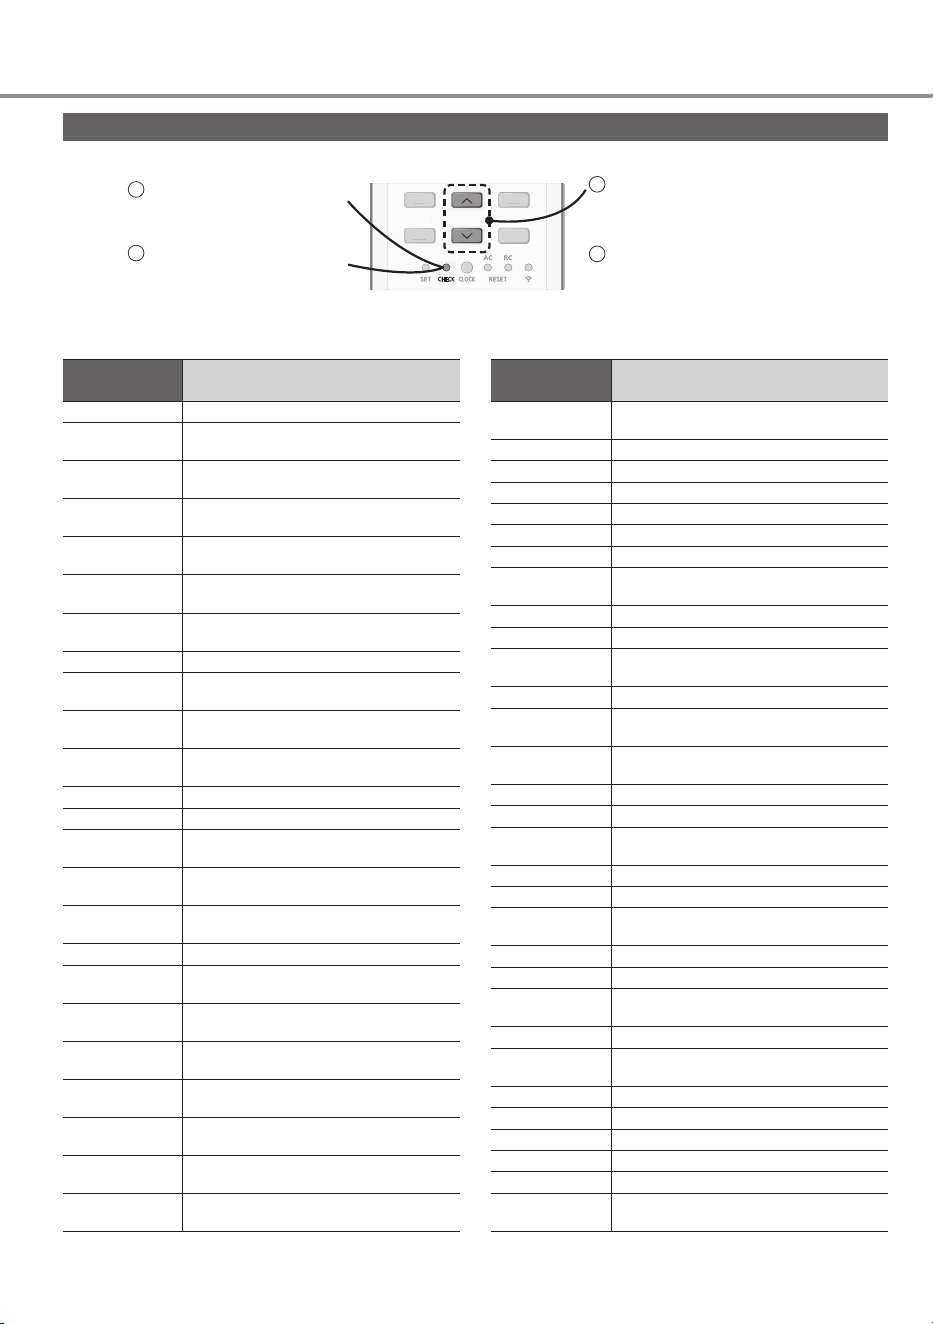
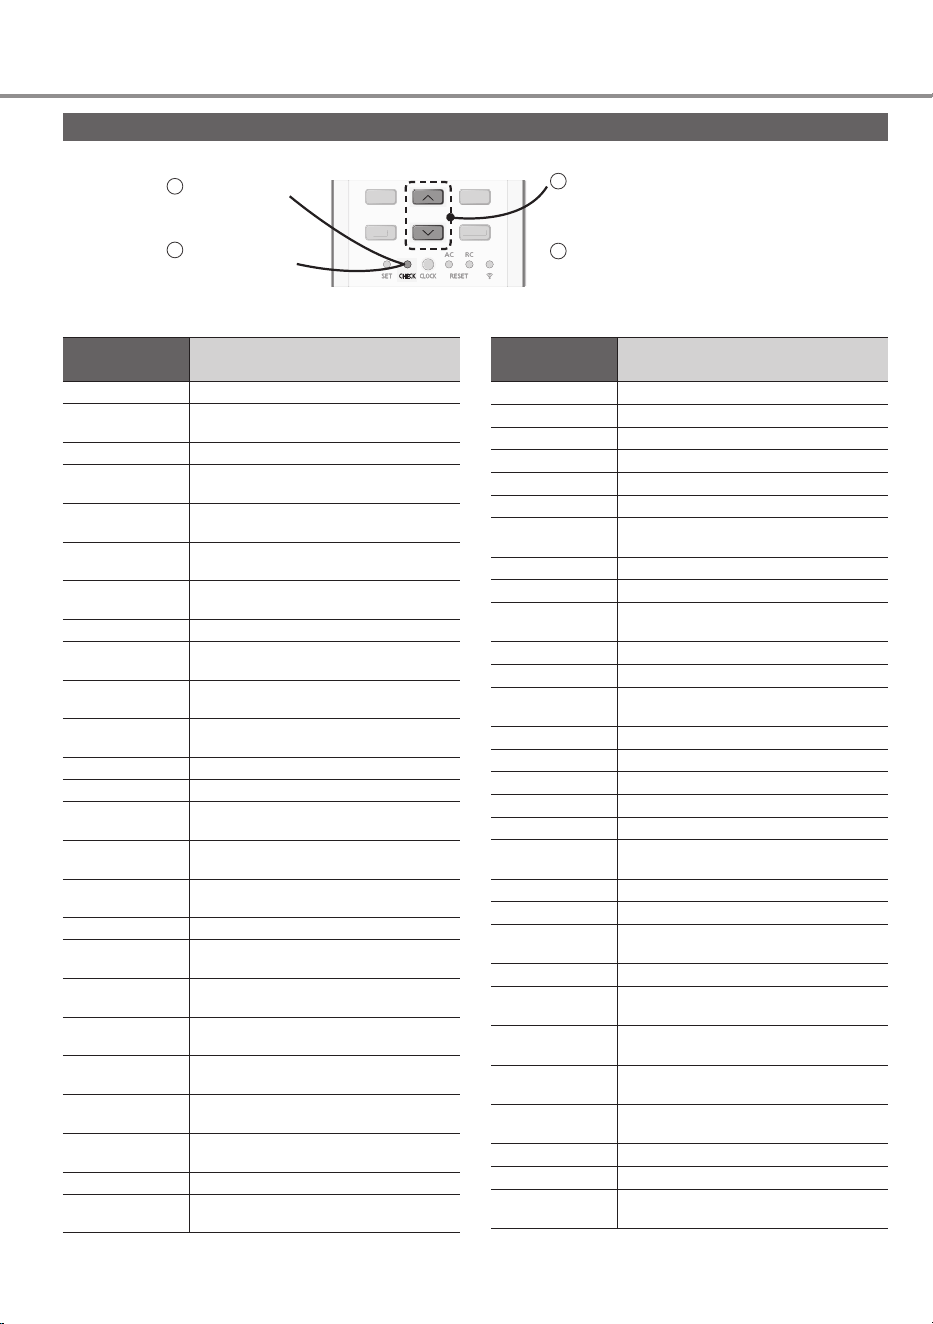
Lấy mã lỗi
Nếu máy ngừng hoạt động và đèn báo TIMER (HẸN GIỜ) nhấp nháy, dùng điều khiển từ xa để lấy mã báo lỗi.
ON
OFF
SET
TIMER
CANCEL
ON
O
FF
S
ET
TIMER
C
AN
C
E
L
1
Dùng vật nhọn nhấn nút
trong 5 giây
3
Dùng vật nhọn nhấn
nút trong 5 giây để thoát
khỏi chế độ kiểm tra lỗi
Nhấn nút đến khi bạn nghe
một loạt tiếng bíp, sau đó
ghi lại mã báo lỗi
2
Tắt máy và thông báo mã
báo lỗi với trạm bảo hành
ủy quyền.
4
• Đối với một số lỗi, bạn có thể phải khởi động lại máy với chế độ hoạt động hạn chế, với 4 tiếng “bíp” lúc
khởi động.
* Một số mã lỗi không có cho mẫu máy của bạn. Vui lòng kiểm tra với đại lý ủy quyền để biết thêm chi tiết.
Hiển thị chẩn
đoán
Vấn đề/Kiểm soát bảo vệ
H 00
Không có ghi nhớ về lỗi
H 11
Tín hiệu giữa hai khối trong/khối ngoài
bất thường
H 12
Khối trong hoạt động không đúng công
suất
H 14
Cảm biến nhiệt độ gió khối trong bất
thường
H 15
Cảm biến nhiệt độ máy nén của khối
ngoài bất thường
H 16
Bộ phận biến thế (CT) khối ngoài bất
thường
H 17
Cảm biến nhiệt độ hút khối ngoài bất
thường
H 19
Động cơ quạt khối trong nhà bị kẹt
H 21
Báo mức nước ngưng của khối trong
bất thường
H 23
Cảm biến nhiệt độ dàn trao đổi nhiệt số 1
của khối trong bất thường
H 24
Cảm biến nhiệt độ dàn trao đổi nhiệt số 2
của khối trong bất thường
H 25
Thiết bị i-on của khối trong bất thường
H 26
Bộ phát i-on bất thường
H 27
Cảm biến nhiệt độ gió khối ngoài bất
thường
H 28
Cảm biến nhiệt độ dàn trao đổi nhiệt số 1
của khối ngoài bất thường
H 30
Cảm biến nhiệt độ đường đẩy khối ngoài
bất thường
H 31
Cảm biến hồ bơi có vấn đề
H 32
Cảm biến nhiệt độ dàn trao đổi nhiệt số 2
của khối ngoài bất thường
H 33
Khối trong/khối ngoài mất kết nối với
nhau
H 34
Cảm biến nhiệt độ bộ làm mát khối ngoài
bất thường
H 35
Nước ngưng hoặc bơm nước ngưng bất
thường
H 36
Cảm biến nhiệt độ ống dẫn gas khối
ngoài bất thường
H 37
Cảm biến nhiệt độ ống lỏng khối ngoài
bất thường
H 38
Khối trong/khối ngoài không cùng kiểu
máy (không trùng mã hiệu)
Hiển thị chẩn
đoán
Vấn đề/Kiểm soát bảo vệ
H 39
Khối trong hoạt động bất thường hoặc ở
chế độ chờ
H 41
Kết nối dây điện hay ống dẫn bất thường
H 50
Động cơ quạt thông gió bị kẹt
H 51
Động cơ quạt thông gió bị kẹt
H 52
Bộ phận giới hạn trái-phải bất thường
H 58
Cảm biến gas khối trong bất thường
H 59
Cảm biến Eco bất thường
H 64
Cảm biến áp suất cao khối ngoài bất
thường
H 67
Nanoe bất thường
H 70
Đèn cảm biến bất thường
H 71
Bo điều khiển bên trong quạt dàn lạnh
DC bất thường
H 72
Cảm biến nhiệt độ bình chứa bất thường
H 79
Mô-đun mạng nôi bộ (LAN) không dây
ghi lỗi
H 85
Giao tiếp bất thường giữa khối trong nhà
và mô-đun mạng nội bộ (LAN) không dây
H 97
Động cơ quạt khối ngoài bị ket
H 98
Bảo vệ áp suất cao khối trong
H 99
Bảo vệ hiện tượng đông đá của khối
trong hoạt động
F 11
Công tắc van 4 chiều bất thường
F 16
Bảo bệ tỏng dòng điện hoạt động
F 17
Khối trong ở chế độ chờ đông đá bất
thường
F 18
Bảng mạch khô bị khóa bất thường
F 87
Bảo vệ quá nhiệt với hộp điều khiển
F 90
Bảo bệ mạch công suất (PFC) bất
thường
F 91
Chu kỳ làm lạnh bất thường
F 93
Vòng quay của máy nén khối ngoài bất
thường
F 94
Bảo vệ quá áp đầu đẩy máy nén
F 95
Bảo vệ áp suất cao làm lạnh khối ngoài
F 96
Bảo vệ quá nhiệt điện trở máy nén
F 97
Bảo vệ quá nhiệt máy nén
F 98
Bảo vệ tổng dòng điện hoạt động
F 99
Nhận biết dòng điện một chiều (DC) khối
ngoài

11
Tiếng Việt
Memo
Những vấn đề thường gặp
12
A new built-in Network Adaptor that allows you to control
your air conditioner unit operation from anywhere.
Use the remote
control within 8 m
from the remote
control receiver
on the indoor unit.
Quick Guide
Inserting the batteries
OPEN
2
3
1
1
Pull out the back cover
of remote control.
2
Insert AAA or R03
batteries.
3
Close the cover.
A
Clock setting
1
Press
, then press
to set the time.
• Press for
approximately 5
seconds to show the
time as 12-hour
(am/pm) or 24-hour.
2
Press
SET
to confi rm.
2
ON
OFF
SET
TIMER
CANCEL
OFF/ON
AIR SWING
TEMP
OFF/ON
MODE
SLEEP
FAN SPEED/
QUIET
POWERFUL/
ECO
AIR CONDITIONER
ON
OFF
TIMER
CANCEL
AIR SWING
SLEEP
FAN SPEED/
QUIET
POWERFUL/
ECO
AIR CONDITIONER
B
A
13
Table of Contents
How to Use
…………………
14-15
To Learn More... ................16
Cleaning the
Air Conditioner
........................
17
Troubleshooting
…………
18-20
Accessories
• Remote control
• AAA or R03 batteries × 2
• Remote control holder
• Screws for remote control
holder × 2
The illustrations in this manual are for
explanation purposes only and may differ
from the actual unit. They are subject to
change without notice.
B
Basic operation
2
Press
MODE
to select
the desired mode.
DRYAUTO COOL
1
Press
OFF/ON
OFF/ON
to start/
stop the operation.
POWER
• When the unit
is ON,
disappears from
the remote control
display.
3
Press TEMP UP, TEMP
DOWN to select the
desired temperature.
TEMP
Up
Down
Selection range:
16.0 °C ~ 30.0 °C /
60 °F ~ 86 °F.
• Press
for
approximately 10 seconds
to show the temperature
as °C or °F.
Thank you for purchasing
Panasonic Air Conditioner.
English
14
How to Use
Upper/Lower direction:
• Do not adjust the fl ap by hand.
* For details operation, refer to “To Learn More...”
Lateral direction:
• For lateral direction, it is
manually adjustable as
shown.
To adjust airfl ow direction
AIR SWING
Upper/Lower
direction
nanoe-G
ECO
ON
OFF
SET
TIMER
CANCEL
OFF/ON
AIR SWING
TEMP
OFF/ON
MODE
SLEEP
FAN SPEED/
QUIET
POWERFUL/
ECO
AIR CONDITIONER
Not used in
normal
operation.
Press to turn
the Wireless
LAN feature
ON or OFF.
Press to restore the
remote control to
default setting.
Indicators
POWER
TIMER
nanoe-G
ECO
(swing)
POWERFUL:
To reach the desired temperature quickly
• This operation is automatically stop after 4 hours.
ECO:
• To reduce power consumption for better energy saving
without sacrifi cing comfort.
To switch between POWERFUL/ECO
POWERFUL/
ECO
(exit setting)
Lateral
direction
To connect to a network
• Press to turn the Wireless LAN feature ON or
OFF.
• For Wireless LAN Module operation setup,
please refer to Setup Instructions Manual.
• If the Wireless LAN LED blinks continuously
and you do not want to use the app, press the
Wireless LAN button to turn it off.
To adjust FAN SPEED and QUIET condition
FAN SPEED:
• When AUTO FAN is selected, the fan speed is adjusted
automatically according to the operation mode.
• Select the lowest fan speed
to have a low noise
operation.
QUIET:
• This operation reduces airfl ow noise.
FAN SPEED/
QUIET
15
See "To Learn More..." for details.
How to Use
Note
SLEEP
,
POWERFUL/
ECO
,
FAN SPEED/
QUIET
,
POWERFUL/
ECO
• Can be selected at the same time.
• Can be activated in all modes.
• POWERFUL, QUIET and FAN SPEED
cannot be selected at the same time.
• This operation provides you with a comfortable environment while sleeping. It will automatically adjust
the sleep pattern temperature during the activation period.
• The indoor unit indicator will dim when this operation is activated. This is not applicable if the indicator
brightness has been manually dimmed.
• This operation is incorporated with the activation timer (0.5, 1, 2, 3, 4, 5, 6, 7, 8 or 9 hours).
• This operation can be set together with timer. Sleep operation has the priority over OFF timer.
• This operation can be cancelled by pressing the respective button until the sleep timer reaches 0.0h.
To maximise comfort while sleeping
SLEEP
• nanoe™-G starts automatically when the unit is turned on with
OFF/ON
OFF/ON
.
• nanoe™-G operation provides clean air by producing great amount of negative ions and distribute
through the discharge airfl ow to capture or deactivate molds, bacteria or viruses.
• This operation can be turned ON or OFF manually by pressing .
• This operation can be activated even when the unit is turned off. In this condition, the fl ap and fan
speed will operate based on remote control setting.
• If power failure occurs during this operation, this operation will be resumes immediately after power
resumes.
To enjoy fresher and cleaner environment
To set the timer
ON
OFF
SET
TIMER
CANCEL
1 2 3
1
Select TIMER ON or
TIMER OFF.
Example:
OFF at 22:00
• Each time pressed:
OFF
(exit setting)
2
Set the time.
3
Confi rm the setting.
SET
• To cancel the timer, press
ON
or
OFF
to select
the respective setting or , then press
CANCEL
.
• If the timer has been cancelled manually or due
to power failure, you can restore the timer again.
Press
ON
or
OFF
to select the respective
setting or , then press
SET
.
• The nearest timer setting is displayed and will
activate in sequence.
• The timer operation follows the clock setting on
the remote control and will repeat daily when
timer has been set. For clock setting, refer to
Quick Guide.
You can set the timer to turn on and off the unit at 2 different preset time.
English
16
To Learn More...
Operation mode
AUTO : The POWER indicator blinks at the initial stage.
The unit will select an operation mode depending on the room temperature.
COOL : Provides effi cient comfort cooling to suit your needs.
DRY : Operates at low fan speed for a gentle cooling operation.
Energy saving temperature setting
You may save energy when operating the unit within the recommended temperature range.
COOL : 26.0 °C ~ 28.0 °C / 79 °F ~ 82 °F.
Air fl ow direction
In COOL/DRY mode:
The horizontal fl ap is fi xed at middle position setting.
Once the temperature is achieved, the horizontal fl ap swings up/down automatically.
In COOL/DRY mode:
The horizontal fl ap swings up/down automatically.
Auto restart control
When power is resumed after a power failure, the operation will restart automatically with the
last operation mode and airfl ow direction.
• This control is not applicable when TIMER is set.
Operating conditions
Use this air conditioner in the temperature range indicated in the table.
Temperature °C (°F)
Indoor Outdoor
DBT WBT DBT WBT
COOL
Max. 32 (89.6) 23 (73.4) 46 (114.8) 26 (78.8)
Min. 16 (60.8) 11 (51.8) 16 (60.8) 11 (51.8)
DBT: Dry bulb temperature, WBT: Wet bulb temperature
17
To Learn More... / Cleaning the Air Conditioner
Cleaning the Air Conditioner
Cleaning has to be carried out at regular
intervals to ensure the unit is at optimal
performance. A dirty unit may cause
malfunction and you may retrieve “H 99”
error code. Consult an authorised dealer.
• Before cleaning, switch off the power
supply and unplug the unit.
• Do not touch the aluminium fi n as the sharp
parts may cause injury.
• Do not use benzine, thinner or scouring
powder.
• Use soap (
pH 7) or neutral household
detergent only.
• Do not use water hotter than 40 °C / 104 °F.
Outdoor unit
Clean the debris that surround
the unit.
Clear any blockage from the
drain pipe.
nanoe
TM
-G Generator
Once every 2 weeks
• Clean with dry cotton bud.
• Do not touch during
operation.
Air fi lters
Once every 2 weeks
• Wash/rinse the fi lters gently
with water to avoid damaging
the surface.
• Dry the fi lters thoroughly under a shade,
away from fi re or direct sunlight.
• Replace any damaged fi lters.
Remove air fi lter Attach air fi lter
Remove from the unit Insert into the unit
Indoor unit
Indoor unit
Do handle the unit surface
with care to avoid scratches
by sharp or rough items (e.g.
fi ngernails, tools, rings, etc).
Wipe the unit gently with a soft
damp cloth.
The coils and fans should be cleaned
periodically by an authorised dealer.
Front panel
Wash gently and dry.
How to remove front panel
nanoe-G
E
CO
2
Slide the
front panel
to right
A
and pull out
B
.
1
Raise up.
B
A
Close it securely
nanoe-G
ECO
2
Match and
push in.
1
Hold horizontally.
3
Close down.
4
Press both ends and center of the front
panel.
n
a
n
oe
-G
E
CO
Aluminium fi nFront panel
Air fi lters nanoe™-G Generator
English

18
Troubleshooting
The following symptoms do not indicate malfunction.
Symptom Cause
POWER indicator blinks before the unit is switched
on.
•
This is the preliminary step to prepare for the TIMER
operation after it has been set.
•
When Timer is set ON, the unit may start earlier (up to 15
minutes) before the actual set time to achieve the desired
temperature on time.
TIMER indicator is always ON.
•
When Timer has been set, the Timer setting repeats daily.
Operation is delayed a few minutes after restarting.
•
The delay is a protection to the unit’s compressor.
Cooling capacity is reduced during lowest fan
speed setting.
•
The lowest fan speed is to have a low noise operation, so
cooling capacity may be reduced depending on the condition.
Increase the fan speed to increase the capacity.
Indoor fan stops occasionally during automatic fan
speed setting.
•
This is to help remove the surrounding odour.
The room has a peculiar odour.
•
This may be due to damp smell emitted by the wall, carpet,
furniture or clothing.
Cracking sound during operation.
•
Changes in temperature caused the unit to expand and
contract.
Water fl owing sound during operation.
•
Refrigerant fl ow inside the unit.
Mist emerges from indoor unit.
•
During cooling operation, the discharged cold air may
condense to water vapour.
Outdoor unit emits water or steam.
•
During cooling operation, condensation occurs on cold pipes
and the condensed water may drip from the outdoor unit.
Discoloration of some plastic parts.
•
Discoloration is subjected to the types of materials used in
plastic parts. It is accelerated when exposed to heat, sun
light, UV light or environmental factors.
After extended use, dust may cover the front panel,
grilles and the wall surrounding the unit.
•
The dust accumulation is due to the air purifi cation effect of
negative ions from nanoe™-G. Remove the dust regularly
with a clean dampened cloth.
Wireless LAN indicator is ON when the unit is OFF.
•
The unit’s wireless LAN connection with the router has been
activated.
Check the following before calling for servicing.
Symptom Check
Operation in COOL mode is not working effi ciently.
•
Set the temperature correctly.
•
Close all doors and windows.
•
Clean or replace the fi lters.
•
Clear any obstruction at the air inlet and air outlet vents.
Noisy during operation.
•
Check if the unit has been installed at an incline.
•
Close the front panel properly.
Remote control does not work.
(Display is dim or transmission signal is weak.)
•
Insert the batteries correctly.
•
Replace weak batteries.
The unit does not work.
•
Check if the circuit breaker is tripped.
•
Check if timers have been set.
The unit does not receive the signal from the
remote control.
•
Make sure the receiver is not obstructed.
•
Certain fl uorescent lights may interfere with the signal
transmitter. Consult an authorised dealer.
nanoe™-G indicator at the indoor unit blinks when
nanoe™-G is activated.
•
Use the remote control to retrieve the error code and consult
an authorised dealer.
19
When...
■The remote control is missing or a malfunction has occurred
AUTO
OFF/ON
1. Raise the front panel.
2. Press AUTO OFF/ON once to use in AUTO mode.
3. To operate forced COOL mode, press AUTO OFF/ON hold until you
hear 1 beep, then release. (This operation shall be performed by service
personnel)
4. Press AUTO OFF/ON again to turn off the unit.
■The indicators are too bright
•
To dim or restore the indicators’ brightness on the unit, press on the remote for 5 seconds.
■ Conducting a seasonal inspection after extended period of non-use
• Check the batteries in the remote control.
• Check that there is no obstruction around the air inlet and outlet vents.
• Use AUTO OFF/ON on the unit to select COOL mode. For details, refer “The remote control
is missing or a malfunction has occurred” above. After 15 minutes of operation, it is normal
to have the following temperature difference between the air inlet and outlet vents:
COOL: ≥ 8 °C / 14.4 °F
■ The units will not be used for an extended period
• Activate nanoe™-G mode for 2~3 hours to remove any moisture left in the internal parts
thoroughly. This is to prevent mould growth.
• Turn off the power supply and unplug the unit.
• Remove the batteries from the remote control.
NON SERVICEABLE CRITERIAS
TURN OFF THE POWER SUPPLY AND UNPLUG THE UNIT. Then consult an authorised
dealer in the following conditions:
• Abnormal noise during operation.
• Water/foreign particles have entered the remote control.
• Water is leaking from the indoor unit.
• The circuit breaker switches off frequently.
• The power cord becomes unnaturally warm.
• The switches or buttons are not functioning properly.
TroubleshootingEnglish
20
Troubleshooting
How to retrieve error codes
If the unit stops and the TIMER indicator blinks, use the remote control to retrieve the error code.
ON
OFF
SET
TIMER
CANCEL
ON
O
FF
S
ET
TIMER
C
AN
C
E
L
Press for
5 seconds
Press for 5
seconds to
quit checking
Press until you hear beep
sound, then write down the
error code
2
1
3
Turn the unit off and
inform the error code to an
authorised dealer.
4
•
For certain errors, you may restart the unit for limited operation if there are 4 beeps when operation starts.
Diagnostic
display
Abnormality/Protection
control
H 00
No memory of failure
H 11
Indoor/outdoor abnormal
communication
H 12
Indoor unit capacity unmatched
H 14
Indoor intake air temperature sensor
abnormality
H 15
Outdoor compressor temperature
sensor abnormality
H 16
Outdoor current transformer (CT)
abnormality
H 17
Outdoor suction temperature sensor
abnormality
H 19
Indoor fan motor mechanism lock
H 21
Indoor fl oat switch operation
abnormality
H 23
Indoor heat exchanger temperature
sensor 1 abnormality
H 24
Indoor heat exchanger temperature
sensor 2 abnormality
H 25
Indoor ion device abnormality
H 26
Minus ION abnormality
H 27
Outdoor air temperature sensor
abnormality
H 28
Outdoor heat exchanger temperature
sensor 1 abnormality
H 30
Outdoor discharge pipe temperature
sensor abnormality
H 31
Abnormal swimming pool sensor
H 32
Outdoor heat exchanger temperature
sensor 2 abnormality
H 33
Indoor/outdoor misconnection
abnormality
H 34
Outdoor heat sink temperature sensor
abnormality
H 35
Indoor/outdoor water adverse current
abnormality
H 36
Outdoor gas pipe temperature
sensor abnormality
H 37
Outdoor liquid pipe temperature
sensor abnormality
H 38
Indoor/outdoor mismatch (brand code)
H 39
Abnormal indoor operating unit or
standby units
Diagnostic
display
Abnormality/Protection
control
H 41
Abnormal wiring or piping connection
H 50
Ventilation fan motor locked
H 51
Ventilation fan motor locked
H 52
Left-right limit switch fi xing abnormality
H 58
Indoor gas sensor abnormality
H 59
Eco sensor abnormality
H 64
Outdoor high pressure sensor
abnormality
H 67
nanoe abnormality
H 70
Light sensor abnormality
H 71
DC cooling fan inside control board
abnormality
H 72
Abnormality tank temperature sensor
H 79
Wireless LAN module write error
H 85
Abnormal communication between
indoor & wireless LAN module
H 97
Outdoor fan motor mechanism lock
H 98
Indoor high pressure protection
H 99
Indoor operating unit freeze protection
F 11
4-way valve switching abnormality
F 16
Total running current protection
F 17
Indoor standby units freezing
abnormality
F 18
Dry circuit blocked abnormality
F 87
Control box overheat protection
F 90
Power factor correction (PFC)
circuit protection
F 91
Refrigeration cycle abnormality
F 93
Outdoor compressor abnormal
revolution
F 94
Compressor discharge pressure
overshoot protection
F 95
Outdoor cooling high pressure
protection
F 96
Power transistor module overheating
protection
F 97
Compressor overheating protection
F 98
Total running current protection
F 99
Outdoor direct current (DC) peak
detection
* Some error code may not be applicable to your model. Consult an authorised dealer for clarifi cation.

21
Memo
TroubleshootingEnglish

Memo

Memo

Printed in Malaysia
ACXF55-37381
SS0723-1
Panasonic Corporation
1006, Oaza Kadoma, Kadoma City,
Osaka 571-8501, Japan
Website: http://www.panasonic.com
© Panasonic Corporation 2023