Loading ...
Loading ...
Loading ...

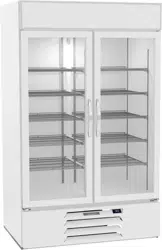
User Manual for MMR Refrigerators Beverage-Air
Rev. 10/20 Beverage-Air 11
This is a cord-connected unit, and must be connected to its own dedicated power supply. Check the dataplate on the
machine to conrm the voltage and per the dataplate use the correct fuses or HACR circuit breakers.
Note: Do not connect to GFI / GFCI outlets. Connection to that type of outlet can result in product loss due to
unsafe cabinet temperature when GFI device trips from moisture.
Power Cord
This 115 volt model is equipped with a cord and 5-15P plug.
If the power cord becomes damaged, it must be replaced
with the identical cord.
Follow All National and Local Codes
This Unit Must Be Grounded. Do not use extension cords
and do not disable or by-pass ground prong on electrical
plug.
Initial Start Up
Plug the power cord into the proper power supply.
The cabinet will soon begin to blow warm air out of the
top area, and cool air will ow from the inside blower.
The cabinet temperature has been set at the factory and
should not need adjustment, however if it was changed,
the standard setting is 38º F.
Cautions
Care must be taken whenever moving or servicing the
unit. The refrigerant is contained in a sealed system, but if
released it may be ammable.
Door Reversal Instructions
1. Remove hinge cover.
2. Remove door from the unit including the hinge
mounting brackets
3. Remove white hole covers from the side of the door
opening you would like the hinges to be located (do
not throw away).
4. On the bottom of the door the same hole plugs are
present and need to be removed.
5. Take the hole plugs and insert them into the screw
holes where the hinges were originally located on the
unit.
6. Install the hinge bracket upright on the unit. The
thick portion of the hinge bracket should be on the
bottom as you mount them.
7. The door portion of the hinges need to be removed
and rotated 180 degree and remounted.
8. Install the hole plugs that were removed from the
bottom of the door into the holes where the handle
was rst mounted.
9. Slide door back into position and gently lower into the
white pivot cam.
10. Replace hinge cover.
ELECTRICAL
Loading ...
Loading ...
Loading ...