
USE & CARE MANUAL
LRG
MODELS

USE AND CARE MANUAL
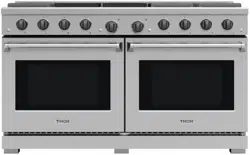
GAS RANGES
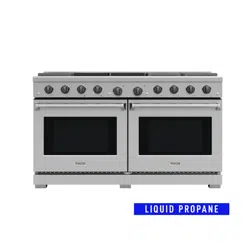
LRG60E | LRG60ELP
TABLE OF CONTENTS
1. WARNINGS ...................................................................................................................... 1
2. WELCOME ....................................................................................................................... 2
3. BEFORE YOU START ....................................................................................................... 3
4. SAFETY AND WARNINGS ................................................................................................ 4
5. GAS SUPPLY REQUIREMENTS ....................................................................................... 10
6. DIMENSIONS AND CLEARANCES ...............................................................................11
7. ELECTRIC POWER SUPPLY REQUIREMENTS ............................................................. 14
8. ELECTRICAL GROUNDING INSTRUCTIONS ................................................................ 15
9. CONNECT RANGE TO GAS SUPPLY ............................................................................ 15
10. FIRST USE ................................................................................................................... 17
11. COOKTOP SAFETY GUIDELINES .................................................................................. 17
12. OPERATING THE OVEN ................................................................................................ 23
TABLE OF CONTENTS
13. CLEANING INSTRUCTIONS ......................................................................................... 30
14. REMOVING AND REPLACING THE OVEN DOOR ........................................................... 33
15. TROUBLESHOOTING GUIDE ............................................................................................ 35
16. WARRANTY&SERVICE ................................................................................................ 39
1.WARNINGS
WARNING
WHAT TO DO IF YOU SMELL GAS
•
•
•
•
•
WARNING:
Never Operate the Top Surface Cooking Section of this Appliance Unattended.
•
•
DO NOT ATTEMPT TO EXTINGUISH AN OIL/GREASE FIRE WITH WATER.
WARNINGS
1

2. Welcome
LRG60E \ LRG60ELP
WELCOME
2
3. Before you start
•
•
•
•
•
•
BEFORE YOU START
3
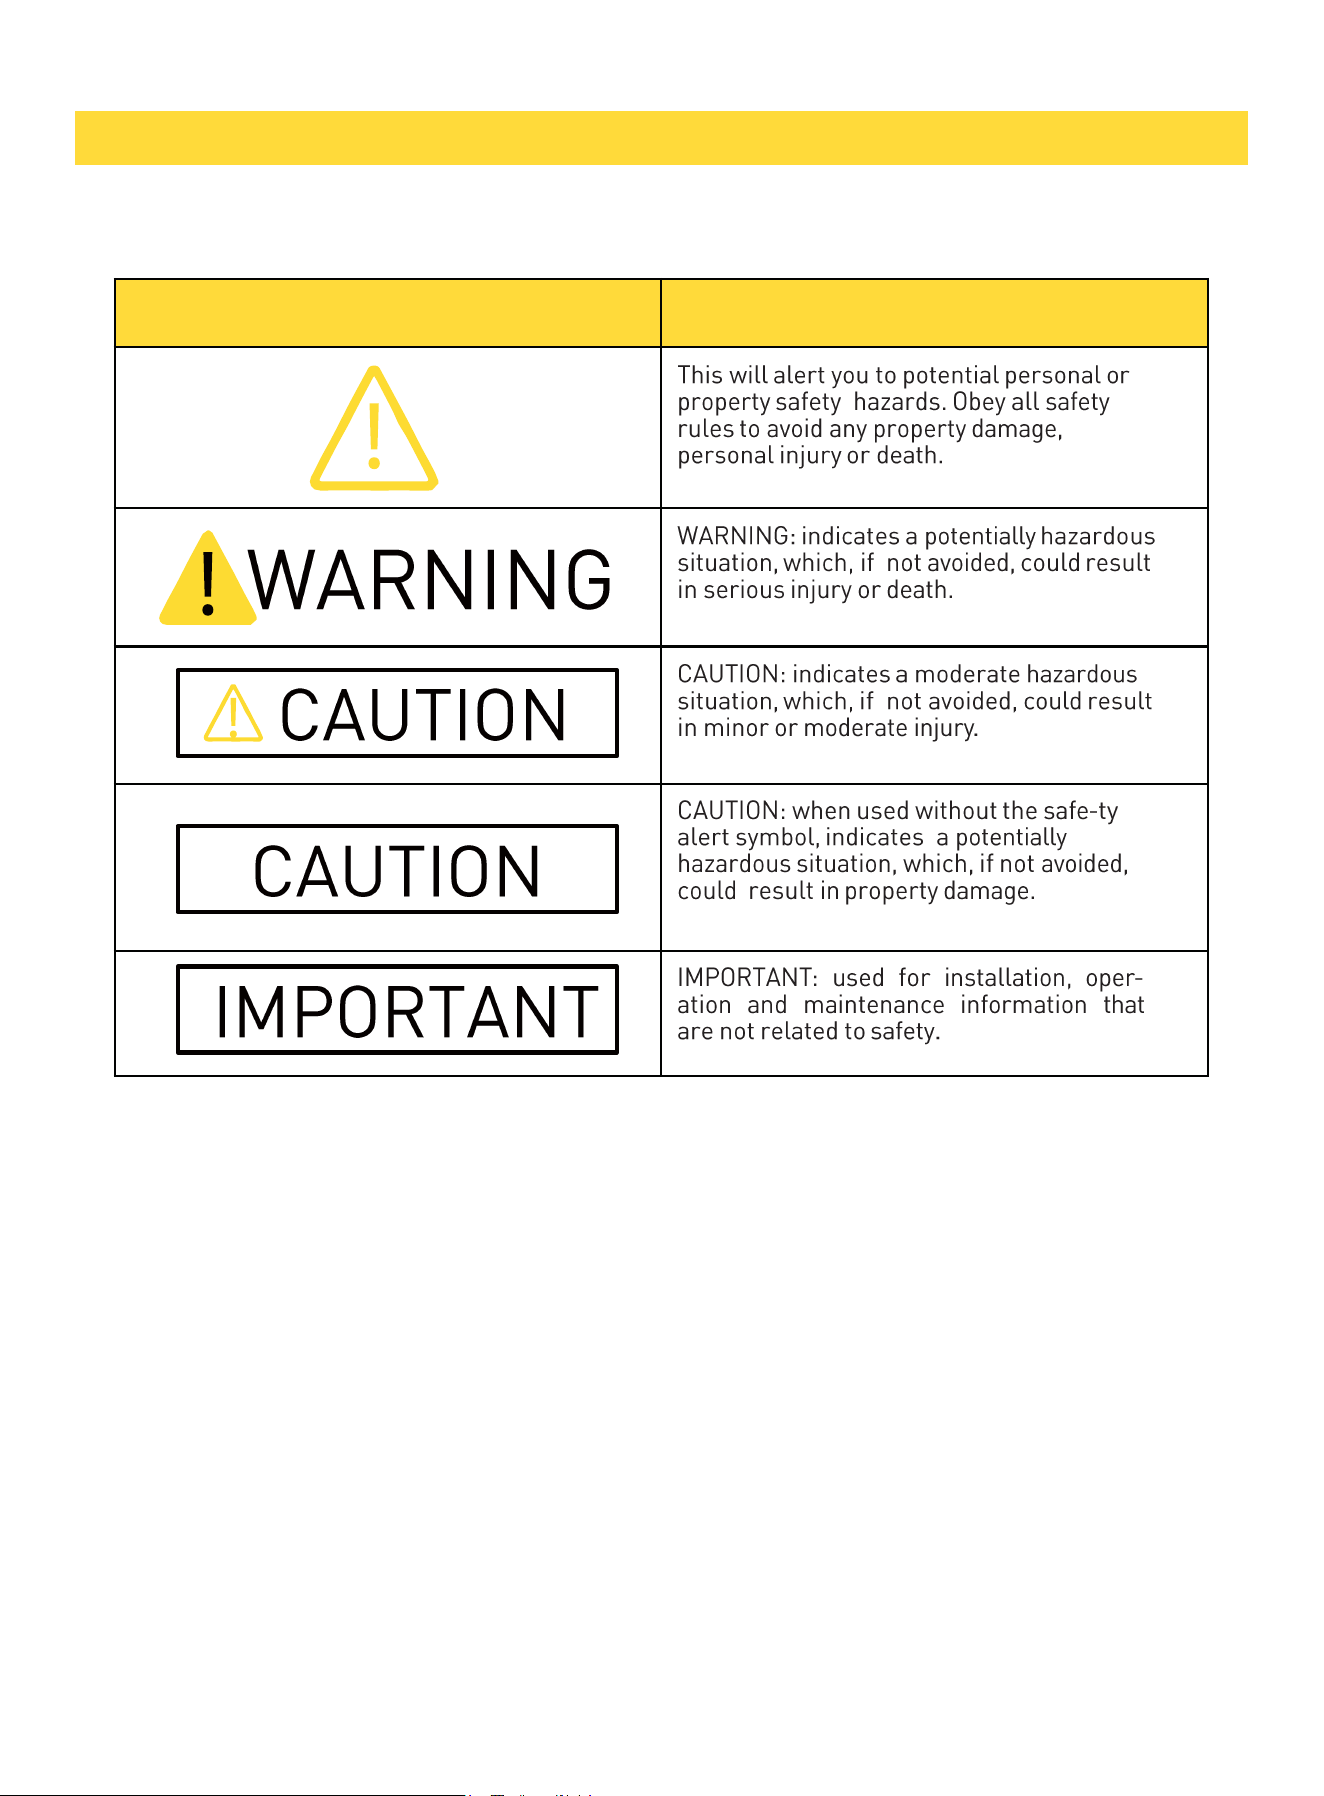
SYMBOL DEFINITION
4. Safety and Warnings
SAFETY AND WARNINGS
4
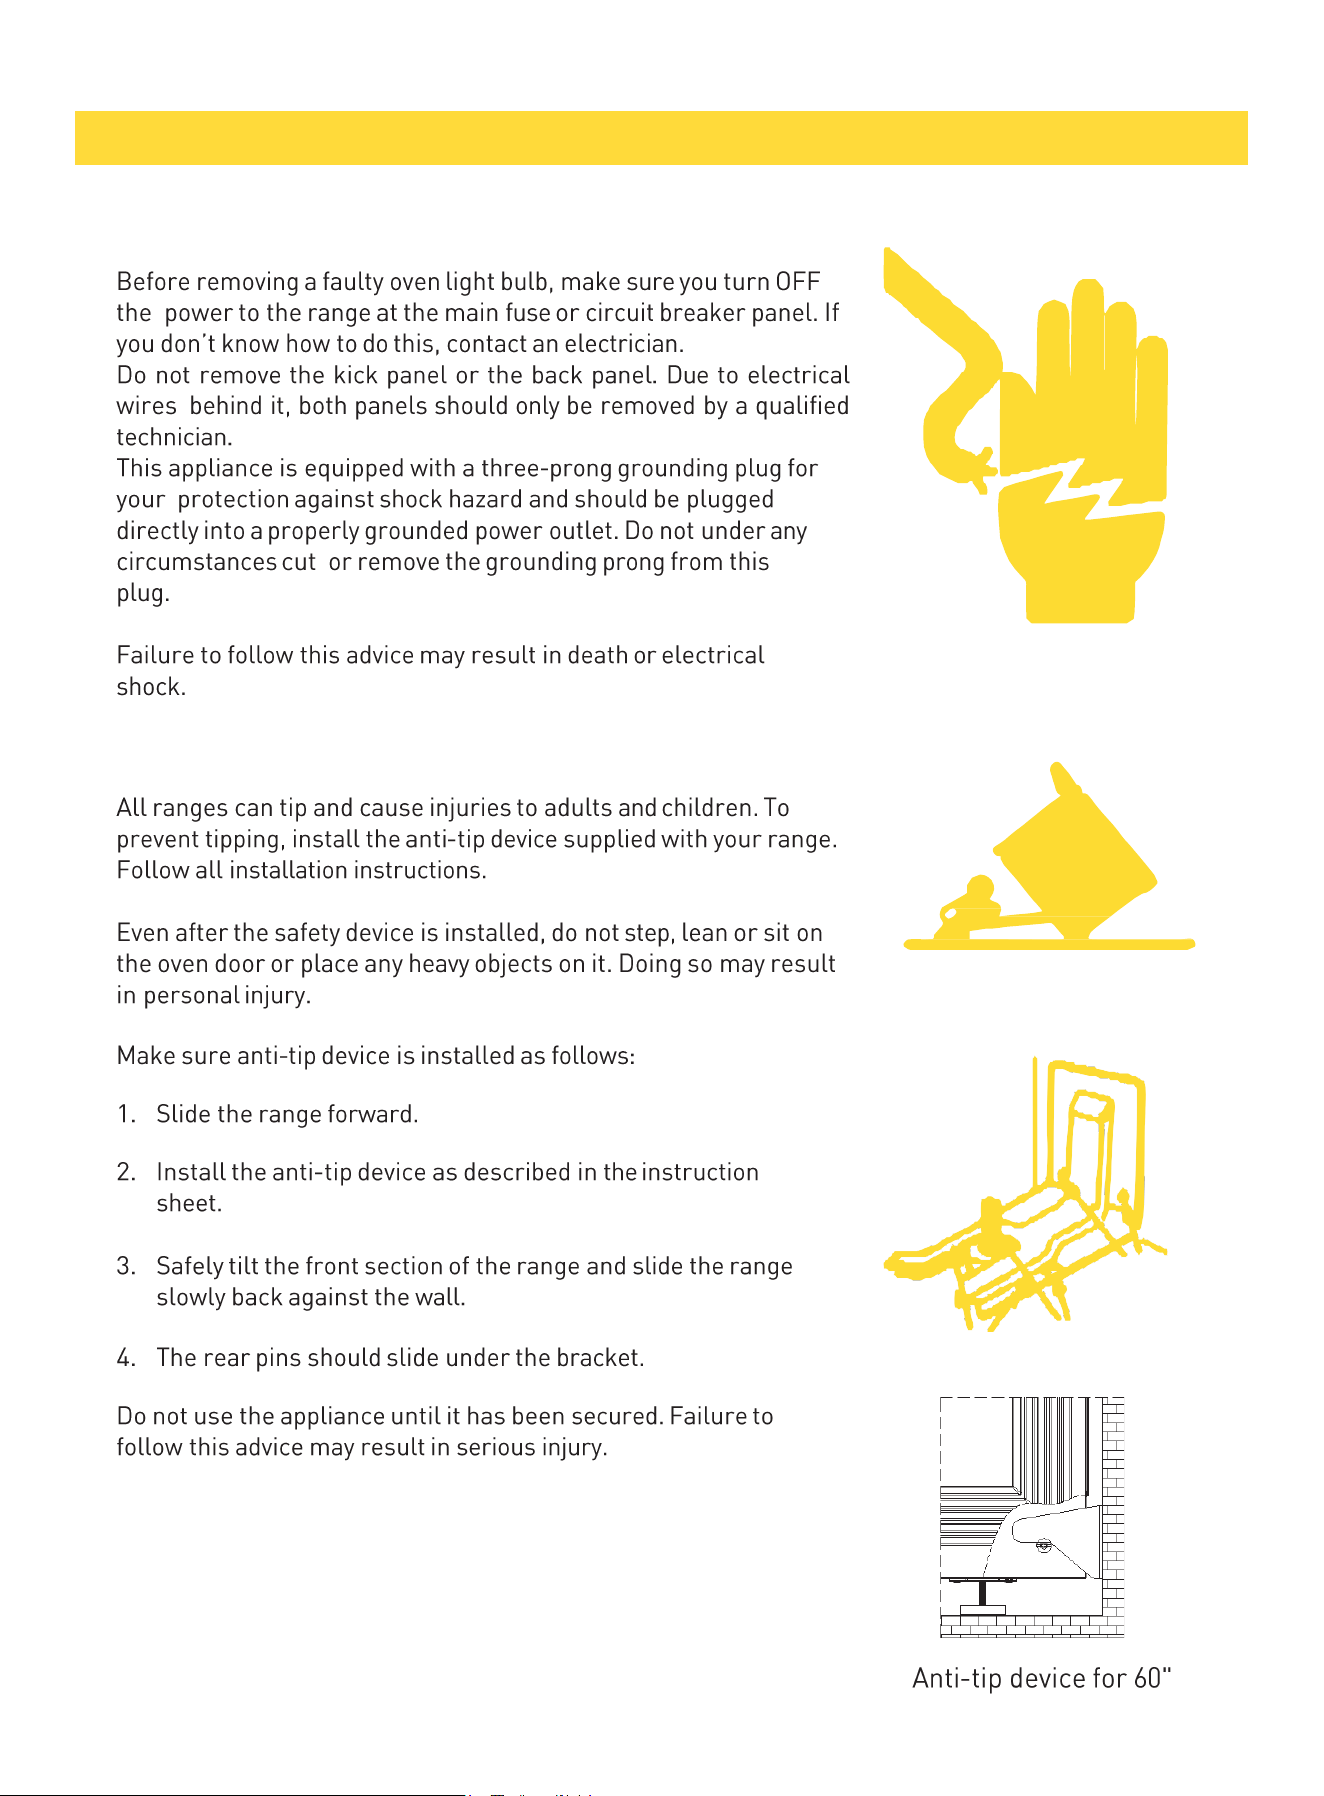
Electrical Shock Hazard
Tipping Hazard
SAFETY AND WARNINGS
5
Explosion Hazard
Fire Hazard
SAFETY AND WARNINGS
6

Poisoning Hazard
Hot Surface Hazard
Other Safety Tips
SAFETY AND WARNINGS
7
SAFETY AND WARNINGS
8
SAFETY AND WARNINGS
9
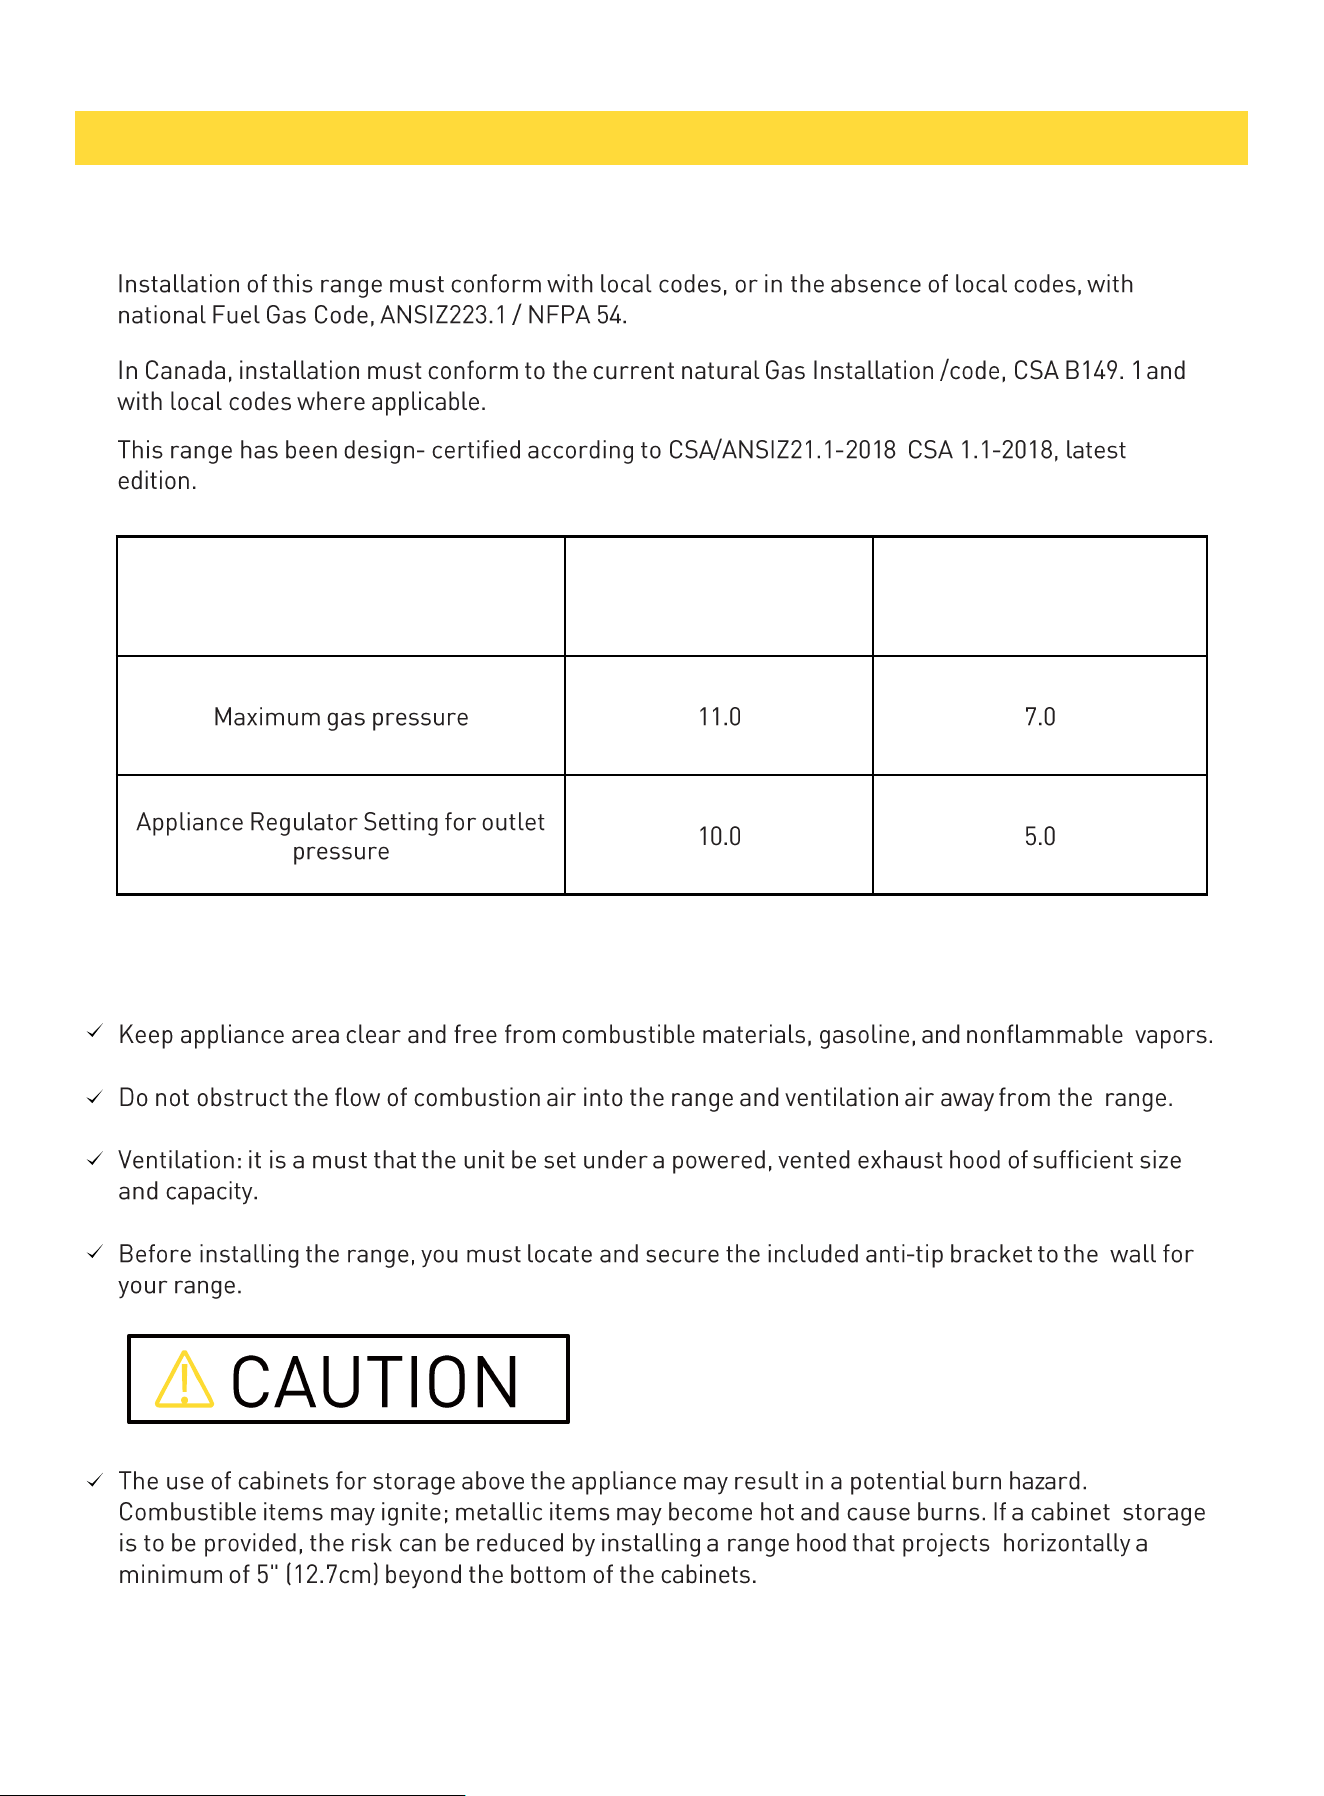
5. Gas Supply Requirements
·
Safety Tips for Gas Operation
GAS SUPPLY REQUIREMENTS
Reading
LP in. w.c. NG (Natural Gas) in. w.c
10
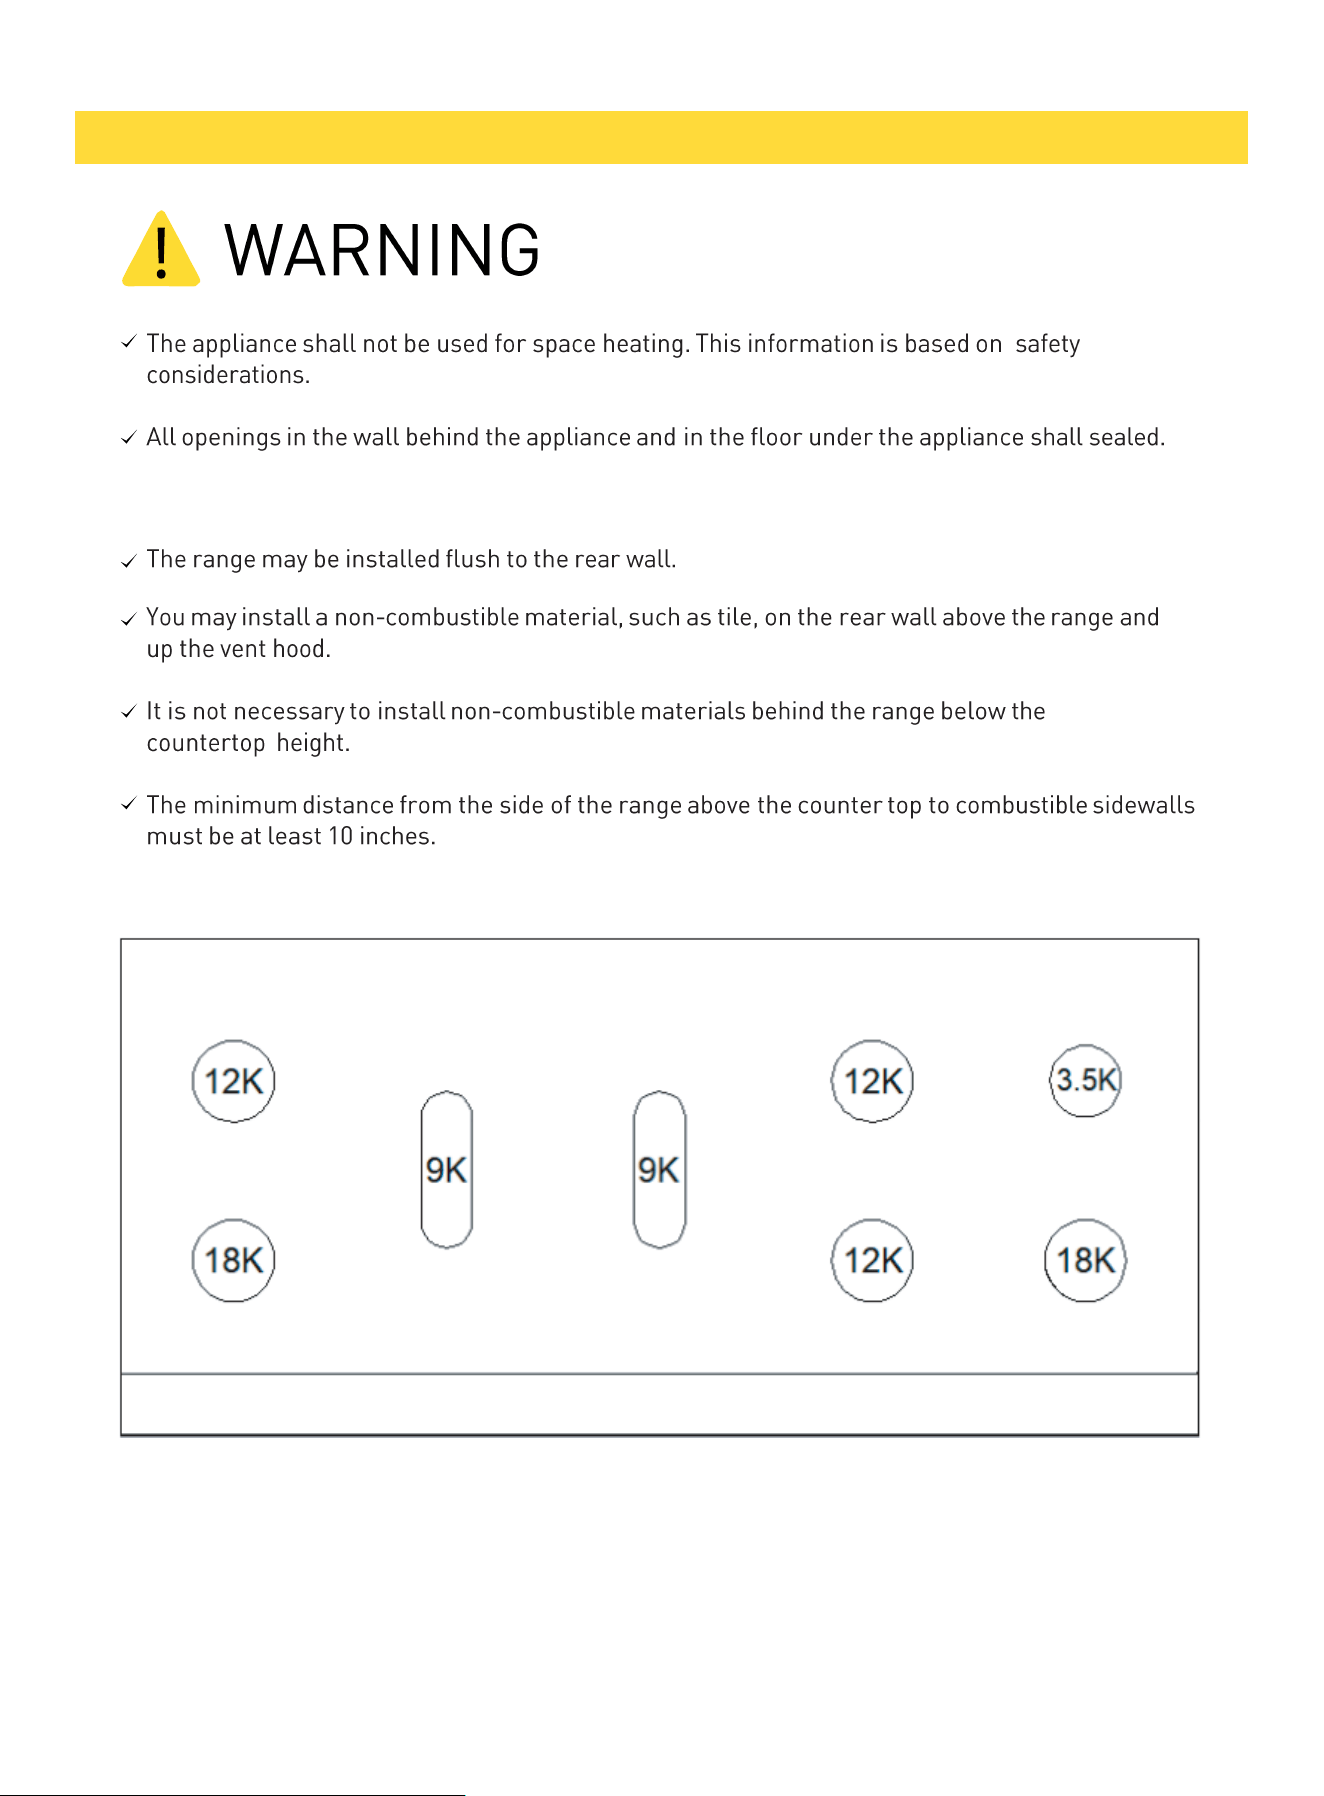
6. Dimensions and Clearances
Btu Design
60"
DIMENSIONS AND CLEARANCE
11
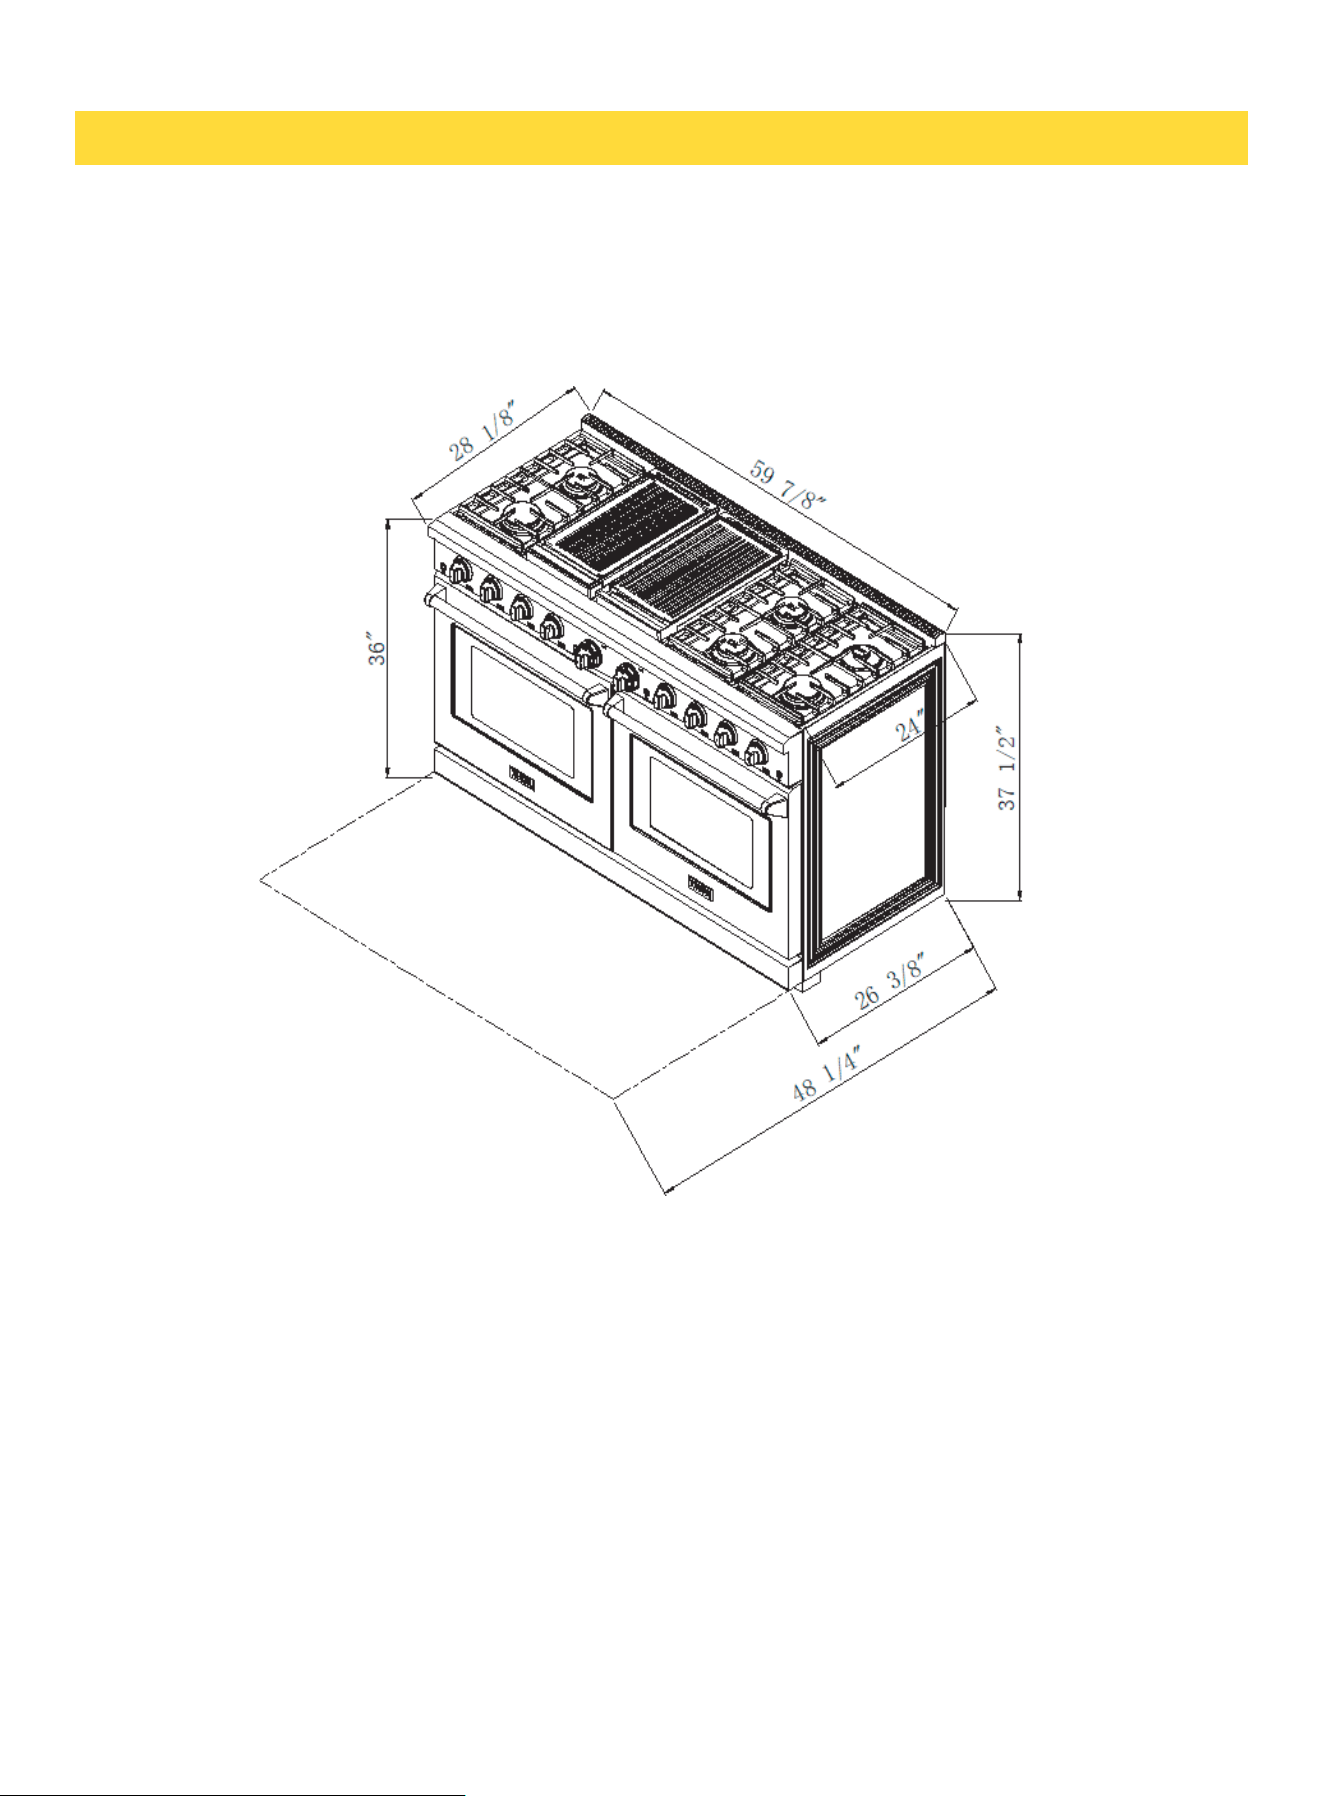
Gas range dimensions
60"
DIMENSIONS AND CLEARANCE
12
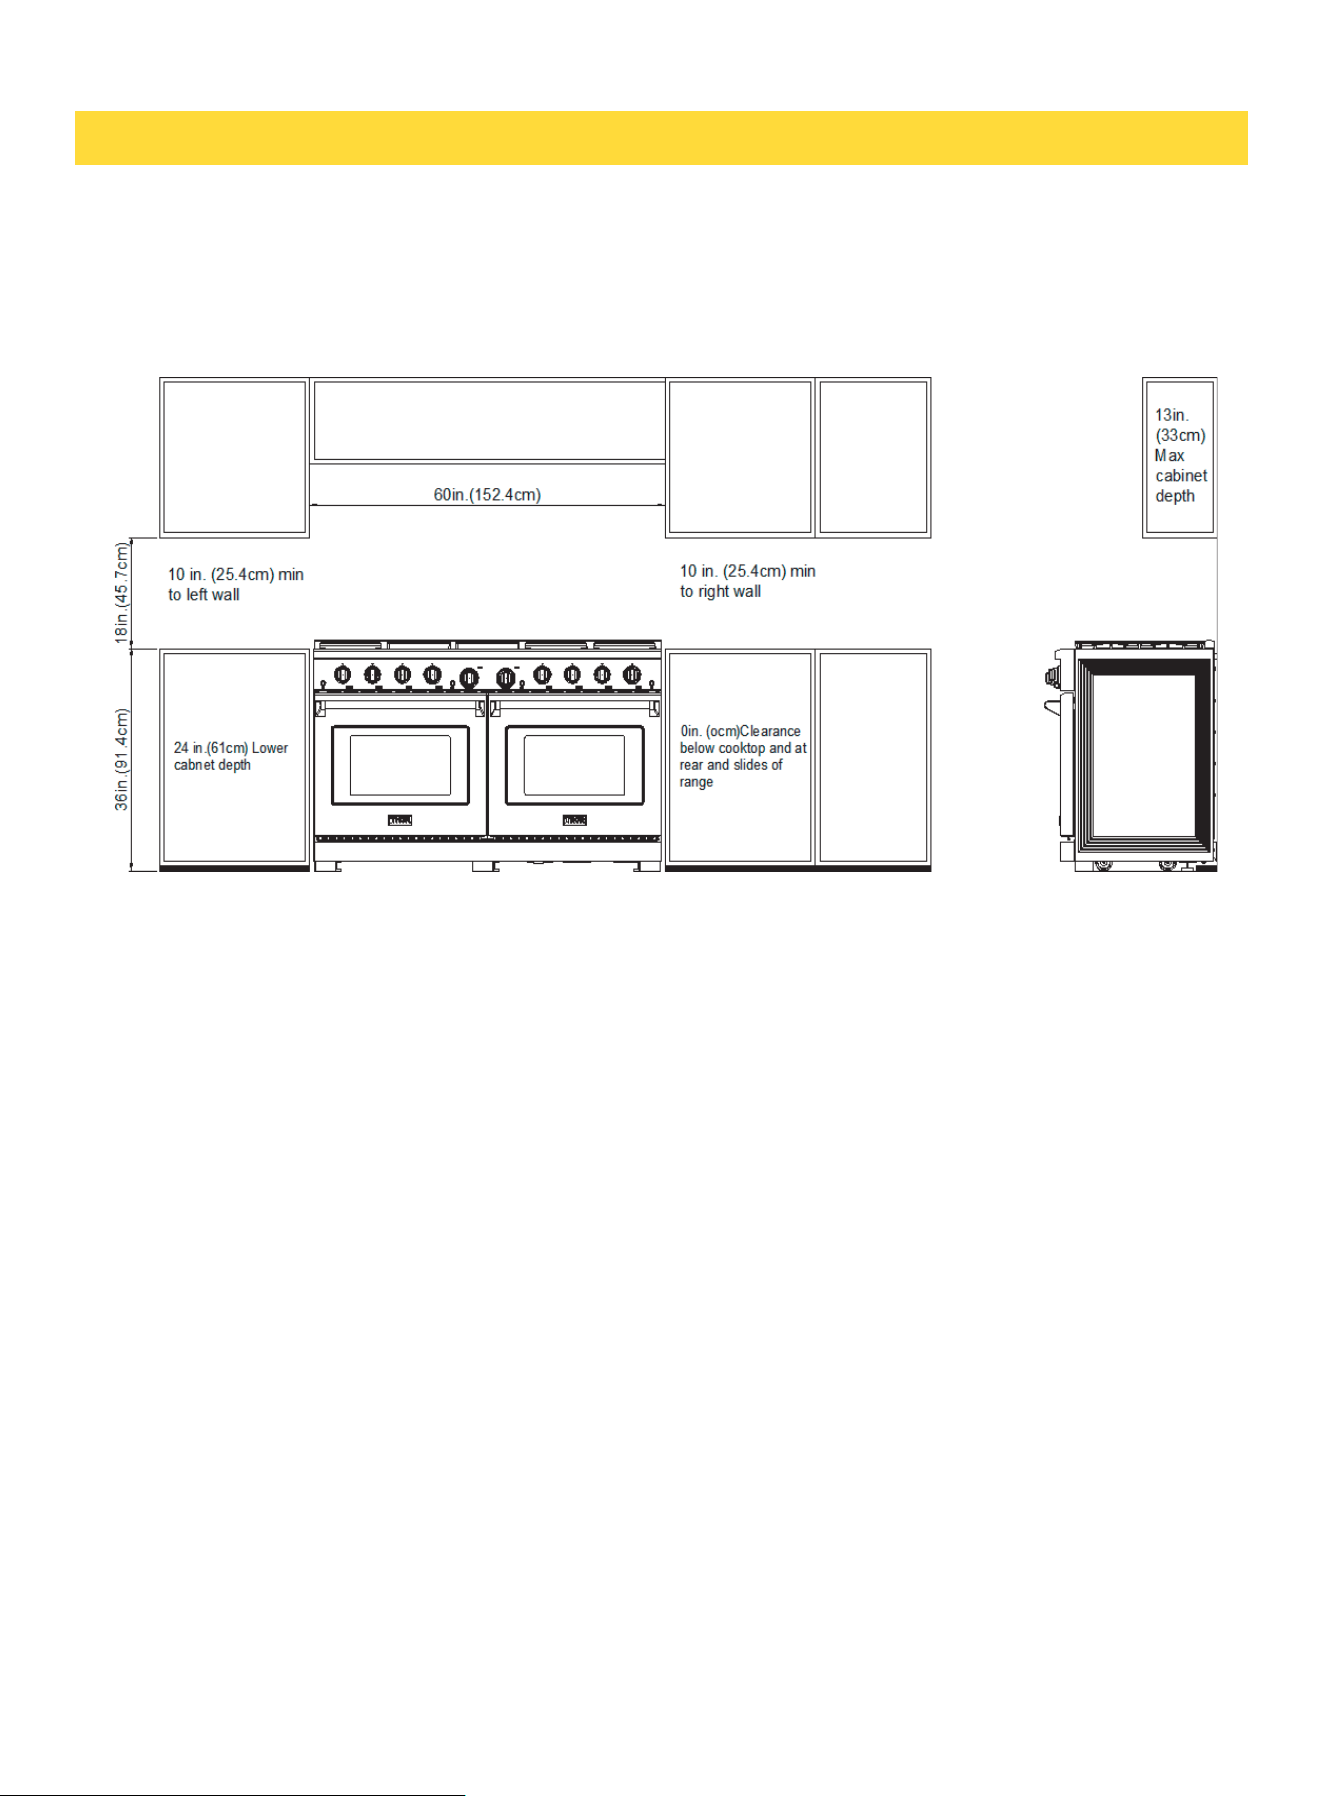
Gas range clearance
60"
DIMENSIONS AND CLEARANCE
13
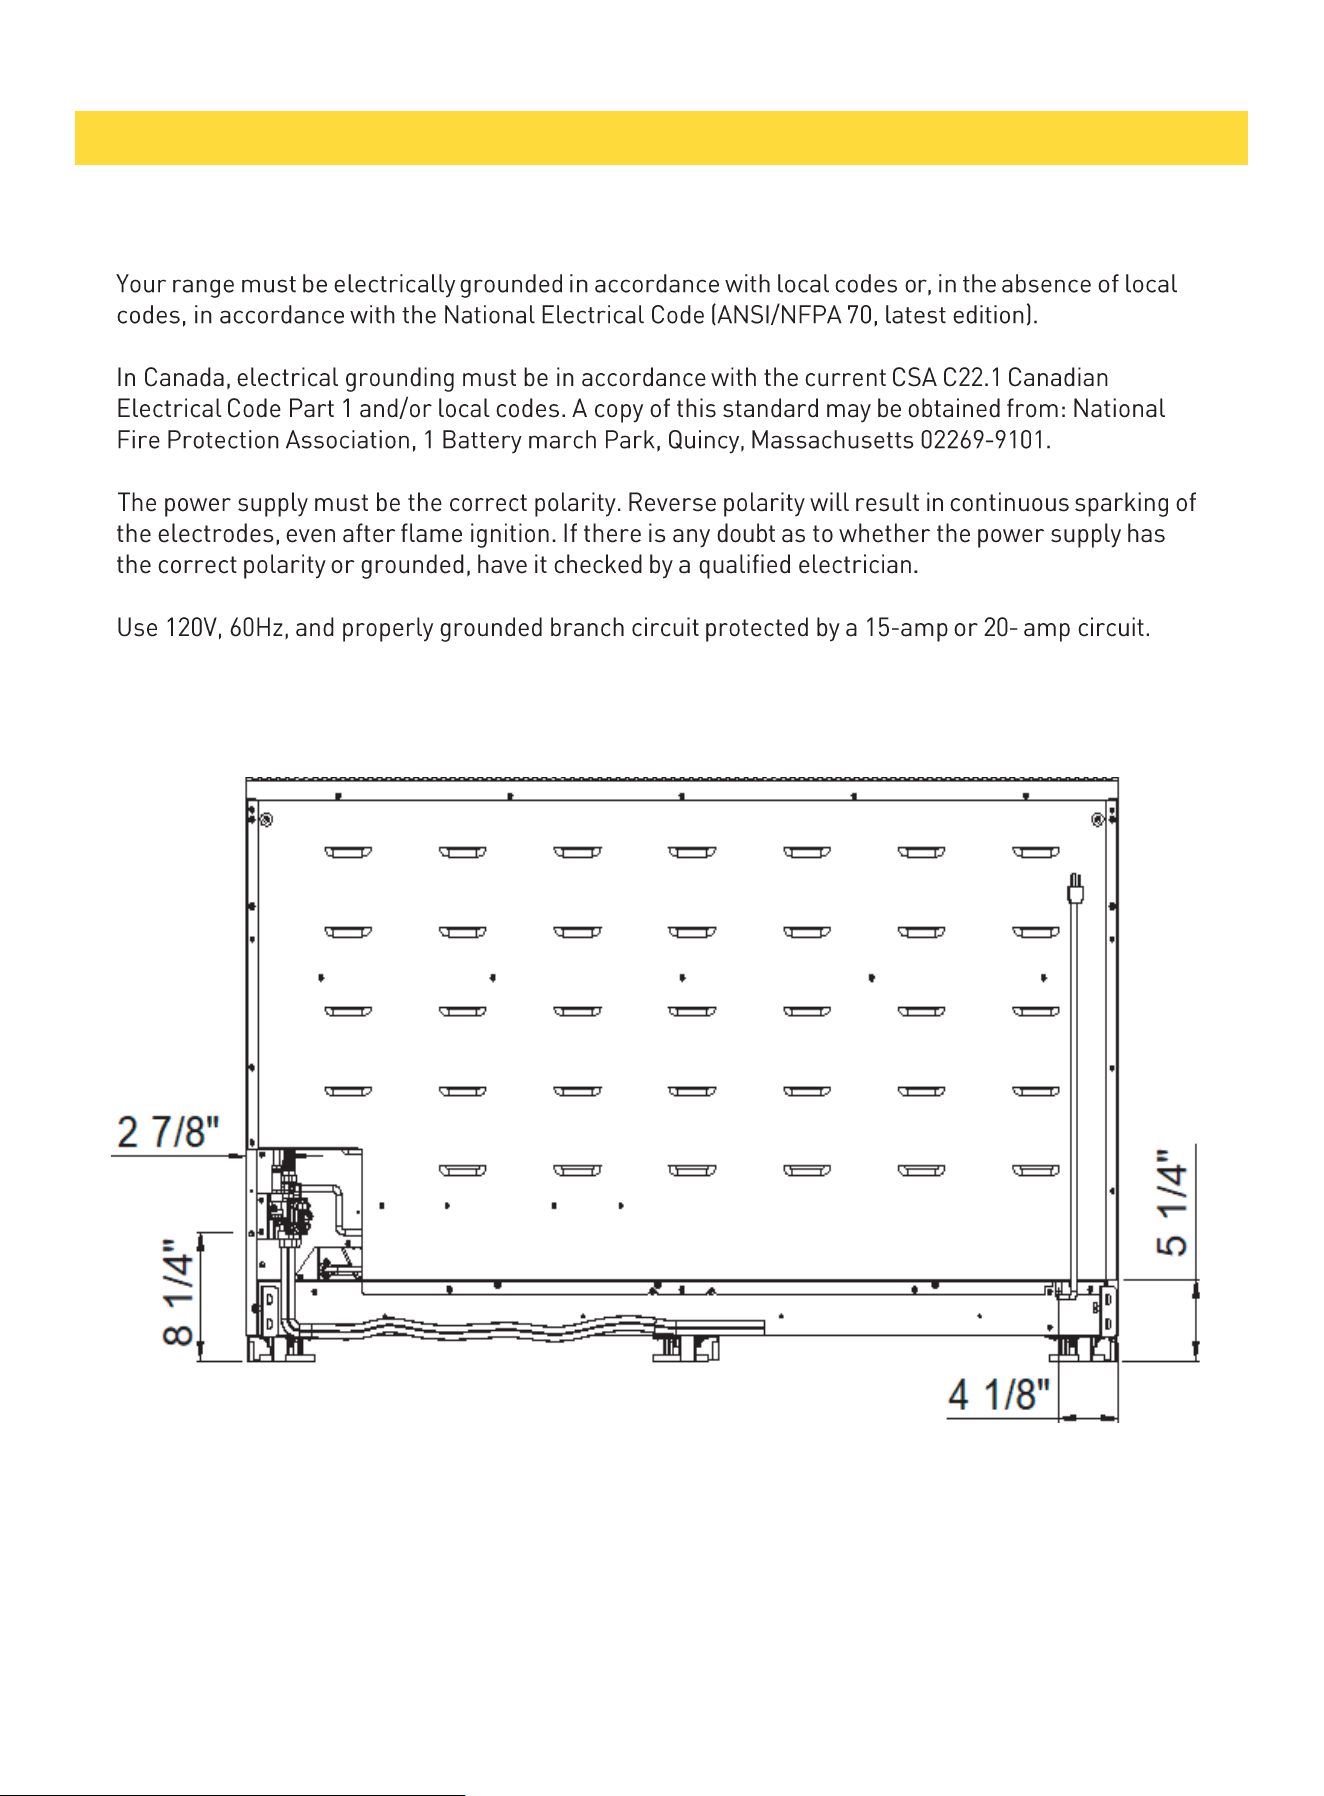
7. Electric Power Supply Requirements
Installation for 60" Gas Range
ELECTRIC POWER SUPPLY REQUIREMENTS
14
8. Electrical Grounding Instructions
9. Connect Range to Gas Supply
ELECTRICAL GROUNDING INSTRUCTIONS
15
CONNECT RANGE TO GAS SUPPLY
16
10. First Use
11. Cooktop Safety Guidelines
FIRST USE
17
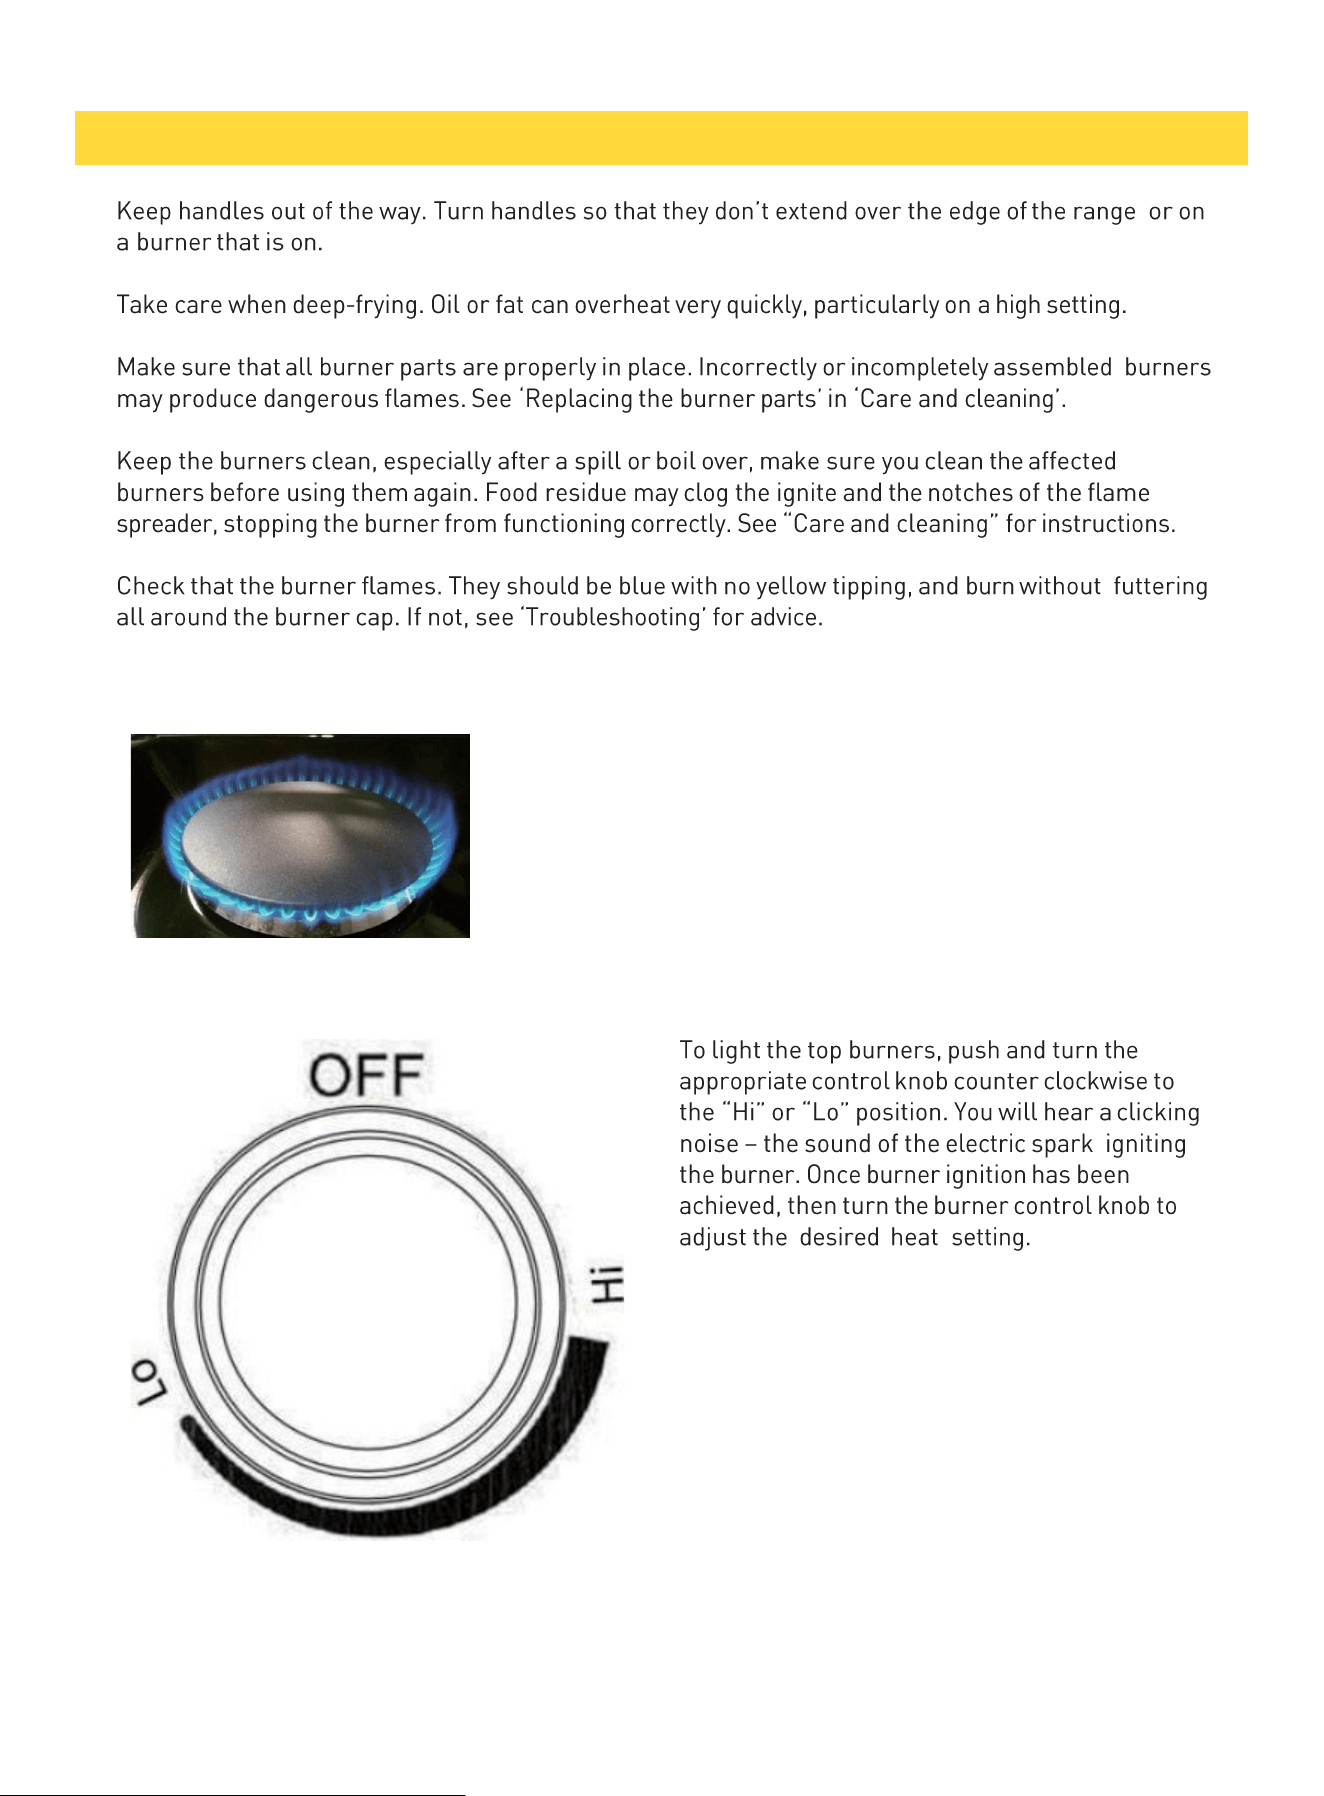
Surface Burner Ignition
COOKTOP SAFETY GUIDELINES
18
NOTE:
Simmer and Boil
Flame Size
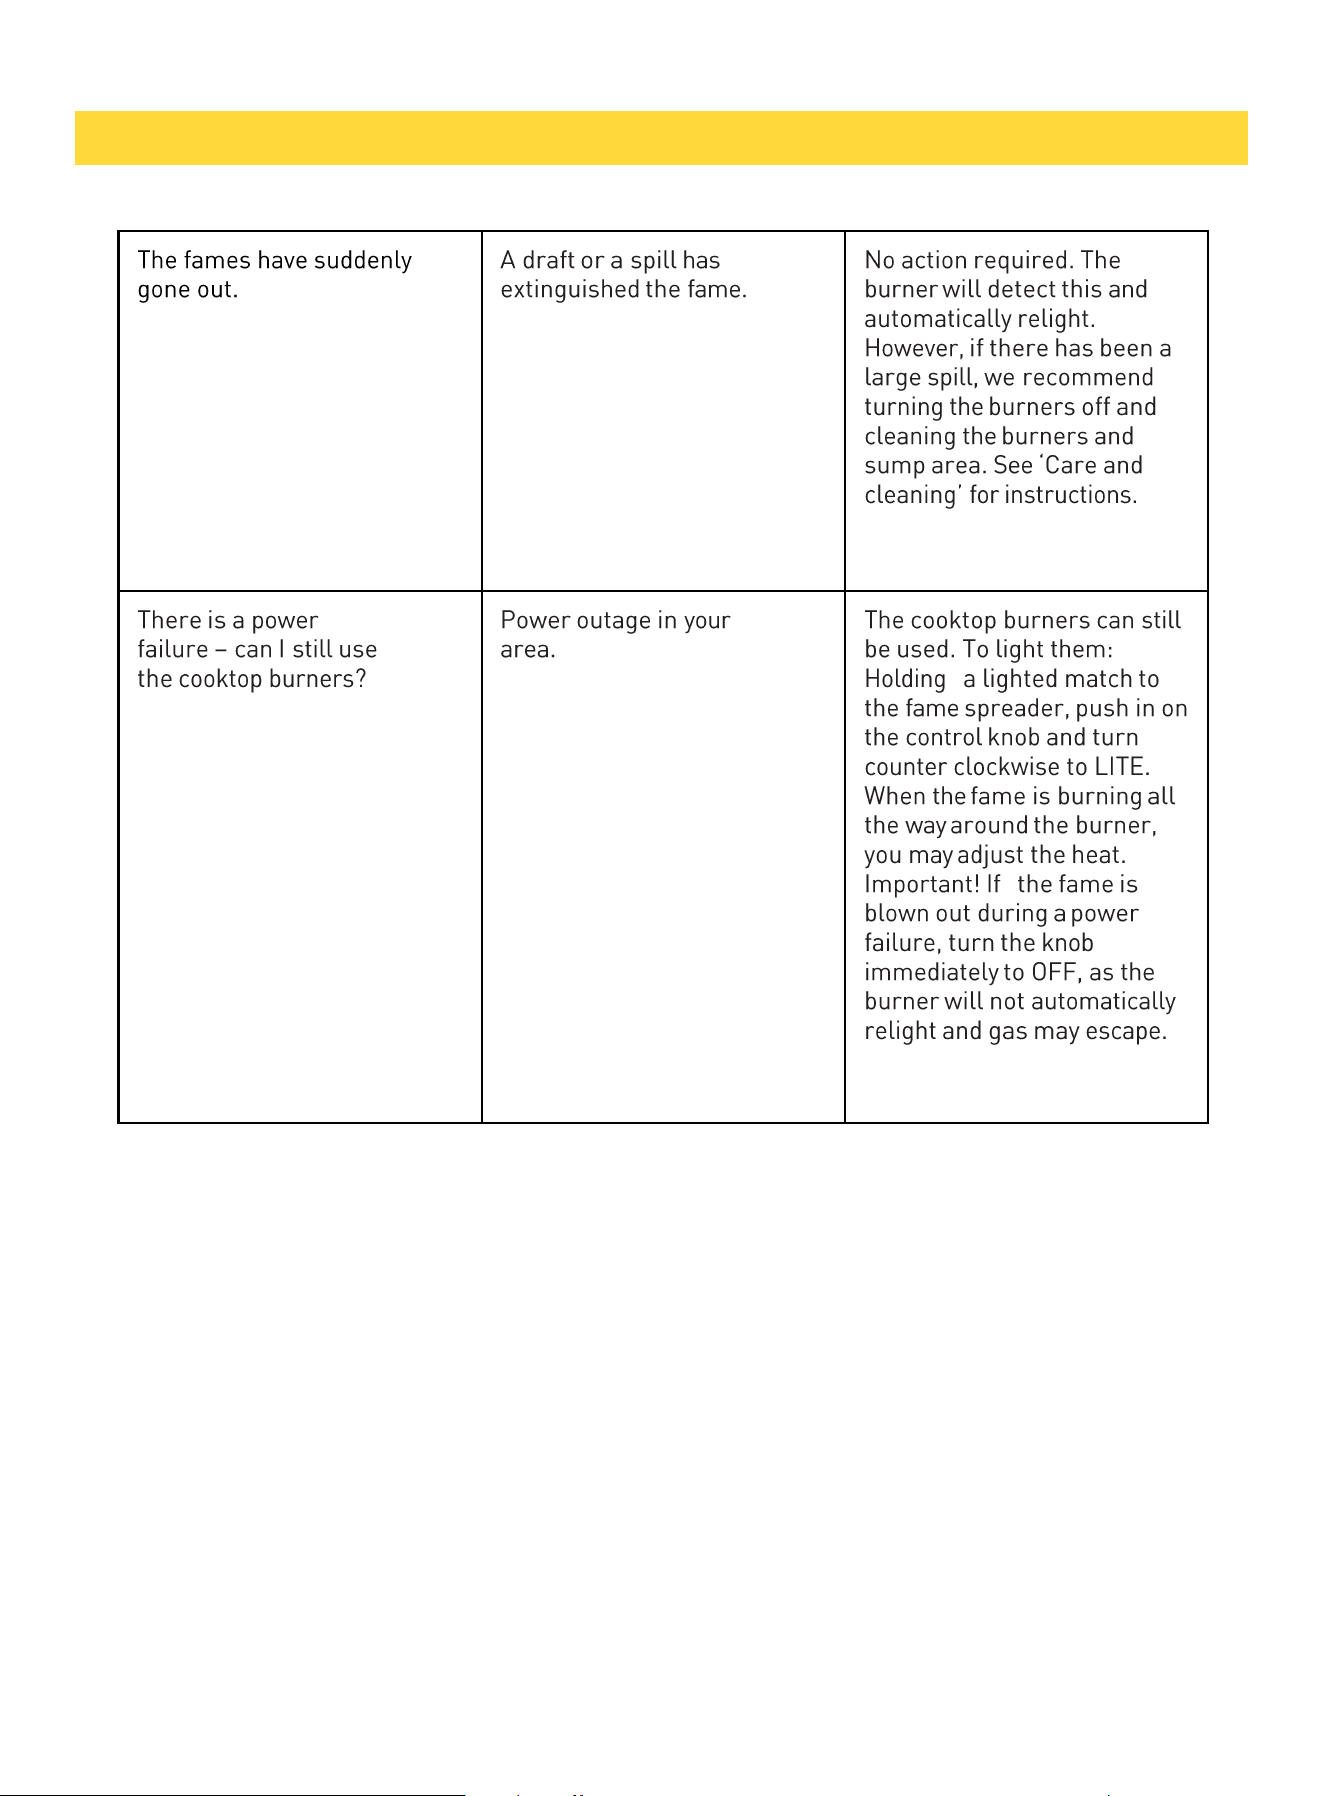
Power Failure
Cooktop
COOKTOP SAFETY GUIDELINES
19
Burner Grates
NEVER use this appliance as a space heater to heat or warm the room. Doing so may result in
carbon monoxide poisoning and overheating of the oven.
COOKTOP SAFETY GUIDELINES
20
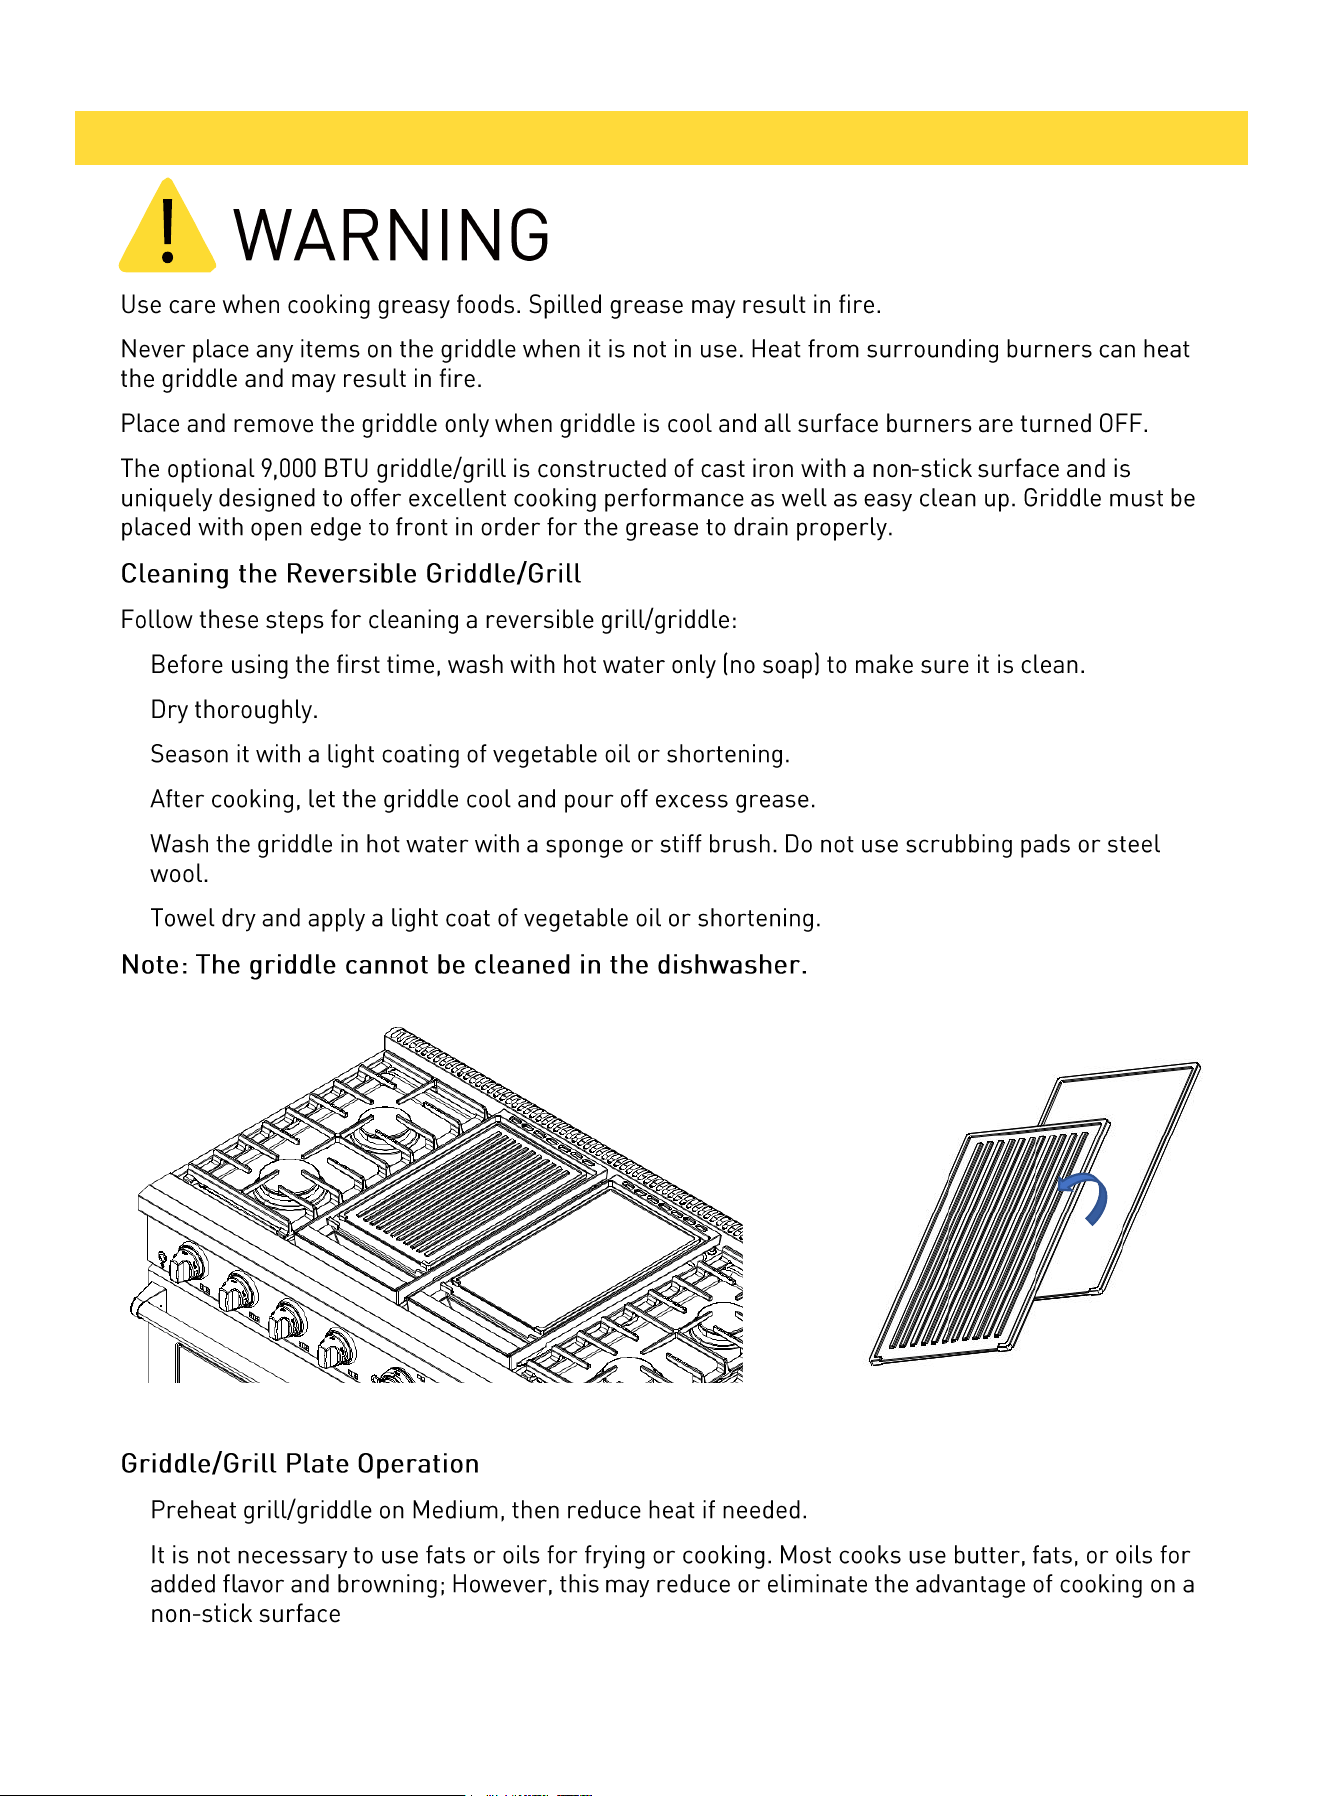
Reversible
•
•
•
•
•
•
•
•
Fire Hazard
COOKTOP SAFETY GUIDELINES
21
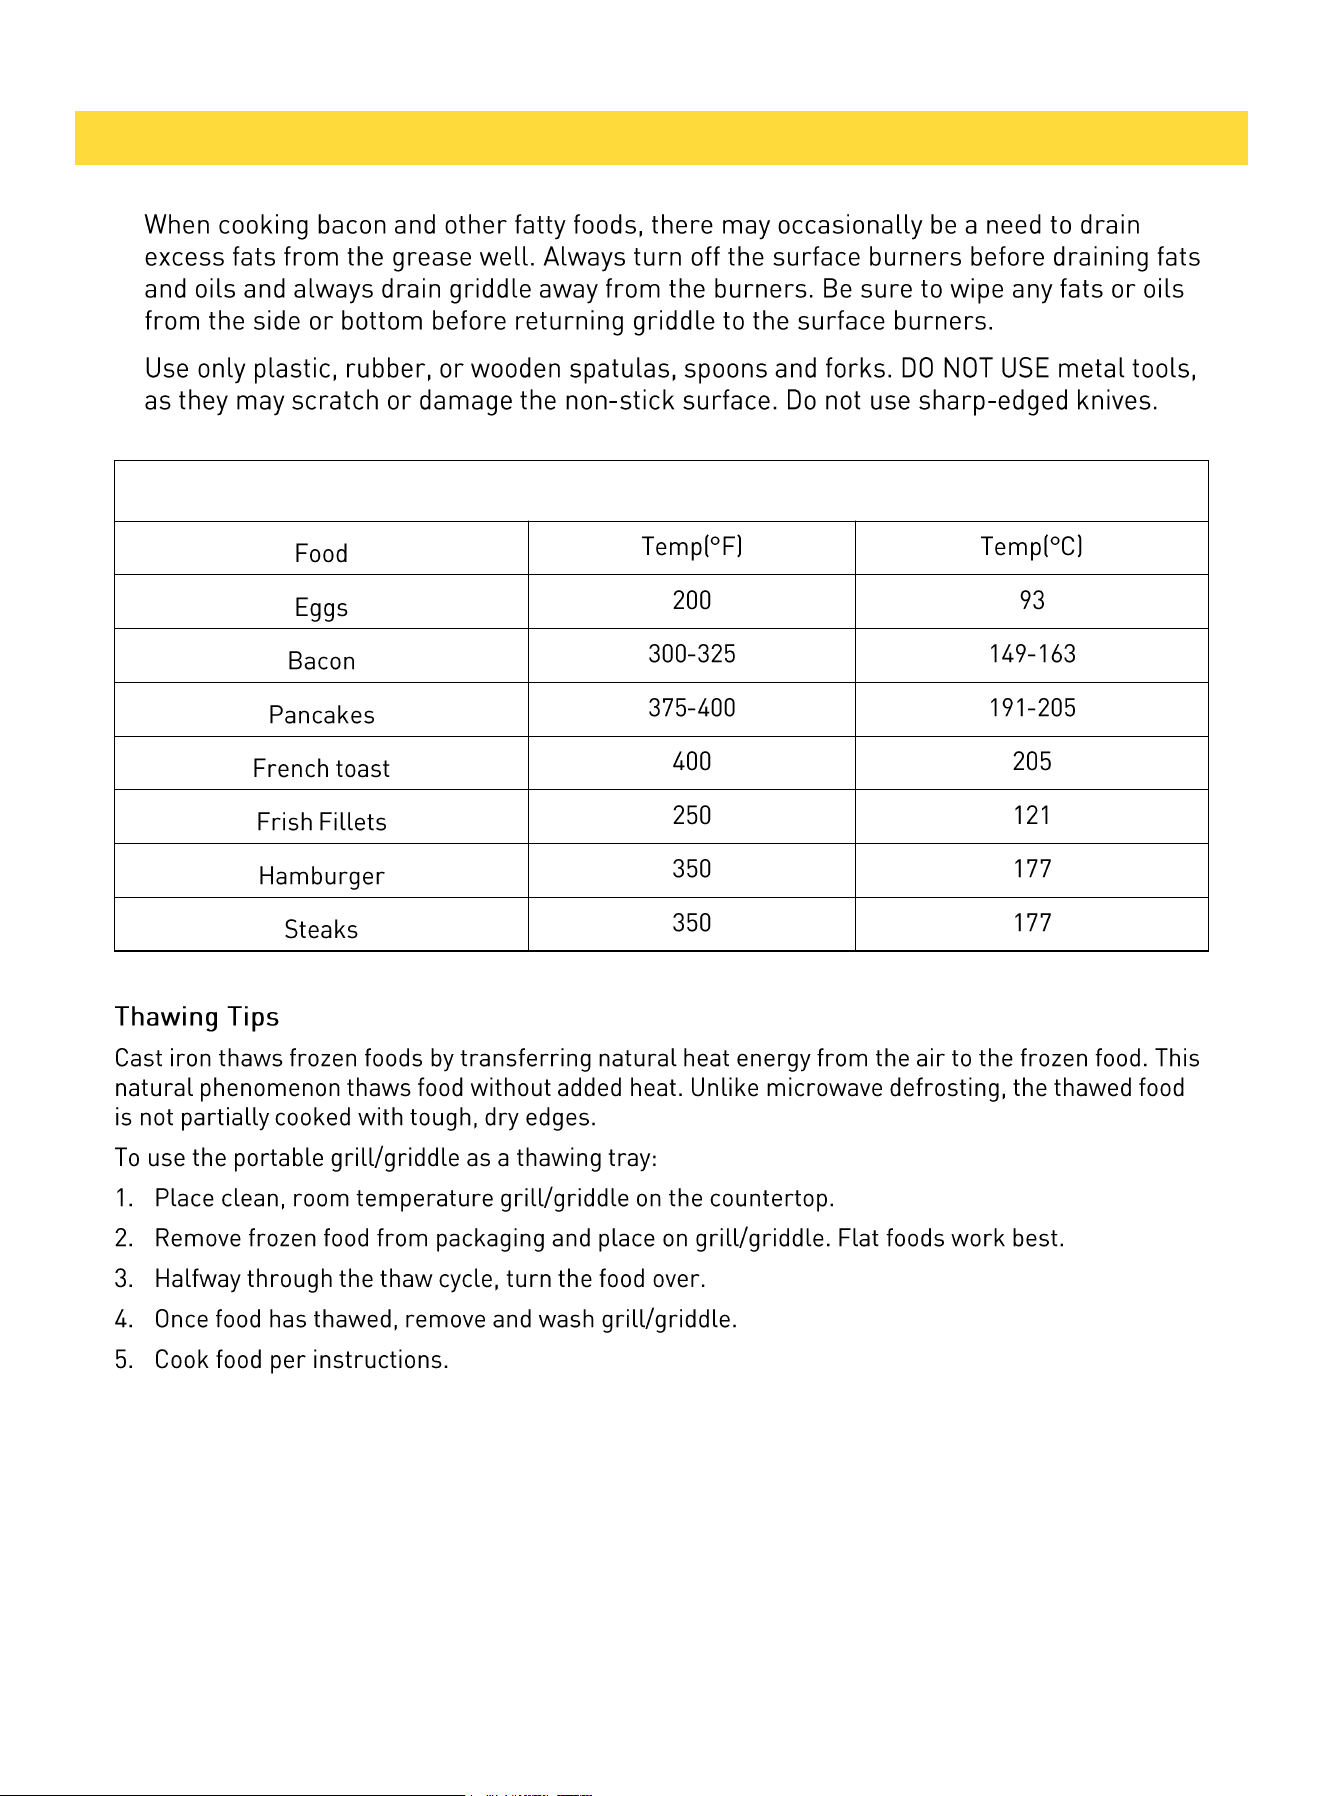
Griddle Cooking Chart
COOKTOP SAFETY GUIDELINES
•
•
22
12. Operating The Oven
Oven Cooking Safety Guidelines
OPERATING THE OVEN
23
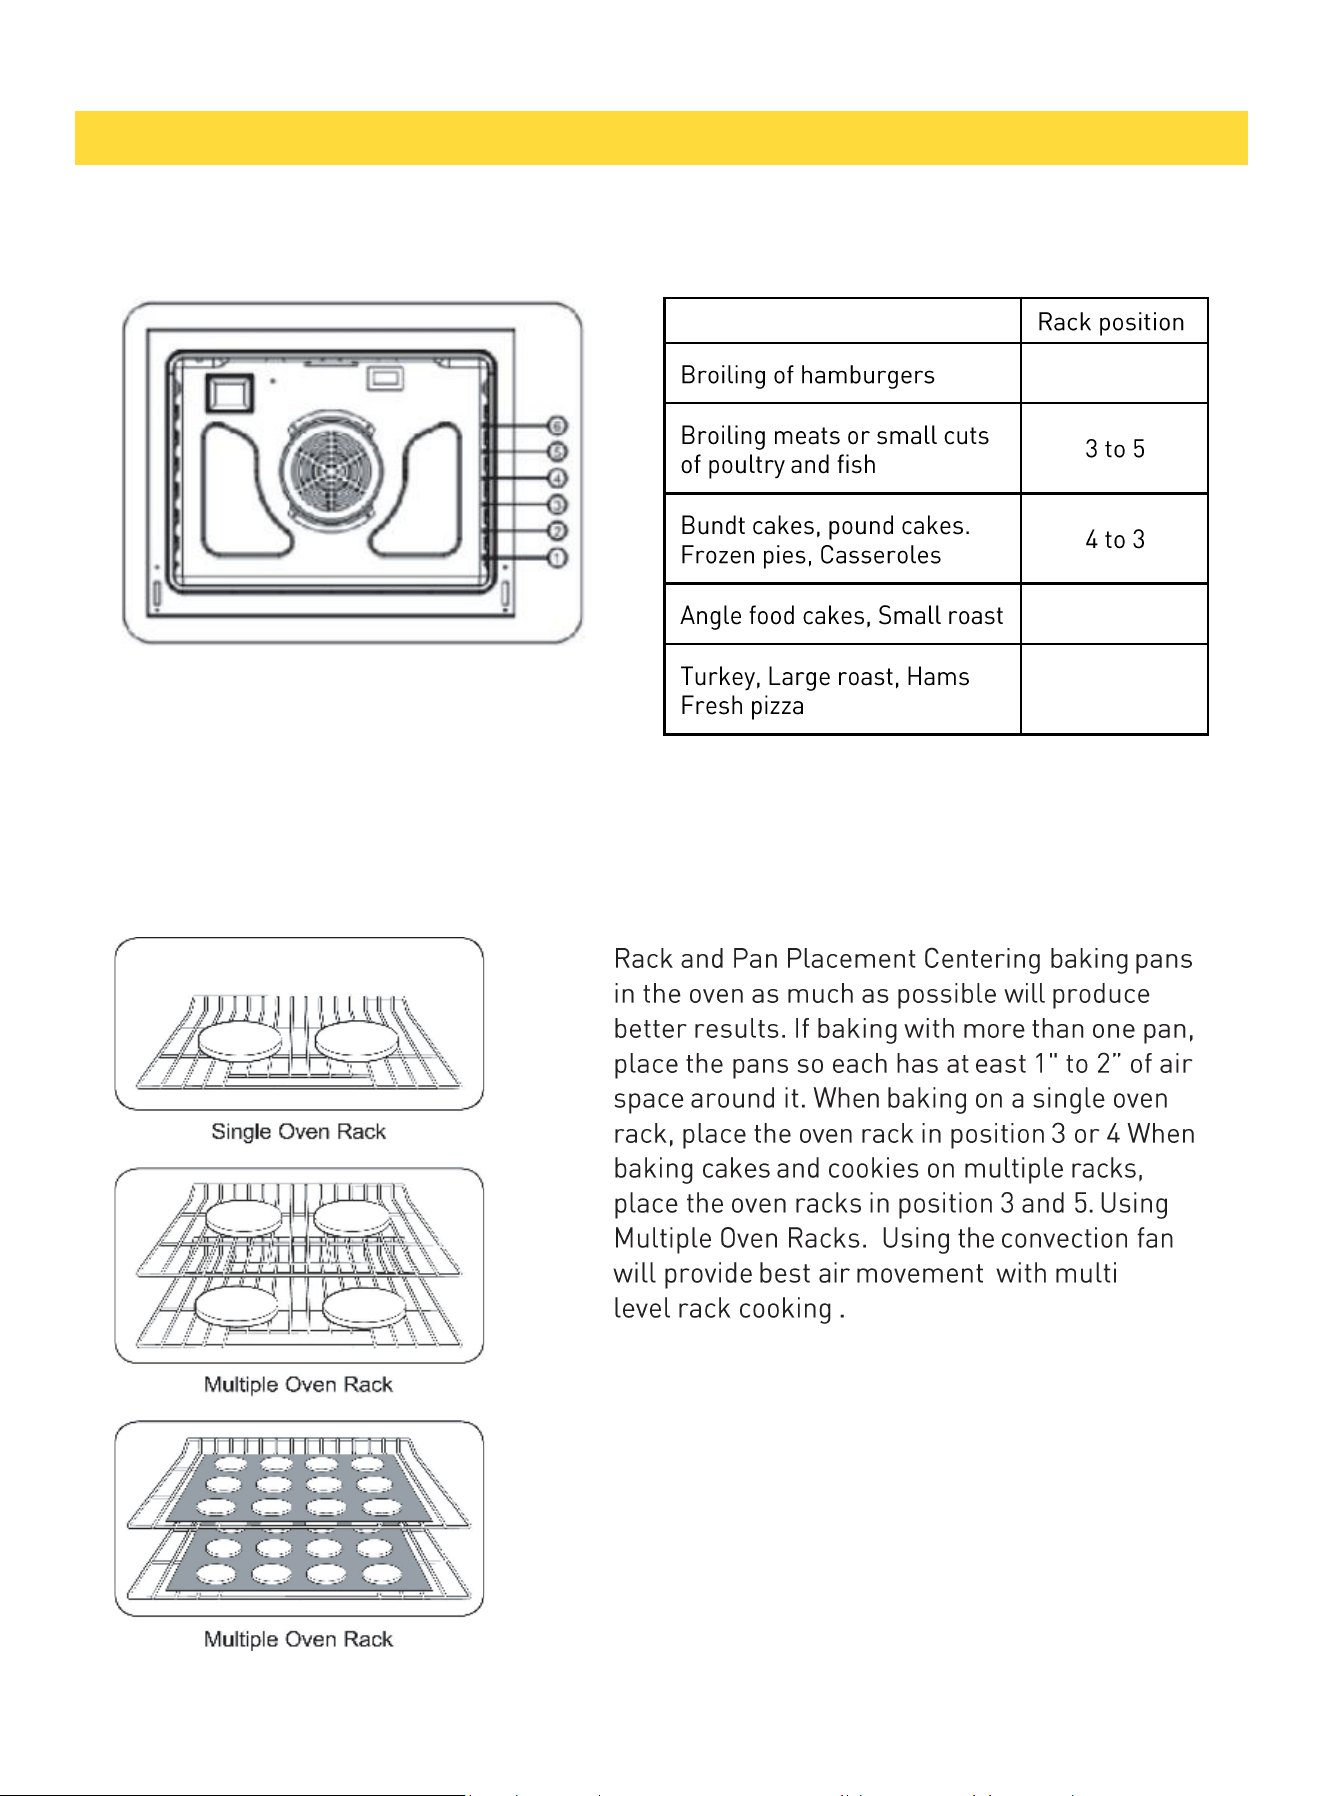
Oven Rack Positions
Rack and Pan Placement
OPERATING THE OVEN
Type of Food
6
2
1
24
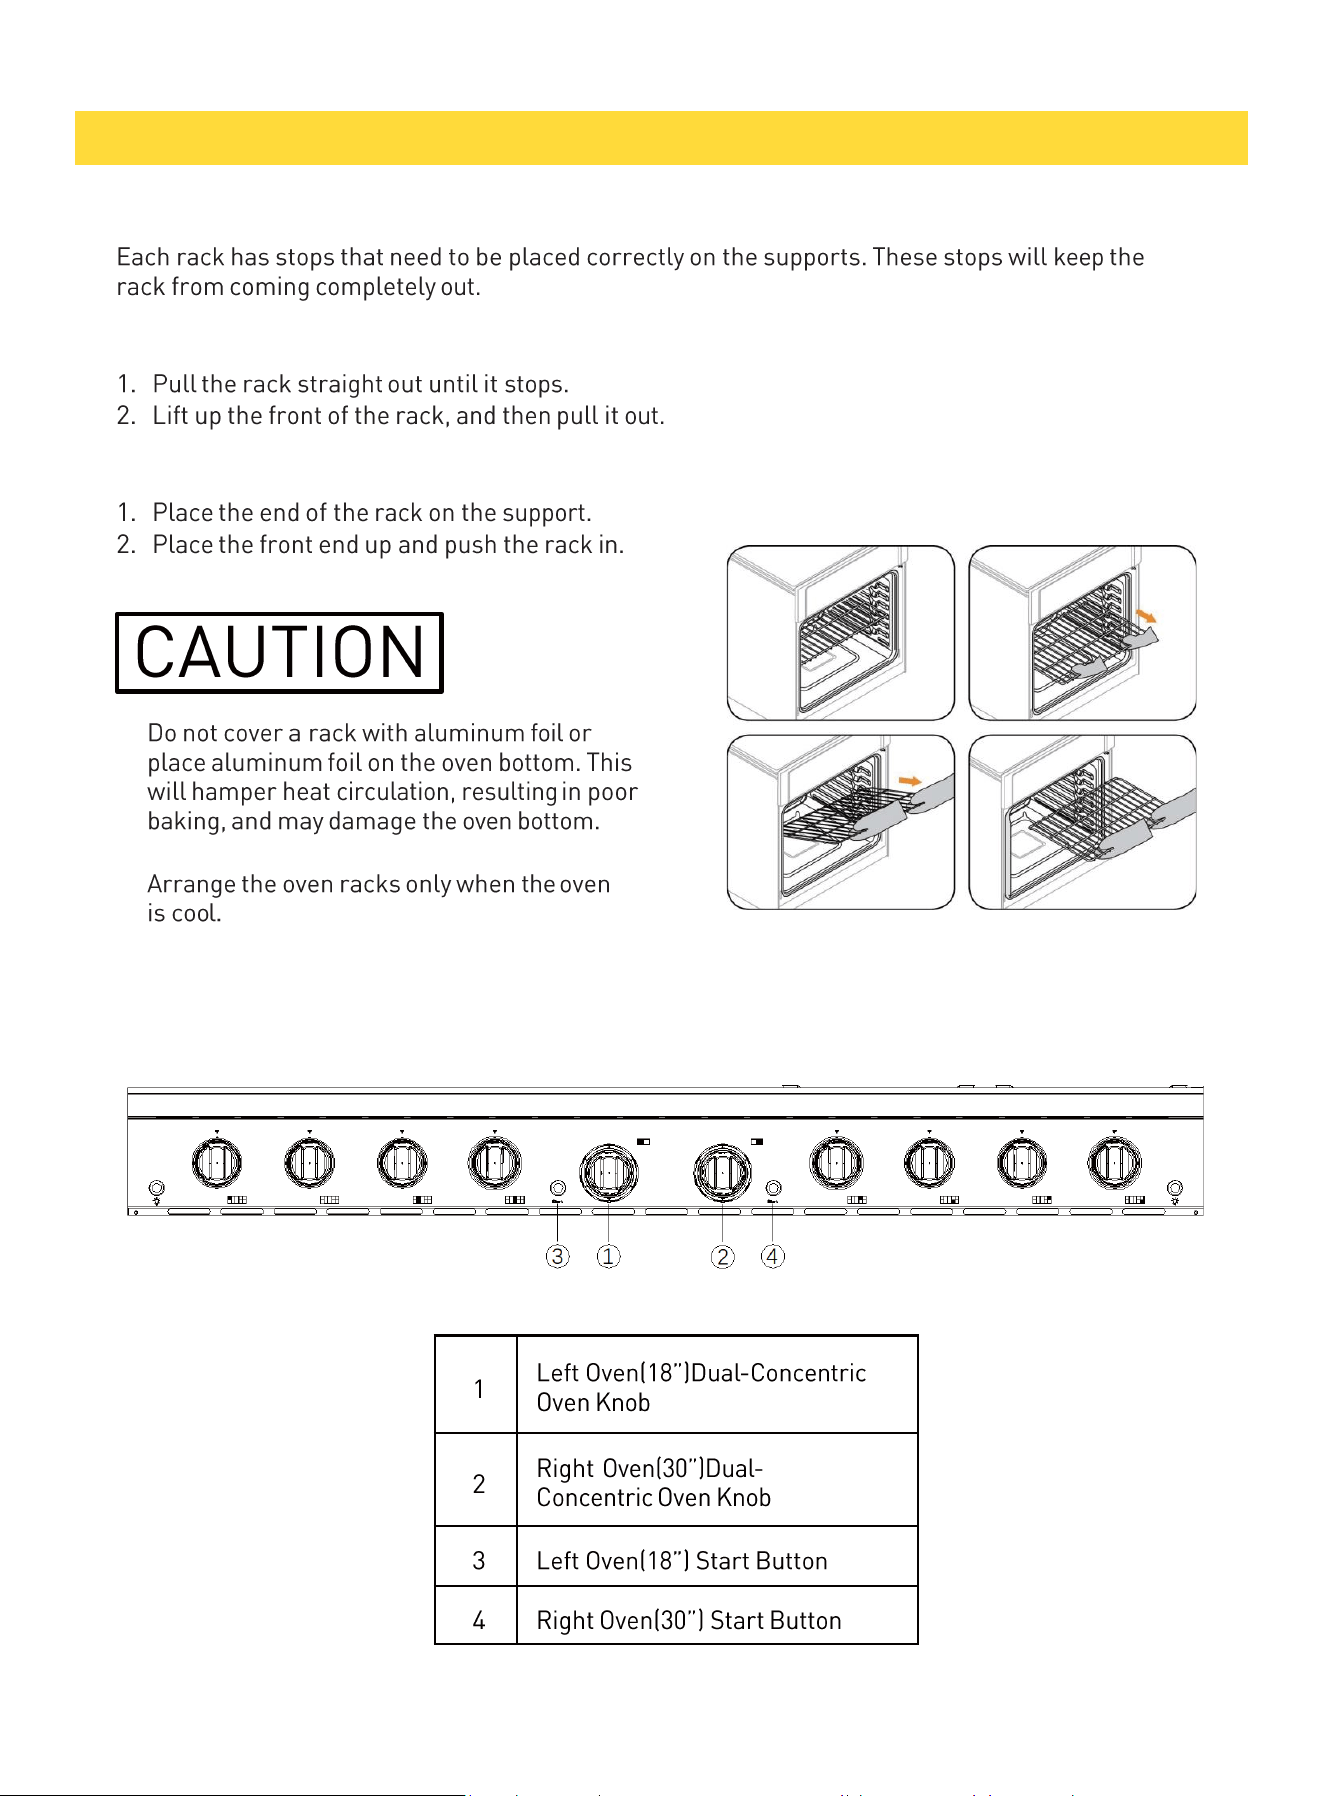
BEFORE USING THE RACKS
REMOVING THE RACKS
REPLACING THE RACKS
•
•
OPERATING THE OVEN
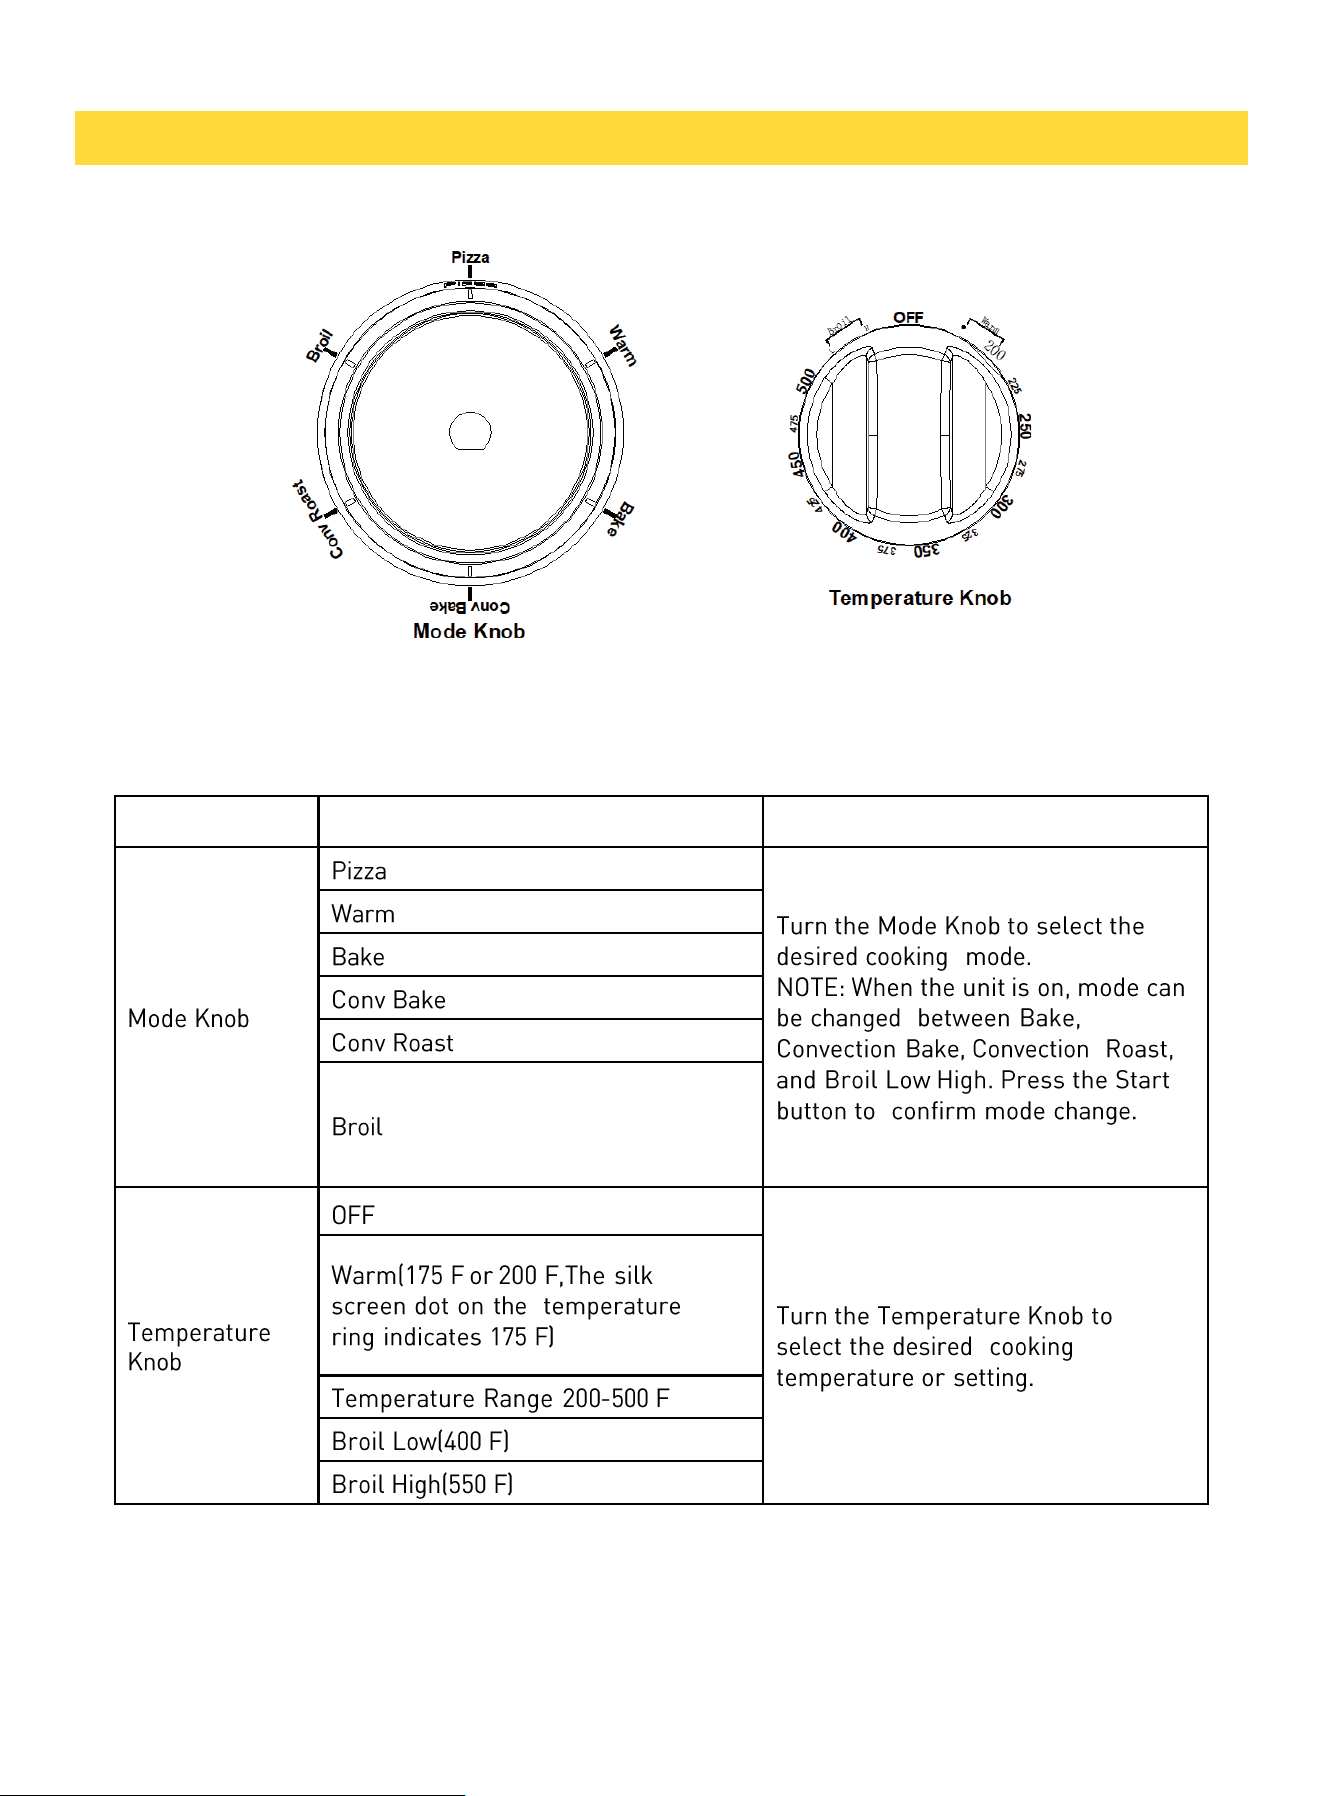
Oven Knobs and Buttons
25
FEATURE
DESCRIPTION/BEHAVIOR
INSTRUCTIONS
° °
°
°
°
°
Dual-Concentric Oven Knob
OPERATING THE OVEN
26
Convection Bake
Cooking Modes
Pizza
Pizza
OFF
Bake
Bake
OPERATING THE OVEN
27
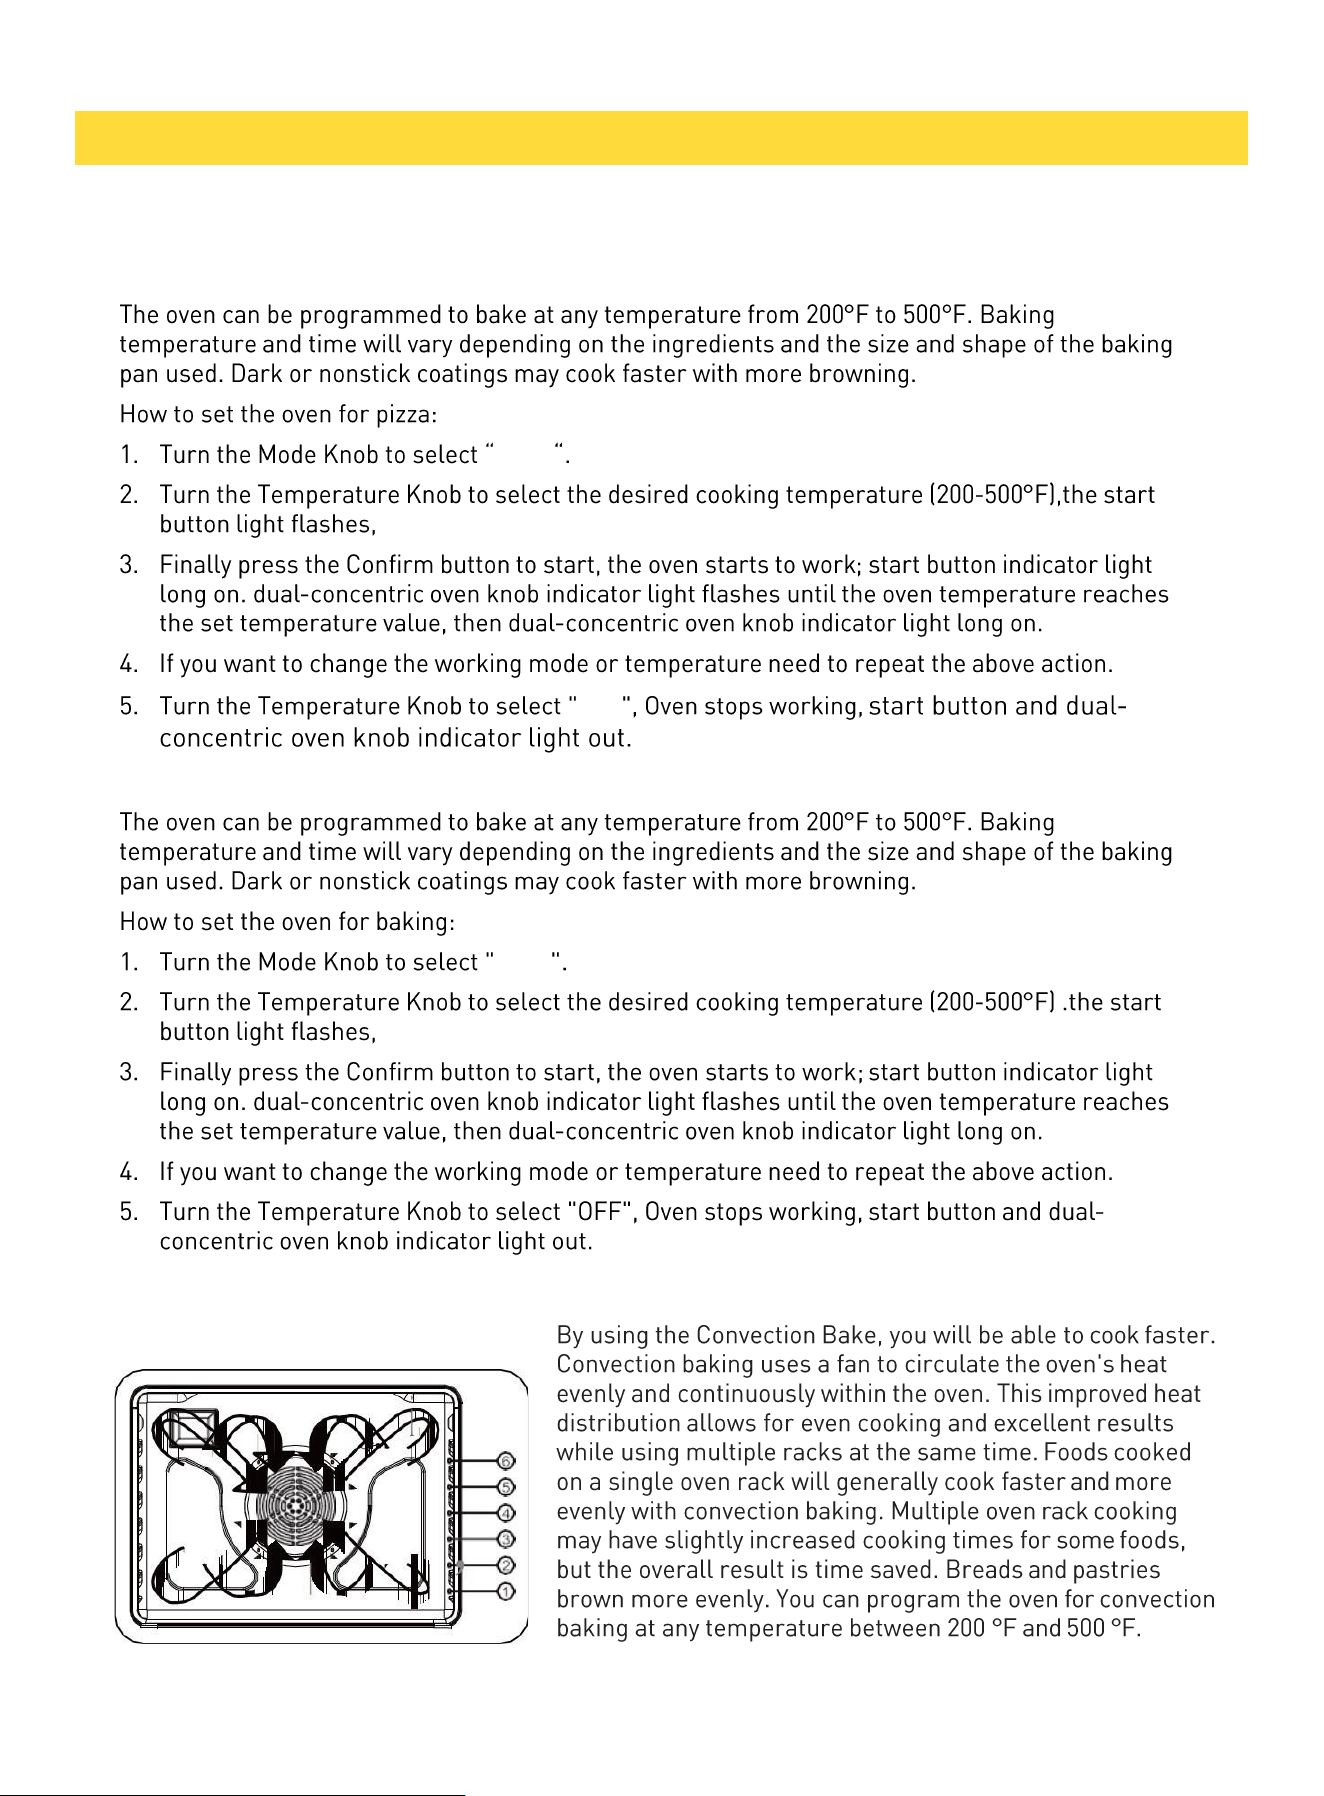
Tips for convection baking
Conv Bake
℉
OFF
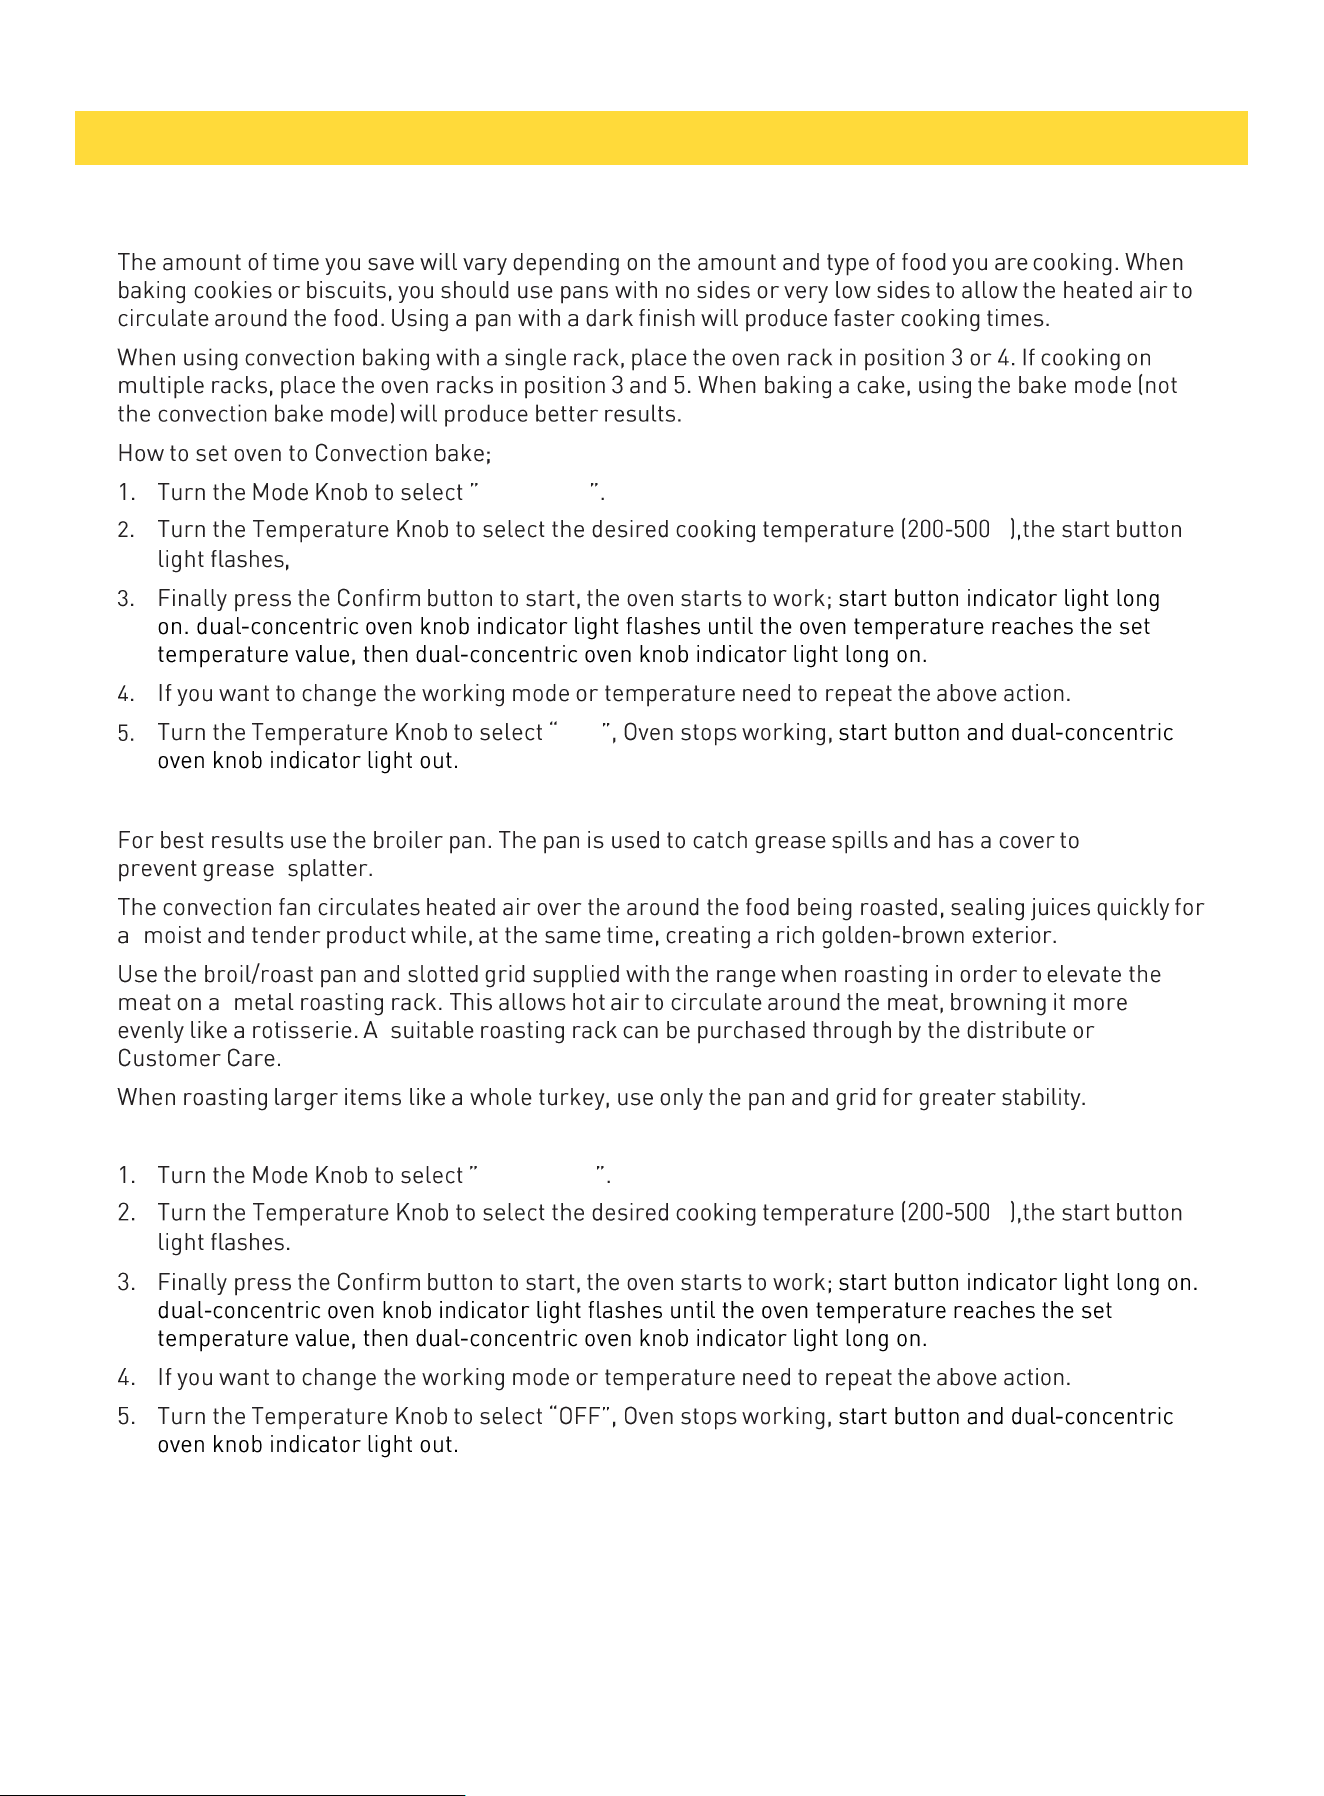
Convection Roast
How to set the oven for convection roast:
Conv Roast
℉
NOTE
Place food in the oven after preheating if the recipe calls for it. Preheating is very important for good
results when baking cakes, cookies, pastry, and breads. the buzzer rings six times when the
preheating is complete.
when the oven door is opened to prevent unwanted heat escape. If oven door is left open for more
than one min the heating elements will turn off.
OPERATING THE OVEN
28
Warm
How to set the oven for warm:
Warm
℉ ℉
OFF
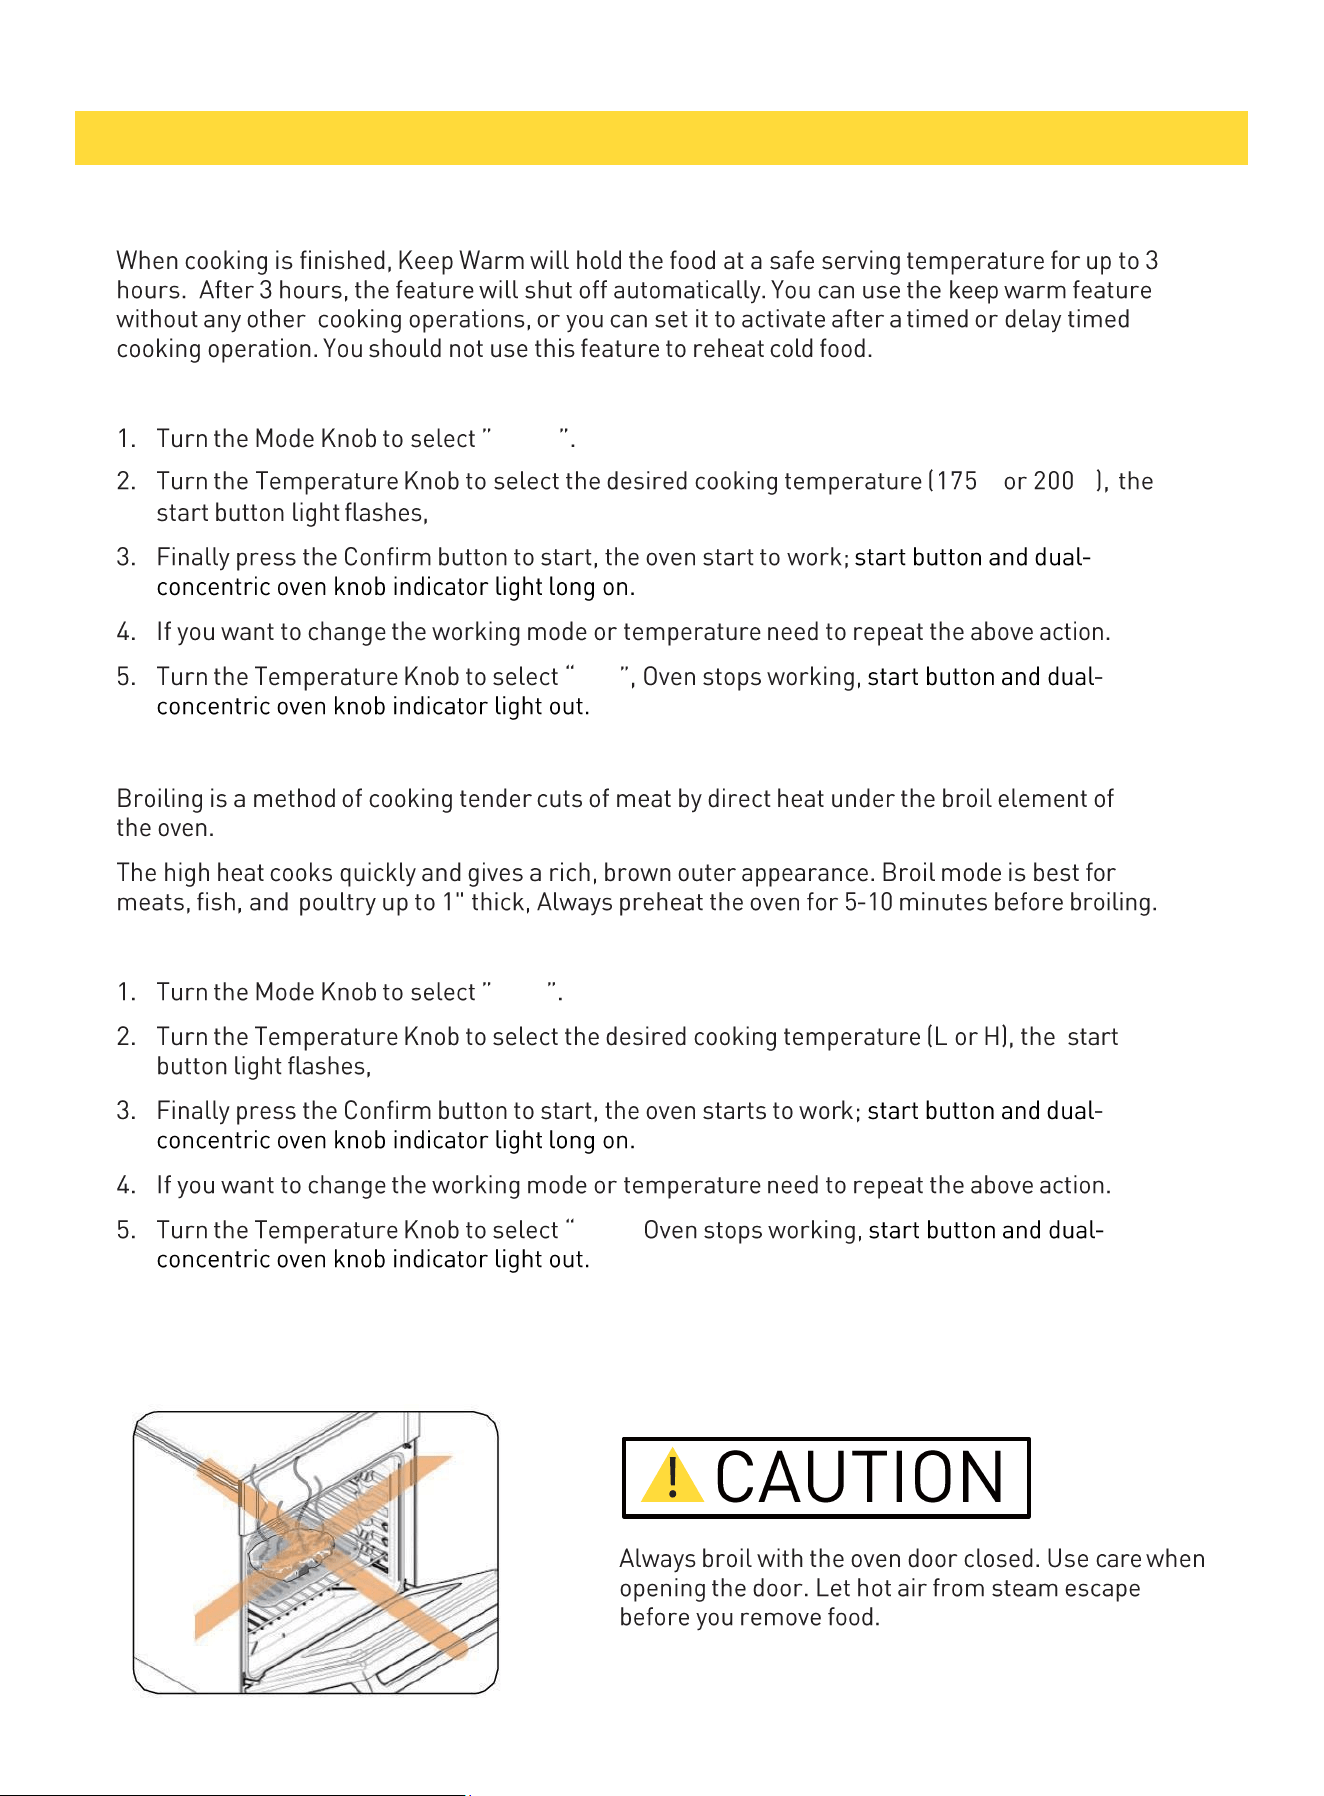
Broil
How to set the oven for broiling:
Broil
OFF",
NOTE
when the oven door is opened to prevent unwanted heat escape. If oven door is left open for
more than one min the heating elements will turn off.
OPERATING THE OVEN
29

13. Cleaning Instructions
Do’s
Don’ts
Cleaning Burner caps and fame spreaders
NOTE
when the oven door is opened to prevent unwanted heat escape. If oven door is left open for more
than one min the heating elements will turn off.
CLEANING INSTRUCTIONS
30
Cleaning oven shelves
Cleaning broil/roast pan
Cleaning bake and broil burners
Cleaning porcelain surfaces
Cleaning the oven glass window
CLEANING INSTRUCTIONS
31
Cleaning the oven door gasket
Cleaning stainless steel surfaces
CLEANING INSTRUCTIONS
32
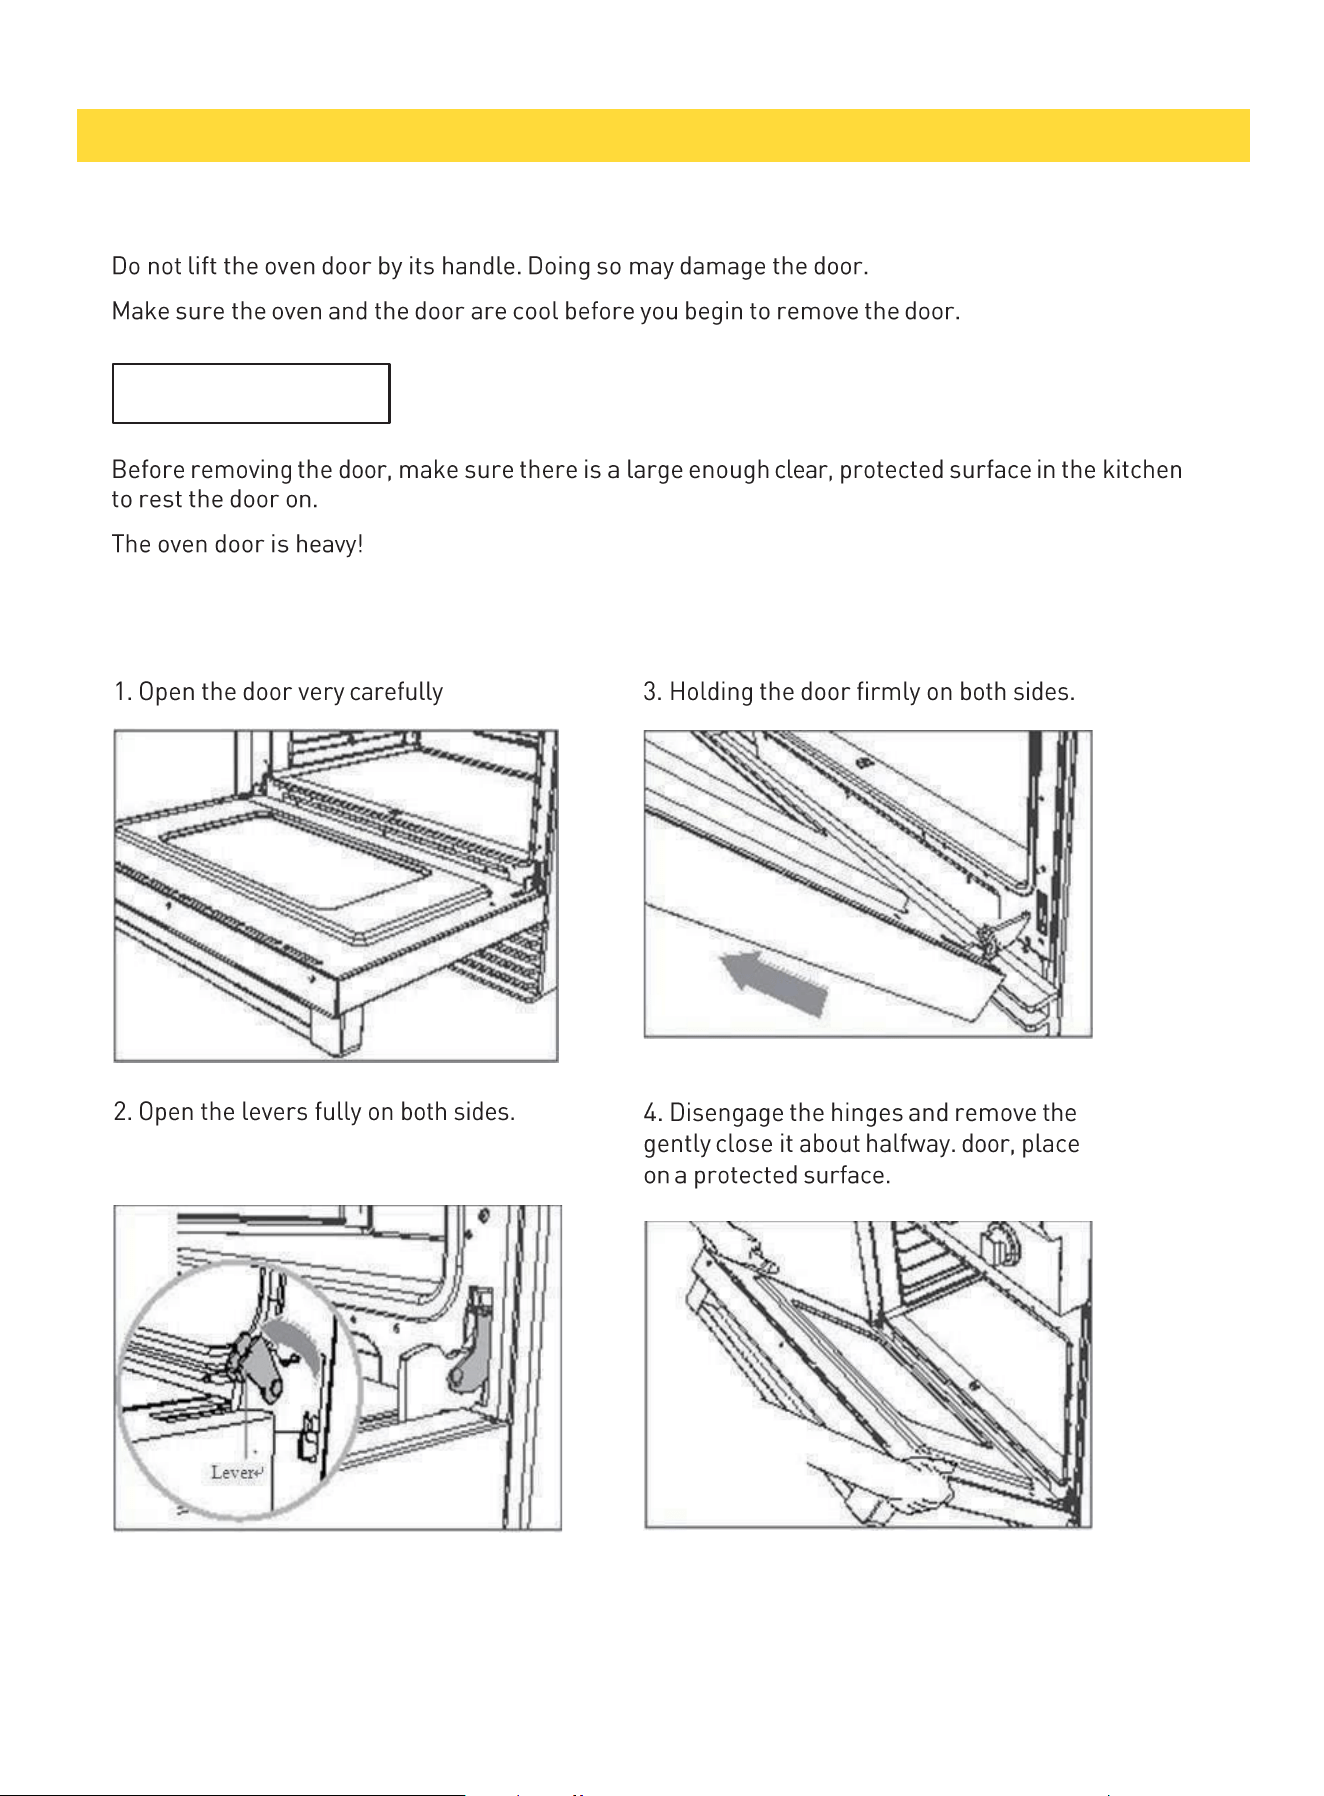
14. Removing and replacing the oven door
IMPORTANT
REMOVING AND REPLACING THE OVEN DOOR
Removing the oven door
33
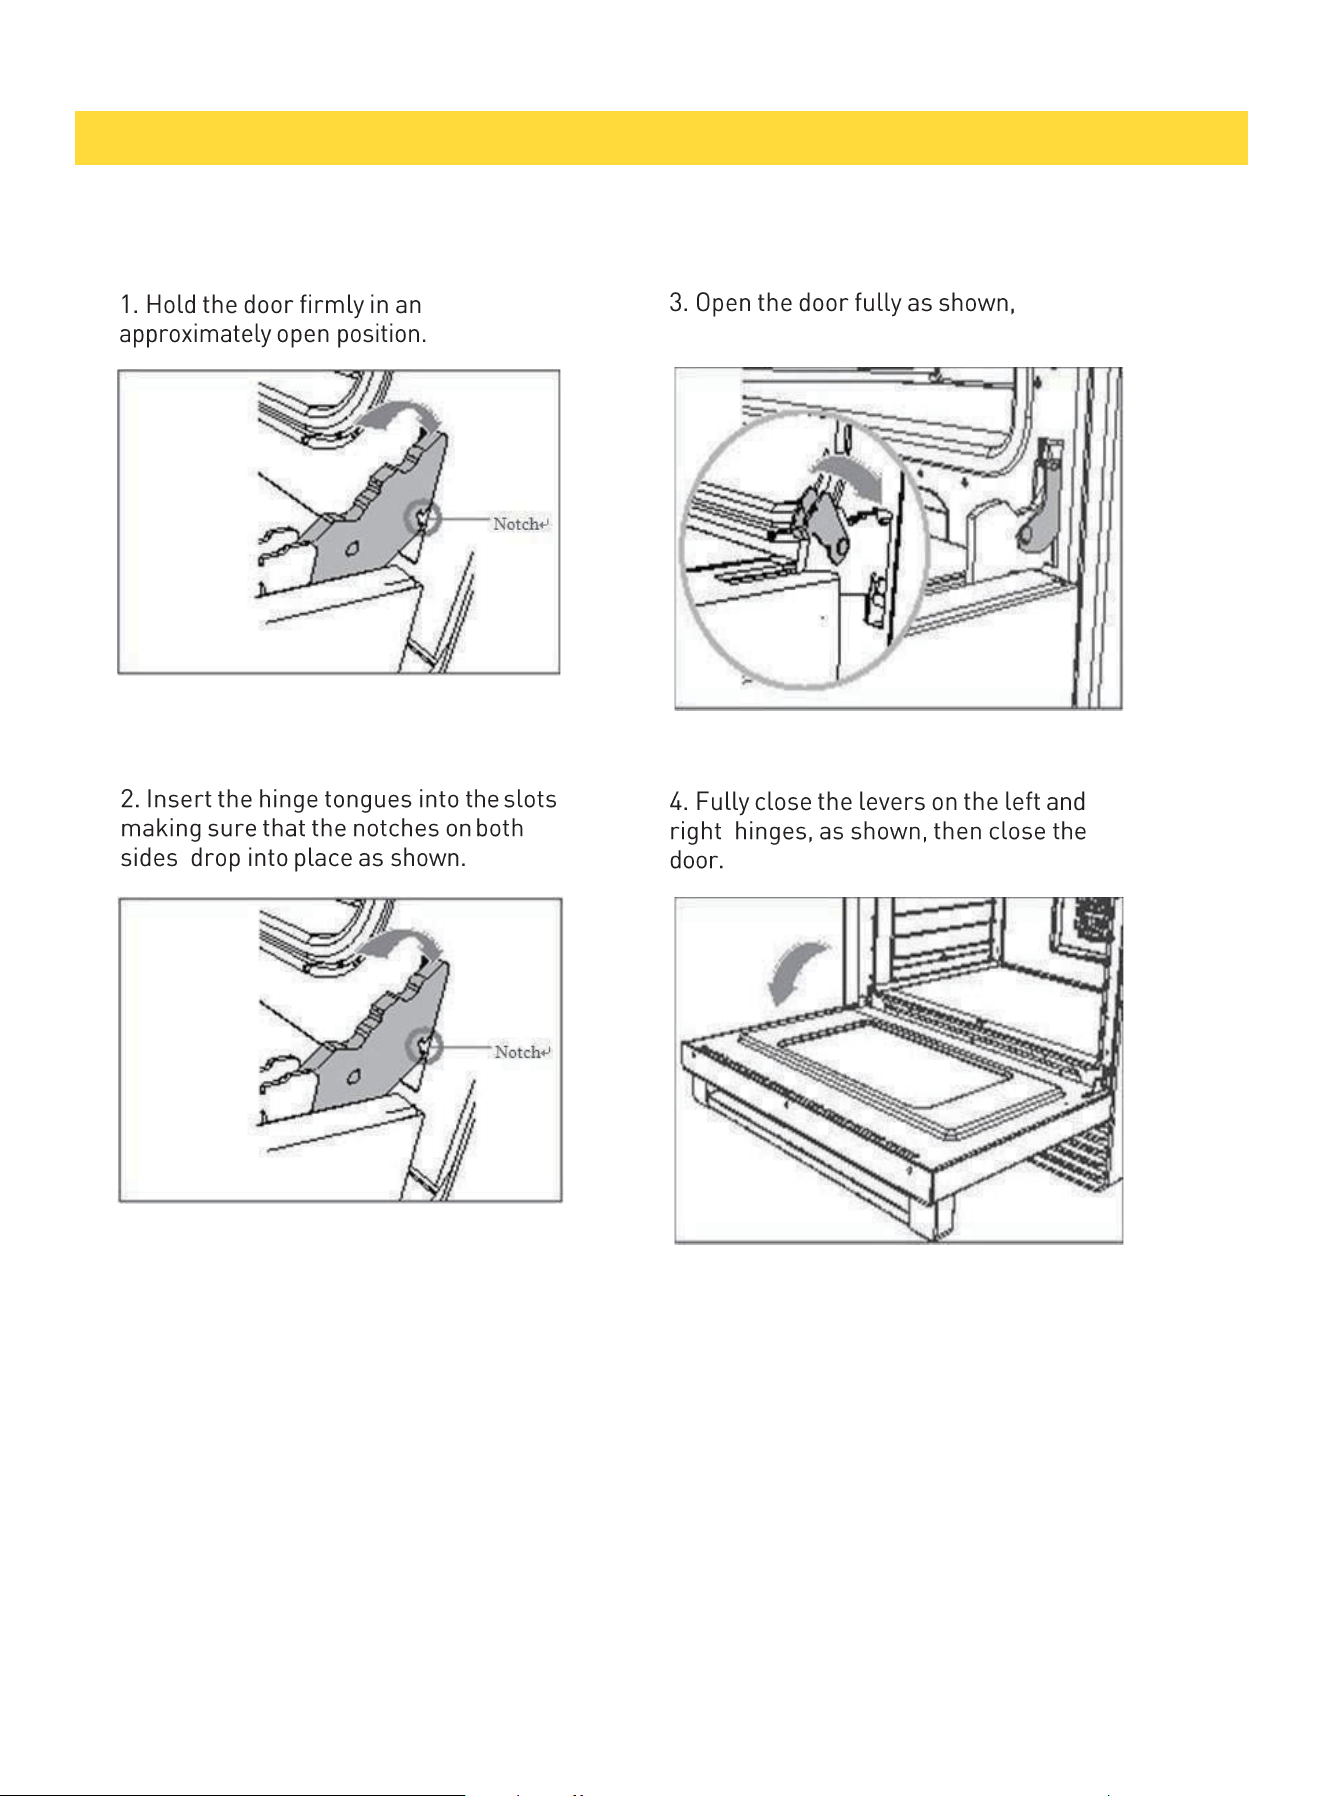
Replacing the oven door
REMOVING AND REPLACING THE OVEN DOOR
34
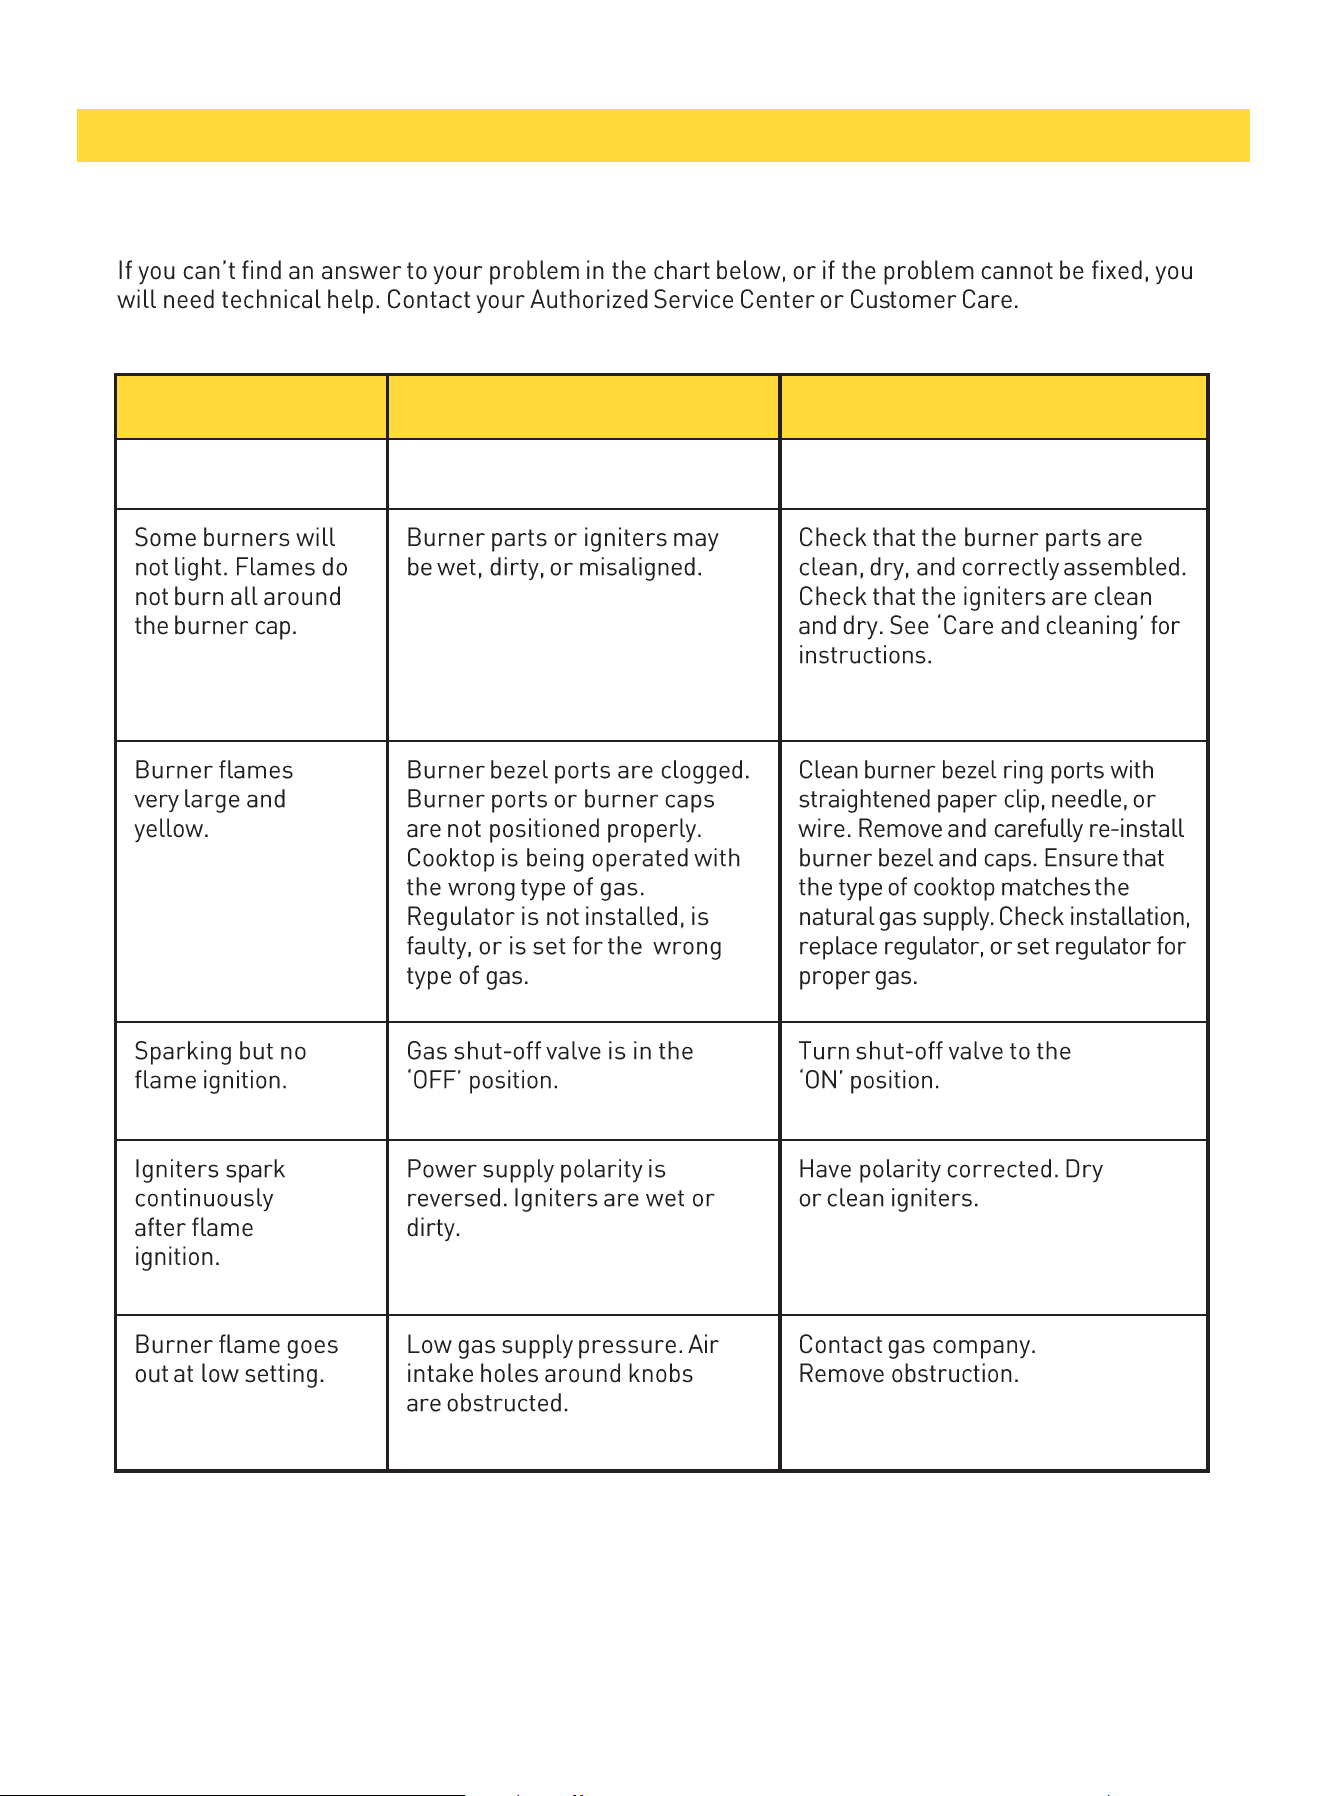
Problem Probable Causes What To Do
COOKTOP
15. Troubleshooting Guide
TROUBLESHOOTING GUIDE
35
Information Code
TROUBLESHOOTING GUIDE
36
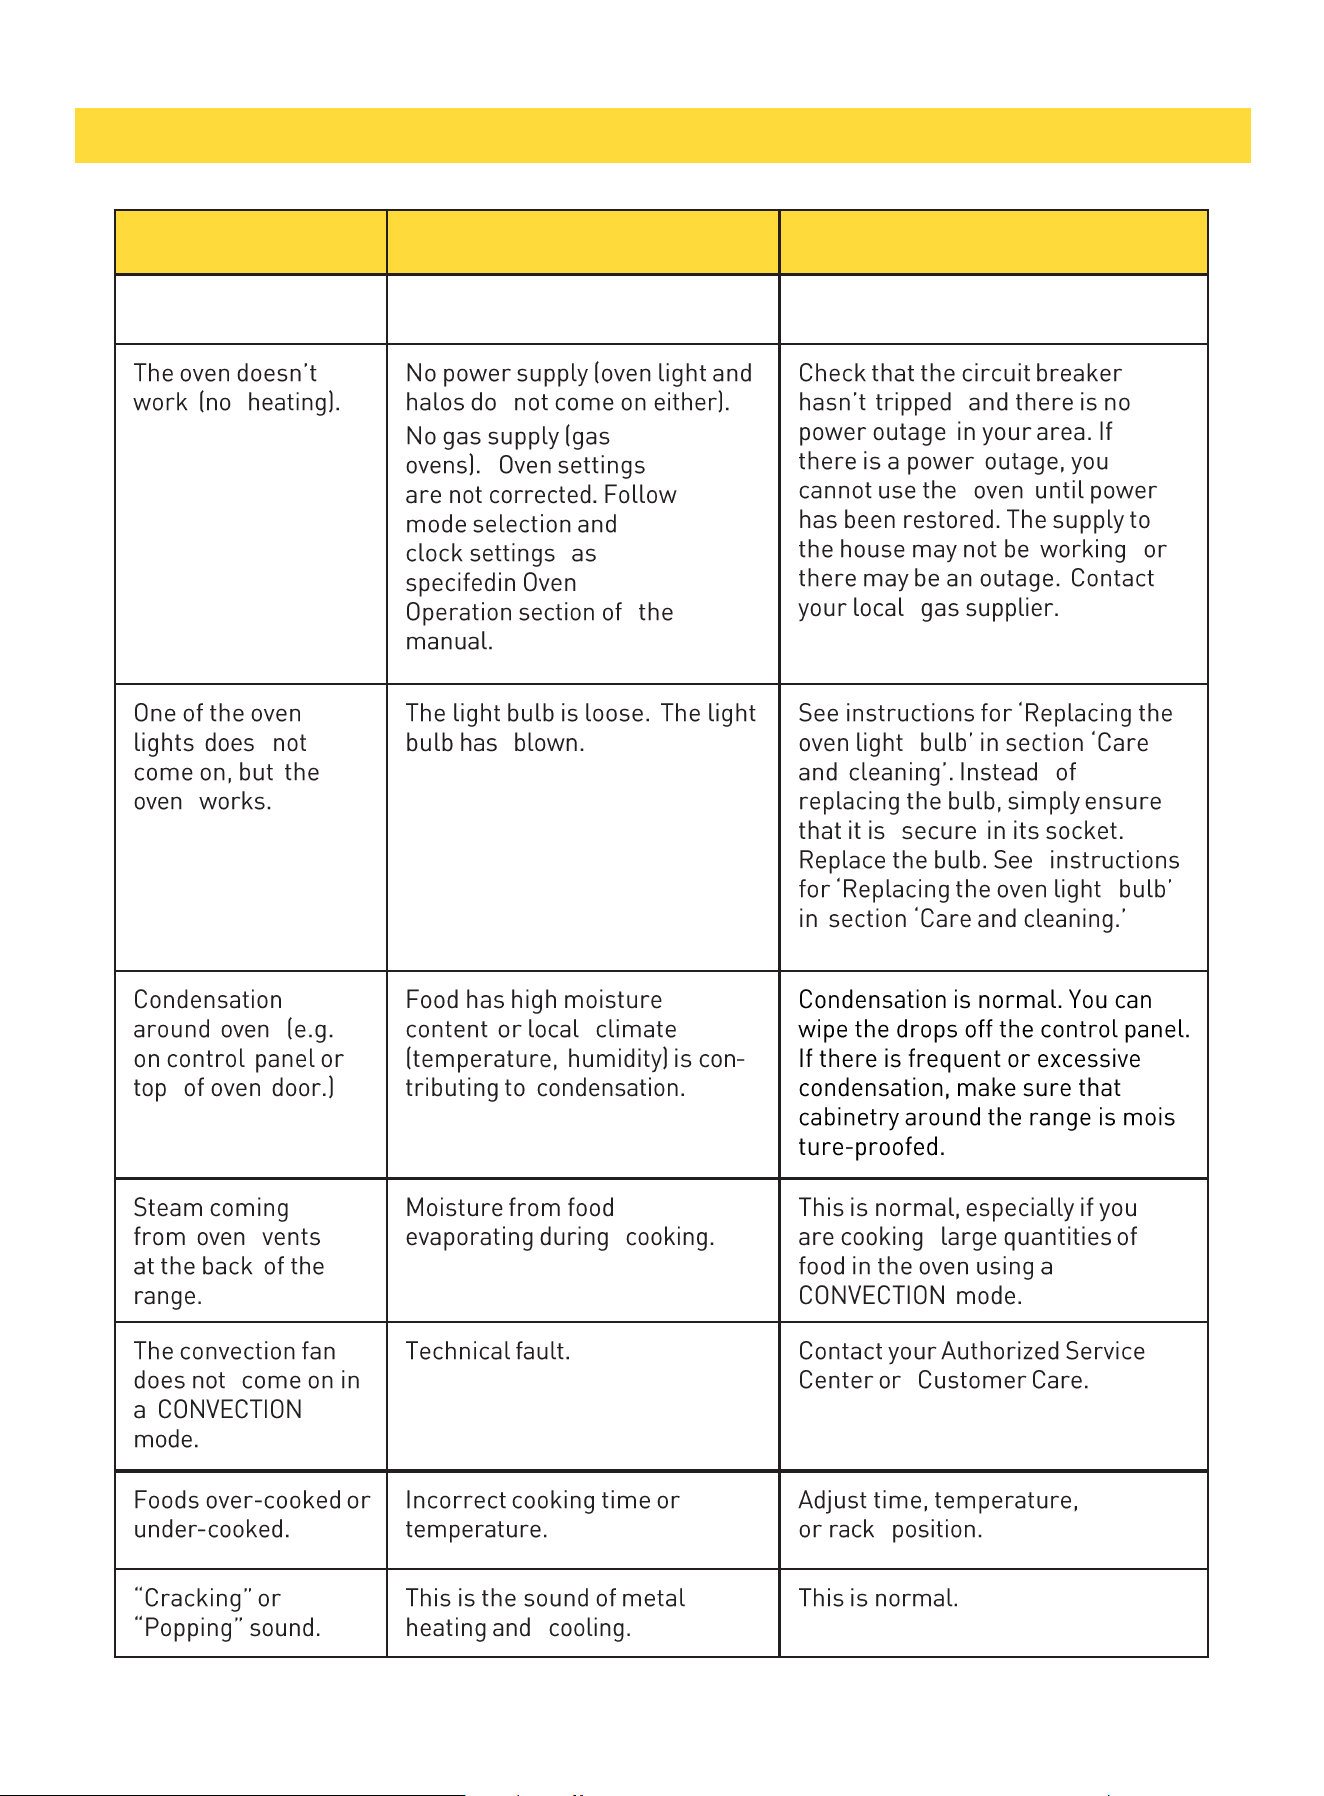
Problem Probable Causes What To Do
OVEN
TROUBLESHOOTING GUIDE
37

Error Code:
The Error codes are displayed on temperature and mode knob Indicator Lights, Refer to the chart
below to determine the type of error that is being displayed.
Error
Type
Error
Code
Red
Light
Cyan
Light
Error Description
NOTE
Turn the knob to “OFF", then restart the oven, If the problem persists, disconnect all power to your
range for at least 30 seconds, then reconnect the power. If this does not solve the problem, call for
service.
TROUBLESHOOTING GUIDE
38
16. Warranty & Service
WARRANTY
39
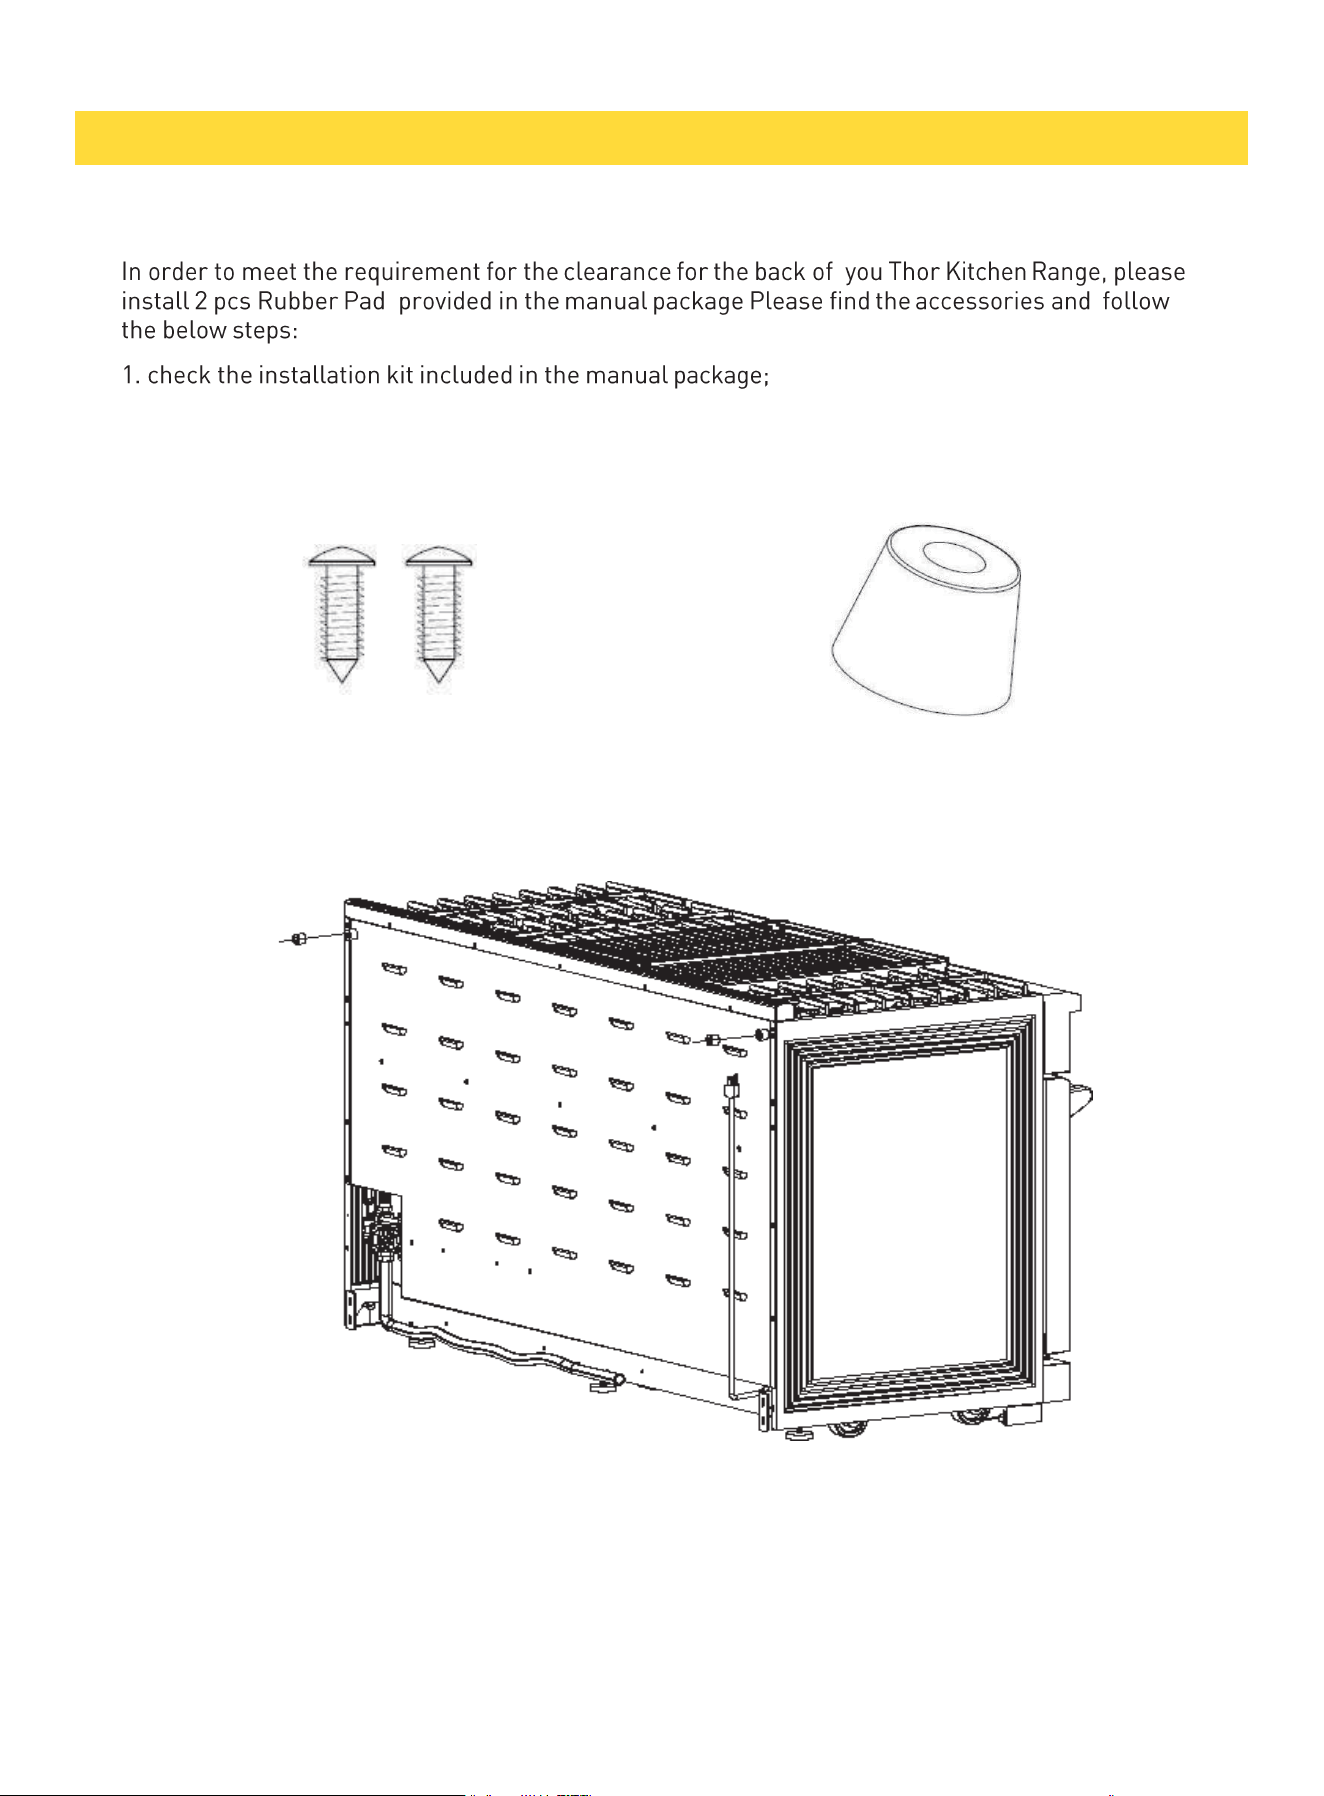
Rubber Pad Installation on Back Panel
2* screws
2* rubber pad
2. Install 2 pcs rubber pad shown above
APPENDIX 1
40
Register your product by following the steps below.
You chose THOR Kitchen to enhance your culinary journey and
we’re stoked to have you in the club. Think of it as a secret
society of really savvy people, such as yourself, choosing
professional power and performance at an affordable price.
WARRANTY REGISTRATION
Scan theQR code or visit Input your product info
You’re done.
thorkitchen.com/warranty
and select register
Let’s get
cookin’.
WARRANTY NEED PARTS?