Loading ...
Loading ...
Loading ...
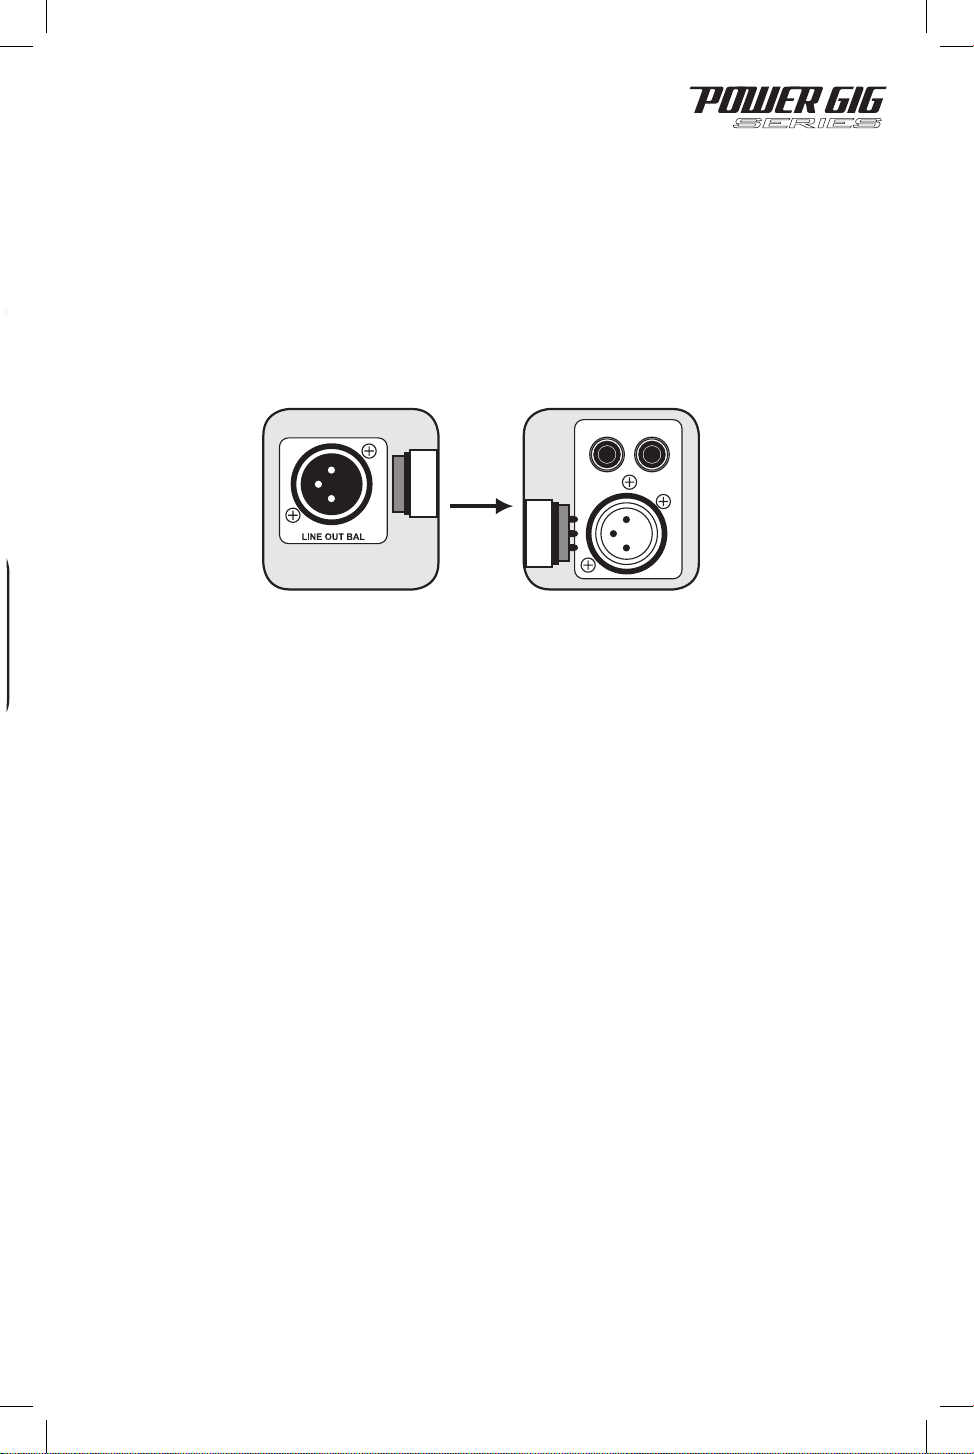
The XLR marked Line Out Bal allows for daisy chaining of signals from one Power Gig
unit to another. Simply attach an XLR cable between the two units to share signals. The
input into Power Gig #2 should go to the LINE IN XLR BAL input.
You can even choose to use Power Gig # 1 for microphone inputs and Power Gig #2 for
musical instrument inputs and mix the two units together. Please note that due to internal
design constraints, the Power Gig-8 features a 1/4” plug instead of XLR connection for
output to second unit.
When setting up for larger venues, a mixing console becomes a critical piece of equip-
ment for appropriately mixing signals from multiple inputs such as singers, speakers,
eects devices, musicians and of course allows for multiple speaker utilization.
To connect a mixing console begin by.
1. Turning your Power Gig unit to OFF position.
2. Turn Master Volume to 0 position.
3. Turn MIC IN BAL Volume to 0 position.
4. Connect the LEFT OUTPUT of mixer to the MIC IN BAL connection of your Left Power
Gig Unit.
5. Connect the RIGHT OUTPUT of mixer to the MIC IN BAL connection of your Right
Power Gig Unit.
6. Switch ON your Power Gig unit.
7. Slowly raise the level of the mixer output to the 0dB level position.
8. Slowly turn the MIC IN BAL volume control clockwise until the CLIP LED indicator
begins to blink, then turn it down slightly. This indicates the maximum input voltage gain
is matched and set properly.
9. Turn Master Volume up to achieve proper volume.
Line Out Balanced Connection.
Public Address / Concert Mixer Setup
LINE IN
BAL
R L
3. Keep Master Volume at 0 position.
4. Turn Mic Volume to 0 position.
5. Switch on the Power Gig unit.
6. Slowly turn microphone volume in clockwise rotation until you achieve appropriate gain
setting. This is determined by the CLIP LED indicator light. Proper function is achieved
when the CLIP indicator lights up at peak levels, it should never be in constant on position.
7. The above adjustment matched the microphone preamp to the input gain of the Power Gig
unit.
8. Now turn up the Master Volume to necessary volume by rotating clockwise.
Always stand behind the Power Gig when making your microphone adjustments to avoid
feedback distortion.
You can choose to hook up two microphones to your Power Gig in the following manner.
Set up Microphone #1 as instructed above. Using same set up instructions, insert micro-
phone #2 into second XLR balanced input which features its own separate gain control.
This second XLR though balanced is part of the Line In circuit and thus will have a -10dB
response and will be lower in volume than microphone #1. Use the gain control associ-
ated with this input to increase the microphone level and balance the inputs between the
two microphones before attempting to adjust the Master Volume.
Multi-Microphone Hook Up
Loading ...
Loading ...
Loading ...