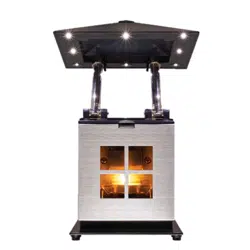
Loading ...
Loading ...
Loading ...
– 4 –
5. JOI Care and Maintenance
JOI has been designed to provide many seasons of enjoyment when you follow the operating
instructions included. The stainless steel surfaces should be cleaned regularly to keep JOI
looking beautiful. Fingerprints and dirt can be removed with regular glass cleaner and a
warm water rinse.
Cleaning Soot Build-Up
Under normal operation JOI will burn o any soot that forms on the heat collector. However,
soot can build up if a candle wick is too long or not situated in the center of the heat collector.
If soot is allowed to build up you will see a reduction in the amount of light generated by JOI.
This can be easily corrected by cleaning the soot from the heat collector by following these
easy steps:
6. Candle Flares and JOI Safety Feature
Candle flares occur when the entire liquid candle wax pool ignites. This is normally caused
when a match or other debris has fallen into the wax pool. If you notice a flare occurring in
JOI – DO NOT OPEN THE DOOR. JOI has been designed to cut o the oxygen and minimize
the flame in the case of such a flare. Ensure any combustibles are moved away from JOI and
allow the flame to burn out.
7. Extinguishing the Candle
To extinguish the candle at any time it is recommended that you open the door and place a
candle snuer over the flame. If a candle snuer is not readily available blow out the candle
by placing your index finger horizontally in front of the flame and blowing on it gently. This
forces the air to surround the flame and minimize the splattering of hot wax. Allow the candle
to sit until the molten wax cools and solidifies before disposing of the used tea light. Do not
re-use the tea light.
A. Allow JOI to cool completely.
B. Place JOI on top of newspaper and wear
gloves (soot is very messy).
C. Open door.
D. Insert paper towel below heat collector
to catch any falling soot.
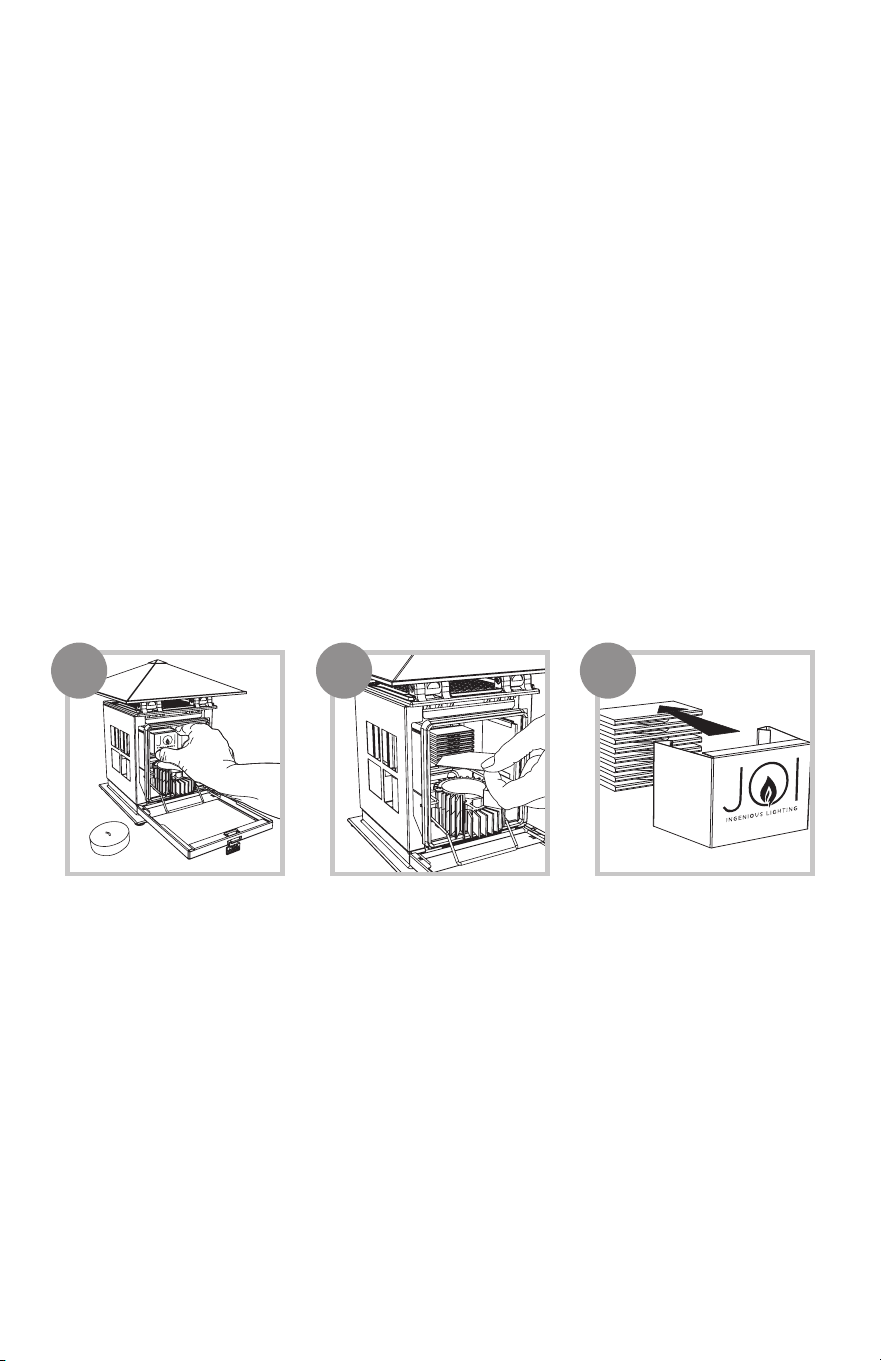
E. Remove heat collector shield by pulling
straight out (see below).
F. Remove soot by running a folded piece
of paper or clean paintbrush through the
grooves of the heat collector as shown.
G. Carefully remove the sooted paper
towel.
H. Replace heat collector shield and close
door.
E F H
Loading ...
Loading ...
Loading ...