
Loading ...
Loading ...
Loading ...
3938
ENEN
36 ’’ model 30 ‘‘ model 24 ‘‘ model
A 860 (33 7/8”) 740 (29 1/8”) 560 (22”)
B > 100 (4”)
C 10 (3/8”)
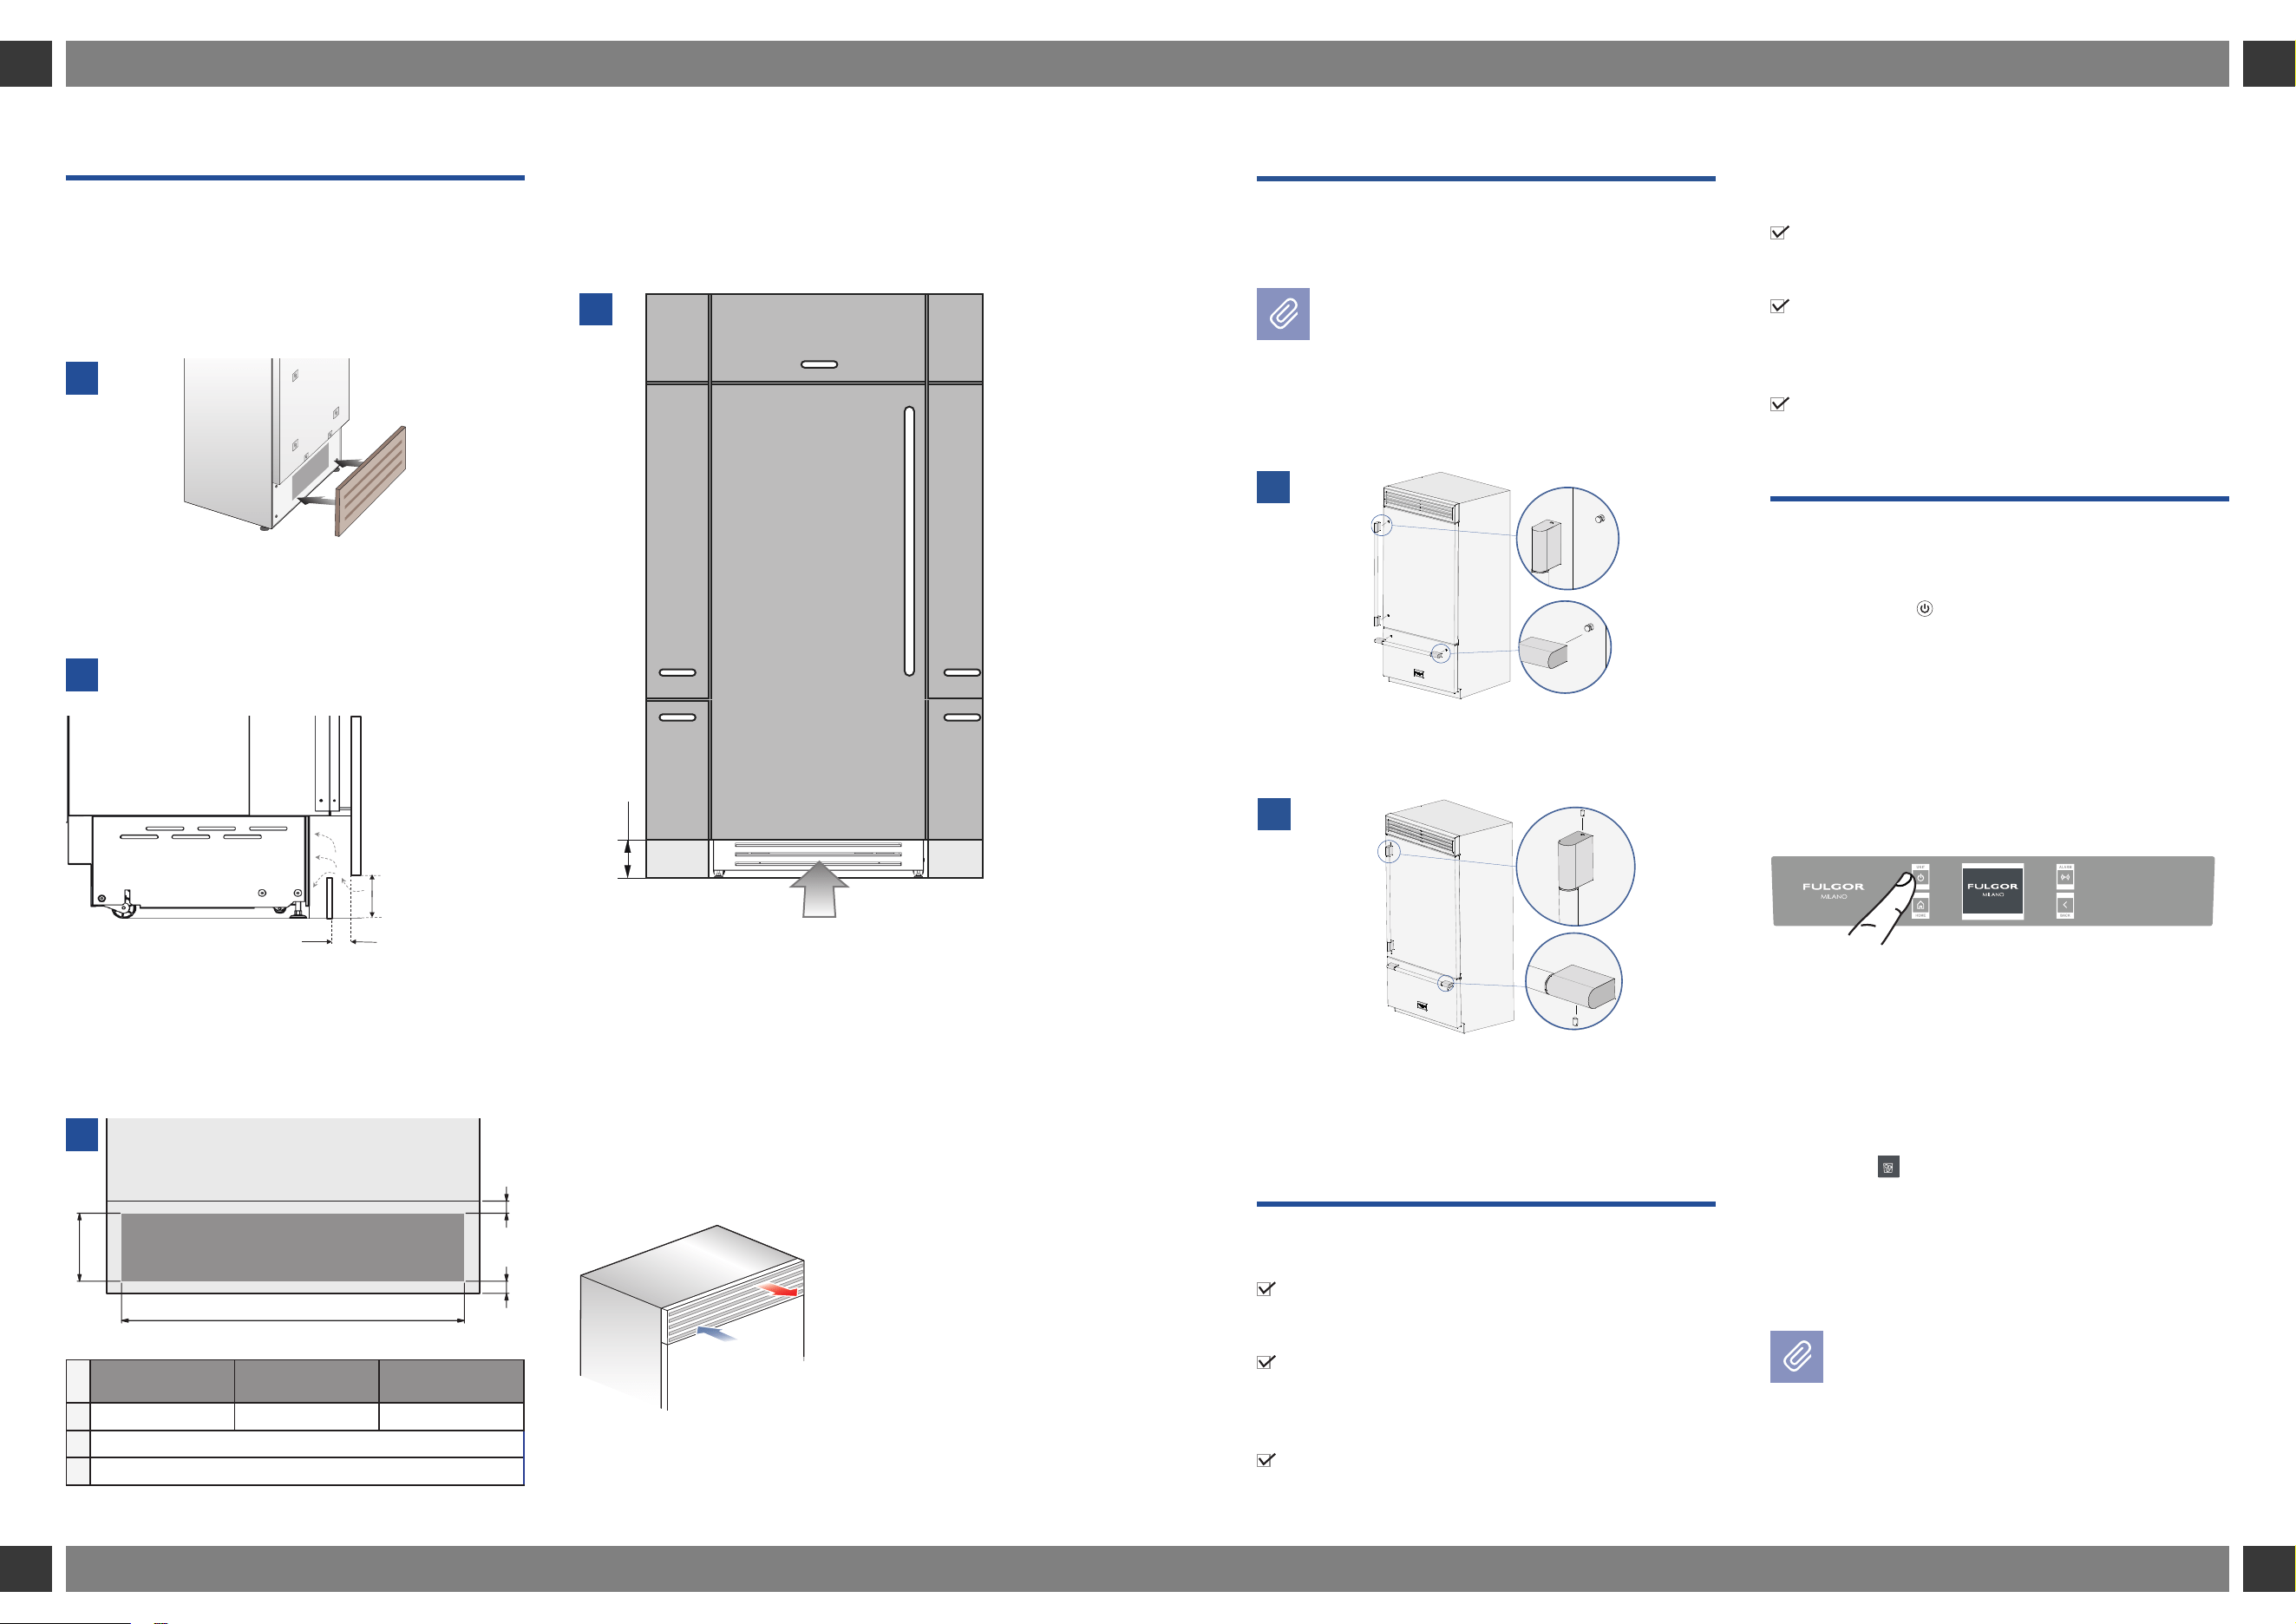
7.2 Ventilation
PANEL READY AND CLADDED MODELS
A forced air system assures ventilation through a
grille, secured to the unit with magnetic plates,
positioned in the lower front part of the unit [ 1 ].
If the kitchen cabinet includes a kickplate, it must be
placed in a way to ensure optimal airflow [ 2 ].
In case of placing a kickplate dierently from picture
[ 2 ], the kickplate must have vents / openings at
least of an area equal to 50% of the area delimited
by A and B dimensions in picture [ 3 ].
7.3 Mounting the handles
on cladded models
To mount the handles onto the door and
the drawer operate as follows:
Operate as follows:
> Insert the handle ends onto the supports
already installed on the door and the drawer [ 1 ].
> Screw in the set screws available on the handle [ 2 ].
The screws must be tightened in by means of a
2.5 mm (1/8”) hex key or driver. It is recommen-
ded to use a thread-locking compound on the set
screws to ensure they do not loosen over time /
use.
7.4 Post installation checklist
Check that the front levelling feet have been
properly installed.
Check that the connection to the water system
does not have any leaks and that the shut-o valve
is easily accessible.
Check that the electrical connection is correctly
installed and that the socket and / or breaker are
easily accessible.
Check the perfect alignment of the appliance
with adjacent structures.
Check that all adhesive tape and external or
internal temporary protective devices have been
removed.
Check the perfect closing of the doors and the
smooth sliding of the drawers and shelves.
7.5 Start up
>To turn on all the appliance compartments,
press the Unit
button for three seconds. The
display will show the message “Initial test” for
approximately 2 minutes. After this phase the
compressors will start up and remain on until
the compartment set temperatures are achieved.
> If the appliance is provided with an Ice Maker,
prior to switching it on make sure that the water
filter cartridge is installed (unless water supply
source is already filtered by other means such as
reverse osmosis).
> Purge air from the water lines by performing
the ‘Manual Clean’. You may need to complete this
sequence several times until you stop hearing air
sputtering from the ice maker fill tube (Refer to
your Use & Care Manual).
> Once you are satisfied that the system is purged
of air switch the Ice Maker on in the ice maker
menu item
ICE MAKER
of the appliance functions. Please
refer to the Use & Care Manual for more details.
> For further information about the appliance
operation, refer to the User Manual.
If at the first start messages appear, such
as Fridge too warm, Freezer too warm,
or sound signals are activated, it means
that the appliance has already previously
started the cooling process.
If this is the case, deactivate any possible
acoustic signals by pressing the Alarm
The condenser must to be cleaned on a regular
basis. In order to do that, the front grille has to be
accessible [ 4 ].
Stainless exterior Pro SERIES:
Ventilation is accomplished by a forced air system
through a grille located in the upper part of the
appliance. This grille should never be covered
by panels or any other devices that could reduce
its efficiency. Please refer to page Technical
specifications sections for Stainless exterior Pro
models to ensure correct air circulation.
7. COMPLETING THE INSTALLATION
A
B
C
C
100 (4”)
50mm (1 ⅞”)
min 100mm (4”)
2
1
3
4
1
2
Loading ...
Loading ...
Loading ...