Loading ...
Loading ...
Loading ...
10
RANGE HOOD CARE
Cleaning
WARNING
•
Toreduce the risk of electrical shock, DO NOT clean
the hood while it's operating.
•
Never put your hands into the area housing the fan
when the fan is operating.
Cleaning the Exterior Surfaces:
IMPORTANT
To avoid damage to the exterior surfaces:
•
DO NOT use corrosive or abrasive detergent.
•
DONOTusesteelwool,scoringpadorsteel
brushes. Use a paper towel or soft cloth or
nonabrasive sponge instead.
•
DO NOT use salt solutions, disinfectants, bleaches
or cleaning compound that contains harmful
chemicals.
Cleaning Method:
•
Noncorrosive or nonabrasive liquid detergent soap
or all-purpose liquid cleanser.
•
Wipe the surfaces with a damp paper towel or soft
cloth or nonabrasive sponge.
•
Rinse with cleanwater.
•
Wipe dry with dry towel or cloth.
Note
•
Thenonabrasive stainless steel polisher can be
appliedwhendonecleaningtoretainthestainless
luster and grain.
•
Always follow the instruction of the polisher.
Cleaning the Stainless Steel Baffle Filters:
•
Pullthe springrelease handle and remove the filter
by pulling itdown.
•
Wash the filters in the dishwasher, or soak it into
hot or warm water with dish detergent for half an
hour,then wipe the filter clean. Repeat these steps
until there's no oil residue remains.
•
Let the filters dry thoroughly.
•
Make sure the spring release handle is toward the
front, align and insert the filter.
•
Pull the spring release handle and push the filter
into position.
•
Release the handle.
•
Repeat the steps for the remaining filters.
Replacing the Filters
•
Replace the baffle filters immediately should they
becomewornoutduetoagingorprolonged usage.
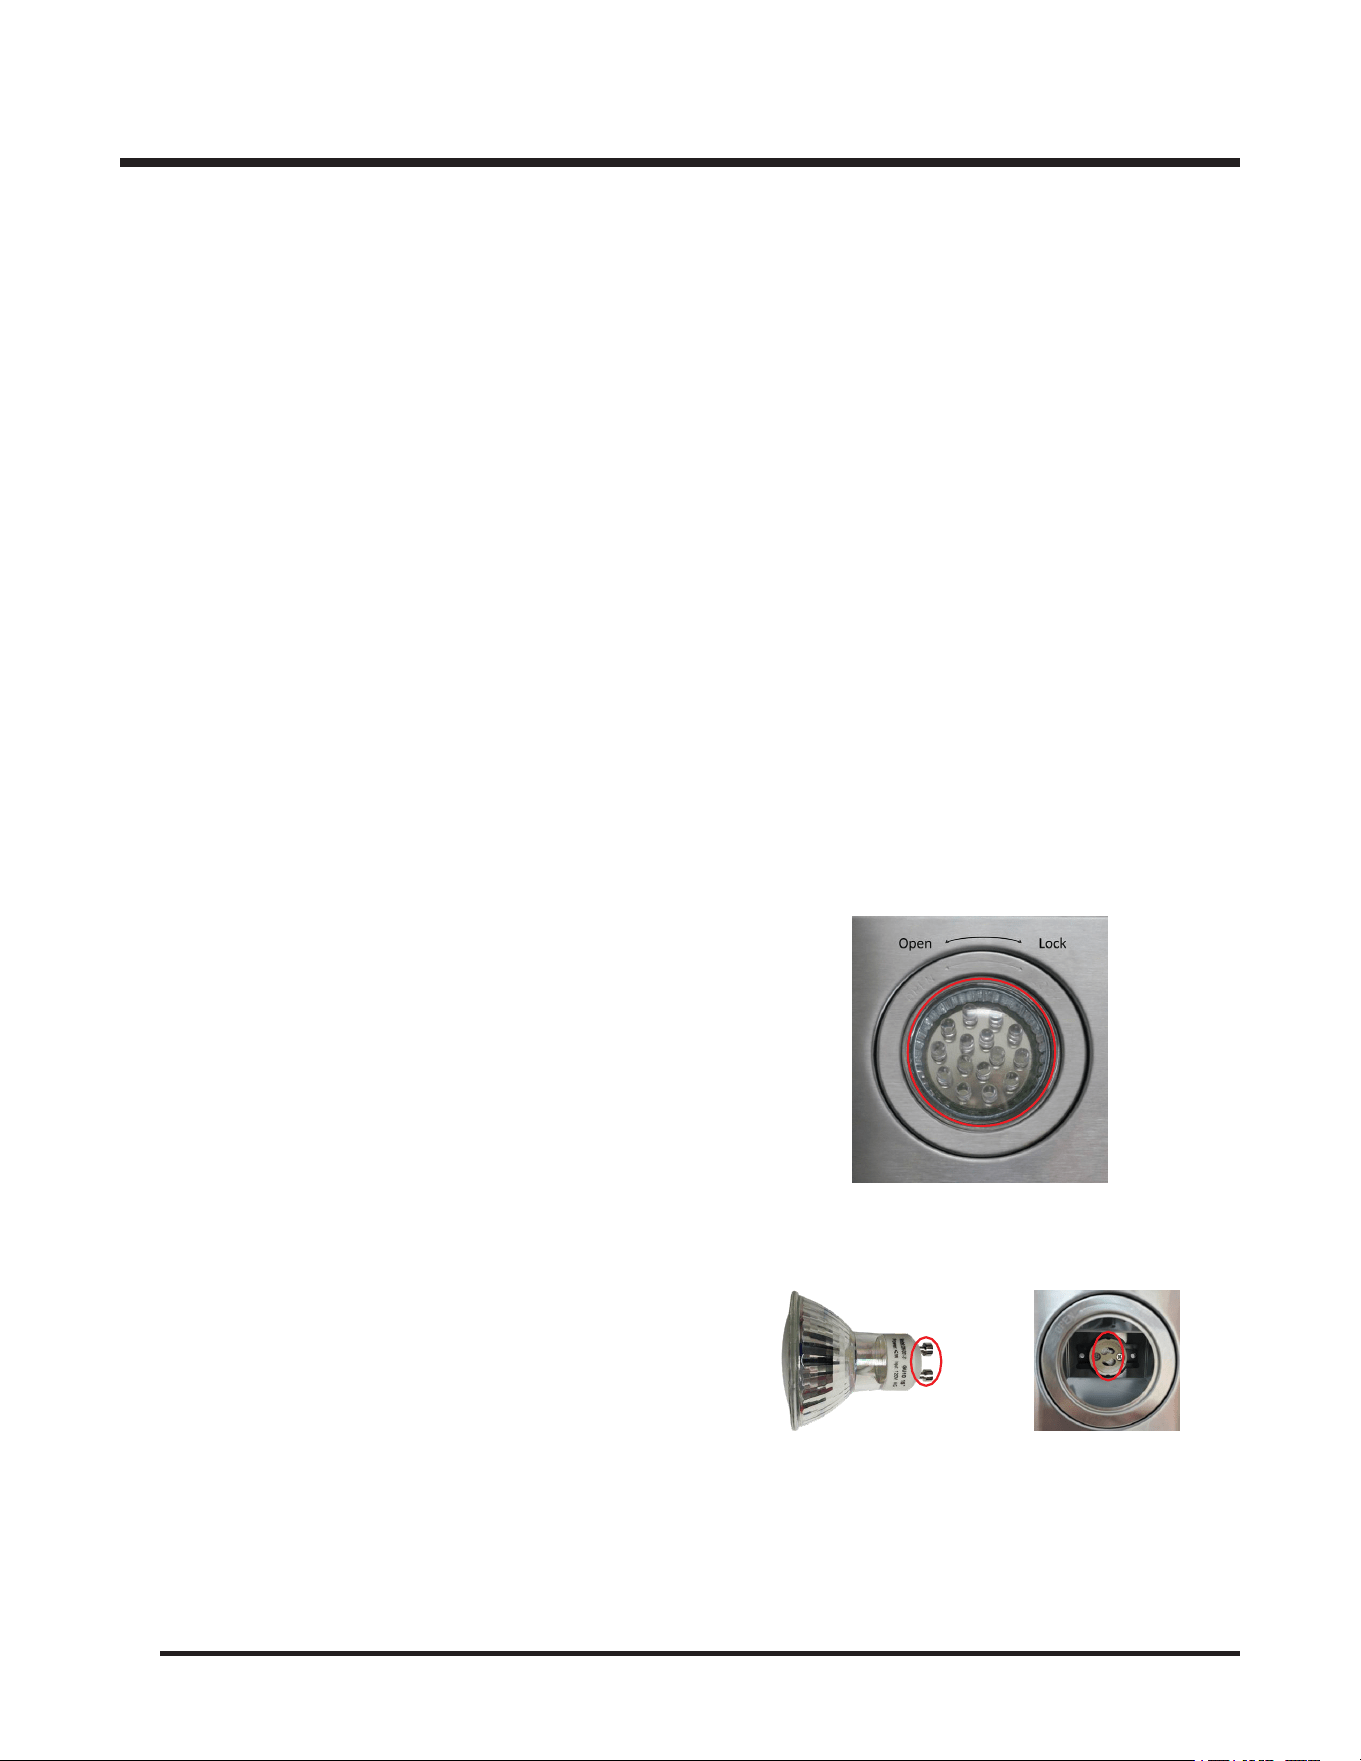
Replacing the LED Lamps
WARNING
Electrical Shock Hazard
Disconnect power before servicing
Wear gloves to protect against sharp edges
•
Thisrange hooduses120VLED.(ModelNo.:GU10.)
•
Unplug the range hood, or turn off the breaker.
•
Press on the rim of the Lamp and twist counter-
clockwise to unlock the Lamp.
•
Pullout the defective Lamp.Use a
flathead screwdriver if needed.
•
Align and put the new Lamp back into position.
•
Press on the rim of the new Lamp and twist
clockwise to lock the Lamp in position.
•
Plug in the range hood, or turn on the breaker.
•
Check if the new Lamp is working properly.
Loading ...
Loading ...
Loading ...