4
5
Preparation for Use
Installing/Replacing the Battery
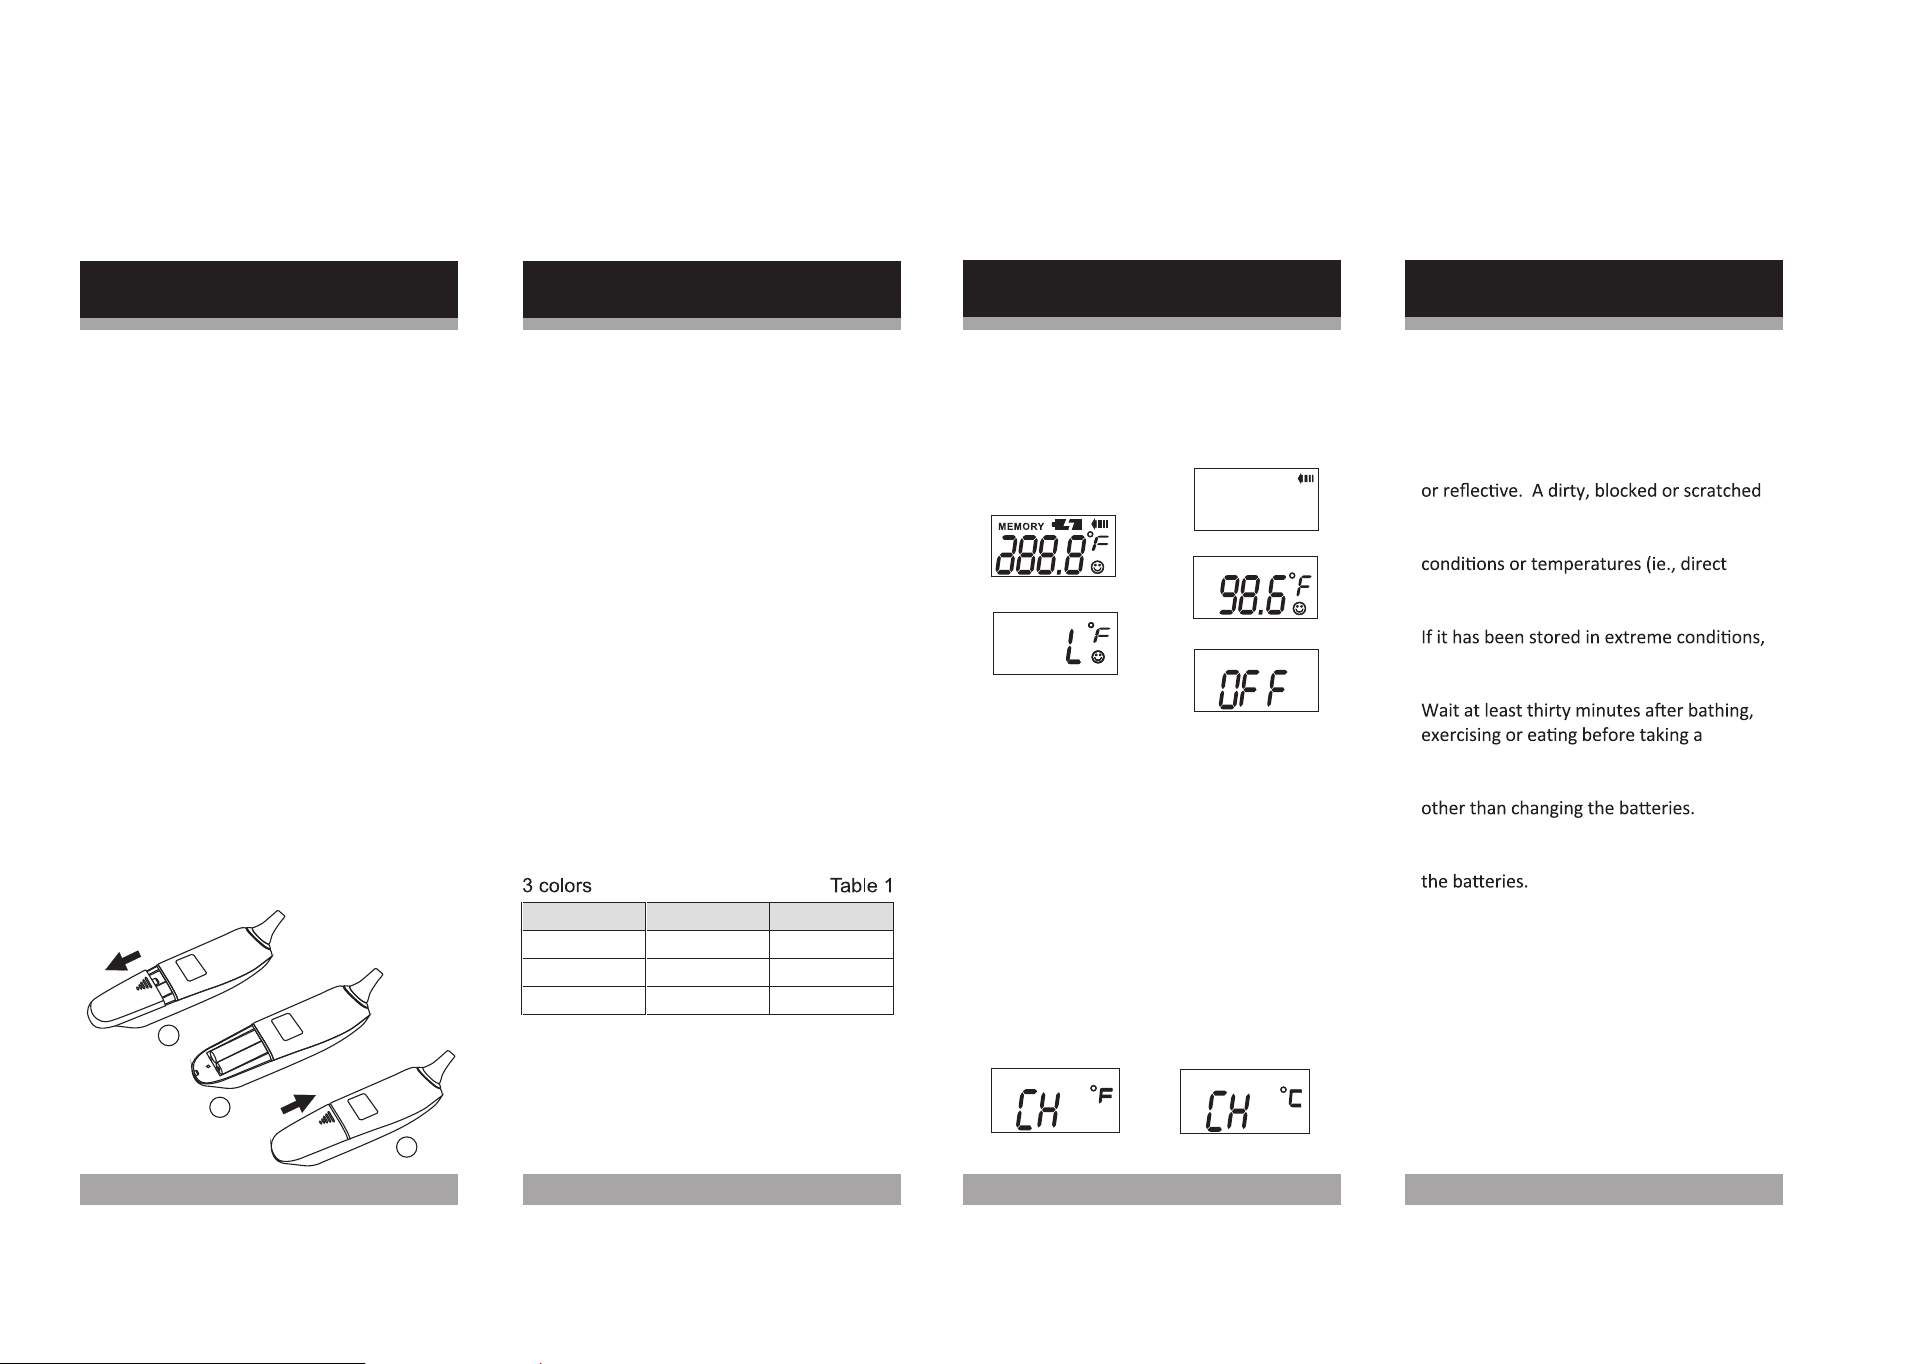
1. Pull the battery cover off in the
direction shown.
2. Clean the battery contacts and also
those of the device prior to battery
re-installation.
3. Install two new "AAA" batteries into
the battery compartment matching
correct polarities.
4.Replace and fasten the battery cover
securely.
1. Press and release the START/STOP
button to turn on the unit.
(F igure 1 )
A beep is heard. After about 2
seconds, the display shows that the
unit is ready for measurement.
(F igure 2 )
2. Place the probe into the ear canal
then press and release the
START/STOP button again to start
measurement.
3. While it is measuring, the display will
show an "arrow" sign.
(F ig u r e 3 )
4. A "beep-beep"sound is heard when
the measurement is completed.
(F ig u r e 4 )
5.
6. After the smiling face symbol stops
flashing, you can repeat
measurement by pressing the
START/STOP button again.
The temperature and back light color
shows on the display. The display
will light up according to the reading.
Please refer to Table 1.
How to Operate the Thermometer
1
-
-
-
-
-
-
2
-
-
-
-
-
-
3
7
The Centigrade or Fahrenheit mode
can be switched by turning the unit on
then pressing the START/STOP button
again immediately and holding it down.
The display will show "CH" with "F"
or"C". Release the button when the
mode you desire is in the display
window. The unit will show "L" with the
degree sign and the smiling face
symbol in the display and is ready to
take a new temperature reading.
or
Warning:
Caution:
When replacing batteries, do not mix
old ones and new ones. Do not mix
alkaline, standard(carbon-zinc) or
rechargeable(nickel-cadmium)
batteries.
7. Turn off the unit by pressing and
holding the START/STOP button for
5
seconds until the OFF message is
displayed. A long beep is heard.
(F igure 5 )
How to Operate the Thermometer
6
Batteries contain mercury. Refer to your
local disposal laws for proper disposition.
Manage as hazardous waste. Do not
recharge, put in backwards, disassemble
or dispose of batteries in fire. This may
cause explosion, leakage and injury.
(Figure1)
(Figure2)
(Figure3)
(Figure4)
(Figure5)
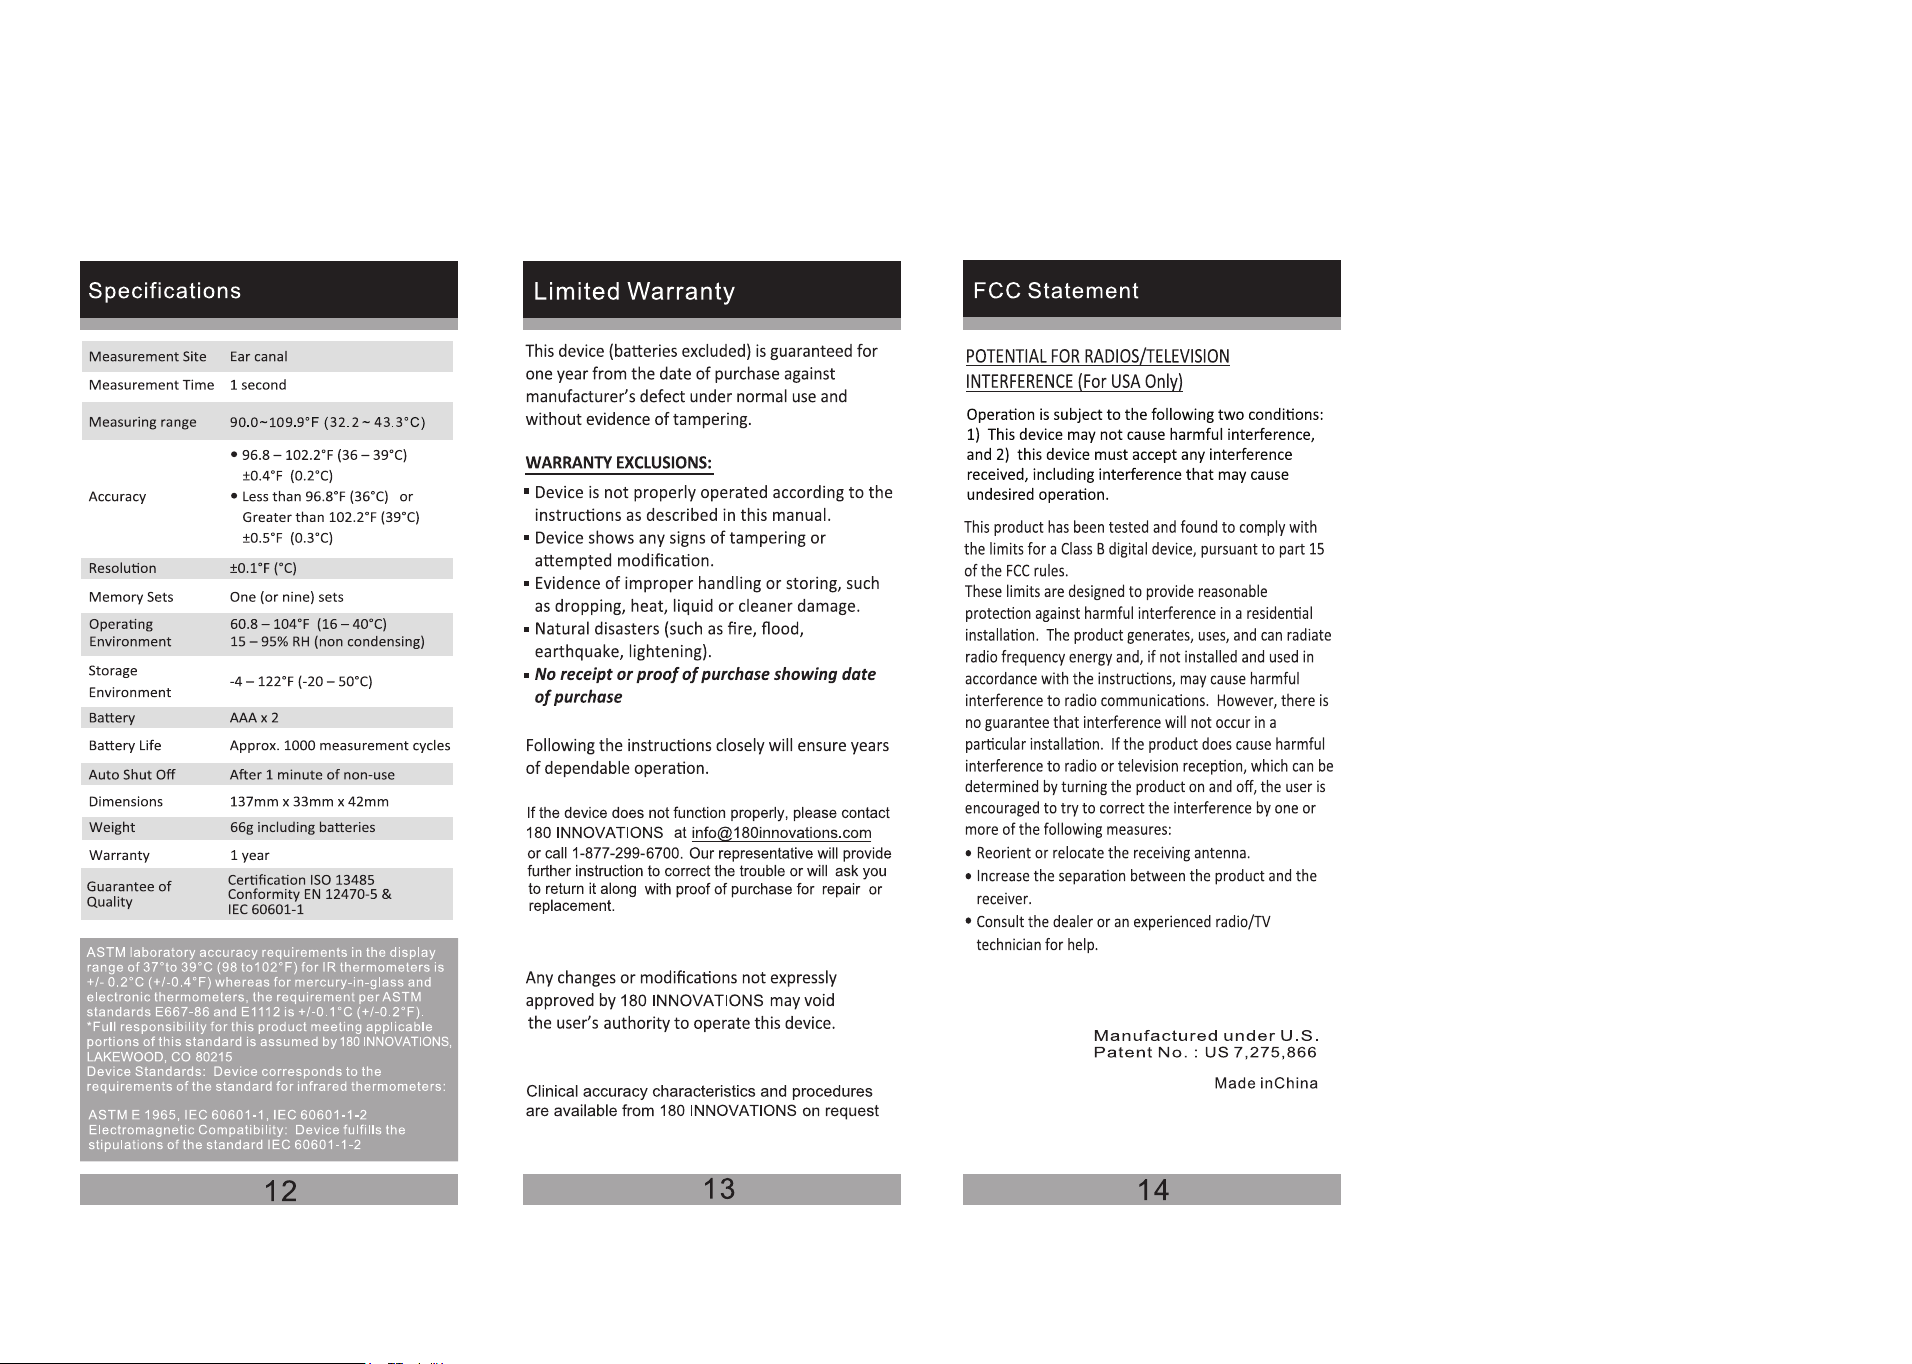
For Fahrenheit and Centigrade
Switchable Models:
Reading in °F Reading in °C Back Light Color
UP TO 98.9 UP TO 37.1 GREEN
99.0 – 99.4 37.2 – 37.4 YELLOW
99.5 AND UP 37.5 AND UP RED
WARNING: Performance of the device
may be degraded if it is operated or
stored outside the stated temperature
and humidity range or if the patient’s
temperature is below the ambient
(room) temperature.
IMPORTANT THINGS TO KNOW
Allow at least 1-3 minutes between each
measurement in order to obtain the most
accurate result.
Make sure the probe lens is clean and
clear before use. It should be ‘mirror like’
lens will cause incorrect results.
Do not store the device in extreme
sunlight, very hot/cold or high moisture
like a bathroom). Unit is not waterproof.
wait at least one hour for it to return to a
normal room temperature before using.
measurement.
Do not dismantle or modify the device
This device has no user serviceable parts. Do
not dismantle or modify other than changing
9
11
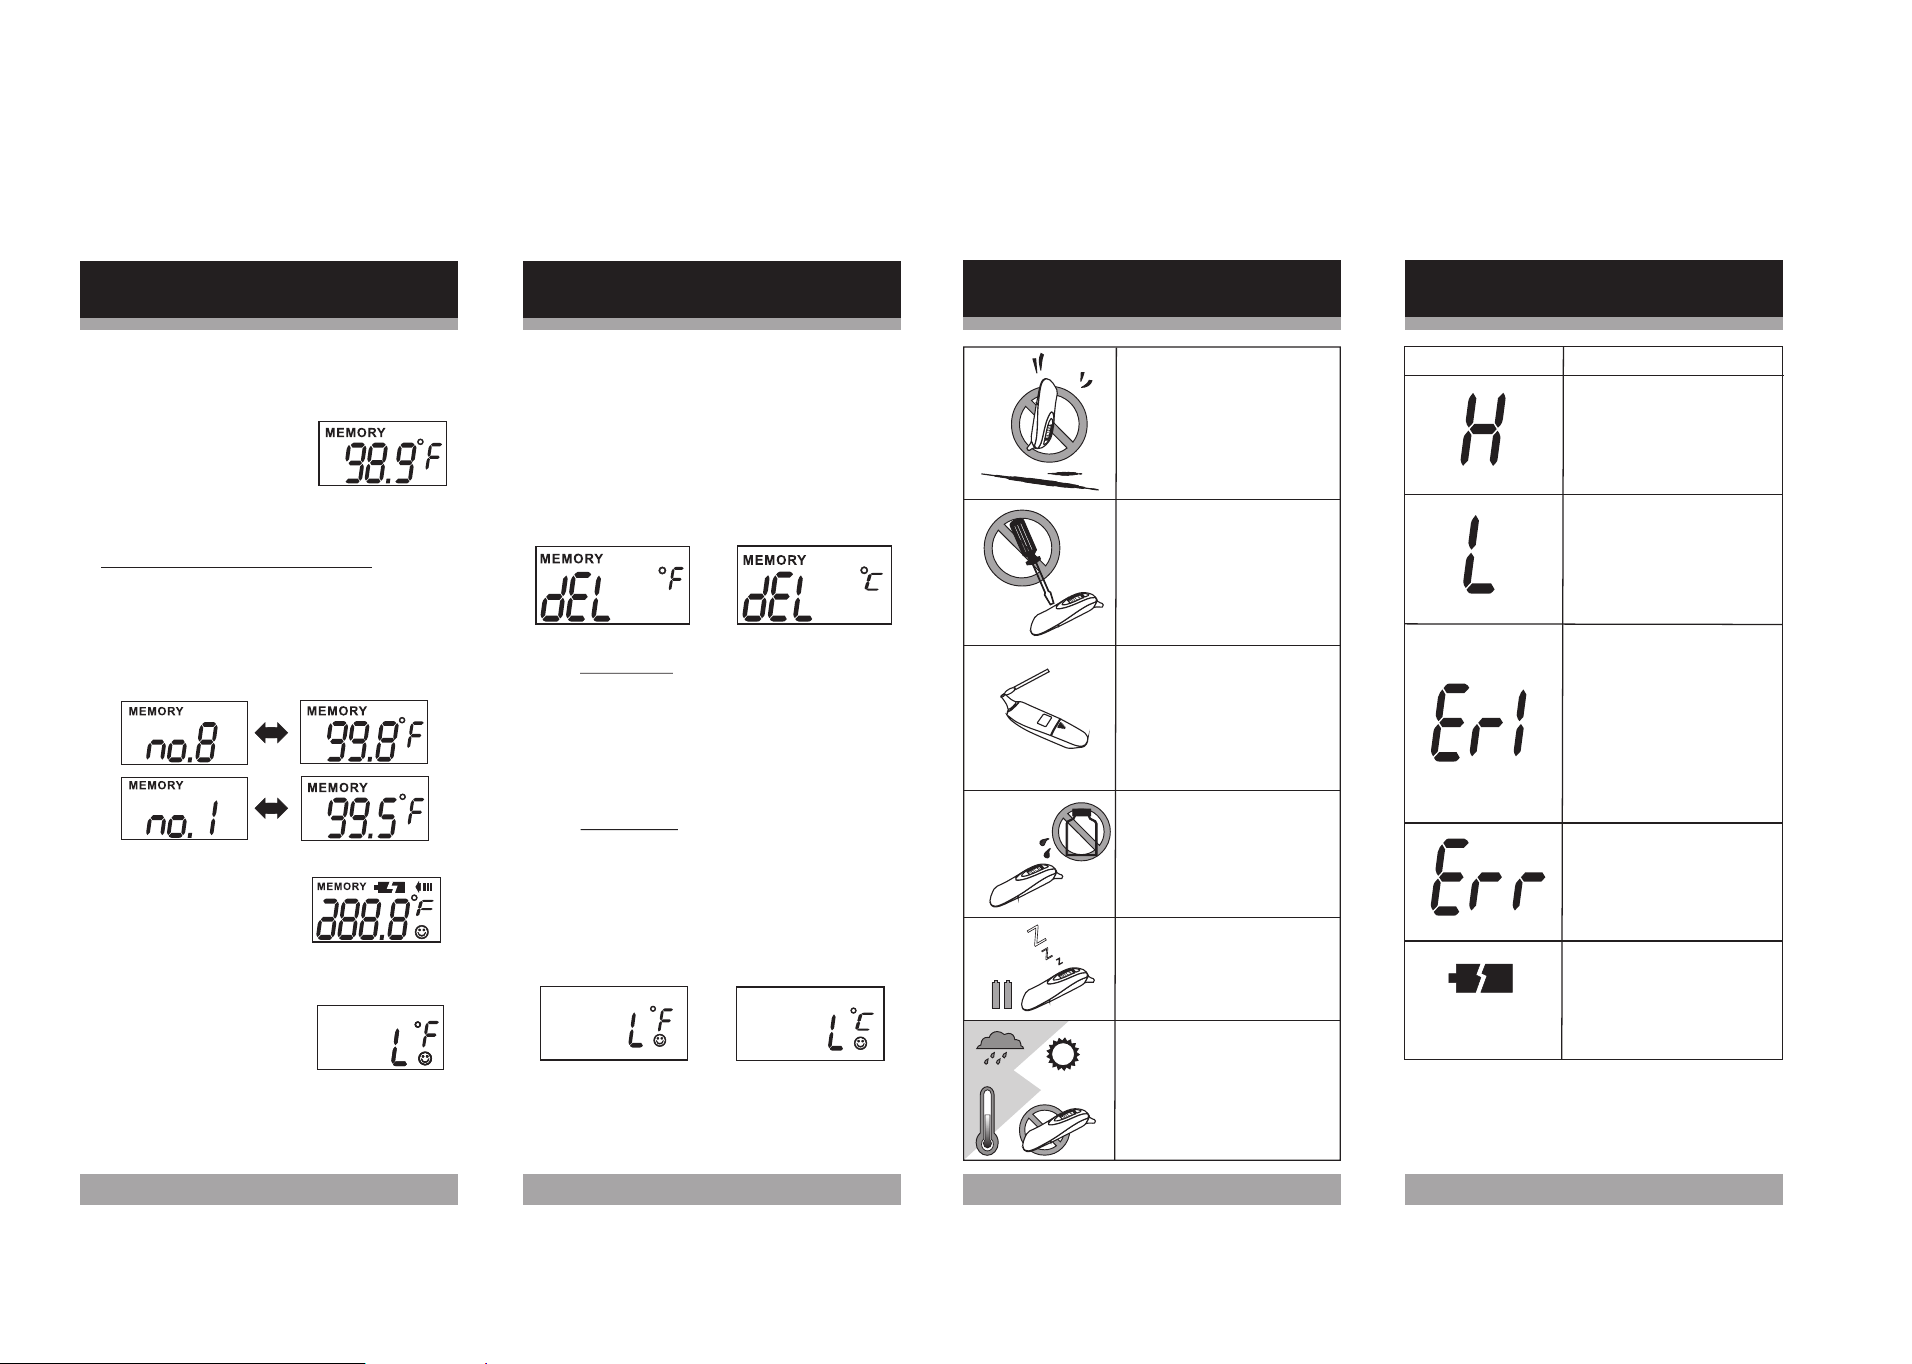
DO NOT modify or
disassemble the
thermometer.
Cleaning and Care
Please avoid thinner
and benzene or other
harsh cleaners.
Please remove the
batteries if the unit wi ll
not be used for a long
time.
Please keep the unit in a
suitable place avoiding
high temperature, direct
sunlight, high moisture,
and dust. The unit is not
water proof.
10
or
No display
Message
Correction
The temperature
measured was higher
than the specified
measuring range.
Pl eas e me as ur e again.
The temperature
measured was lower
than the specified
measuring range.
Pl ease m eas u r e ag ai n.
The am bi
ent
(room)
t
em
perat
ur
e was outside
the oper
at
ing range.
K
eep
it at roo
m
tem
perat
ure
approx. 60. 8~104
°F
(16°C~40°C
)
for 30
mi nutes befor
e
usi
ng
.
Repl ac e t he t wo
" A A A " b at ter i es.
Error Message
DO NOT drop or expose
thermometer to electric
shock as this may
adversely affect its
performance.
Memory Mode
Deleting Memories:
1.Repeat the first two steps of
"Rec alli n g Mem o ries " .
2.Pr ess an d h old the START/STOP
button for three seconds until "dEL"
is displayed.
3. (a) To delete:
Press and release the
START/STOP button to erase all
of the records in the unit. A beep
is heard and the unit is turned off.
All records are now deleted.
(b) To cancel:
DO NOT press the START/STOP
button for 10 seconds until the
display " L" appears. At that
moment, the unit is ready for
measurement again.
Z
Z
Z
Failed self-diagnostic
test. Rei ns tall b at teri es
an d t ry again .
or
or
8
Memory Mode
Recalling Memory:
1. If the power is on,
turn off the
power.
first
2. Press and hold the
START/STOPbutton
for about 3 seconds
until the last recorded
temperature is displayed.
3. For models with 9 memories
Press the START/STOP button
repeatedly will take you to each
recorded temperature in the
memory. you may toggle the button
to see the recorded temperatures.
4. After you release the
START/STOP button
the unit will return to
the measurement
5. "L" will appear on the display. The
unit is then ready to
measure
again.
6. It is now ready to take a new
temperature reading.
Please use a cotton swab
with
rubbing
alcohol to
gently clean the surface
of the lens. Before next
measurement, wait at
least 40 minutes for the
unit to dry.
REV.20160525 P/N 8281700204