Loading ...
Loading ...
Loading ...
USER GUIDE
Ice
u-line.com
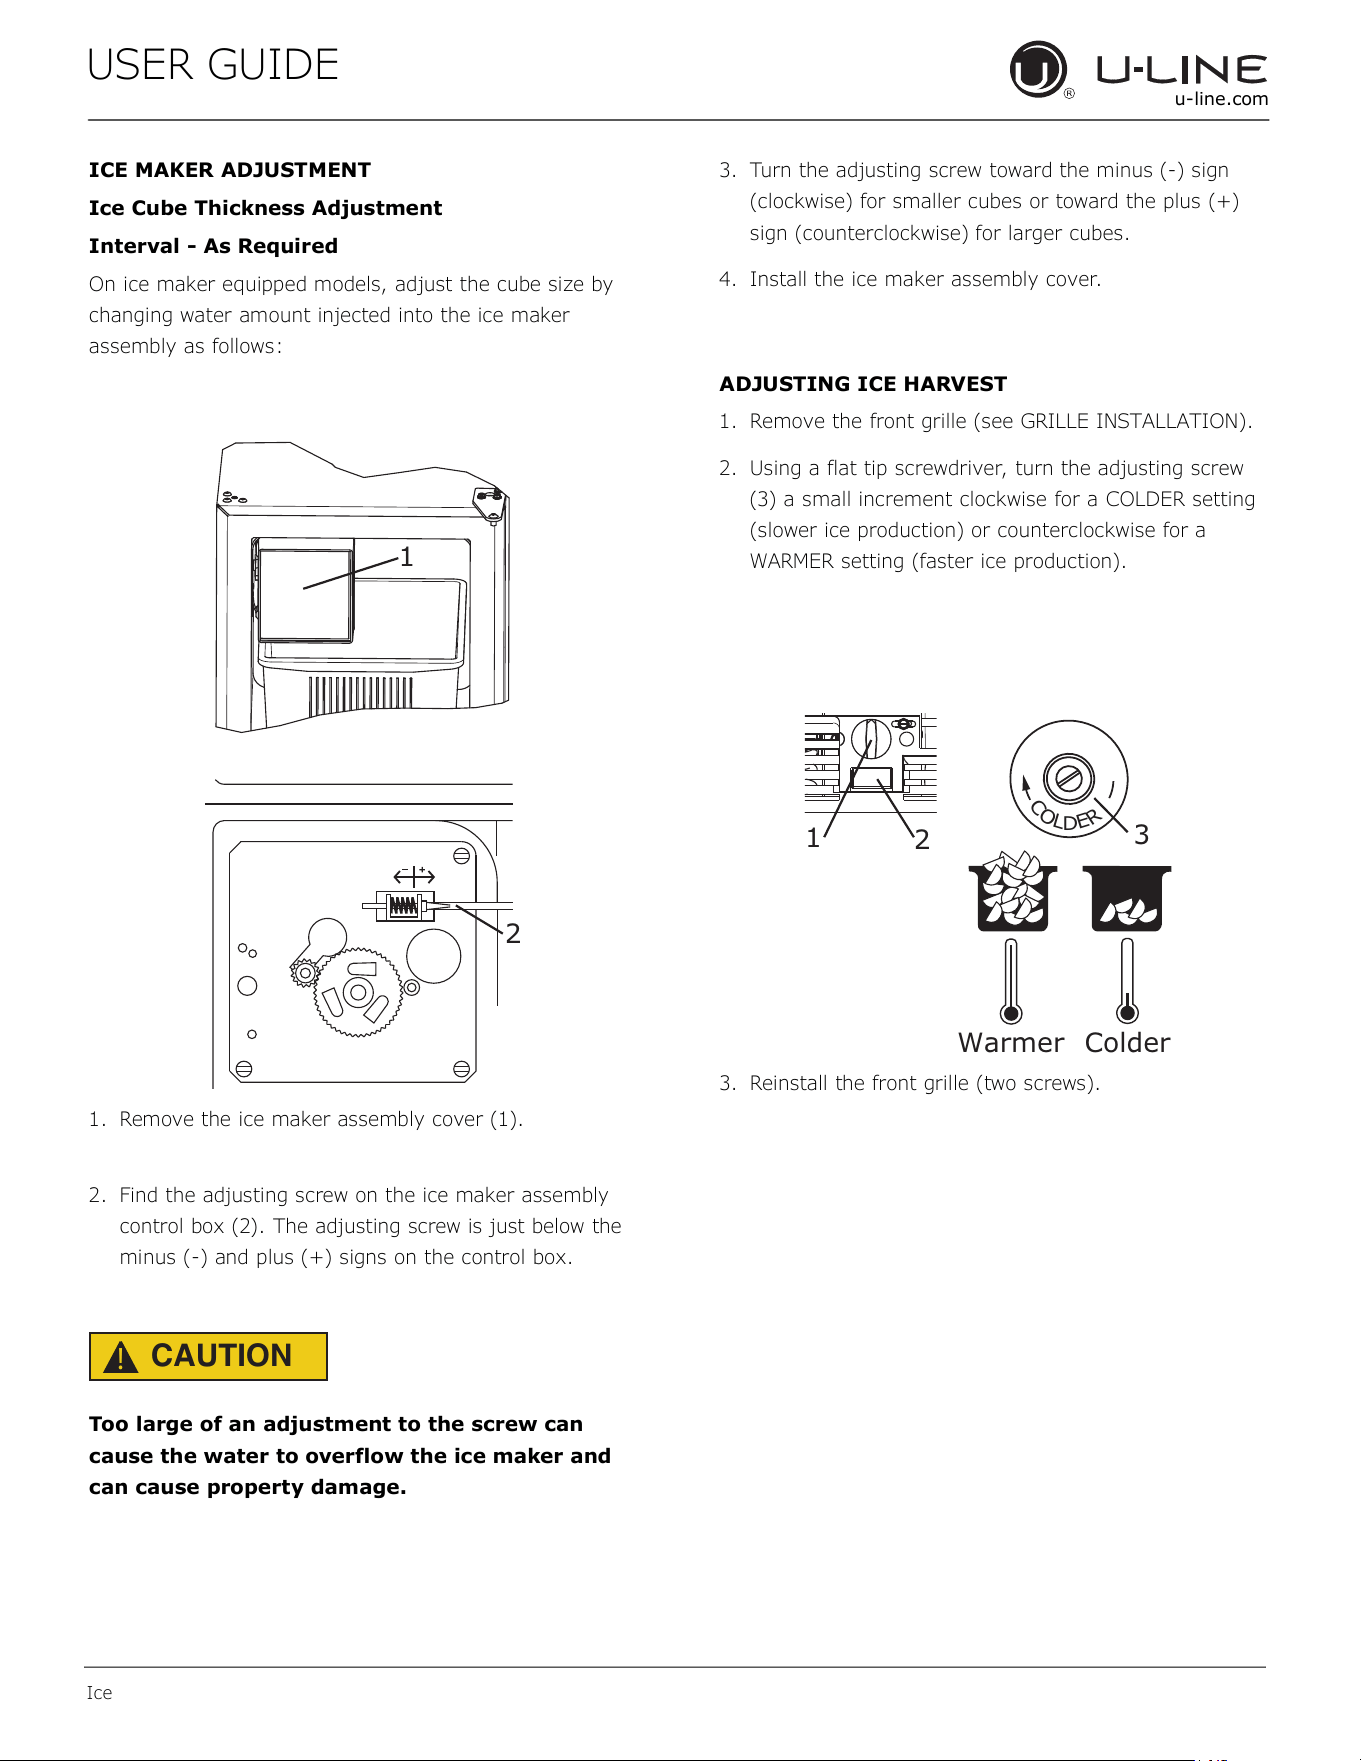
ICE MAKER ADJUSTMENT
Ice Cube Thickness Adjustment
Interval - As Required
On ice maker equipped models, adjust the cube size by
changing water amount injected into the ice maker
assembly as follows:
1. Remove the ice maker assembly cover (1).
2. Find the adjusting screw on the ice maker assembly
control box (2). The adjusting screw is just below the
minus (-) and plus (+) signs on the control box.
CAUTION
!
Too large of an adjustment to the screw can
cause the water to overflow the ice maker and
can cause property damage.
3. Turn the adjusting screw toward the minus (-) sign
(clockwise) for smaller cubes or toward the plus (+)
sign (counterclockwise) for larger cubes.
4. Install the ice maker assembly cover.
ADJUSTING ICE HARVEST
1. Remove the front grille (see GRILLE INSTALLATION).
2. Using a flat tip screwdriver, turn the adjusting screw
(3) a small increment clockwise for a COLDER setting
(slower ice production) or counterclockwise for a
WARMER setting (faster ice production).
3. Reinstall the front grille (two screws).
1
2
C
O
L
D
E
R
Warmer Colder
3
1
2
20
Loading ...
Loading ...
Loading ...