Loading ...
Loading ...

ninjakitchen.com
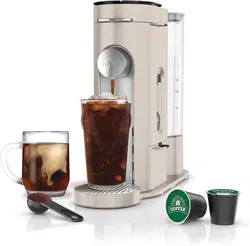
PARTS & ACCESSORIES
USING THE CONTROL PANEL
ninjakitchen.com
HIGH-ALTITUDE CALIBRATION BREW
Required for users in high-altitude areas. Not running the high-altitude calibration brew in a high-
altitude area will result in excessive steaming during brewing.
Because water boils at a lower temperature at higher altitudes, running a calibration cycle before
your first brew allows the coee maker to detect the boiling point of water at your location. Running
a calibration cycle will help deliver a consistent brew each time.
1 Fill the water reservoir up to, but not exceeding, the MAX line.
2 Insert the brew basket and close the coee maker lid, then place a 24 oz. cup or travel mug
underneath the nozzle.
3 Power on the unit and press and hold the BREW and CLEAN buttons until you hear a
confirmation sound.
4 A calibration cycle will begin, and the progress bar will advance until the altitude calibration is
complete. The coee maker will beep when completed. Discard the water in the 24 oz. cup or
travel mug.
1 Power Button
2 Brew Style Button
3 Brew Size Button
4 Start/Cancel Brew Button
5 Intelligent Clean Cycle Button
6 Smart Sensing Mode Indicators
7 Intelligent Clean Cycle Indicator
(Orange)
NOTE: This calibration is permanently saved and will not be reset if power is lost or unit is
unplugged. The coee maker can be recalibrated at any time.
SMART SENSING MODE INDICATORS
MODE INDICATORS STATE
Grounds: The Permanent Filter is inserted; shut the coee maker lid and
the coee maker is ready to brew grounds.
Pods: The Ninja® Pod Adapter is inserted; shut the coee maker lid and
the coee maker is ready to brew pods.
No State: One of the above criteria has not been met.
USING THE NINJA POD ADAPTER AND
PERMANENT FILTER
1
2
3
4
5
6
7
The coee maker comes with the unique Ninja Pod Adapter already installed in the brew basket, and
the Permanent Filter located in the Adapter Storage Bin on the bottom right side of the coee maker.
Always ensure the Ninja Pod Adapter or Permanent Filter is installed over the brew basket.
INSTALLING THE NINJA
POD ADAPTER
Place the Ninja Pod Adapter
in the brew basket, ensure
the handle is aligned with
the brew basket handle, and
press down on the Ninja Pod
Adapter firmly until it clicks
into place.
INSTALLING THE
PERMANENT FILTER
Place the Permanent
Filter in the brew basket
and ensure the handle
is aligned with the brew
basket handle.
A Coee Maker
(Power cord not shown)
B 56 oz. Removable
Water Reservoir
C Removable Water Reservoir Lid
D Control Panel
E Coee Maker Lid
F Brew Basket
G Permanent Filter
H Ninja Pod Adapter
I Frother Whisk*
J Adjustable Cup Tray
K Ninja Smart Scoop
L Adapter Storage Bin
M Removable Nozzle
J
*(accessories may vary by model)
G
K
B
C
H
F
L
A
D
E
M
I
2 3
Loading ...
Loading ...
Loading ...