Loading ...
Loading ...
Loading ...
Part 1 – Introduction
13
Installation
• Check the wall or ceiling to see if it needs to be
reinforced. The camera may fall o if the wall or
ceiling is not strong enough to support its weight.
• Install the camera in a shaded area. If the camera
is installed in direct sunlight, it may be aected
adversely.
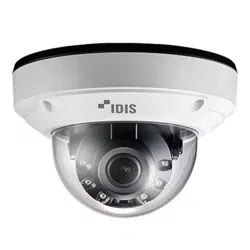
DC-D4537RXA
1
Use the screws, anchor provided with the camera to
secure the install bracket on a wall or a ceiling.
Use the provided guide pattern to check the
distance between the screws.
2
Connect external devices, the network cable, and
the power adapter.
3
Adjust the angle. For more information, refer to the
Angle Adjustment.
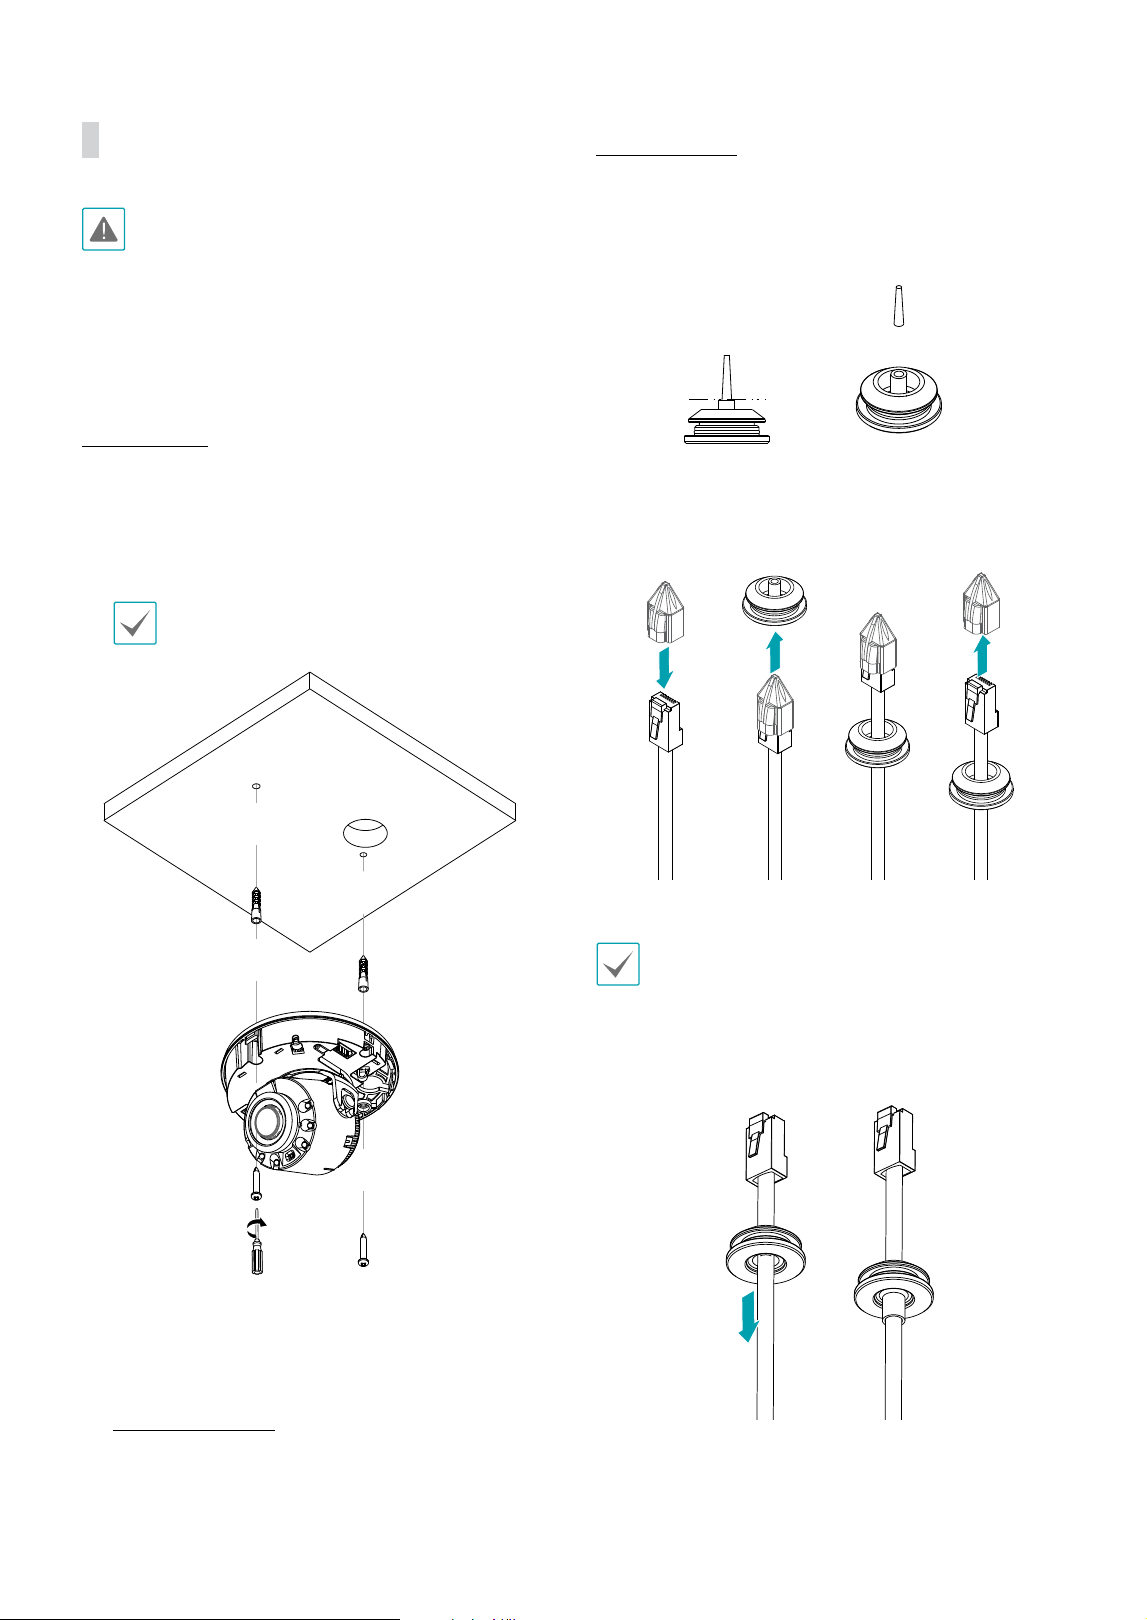
DC-D4537HRXA
1
Detach the protrusion part from the cable rubber
along the dotted line.
2
Make the LAN cable go through the cable rubber
using the protect connector.
It is recommended to use lubricant to move the LAN
cable smoothly.
3
Pull the cable slightly and arrange the rubber as
shown below.
Loading ...
Loading ...
Loading ...