RICHMOND & STERLING CORE
User manual - EI (100-110 cm)
2
COUNTRIES OF DESTINATION:
GB - Great Britain
IE - Ireland
DE - Germany
ES - Spain
FR - French
IT - Italy
PL - Poland
NL - Netherlands
BE - Belgium
SE - Sweden
CN - China
NZ - New Zealand
AU - Australia
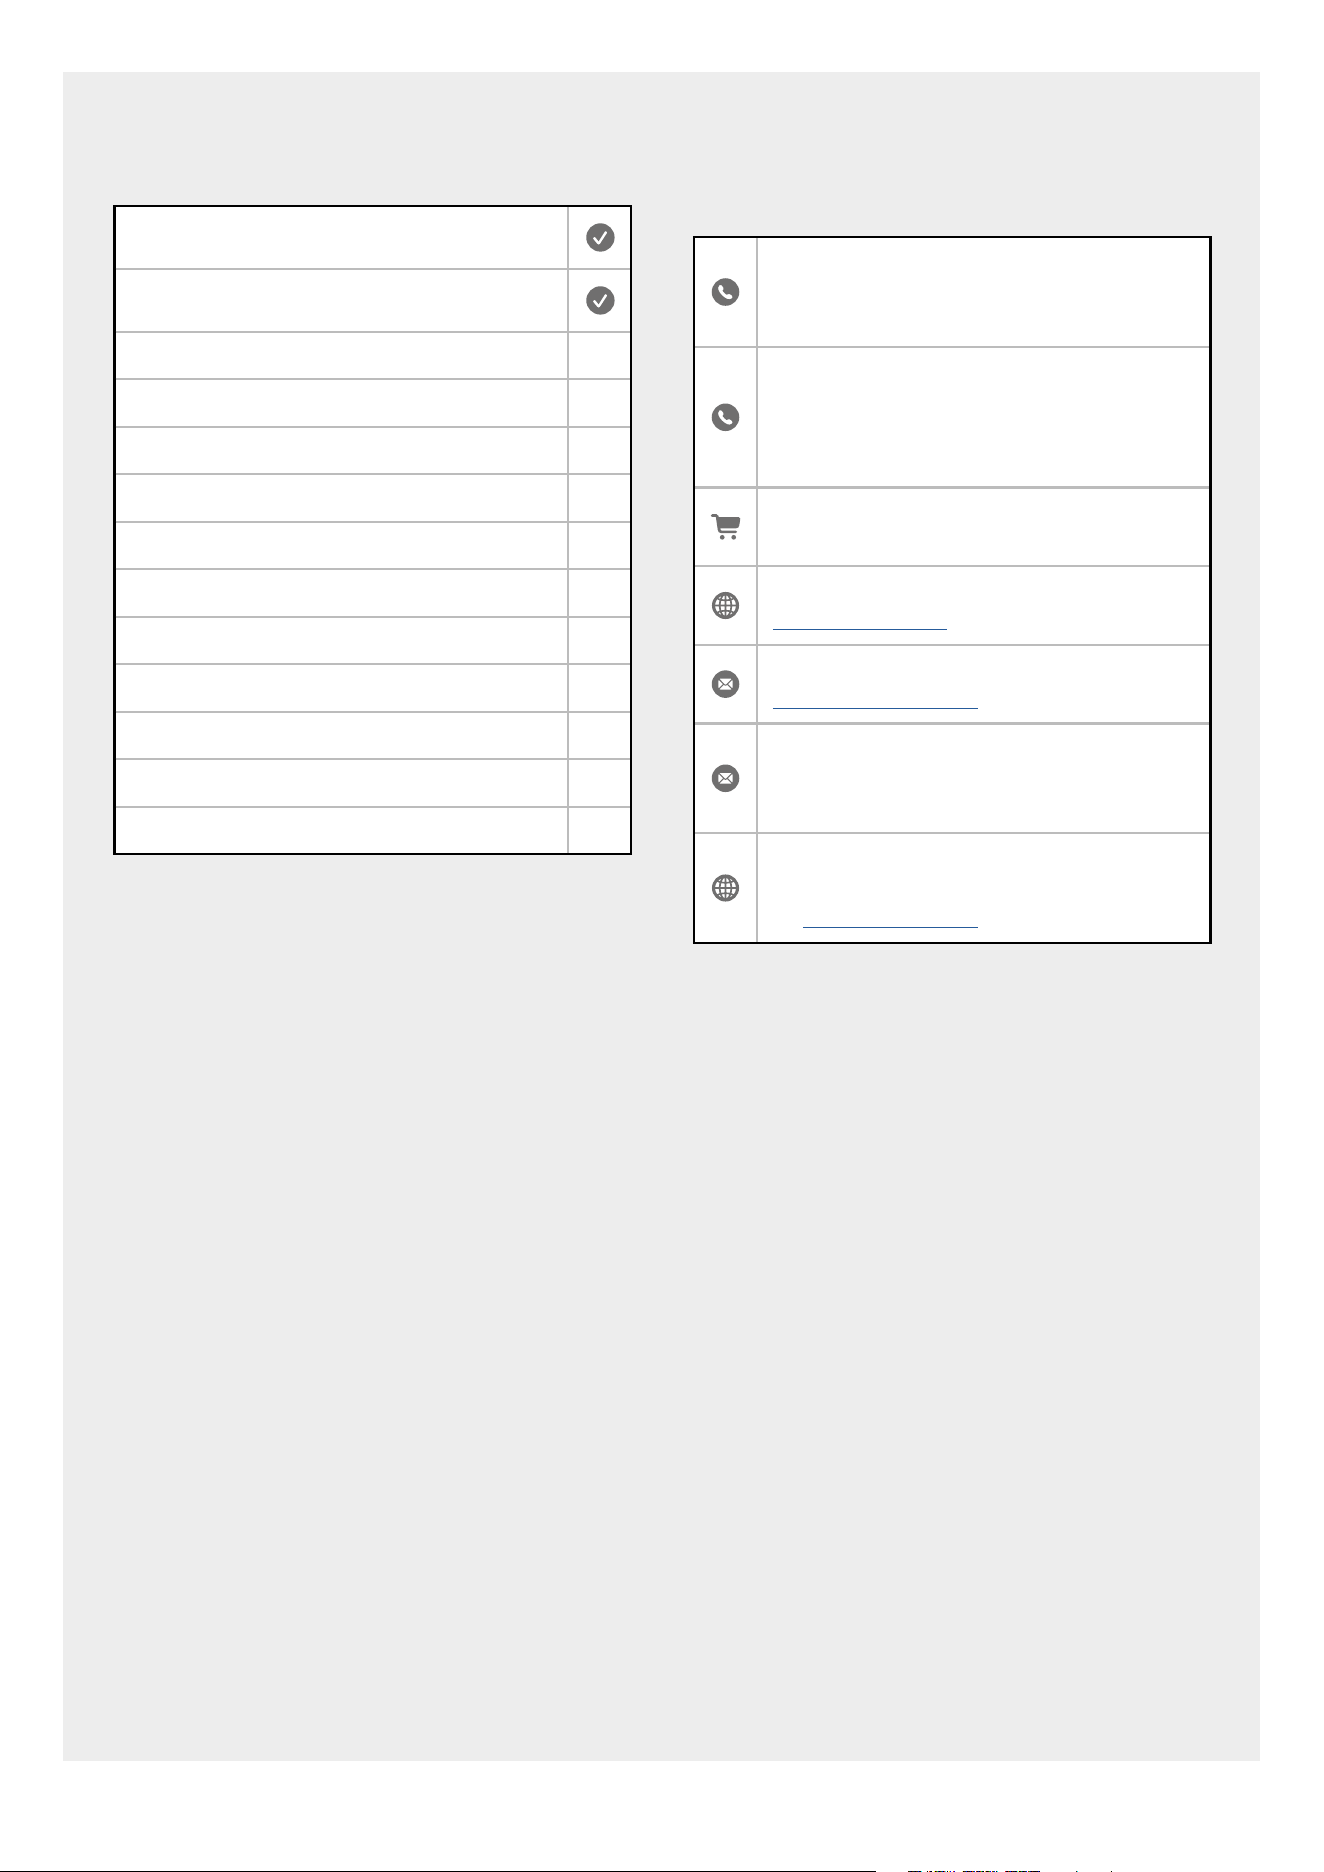
TO CONTACT STOVES ABOUT YOUR
APPLIANCE, PLEASE CALL:
Customer Care Helpline
0344 815 3740
In case of diculty within the UK
Warranty Registration
0800 952 1065
*Please call our Customer Care team for
extended warranty
Spares Store
0344 815 3745
To register your appliance online:
www.stoves.co.uk
To contact us by email:
gdhainfo@gdha.com
To register your appliance by mail: Please
complete the warranty card and return to
the address supplied
Alternatively general, spares and service
information is available from our website
at:
www.stoves.co.uk
Calls are charged at the basic rate, please check with
your telephone service provider for exact charges
Your new appliance comes with our 2 year guarantee
(UK only), protecting you against electrical and
mechanical breakdown. To register, please complete
the registration form included, register online
or by phone. For full terms & conditions of the
manufacturer’s guarantee, please refer to the website
above. In addition, you may wish to purchase an
extended warranty. A leaflet explaining how to do this
is included with your appliance.
Our policy is one of constant development and
improvement, therefore we cannot guarantee
the strict accuracy of all of our illustrations and
specifications. Changes may have been made
subsequent to publishing.
Glen Dimplex Home Appliances, Stoney Lane,
Prescot, Merseyside, L35 2XW
3
CONTENTS
INTRODUCTION 4
SAFETY 5
GETTING TO KNOW YOUR PRODUCT 8
USING YOUR APPLIANCE 10
USING THE HOB 11
USING THE GRILL 18
USING THE TOP OVEN 19
USING THE MAIN OVEN - ELECTRIC 21
USING THE OVEN/GRILL - MULTI-FUNCTION 24
USING THE OVEN - SLOW COOK 28
COOKING GUIDE 30
BAKING GUIDE 33
ROASTING GUIDE 38
CLOCK/PROGRAMMER - STOVES RICHMOND 40
CLOCK/PROGRAMMER - STOVES STERLING 44
SHELF GUIDES AND RUNNERS 47
CLEANING YOUR APPLIANCE 50
TECHNICAL DATA 51

4
INTRODUCTION
Thank you for buying this British-built appliance from
us.
This user guide book is designed to help you through
each step of owning your new product.
Please read it carefully before you start using your
appliance, as we have endeavored to answer as many
questions as possible, and provide you with as much
support as we can.
General information, spares and service information is
available from our website.
If you should find something missing from your
product or have any questions that are not covered
in this user guide, please contact us (see contact
information inside the front cover).
EUROPEAN DIRECTIVES
As a producer and a supplier of cooking appliances we
are committed to the protection of the environment
and are in the compliance with the WEEE directive.
All our electric products are labelled accordingly with
the crossed out wheeled bin symbol. This indicates, for
disposal purposes at end of life, that these products
must be taken to a recognized collection points, such
as local authority sites/local recycling centres.
This appliance Complies with European Community
Directives (CE) for household and similar electrical
appliances and Gas appliances where applicable.
This appliance conforms to European Directive
regarding Eco design requirements for energy-related
products. Our policy is one of constant development
and improvement, therefore we cannot guarantee
the strict accuracy of all of our illustrations and
specifications - changes may have been made
subsequent to publishing.
DISPOSAL OF PACKAGING
MATERIAL
The packaging materials used with this
appliance can be recycled. Please dispose of
the packaging materials in the appropriate
container at your local waste disposal
facilities.

5
SAFETY
WARNING
6 Never put items directly on the base
of the oven or cover the oven with foil,
as this can cause the base element to
overheat.
6 Accessible parts may become hot when
the grill is in use. Children should be kept
away.
6 Do not place articles on or against the
appliance.
6 Always switch off your appliance and
allow it to cool down before you clean
any part of it.
6 Although every care has been taken to
ensure this appliance has no sharp edges,
we recommend that you wear protective
gloves when installing and moving this
appliance. This will prevent injury.
6 This appliance must be fitted to a switch
providing all pole disconnection with a
minimum contact separation of 3mm.
6 Connection should be made with a
suitable flexible cable with a minimum
temperature of 70 °C.
6 Do not use a steam cleaner on any
cooking range, hob or oven appliance.
6 Metallic objects such a knives, forks,
spoons and lids should not be placed on
the hob surface since they can get hot.
6 If your appliance is fitted with a lid, any
spillage should be removed from the lid
before opening. The hob surface should
be allowed to cool before closing the lid
(if fitted).
6 After use, switch off the hob element by
its control and do not rely on the pan
detector.
6 To avoid electric shock, ensure that the
appliance is switched off before replacing
the lamp.
6 The appliance is not intended to be
operated by means of an external timer
or separate control system.
6 Unattended cooking on a hob with fat or
oil can be dangerous and may result in
fire.
6 NEVER try to extinguish a fire with water,
but switch off the appliance and then
cover the flame with a lid or damp cloth.
6 Danger of fire: Do not store items on the
cooking surfaces.
6 Only use hob guards designed by the
manufacturer of the cooking appliance
or indicated by the manufacturer of the
appliance in the instructions for use as
suitable or hob guards incorporated in
the appliance. The use of inappropriate
hob guards can cause accidents.
6 If the cooker is placed on a base,
measures have to be taken to prevent the
appliance slipping from the base.
6 The cooking process has to be supervised.
A short term cooking process has to be
supervised continuously.
6 This appliance must not be installed
behind a decorative door in order to avoid
overheating.

6
6 Ensure shelving is correctly installed. See
the sections on the shelf runners and
shelf location within this book.
6 This appliance is for cooking purposes
only. It must not be used for other
purposes, for example room heating.
6 When hot moist air (created through the
cooking process) meets a cooler surface
such as an oven door, condensation
is normal especially when cooking
high moisture content foods at low
temperatures.
To minimise this,
- Pre-heat the oven before putting the food
into the oven.
- Cover the food you are cooking.
- Where possible cook high moisture
content foods at higher temperatures.
- Do not leave food in the oven to cool
down.
6 Warning! If the surface is cracked, switch
off the appliance to avoid the possibility
of electric shock.
6 Warning! The appliance and its
accessible parts become hot during use.
Care should be taken to avoid touching
heating elements. Children less than 8
years of age shall be kept away unless
continuously supervised.
4
Note! Automatic cooking will normally
produce condensation when cooling
down and the food is still inside.
CAUTION
6 If the hob surface is cracked, broken or
shattered, switch off the appliance to
avoid the possibility of electric shock and
call for a service engineer’s visit.
6 Children less than 8 years of age shall
be kept away unless continuously
supervised. This appliance can be
used by children aged from 8 years
and above and persons with reduced
physical sensory or mental capabilities
or lack of experience and knowledge
if they have been given supervision or
instruction concerning the use of the
appliance in a safe way and understand
the hazards involved. Children shall not
play with the appliance. Cleaning and
user maintenance shall not be made by
children without supervision.
6 Do not use harsh abrasive cleaners or
sharp metal scrapers to clean the oven
door glass or the hob, since they can
scratch the surface, which may result in
shattering of the glass.
6 This induction hob complies with the
applicable EMC and EMF standards.
Therefore it should not interfere with
other electronic units. Persons fitted
with a pacemaker or any other electrical
implant should clarify with their doctor
or the producer of the implant, whether
there implant is adequate and fail-
safe. Please place pans centrally on
the cooking zones. The British Heart
Foundation provide additional advice
regarding using induction hobs when a
pacemaker is fitted.

7
FIRE SAFETY ADVICE
6 If you do have a fire in the kitchen, don’t
take any risks - get everyone out of your
home and call the Fire Service.
If you have an electrical fire in the
kitchen:
1. Pull the plug out, or switch off the power
at the fuse box - this may be enough to
stop the fire immediately
2. Smother the fire with a fire blanket,
or use a dry powder or carbon dioxide
extinguisher
6 Remember: never use water on an
electrical or cooking oil fire.
OTHER SAFETY ADVICE
6 Servicing should be carried out only by
authorised personnel.
6 Do not operate the appliance without the
glass panel correctly fitted.
6 There is a risk of electric shock, so always
make sure you have turned off and
unplugged your appliance. Always allow
the product to cool down before you
change a bulb.
6 Do not modify the outer panels of this
appliance in any way.
6 This appliance must be earthed.
6 The appliance must never be
disconnected from the mains supply
during use, as this will seriously affect
the safety and performance, particularly
in relation to surface temperatures
becoming hot and gas operated parts
not working efficiently. The cooling fan
(if fitted) is designed to run on after the
control knob has been switched off.
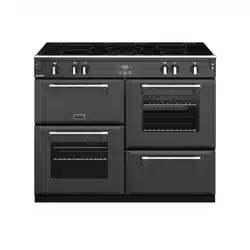
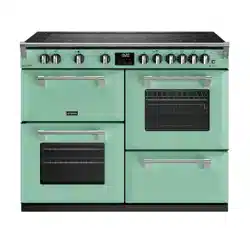
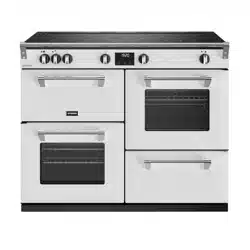
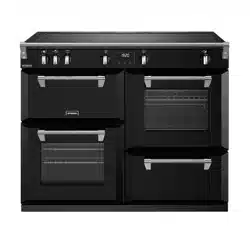
8
GETTING TO KNOW YOUR PRODUCT
4
Note: Your appliance layout may differ
depending on the model.
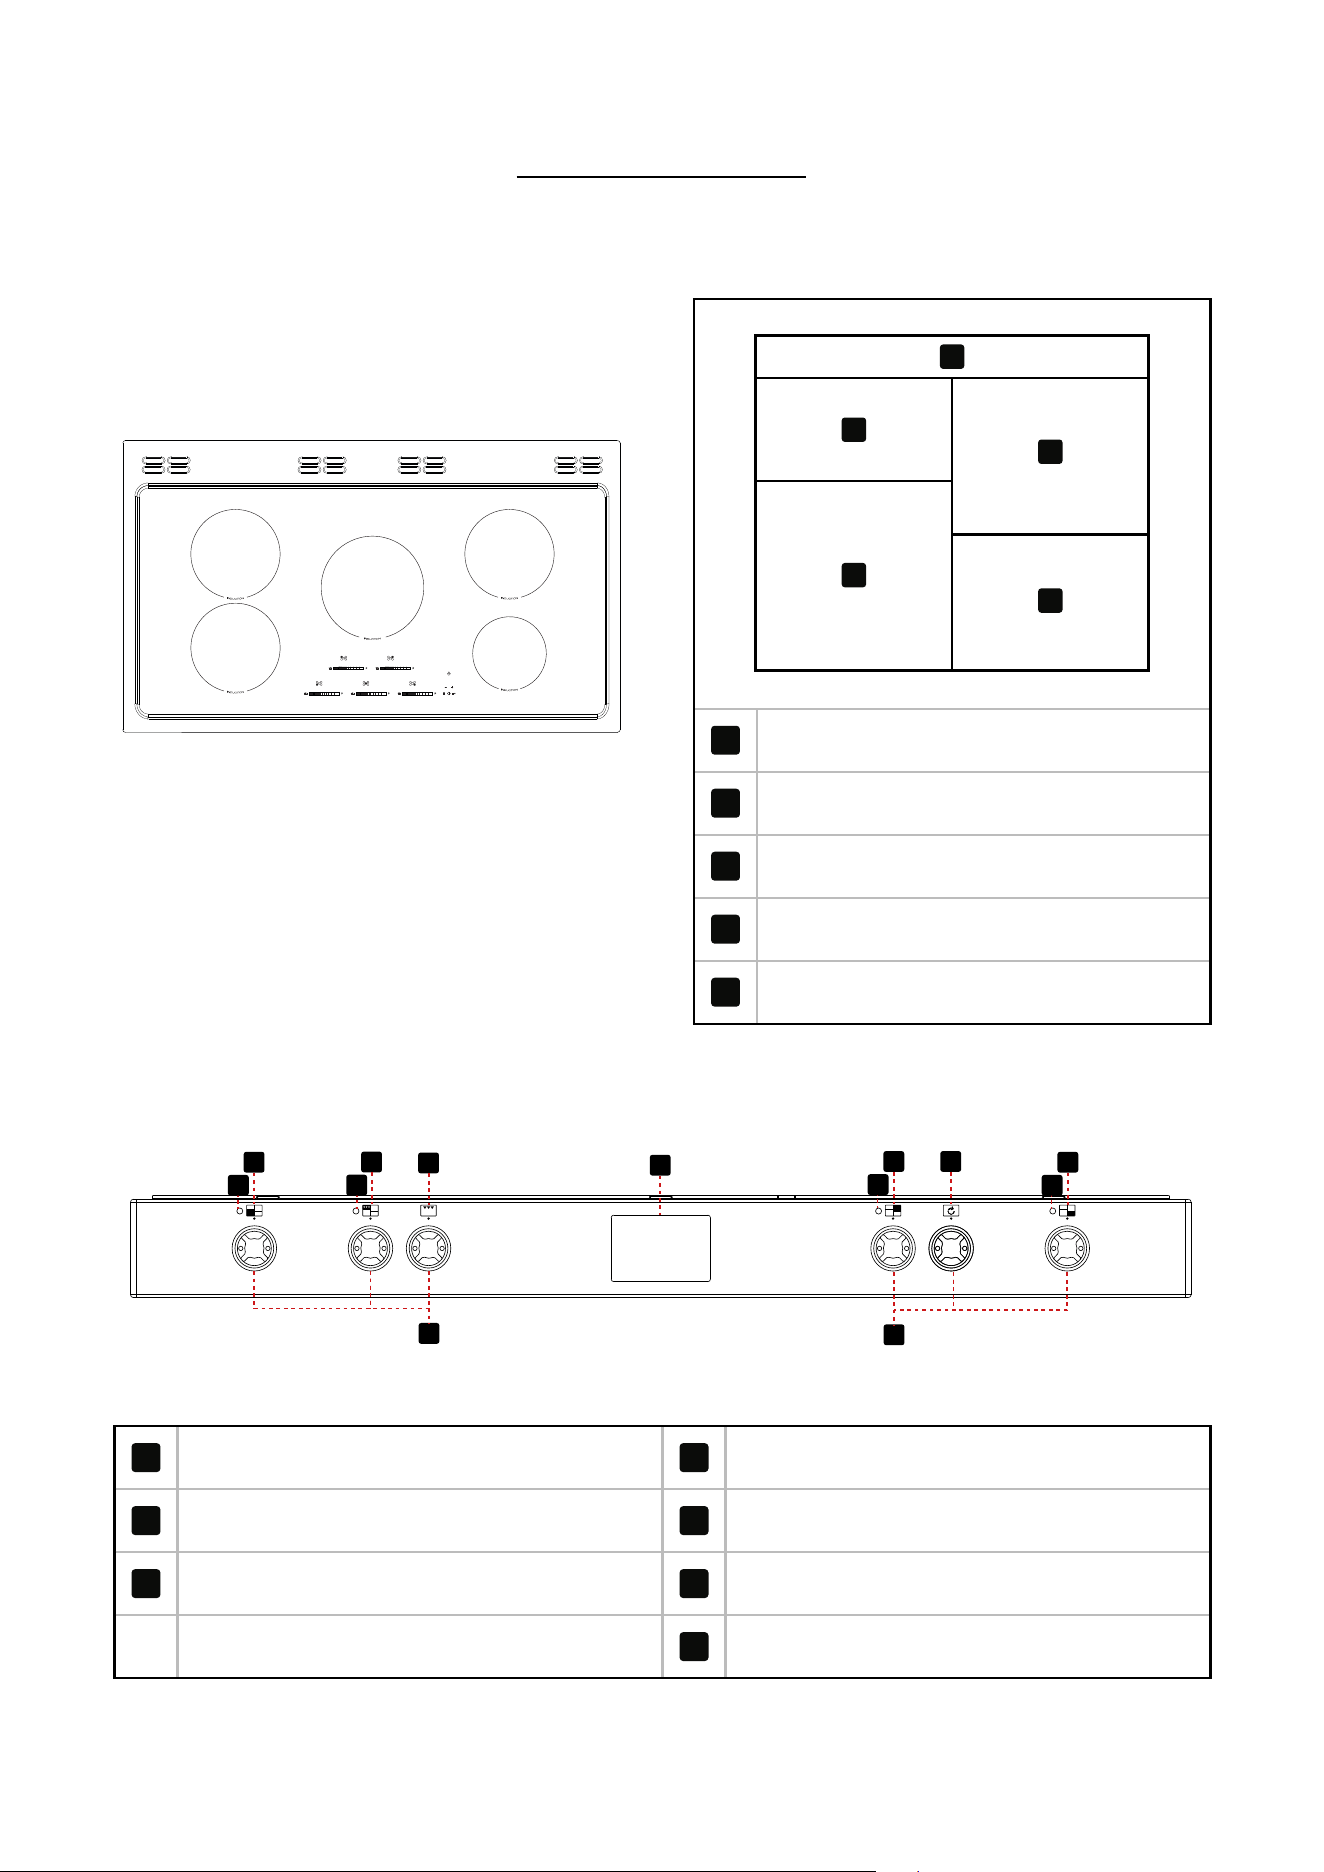
HOB
OVERVIEW
100/110cm
4
2
1
5
6
1
Fascia
2
Top Oven/Grill
4
Fanned Oven
5
Multifunction Oven
6
Slow Cook
CONTROL PANEL
3
6
9
2
4
5
5
5
3
5
3
8
8
2
Grill
5
Thermostat indicator
3
Oven
6
Top Oven/Grill
4
Clock/Programmer
8
Hob and Oven controls
9
Oven Selector Control
9
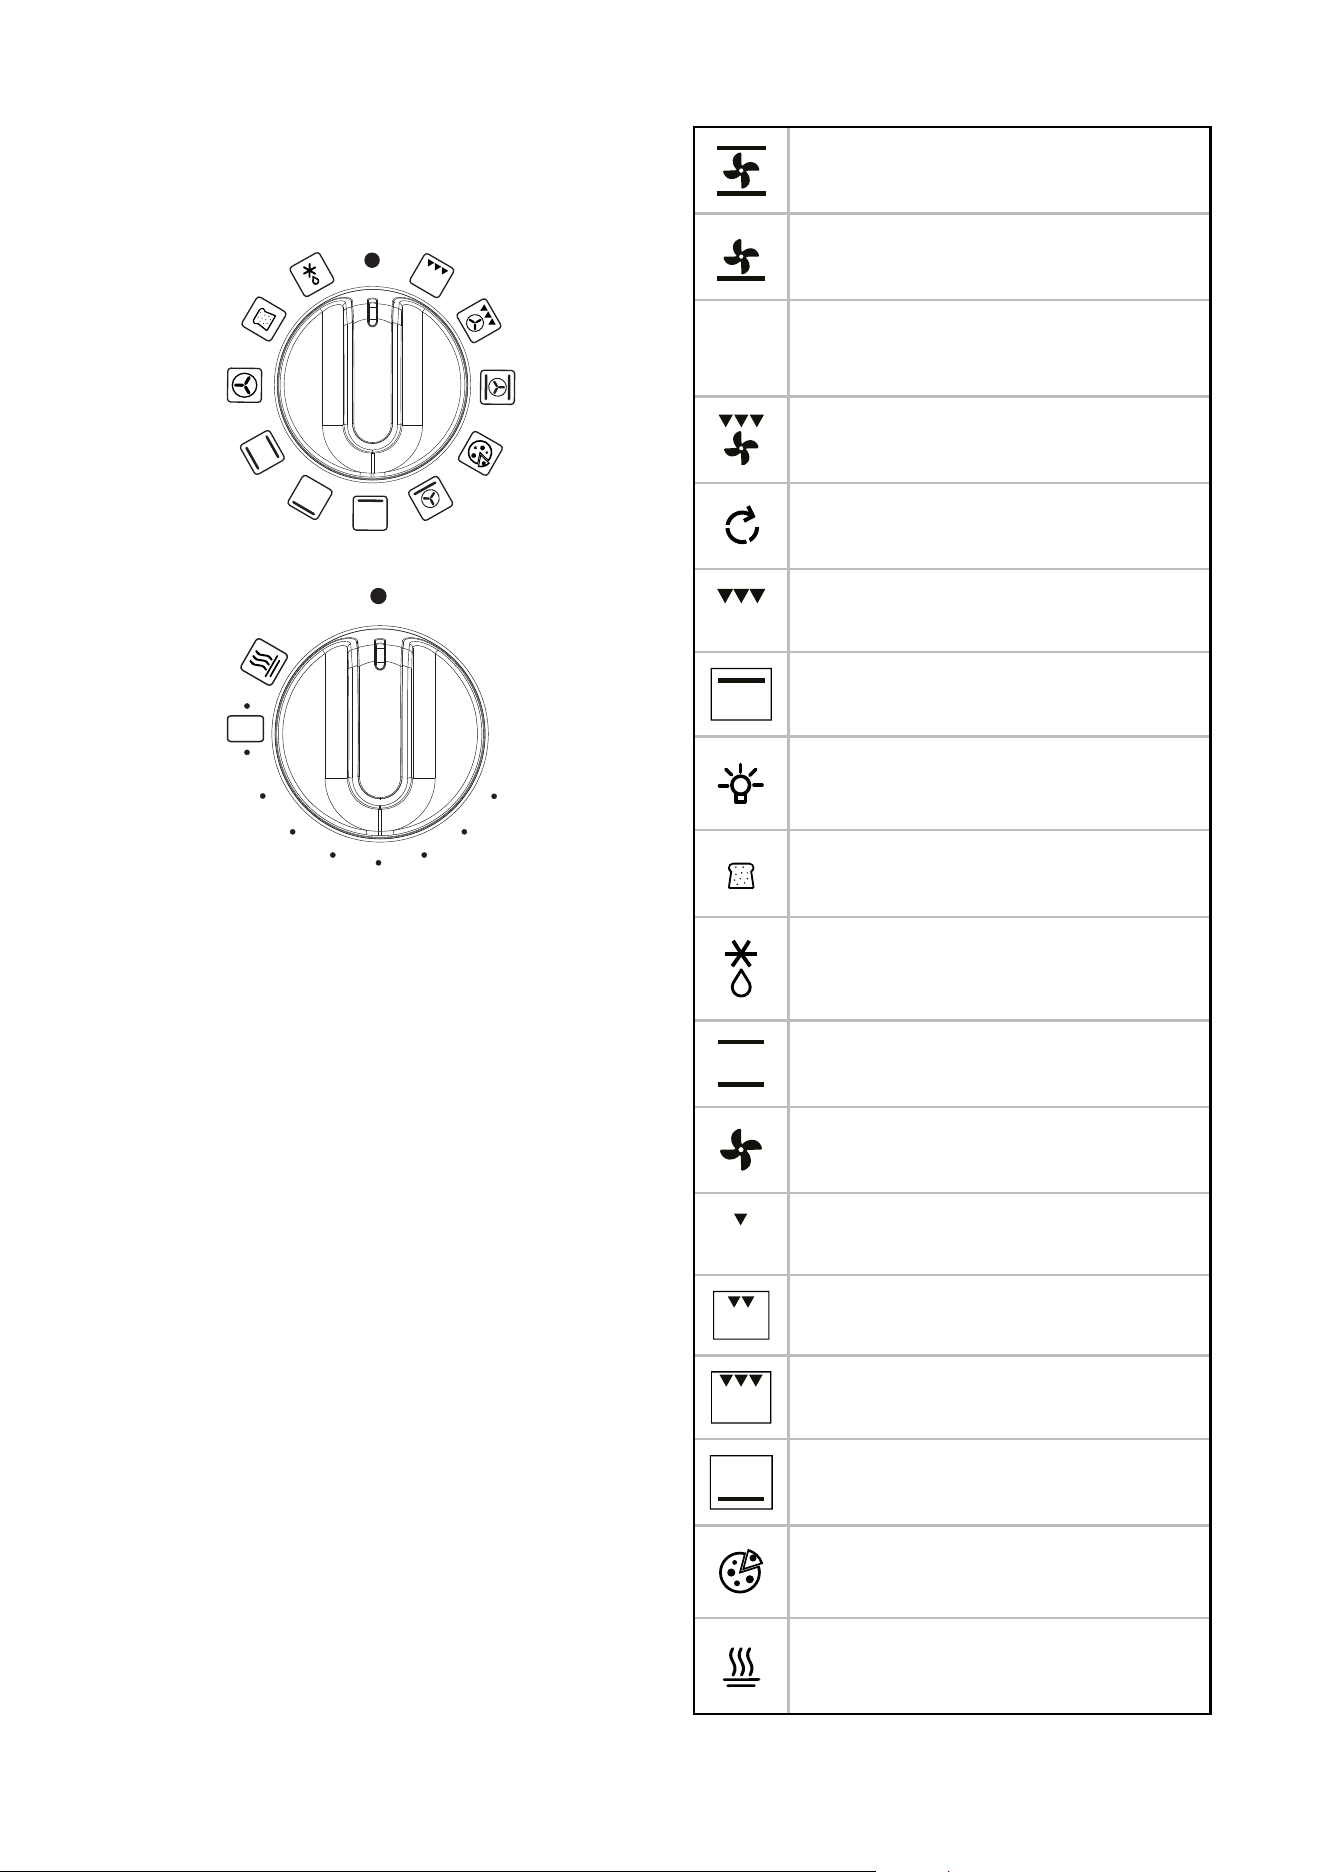
OVEN CONTROLS
Oven Selector Control
OFF
Electric oven
OFF
S
120
140
160
180
200
220
240
260
APPLIANCE FUNCTIONS
Only slow cook using the dedicated function. When
using the multifunction oven, firstly select the fanned
oven feature.
4
Note: Your oven may not have all of the
functions shown here. We recommend
for best cooking results, please preheat
your oven for 15 minutes and 3-5
minutes for grilling.
Intense Baking
Base Heat with Fan
S
Slow Cook
Fanned Grill
Oven Selector Control
Conventional Grill
Top Heat
Lights Only
Bread Proving
Defrost
Conventional oven
Fanned Oven
Low Grill
Single Grill
Dual Grill
Base Heat
Pizza Function
Keep Warm
10
USING YOUR APPLIANCE
OVENS AND GRILL
When using the top oven or main oven, the white
thermostat indicator light will come on until the
selected temperature is reached.
When the Top oven/grill or grill is switched on, the
cooling fans come on to keep the fascia and control
knobs cool during cooking/grilling. The cooling
fans may operate when the main ovens are in use,
depending on the temperature setting. The fans may
continue to operate for a period after the oven/grill
has been switched off. During use the fan may cycle
on and off, this is normal.
6 Important: Never put items directly on
top the base of the oven, or cover the
oven base with foil, as this may cause
the element to overheat. Always position
items on the shelf.
4
The left hand main oven will not operate
if the programmer is set to Auto, see
Clock/Programmer section.
Top Oven - Grill
6 The door must be OPEN when the grill is
used.
Main Oven - Grill
6 The door must be CLOSED when the
grill is used for fanned and conventional
grilling.
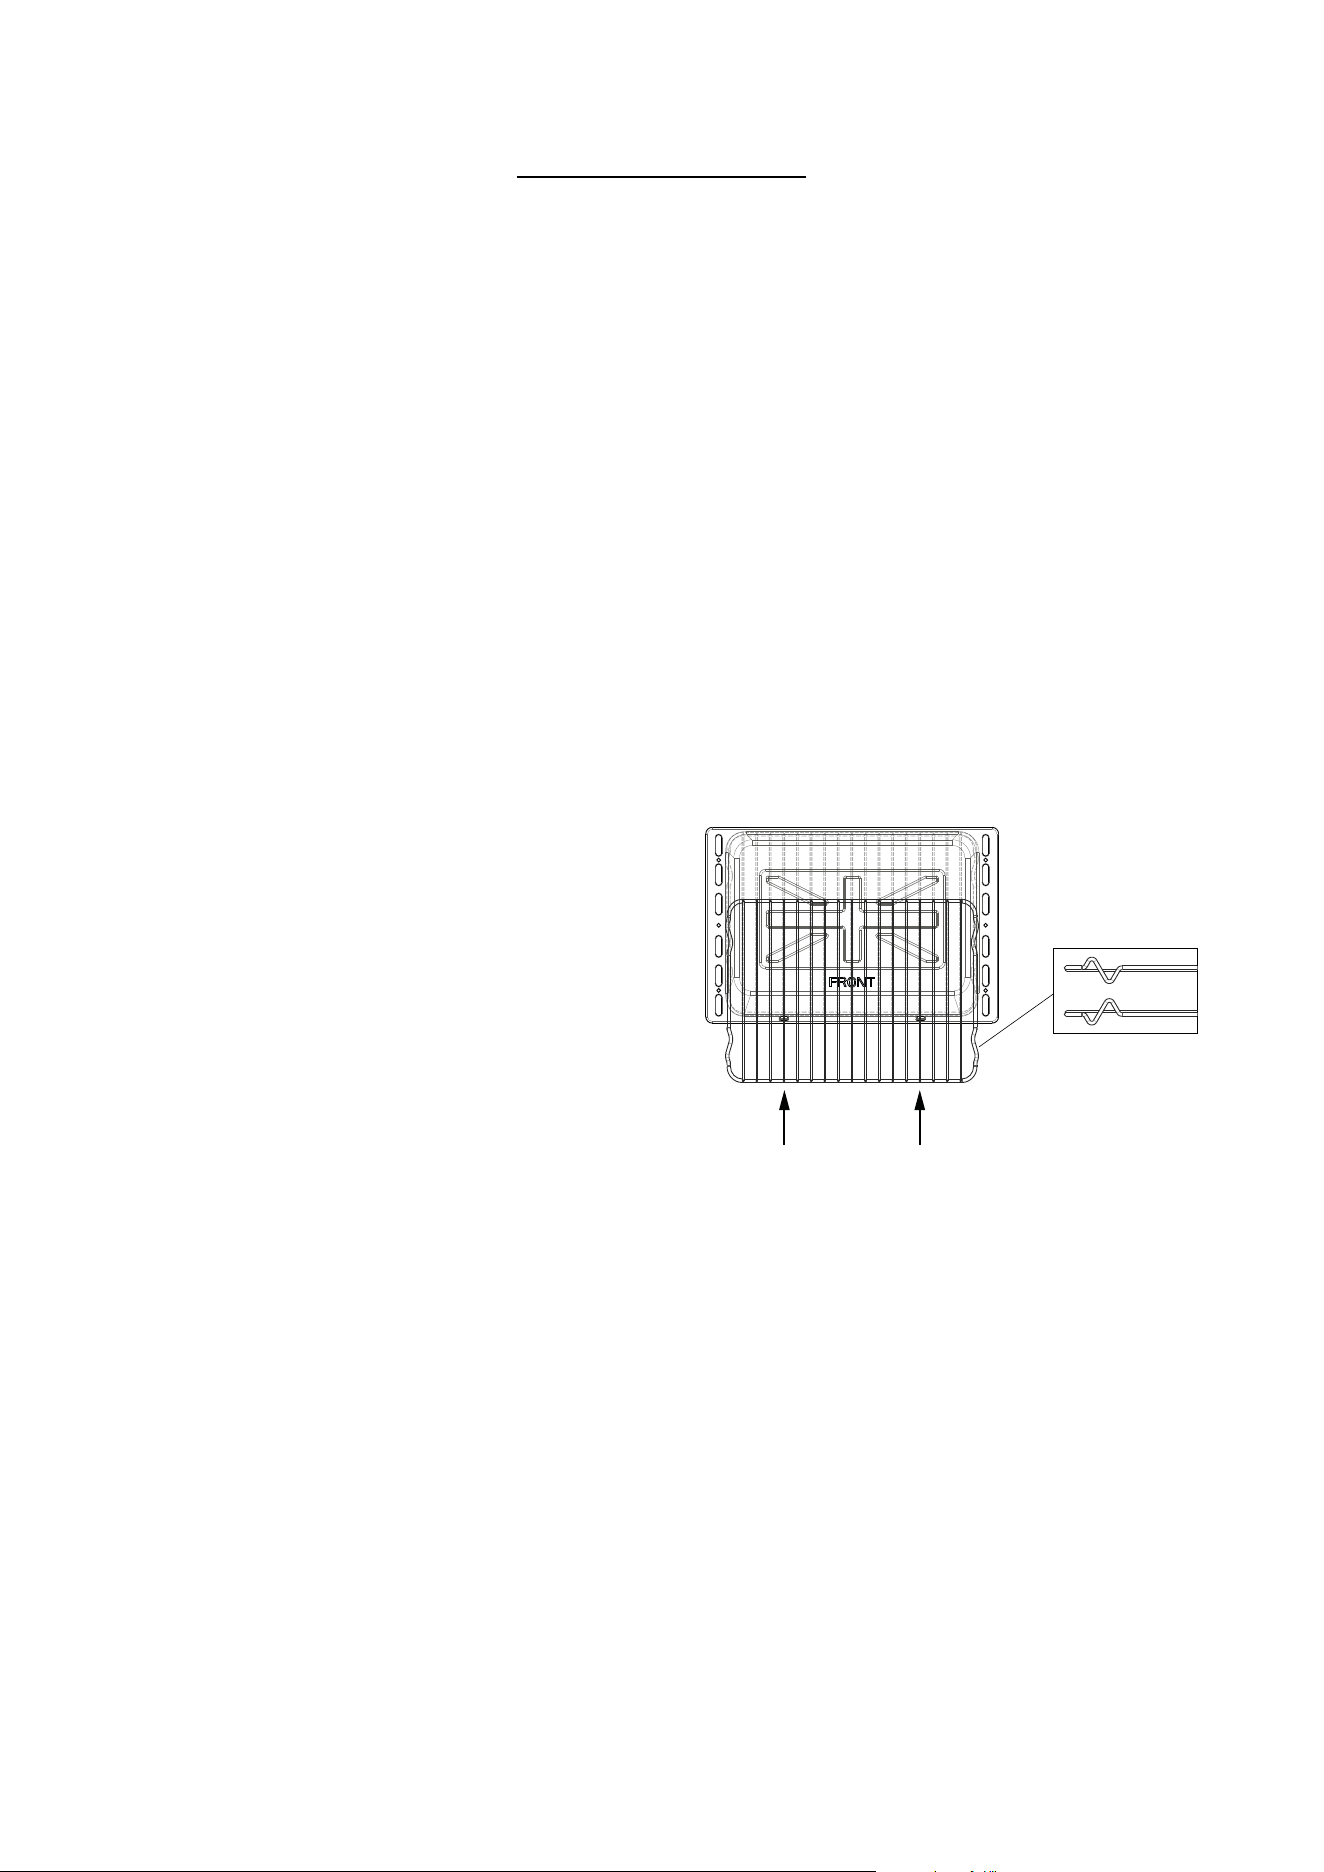
GRILL PAN AND TRIVET
The grill trivet (inside the grill pan) can be inverted
to give a high or low position, or it may be removed.
The speed of grilling can be controlled by selecting a
higher or lower shelf position, or adjusting the grill
setting.
To operate the grill, turn the left hand control to the
grill function symbol.
Inverted
6 The door must be open when the grill is
used for conventional grilling.

11
USING THE HOB
SAFETY
6 Commercial simmering aids should
not be used as they create excessive
temperatures that can damage the
surface and may cause a hazard.
6 Do not place aluminium foil or plastic
utensils on the ceramic glass, as they may
melt and damage the surface.
6 Do not use the ceramic glass hotplate
surface for storage.
6 When cooking with fat or oil, never leave
unattended.
6 Turn pan handles to a safe position, so
they are out of reach of children, not
overhanging the appliance, and cannot be
caught accidentally.
6 Position pans over the centre of the
hotplate elements.
6 Do not use the hob as a chopping board
or a storage area, as this increases the
likelihood of it being damaged - e.g.;
plastic utensils placed on a warm hob
may melt onto it, and damage the
ceramic glass surface.
6 Be careful when cooking foods in salted
water, or foods containing large amounts
of sugar, syrup or jam - if they are spilled
onto hot areas of the hob they may
damage it.
6 Lift pans onto and off the surface, rather
than sliding them across the surface, to
avoid marks and scratches.
6 If you use a wet paper towel to remove
spills from a warm heating area of the
hob, be careful to avoid steam burns.
6 Do not use abrasive powder cleaners,
metal wire wool pads, impregnated
plastic pads, detergents, bleaches,
bath stain removers, or chemical oven
cleaners; all these types of products will
damage the ceramic glass.
Electromagnetic interference
The functions of the hob comply with the applicable
standards on electromagnetic interference
Your induction cooking hob thus complies fully with
the statutory requirements (Directive 2004/108/EC).
It is designed to not interfere with the functioning
of other electrical equipment as long as these also
comply with the same regulations.
Your induction hob generates magnetic fields in its
immediate vicinity.
So that there is no interference between your
cooking hob and a pacemaker, the pacemaker must
be designed in compliance with the appropriate
regulations.
In this respect we can only guarantee the compliance
of our own product. You can ask the manufacturer
or your doctor about the compliance or any
incompatibilities of your pacemaker.
ABOUT THE INDUCTION HOB
The induction hob provides the most energy efficient
hob technology available.
The induction system provides superior heat up
and cool down times for pans - you get fast, precise,
repeatable power control.
As induction only heats up the pan, there is no lost
heat from the cooking process, which in turn, limits
the heat generated in the kitchen.
12
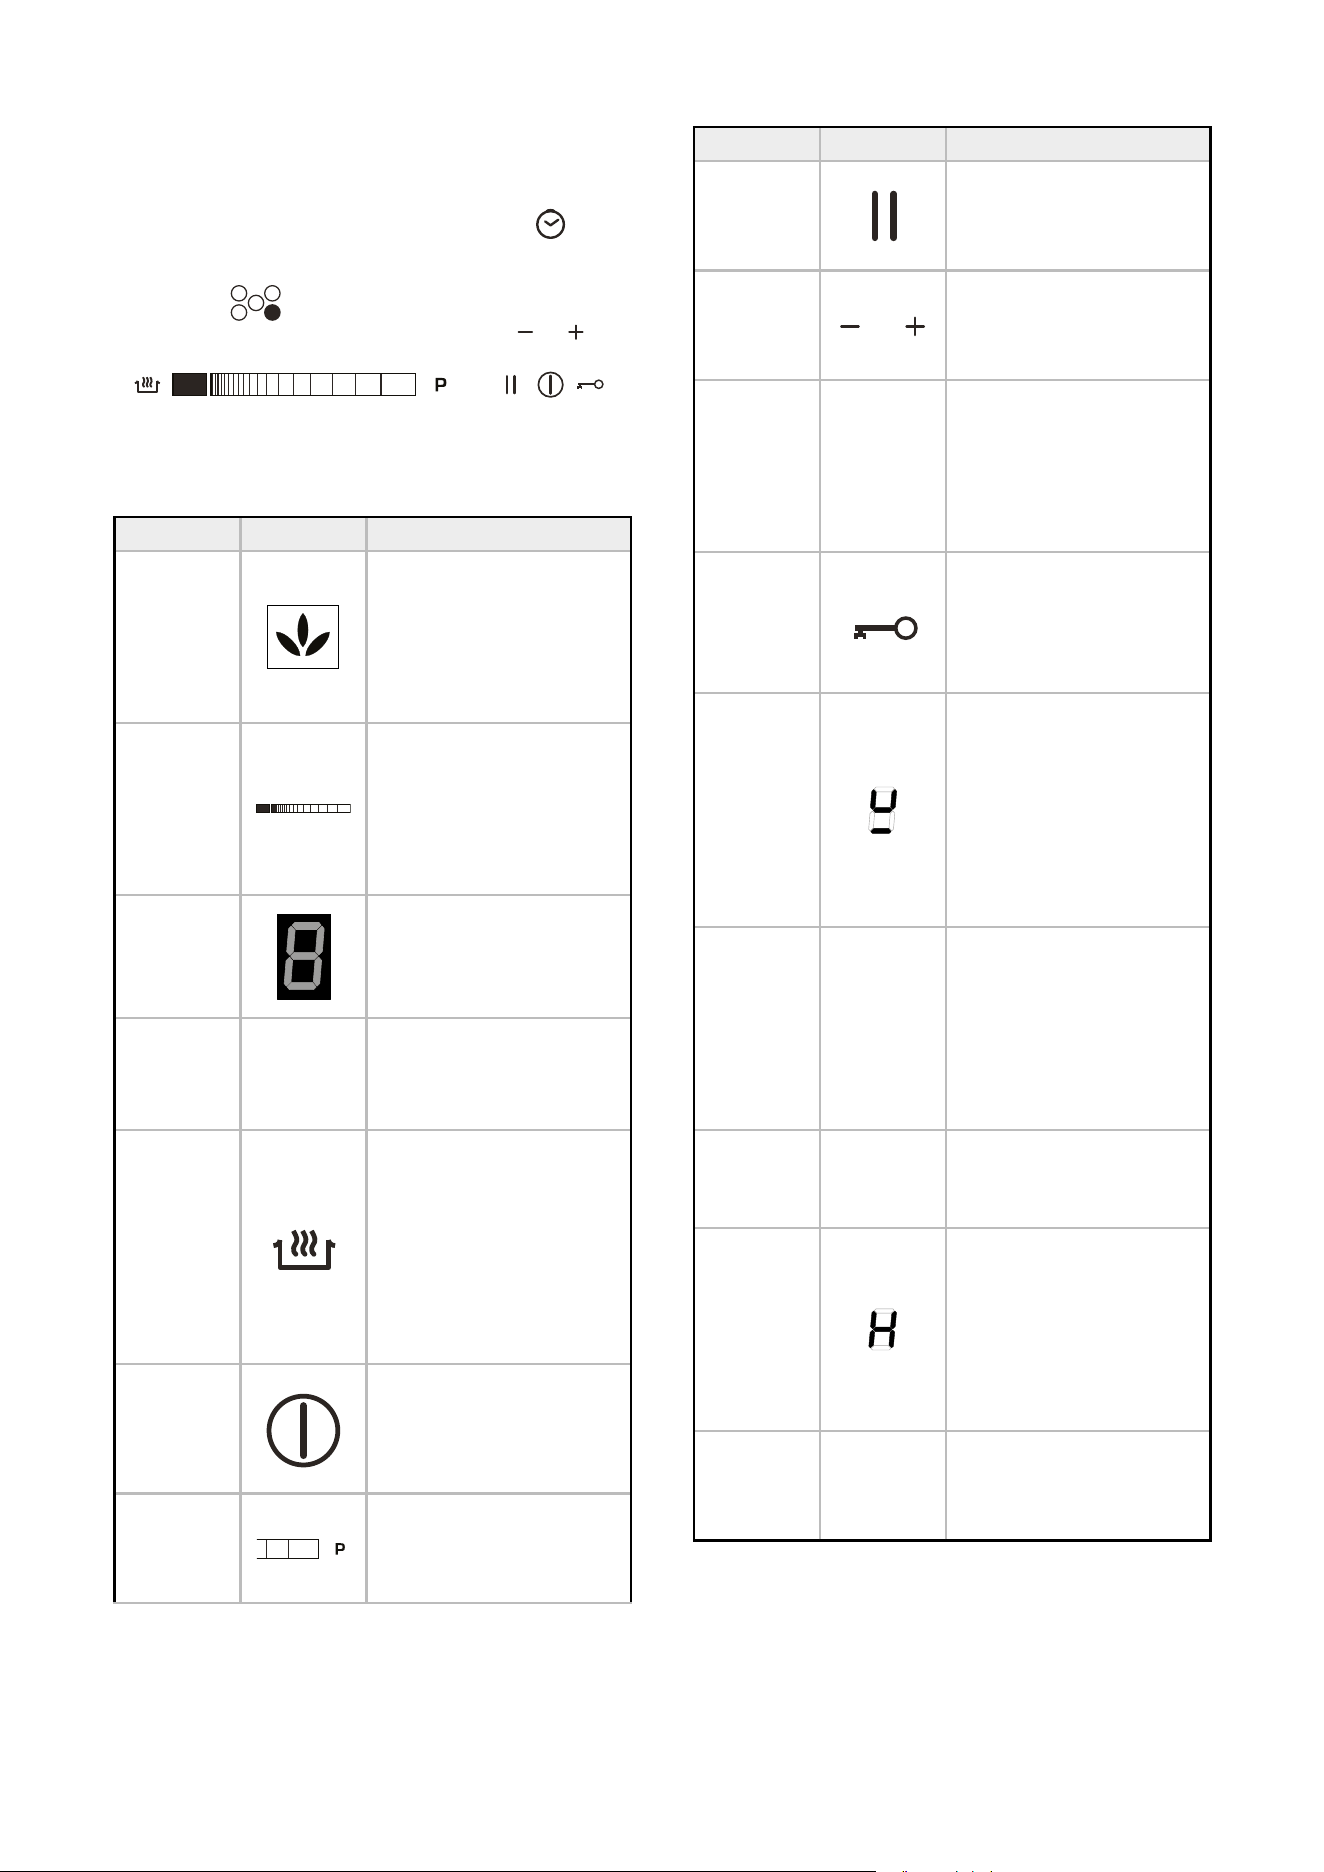
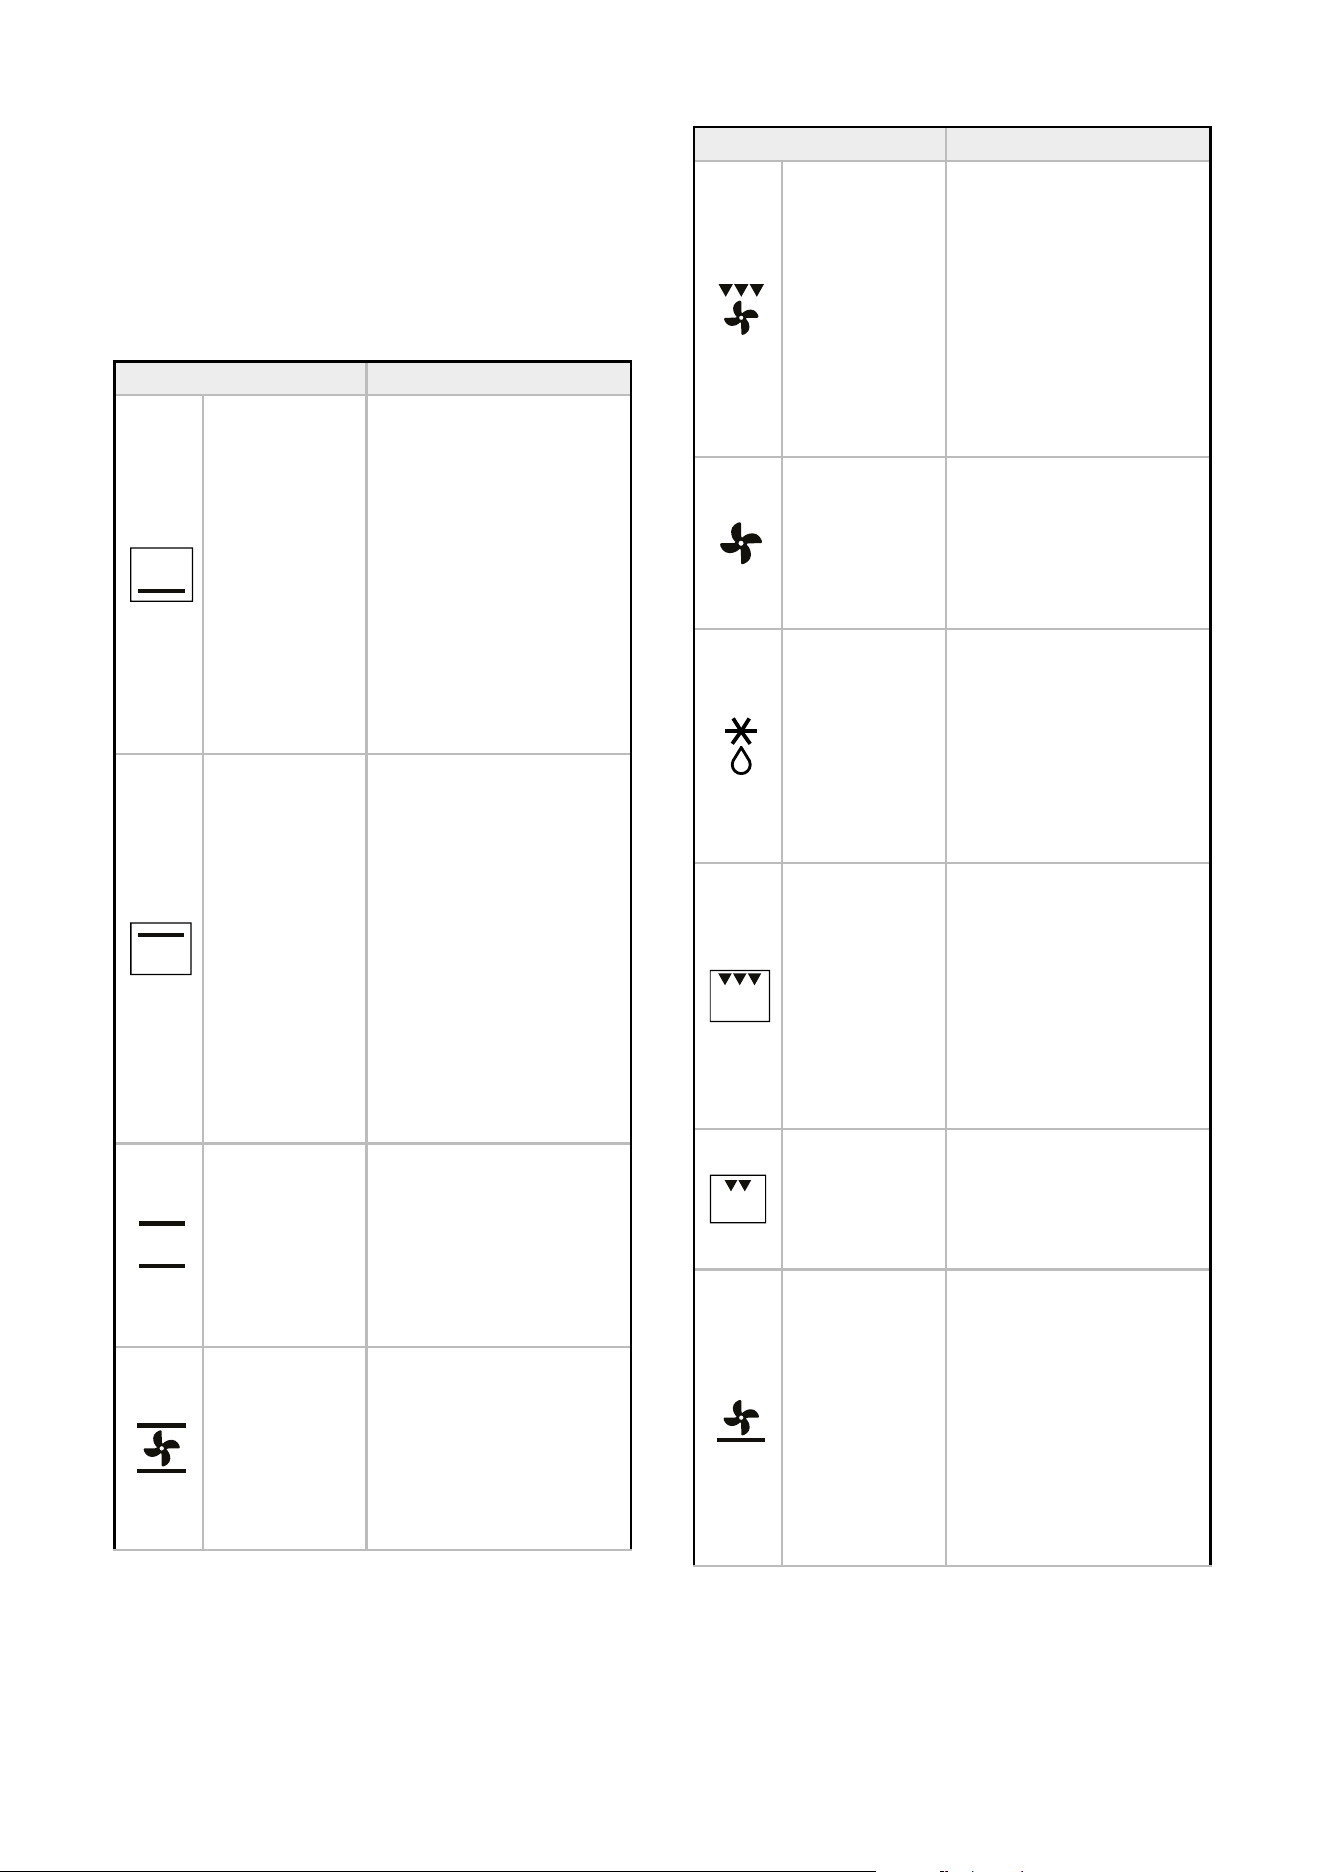
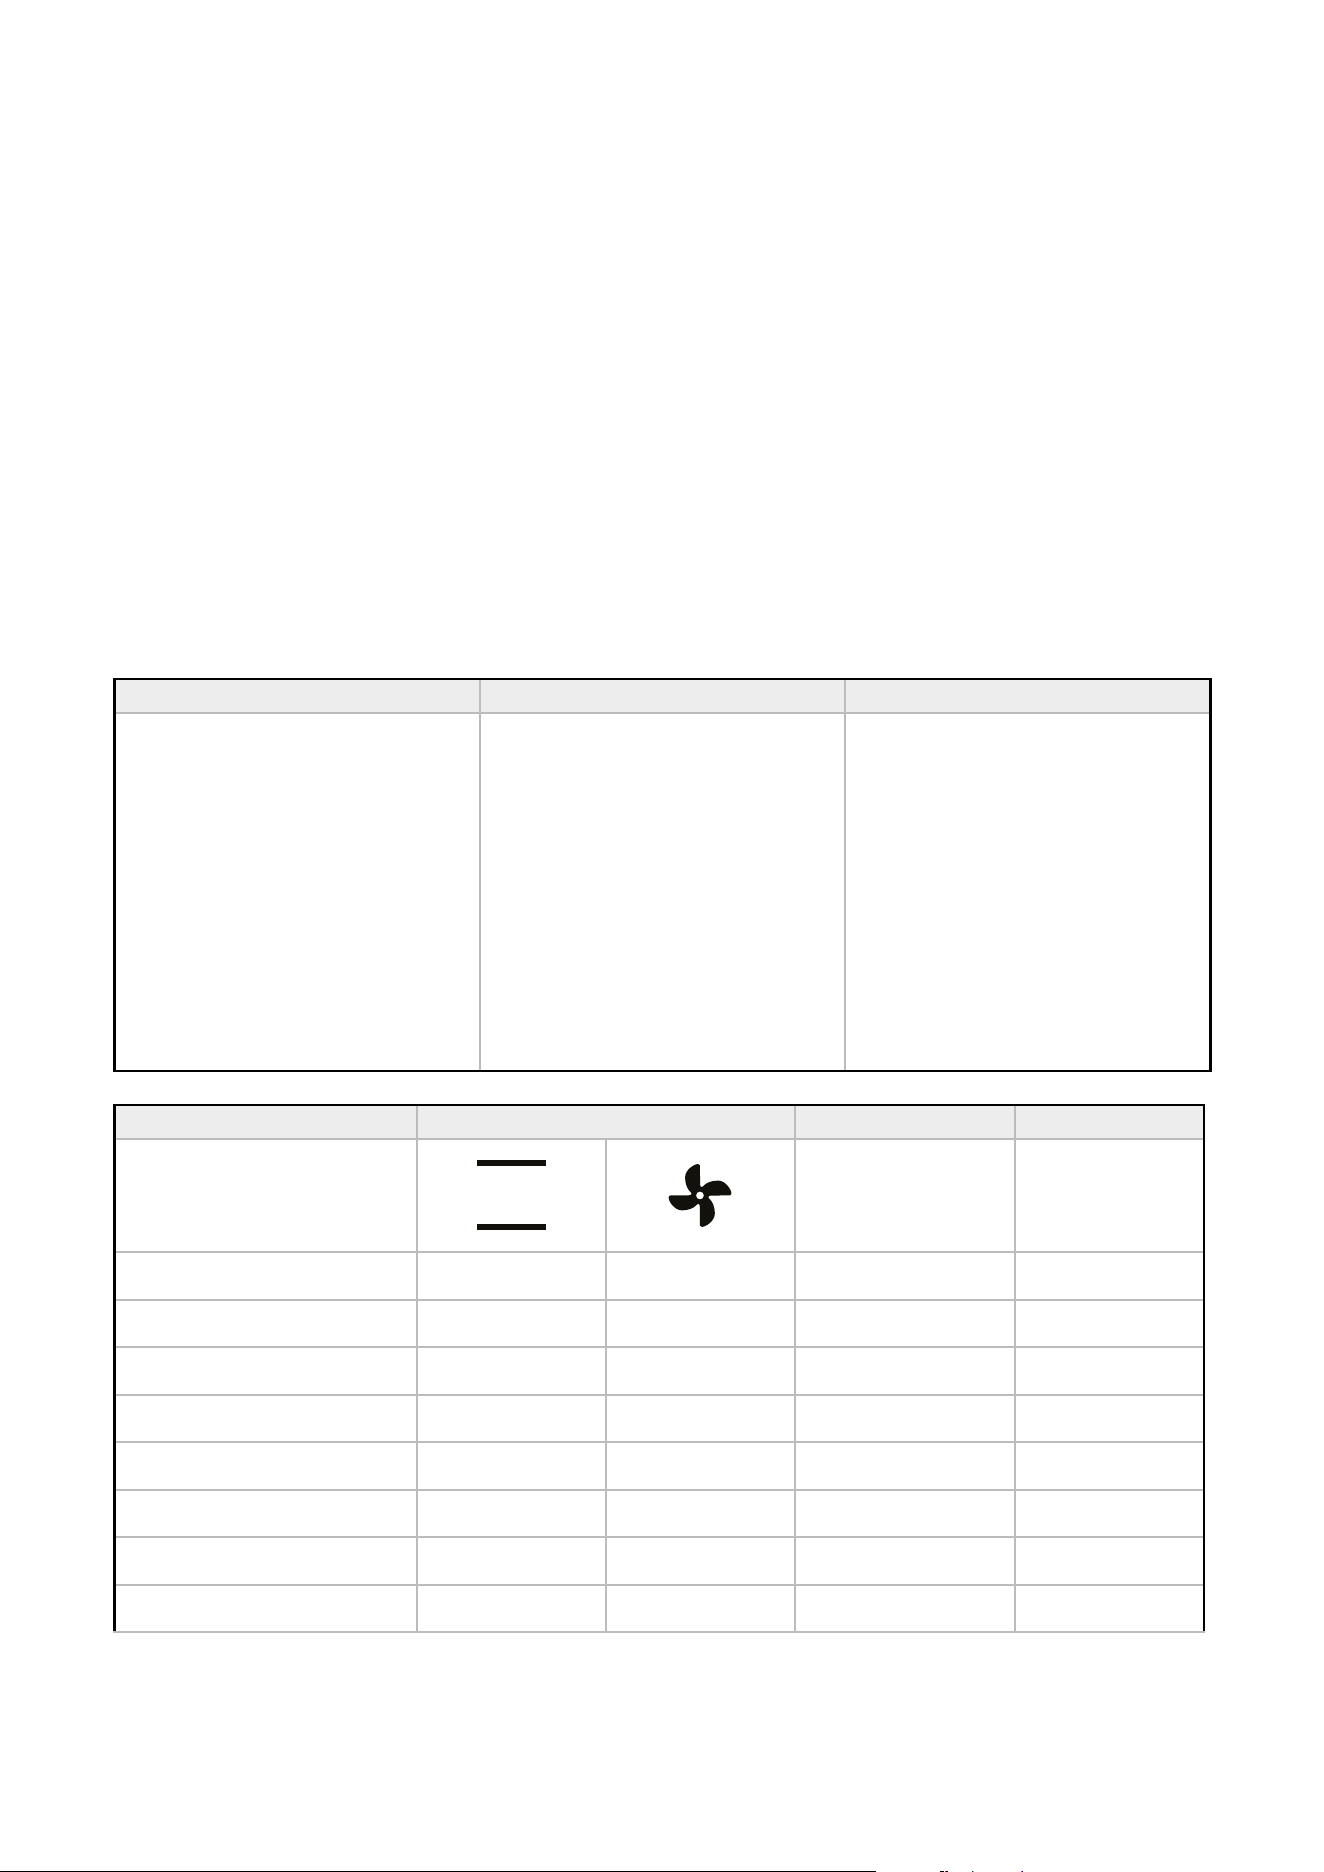
Induction controls
Feature Symbol Description
Eco
power
Induction Power is the
most energy ecient
means of cooking food,
provides fast heat up
and boiling times.
Slide
Control
Slide your finger along
the graphic or simply
touch the graphic at
the power level you
require.
Digital
display
Secret till “lit” hob
display.
No. of
power
levels
13
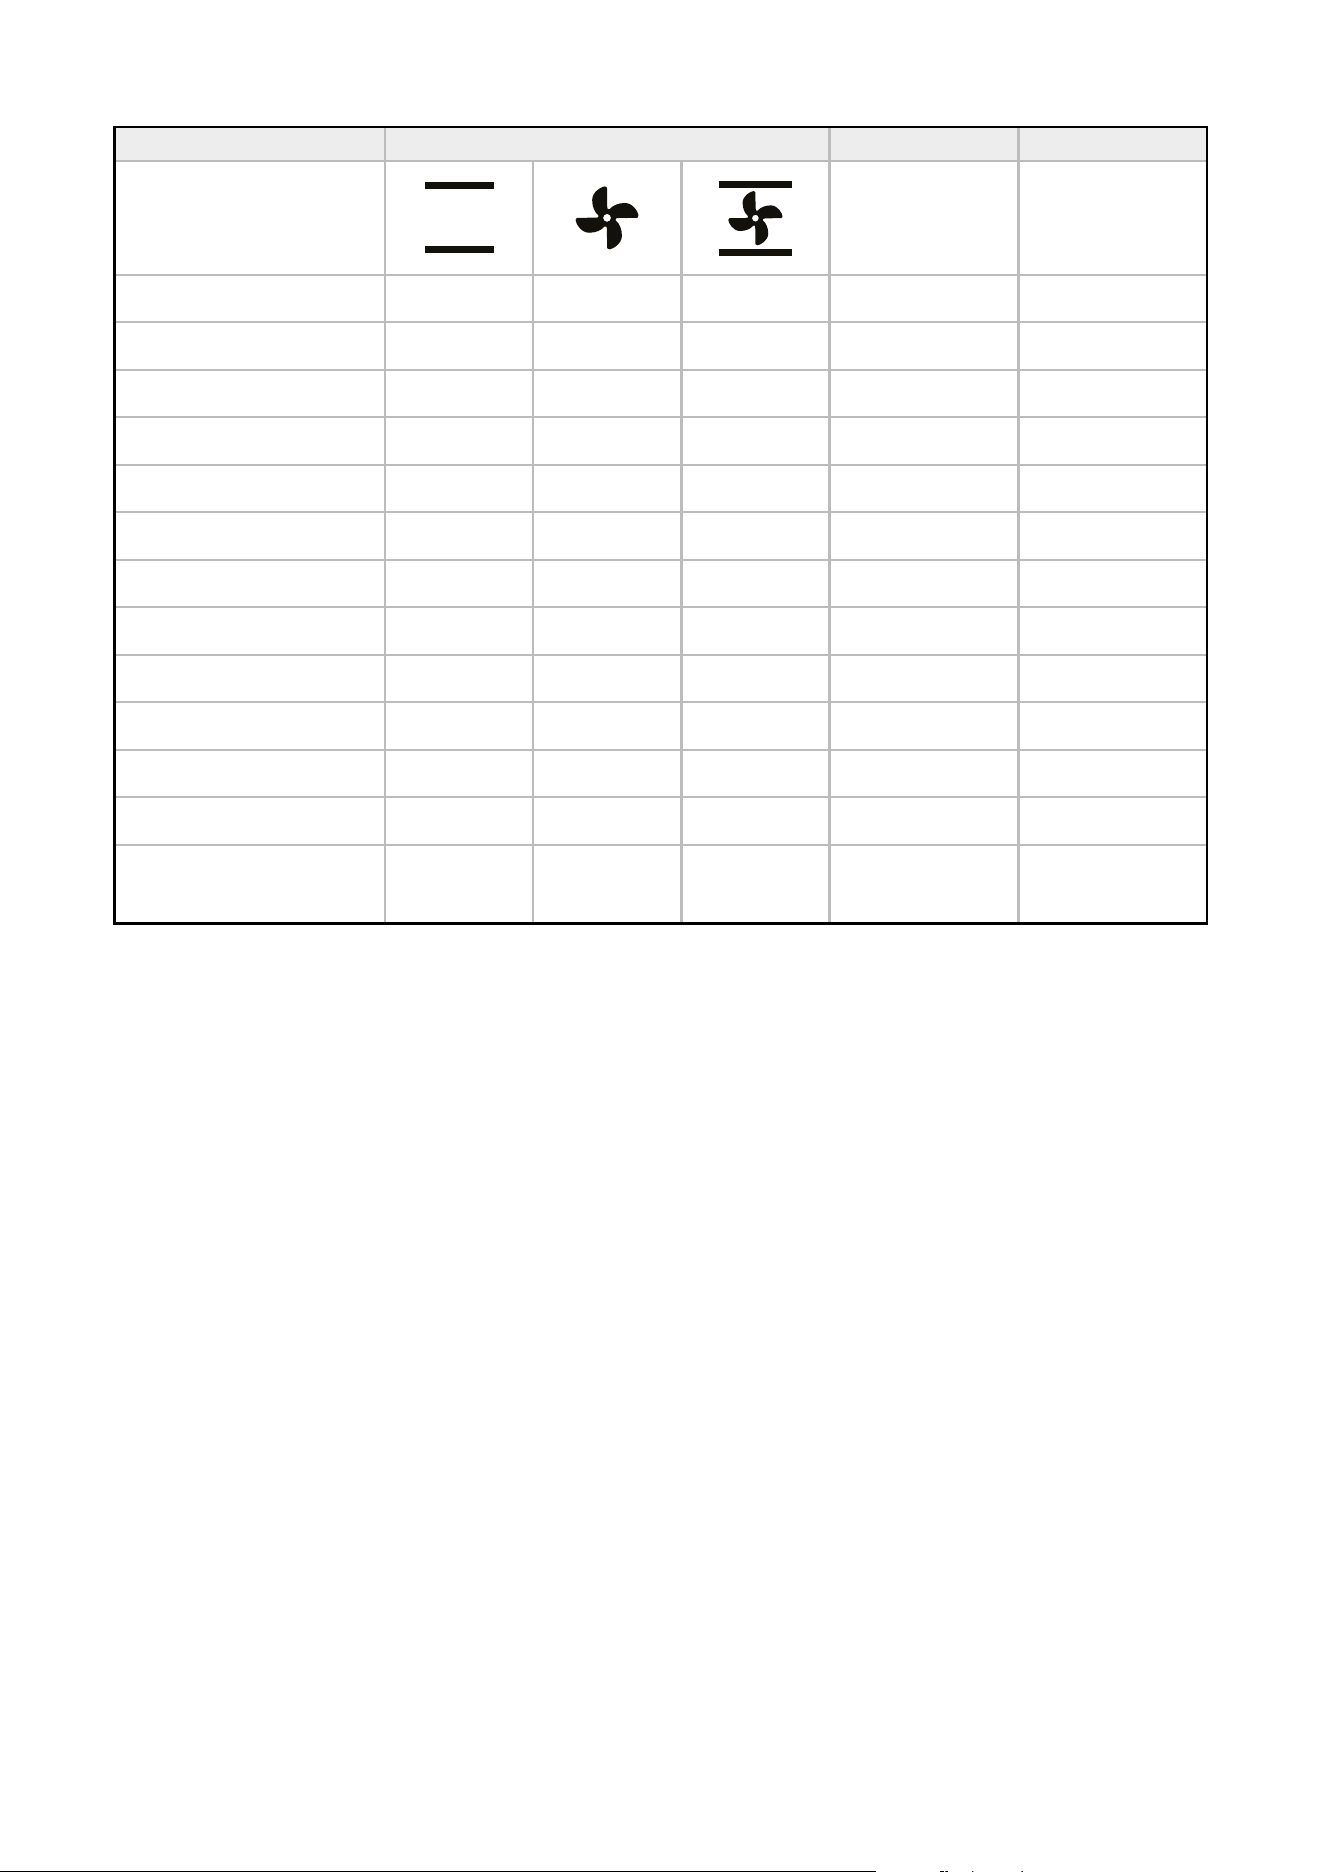
Precise and repeatable
control settings.
Special
Func-
tions
Three preset
temperature controls
set at 42°C, 70°C, and
94°C. Ideal for Melting
chocolate, Warming
and Rapid Simmer
respectively.
Central
Power
On/O
Power On / O for the
Induction hob.
Power
Boost
Temporarily boost the
power to a cook zone
by a massive 60%.
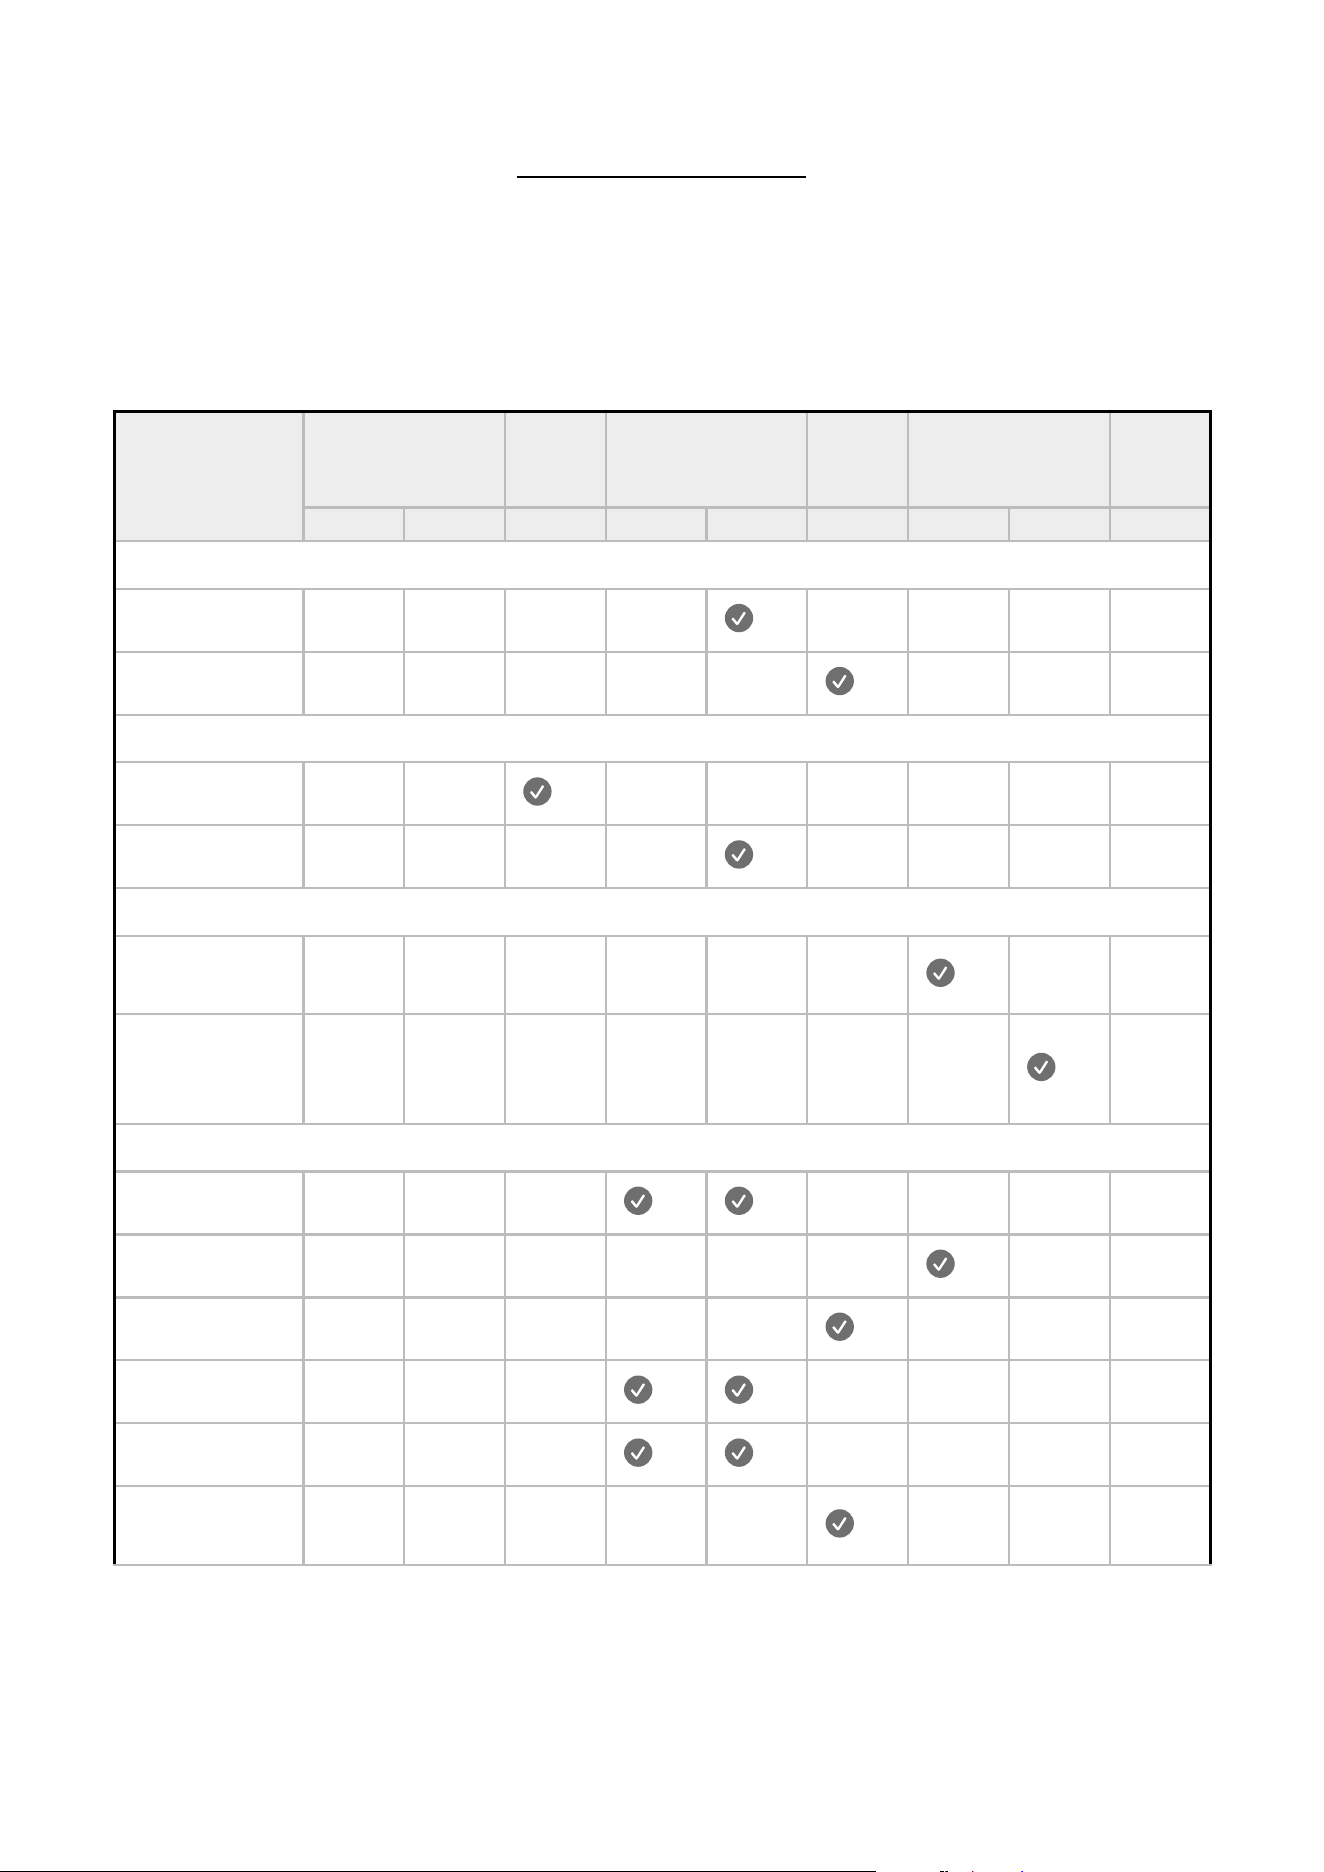
Feature Symbol Description
Pause/
un-pause
This button pauses
cooking with one
touch. (cuts power)
Minute
Minder
To a maximum time of
9 hours 99 minutes,
you can time anything.
Auto
Time
Switch’s
O all 5
zones
Yes
All five zones can
be simultaneously
timed to turn o
automatically.
Key Lock
To prevent accidentally
changing settings,
press the key graphic
to lock the controls.
Pan De-
tection
Lets you know if the
correct pans are being
used and helps to save
energy. When a pan is
lifted o the zone, the
power is automatically
cut.
Overheat
Pan De-
tection
Yes
Helps prevent
cookware from
overheating providing
an additional level of
safety not available on
other types of hobs.
Child
Lock
Yes
Prevents unintentional
operation of the hob.
Residual
Heat In-
dictions
Warns you against
hot surfaces but also
indicates that the
residual heat which can
be used as a temporary
warm zone.
Holiday
Shut-
down
Yes
No operation is
required - the hob will
turn its self o if left.
13
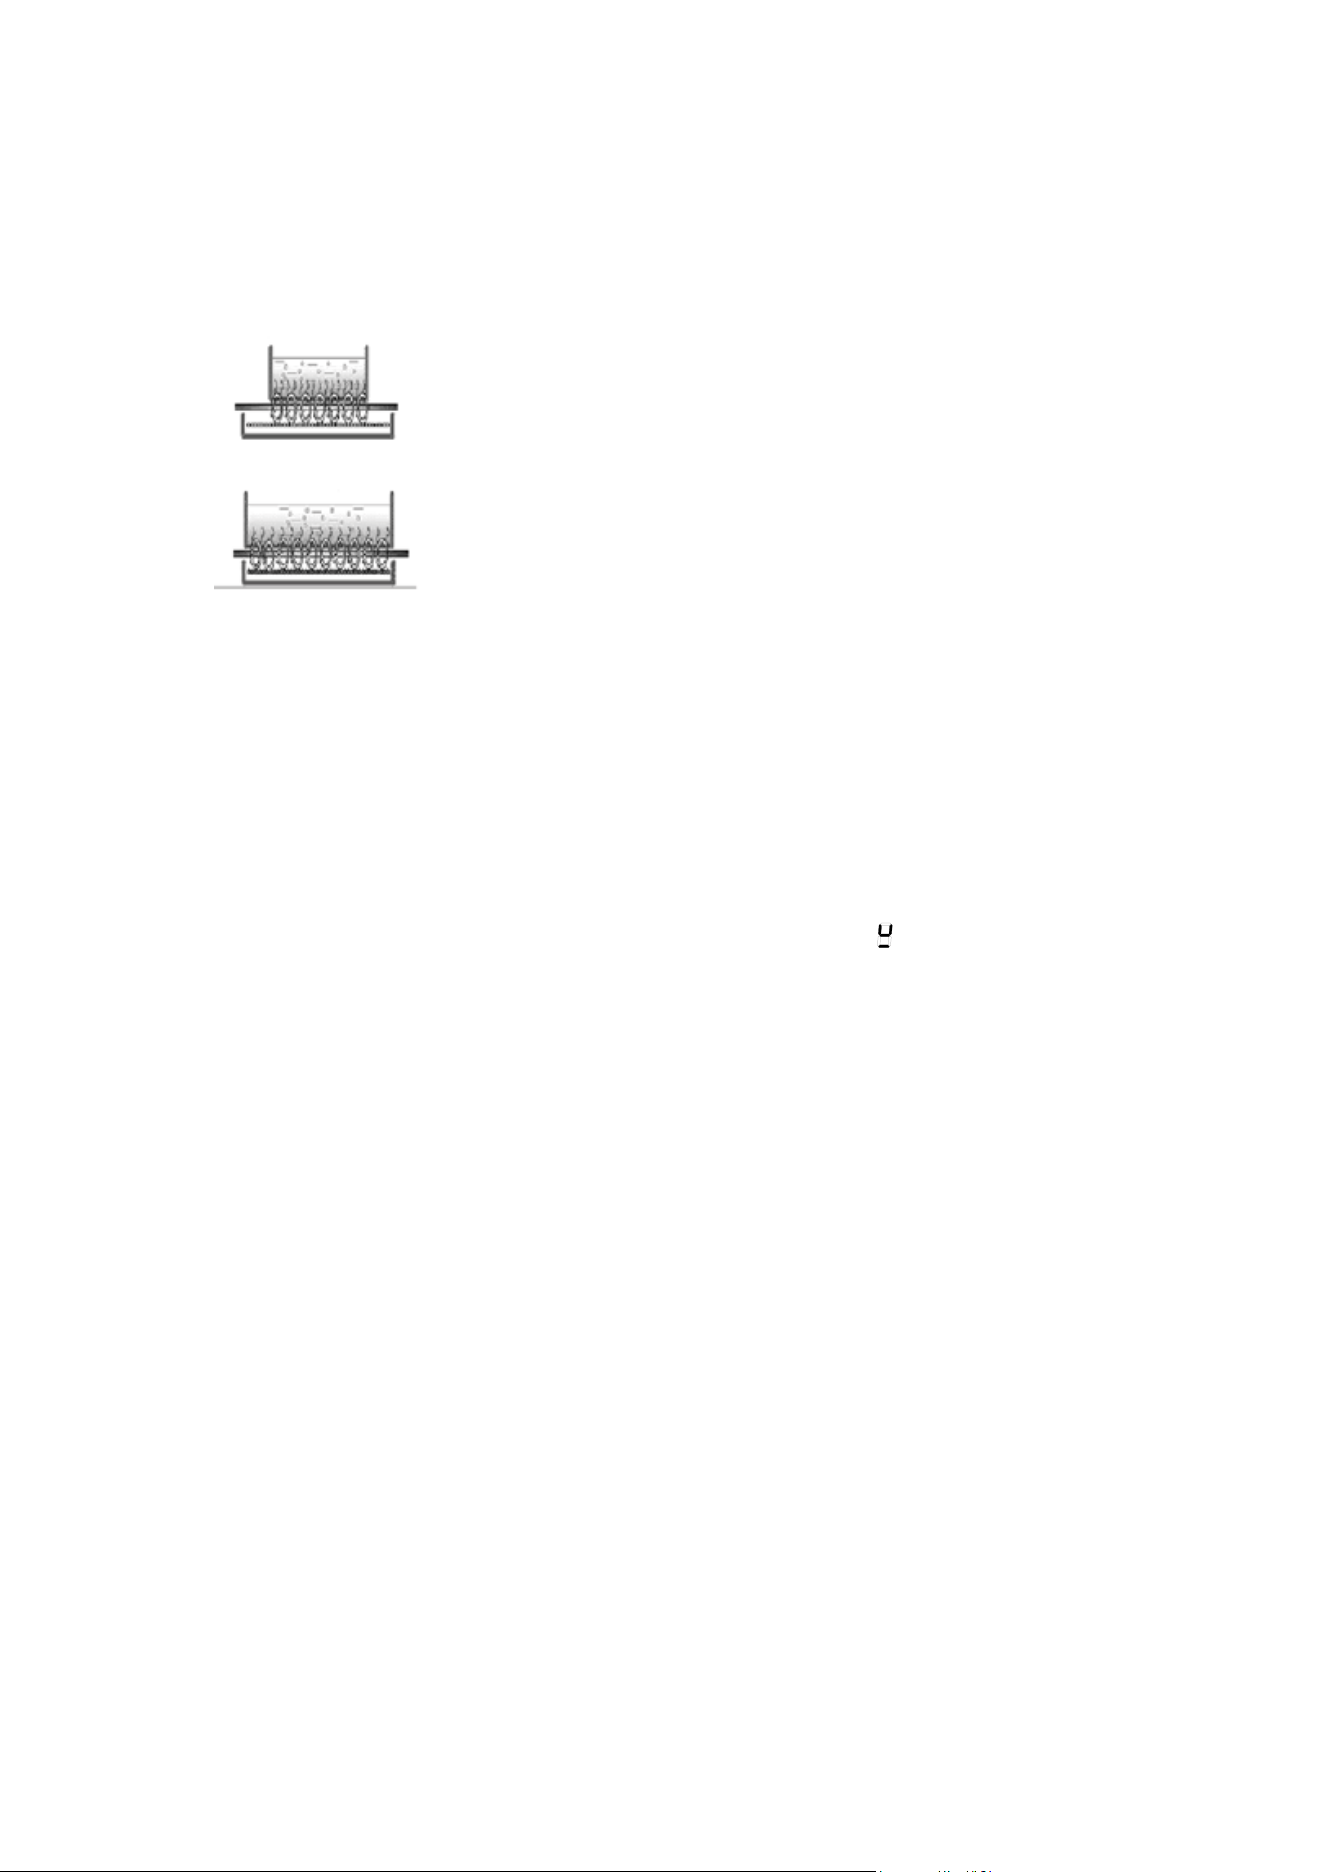
Auto Power Tuning
Induction hobs have a unique power tuning system
that automatically tunes the power to the size of the
pan base this ensures energy isn’t wasted.
Small Pan
Large Pan
Touch Controls
The touch controls for your induction have been
designed to provide you with finger touch control of
your hob, providing accurate and repeatable power
settings for cooking and an easy clean surface that can
be easily wiped over.
Each cook zone displays it’s individual power setting.
Using the Touch Controls
To select a cook zone or the timer, simply touch the
graphic slider, using the flat of your finger, not the tip,
The controls respond to touch, so you don’t need to
apply any pressure.
Once you have powered on the induction hob, you
have 10 seconds to set the power or use the timer.
If the red displays disappear, simply press the power
button again.
Always ensure the control area is clean, dry and free
from of any objects (e.g. utensils, tea towels and
cloths). Spillages and water may make the controls
difficult to operate.
Power Boost
The power boost is a function that can be used to
temporally boost the normal maximum power for a
cook zone by borrowing the available power from a
“paired zone”.
All the cook zones have this function.
The Power Boost is activated by sliding or touching the
P.
4
Note The Power Boost function will only
operate for a limited time and is also
under thermal control. This means the
power boost will deactivate automatically
if the product is hot, to protect the
internal electronic components of the
hob and to prevent the cookware from
overheating.
Pan detection
When a zone has been activated but no pan has been
placed on the cook zone, the zone will recognise that
there is no pan in position. It also means the hob
only uses power when a suitable pan is placed on the
zone. This reduces the energy used during the cooking
process, i.e. when you take your pan off the zone
the hob automatically reduces the power, and only
switches back on when you replace the pan.
4
Note If the symbol does not disappear
when a pan is placed on the zone it
indicates that the pan is not suitable for
induction cooking.
Auto Stand by (Holiday Shut Down)
The hob will automatically switch itself off if left
unattended.
BASIC HOB FUNCTION
Turning on the hob.
∙ Use the on/off button.
Once you have powered on the induction hob, you
have 10 seconds to set the power or use the timer,
before the induction hob is automatically switched off.
Activating a cook zone.
Select the slider and operate by sliding your finger
across the graphic or touching the graphic at the
desired power level (0-9).
14
Turning off individual cooking zones.
Decrease the power setting until the display shows 0.
If the cook zone surface is hot to touch, H will replace
0 in the display.
On/Off switch
The central on/off switch enables all of the cooking
zones to be switched on/off simultaneously at a touch
of a button, so when you have finished cooking or are
called away from the kitchen for any reason you can
be safe in the knowledge that everything is under
control and safe.
To Operate
Select the on/off key. The key needs to be pressed for
at least 1 second to activate, this is to ensure that the
hob cannot be activated unintentionally.
4
All other keys only need to be pressed for
0.3 seconds to be activated/deactivated.
4
“H” will appear on any cook zone display
that is still hot to touch.
SPECIAL HOB FUNCTIONS
Special Function Key
Touch once for Function 1 94°C
- Ideal for a Rapid Simmering.
Touch twice for Function 2 70°C
- Ideal for keeping warm
Touch three times for Function
3 42°C - Ideal for melting or
sauces
Pause key
6 Warning! Don’t leave pans on the hob
when you’re not around - take them off
the heat if you have to leave the kitchen
(even if you think it will only be for a
moment, while you answer the door or
phone) or you can use the Pause Key.
The Pause key is ideal for unexpected interruptions
when cooking. With this button you can pause all
cooking settings (Cuts power) with one touch.
To Operate
1. Press the pause key.
4
Note:- All cook zones functions will
pause (no power) and will be displayed
for each cook zone.
2. To restart, press the pause button and then within
10 sec use the cooking zone slider left to the timer
(slide from low to higher levels).
4
Note:- All cook zones will automatically
resume to the previous settings.
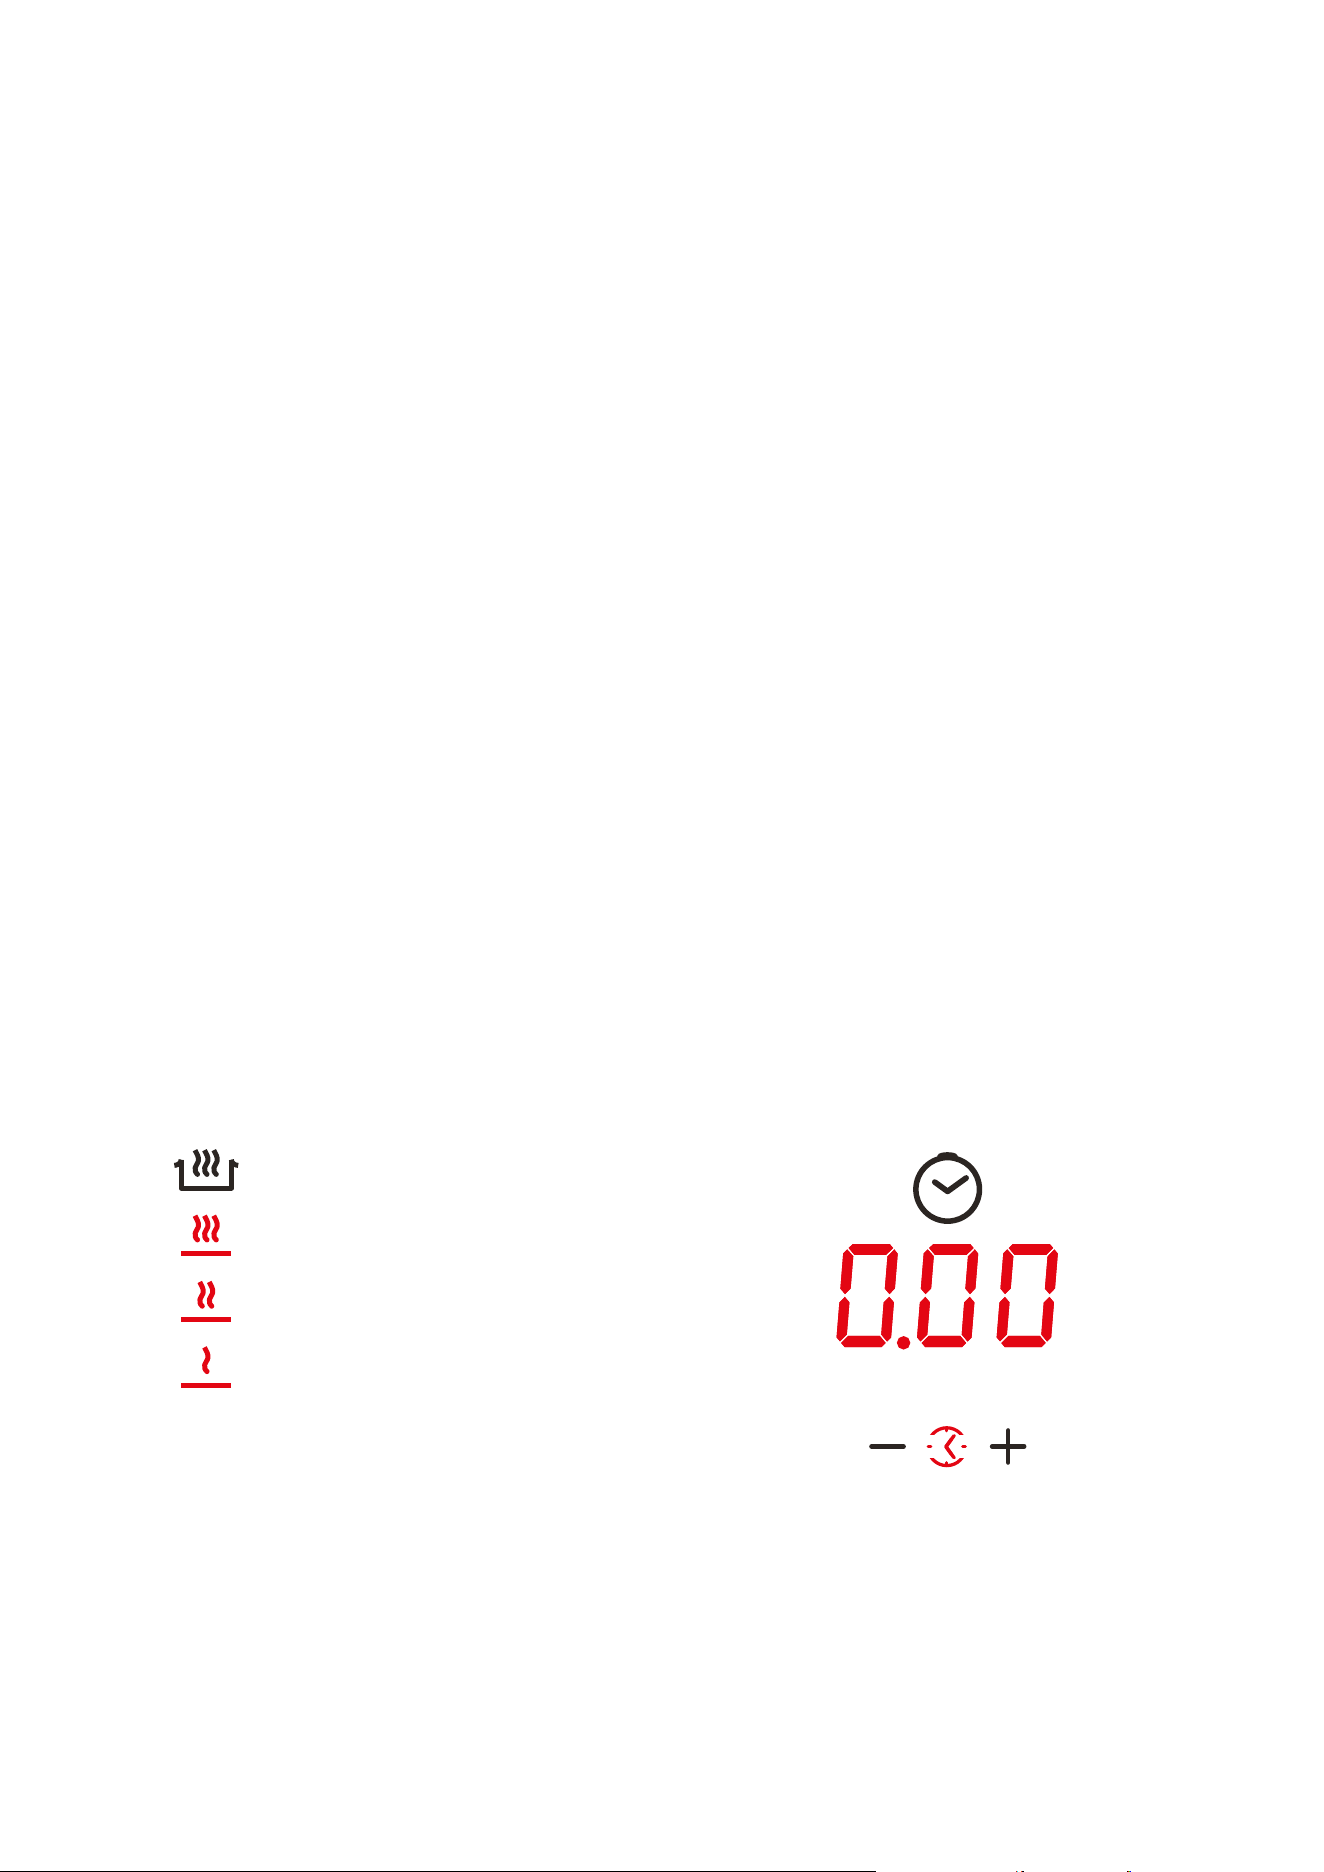
Using the Timer
The timer has up to 7 timers. 6 timers to be assigned
to the cooking zones and one independent timer
called egg-timer.
The displays show the remaining time until the alarm
is activated.
All timers work as count down timers. The operation
range is between 1 min to 2h 59min. For times less
than 59mins, the display is exact to the second.
min
Before activating a timer the control has to be
switched on. Switching the control off deactivates
cooking zone related timers. The egg timer stays active
after switching the control off.
A symbol next to the zone will be lit when a timer is
set to that zone

15
Activating Cooking Zone Timer
To activate the timer, press both the plus (+) and
minus (-) keys together.
A timer can be activated for each active cooking zone.
After selecting the timer the cooking zone related
luminous symbol is fully lit and the timer display
shows 0.00. For the following 10 sec it is now pos-
sible to assign a timer value to the active cooking
zone. After 10 sec without input, the timer function
is deactivated and the display is switched off again.
Using the timer selection key again (as long as no
value was set) the next active cooking zone can be
selected.
Setting a timer value
By pressing the timer keys, a timer value can be set. If
the timer-plus-key is pressed first the display starts
with 1 min and can be increased in 1 min steps. If the
timer-minus-key is pressed first the timer starts with
15 min and can be decreased in 1 min steps.
Pressing the key permanently speeds up the timer
adjustment. The speed will also increase while the key
is held. (the time between two time steps reduces).
If a timer has expired the timer alarm is activated and
the assigned cooking zone is immediately switched
off.
The cooking zone display shows 0 or H.
4
If no user input stops the alarm signal it
will be on for maximum 2 minutes.
4
The alarm can be deactivated by
switching off the control using the main
switch or by pressing the two timer keys
or it will be deactivated automatically
after 2 minutes.
Switching off a timer or changing the time setting
The timer value can be modified at any time by
selecting the timer and then by pressing the (+ or -)
timer key.
To stop an active timer the value can be set to 0.
Pressing plus and minus simultaneously for 2 seconds
also resets the timer value to 0.00.
Minute Minder
The minute minder buzzes when the time set has
expired. It does not switch off any zone.
To Operate
1. Turn on the hob, using the on/off key.
2. Select the timer by pressing the + and - keys
together (do not activate any cook zone).
3. Set the right hand digit up to 9 minutes (Single
Minutes Units) and wait a couple of seconds.
4. The display will now indicate for you to set the left
hand digit, up to 90 minutes (10 Minute Units).
5. The timer is now set and begins counting down.
(No zone indicator light should be set).
6. You can now use the hob as normal.
When the time is up.
1. The corresponding indicator in the timer display
will flash, the timer will beep.
2. Touch any control to stop the beeping.
6 Warning! - Never leave the hob
unattended when in use, even when you
have set the timer to turn off the cook
zone.
Additional timer information
To modify or cancel a timer setting follow steps 1) to 5)
above.
To set the timer for additional zones follow steps 1) to
5) above.
If multiple zones have been set for timed operation,
the timer display will always display the time for the
cook zone with the shortest time remaining.
To check the timer setting for a different cook zone,
press the plus and minus keys together until the clock
symbol illuminates next to the chosen cook zone. The
remaining time will briefly appear in the timer display.

16
COOKWARE FOR THE INDUCTION
HOBS
Cookware for the induction cooking zones must be
made of metal and have magnetic properties. The base
must also be the correct diameter.
Suitable Cookware for
Induction Hobs
Unsuitable Cookware
Enamelled steel pots
with a thick base
Pots made of copper,
stainless steel,
aluminium, oven-proof
glass, wood, ceramic
and terra-cotta.
Cast iron pots with an
enamelled base
Pots made of multi
layer stainless steel,
rustproof ferrite steel
or aluminium with a
special base
Pans marked for use
with induction
How to establish the suitability of a pan
Check your pans with a magnet. If it sticks and it’s the
correct diameter, it’s suitable for use with induction.
Also with pans that bear the symbol for suitability for
cooking with induction.
4
Note - when using certain pans, you may
get various noises from the pans. This is
due to the design of the pans and does
not effect the performance or safety of
the hob.
Pans should not be allowed to come into contact
with coloured trims during use as this may cause
discolouration of the surface
Smallest recommended pan diameter
145mm
145mm
145mm
120mm
145mm
Child Lock
This feature is to help prevent accidental switching on
of the hob, especially by young children.
To activate:
∙ Press the key lock button and pause button
together, and then release them. Complete
activation by pressing the key lock button again.
Residual Heat indicators
If when the cook zone is switched off the glass
surface is above 60°C , H will be displayed in the
cook zone display until the glass surface drops below
approximately 55°C.
This feature not only warns you against hot surfaces
but also indicates that there is residual heat which can
be used as temporary warm zone.
4
Note - The cook zone itself does not heat
up, but the ceramic glass does get hot
because of the hot pan conducting heat
back onto the hob glass.
Overheat Pan Protection
The hob is equipped with additional safety systems
that help to prevent cookware from overheating,
providing an additional level of safety not available on
conven-tional hobs (such as gas and ceramic hobs).
17
Approximate Glass
Surface Termperature
(°C)
Intelligent hob safety
system
200
Reduces Power Boost
setting to Power Level
9
250
Reduces power to
60% of power level
setting
270
Switches cook zone
o
300
Switches whole
appliance o
4
Note - The safety temperature control
of the pans is only possible with quality
flat bottomed pans suitable for induction
cooking. Poor quality pans can create
air gaps between the glass and the
pan, which affects the accuracy of the
temperature control.
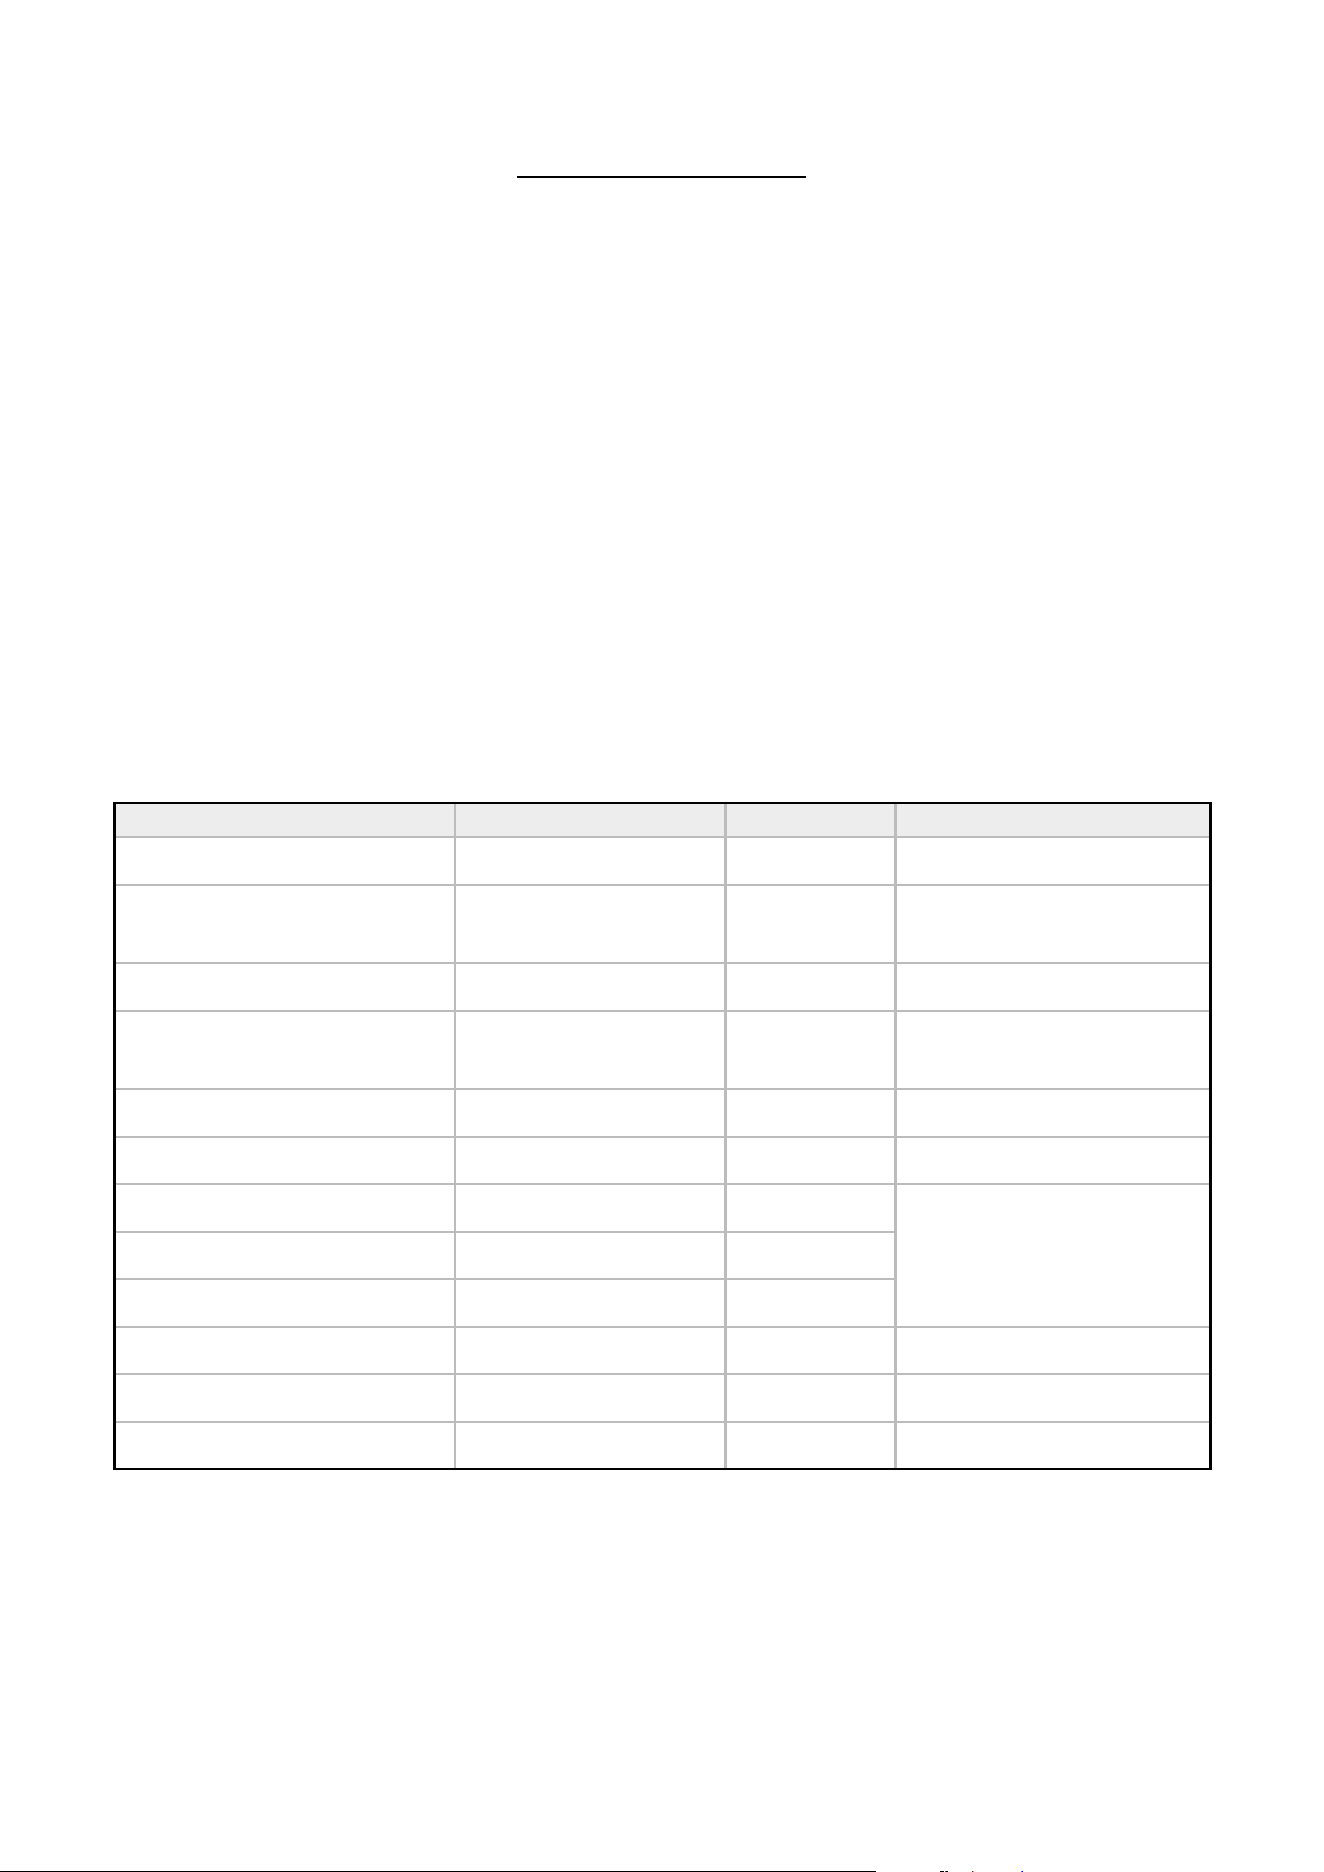
TROUBLESHOOTING WITH THE INDUCTION HOB
Code Problem Possible Cause Solution
Hob is not working in
display
Child lock is activated Deactivate child lock
- Power boost not working
The appliance is hot, power
boost is deactivated when
the appliance is hot to
protect the electronics and
prevents the pans from
overheating
Allow the appliance to cool
ER21
Control unit cuts o after
program setting
Electronics overheating Allow the appliance to cool
ER400 - -
Check mains cable
connection and terminals
at the terminal block are
wired correctly
E2
Overheating of induction
coil
Pan overheating
Remove pans and allow to
cool
E8 Fan blocked or faulty
Fan inlets are blocked or
faulty fans
Check fan inlet at the rear
of the appliance
E6 Error on power board No power to power board Please call Customer Care
ER03 and
continuous
tone or
Water or pans on the glass
above the user controls
Water or cookware on the
glass over the touch control
sensors
Clean any water on surface
above user controls/display

18
USING THE GRILL
BEFORE YOU START GRILLING. . . .
Before you use the grill, make sure you have placed the
grill shelf in the position you need as once the grill is
on you may injure yourself if you try to move the shelf.
∙ Do not close the door while the grill is in use.
∙ Turn the top oven control knob to the required grill
setting.
∙ Turn the grill control knob (if fitted) to the heat
setting you require.
∙ To switch off, return the control knob(s) to the ‘off’
position.
∙ The cooling fan will come on during use, and may
continue to run for some time afterwards.
∙ To adjust your results, you can turn the grid over,
or remove it altogether.
∙ The dual grill uses all of the top element and is
ideal for grilling large quantities of food.
∙ The single grill uses part of the element only, and
is better suited to grill smaller amounts of food.
THE GRILL PAN
This appliance comes with a grill pan and trivet.
SHELF & TRIVET ADJUSTMENTS
Speed of grilling can be adjusted by changing the shelf
position or the turning the trivet.
∙ High: For thin foods and toasting
∙ Low: For thicker meat pieces.
ALUMINIUM FOIL
6 Never cover the grill pan or grill trivet
with foil, or allow fat to build up in the
grill pan, as this creates a fire hazard.
6 Accessible parts may become hot when
the grill is in use. Children should be kept
away.
TYPES OF GRILL
Dual grill: has two grill elements which can be used
together, or as a single grill.
For best results: Pre-heat the single grill for 5
minutes and the dual grill for 3 minutes.
THE COOLING FAN
During use the fan may cycle on and off, this is
normal.
When the grill is switched on, the cooling fan comes
on to keep the fascia and control knobs cool during
grilling. The fan may continue to operate for a period
after the grill has been switched off.

19
USING THE TOP OVEN
6 When you are cooking keep children
away from the vicinity of the oven.
6 Caution: The top element gets extremely
hot when in use, so take extra care to
avoid touching it.
4
The top oven is a conventional oven.
4
Note: The top oven is not controlled by
the programmer.
OVEN FURNITURE
Oven shelves
The oven shelf must be positioned with the upstand at
the rear of the oven and facing upwards.
4
Extra shelves may be ordered from your
local supplier.
Baking tray and roasting tins
For best cooked results and even browning, the
recommended size baking trays and roasting tins that
should be used are as follows;
∙ Baking tray 350 mm x 250 mm
∙ Roasting tin 370 mm x 320 mm
4
Position baking trays and roasting tins on
the middle of the shelves, and leave one
clear shelf-position between shelves, to
allow for circulation of heat.
4
We recommend that you use good quality
cookware. Poor quality trays and tins may
warp when heated, leading to uneven
baking results.
Shelf positions
As a general guide, when cooking frozen or chilled
food, use the highest possible shelf position, while
allowing some clearance between the food and the top
element. Follow the instructions given on packaging.
The cooling fan
When the top oven is switched on, you will hear
the cooling fan come on - this keeps the fascia and
control knobs of the appliance cool during cooking.
The fan may continue to operate for a period after the
oven control has been switched off.
TO TURN ON THE TOP OVEN
1. Turn the temperature control knob until the
required temperature is selected.
The white thermostat indicator will come on until
the selected temperature is reached, and then go off.
It will turn on and off periodically as the thermostat
operates to maintain the selected temperature.
2. To switch off, return the top oven control knob to
the off position.
6 Important: Never put items directly on
the base of the oven, or cover the oven
base with foil, as this may cause the
element to overheat. Always position
items on the shelf.

20
PREHEATING
Preheat the oven until the indicator light switches
off for the first time, this will take up to 15 minutes
depending on the temperature selected.
4
The oven must be preheated when
cooking frozen or chilled foods, and
we recommend preheating for yeast
mixtures, batters, soufflés, and whisked
sponges.
4
If you are not preheating the oven, the
cooking times in the following guide may
need to be extended, as they are based on
a preheated oven.
4
Put the oven shelves in the position
required before preheating the oven.
The oven shelf must be positioned with the up-stand
at the rear of the oven and facing up. Position baking
trays and roast-ing tins on the middle of the shelves,
and leave one clear shelf position between shelves, to
allow for circulation of heat.
WHEN USING THE TOP OVEN
As part of the cooking process, hot air is expelled
through a vent at the top of the oven(s). When opening
the oven door, care should be taken to avoid any
possible contact with potentially hot air, since this
may cause discomfort to people with sensitive skin.
We recommend that you hold the underneath of the
oven door handle.

21
USING THE MAIN OVEN - ELECTRIC
6 Accessible parts may be hot when the
oven is used. Young children should be
kept away.
OVEN FURNITURE
Oven shelves
The oven shelf must be positioned with the upstand at
the rear of the oven and facing upwards.
4
Extra shelves may be ordered from your
local supplier.
Baking tray and roasting tins
For best cooked results and even browning, the
recommended size baking trays and roasting tins that
should be used are as follows;
∙ Baking tray 350 mm x 250 mm
This size of baking tray will hold up to 12 small cakes.
∙ Roasting tin 370 mm x 320 mm
4
Position baking trays and roasting tins on
the middle of the shelves, and leave one
clear shelf-position between shelves, to
allow for circulation of heat.
4
We recommend that you use good quality
cookware. Poor quality trays and tins may
warp when heated, leading to uneven
baking results.
Shelf positions
As a general guide, when cooking frozen or chilled
food, use the highest possible shelf position, while
allowing some clearance between the food and the top
element. Follow the instructions given on packaging.
To help the air circulate freely
Position the shelves evenly within the oven and
maintain a clearance from the oven roof and base.
If more than one cooking dish or baking tray is to be
used on a shelf, leave a gap of at least 25mm between
the items themselves and the oven interior.
The cooling fan
The cooling fan may operate when the main oven is
on and may continue to operate for a period after the
oven has been switched off.
Aluminium Foil
6 Use foil only to cover food or cooking
dishes, using foil to cover the shelves or
oven base creates a fire hazard.
WHEN USING THE OVEN
As part of the cooking process, hot air is expelled
through a vent at the top of the oven(s). When opening
the oven door, care should be taken to avoid any
possible contact with potentially hot air, since this
may cause discomfort to people with sensitive skin.
We recommend that you hold the underneath of the
oven door handle.

22
To switch on the oven
∙ Turn the oven control knob(s) to the required
setting.
The white thermostat neon (if fitted) will come
on until the selected temperature is reached and
then go off; it will turn on and off periodically as
the thermostat operates to maintain the selected
temperature.
∙ To switch off, return the control knob to the off
position.
Preheating
Fanned oven
When cooking sensitive items such as souffle and
Yorkshire puddings or, when cooking bread, we
recommend that the oven is preheated until the neon
switches off for the first time. For any other types of
cooking, a preheat may not be required.
Conventional oven
Preheating is always required
Manual Operation (Right hand oven only)
The programmer must be set to manual operation
before the main oven can be used. If A (Auto) is on the
programmer display, return the oven to manual by
pressing the plus and minus buttons simultaneously
or the Menu button where applicable. Any programme
which has been set is cancelled.
Cooking with a fanned oven
6 As this is a high efficiency oven, you may
notice the emission of steam from the
oven when the door is opened. Please
take care when opening the door.
If you are used to cooking with a conventional oven
you will find a number of differences to cooking with
a fan oven which will require a different approach:
There are no zones of heat in a fan oven as the
convection fan at the back of the oven ensures an even
temperature throughout the oven.
This makes it ideal for batch baking - eg; when
planning a party as all the items will be cooked within
the same length of time.
4
Foods are cooked at a lower temperature
than a conventional oven, so
conventional recipe temperature may
have to be reduced. Please refer to the
conversion chart.
4
Preheating is generally not necessary as a
fan oven warms up quickly.
4
There is no flavour transference in a fan
oven, which means you can cook strong
smelling foods such as fish at the same
time as mild foods - eg; milk puddings.
4
When batch baking foods that will rise
during cooking - eg; bread - always
ensure that enough space has been left
between the shelves to allow for the rise.
Notes:
4
When 2 or more shelves are being used, it
may be necessary to increase the cooking
time slightly.
4
Because the 2 oven shelves are wider
than in many ovens, it is possible to
cook 2 items per shelf - eg; 2 victoria
sandwiches or 2 casseroles.
4
When roasting meats, you will notice that
fat splashing is reduced, which is due in
part to the lower oven temperatures, and
will help keep cleaning of the oven to a
minimum.
4
Because a fan oven has an even
temperature throughout the oven, there
is no need to follow the shelf positions
given in the baking guide.
4
There is no need to interchange dishes
onto different shelves part way through
cooking, as with a conventional oven.

23
Keep Warm (Setting or 70°C)
This setting temperature is set to allow the user to
keep food warm without over cooking. This setting can
also thaw frozen foods, or warm plates.
4
Do not use this as a cooking function.
Defrosting
and cooling in the main
oven
To defrost frozen foods, turn the main oven control
to the Bread Proving position, place the food in the
centre of the oven and close the door.
To cool foods after cooking prior to refrigerating or
freezing, turn the main oven control to the defrost
position and open the door.
Defrosting times
4
Small or thin pieces of frozen fish or
meat - eg; fish fillets, prawns & mince
will take approximately 1 - 2 hours.
4
Placing the food in a single layer will
reduce the thawing time.
4
A medium sized casserole or stew will
take approximately 3 - 4 hours.
4
A 1½kg/3lb oven ready chicken will
take approximately 5 hours, remove the
giblets as soon as possible.
Be safe
4
Do not defrost stuffed poultry using this
method.
4
Do not defrost larger joints of meat and
poultry over 2kg / 4lb using this method.
4
Never place uncooked food for defrosting
next to cooked food which is to be cooled,
as this can lead to cross contamination.
4
Defrosting meat, poultry, and fish can be
accelerated using this method but make
sure they are completely thawed before
cooking thoroughly. Place meat and
poultry on a trivet in a meat tin.

24
USING THE OVEN/GRILL - MULTI-FUNCTION
OVEN FURNITURE
Oven shelves
The oven shelf must be positioned with the upstand at
the rear of the oven and facing upwards.
Position baking trays and roasting tins on the middle
of the shelves, and leave one clear shelf-position
between shelves, to allow for circulation of heat.
Baking tray and roasting tins
For best cooked results and even browning, the
recommended size baking trays and roasting tins that
should be used are as follows;
∙ Baking tray 350 mm x 250 mm
This size of baking tray will hold up to 12 small cakes.
∙ Roasting tin 370 mm x 320 mm
4
We recommend that you use good quality
cookware. Poor quality trays and tins may
warp when heated, leading to uneven
baking results.
6 Never use dishes which are cracked,
damaged or not oven proof as heating
may lead to shattering inside the oven.
SWITCHING ON THE
MULTIFUNCTION OVEN
The multifunction oven can be controlled by the
programmer (see The Programmer/Clock for details).
4
The programmer, must be set to manual
before it can be used, or programmed.
1. Use the function control knob to select the
function you wish to use -see the functions table
for details.
2. Turn the temperature control knob to the
temperature you wish to use.
The thermostat indicator will come on to show that
the oven is heating, and once the temperature is
achieved, it will go out.
3. To switch off the oven, simply turn the control
knob back to the ‘•‘ position.
6 Important: Never place food, or dishes
on the base of the main oven, the
element is here and it will cause over
heating.
4
Note: You can change function during
cooking if you wish, as long as the oven is
in manual mode.
4
The cooling fan may come on during use,
and may continue to run for some time
afterwards.
25
OVEN & GRILL FUNCTIONS
4
The chart below details all of the
functions which are available. Your oven
may not have all of the functions shown
here.
Main Oven Function Recommended Uses
Base Heat
Only
Used to finish o the
bases of food following
cooking using the
conventional or fanned
modes. The base heat
can be used to provide
additional browning
for pizzas, pies and
quiche. Use this
function towards the
end of cooking.
Top Heat
Only
The heat is ideal from
browning o the tops
of food as it is not
as fierce as the grill
following conventional
or fanned cooking.
Provides additional
browning for dishes
like Lasagna or Cauli-
flower cheese. Use this
function towards the
end of cooking.
Conventional
oven
This function is ideal
for traditional roasting.
The meat is placed in
the middle of the oven,
roast potatoes towards
the top.
Intensive
Bake
Suitable for food with a
high moisture content,
such as quiche, bread
and cheesecake. It also
eliminates the need for
baking pastry blind.
Main Oven Function Recommended Uses
Fanned Grill
The fan allows the heat
to circulate around the
food. Ideal for thinner
foods such as bacon,
fish and gammon
steaks. Foods do not
require turning. Use
with the oven door
closed.
Fanned Oven
The even temperature
in the oven makes this
function suitable for
batch baking, or batch
cooking foods.
Defrost
To defrost foods,
such as cream cakes/
gateaux, use with the
oven door closed. For
cooling dishes prior to
refrigeration, leave the
door open.
Dual Grill
This function cooks
food from the top and
is ideal for a range
of food from toast to
steaks. As the whole
grill is working, you can
cook larger quantities
of food.
Single Grill
For smaller quantities
of food, but is still ideal
for anything from toast
to steaks.
Base Heat
with Fan
Used to cook open
pies (such as mince
pies) the base element
ensures that the base
is cooked while the
fan allows the air to
circulate around the
filling - without being
too intensive.

26
Main Oven Function Recommended Uses
Bread
Proving
This function circulates
air at the correct
temperature for
proving bread dough
before baking for up to
40°C.
Pizza
This function is ideal
for cooking pizza. The
fanned oven oper-ates
with the addition of
the base element to
cook pizza perfectly
BEFORE YOU START GRILLING. . . .
Before you use the grill, make sure you have placed the
grill shelf in the position you need as once the grill is
on you may injure yourself if you try to move the shelf.
6 Warning: Accessible parts may become
hot when the grill is in use. Children
should be kept away
FANNED / CONVENTIONAL GRILL
6 The grill function must be used with the
door closed.
1. Turn the selector control knob to the grill setting
you require (conventional or fanned).
2. Turn the temperature selector to the heat setting
you require in a similar way to selecting the oven
temperature.
3. To switch off, return the control knobs to the ‘off’
position.
4
The cooling fan may come on during use,
and may continue to run for some time
afterwards.
4
To adjust your results, you can turn the
grid over, or remove it altogether.
Types of grill
Single grill: has one grill element. The grill pan trivet
MUST be inverted when using single grill in the main
oven.
6 For best results: Pre-heat the single grill
for 3 - 5 minutes.
The grill neon
When grilling with the door closed, the neon will cycle
on and off as the temperature is maintained inside the
cavity.
PRE-HEATING
To get the best results from your oven, we recommend
pre-heating for around 5 to 15 minutes before placing
your dishes in. This is especially important for items
which are chilled, frozen, batter based, yeast based or
whisked sponges.
4
If you are using a fanned function, you
should still preheat but for a shorter time.
4
The items in the cooking guide below are
based on a pre-heated oven, but can be
adjusted to take into account personal
taste.
COOLING AND DEFROSTING
FUNCTION
To cool foods quickly straight after cooking, but before
refrigerating or freezing, turn the oven control to the
defrost position, and open the door.
To defrost frozen foods, turn the oven control to the
defrost position, place the food in the centre of the
oven and close the door.

27
Defrosting times
4
Small or thin pieces of frozen fish or
meat - eg; fish fillets, prawns, and mince
will take approximately 1 - 2 hours.
Placing the food in a single layer will
reduce the thawing time.
4
A medium sized casserole or stew will
take around 3 - 4 hours.
4
A 1½kg / 3lb oven ready chicken will take
around 5 hours, remove the giblets as
soon as possible.
4
Always check foods are thoroughly
defrosted before cooking.
Be safe
4
Do not defrost stuffed poultry using this
method.
4
Do not defrost larger joints of meat and
poultry over 2kg / 4lb using this method.
4
Never place uncooked food for defrosting
next to cooked food which is to be cooled,
as this can lead to cross contamination.
4
Defrosting meat, poultry and fish
speeded up using this method, but make
sure they are completely thawed before
cooking thoroughly.
4
Place meat and poultry on a trivet in a
meat tin, to catch the juices from the
defrosting process.

28
USING THE OVEN - SLOW COOK
INTRODUCTION
One of your oven compartments is an electric oven
which provides a gentle heat suitable for slow cooking
or keeping food warm. The oven is operated by a
button at the right hand of the fascia, and a white
neon will illuminate to show that the oven is switched
on. Please check which side the slow cook oven is on,
by looking at the specification at the front of this
handbook.
The slow cook element is positioned in the base of
the lower compartment-always make sure that the
prepared cooking pot is placed centrally on the base of
this compartment.
6 Do not use either compartment to store
food or canned items.
6 Do not use the upper compartment for
slow cooking,or food warming.
SLOW COOKING
Slow cooking has always been the best way to
prepare a nutritious hot meal with the minimum
of preparation and maximum time away from the
kitchen. The benefits of slow cooking have been
recognized by cooks for centuries, and are still
appreciated by cooks today.
The advantages of slow cooking are as follows:
∙ Food can be left to cook unattended for several
hours and will keep hot for several hours if left
covered, without spoiling for a further 2-3 hours,
so foods can be left to cook while you are out for
the day, or over night.
∙ Inexpensive cuts of meat become deliciously
tender when slow cooked.
∙ Slow cooking will also produce moist, tender
“roasts” with minimal meat shrink-age and
reduced oven soiling.
∙ Dishes such as soups, vegetables, puddings savory
dishes and preserves are also suitable for slow cooking.
∙ There is no topping up of steamers, steam filled
kitchens or constant checking to do.
COOKING TIMES
The cooking time varies according to the type of food
being cooked, and experience will show how long
foods should be cooked for, according to personal taste
and preference.
In general foods should be cooked for at least 5 hours,
and maybe left up to 8-10 hours without spoiling if
covered. As a guide, foods cooked using the slow cook
oven will take about three times longer than they
would in a conventional oven.
COOKWARE
Any oven proof cookware maybe used for slow
cooking, provided they have a close fitted lid.
4
To rectify a badly fitting lid a piece of
cooking foil may be placed over the dish,
under the lid.
For convenience and to save washing up, the most
useful cookware for slow cooking are the flame proof
type which can be used over direct heat and for
oven cooking,and are sufficiently attractive to use as
serving dishes.

29
KEEPING FOOD WARM
Turn the oven on, and allow to pre-heat for 20
minutes before placing the food in the oven. If food is
to be kept moist then it is important to cover the dish
or plate to prevent food from drying out. This can be
done using aluminium foil if the dish does not have a
lid.
4
Do not use cling film to cover food as it
cannot with stand the heat produced in
the oven.
4
Some foods are best left un covered if you
wish to keep the food dry and crisp.
4
Do not add gravy to plated meals until
serving.
4
Carved meat should be placed on one
plate and covered, adding just one
table-spoon of gravy to keep it moist.
When keeping plated meals warm it is
recommended that the food is placed on
hot rather than cold plates.
USING THE SLOW COOK OVEN
Turn the oven on and preheat for 20 minutes. Always
place the prepared cooking pot centrally on the base of
the oven. Follow the guide lines for the best results.
4
The maximum capacity of oven proof
dishes should be no more than 2.5 litres
(4.5 pints).
4
Please note: The more you fill the dish/
pot the longer it will take to cook.
4
Cooking times will vary depending on the
size and shape of the meat, or poultry.
4
Always bring soups,casseroles and liquids
to the boil before placing in a preheated
oven. To give more colour to meat or
poultry, fry the meat to brown and add to
stock which is hot.
4
All meat and poultry recipes need a
minimum of 5 hours to cook.
4
Make sure all frozen ingredients are well
thawed out.
4
Always ensure that frozen poultry has
thoroughly defrosted in a refrigerator
and all ice crystals have melted.
4
Cut root vegetables into smaller pieces as
they take longer than meat to cook.
4
If possible they should be sauteed for 2-3
minutes before slow cooking.
4
Ensure that root vegetables are always at
the bottom of the pan immersed in the
cooking liquid.
4
A meat thermometer should be used
when cooking pork joints and poultry.
The internal temperature of the food
should reach 88˙C,
4
Stuffed meat or stuffed poultry should
not be slow cooked. Cook any stuffing
separately.
4
Cover casseroles with a lid, or foil to
prevent loss of moisture.
4
Adjust seasonings and thickenings at the
end of cooking time.
4
Dried red kidney beans must be boiled
for a minimum of 10 minutes following
soaking before inclusion in any dish.
4
Opening the door during cooking, leads
to heat loss, and will lead to increased
cooking times.
30
COOKING GUIDE
INDUCTION HOB
For best cooking results, follow the examples in the guide below, bearing in mind that settings 8 and 9 are
maximum positions and should only be used for deep frying and bringing up to the boil quickly.
Preparation Very fast frying Fast Medium Slow Simmering,
re-heating
Keep-
ing
warm
9 8 7 6 5 4 3 2 1
Soup
Thin soup
Thick soup
Fish
Court-Bouillon
Deep fried
Sauces
Thick, flour
based
Buttery,
containing
eggs
Vegetables
Spinach
Pulses
Boiled potatoes
Carrots
Saute potatoes
Frozen
vegetables
31
Preparation Very fast frying Fast Medium Slow Simmering,
re-heating
Keep-
ing
warm
9 8 7 6 5 4 3 2 1
Meat
Thin cuts of
meat
Fried steak
Other types of cooking
Deep frying:
frozen chips
Deep frying:
fresh chips
Pressure
cooking
Stewed fruit
Pancakes
Custard
To melt
chocolate
Jam
Milk
Fried eggs
Pasta
Re-heating
baby food
Rice pudding
Keeping food
warm
Stews

32
GRILL
Food Type Time Approx (mins)
Bacon
8 - 15
Sausages
12 - 15
Chops
- Lamb 10 - 15
- Pork 15 - 25
Toast
- 2 rounds 1 - 2 (per side)
- 4 rounds 1 - 2 (per side)
Bread products
- Buns 1 - 2 (per side)
- Tea cakes 1 - 2 (per side)
Cheese on toast
- 2 rounds 4 - 5
- 4 rounds 4 - 5
Fish
- Fillets 10 - 15
Chicken
- Fillets 20 - 30
Beef Steaks
- Rare 7 - 10
- Medium 10 - 15
- Well done 15 - 20
Gammon Steaks
12 - 15
4
As with any cooking guide, all times are
approximate and can be adjusted to suit
personal taste.
33
BAKING GUIDE
TOP OVEN
Cooking temperatures
The temperature settings and time given in the
Baking Guides are based on dishes made with block
margarine. If soft tub margarine is used, it may be
necessary to reduce the temperature setting. If a
recipe gives a different temperature set-ting to that
shown in the guide, the recipe instruction should be
followed.
4
Because the top oven is more compact,
it may be necessary to reduce cooking
temperatures specified in recipes by up
to 20°C.
4
Use the baking guide as a reference for
determining which temperatures to use.
Cooking times
4
These times are based on cooking in a
preheated oven.
4
These cooking times are approximate,
due to the size and type of cooking dish
and personal preferences.
Item Temperature (°C) Shelf Position Approximate cooking time
Small cakes 160°C - 180°C (fanned) 1 15 - 20 mins
Victoria sandwich (2 x 180mm
/ 7”)
160 1 20 - 25 mins
Swiss roll 200 1 8 - 12 mins
Semi rich fruit cake (180mm x
7”)
140 1 2¼ - 2¾ hours
Scones 215 1 10 - 15 mins
Meringues 90 - 100 1 2 - 3 hours
Shortcrust pastry 200 - 210 1
Depends on size & type
of cooking dish & also the
filling
Pu / flaky pastry 200 - 210 1
Choux pastry 200 - 210 1
Biscuits 160 - 200 2 10 - 20 mins
Sponge pudding 150 1 30 - 45 mins
Milk pudding 140 1 2 - 2½ hours
34
MAIN OVEN
Cooking times & temperatures
4
The temperature settings and times
given in the baking guide are based on
dishes made with block margarine. If
soft tub margarine is used it may be
necessary to reduce the temperature
setting.
4
Allow enough space between shelves for
food that will rise during cooking.
4
Do not place items on the oven base as
this will prevent air circulating freely.
4
Note: This is a fanned oven, therefore
some adjustment will have to be made to
conventional cooking temperatures. The
table below shows conventional cooking
temperatures, fanned oven temperatures
and gas marks. For optimum results,
conventional temperatures need to be
converted to fanned oven temperatures.
For example, an item which would
normally cook at a conventional
temperature of 180 °C, will now cook at
the fanned oven temperature of 160 °C.
Conventional temperature (°C) Fanned Oven (°C) Gas Mark
100
110
130
140
150
160
180 - 190
200
220
230
250
100
110
120
130
140
150
160
170
180
190
200
1/4
1/4
1/2
1
2
3
4 - 5
6
7
8
9
Food Type Temp. Setting °C Time Approx. Shelf Position
Cakes
Small cakes 190 160 15 - 25 2 - 4
Victoria sandwich 180 160 20 - 30 3
Semi rich fruit cake 150 125 2½ - 3 hours 2
Christmas cake 150 125 2½ - 3 hours 2
Puddings
Bread & butter pudding 170 150 45 - 1 hour 3
Fruit crumble 200 175 40 - 1 hour 3

35
Food Type Temp. Setting °C Time Approx. Shelf Position
Miscellaneous
Yorkshire pudding:
- large 220 200 40 - 48 4 - 5
- small 220 200 15 - 20 4 - 5
Shortcrust pastry 200 180 depends on filling 4 - 5
MULTIFUNCTION OVEN
Cooking times & temperatures
4
This is a high efficiency oven, you may
notice an emission of steam when the
door is opened.
4
When cooking chilled or frozen foods,
use the recommended cooking times
and temperature on the packaging.
Always make sure the food is piping hot
throughout before serving.
4
There are no zones of heat, and no flavour
transfer when using a fanned oven -
allowing you to cook a greater variety of
foods together.
4
If you are cooking on more than one
shelf, you may need to slightly increase
the cooking time.
4
Always make sure that there is enough
space between dishes, to allow food to
rise, and to air to circulate.
4
Note: This is a fanned oven, therefore
some adjustment will have to be made to
conventional cooking temperatures. The
table below shows conventional cooking
temperatures, fanned oven temperatures
and gas marks. For optimum results,
conventional temperatures need to be
converted to fanned oven temperatures.
For example, an item which would
normally cook at a conventional
temperature of 180 °C, will now cook at
the fanned oven temperature of 160 °C.
Conventional temperature (°C) Fanned Oven (°C) Gas Mark
100
110
130
140
150
160
180 - 190
200
220
230
250
100
110
120
130
140
150
160
170
180
190
200
1/4
1/4
1/2
1
2
3
4 - 5
6
7
8
9
36
Food Type Temp. Setting °C Time Approx. Shelf Position
Cakes
Small cakes 190 175 15 - 25 2 & 4
Victoria sandwich 180 160 20 - 30 3
Semi rich fruit cake 150 125 2½ - 3 hours 2
Christmas cake 150 125 2½ - 3 hours 2
Puddings
Bread & butter pudding 170 150 - 45 - 1 hour 3
Fruit crumble 200 175 - 40 - 1 hour 3
Miscellaneous
Yorkshire pudding:
- large 220 200 200 40 - 45 4 - 5
- small 220 200 200 15 - 20 4 - 5
Shortcrust pastry 200 180 180
depends on
filling
4 - 5
GENERAL BAKING GUIDE
Traditional fruit cakes
It should be remembered that ovens can vary over
time, therefore cooking times can vary, making it
difficult to be precise when baking fruit cakes.
It is necessary therefore, to test the cake before
removal from the oven. Use a fine warmed skewer
inserted into the centre of the cake. If the skewer
comes out clean, then the cake is cooked.
4
Follow the temperatures suggested in the
recipe and then adjust accordingly to the
conversion table.
4
Do not attempt to make Christmas cakes
larger than the oven can cope with, you
should allow at least 25mm (1”) space
between the oven walls and the tin.
4
Always follow the temperatures
recommended in the recipe.
4
To protect a very rich fruit cake during
cooking, tie 2 layers of brown paper
around the tin.
4
We recommend that the cake tin is not
stood on layers of brown paper, as this
can hinder effective circulation of air.
4
Do not use soft tub margarine for rich
fruit cakes, unless specified in the recipe.
4
Always use the correct size and shape of
tin for the recipe quantities.

37
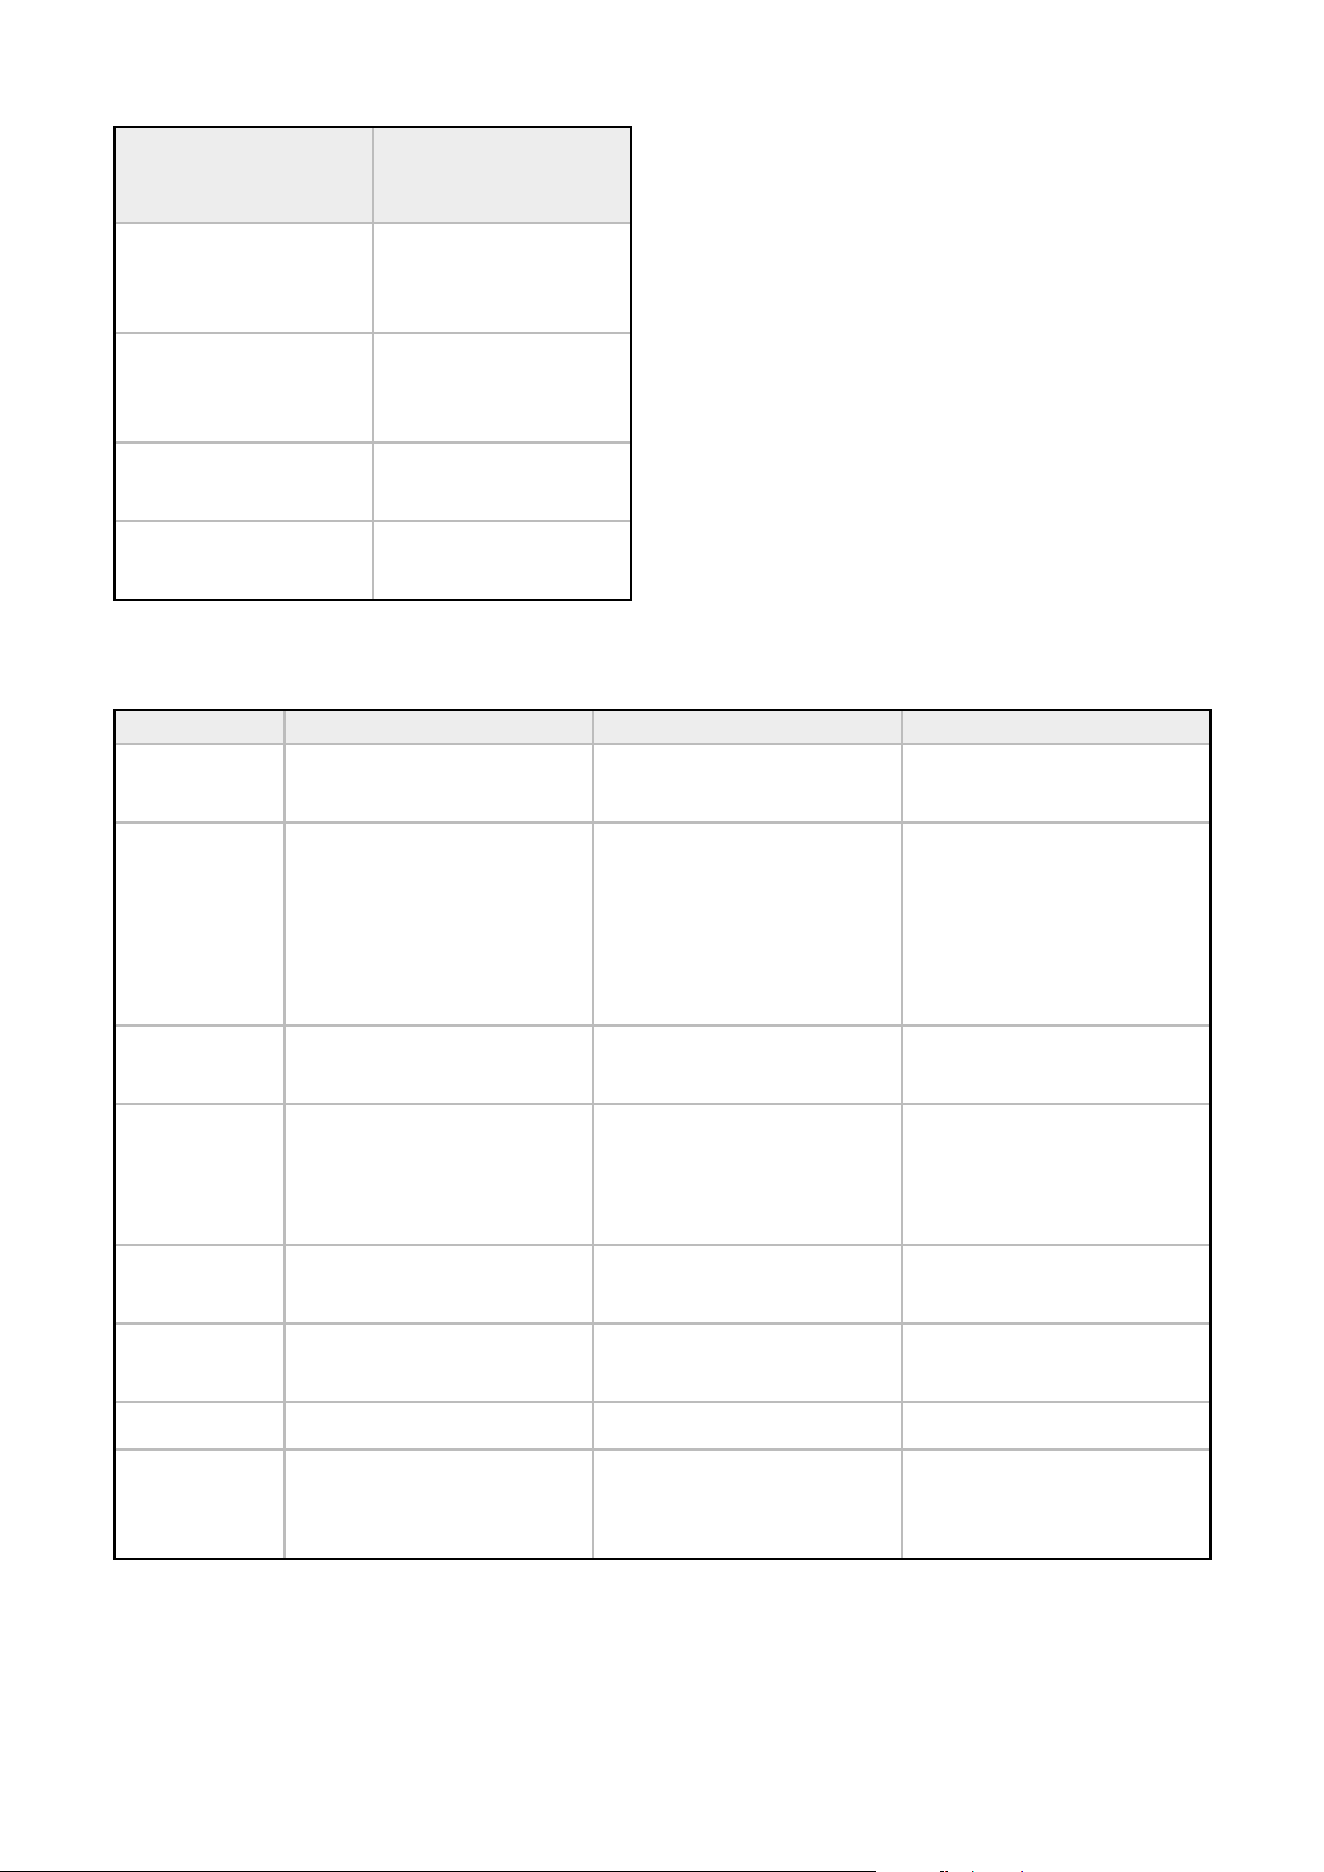
Trouble-shooting - fruit cakes
Problem Possible Cause
Fruit sinking to
the bottom
Low oven temperature which
may cause the cake to take
longer to set, allowing the
fruit to sink. Or, too much
liquid, or raising agent. The
fruit may not have been
properly washed and dried.
Cake sinking /
dipping in the
centre
Too much raising agent in
the mixture. Too hot, or
too cool an oven. Or, not
enough liquid or insucient
creaming.
Surface cracks
Too small a tin, or too much
mixture in the tin. Too much
raising agent in the mix,
plus not enough liquid or
insucient creaming. The
oven may be too hot.
Hard outer
crust with a
damp patch
inside
Oven too hot, therefore the
cake baked too quickly. Too
much sugar, or insucient
liquid.
Burnt outside
Oven temperature too high.
Oven too small for the size of
cake. Insucient protection
around the tin. Cake baked
on too high a shelf.
Texture with
pronounced
holes.
Too much raising agent. Flour
unevenly mixed.
Texture too
close and cake
insuciently
risen.
Not enough raising agent.
Not enough liquid. Too
cool an oven. Insucient
creaming.
Cake crumbles
when cut
Not enough liquid. Baked for
too long. Not enough sugar.
Too much baking agent.
Too dry
Over baking. Insucient egg
or liquid. Too much raising
agent.
Trouble-shooting - sponge cakes
Problem Possible Cause
Domed top
Insucient creaming of
mixture. Cake baked on
too high a shelf position, or
at too high a temperature.
Paper liners can cause the
outer edge not to rise and
the centre to peak.
Hollowed /
sunken top
Too much raising agent.
Oven temperature too low, or
incorrect shelf position. Cake
removed from oven before
it’s cooked. Use of soft tub
margarine.
Very pale, but
cooked
Oven temperature too low.
Baked too low in the oven
Overflowing tin
Tin too small for the amount
of mixture
Slow cooking (
S
Setting or 100°C)
4
Make sure that frozen foods are
thoroughly thawed before cooking.
4
Do not slow cook joints of meat or
poultry weighing more than 2¼kg/4½lb.
4
Preheat the oven to 170°C and cook for
30 minutes, then adjust the oven control
to
S
or 100°C (slow cook setting) for the
remainder of the cooking time.
4
Slow cooking times will be about 3 times
as long as conventional cooking times.
4
Do not open the oven door unnecessarily
during slow cooking, as this will result in
heat loss at low temperatures.
4
Always use dishes with tightly fitting lids.
To rectify badly fitting lids, place foil over
the dish underneath the lid.

38
ROASTING GUIDE
The times given in the roasting guide are only
approximate, because the size and age of the bird will
influence cooking times as will the shape of a joint
and the proportion of the bone.
Frozen meat should be thoroughly thawed before
cooking. For large joints it is advisable to thaw over
night.
Frozen poultry should be thoroughly thawed before
cooking. The time required depends on the size of the
bird - eg; a large turkey may take up to 48 hours to
thaw.
Use of a trivet with a roasting tin will reduce fat
splashing and will help to keep the oven interior clean.
Alternatively, to help reduce fat splashing, potatoes
or other vegetables can be roasted around the meat/
poultry.
Cook in main oven at:
160°C - 180°C (fanned)
180°C - 200°C
(conventional)
Approximate Cooking
Time (preheated oven)
Beef
Rare
20 minutes per 450g
(1lb), plus 20 minutes
Medium
25 minutes per 450g
(1lb), plus 25 minutes
Well
done
30 minutes per 450g
(1lb), plus 30 minutes
Lamb
Medium
25 minutes per 450g
(1lb), plus 25 minutes
Well
done
30 minutes per 450g
(1lb), plus 30 minutes
Pork -
35 minutes per 450g
(1lb), plus 35 minutes
Poultry -
20 minutes per 450g
(1lb), plus 20 minutes
Notes:
4
When cooking stuffed meat or poultry
calculate the cooking time from the total
weight of the meat plus the stuffing.
4
For joints cooked in foil or covered
roasters, and for lidded casseroles, add 5
minutes per 450g (1lb) to the calculated
cooking time.
4
Smaller joints weighing less than 1.25kg
(2½lb) may require 5 minutes per 450g
(1lb) extra cooking time.
4
Position the oven shelf so that the meat
or poultry is in the centre of the oven.
4
It is recommended that the appliance is
cleaned after open roasting.

39
ROAST TURKEY
Roasting turkey involves cooking two different types
of meat - the delicate light breast meat, which must
not be allowed to dry out, and the darker leg meat,
which takes longer to cook.
The turkey must be roasted long enough for the legs
to cook, so frequent basting is necessary. The breast
meat can be covered once browned.
To test if the turkey is cooked, push a fine skewer into
the thickest part of the thigh. If the juices run clear,
the turkey is cooked. If the juices are still pink, the
turkey will need longer cooking.
4
Always make sure that the turkey is
completely thawed and that the giblets
are removed before cooking.
4
Turkey should be roasted at gas mark 5
for 20 minutes per lb, plus 20 minutes,
unless packaging advises otherwise.
4
The turkey can be open roasted, breast
side down, for half of the cook time, and
then turned over for the remainder of the
cooking time.
4
If the turkey is stuffed, add 5 minutes per
1lb to the cooking time.
4
If roasting turkey covered with foil, add 5
minutes per 1lb to the cooking time.
4
Please note: for all other Roasting guides
refer to main oven section and see table.
40
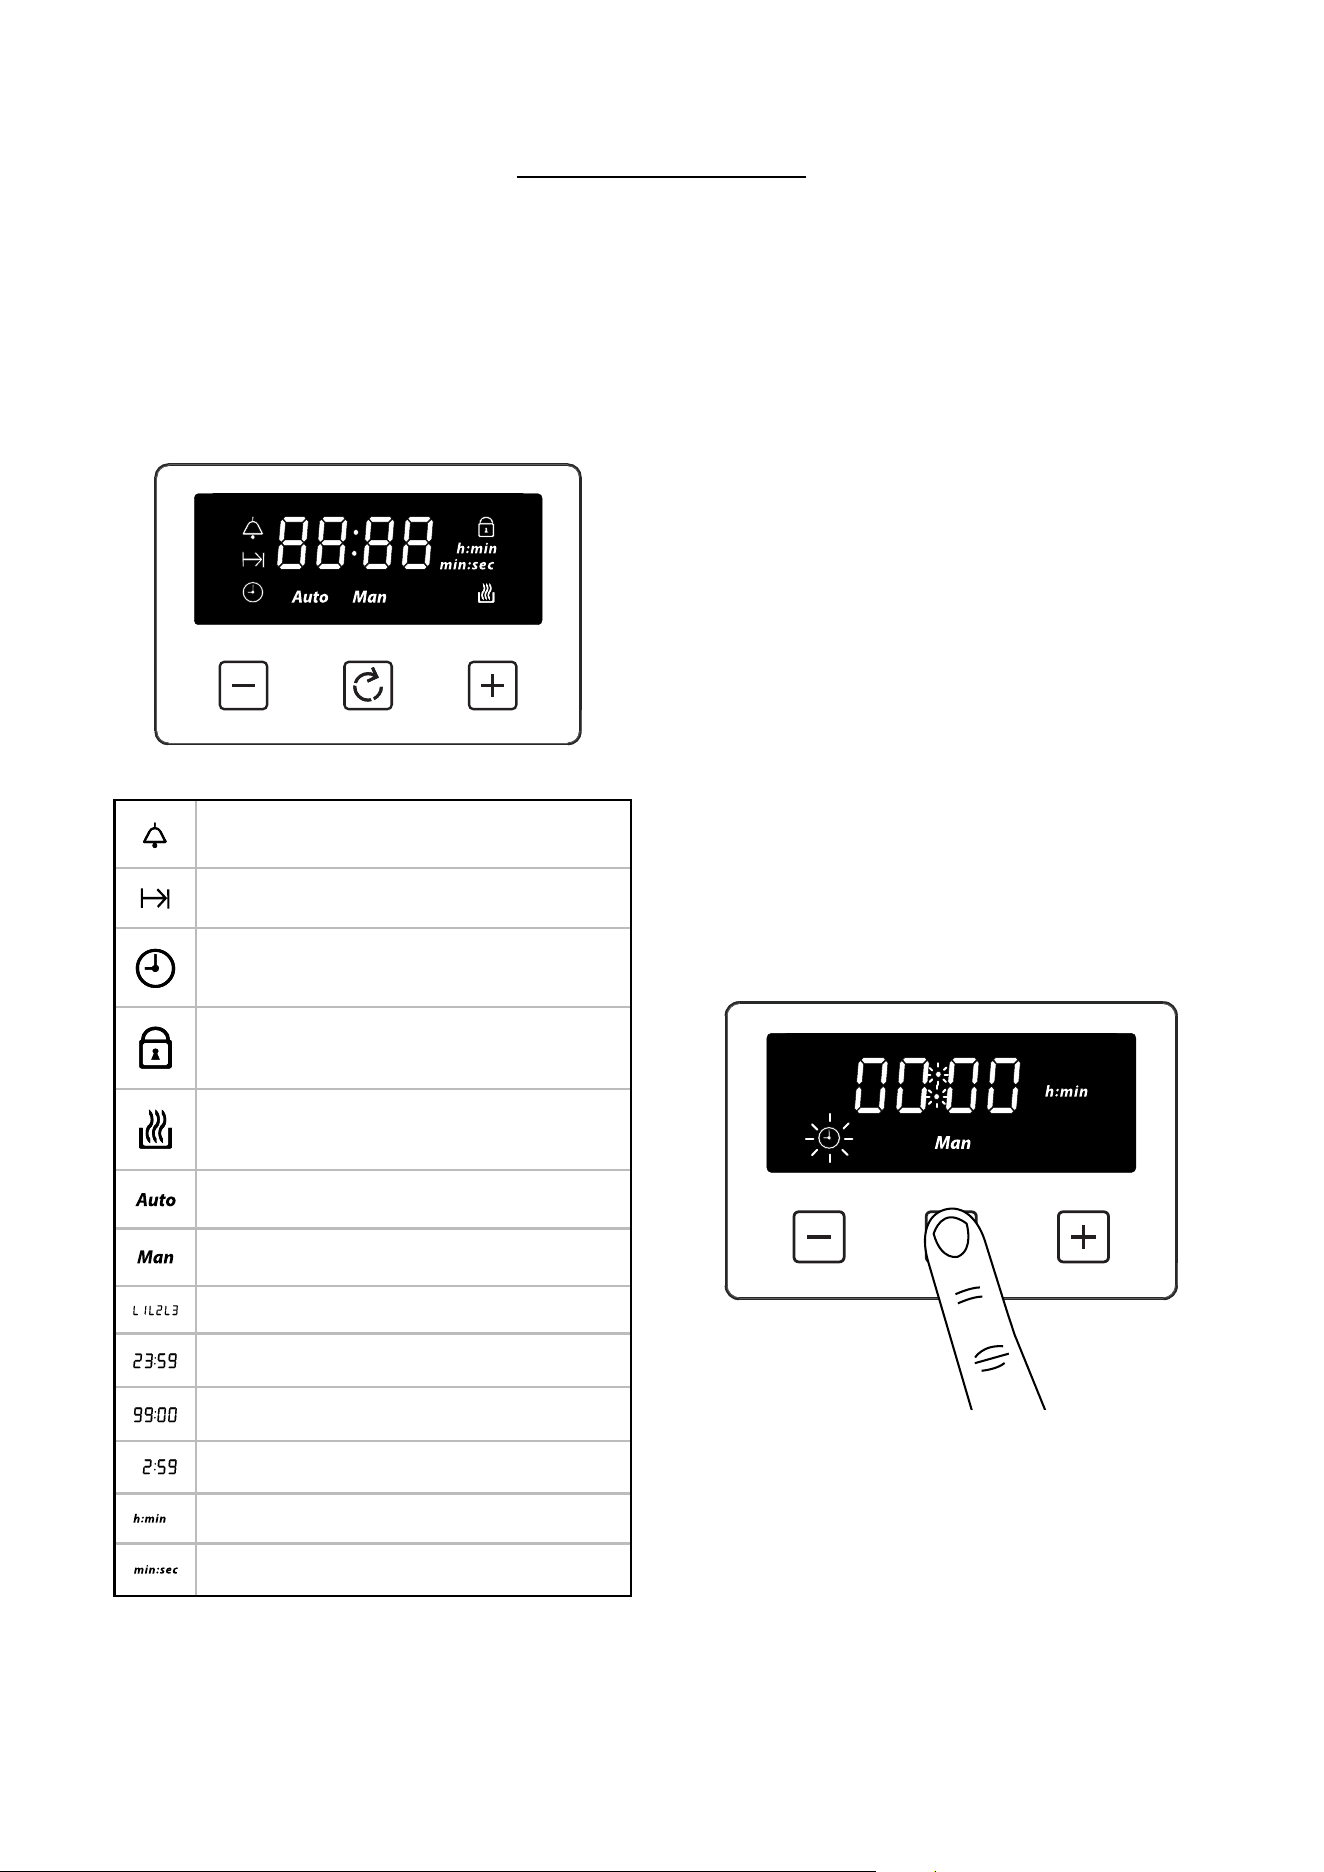
CLOCK/PROGRAMMER - STOVES RICHMOND
4
Please be aware that only the main oven
is controlled by the programmer.
4
Note: Your clock / programmer may not
have all these functions
MenuMinus Plus
Minute minder
Cooking time / Duration
Time of day
Key Lock
Auto cooking
Automatic mode
Manual mode
, ,
Volume level
, ,
7-segment display
Max. adjustable minute minder
Max. adjustable cooking time
Display hours:minutes
Display minutes:seconds
USING THE TOUCH CONTROLS
∙ Menu - Scroll through to select a function
∙ Plus - Increase time or volume
∙ Minus - Decrease time or volume
4
When a function is selected and the time
or volume is set, the chosen function will
automatically start seven seconds after
setting.
MANUAL MODE
If the programmer is not in semi-automatic or full-
automatic mode you can use oven functions manually.
The manual icon is also on the display.
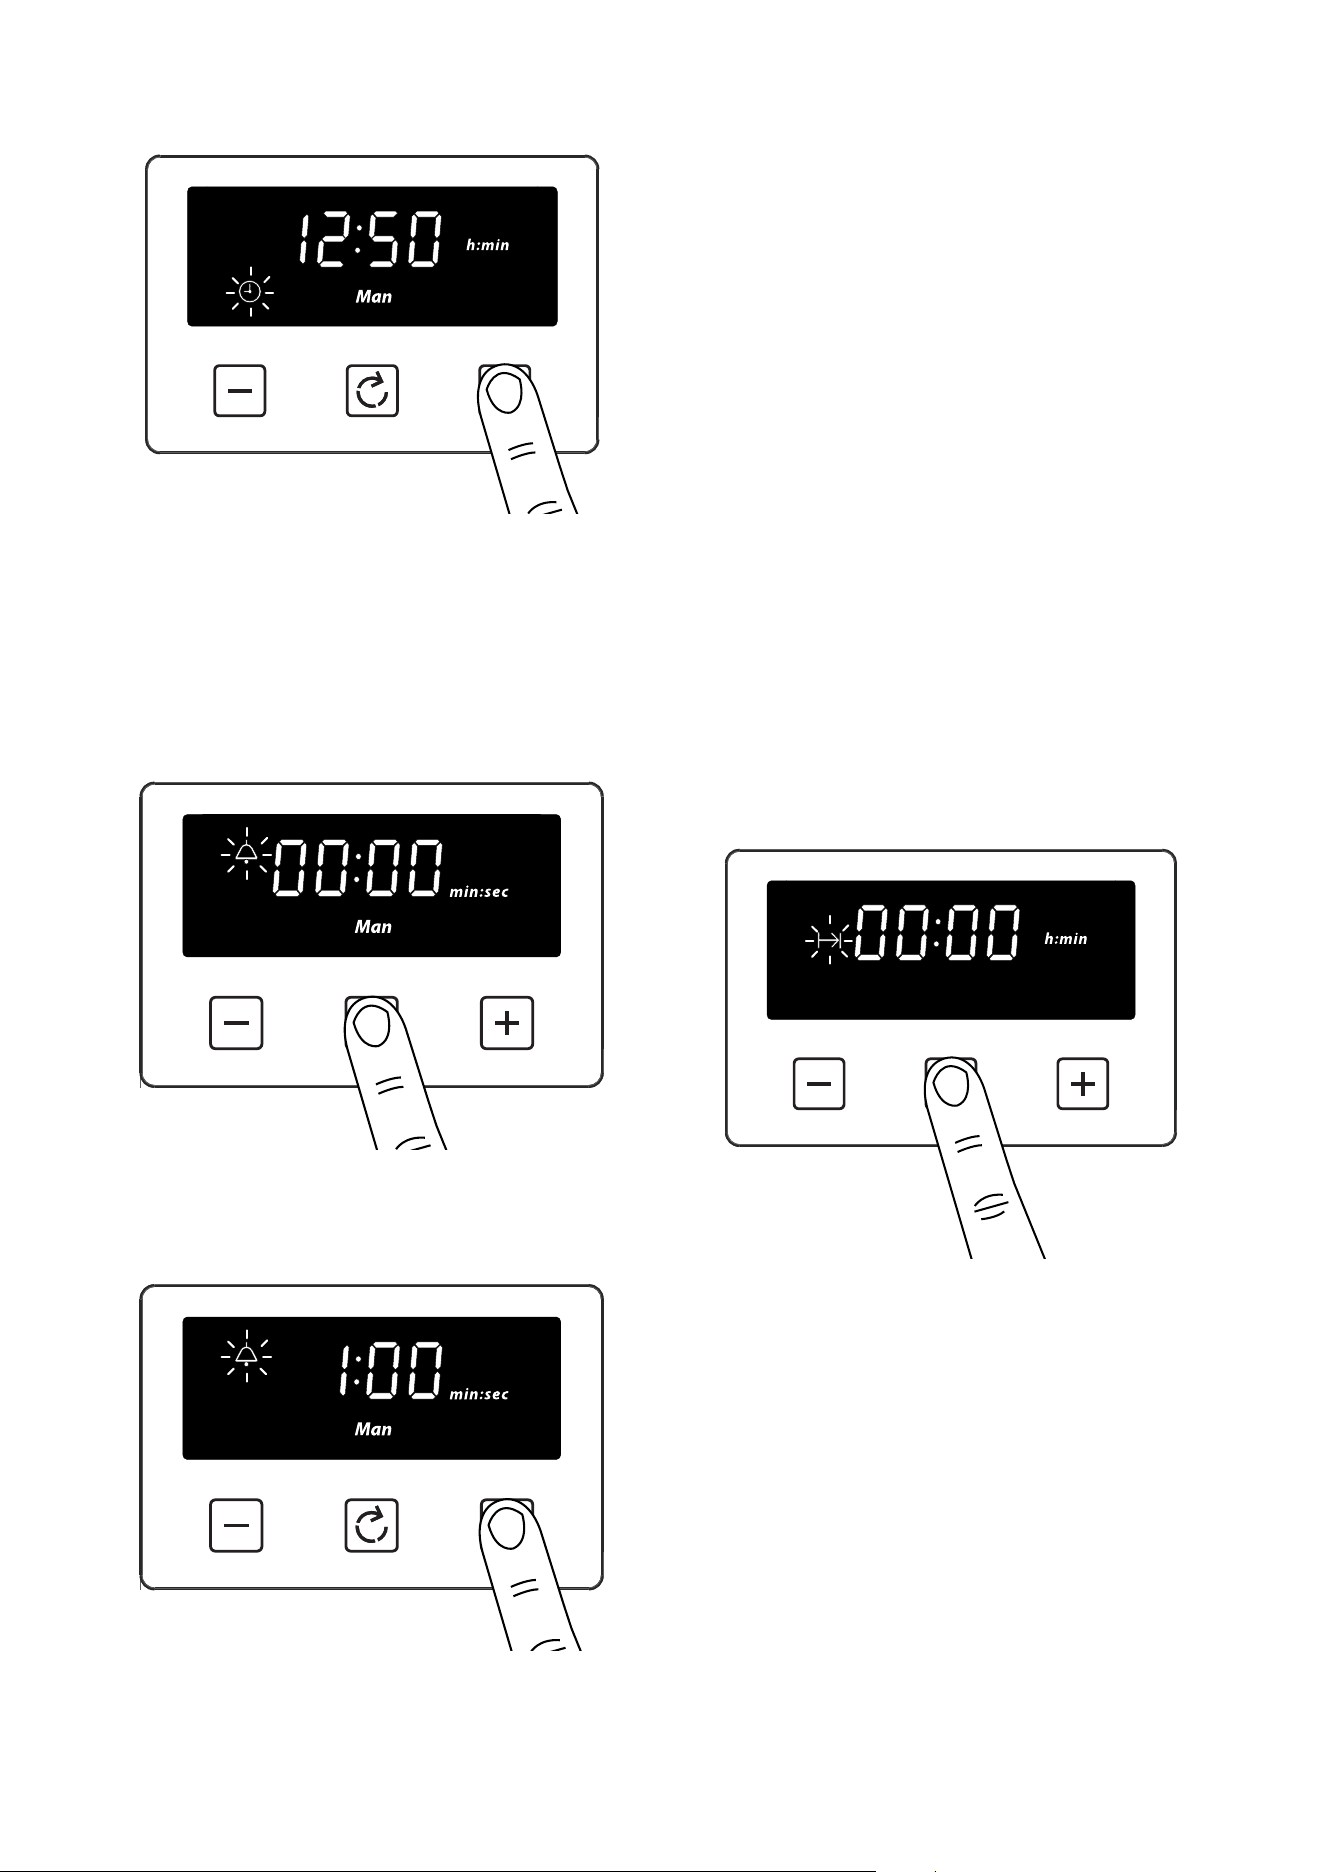
SETTING THE TIME OF DAY
By pressing menu, scroll through the functions until
you reach ‘time of day’.
1. Press the function button until the 'time of day'
symbol appears
41
2. Press the plus or minus buttons to set a time
SETTING THE MINUTE MINDER
The maximum cooking time that can be set is 99
minutes.
1. Press the function button until the 'minute
minder' symbol appears
2. Press the plus or minus buttons to set a time
Once set, the minute minder will start to countdown
in steps of seconds. The display will show the
minute minder symbol and the remaining time. The
countdown will continue in the background, if other
functions are being set.
When the set time for the minute minder has
completed, an alarm is heard and the minute minder
symbol will flash on the display. Press any button to
stop the alarm and the time of day is displayed.
To modify or cancel the minute minder
Return to the minute minder function and use
either the plus or minus buttons to adjust the time.
By setting the time to ‘0.00’, this will cancel the
countdown.
SETTING THE COOKING TIME (SEMI
AUTOMATIC COOKING)
1. Press the function button until the 'cooking time'
symbol appears
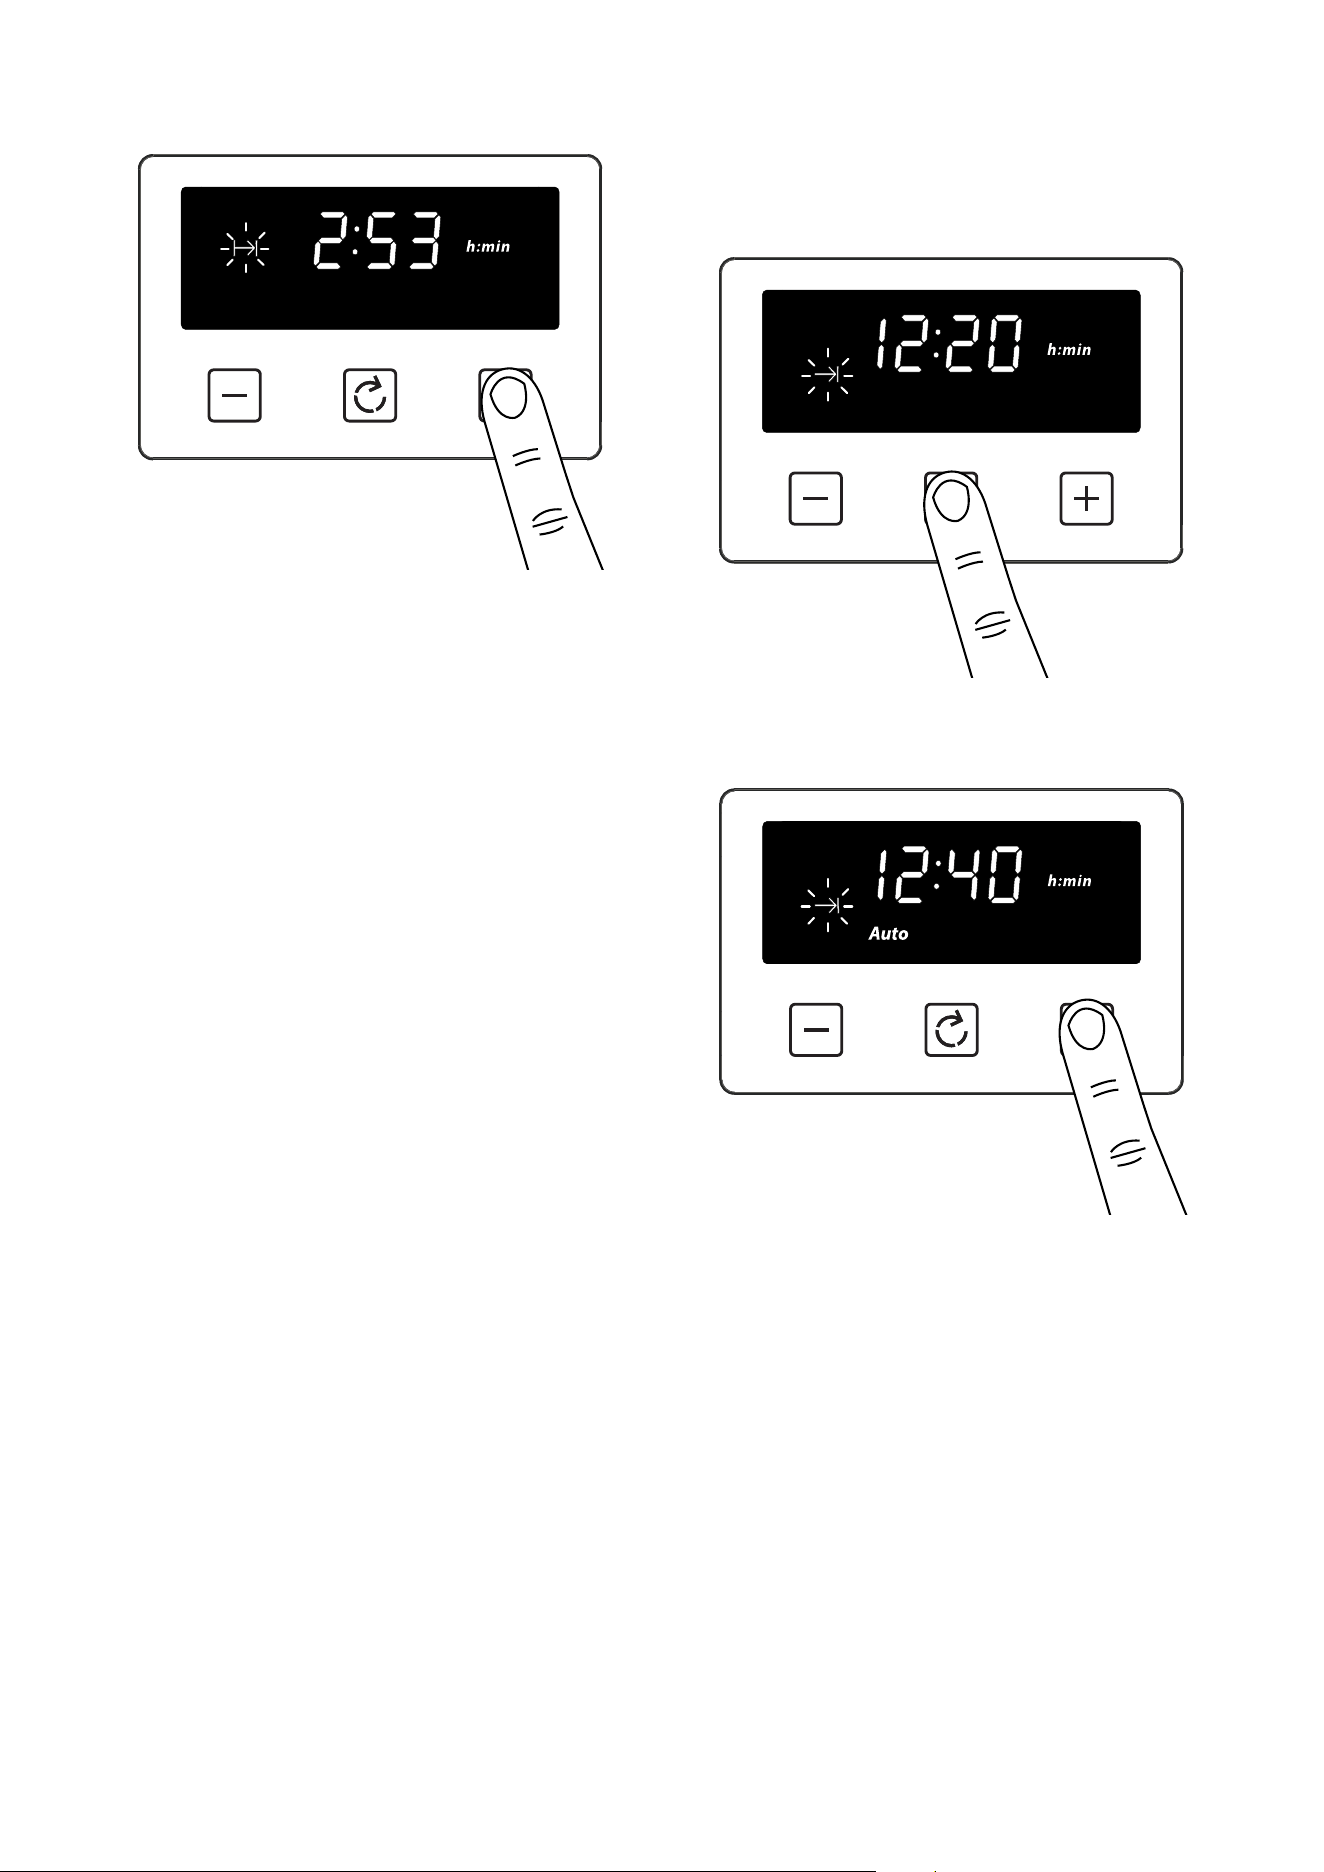
42
2. Press the plus or minus buttons to set a time
Once set, the automatic mode, auto cooking symbol
and the time of day is displayed.
When cooking is completed, an alarm is heard and the
manual mode symbol flashes on the display. Press the
Menu button to stop the alarm and then the ‘time of
day’ will then be displayed. Pressing the Menu button
again will return to manual mode.
4
Note: Only the bottom left hand oven
can use the Semi Automatic cooking
function.
4
The maximum cooking time that can be
set is 23 hours and 59 minutes.
To modify or cancel the cooking time
Return to the ‘cooking time’ function and use either
the plus or minus buttons to set the time. By setting
the time to ‘0.00’, this will cancel the countdown.
SETTING THE END OF COOKING
TIME (FULLY AUTOMATIC)
1. Press the function button until the 'end of cooking
time' symbol appears
2. Press the plus or minus buttons to set a time
∙ Enter cooking duration as described in ‘Setting the
cooking time’ section.
The display shows the current ‘time of day’ plus
the ‘end of cooking time’ symbol. The latest ‘end of
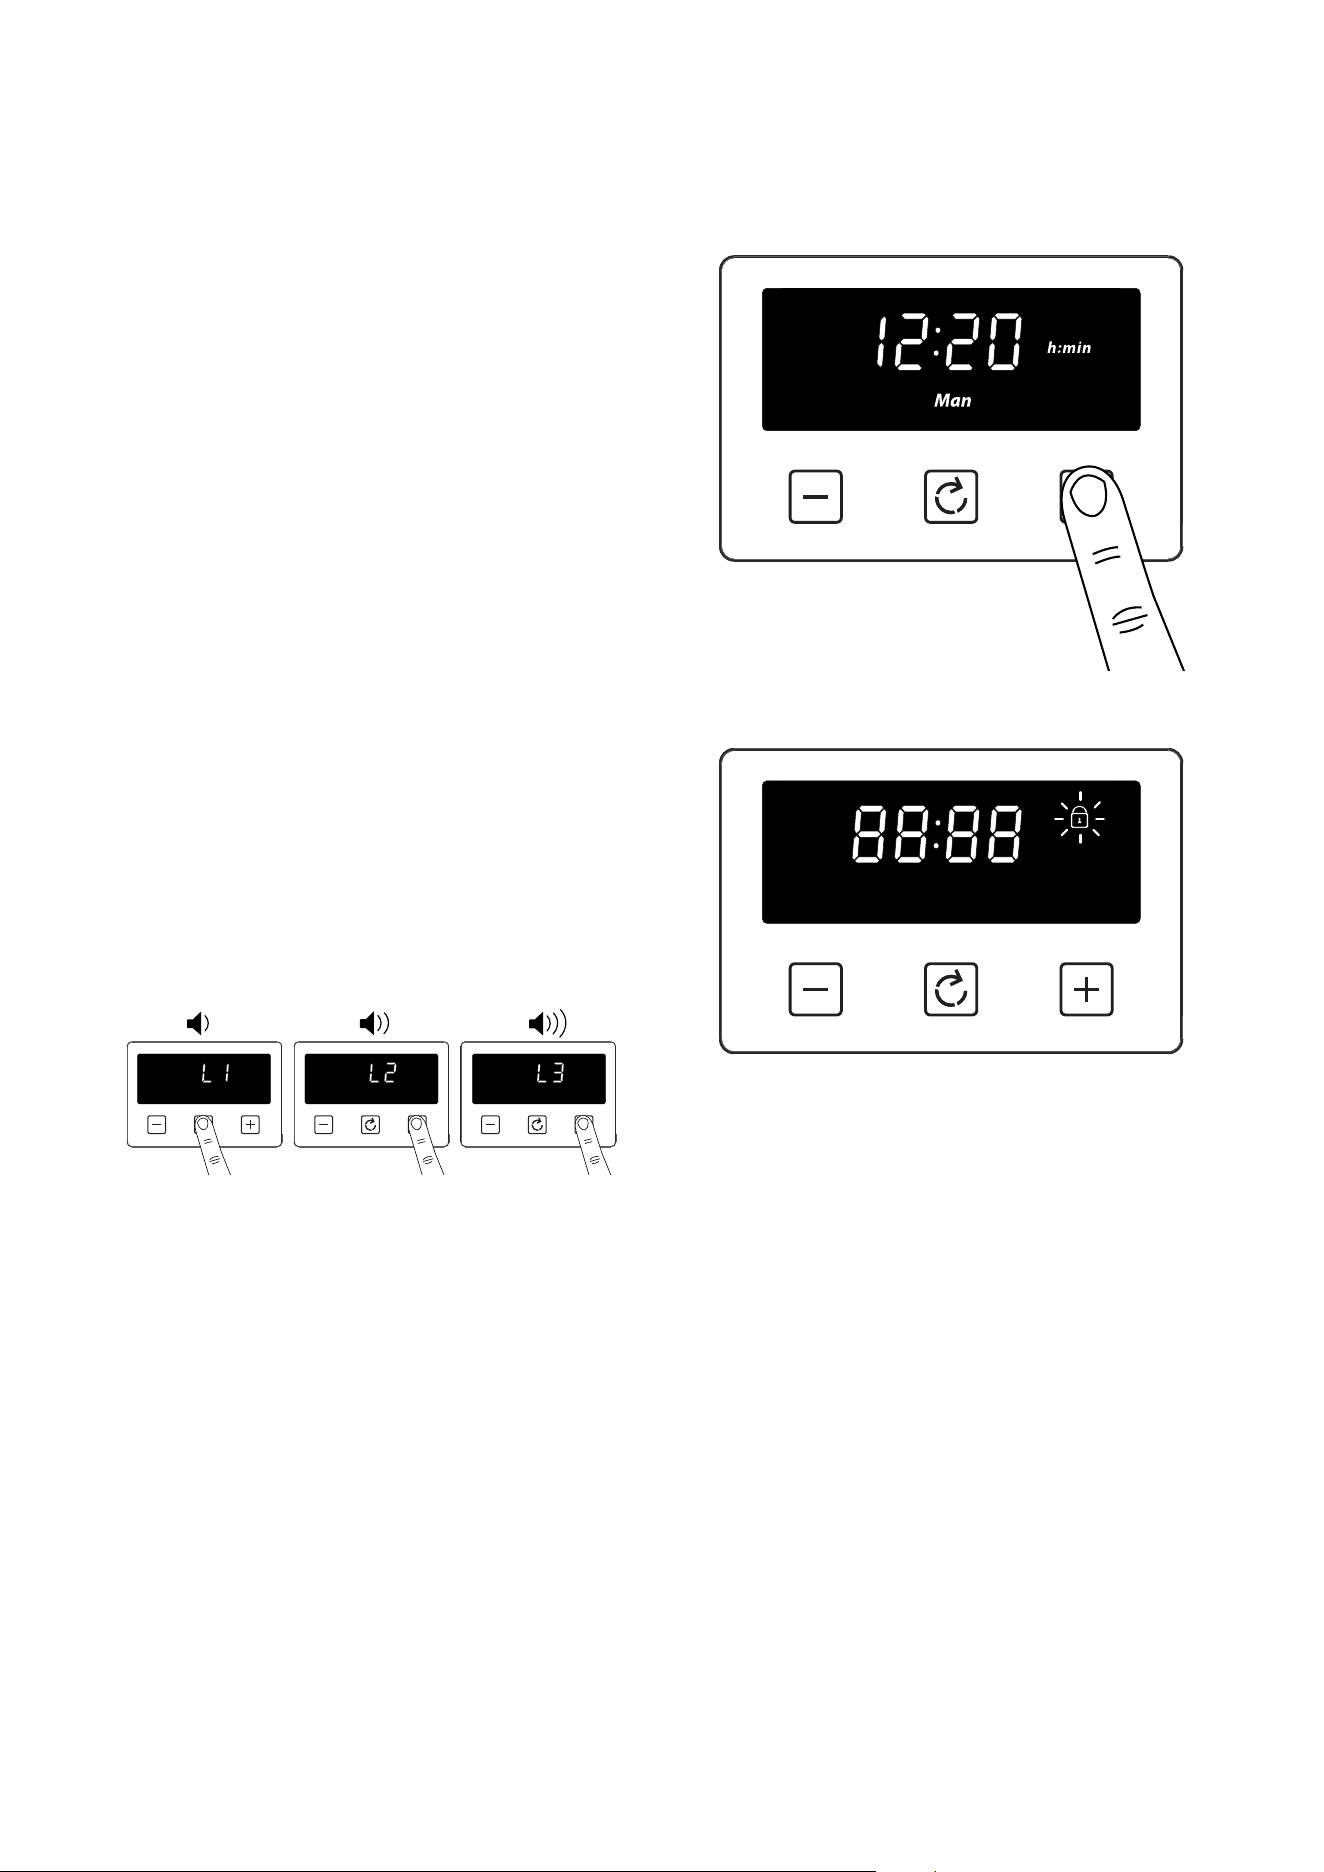
43
cooking time’ is limited to the current ‘time of day’
plus the maximum time that can be set (23 hours and
59 minutes).
The auto cooking symbol disappears from the display
once the time, the required cooking settings and
temperature have been set. The appliance will not be
switched on until the set cooking start time, that is
the difference between the cooking end time and the
cooking duration.
When cooking is completed, an alarm is heard and the
manual mode symbol flashes on the display. Press the
Menu button to stop the alarm and then the ‘time of
day’ will then be displayed. Pressing the Menu button
again will return to manual mode.
To modify or cancel the end cooking time
Return to the ‘end of cooking time’ function and use
either the plus or minus buttons to set the time. The
‘end of cooking time’ can be deleted by counting back
using the minus button until it equals the current
time of day.
SETTING THE VOLUME
∙ Press the menu button until “LX” (X = 1, 2 or 3)
flashes on the display. Use the plus or minus
buttons to select a tone.
4
Note: Default tone is L3
ACTIVATING / DEACTIVATING KEY
LOCK
1. Press and hold the plus button for 3-5 seconds
Once the Key lock is active, the buttons will be
inactive. A two beep signal will be heard if the buttons
are pressed.
To deactivate the Key lock
∙ Press and hold the plus button for 3-5 seconds. The
Key lock symbol will disappear and the appliance
can continue to be used.
4
Note: In case of main power loss for a
short time (about 1.5 minutes), timer
maintains its status.
4
Key lock status and buzzer tone are
memorized independent of the power
loss duration.
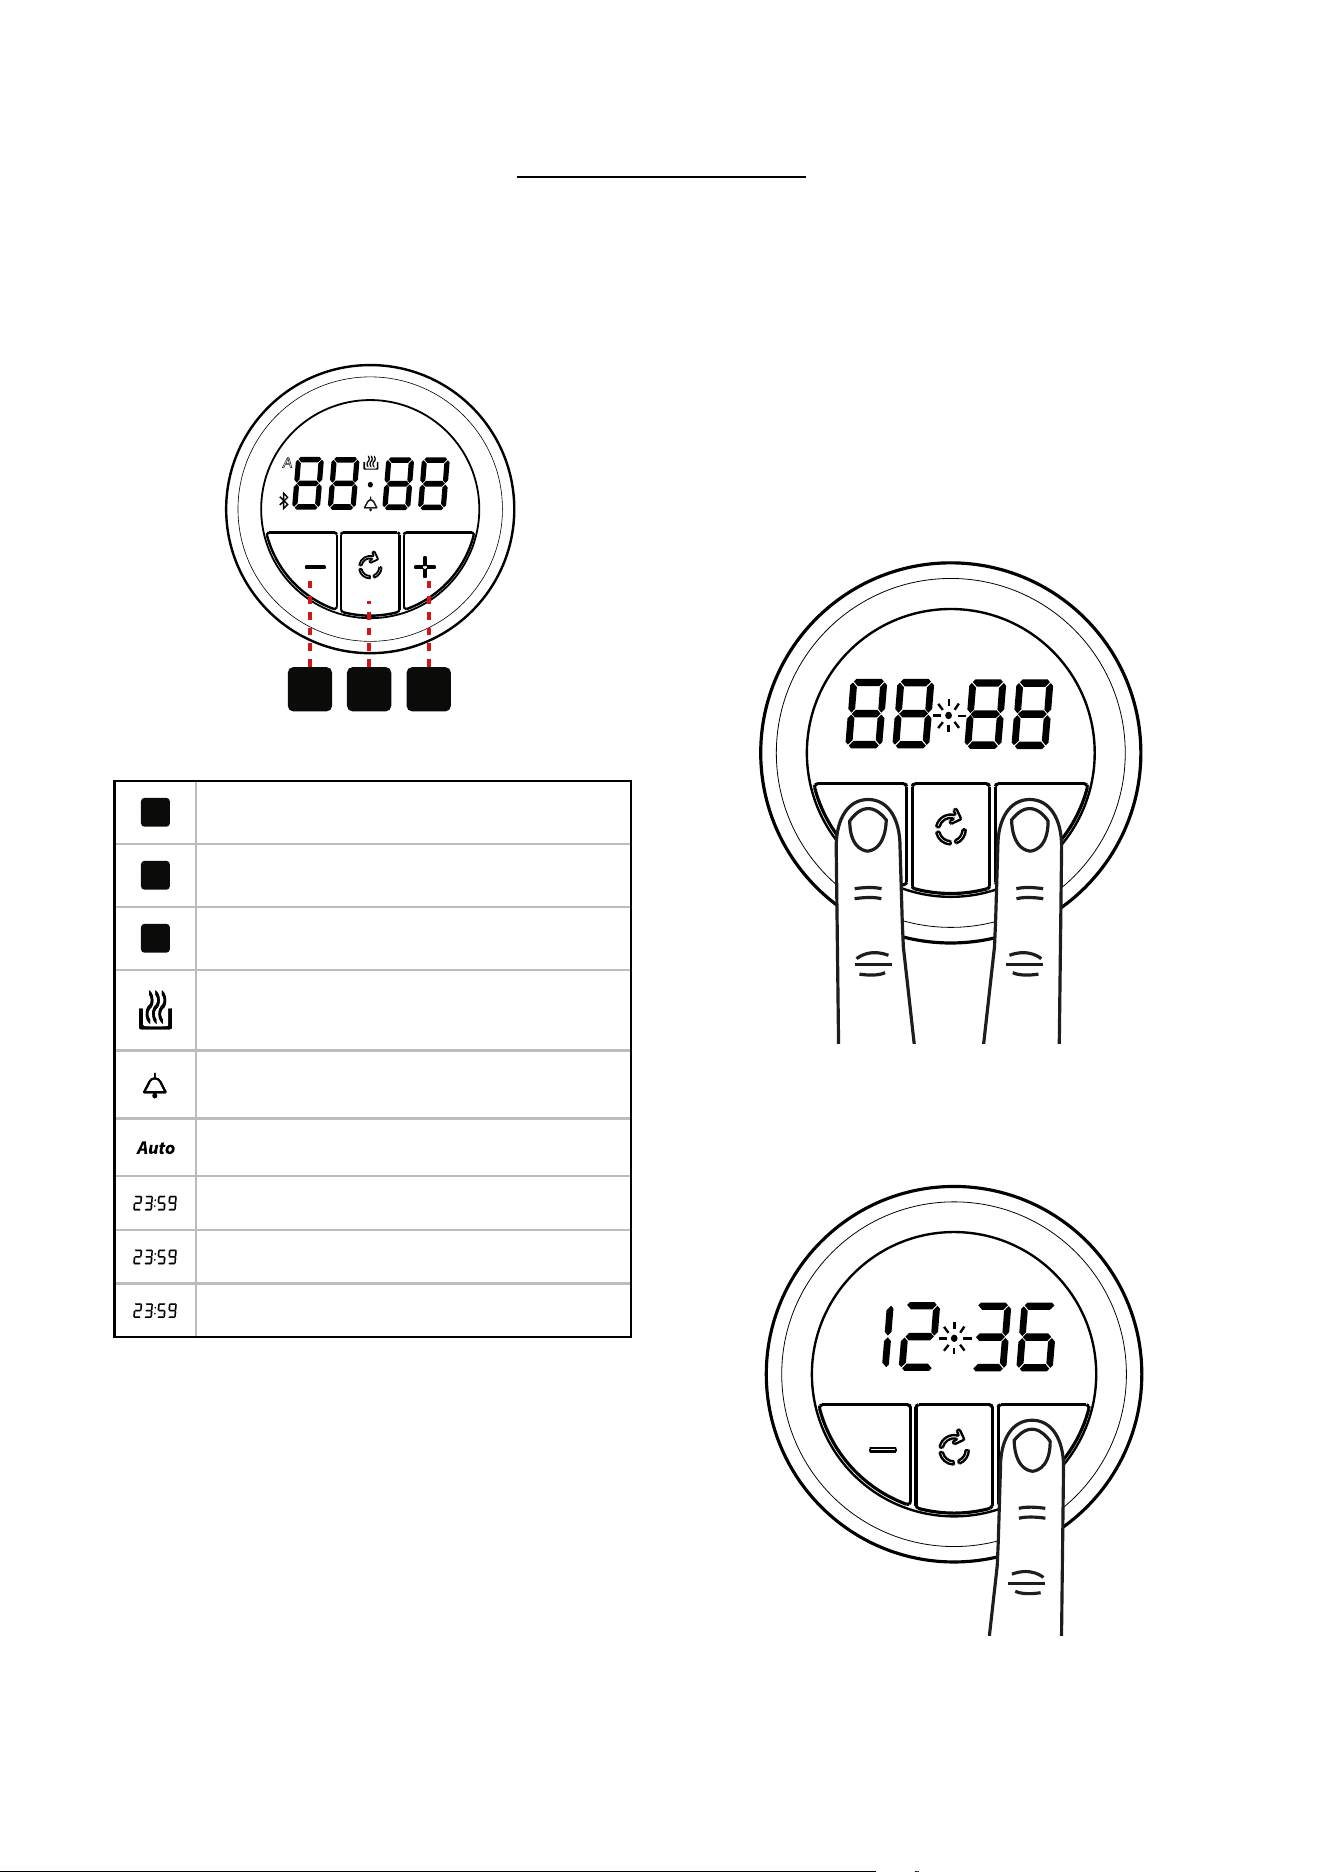
44
CLOCK/PROGRAMMER - STOVES STERLING
4
Note: Your clock / programmer may not
have all these functions
A
1 2 3
1
Minus
2
Function
3
Plus
Auto cooking
Minute minder
Automatic mode
, ,
7-segment display
, ,
Max. adjustable minute minder
, ,
Max. adjustable cooking time
USING THE TOUCH CONTROLS
∙ Menu - Scroll through to select a function
∙ Plus - Increase time or volume
∙ Minus - Decrease time or volume
4
When a function is selected and the time
or volume is set, the chosen function will
automatically start seven seconds after
setting.
MANUAL MODE
If the programmer is not in semi-automatic or full-
automatic mode you can use oven functions manually.
The manual icon is also on the display.
SETTING THE TIME OF DAY
1. Press and hold the minus and plus buttons until
the dot begins to flash
2. Press the minus or plus buttons to set the time of
day
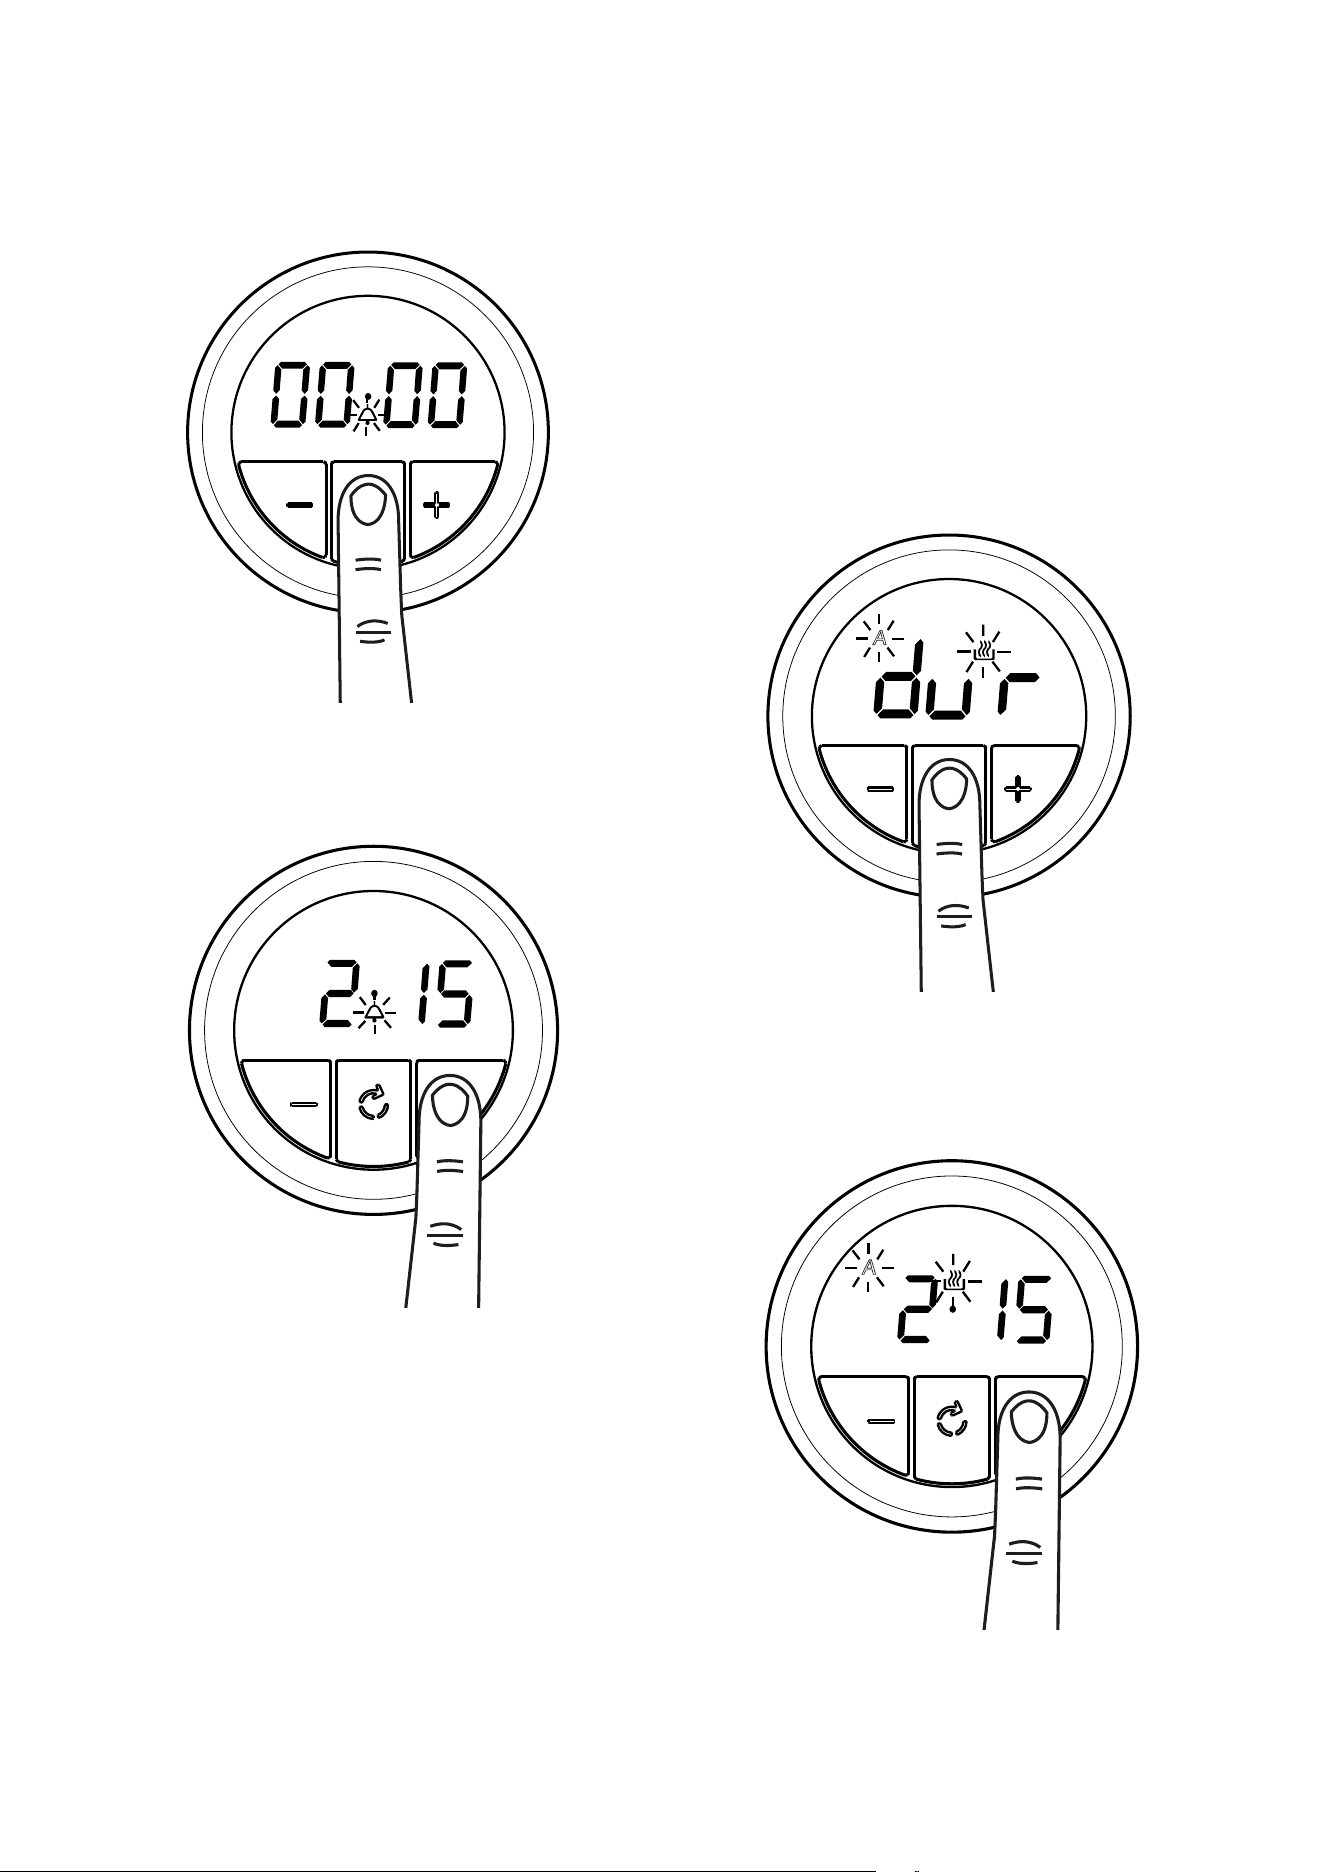
45
SETTING THE MINUTE MINDER
1. Press the function button until the bell symbols
begins to flash
2. Press the minus or plus buttons to set a time
During countdown, the minute minder has priority on
the display, which will show (in minutes : seconds, or
hours : minutes) the time remaining.
When the set time for the minute minder has
completed, an alarm is heard and the minute minder
symbol will flash on the display. Press any button to
stop the alarm and the time of day is displayed.
To modify or cancel the minute minder
Return to the minute minder function and use
either the plus or minus buttons to adjust the time.
By setting the time to ‘0.00’, this will cancel the
countdown.
SETTING THE COOKING TIME (SEMI
AUTOMATIC COOKING)
A
1. Press the function button until 'dur' appears on
the display
A
2. Press the minus or plus buttons to set a time
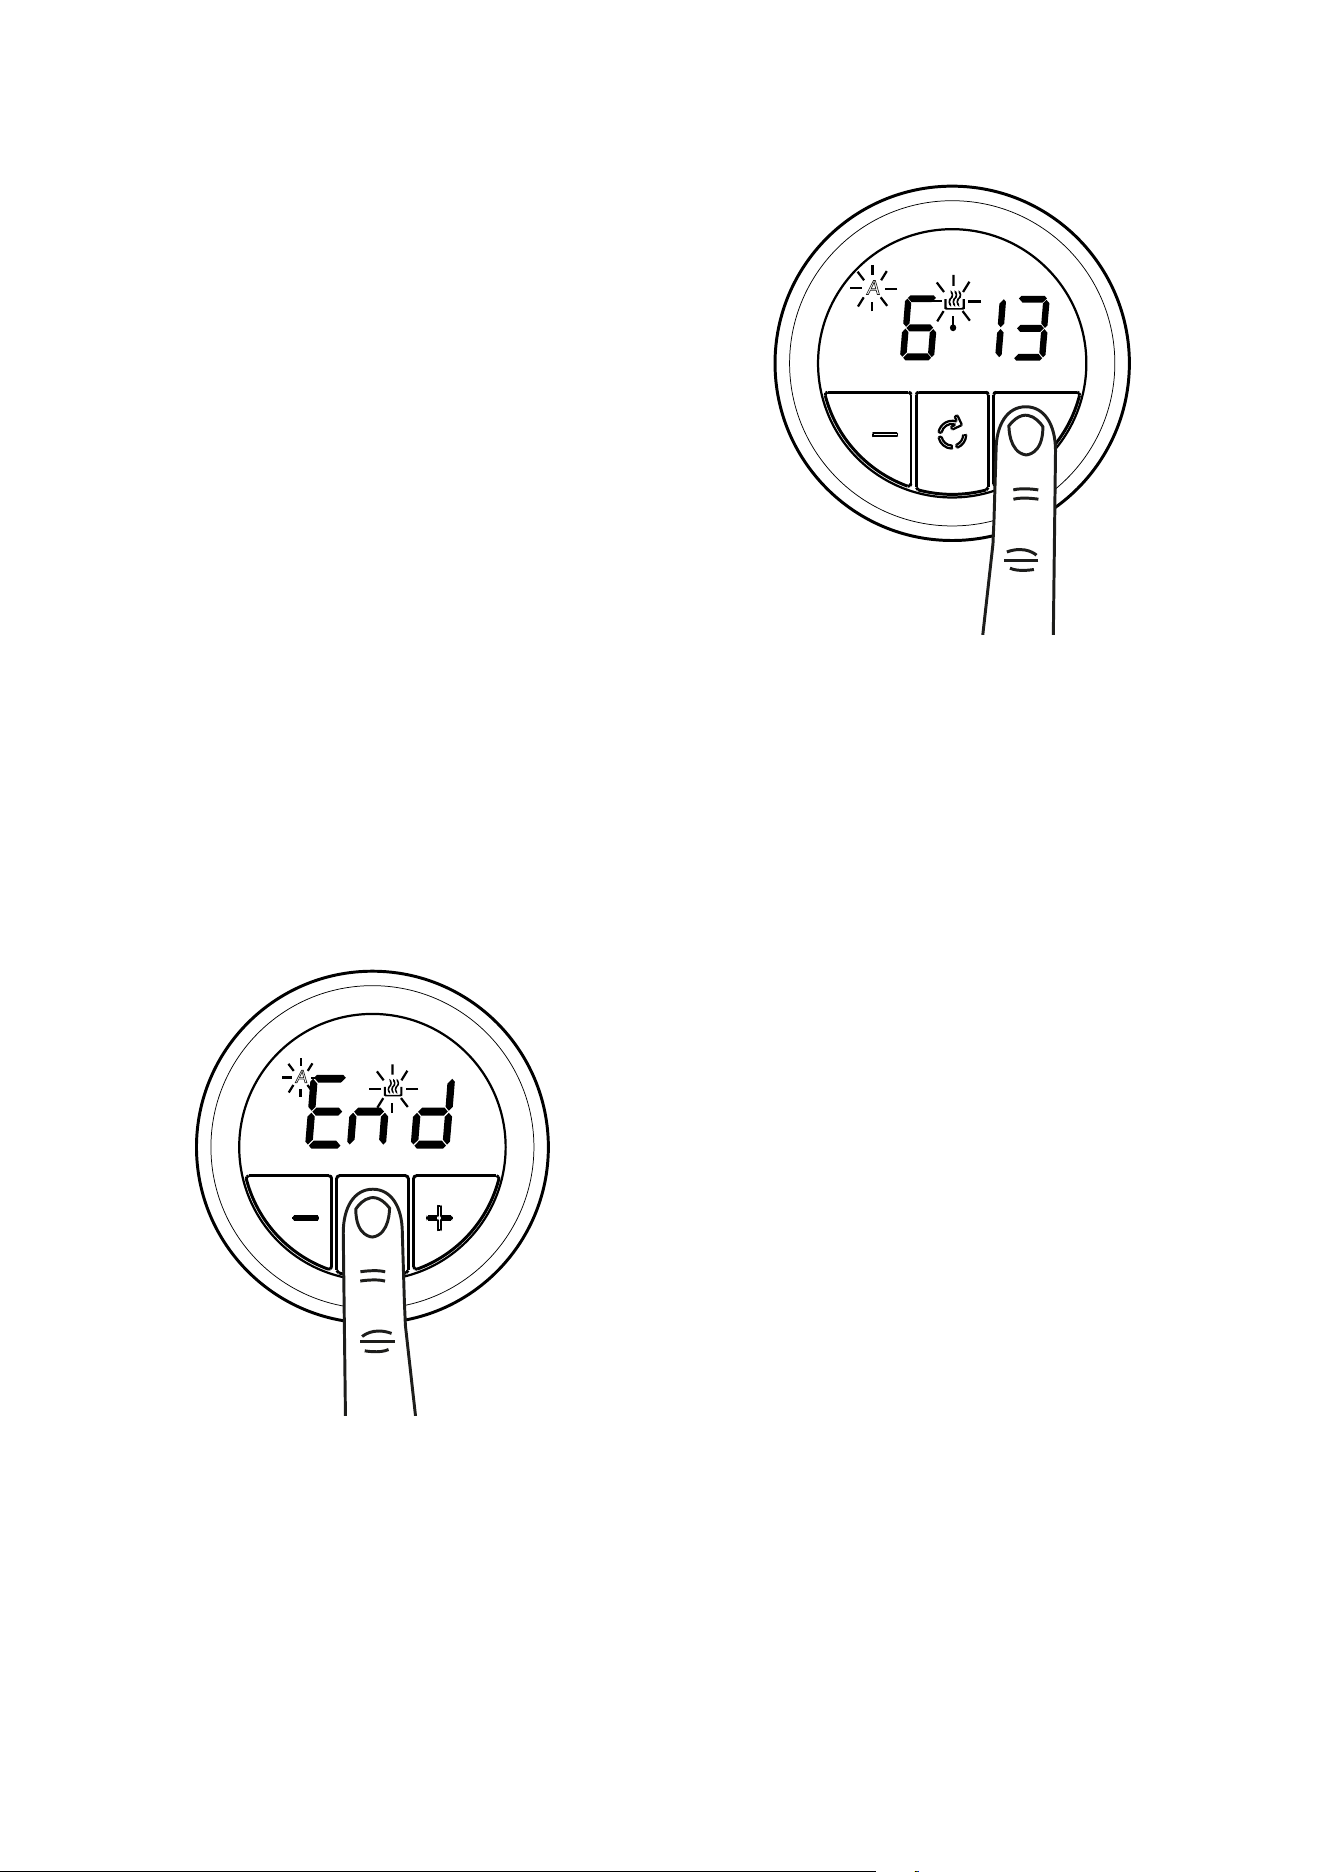
46
Once set, the automatic mode, auto cooking symbol
and the time of day is displayed.
To see the remaining cooking time, press the function
button twice.
When the set time has completed, an alarm is heard.
Press any button to stop the alarm. The time of day is
then displayed.
To modify or cancel the cooking time
To modify, press the function button until ‘dur’
appears on the display then press either the minus
or plus button to set the time. To cancel, press the
function button until ‘dur’ appears on the display then
press the plus button until 0.00
SETTING THE END OF COOKING
TIME (FULLY AUTOMATIC)
Enter cooking duration as described in ‘Setting the
cooking time’ section.
A
1. Press the function button until 'end' appears on
the display
A
2. Press the minus or plus buttons to set a time
To modify or cancel the end cooking time
To modify, press the function button until ‘end’
appears on the display then press either the minus
or plus button to set the time. To cancel, press the
function button until ‘end’ appears on the display,
then press the minus button until the set time of day
appears.
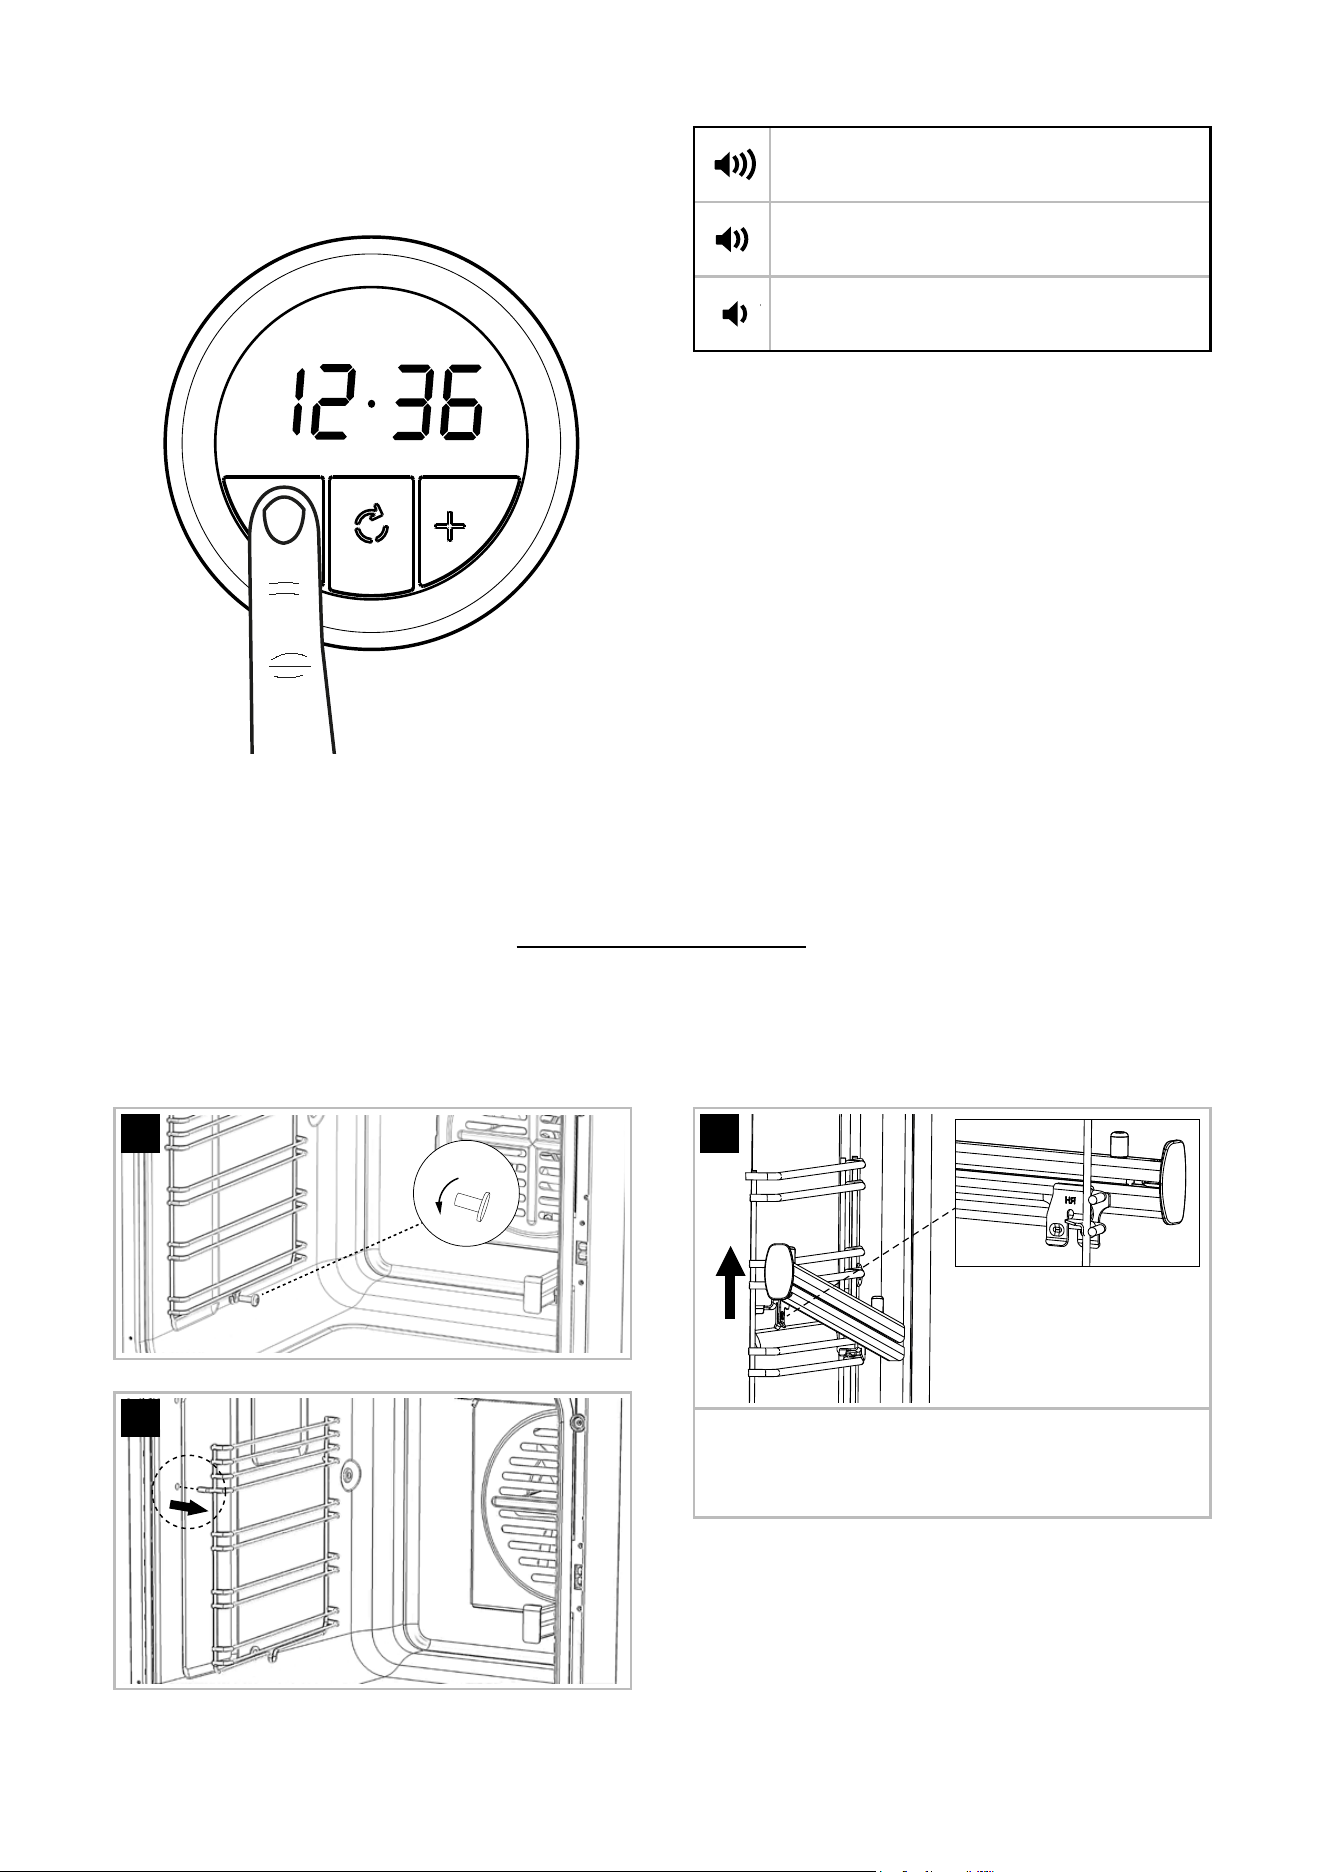
47
SETTING THE ALARM TONE
First tone
First tone
Second tone
Second tone
Third tone
Third tone
Press and hold the minus button to listen to the first
tone, then release the minus button and press it again
to listen to the second tone, then the third tone.
Releasing the minus button after a tone has sounded,
will automatically select that tone.
SHELF GUIDES AND RUNNERS
REMOVING SHELF GUIDES
To Open
1
2
REMOVING TELESCOPIC RUNNERS
Front Clip
1
1. Push the front of the runner upwards firmly,
ensuring the front clip is released from the shelf
guide.
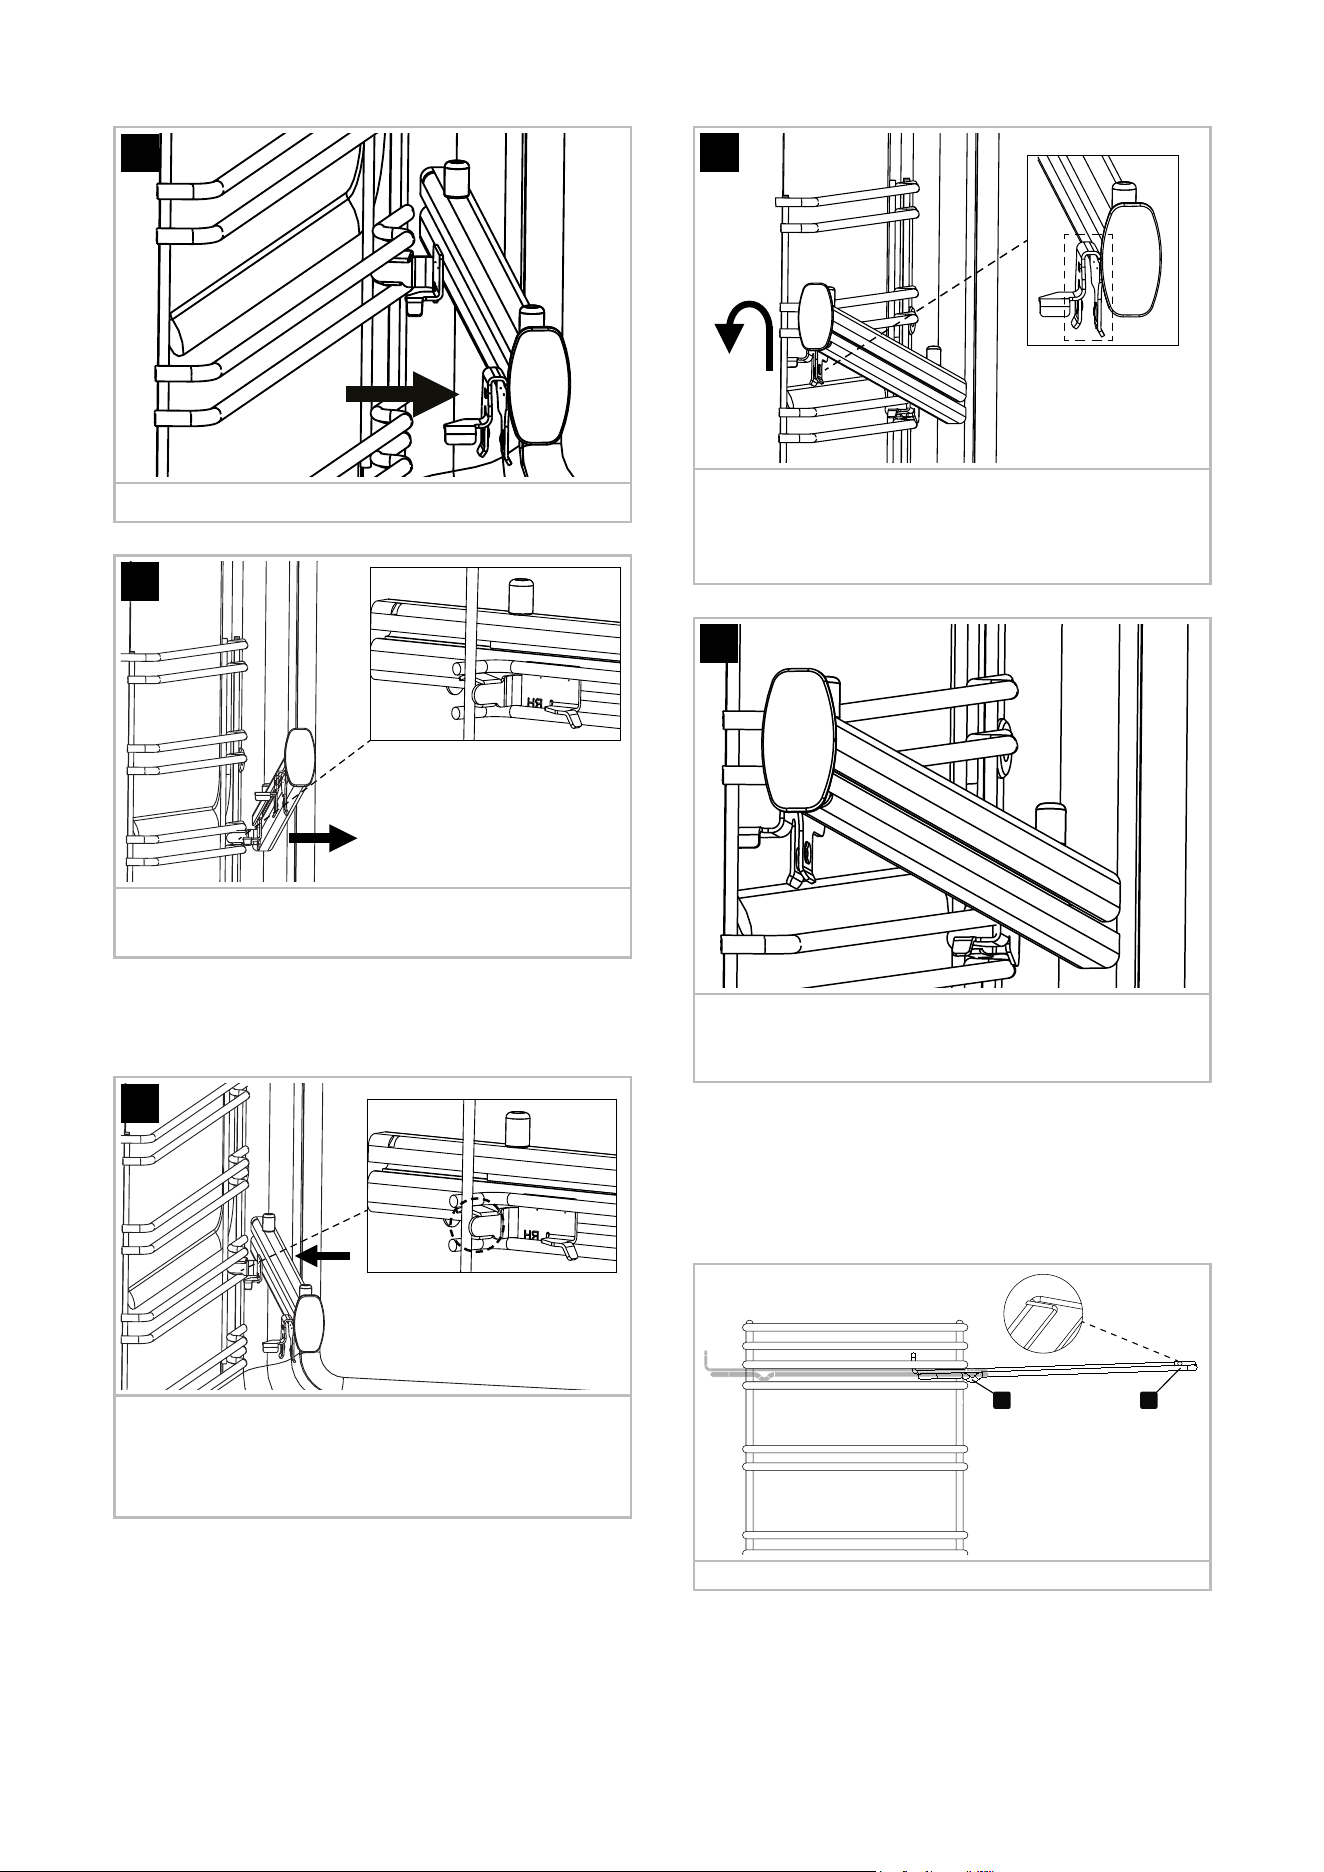
48
2
2. Pull the runner away from the shelf guide.
Back clip
3
3. Pull the back clip away from in between the shelf
guide.
RE-FITTING TELESCOPIC RUNNERS
Back clip
1
1. Secure the back clip in between the shelf guide.
Ensure the runner is fully pushed back towards
the back of shelf guide.
Front clip
2
2. Locate the front clip onto the shelf guide and
firmly push the front of the runner down until
the front clip is secured into place.
3
The Telescopic runner should now be fitted correctly
and secure to the shelf guide.
PLACING SHELVES
Standard shelves
1 2
Front of appliance
1. Slightly raise the shelf and insert in the chosen
shelf position
2. Ensure the shelf is fully pushed back towards the
back of the oven, until the shelf stopper is reached.
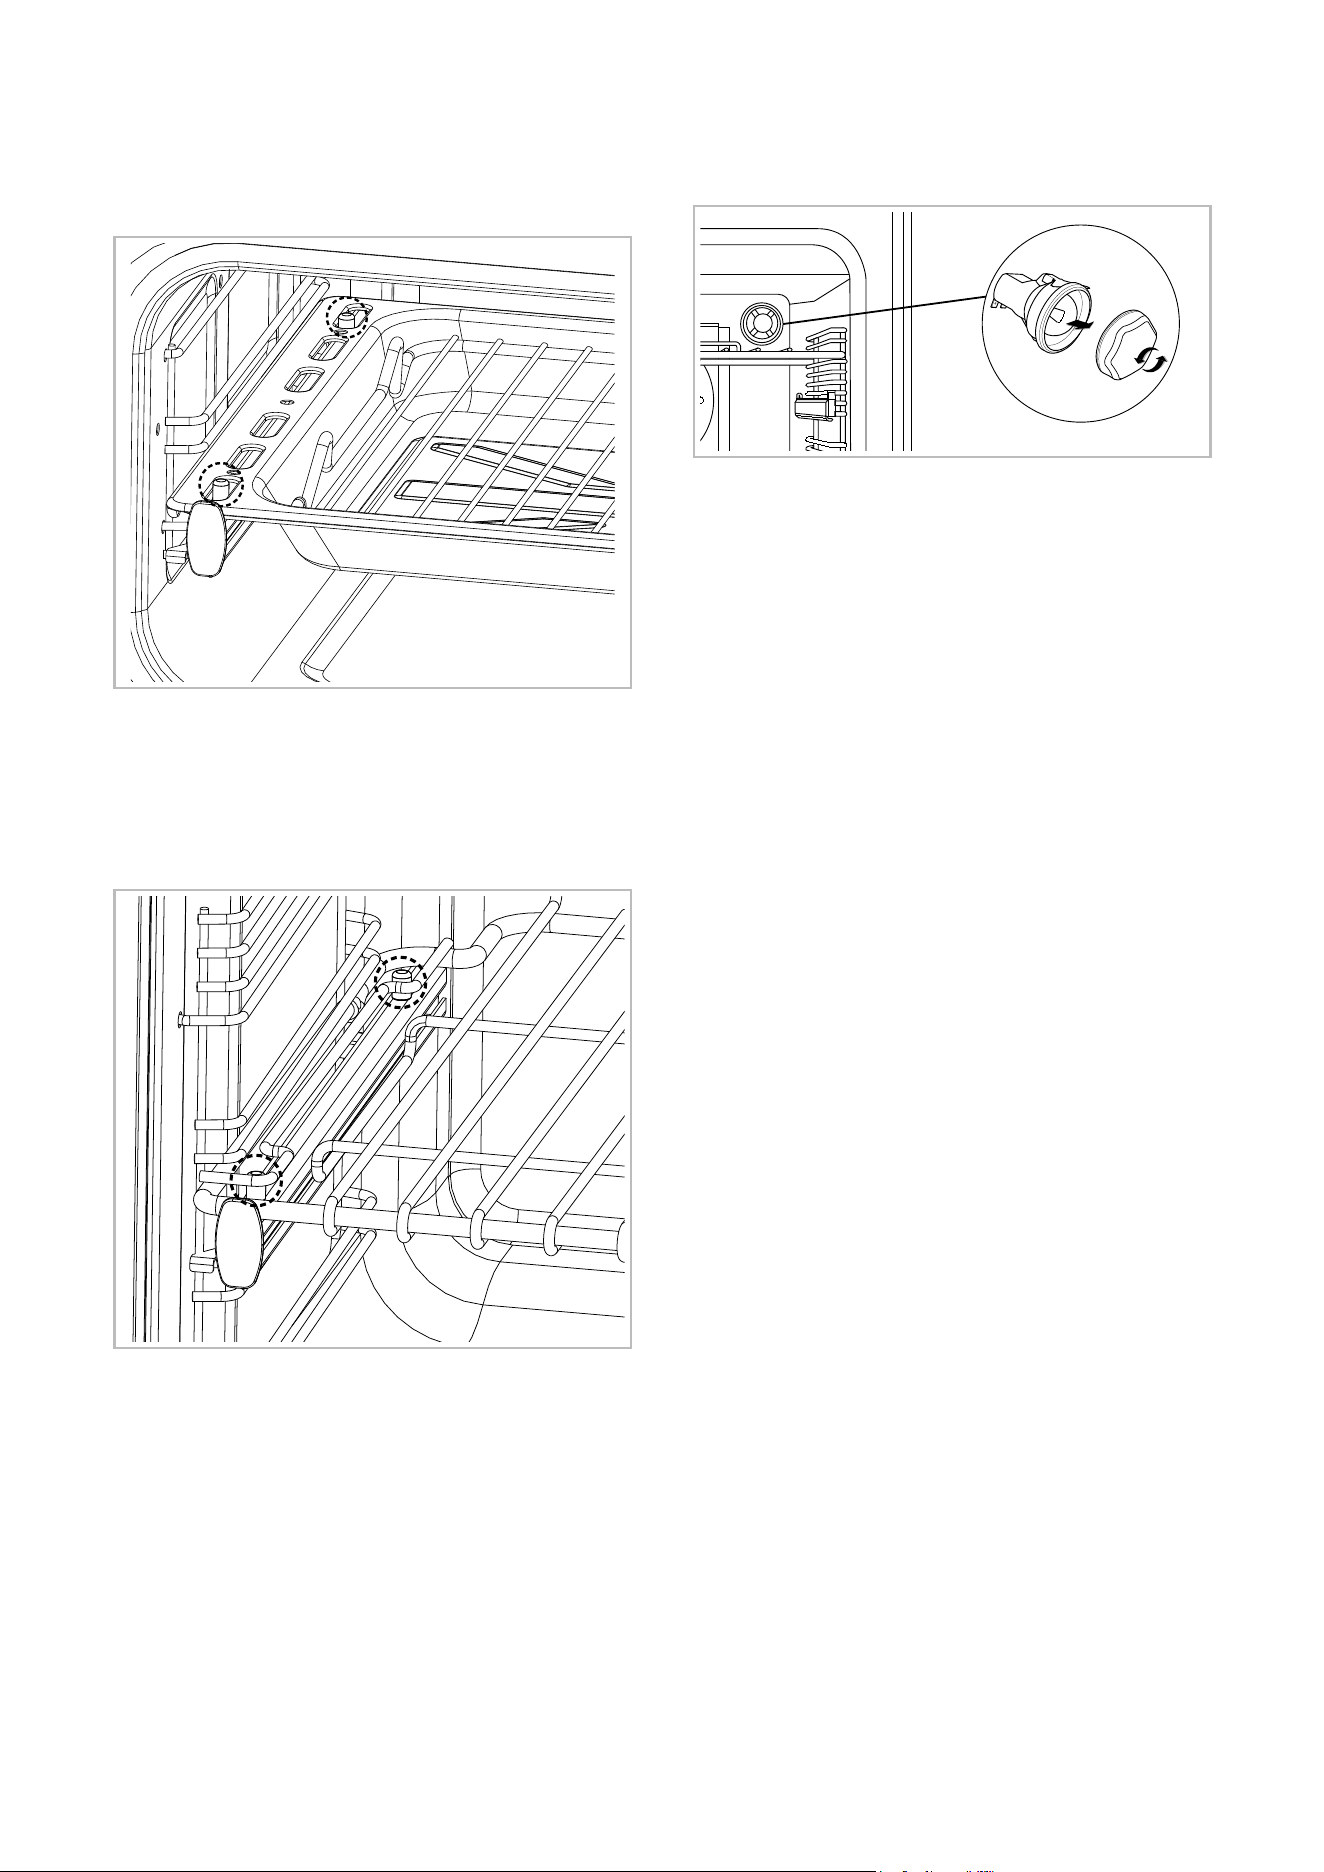
49
Positioning a full-width oven pan with
telescopic runners
4
Note: Please ensure the wires / oven
pan locate around the small tabs on the
telescopic runner.
Positioning a shelf on telescopic runners
CHANGING THE LIGHT BULB
6 Warning! Switch off the power before
you change the light bulb.
4
Not all appliances have the same number
and type of bulbs. Before you replace
your bulb, check to see what type you
have. Please remember that bulbs are not
covered by your warranty.
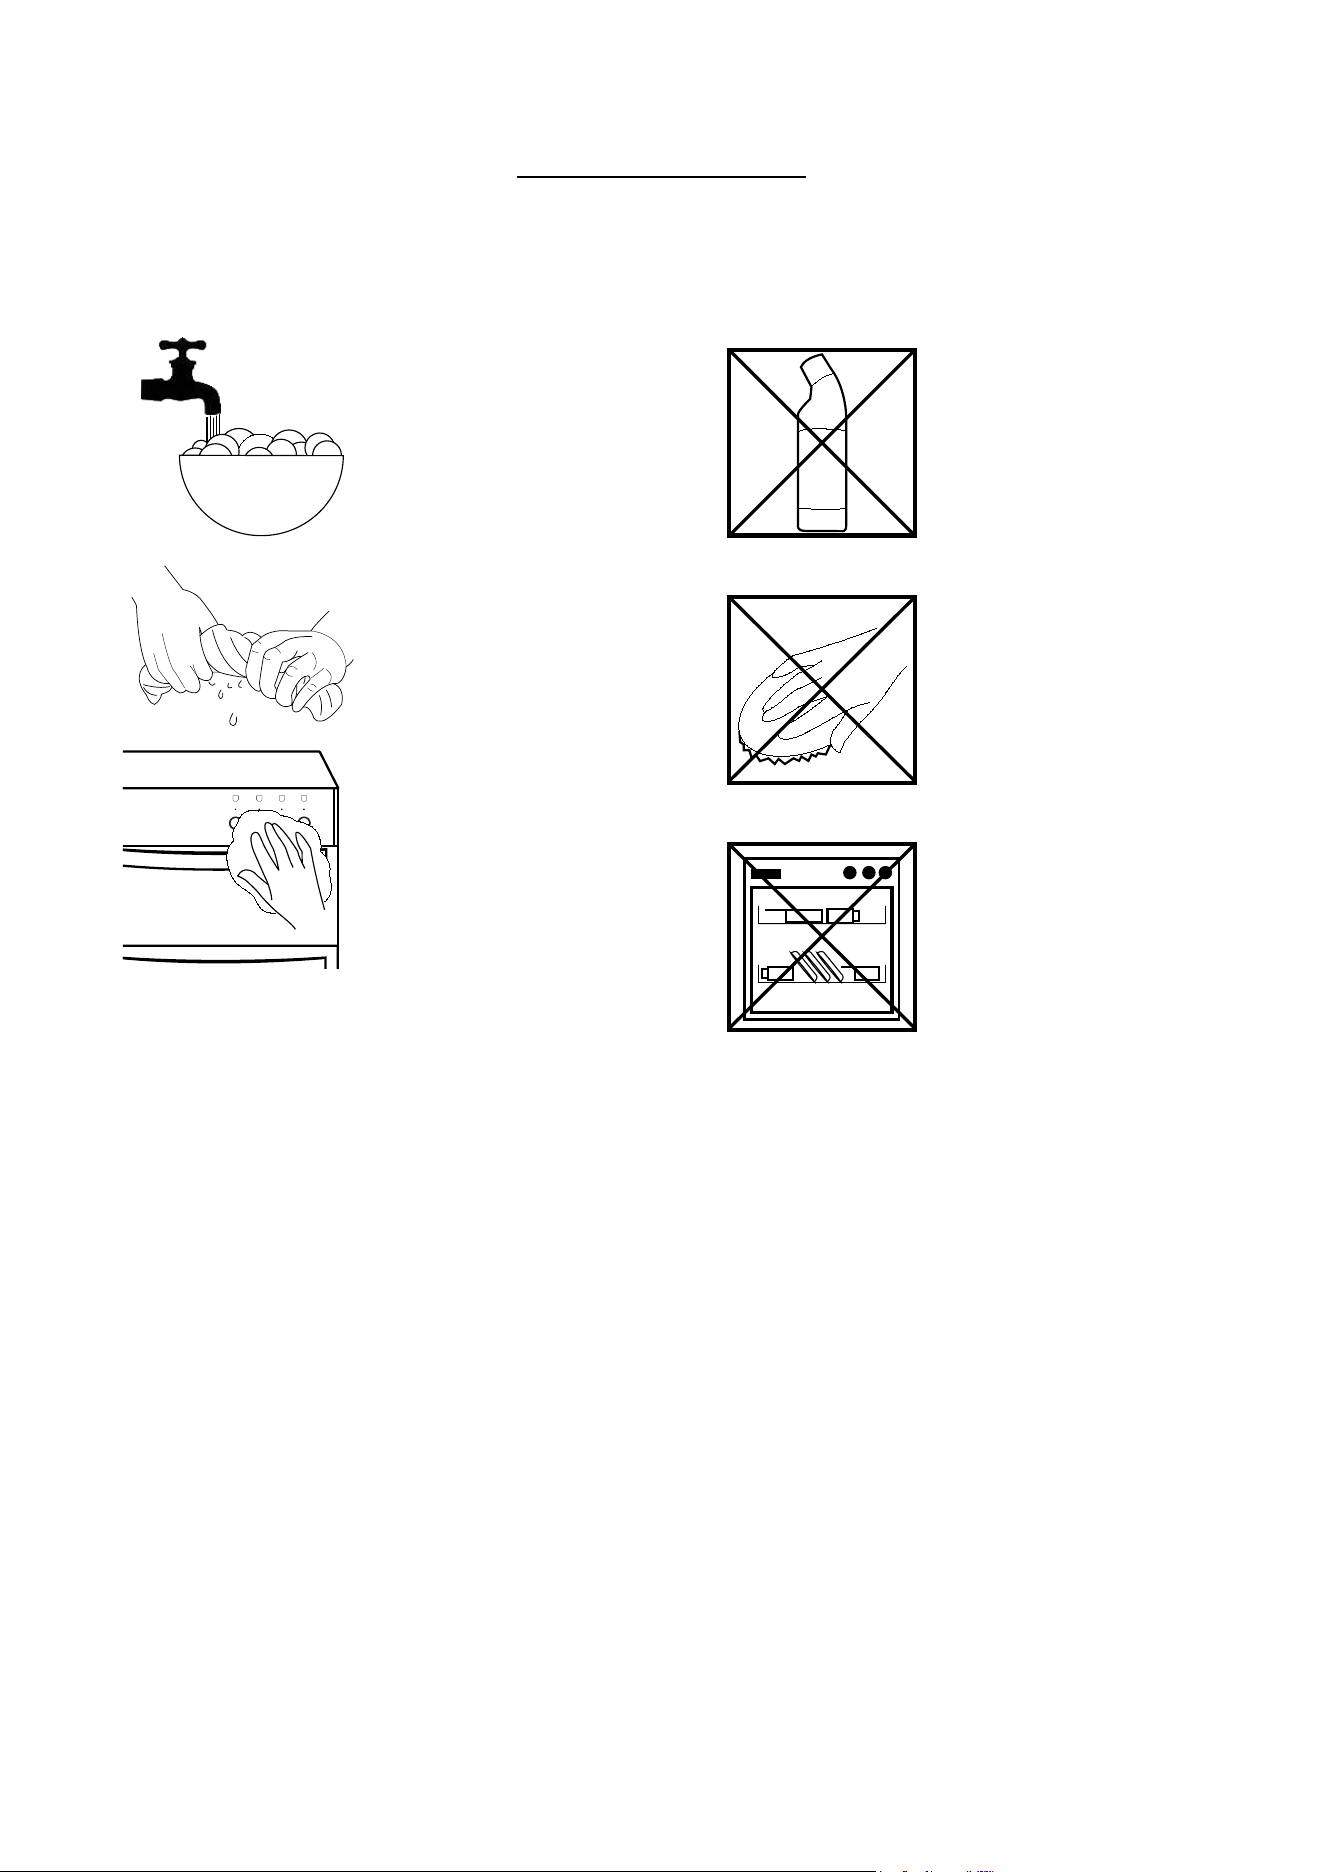
50
CLEANING YOUR APPLIANCE
DO'S
H
∙ Warm, soapy water
∙ Clean, wrung out cloth
∙ Wipe with damp cloth
∙ Dry with a soft cloth
4
Note: Always switch off your appliance
and allow it to cool down before you
clean any part of it.
4
Note: Please take extra care when
cleaning over the symbols on the control
panel, as this can lead to them fading.
4
Tips: Some foods can mark or damage
the metal or paint work e.g.; Vinegar,
fruit juices and salt. Always clean food
spillages as soon as possible.
DON’TS
∙ Undiluted bleaches
∙ Chloride products
∙ Wire Wool
∙ Abrasive cleaners
∙ Nylon pads
∙ Steam cleaners
Do not place in the
dishwasher:
∙ Cast iron griddle
∙ Pan supports
6 It is important to clean your appliance
regularly as a build up of fat can affect
its performance or damage it and may
invalidate your guarantee.
6 In addition to the above, do not use metal
scrapers to clean the oven door glass.
4
We offer a great range of cleaning
products and accessories for your
appliance. To shop, please visit our
website located at the front of this User
Guide.
51
TECHNICAL DATA
6 WARNING - This cooker must be earthed
ELECTRICAL SUPPLY / LOAD
Hob top
Electrical supply Hotplate Zone Load (kW)
240 V Induction
Left hand front 1.60 boost to 3.00
Left hand rear 1.60 boost to 3.00
Right hand front 1.10 boost to 2.20
Right hand rear 1.40 boost to 3.00
Middle 2.30 boost to 3.70
Appliance
Electrical supply Oven / Grill Load (kW)
240 V
Multifunction oven 3.1
Fanned oven 2.0
Dual variable grill 1.7 / 2.7
Conventional top 1.4
Oven Lamps
Lamp (left hand oven) 40 W each
Electrical supply Max. load (kW)
230/400V 3N ~ 50 Hz 14.23 - 15.53

084002601
WWW.STOVES.CO.UK
Glen Dimplex Home Appliances, Stoney Lane, Prescot, Merseyside, L35 2XW
www.stoves.co.uk
Customer Care
0344 815 3740
Product information helpline
0344 248 4149