Loading ...
Loading ...
Loading ...

SYSTEM INSTALLATION
System can be mounted vertically (preferred) or horizontally.
REFER OFTEN TO SYSTEM DIAGRAMS/PICTURES. BE CAREFUL NOT TO KINK TUBING.
Tools required (Not included): Phillips Screwdriver; Utility Knife; Permanent Marker; Tape Measure; Safety Glasses.
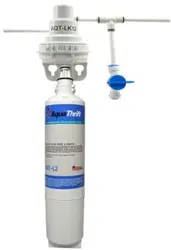
CONNECTING ELBOW FITTINGS TO HEAD
1. Turn OFF ice maker by following instructions of your refrigerator.
2. Shut OFF cold water supply pipe.
3. Remove the AQT-L2 filter from the head by turning it to the left (counter-clockwise), 1/4 turn.
4. Push an elbow fitting onto the Inlet (lower) tube sticking out from the head. There will be some resistance when fitting
is initially pushed on. Make sure Inlet tube inserts all the way into fitting until it meets the tube stop, at least 5/8”
(See Connecting Elbow Fittings to Head diagrams). Tube may be gripped but not sealed if not fully inserted.
5. Repeat step 4 with the Outlet (upper) tube sticking out from the head. Once the elbow fittings are installed onto head,
rotate fittings only as needed, keeping rotation of fittings to a bare minimum.
NOTE: To determine the mounting location of the system and tubing connections to the Tee, note the direction of the
tubing from the cold water supply, the tubing from the ice maker and the drain or bucket the system will flush to.
Approximate total area needed is 17.5” H x 8” W x 3.5” D.
6. Using the bracket as template, mark and then mount system head in desired location using two self-tapping screws.
Leave enough area around head to attach tubing, Tee and Flush Valve and at least 13” of space under the head for easy
filter replacement.
IMPORTANT. DO NOT insert filter until instructed to do so.
7. Firmly hold the Inlet (lower) elbow fitting of the head and connect tubing from the cold water supply pipe to the
fitting (See QuickConnect Fittings instructions on page 5).
8. Cut a 4” piece from the tubing supplied and, while firmly holding the Outlet (upper) elbow fitting of the head, connect
one end of the tubing to the fitting (See QuickConnect Fittings instructions on page 5).
9. Connect the other end of the 4” piece of tubing coming from the Outlet fitting to the Tee (See QuickConnect Fittings
instructions on page 5).
10. Firmly hold the Tee and connect tubing from the ice maker or other water dispenser to the Tee (See QuickConnect
Fittings instructions on page 5).
11. Cut a another 4” piece from the tubing supplied and, while firmly holding the Tee, connect the tubing to the Tee (See
QuickConnect Fittings instructions on page 5).
12. Connect Flush Valve to the 4” piece of tubing coming from the Tee (See QuickConnect Fittings instructions AND instruc-
tion concerning horseshoe clips for Flush Valve.)
13. Firmly hold the Flush Valve and connect the remainder of the tubing supplied to the other end of the Flush Valve (See
QuickConnect Fittings instructions AND instruction concerning horseshoe clips for Flush Valve.)
14. Close Flush Valve by turning the lever clockwise. (Diagram shows Flush Valve in Closed position.)
IMPORTANT. DO NOT insert filter yet. Water must be supplied to the head and the entire installation checked before
inserting filter. Built in bypass valve in the head shuts off water to the filter when filter is removed.
IMPORTANT: Tubing Brackets (Not Included) must support all the weight of the tubing, with additional brackets/support
for the tee and flush valve.
15. Turn ON cold water supply pipe. Leave ice maker turned OFF. Inspect entire system head and tubing connections for
leaks.
16. Insert filter into head and turn it to the right (clockwise), 1/4 turn until it is fully seated.
17. Slowly open the Flush Valve on the Outlet of system by slowly turning the lever counter-clockwise and slowly run water
into a bucket or drain for 5 minutes at .5 gpm (about 2.5 gallons) to clear the system. Close Flush Valve by turning the
lever clockwise. Check for leaks at all fittings and connections.
18. Turn ice maker ON. System is ready to use. Check for leaks within the next 24 hrs.
Note: The first few batches of ice may contain some carbon fines. If the system was properly flushed, this should be minimal.
Please discard the ice. If you are also filtering water to a water dispenser or filtered-water faucet, the water may appear cloudy
for 1-3 days as the filter is purged of air. You can check to make sure it is only air bubbles causing the cloudiness by filling a
large glass with water and letting it stand. The bubbles will rise and the water will become clear. The water is fine to drink. If
the cloudiness persists, please contact Customer Service at: 1-866-218-8473.
7
AQT-LK12
INSTALLATION, OPERATION
AND MAINTENANCE MANUAL
www.aquathrift.com
Customer Service
M-F 8AM-5PM PST • 866-218-8473
Loading ...
Loading ...