Loading ...
Loading ...
Loading ...
12
Assembly Instructions
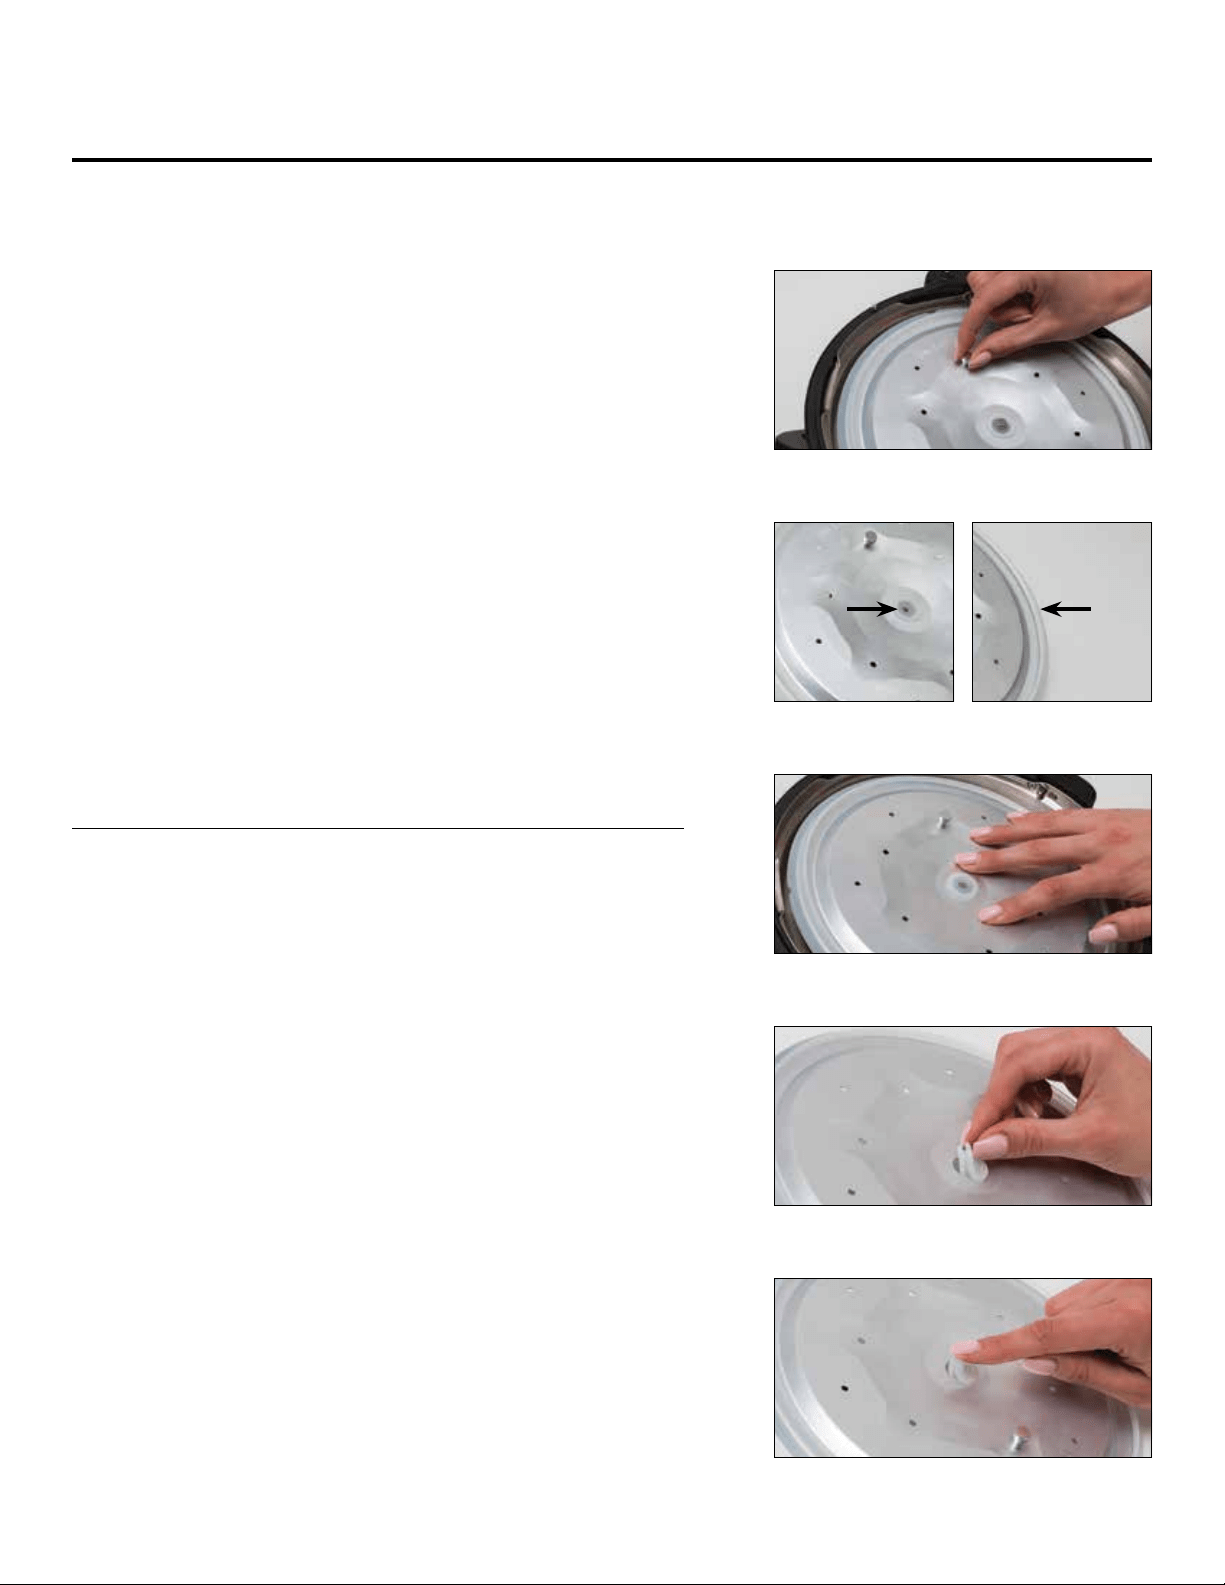
1. Hold the Knob on the underside of the Inner Lid and pull
to remove the Inner Lid (see Fig. i).
1. Hold the Inner Lid Knob on the underside of the Inner Lid
and pull to remove the Inner Lid (see Fig. i).
2. Pull off the Inner Lid Center Gasket (see Fig. iv) and the Inner Lid
Outer Gasket (see Fig. ii-b).
3. Inspect the Inner Lid Rubber Gaskets to ensure that they are clear
of debris. Clean after each use.
4. Place the new or clean Inner Lid Center Gasket in the hole
in the Inner Lid (see Fig. v). Attach the Inner Lid Outer Gasket
to the outside of the Inner Lid. When properly attached, the Inner
Lid Rubber Gaskets should sit evenly.
5. Ensure that the Knob on the Inner Lid is facing outward, away
from the Lid. You should be able to see the Knob.
6. Press the Inner Lid onto the Lid and press the hole on the Inner
Lid onto the Center Knob on the underside of the Lid (see Fig. iii).
7. Ensure that the Inner Lid is facing outward and that the Inner Lid
Rubber Gasket sits correctly and evenly on the Inner Lid.
1. Ensure that the Knob on the underside of the Inner Lid is facing
outward, away from the Lid.
2. Ensure that the Inner Lid Rubber Gaskets are properly attached
to the Inner Lid (see Fig. ii-a & ii-b).
3. Press the hole on the Inner Lid into the Center Knob on
the underside of the Lid (see Fig. iii).
4. Ensure that the Inner Lid is facing outward and that the Inner Lid
Rubber Gaskets sit correctly and evenly on the Lid.
INNER LID ASSEMBLY
REMOVING LID
CHANGING OR CLEANING THE INNER LID
INSERTING INNER LID
FIG. i
FIG. iv
FIG. ii-a
FIG. v
FIG. iii
FIG. ii-b
Loading ...
Loading ...
Loading ...