GEEVON Wall clock Item No.W22127 User Manual
Thank you for purchasing W22127 wall clock.
Please take a moment to read this guide and store it for future reference.
Features & Benefits:
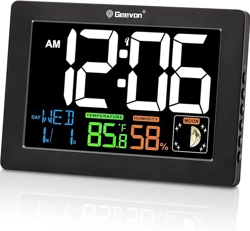
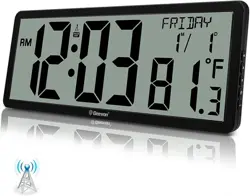
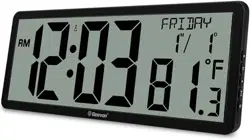
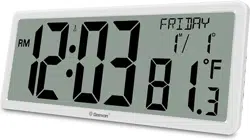
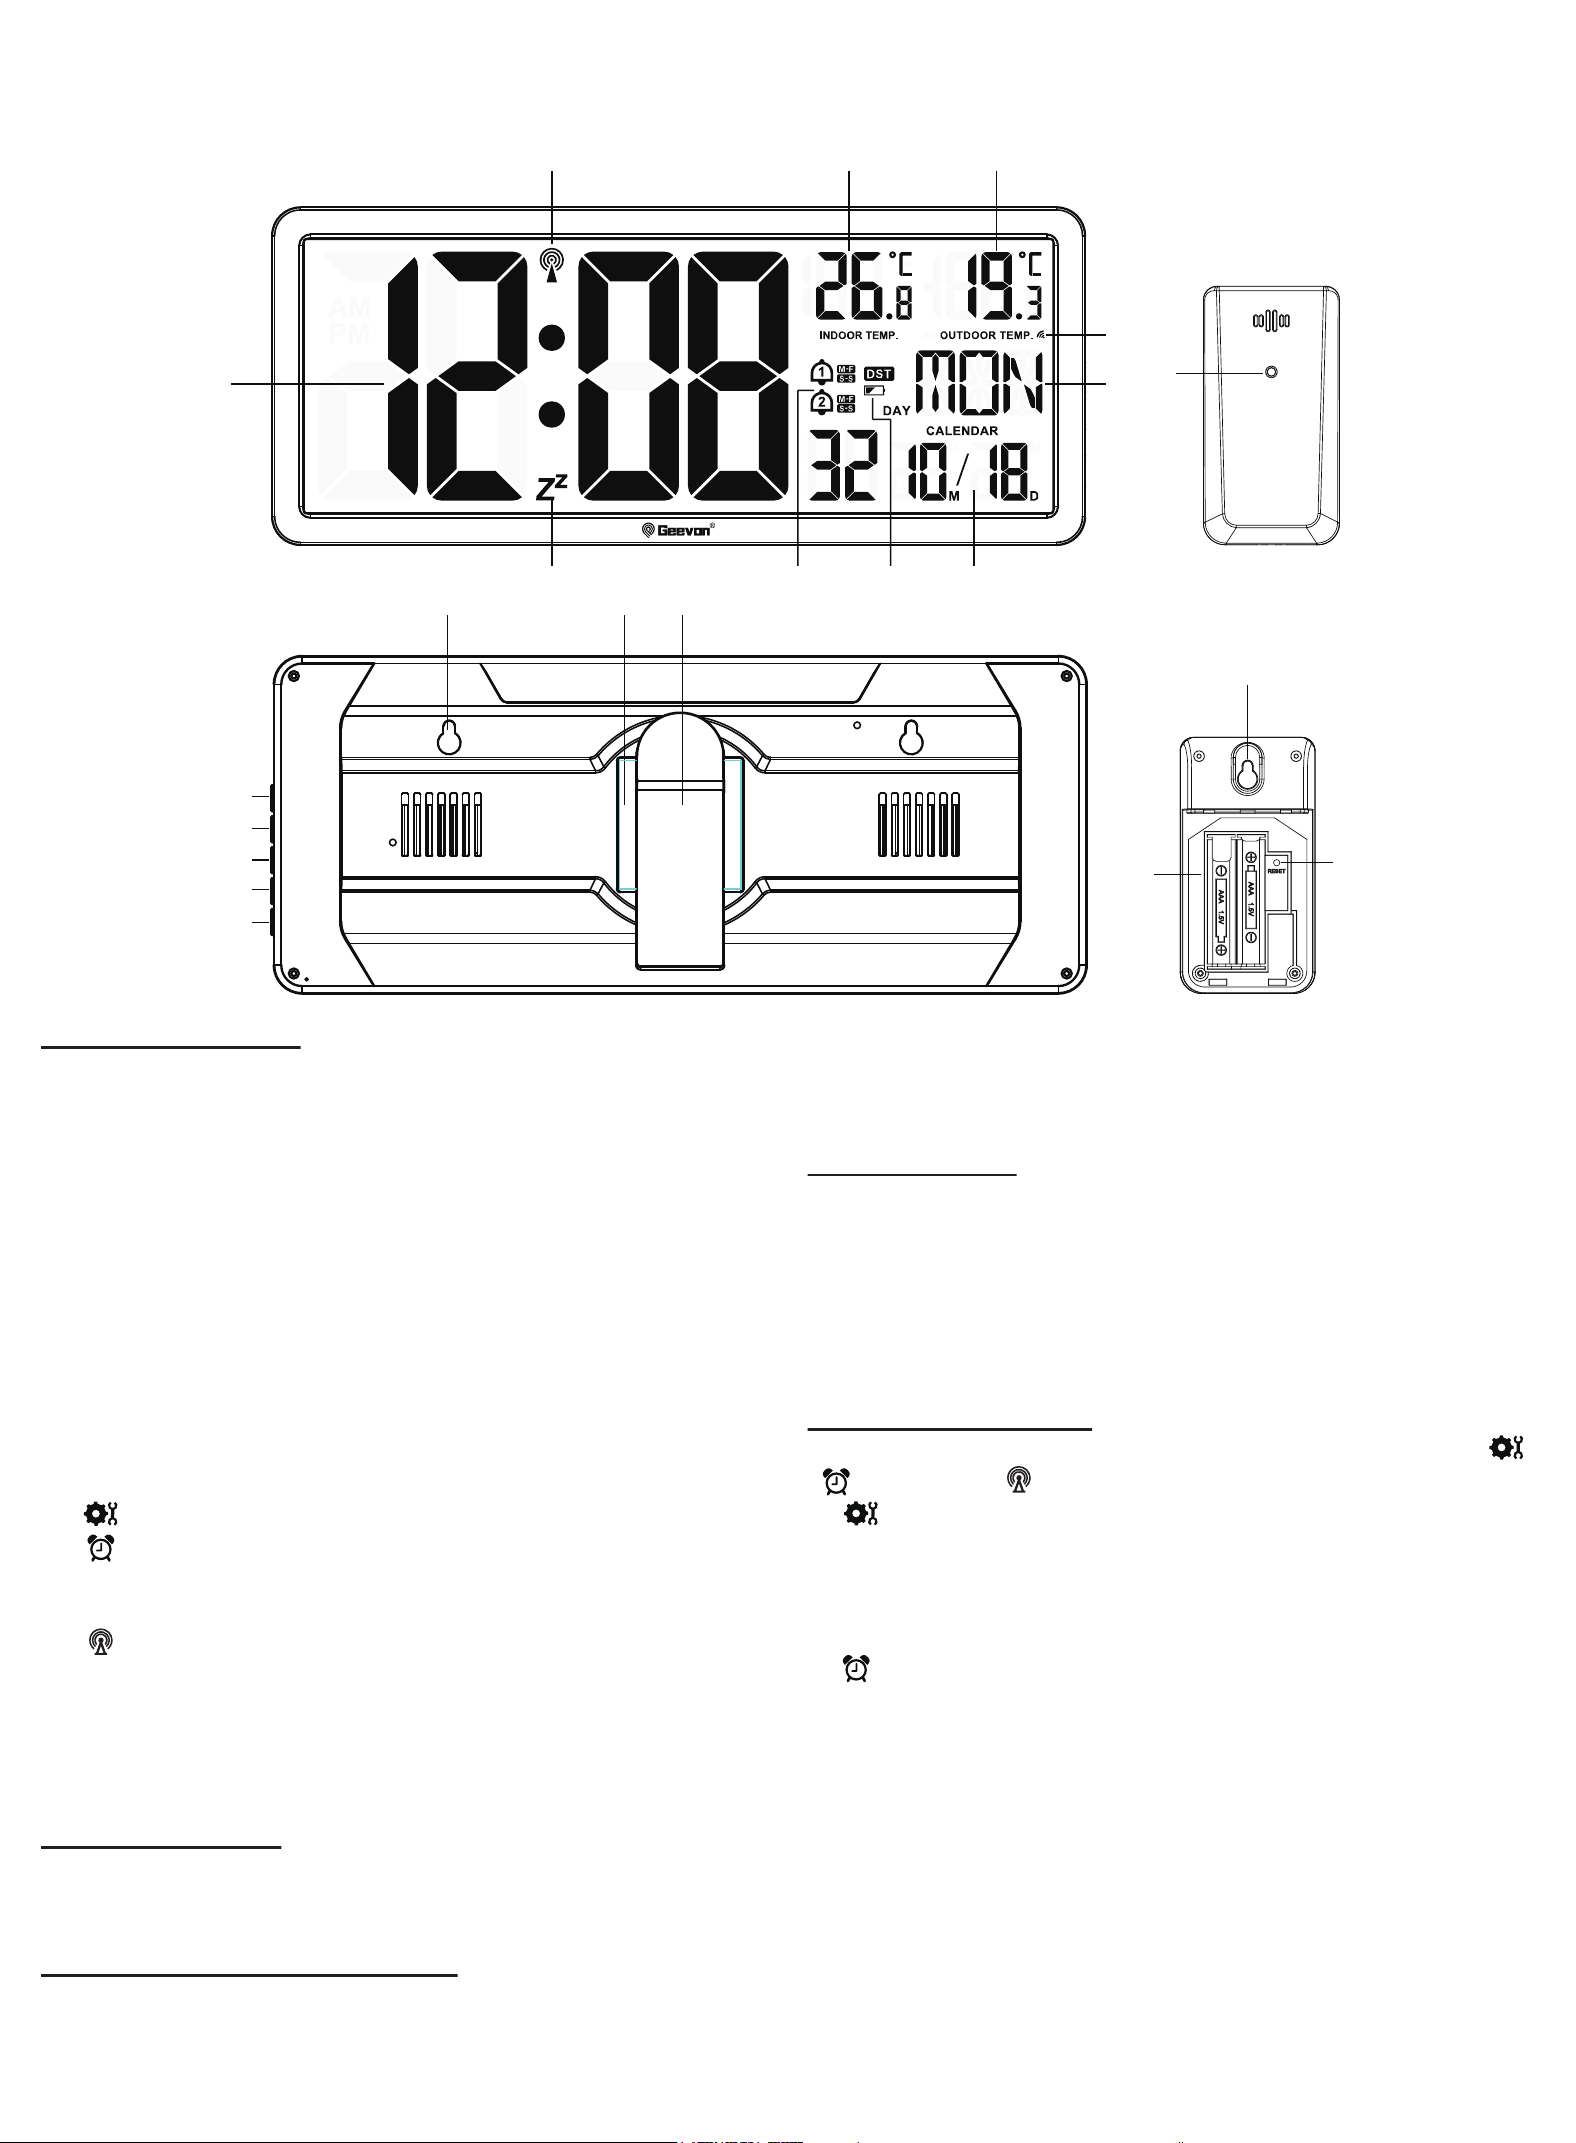
DISPLAY UNIT&OUTDOOR SENSOR
1. The RCC signal
2. Indoor temperature
3. Outdoor temperature
4. Time display
5. The RF signal
6. Weekday display
7. Snooze icon
8. Alarm icon
9. Low battery indicator
10. Calendar
11. Main unit integrated hang hole
12. Battery Compartment 4xAA (batteries not included)
13. Stand
14. button
15. button
16. ▲ button
17. ▼/CH button
18. button
19. Wireless signal indicator(Flashes when data is being sent
to the display unit)
20. Outdoor sensor integrated hang hole
21. Compartment 2xAAA batteries (batteries not included)
22. Reset
Package Contents:
1. Display Unit
2. Outdoor sensor
3. Instructions Manual
Installing or Replacing Batteries:
•We recommend using high quality alkaline batteries for the
best product performance.
•Heavy duty or rechargeable batteries are not recommended.
•The outdoor sensor requires high quality alkaline batteries in
low temperature conditions. Cold temperatures could cause
other batteries to function improperly.
•Do not mix old and new batteries. Do not mix alkaline,
standard, and/or rechargeable batteries.
Default settings:
1. Default time: AM12:00 (Time form: 12H)
2. Default date: 01/01 (Year: 2019, date form: M/D)
3. Default week: TUE(Language: ENGLISH, 3 languages can
be selected)
4. Default temperature: °F
5. Default alarm: AM 6:00(ALARM1), AM 2:00(ALARM2),
default: off.
Display / Keys Details:
There are totally 5 keys for the wall clock, they are included:
, , ▲, ▼/CH, .
1. button:
a. In standard mode, press and hold this button to enter time
setting mode.
b. In time setting mode, press this button to switch/confirm
the setting.
2. button:
a. In standard mode, press this button to check the alarm time.
b. In standard mode, press and hold this button to enter the
alarm setting mode.
3. ▲ button:
a. Press to increase the setting value during setting.
b. Press and hold this button for fast adjust during setting mode.
c. In standard mode, press this button to turn on or off the alarm.
4. ▼/CH button:
a. Press to decrease the setting value during setting.
b. Press and hold this button for fast adjust during setting mode.
c. In standard mode, press this button to switch 12/24 Hr.
d. In standard mode, press and hold this button to search RF
signal.
20
21
22
11 12 13
14
15
16
17
18
19
1
4
7 8 9 10
2 3
5
6
> ALARM2 > Exit.
2. Press ▲ button to turn on/off ALARM1/ALARM2. The
alarm icon or will appear to disappear. Press and
hold the button to enter the alarm setting mode, the
setting order is ALARM1 Hour > ALARM1 Minute > ALARM1
Repeat > ALARM1 Snooze time > ALARM2 Hour > ALARM2
Minute > ALARM2 Repeat > ALARM2 Snooze time > Exit.
Use the ▲ and ▼/CH button to set the required hour and
minute.
3. If you do not press the key for more than 20 seconds,
setting mode is exited automatically.
Stopping the alarm/snooze function
• When the alarm is triggered, the alarm symbol or
begins to flash and an alarm sounds.
• By pressing any button to stop the alarm. Otherwise, it will
stop automatically after 2 minutes.
• Alarm sound:
0-19S:BI once/second
20-39S: BI twice/second
40-59S: BI four times/second
Continuous BI after 60 seconds
NOTE: Three items can be set for alarm repeat:1. “M-F”:
alarm will ring from Monday to Friday;2. “S-S”: alarm will
ring from Saturday to Sunday;3. “M-F” and “S-S”: alarm will
ring throughout the weekend.
Low Battery Indicator:
If the low battery indicator is displayed on the LCD for either
the outdoor sensor or the display unit, immediately change
the batteries to prevent disruptions in communications of the
devices.
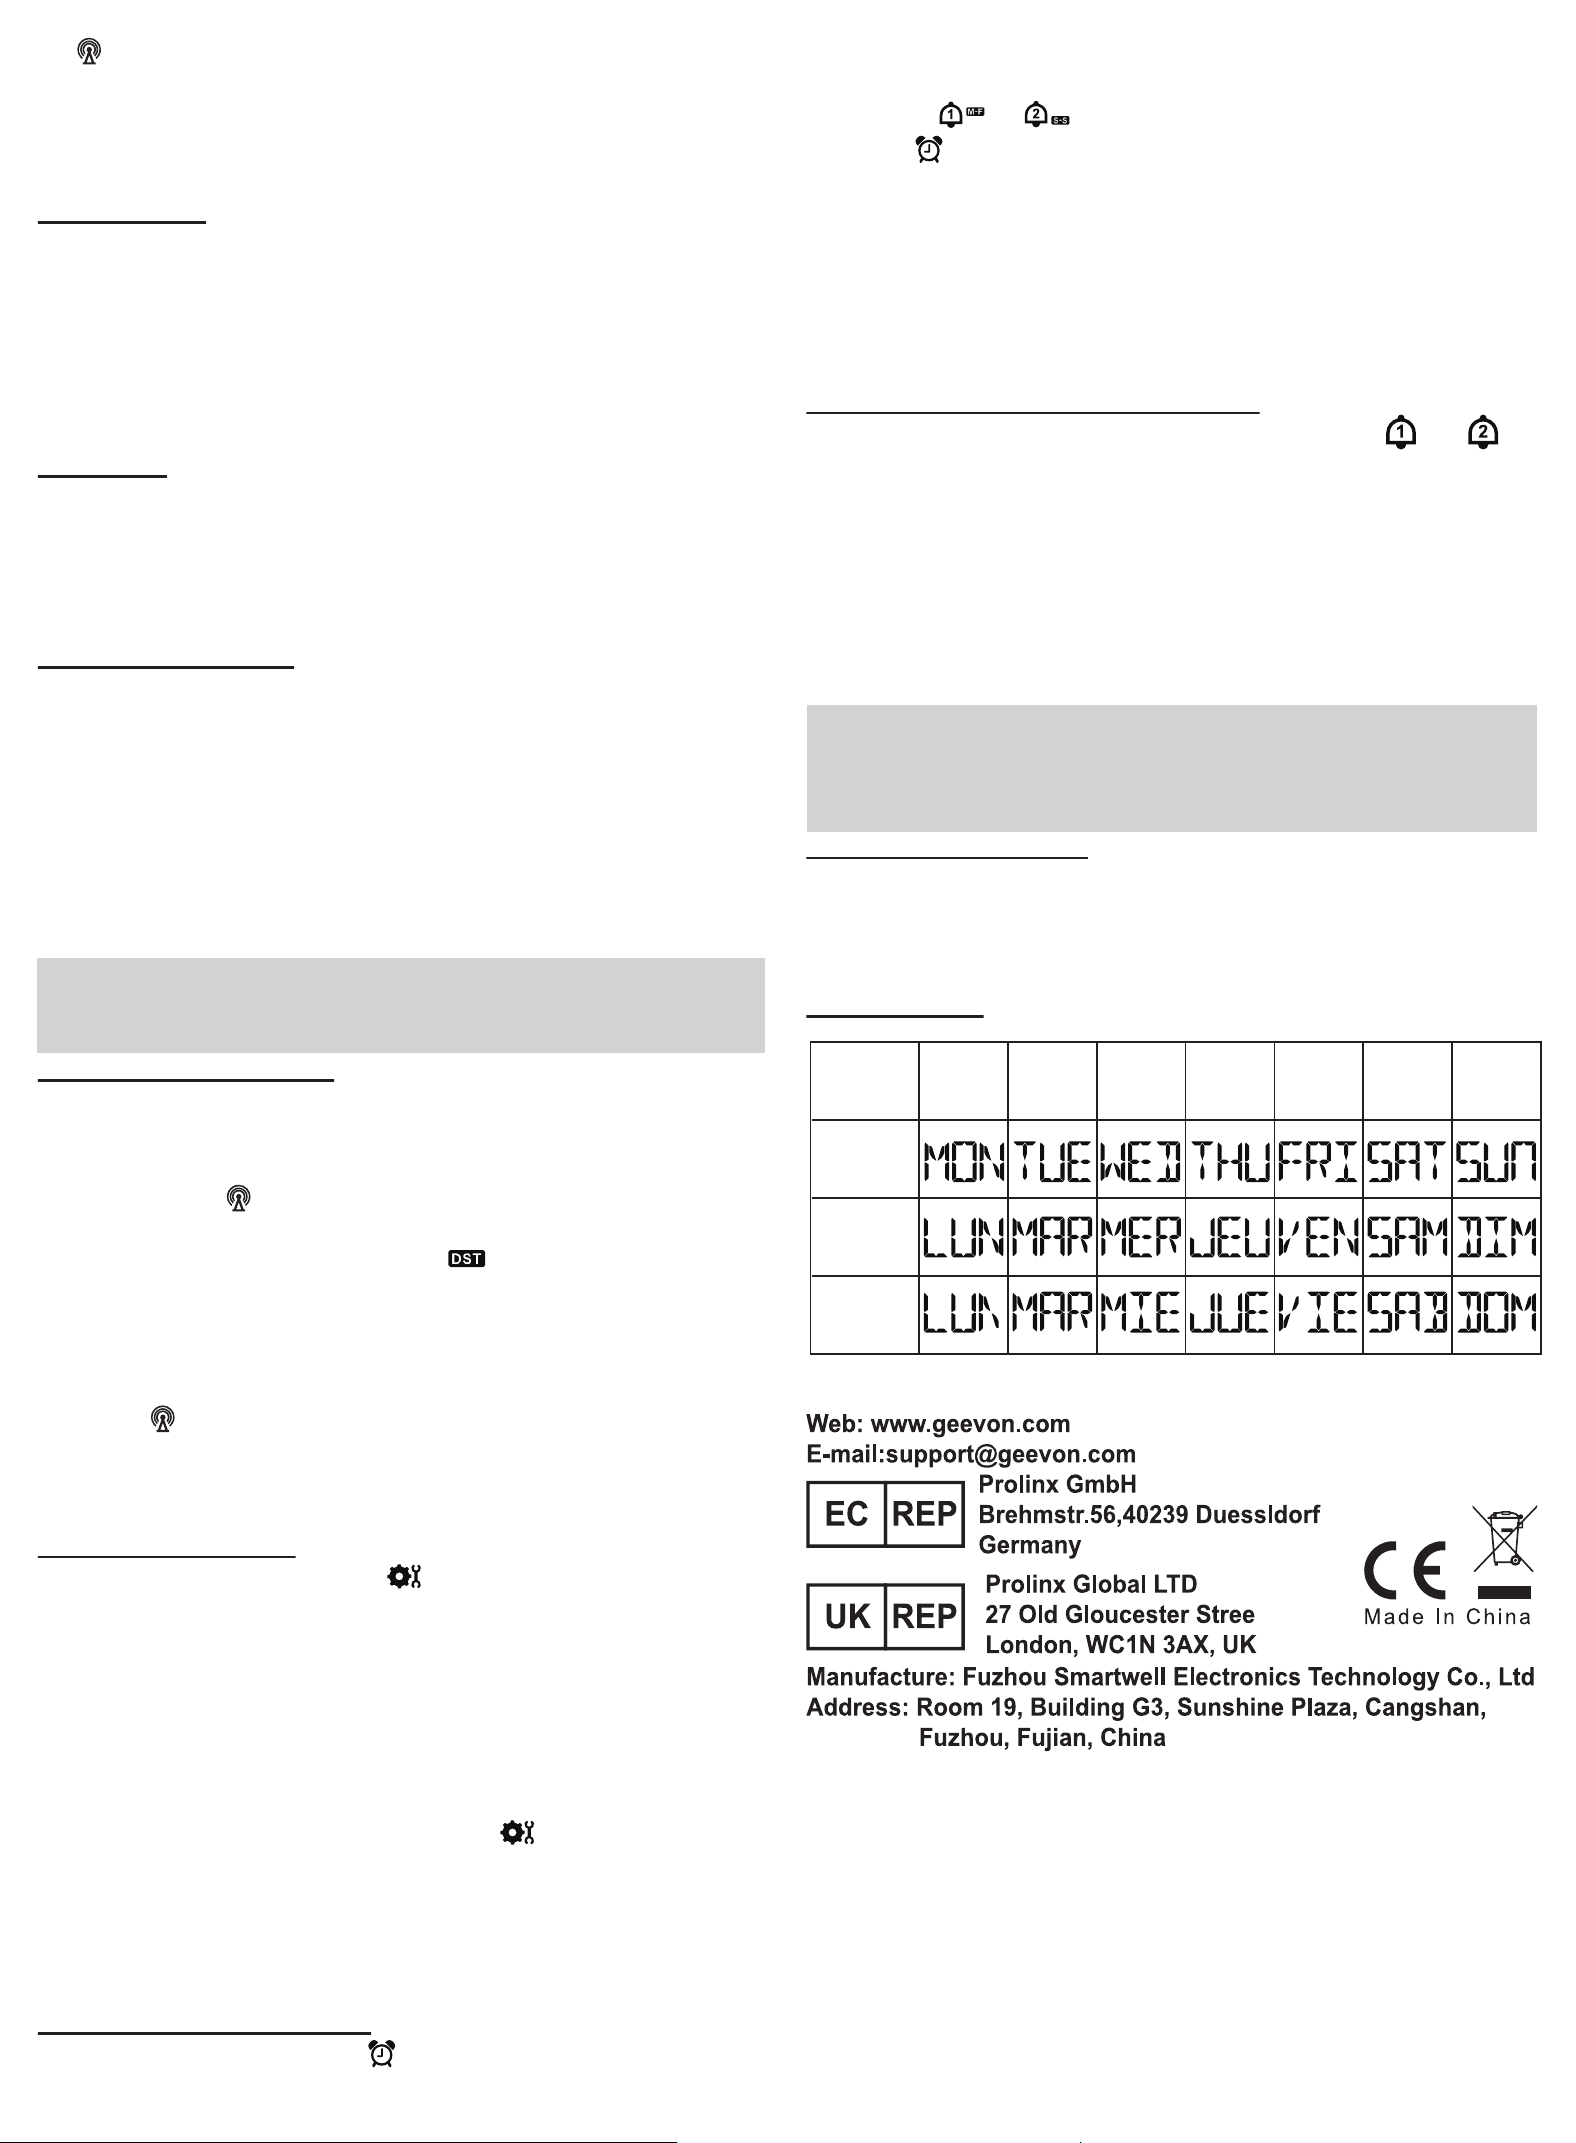
Week display:
5. button:
a. In standard mode, press and hold this button to search
RCC signal.
b. In RCC mode, press and hold this button to turn off RCC
reception.
Temperature:
1. Indoor temperature range: -9.9°C ~ +50°C (14°F ~ 122°F),
display LL.L when below -9.9°C and display HH.H when
higher than 50°C.
2. Outdoor temperature range: -40°C ~ +70°C (-40°F ~
158°F), display LL.L when below -40°C and display HH.H
when higher than 70°C.
3. Temperature resolution: 0.1°C
Accuracy:
Temperature accuracy:
0°C ~ +40°C: ±1°C
<0°C & >40°C:±2°C
32°F ~ +104°F: ±2°F
<32°F & >40°F:±4°F
RF receive function:
The main unit will automatically search for a new sensor after
the batteries are installed. The receiving process is 3 minutes.
During receiving process, the antenna icon is flashing. Once
receive signal,monitor will receive the outdoor temperature at
the same time.
Press and hold ▼/CH button to re-register RF data. If RF
registration failed or missed for more than 1 hour, the data will
flash “--.-“. To manually initiate an outdoor sensor search,
press and hold ▼/CH button.
NOTE: The transmission range may vary depending on many
factors. You may need to experiment with various locations to
get the best results.
Automatic time setting:
After successfully received the RF signal, then the unit will
start to automatic searching for the RCC signal. It takes about
3-7 minutes to complete this process. During the receiving
process, press button for 2 seconds to exit the RCC
receiving state, press any button has no function.
If the DST function is turn on, the “ ” symbol will be shown
on the display.
If the radio signal is received correctly, the date and time are
set automatically and the reception symbol is displayed.
If no radio signal is received, proceed as follows:
1. Press button for approx. 2 seconds to initiate the
reception of the radio signal again.
2. If no radio signal is still received, the time setting must be
made manually.
Manual time setting:
1. In the standard mode, press button to enter the time
setting. The setting order is: RCC ON/OFF→Zone→DST→
ON/OFF→Hour→Minutes→DM/MD→Year→Month→Day→
Language→Exit.
2. In set, press ▲ button to go ahead by once. Hold ▲ button
to go ahead at 8 steps per second.
3. In set, press ▼/CH button to back by once. Hold ▼/CH
button to go back at 8 steps per second.
4. After the setting is completed, press button or do not
press any button for 20 seconds to exit the setting mode.
5. In time zone set ting, press ▼/CH button to switch time
zones. The time zone selection order is: -10(HST) →
-9(AKST) → -8(PST) → -7(MST) → -6(CST) → -5(EST)→
-4(AST).
Alarm and snooze setting:
1. In standard mode, press button to enter the alarm
mode. The setting order is ALARM1
English
French
Spanish
Mon. Tue. Wed. Thur. Fri. Sat. Sun.