
Please give us a chance to make it right and do better !
Contact our friendly customer service department for help first.
Replacements for missing or damaged parts will be shipped ASAP !
Contact Us!
Do NOT return this item.
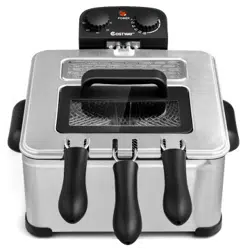
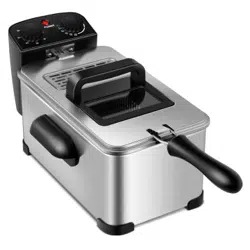
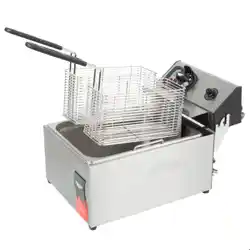
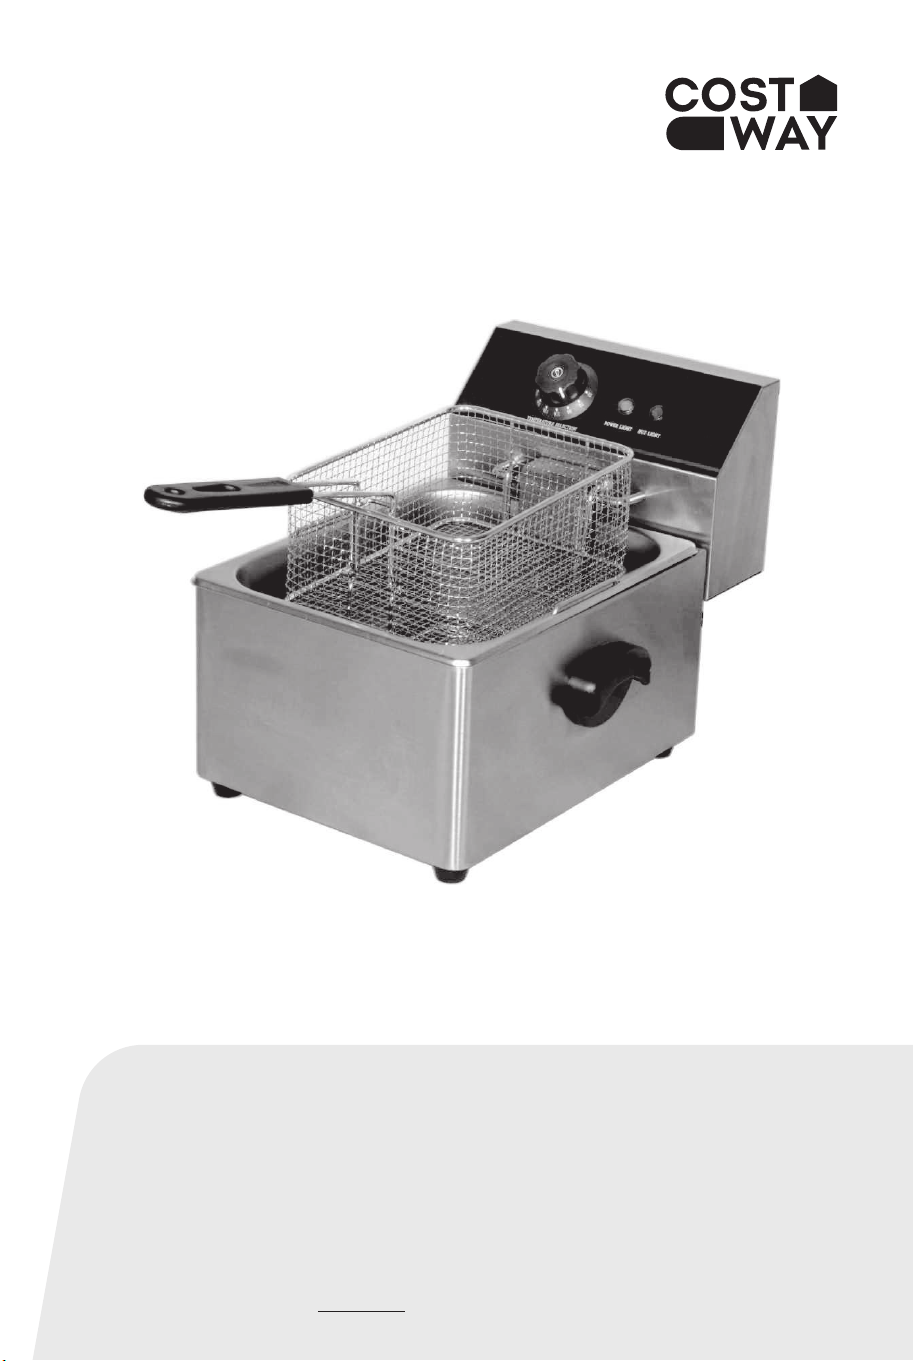
Electric Countertop Deep Fryer
EP25137GB
USER’S MANUAL
THIS INSTRUCTION BOOKLET CONTAINS IMPORTANT SAFETY INFORMATION. PLEASE READ AND KEEP FOR FUTURE REFERENCE.
US office: Fontana UK office: Ipswich AU office: Truganina
DE office: Hamburg
FR office: Saint Vigor d'Ymonville
PL office: Gdańsk
US:cs.us@costway.com
UK:cs.uk@costway.com
Please give us a chance to make it right and do better !
Contact our friendly customer service department for help first.
Replacements for missing or damaged parts will be shipped ASAP !
Contact Us!
Do NOT return this item.
Electric Countertop Deep Fryer
EP25137GB
USER’S MANUAL
THIS INSTRUCTION BOOKLET CONTAINS IMPORTANT SAFETY INFORMATION. PLEASE READ AND KEEP FOR FUTURE REFERENCE.
US office: Fontana UK office: Ipswich AU office: Truganina
DE office: Hamburg
FR office: Saint Vigor d'Ymonville
PL office: Gdańsk
US:cs.us@costway.com
UK:cs.uk@costway.com
Before You Start
Please read all instructions carefully.
Retain instructions for future reference.
Separate and count all parts and hardware.
Read through each step carefully and follow the proper order.
We recommend that, where possible, all items are assembled
near to the area in which they will be placed in use, to avoid
moving the product unnecessarily once assembled.
Always place the product on a flat, steady and stable surface.
Keep all small parts and packaging materials for this product
away from babies and children as they potentially pose a serious
choking hazard.
The electric fryer is designed based on absorbing advantages of
domestic and abroad similar products. It has features of fashionable
design, reasonable construction, convenient operation, fast speed in
temperature raising etc. Apply for family supermarket, leisure snack
shop and places where has large amount of people walk by.
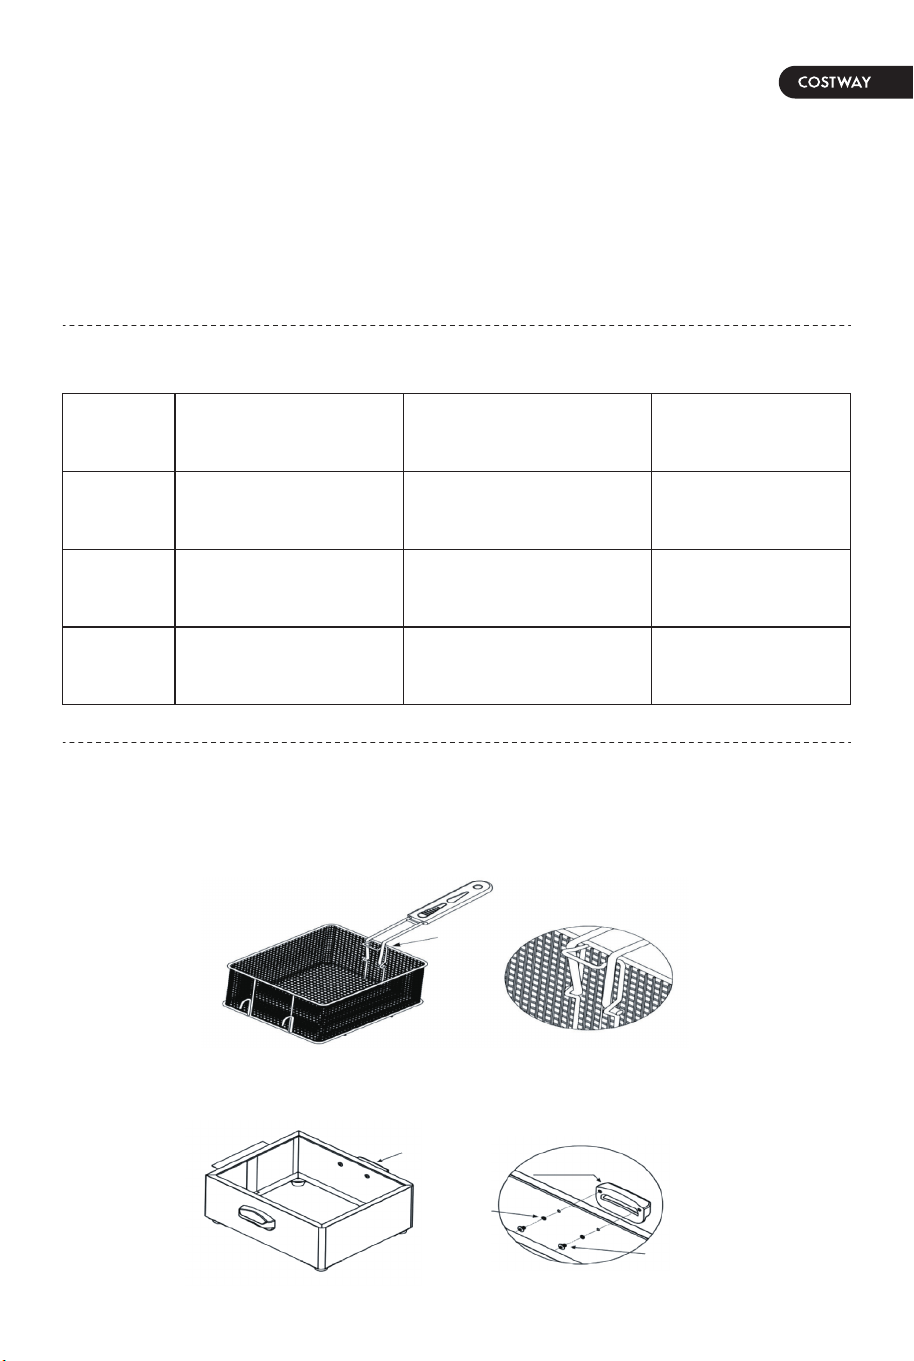
a) Attach the frying basket as the figure shows below, assembly
should be reasonable and fastening.
b) Fasten the electric frying handle as the figure shows below.
I. Main Parameter
II. Installation
Name
Model
Voltage
Power
EP25137GB
220V/50Hz
2.5KW
Oil tank No.
Temperature range
Capacity
Dimension
1
60℃-200℃
6L
28.5x44x29.5cm
Electric Countertop
Deep Fryer
detail I
detail I
detail II
gasket
handle
detail II
screw
02 03
Before You Start
Please read all instructions carefully.
Retain instructions for future reference.
Separate and count all parts and hardware.
Read through each step carefully and follow the proper order.
We recommend that, where possible, all items are assembled
near to the area in which they will be placed in use, to avoid
moving the product unnecessarily once assembled.
Always place the product on a flat, steady and stable surface.
Keep all small parts and packaging materials for this product
away from babies and children as they potentially pose a serious
choking hazard.
The electric fryer is designed based on absorbing advantages of
domestic and abroad similar products. It has features of fashionable
design, reasonable construction, convenient operation, fast speed in
temperature raising etc. Apply for family supermarket, leisure snack
shop and places where has large amount of people walk by.
a) Attach the frying basket as the figure shows below, assembly
should be reasonable and fastening.
b) Fasten the electric frying handle as the figure shows below.
I. Main Parameter
II. Installation
Name
Model
Voltage
Power
EP25137GB
220V/50Hz
2.5KW
Oil tank No.
Temperature range
Capacity
Dimension
1
60℃-200℃
6L
28.5x44x29.5cm
Electric Countertop
Deep Fryer
detail I
detail I
detail II
gasket
handle
detail II
screw
02 03

III. Usage Attention
a) Please make sure the electric box is being inserted into the base of
the deep fryer and press the start-up switch completely (follow the
instruction on the label at the back of the deep fryer). Otherwise the
deep fryer won't heat up.
b) For your safety, if the soft wire is damaged, it must be repaired by
the manufacturer or similar professional staff.
c) The voltage for the equipment must be same with the supply
voltage.
d) User needs to equip the fryer with the suitable outlet and fuse and
the other lines should be in accordance with safety regulations as
well.
e) Cannot use water to spray the fryer for cleaning.
f) The machine cannot be soaked in water.
g) Over-wet or overload food will lead to excessive boiling, our
suggestion is not to boil food more than 1.0kg at a time.
h) Using the old oil may reduce flash point and more likely to cause
excessive boiling
i) For people handicapped in health, sense or intelligence, or
inexperienced and lack of knowledge (including children), the
specification is not applicable.
IV. Usage Instruction
a) Please make sure that the oil in the tank should not up to the
"MAX" liquid level mark and not lower to the "MIN" mark or there is a
danger of fire.
b) Turn on the power switch, the indicator will be on, then move the
temperature control knob to the preset temperature, and the heating
light is on at the same time. When the oil temperature in the tank
reaches the preset value, the temperature controller will cut off the
power automatically and heating light will be off. (When the tank
temperature inside decrease and lower than the preset temperature,
it will resume to heat automatically and the heating light will be on
accordingly)
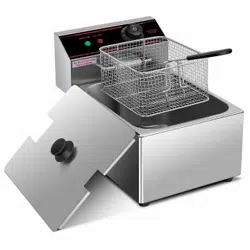
c) The lid of the tank is designed for keeping temperature and
making the tank clean, when cover the tank, the lid should have no
water, avoid the water drops into the oil tank leading to the hot oil
splashing to hurt people.
d) Attached with a special frying basket for frying various foods.
e) The residue separating plate in the oil tank is designed for
protecting the heating tube. When frying food, the residue separating
plate should be put in the oil tank.
f) When you finish using the machine, please disconnect the fryer
with the power supply to avoid any accident arising from ceaseless
heating.
V. Cleaning & Maintenance
a) Disconnect the oven with the power supply when cleaning and
maintaining it to avoid any accident.
b) When cleaning the fryer, please wait until the oil temperature
drops to the normal temperature. Use wet towel to clean the surface
and the power stretching wire. Don't rinse the surface of the control
box directly with water.
c) Regularly get rid of the residue at the bottom of the oil tank lest
the heat of the heating tube can not be well dispersed and causes
damage to the heating tube.
d) Keep the machine clean and hygienic.
04 05

III. Usage Attention
a) Please make sure the electric box is being inserted into the base of
the deep fryer and press the start-up switch completely (follow the
instruction on the label at the back of the deep fryer). Otherwise the
deep fryer won't heat up.
b) For your safety, if the soft wire is damaged, it must be repaired by
the manufacturer or similar professional staff.
c) The voltage for the equipment must be same with the supply
voltage.
d) User needs to equip the fryer with the suitable outlet and fuse and
the other lines should be in accordance with safety regulations as
well.
e) Cannot use water to spray the fryer for cleaning.
f) The machine cannot be soaked in water.
g) Over-wet or overload food will lead to excessive boiling, our
suggestion is not to boil food more than 1.0kg at a time.
h) Using the old oil may reduce flash point and more likely to cause
excessive boiling
i) For people handicapped in health, sense or intelligence, or
inexperienced and lack of knowledge (including children), the
specification is not applicable.
IV. Usage Instruction
a) Please make sure that the oil in the tank should not up to the
"MAX" liquid level mark and not lower to the "MIN" mark or there is a
danger of fire.
b) Turn on the power switch, the indicator will be on, then move the
temperature control knob to the preset temperature, and the heating
light is on at the same time. When the oil temperature in the tank
reaches the preset value, the temperature controller will cut off the
power automatically and heating light will be off. (When the tank
temperature inside decrease and lower than the preset temperature,
it will resume to heat automatically and the heating light will be on
accordingly)
c) The lid of the tank is designed for keeping temperature and
making the tank clean, when cover the tank, the lid should have no
water, avoid the water drops into the oil tank leading to the hot oil
splashing to hurt people.
d) Attached with a special frying basket for frying various foods.
e) The residue separating plate in the oil tank is designed for
protecting the heating tube. When frying food, the residue separating
plate should be put in the oil tank.
f) When you finish using the machine, please disconnect the fryer
with the power supply to avoid any accident arising from ceaseless
heating.
V. Cleaning & Maintenance
a) Disconnect the oven with the power supply when cleaning and
maintaining it to avoid any accident.
b) When cleaning the fryer, please wait until the oil temperature
drops to the normal temperature. Use wet towel to clean the surface
and the power stretching wire. Don't rinse the surface of the control
box directly with water.
c) Regularly get rid of the residue at the bottom of the oil tank lest
the heat of the heating tube can not be well dispersed and causes
damage to the heating tube.
d) Keep the machine clean and hygienic.
04 05
IX. Transporting And Storage
During transport, the electric fryer should be handled and packed
with care.
Be careful not to shake or damage the unit. Store the fryer in a dry,
dust free environment and should not upside down.
The indicator light of the
power switch is not on and
cannot heat.
The orange and green
indicator lights turn on
simultaneously and the oil
temperature does not rise.
The orange indicator light
is not off and the oil
temperature rise is not
controllable.
The indicator lights do not
turn on and the control of
oil temperature is OK.
The safety switch
does not works.
The connection of
the heating tube is
loose or the heating
tube is damaged.
The temperature
controller fails.
The indicator lights
are damaged.
Replace a new safety
switch.
Fix the connection of
the heating tube or
replace the heating
tube.
Replace the
temperature
controller.
Replace the indicator
lights.
Trouble Cause Solution
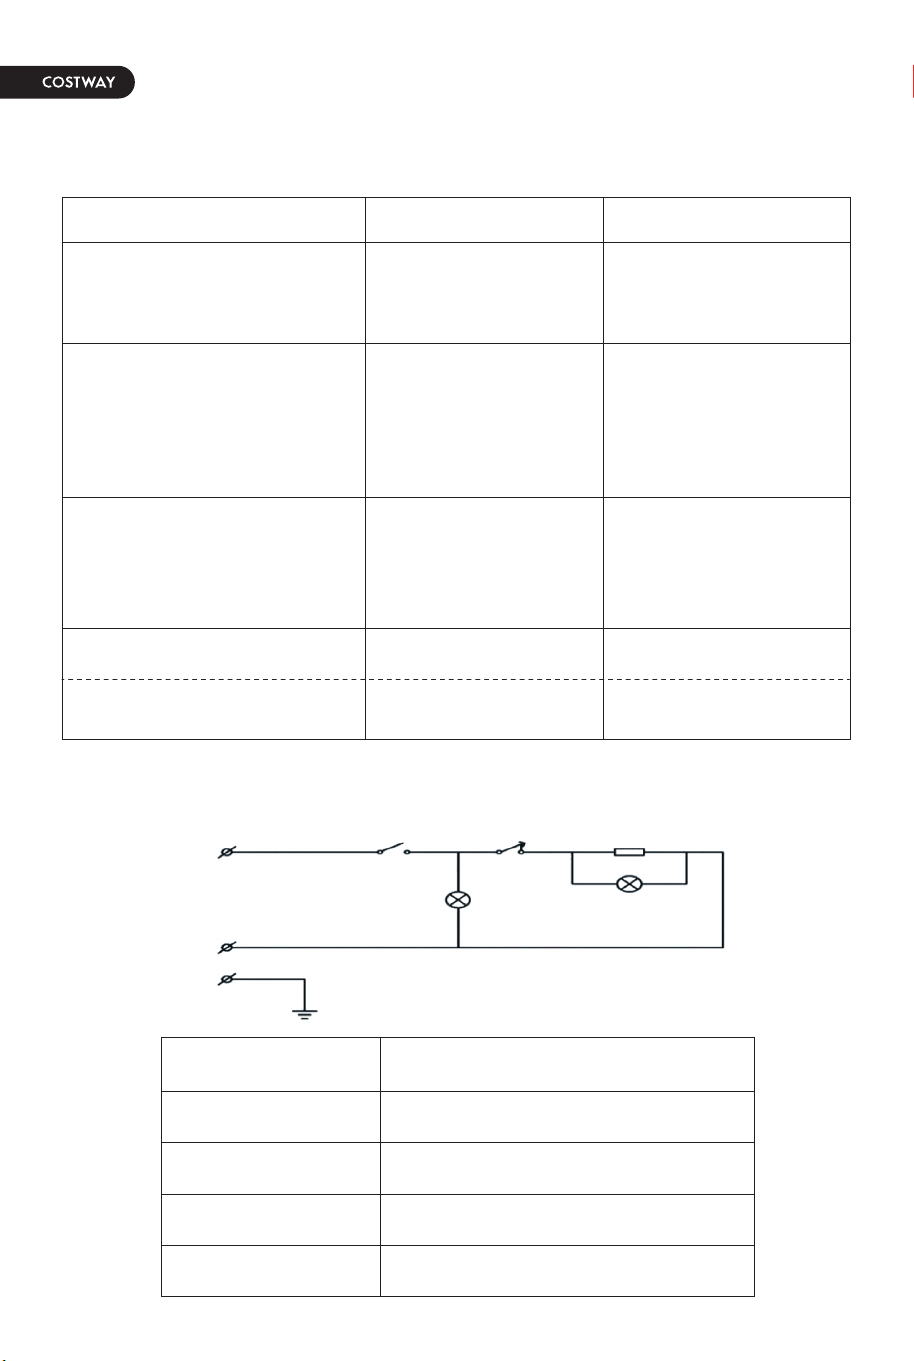
VII. Circuit Diagram
VIII. Accessories Included
K
R
L1
L2
WP
Safety switch
Heating tube
Power indicator
Heating indicator
Temperature controller
EP25137GB-Part A
EP25137GB-Part B
EP25137GB-Part C
EP25137GB-Part D
Temperature controller
Heating pipe
Indicator light
Carton
AC 220V
L
K WP
L1 L2
R
N
E
No.
1
2
3
4
5
6
Name
Frying basket
Frying handle
Residue separating plate
Oil tank
Handle
Screw, gasket
Quantity
1
1
1
1
2
Each 4
Remark
Attach to the frying basket
For handle assembly
VI. Troubleshooting
06 07

IX. Transporting And Storage
During transport, the electric fryer should be handled and packed
with care.
Be careful not to shake or damage the unit. Store the fryer in a dry,
dust free environment and should not upside down.
The indicator light of the
power switch is not on and
cannot heat.
The orange and green
indicator lights turn on
simultaneously and the oil
temperature does not rise.
The orange indicator light
is not off and the oil
temperature rise is not
controllable.
The indicator lights do not
turn on and the control of
oil temperature is OK.
The safety switch
does not works.
The connection of
the heating tube is
loose or the heating
tube is damaged.
The temperature
controller fails.
The indicator lights
are damaged.
Replace a new safety
switch.
Fix the connection of
the heating tube or
replace the heating
tube.
Replace the
temperature
controller.
Replace the indicator
lights.
Trouble Cause Solution
VII. Circuit Diagram
VIII. Accessories Included
K
R
L1
L2
WP
Safety switch
Heating tube
Power indicator
Heating indicator
Temperature controller
EP25137GB-Part A
EP25137GB-Part B
EP25137GB-Part C
EP25137GB-Part D
Temperature controller
Heating pipe
Indicator light
Carton
AC 220V
L
K WP
L1 L2
R
N
E
No.
1
2
3
4
5
6
Name
Frying basket
Frying handle
Residue separating plate
Oil tank
Handle
Screw, gasket
Quantity
1
1
1
1
2
Each 4
Remark
Attach to the frying basket
For handle assembly
VI. Troubleshooting
06 07