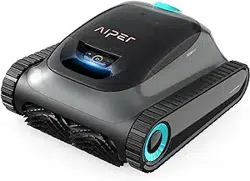
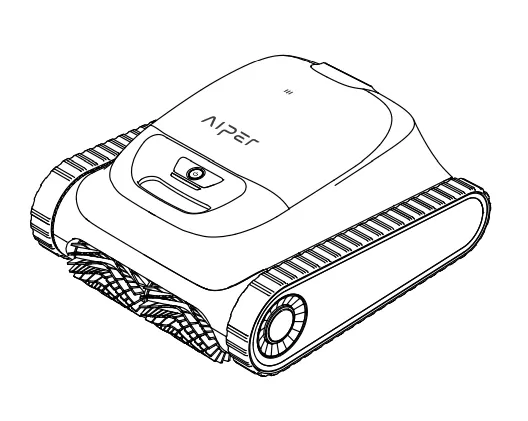
User Manual Aiper Scuba S1 Robotic Pool Cleaner
FCC Statement
Note: This equipment has been tested and found to comply with the limits according to Part 15 of the FCC Rules of a Class B digital device. These limits are designed to provide reasonable protection against harmful interference in a residential installation. This equipment generates. uses. and can radiate radio frequency energy and. if not installed and used in accordance with the instructions. may cause harmful interference to radio communications or persons. However. there is no guarantee that interference will not occur in a particular installation. If this equipment does cause harmful interference to radio or television reception. the user is encouraged to try to correct the interference by one or more of the following measures:
- Reorientate or relocate the receiving antenna.
- Increase the separation between the equipment and receiver.
- Plug the equipment into an outlet on a circuit different from that to which the receiver is connected.
- Consult the manufacturer or an experienced radio/TV technician for help.
Warning
Changes or modifications of this product are not expressly approved by the party responsible for compliance (Aiper). and unauthorized modifications could void the user's authority to operate the equipment.
Compliance Declaration
This device complies with Part 15 of the FCC Rules. Operation is subject to the following two conditions: (1) this device may not cause harmful interference. and (2) this device must accept any interference received. including interference that may cause undesired operation.
Importer. Aiper Intelligent. LLC.
Address: 13851 Ramona Ave. Chino. CA 91710. USA.
Telephone: +1866-850-0666
AU Toll-Free: +61(180)049-7023
IC Statements
This device complies with Industry Canada license - ICES-O003. Operation is subject to the following two conditions: (1) This device may not cause interference. and (2) This device must accept any interference. including interference that may cause undesired operation of the device.
Important Safety Precautions
Please read this manual carefully and use your Aiper pool cleaner in accordance with the manual instructions. Aiper is not liable for any losses or injuries caused by improper use of this device.
For your safety and optimal performance of this device. please read and follow the following suggestions.
- Do not operate your Aiper pool cleaner while people or animals are in the pool.
- Turn the cleaner off while not in use or while performing maintenance.
- Do not allow children to ride the Aiper pool cleaner under any circumstances. Please supervise children when they are around an operational Aiper pool cleaner.
- Use only authorized Aiper power adapters.
- The adapter cord should only be replaced by a qualified electrician or Aiper Customer Care.
- It's suggested to plug the power adapter into a power strip or surge protector and not directly into an electrical outlet.
- Ensure your device is powered off and the charging port is dry before charging. While charging. your Aiper pool cleaner should be kept in a cool place. Do not cover your Aiper pool cleaner while charging as this may cause components to overheat.
- Please store the machine indoors or in a cool place when not in use.
- Do not run your Aiper pool cleaner out of the water as it may lead to overheating.
- Only certified professionals should disassemble the sealed driving kit of your Aiper pool cleaner.
- Do not operate your Aiper pool cleaner and pool filter simultaneously.
- The oil sealing around the motor contains grease. which may cause a small amount of water pollution if the motor is damaged. If you believe there is a leak. stop using the unit immediately.
- Do not pierce the shell of your Aiper pool cleaner. throw. or damage the cleaner intentionally.
- When putting your device into the water. the front of the machine must face upwards and should never be placed upside down or directly thrown into the swimming pool.
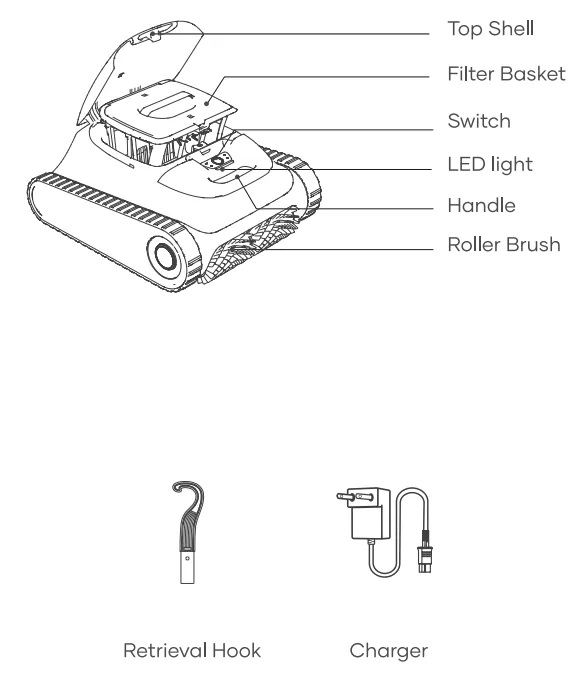
Structure
Specifications & Working Conditions
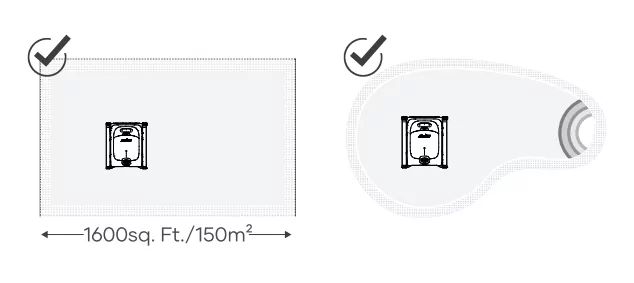
- Pool Size: 1600 Sq.ft/150m2
- Charger Input: 100-240V. 60/50Hz. Max 1.5A
- Charger Output: 16.8V/2.6A
- Charging Time: 4 Hours
- Battery Life: Up to 150 Minutes
- IP Grade: IPX8 Waterproof
- Water Depth: 1.6-10ft(0.5-3m)
- Motor Power: 75W
- Battery Pack: 78200mAh
- Battery Pack Voltage: 14.4V
CAUTION: Do not use the device in a pool environment beyond the conditions described below. doing so may cause damage to the device that will not be covered by warranty.
- Temperature: 50-95°F (10-35°C)
- PH Value: 7.0-7.4
- Chlorine: Maximum 4 ppm
- NaCl: Maximum 5000 ppm
Charging
CAUTION: Do not charge the device in direct sunlight.
a. Fully charge the device before using it to clean the pool.
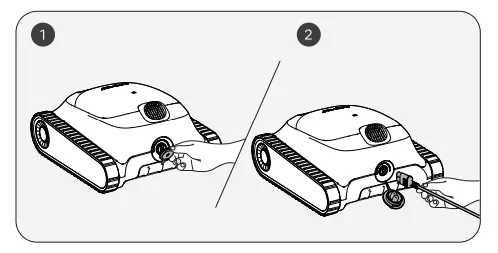
b. Before charging. remove the charging port cover to check if there is any residual water in the charging port. If so. wipe dry the charging port first.
c. Insert the charging cable into the charging port of the device and then into an available electrical outlet. The LED indicator on the device will start to pulse. indicating that the device is being charged. When it is fully charged. the LED will remain on.
Using Your Aiper Pool Cleaner
a. This machine is suitable for cleaning floors. walls and water lines in areas up to 1600sq. Ft./150m. +—1600sq. Ft./150m2.
Operating Your Device
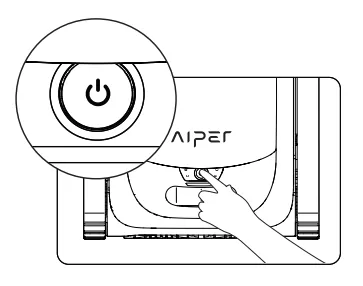
a. Press and hold the Power button for 2s to turn on/off the device.
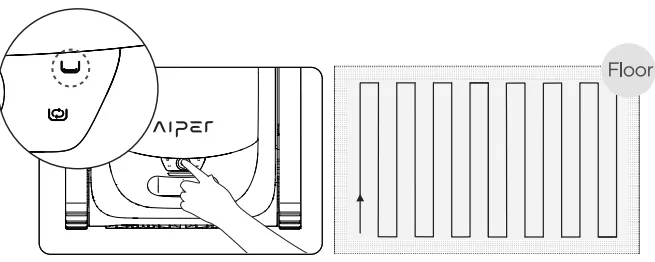
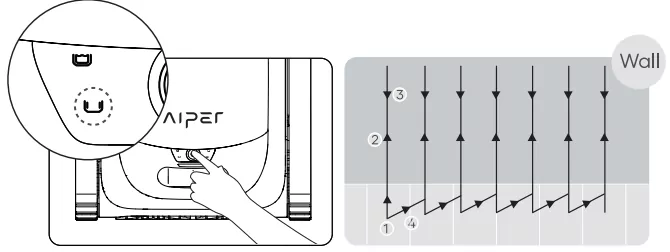
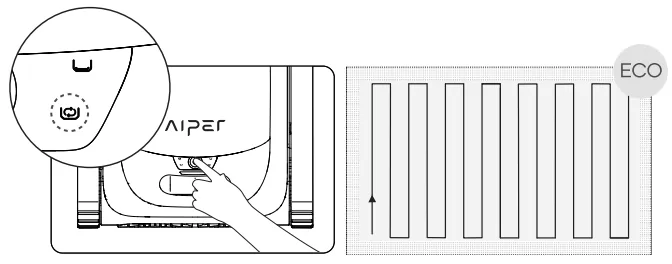
b. Auto mode is the default mode for this device once turned on. Press the button to switch between Auto. Pool Floor. Poo! Wall and Eco.
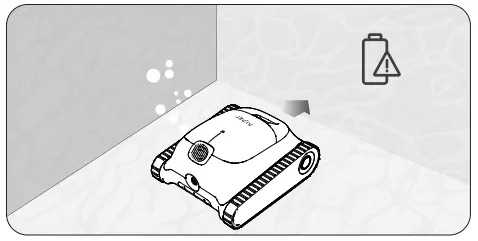
1) Auto Mode: The device will clean the pool floors and walls. while intelligently planning its cleaning route based on its battery level. When the battery level is low. the device will automatically dock and stop
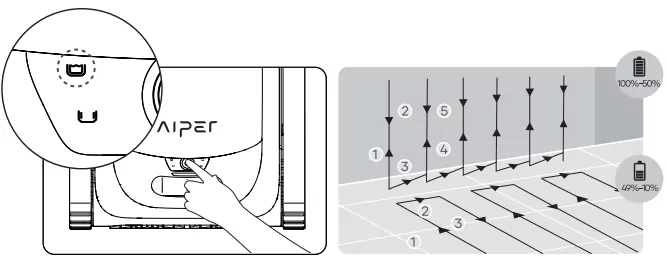
Auto Mode: Floor and Wall Cleaning
2) Pool Floor Mode: The device will clean the pool floor in a S-shaped route. without climbing or cleaning walls. When the battery level is low. the device will automatically dock and stop cleaning.
Floor Cleaning Mode
3) Pool Wall Mode: The device will clean the pool wall in an N-shaped route. without cleaning floors. When the battery level is low. the device will automatically stop cleaning and dock.
Wall Cleaning Mode
4) Eco Mode: The device will clean the pool floor for 45 min once every 48 hours for one week when fully charged.
Eco Mode
c. After the device is turned on for 30 gs. it will turn the water pump briefly every 10 s to check whether it has entered the water for 3 times. If it detects that it has not entered the water 3 times. it will shut down; please put the device into the pool within 1 min after starting the device. The device will begin cleaning within 10 s after it reaches the bottom of the pool.
d. When the battery level is low. the device will automatically dock and stop cleaning.
e. Lift the device from the pool floor with a hook to prevent getting wet. Users can connect the hook to any standard pool cleaning pole (not included) to extend the reach of the hook.
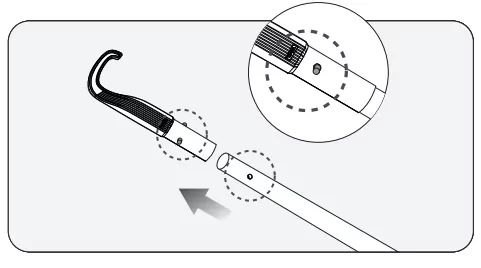
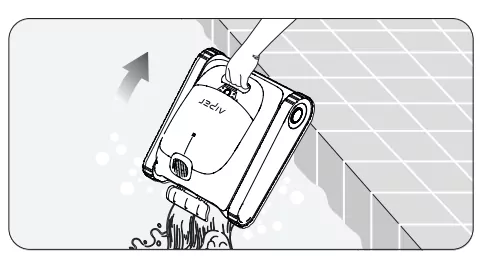
f. Hook the device's handle and lift the device out of the water.
g. Hold the handle and allow the device to drain any stored water.
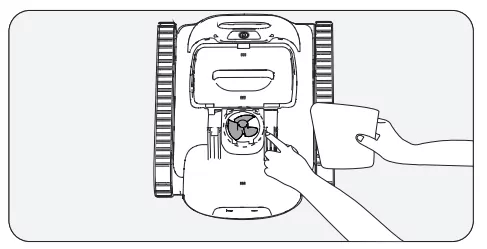
Disassembly and Cleaning
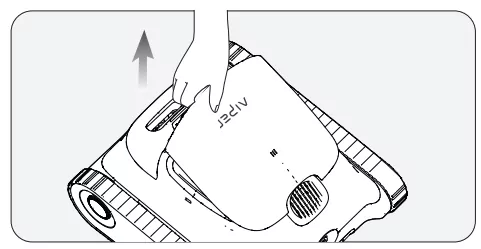
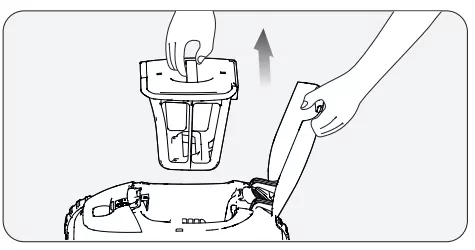
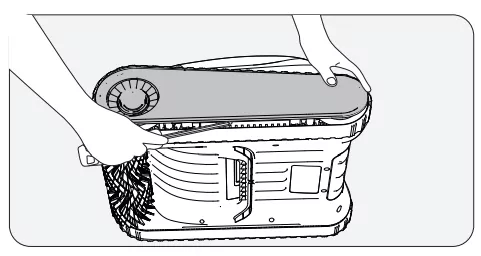
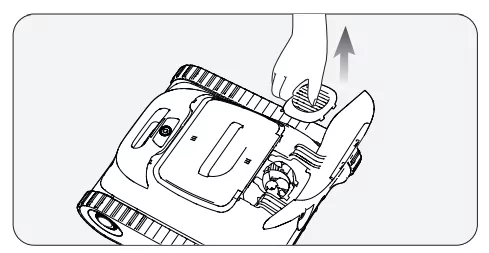
a. Set aside the device in a safe. secure location and open the top shell.
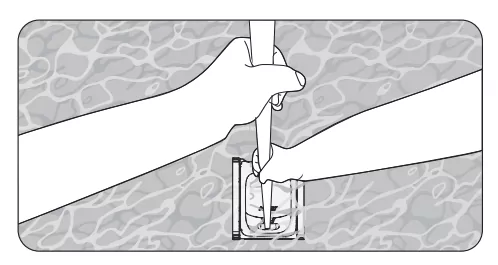
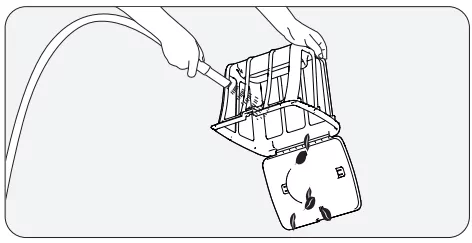
b. Remove the filter basket by lifting its handle.
c. Press the top shells latch of the filter basket and at the same time pull up on the top cover handle to open the filter basket.
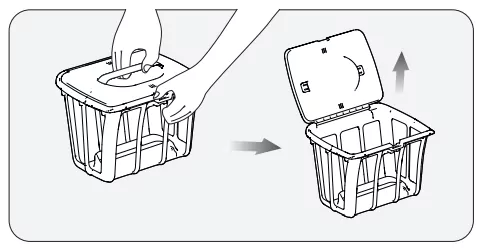
d. Empty the filter basket. rinse. and replace the filter basket back into the device.
Maintenance
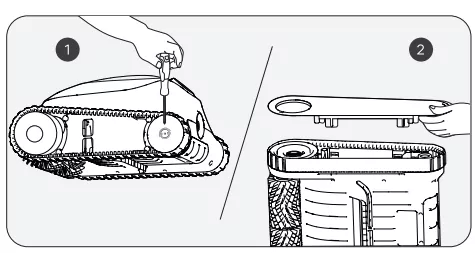
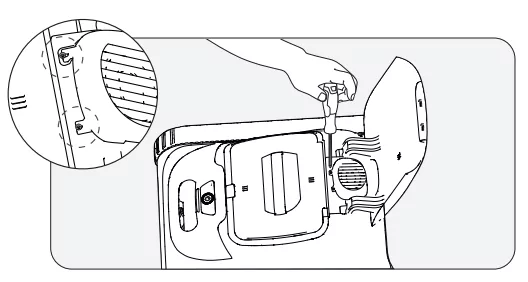
7.1 Replacing the tracks.
a. Remove the side cover plate from the device.
b. Remove the screws and the guide sleeves from the wheels.
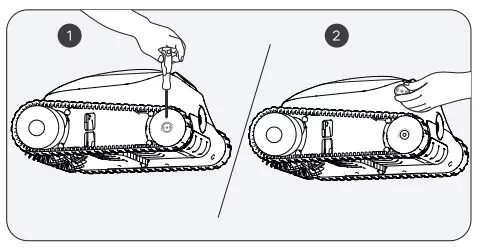
c. Pull the wheels and the track together to remove them.
d. Align the gears on the new tracks with the gears on both wheels. then install the rear wheels and tracks together back onto the shaft sleeves.
e. Re-install the white guide sleeves by aligning their D-shaped openings with that of the shaft sleeves.

f. Tighten the screws and reinstall the side cover plate.
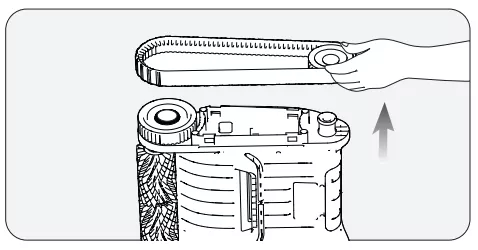
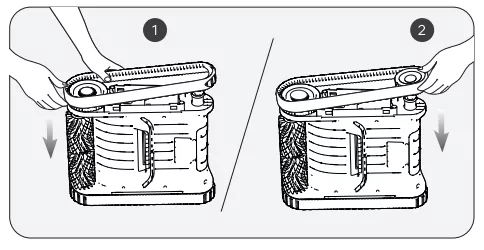
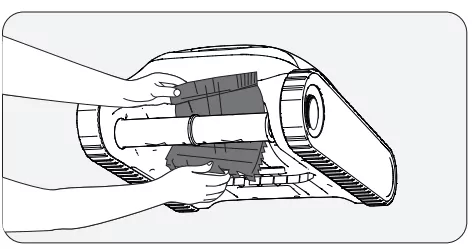
7.2 Replacing the roller brush belt.
a. Find the side that looks different from the other roller brush belts. and pull down the silicone buckles that are stuck in the fixed slot.
b. After all the silicone buckles are pulled out. replace the roller brush belt with a new one. Align the silicone buckles with the fixed slot and pull them outward. They can be fixed after passing through the slot.
7.3 Cleaning the drain.
a. Lift the top shell.
b. Remove the screws and drain the cover.
c. Remove any objects entangled in the drains fan blades. and then re-install the drain cover and screws.
Storage
Winter Tips: How to store and secure your Aiper devices
How should | store my Aiper device during the off-season?
In your pool's off-season. such as winter months or long vacations when your Aiper device won't be used. there are a few steps to take to protect your device and keep it in the best condition possible.
- Power off your device and disconnect it from the charger.
- Clean the device of any residual dirt. including the top & bottom shell. wheels. roller brushes. and charging port.
- Using a paper towel or soft cloth. wipe dry your device.
- Box and store your device in a cool. well-ventilated area.
- Charge your device every TWO months to 40%-60% battery capacity to maintain the battery health of your device.
When you're ready to use your Aiper device in your pool. fully charge the device before using it in your pool. and never charge your device in direct sunlight.
LED Indicator
| Light Status |
Device Status |
Description |
| Light is Pulsing |
Charging |
The LED colors indicate the battery level of the device. |
Blue light always on: 100% |
| Blue: > 50% |
| Yellow: 50-15% |
| Red: < 15% |
| Light Steady On |
Operating |
The LED colors indicate the battery level of the device. |
Blue: > 50% |
| Yellow: 50-15% |
| Red: < 15% |
| Red Light Flashed Rapidly |
Device Malfunction |
Filter basket blockage, motor stalling, electrical leakage, etc. |
Packing List
| NO. |
Name |
Model |
QTY(pc) |
| 1 |
Cleaner |
Aiper Scuba S1 |
1 |
| 2 |
Charger |
/ |
1 |
| 3 |
Retrieval Hook |
/ |
1 |
| 4 |
User Manual |
/ |
1 |
Warranty
This product has passed quality control and safety test conducted by our technicians.
- This product comes with a 24-month warranty that covers your item's battery and motor from the date of purchase.
- This warranty is voided if the product has been altered. misused. or has been repaired by unauthorized persons.
- This warranty extends only to manufacturing defects and does not cover damage resulting from the mishandling of the product by the owner.
- The order number or record of purchase must be presented at the request of any repair claim during the warranty period.
This symbol indicates that this product shall not be treated as household waste. Instead it shall be handed over to the applicable collection point for the recycling of electrical and electronic equipment.