RANGE ROVER CUTTER FOR SX299 MASTER
LOCKING WHEEL NUT REMOVAL SET
MODEL NO: SX299RR
Thank you for purchasing a Sealey product. Manufactured to a high standard, this product will, if used according to these
instructions, and properly maintained, give you years of trouble free performance.
IMPORTANT: PLEASE READ THESE INSTRUCTIONS CAREFULLY. NOTE THE SAFE OPERATIONAL REQUIREMENTS, WARNINGS & CAUTIONS. USE
THE PRODUCT CORRECTLY AND WITH CARE FOR THE PURPOSE FOR WHICH IT IS INTENDED. FAILURE TO DO SO MAY CAUSE DAMAGE AND/OR
PERSONAL INJURY AND WILL INVALIDATE THE WARRANTY. KEEP THESE INSTRUCTIONS SAFE FOR FUTURE USE.
1. SAFETY
WARNING! DO NOT use the tool if damaged or thought to be faulty.
WARNING! Ensure that Health & Safety, Local Authority Regulations and general workshop practice Regulations are adhered to
when using tools.
8 DO NOT use the tool for a task it is not designed to perform.
8 DO NOT use the tool unless you have been instructed in its use by a qualied person.
8 DO NOT operate the tool if you are tired or under the inuence of alcohol, drugs or intoxicating medication.
9 Maintain the tool in good condition.
9 Follow all workshop safety rules, regulations and conditions.
9 Wear eye protection, protective gloves and safety footwear.
9 Maintain correct balance and footing. Ensure the oor is not slippery and wear non-slip shoes.
9 Keep children and non essential persons away from the work area.
2. INTRODUCTION
Specially designed cutter for use on Land Rover, Range Rover locking wheel nuts. To be used in conjunction with Model No. SX299
Master Locking Wheel Nut Removal Set.
3. CONTENTS
4. OPERATION
4.1. TOOL ASSEMBLY
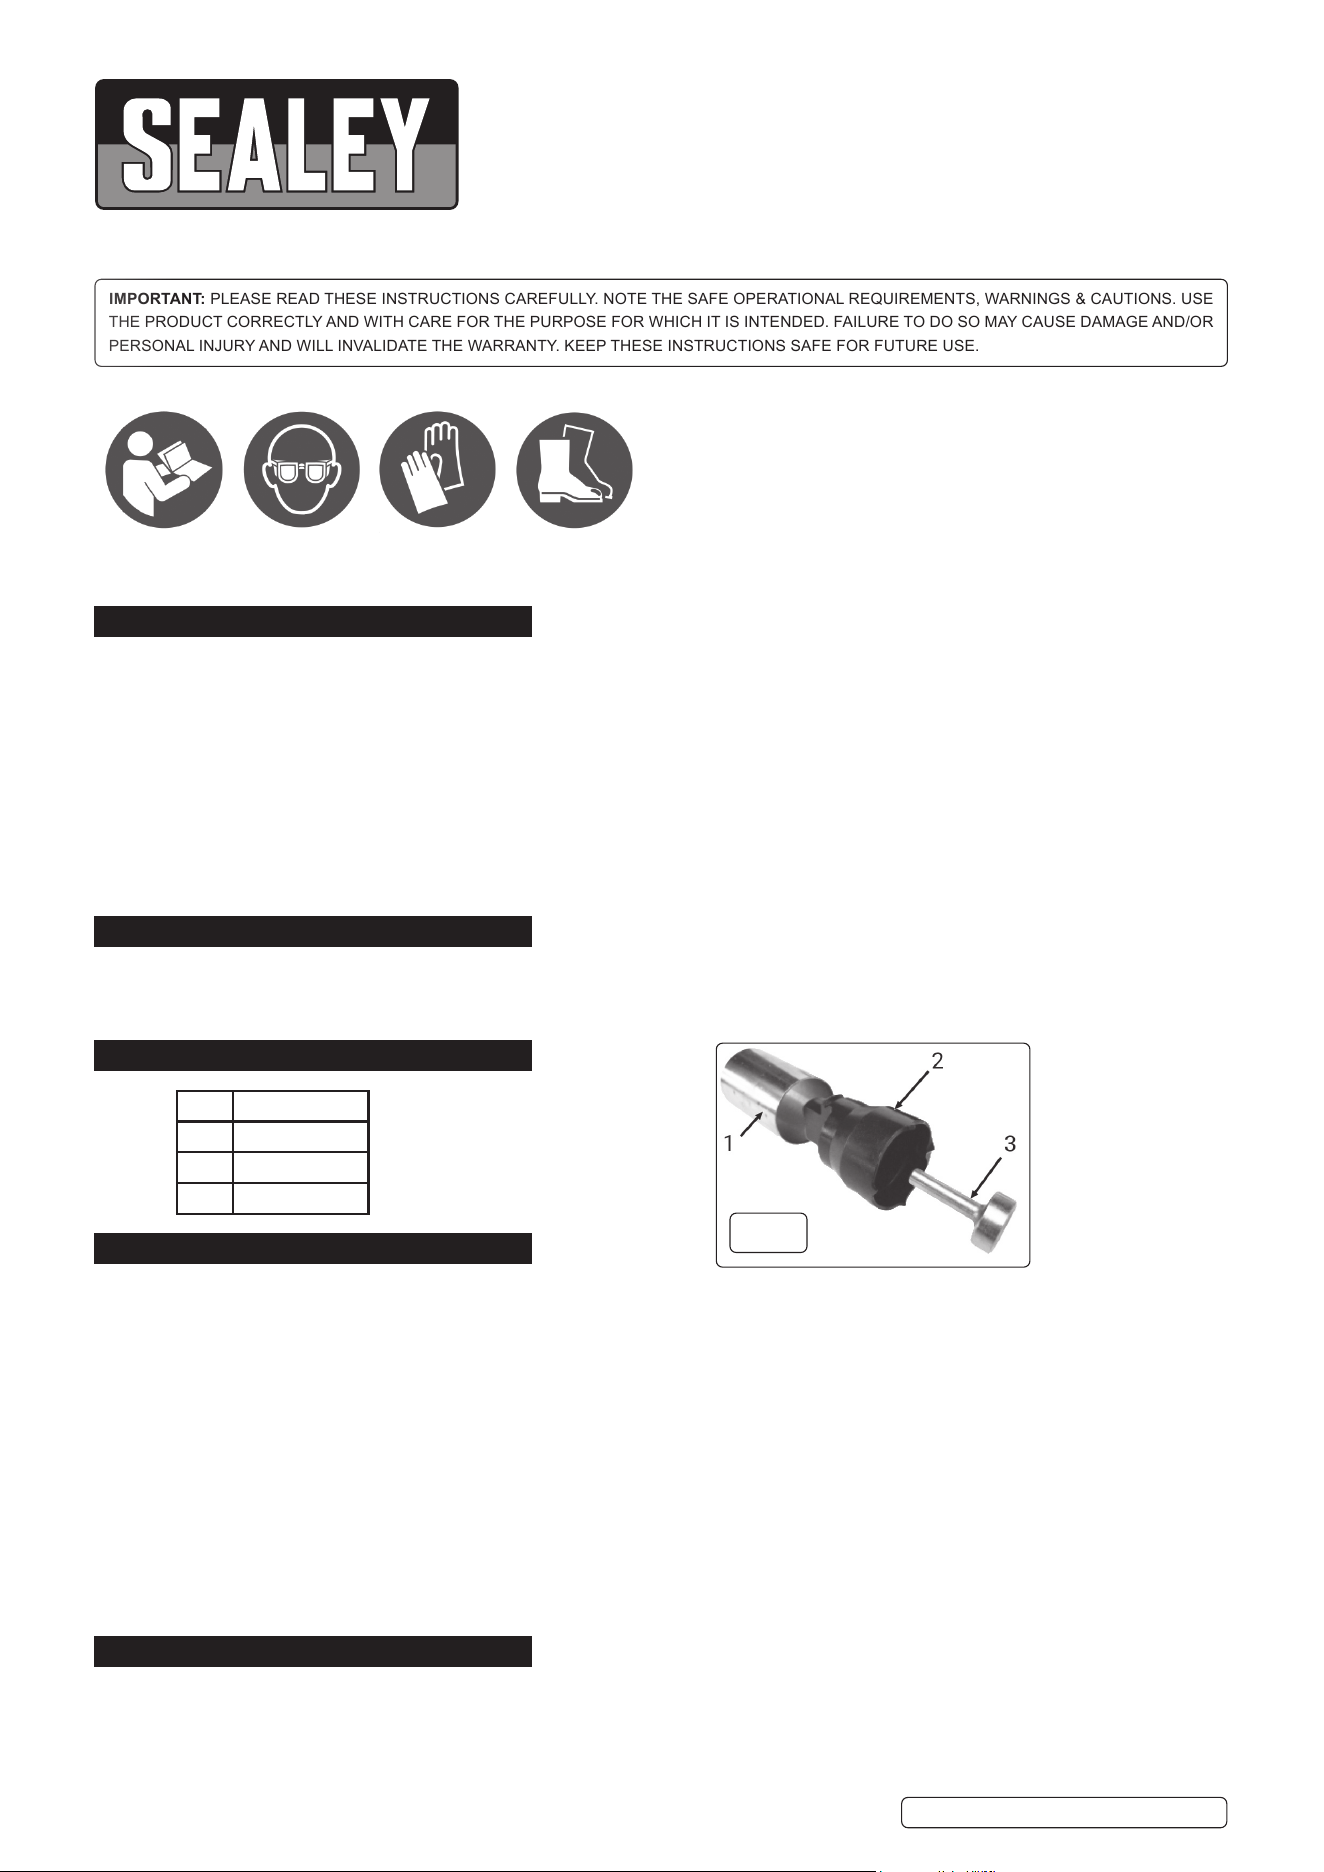
4.1.1. Slide outer shroud (g.1.1) fully down over remover tool body (NOTE: An ‘O’ ring is used to make this a tight sliding t).
4.1.2. Insert key (g1.2) into tool body. Engage and clip in place using the spring ring in tool body.
4.1.3. Slide outer shroud (g.1.1) up over the spring ring to prevent it expanding and the key becoming loose.
4.2. USAGE PREPARATION
4.2.1. Check that the splines (front and back) on the locking wheel nut are aligned.
4.2.2. If not aligned, insert the mandrel (g.1.3) into the key (g.1.2) and locate the key splines with the front splines of the locking wheel
nut.
4.2.3. Rotate the tool to align front and rear splines.
4.3. OPERATION
4.3.1. Once aligned, remove the mandrel (g.1.3) and replace key onto locking wheel nut ensuring re-location of key onto the rear splines
of the locking wheel nut.
4.3.2. Using the impact driver (SX299.V2-01) gradually increase the impact eort ensuring sucient engagement of the key to the rear
splines of the locking wheel nut.
4.3.3. Using the impact drive socket (SX299.08) loosen and remove the locking wheel nut.
5. MAINTENANCE
5.1. Clean with lightly oiled cloth before storing after use.
SX299RR Issue 1 28/04/20
Original Language Version
© Jack Sealey Limited
Refer to
instructions
Wear eye
protection
Wear protective
gloves
Wear safety
footwear
No. Description
1 Outer shroud
2 Key
3 Mandrel
g.1

Original Language Version
© Jack Sealey Limited
Sealey Group, Kempson Way, Suffolk Business Park, Bury St Edmunds, Suffolk. IP32 7AR
01284 757500 01284 703534 sales@sealey.co.uk www.sealey.co.uk
ENVIRONMENT PROTECTION
Recycle unwanted materials instead of disposing of them as waste. All tools, accessories and packaging should be sorted, taken to
a recycling centre and disposed of in a manner which is compatible with the environment. When the product becomes completely
unserviceable and requires disposal, drain any fluids (if applicable) into approved containers and dispose of the product and fluids
according to local regulations.
Note: It is our policy to continually improve products and as such we reserve the right to alter data, specifications and component parts without prior
notice.
Important: No Liability is accepted for incorrect use of this product.
Warranty: Guarantee is 12 months from purchase date, proof of which is required for any claim.
SX299RR Issue 1 28/04/20