www.homesystems-legrandgroup.com
Smarther
SXG/SXM/SXW8002 – XW/SXW8002W – XW/XM/XG8002
0 490 38 – 0 490 39 – 0 490 40
User and installation manual
2
Smarther
User and installation manual

32
Contents
Smarther
User and installation manual
Your Smarther, use it now! 5
Heat your home immediately (Boost) 5
Set the temperature 6
Installation 7
Flush-mounted installation (SXG8002 / SXM8002 / SXW8002) 7
With 503E boxes 7
With 500 boxes 8
With 502PB boxes 8
Wall-mounted installation SXW8002W 9
Front view 10
Symbols on the display 11
Rear view 12
SXG8002 / SXM8002 / SXW8002 12
Wiring diagrams 12
SXW8002W 13
Wiring diagrams 14
Technical data 15
Regulatory warnings 15
Operation 16
Basic functions 18
Boost functions 18
Set the temperature 20
Room humidity display 23
Control the Smarther with Home + Control app 24
Introduction 24
Download the Home + Control app 25
Account registration 26
Preliminary operations for the use of a smartphone with iOS operating system 27
Associate the Smarther 29
if you use a smartphone with Android operating system 30
If you use a smartphone with iOS operating system 34
Create a program using the guided procedure 40
Access your home through invitation 43
Forgotten password 44
Authentication 45
Home Page 46
Control a single device 48
Set the temperature 48
Set the Boost function 50
Control all the devices in the room 51
Control all the home devices 52
Absent Function 52
Frost guard Function 53
Set a program for all the home devices 54
44
Smarther
User and installation manual
Settings 55
Manage my home 55
Home parameters 55
Room settings 58
Smarther settings 60
Valve settings 69
Parameters 72
Schedules 73
Create a new program 73
Duplicate a program 74
Rename a program 75
Change a time interval 76
Activate a program 78
Delete a program 79
Copy-paste the days 80
Set point 81
Example of creation of a new program from an existing one 85
Thermal comfort 91
Chart 92
Manage my guests 93
Invite a user 94
Delete a user 94
Add a product to this home 95
Add valves to the Smarther thermostat 96
Install a new home 99
Quick selections 100
Help 101
My account 102
Tell us what you think! 108
Logout 108
Reset 109
Resetting the Wi-Fi configuration and the HOMEKIT settings 109
Reset to the factory settings 111
Manage your Smarther with third-party apps 114
Control your Smarther with HOMEKIT 115
Quick guide
54
Smarther
User and installation manual
4
Your Smarther, use it now!
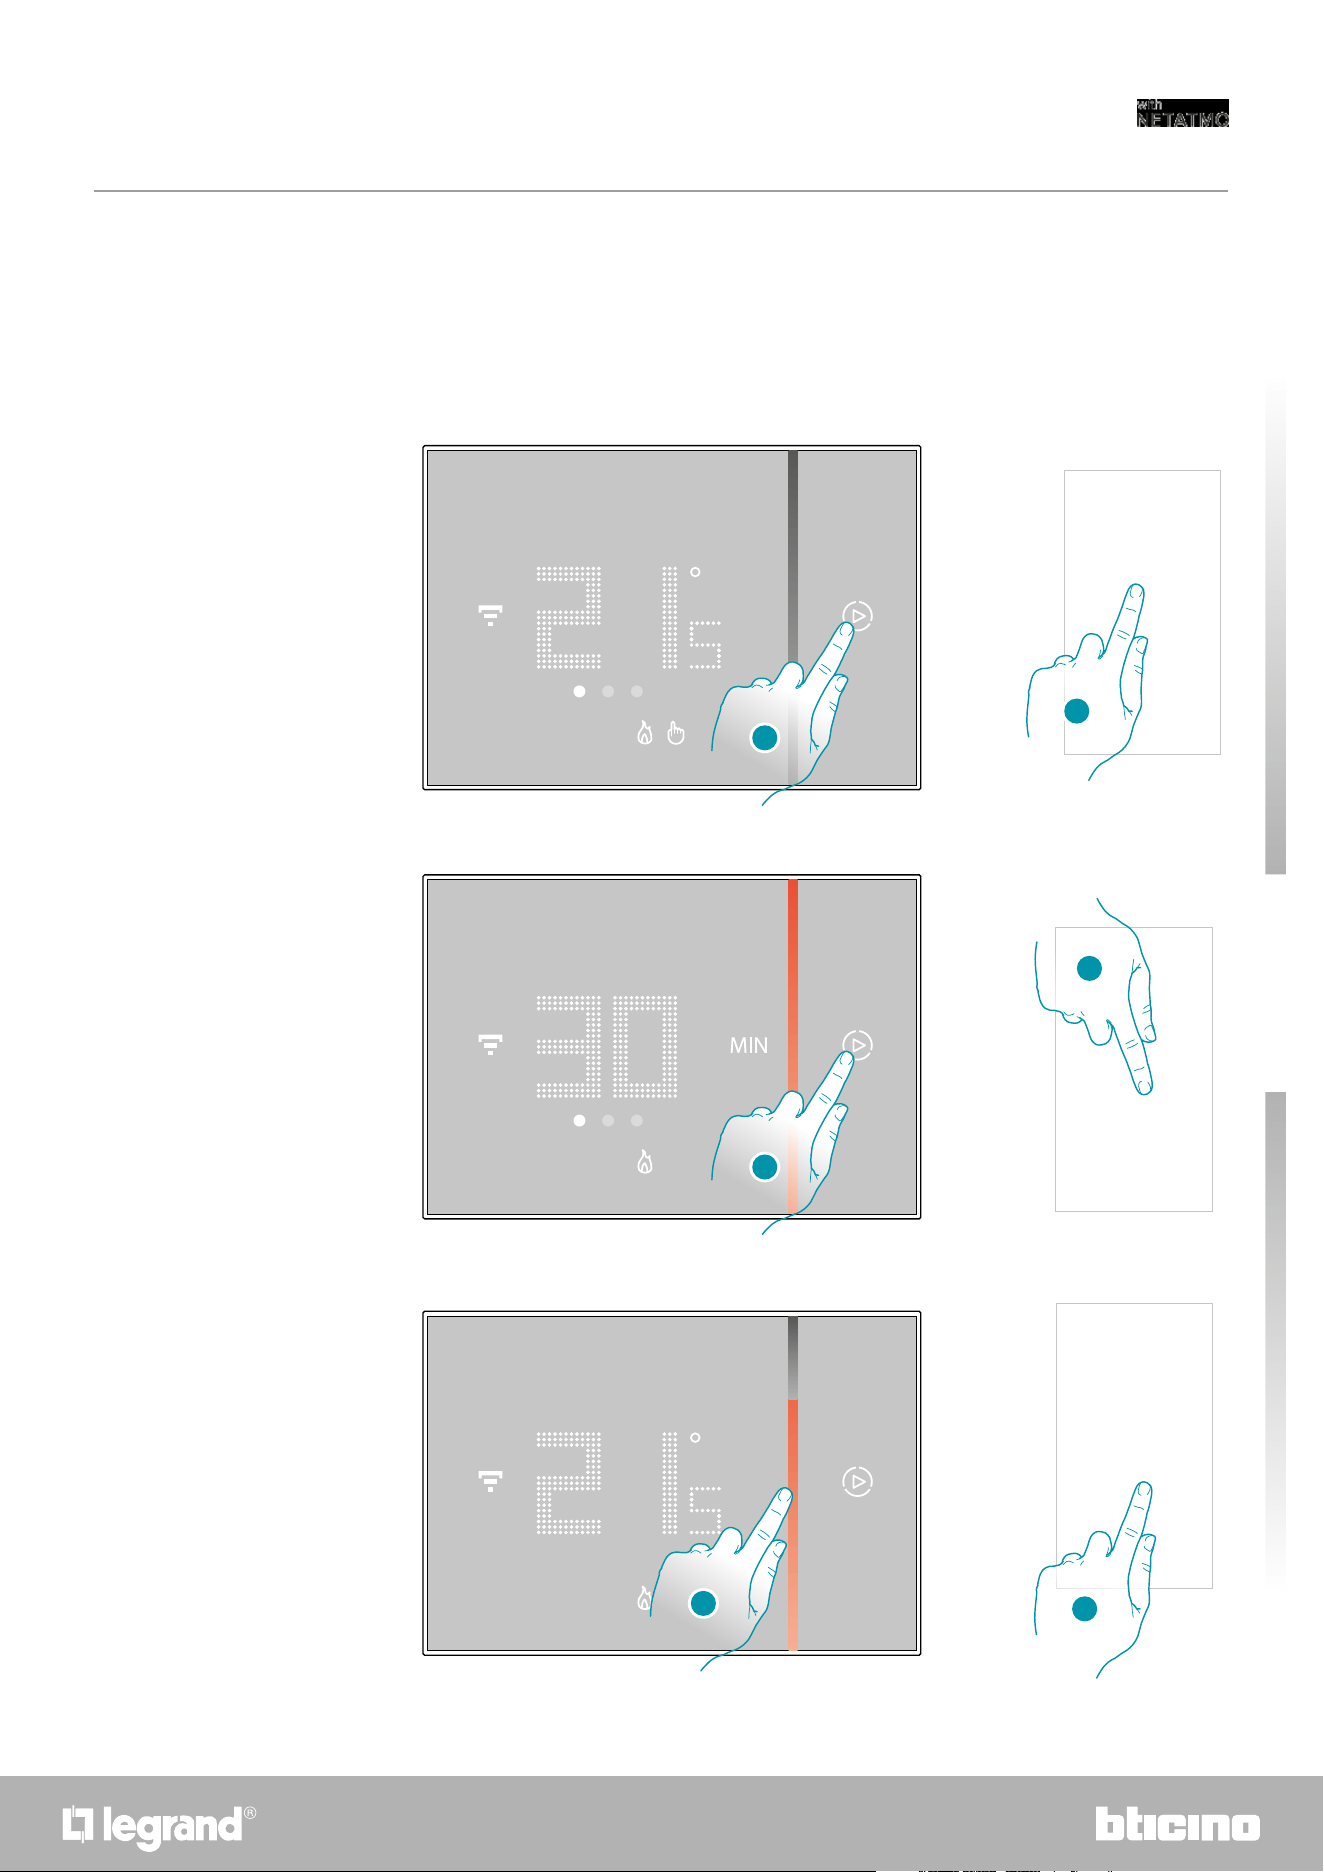
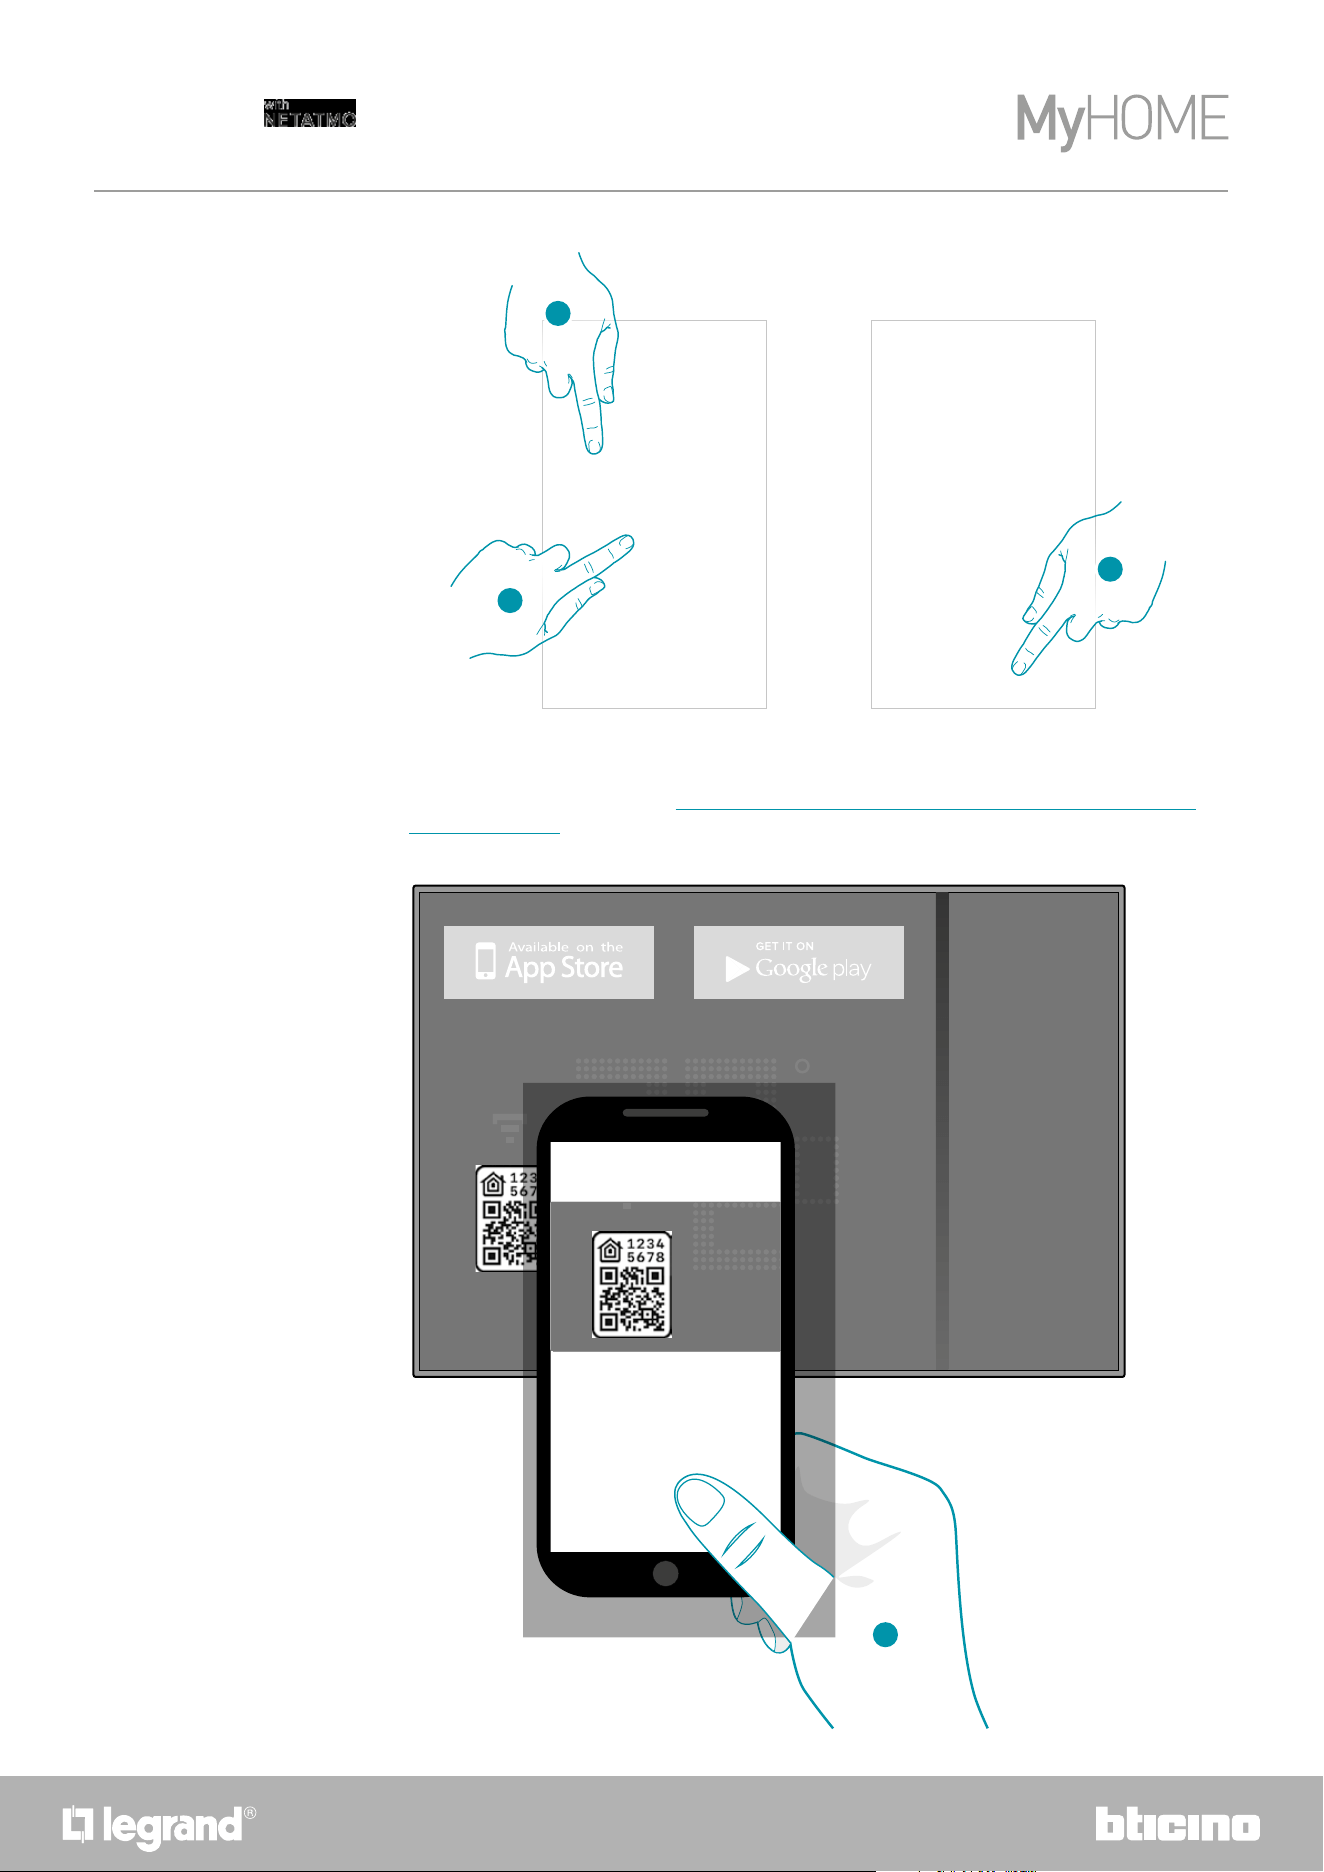
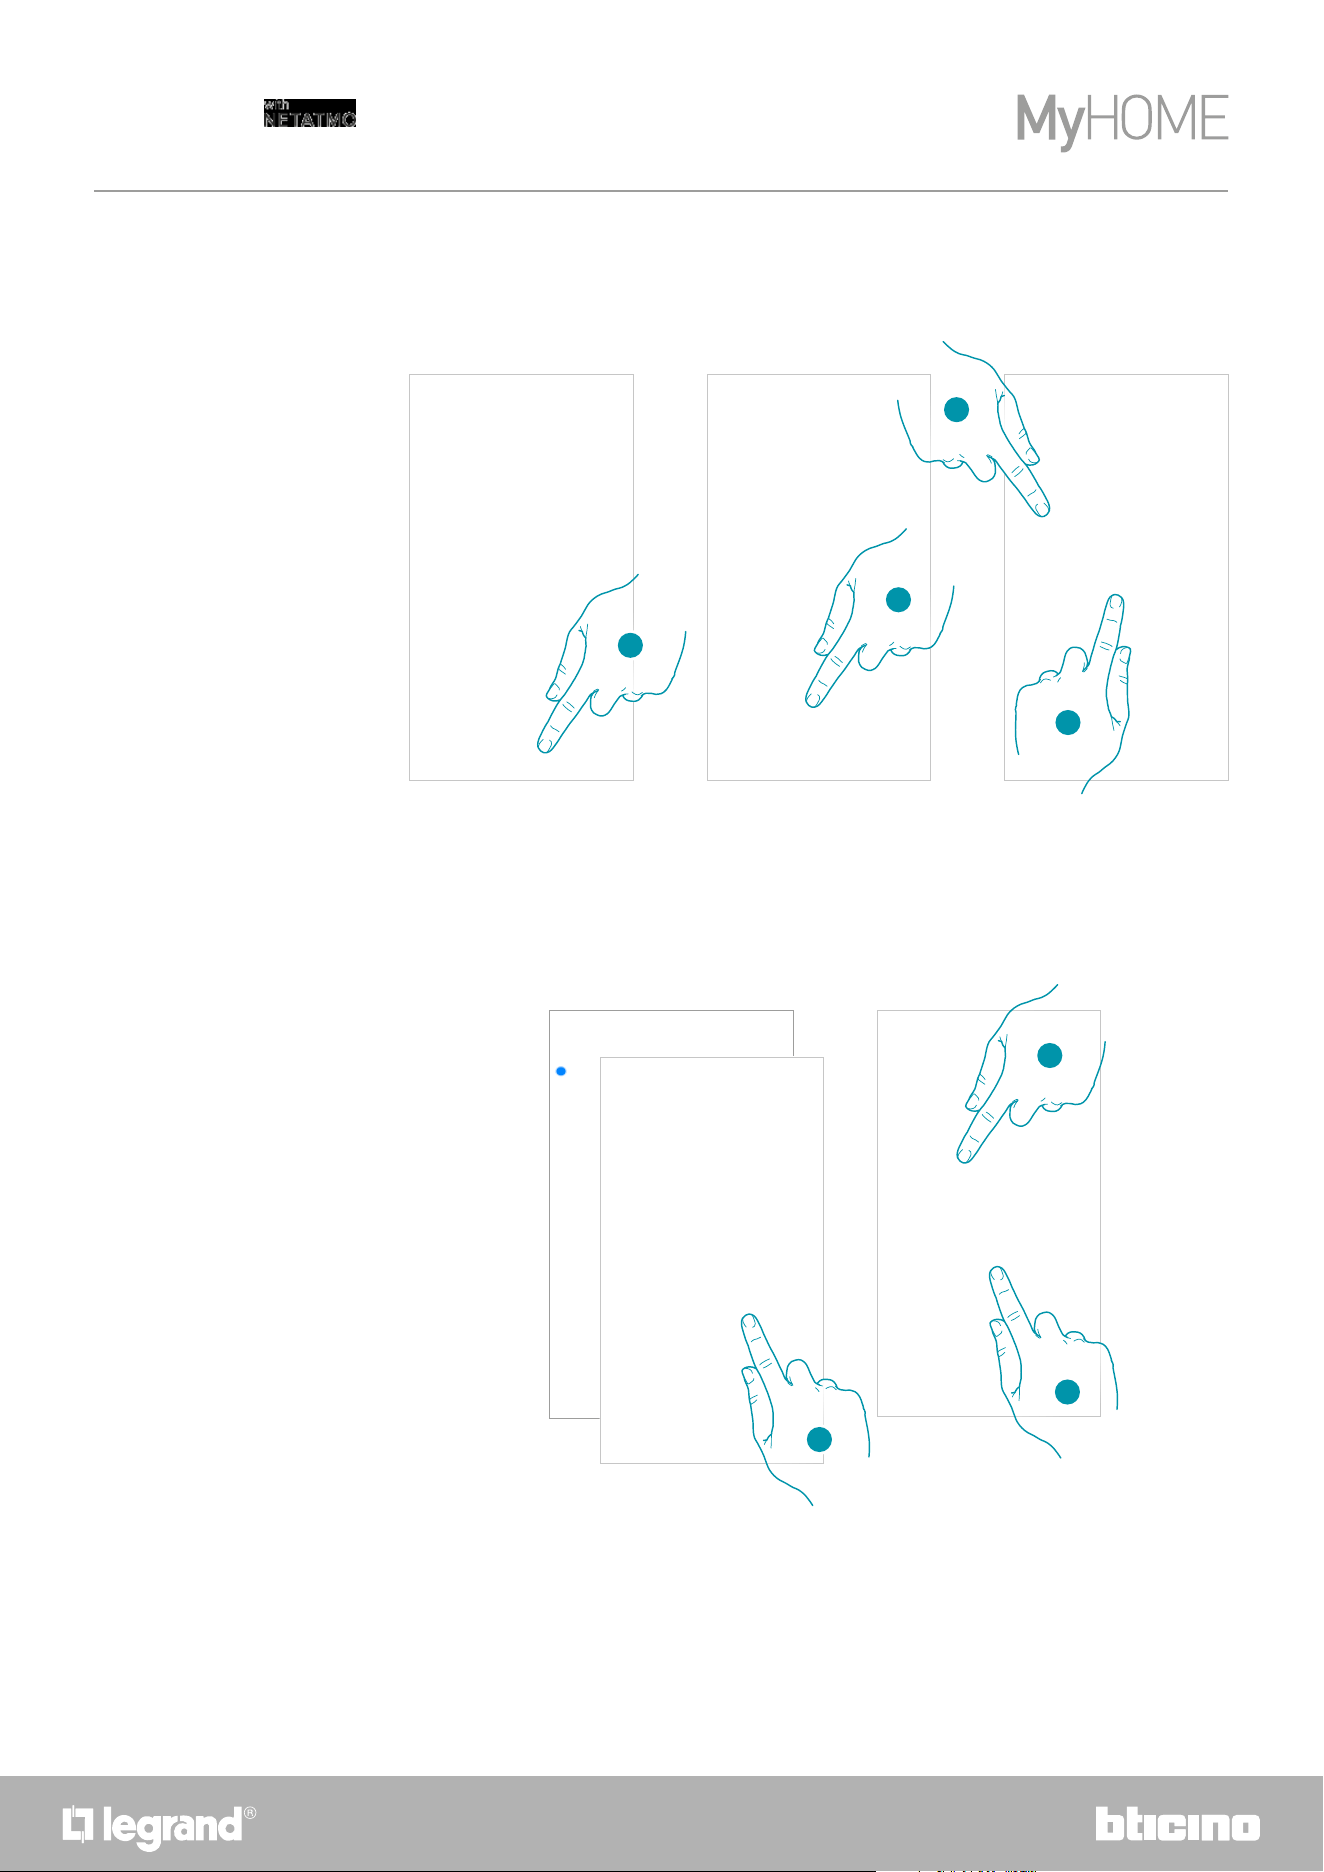
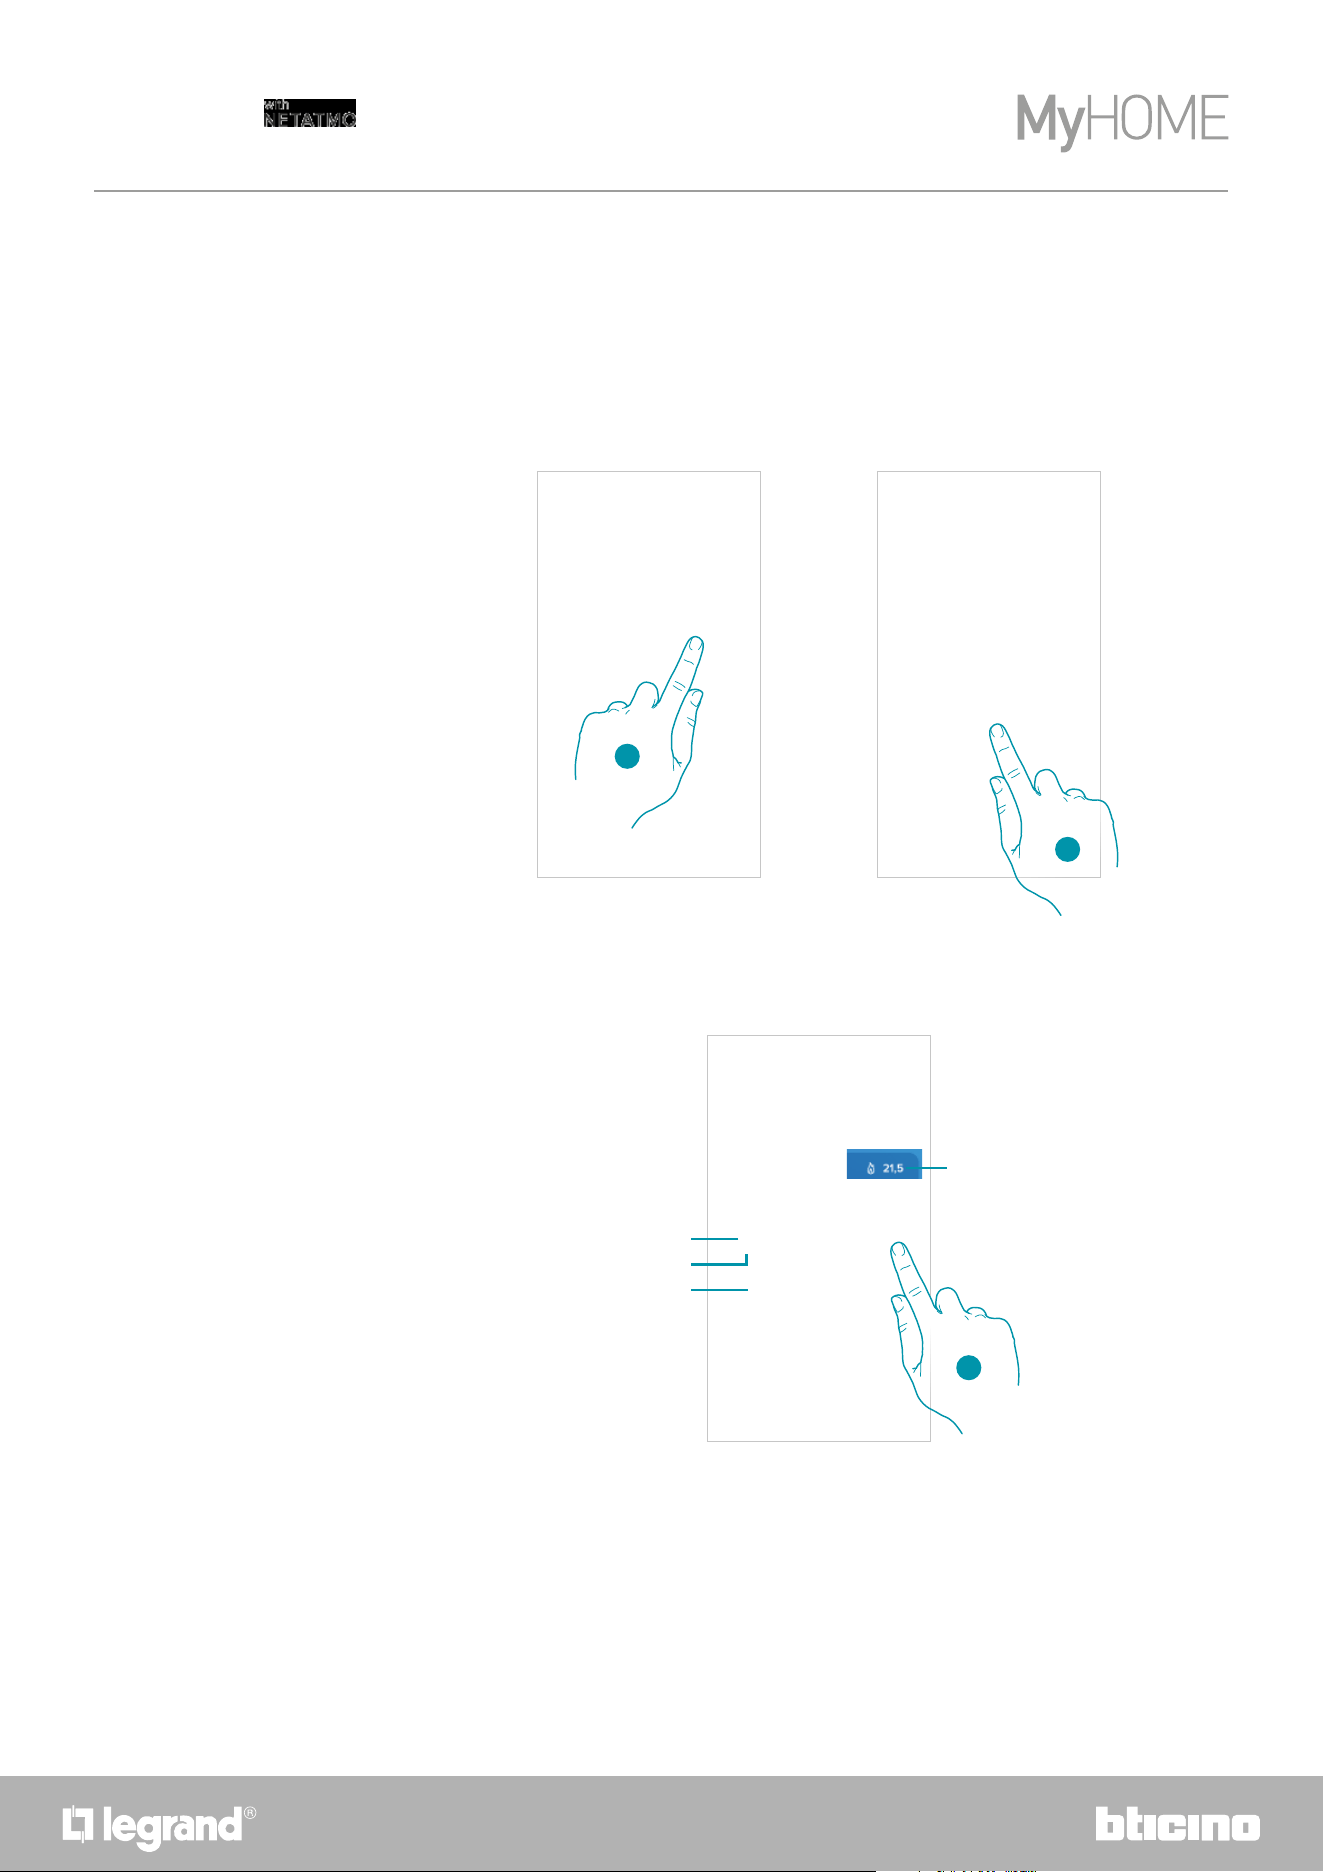
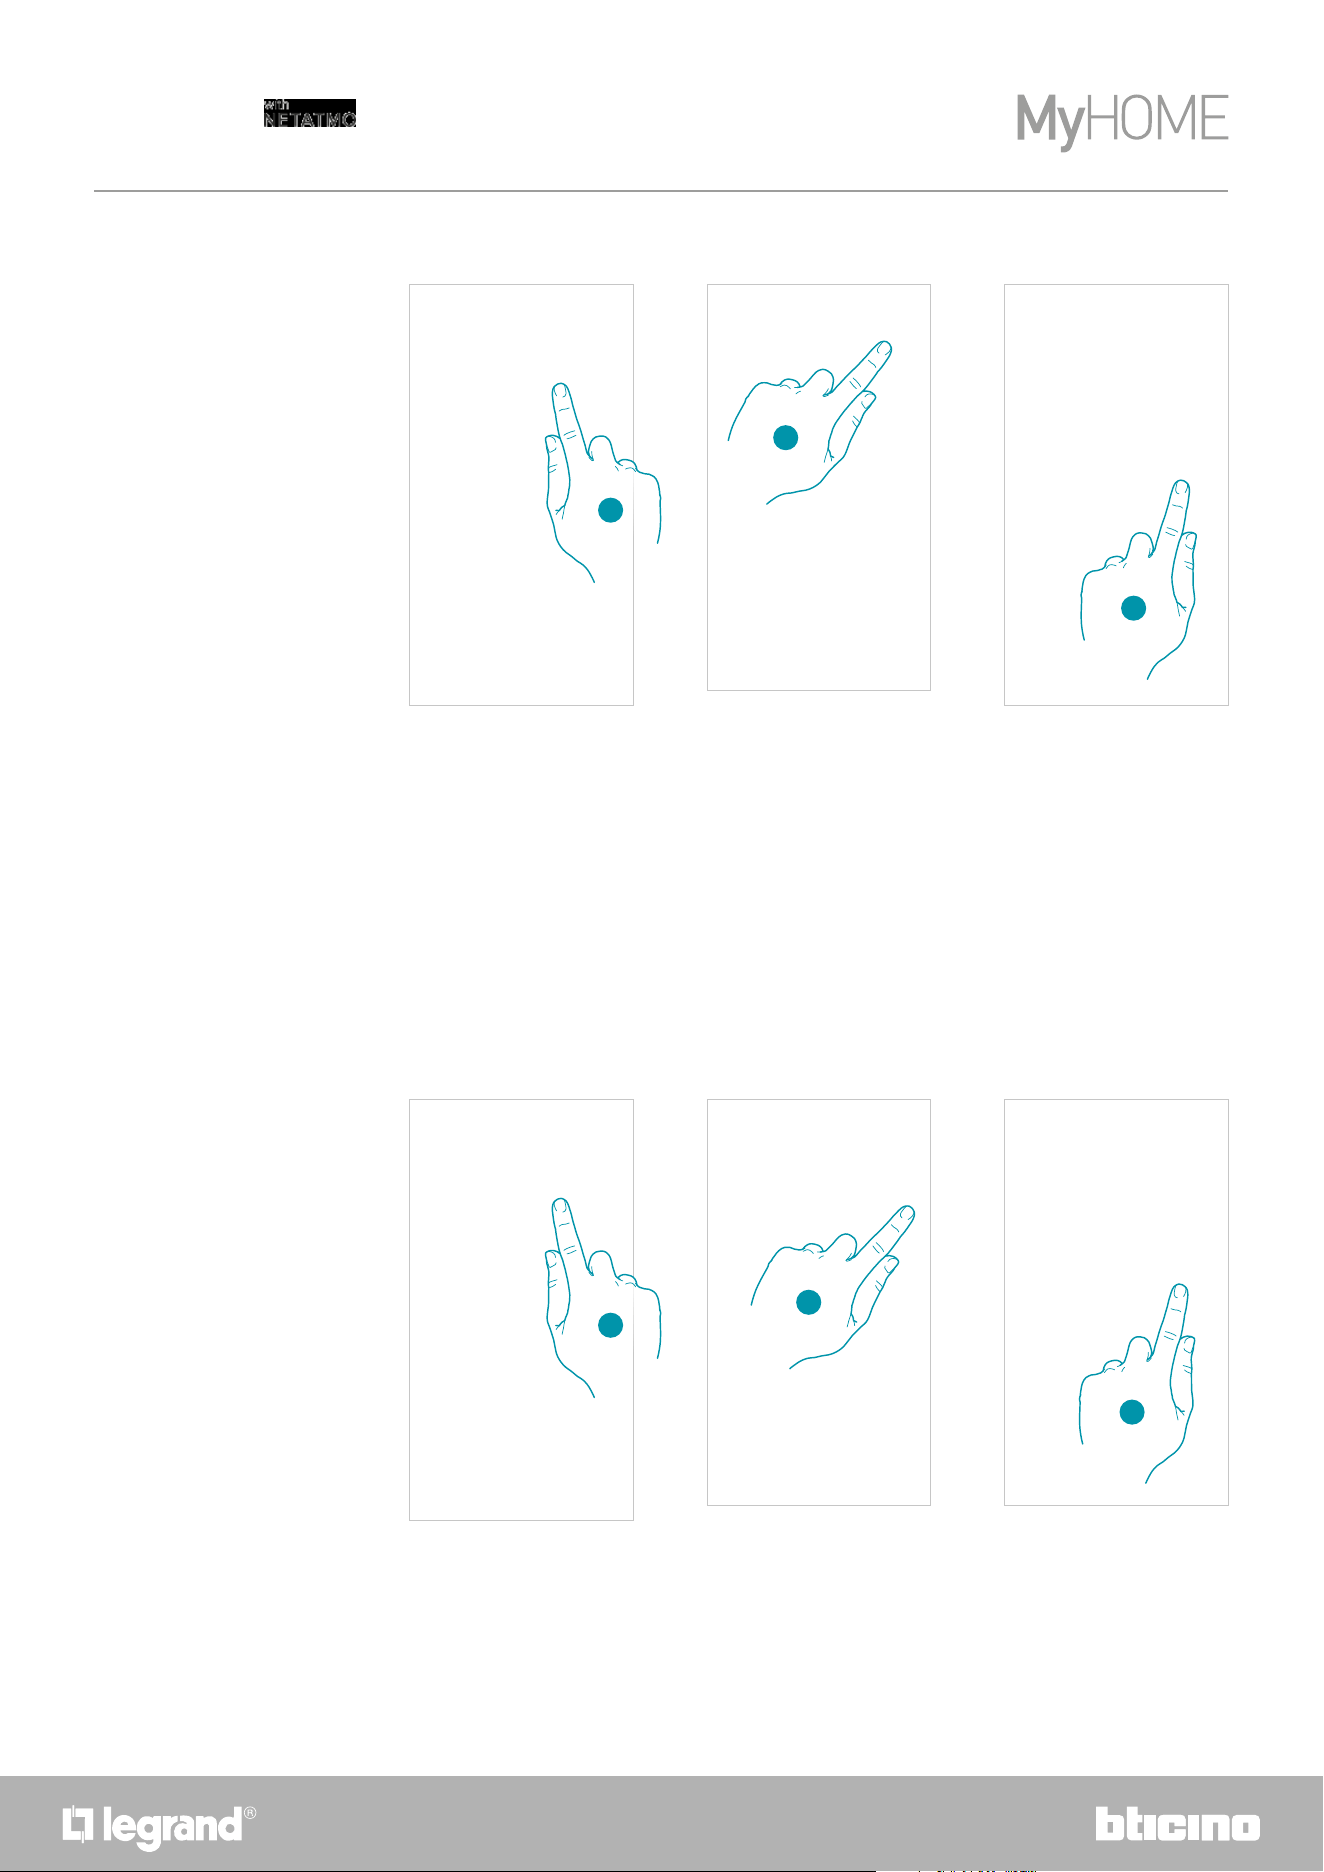
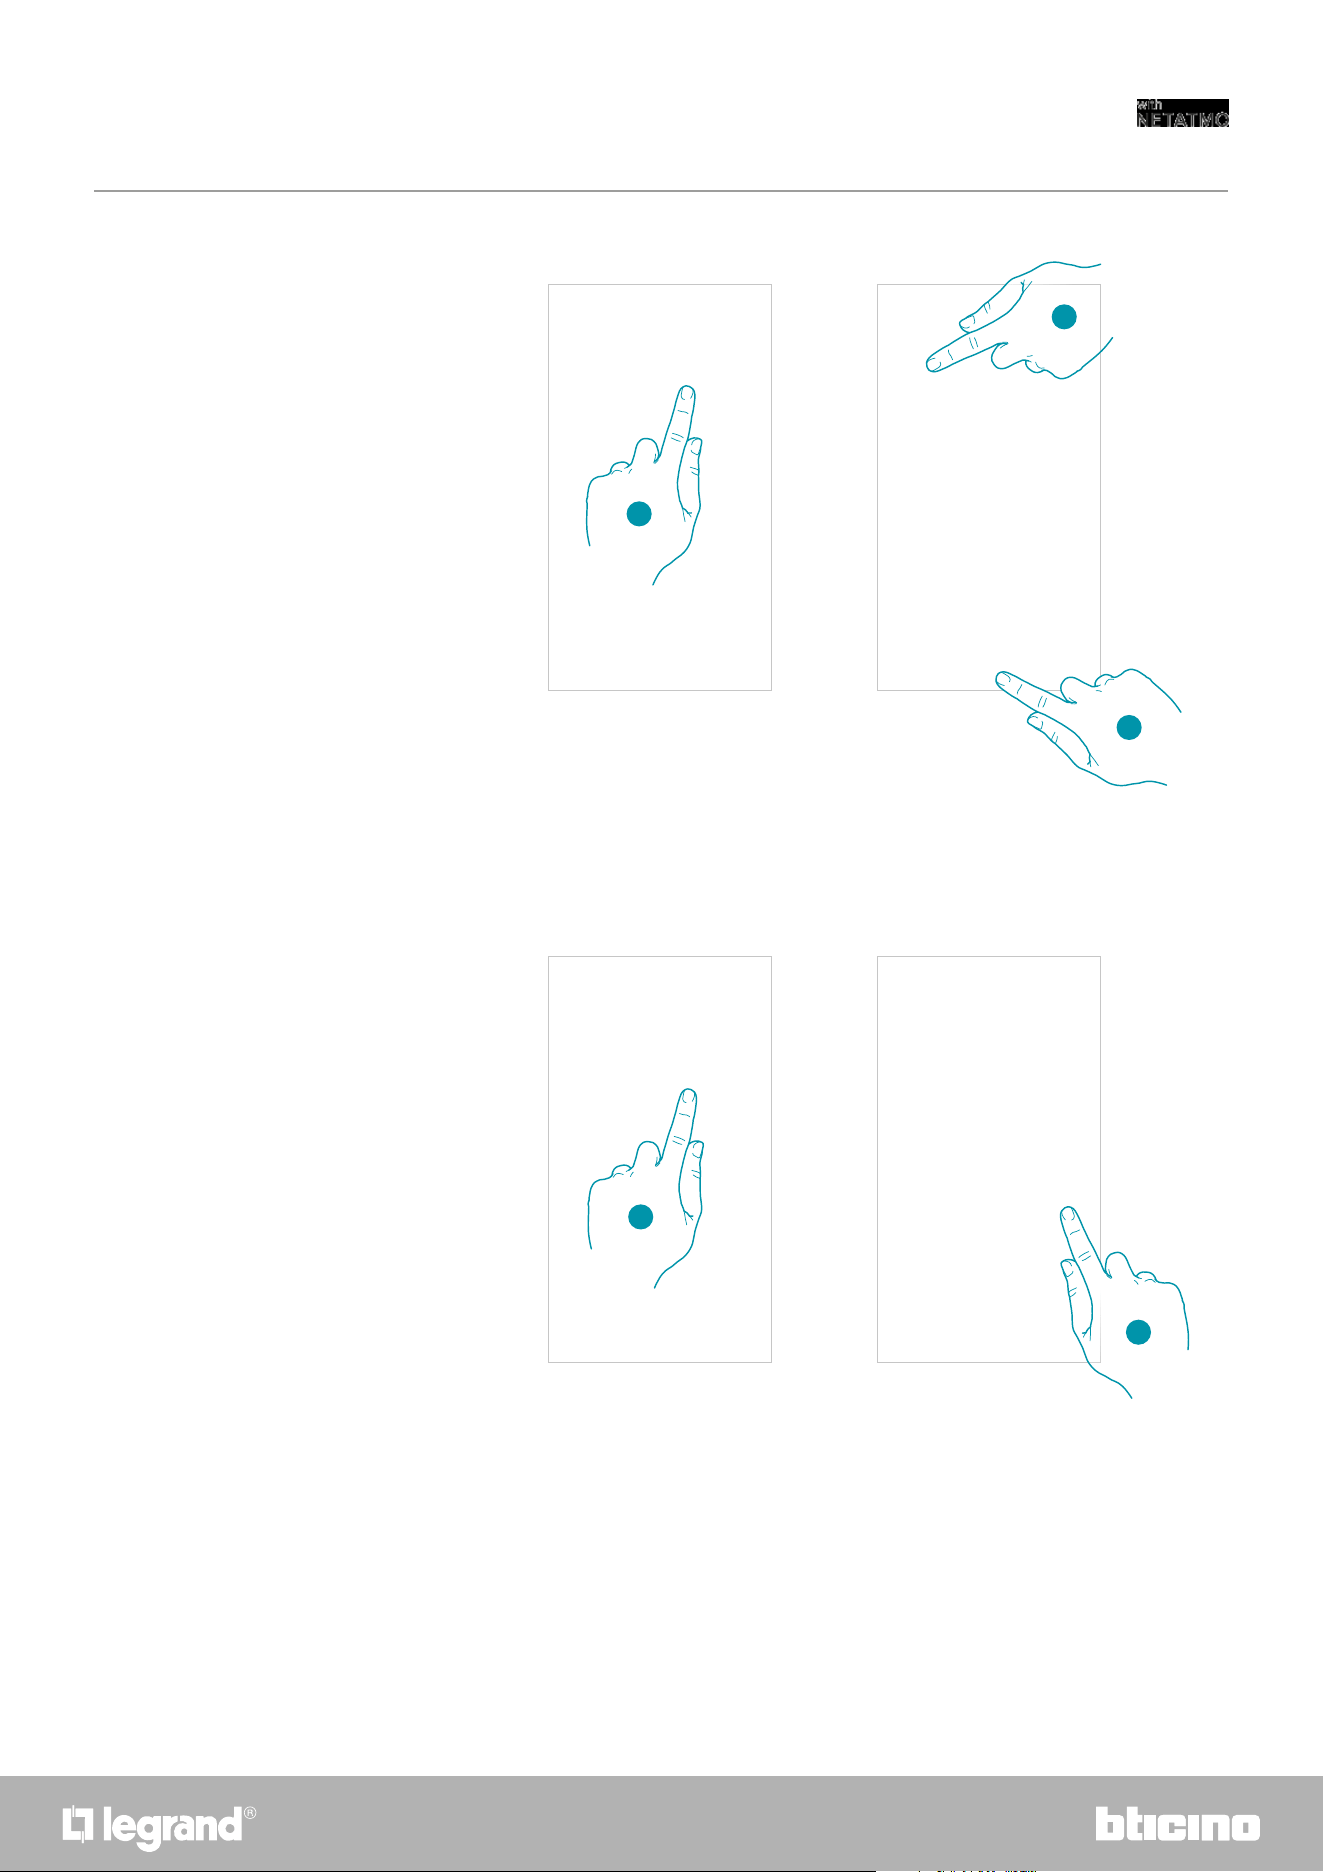
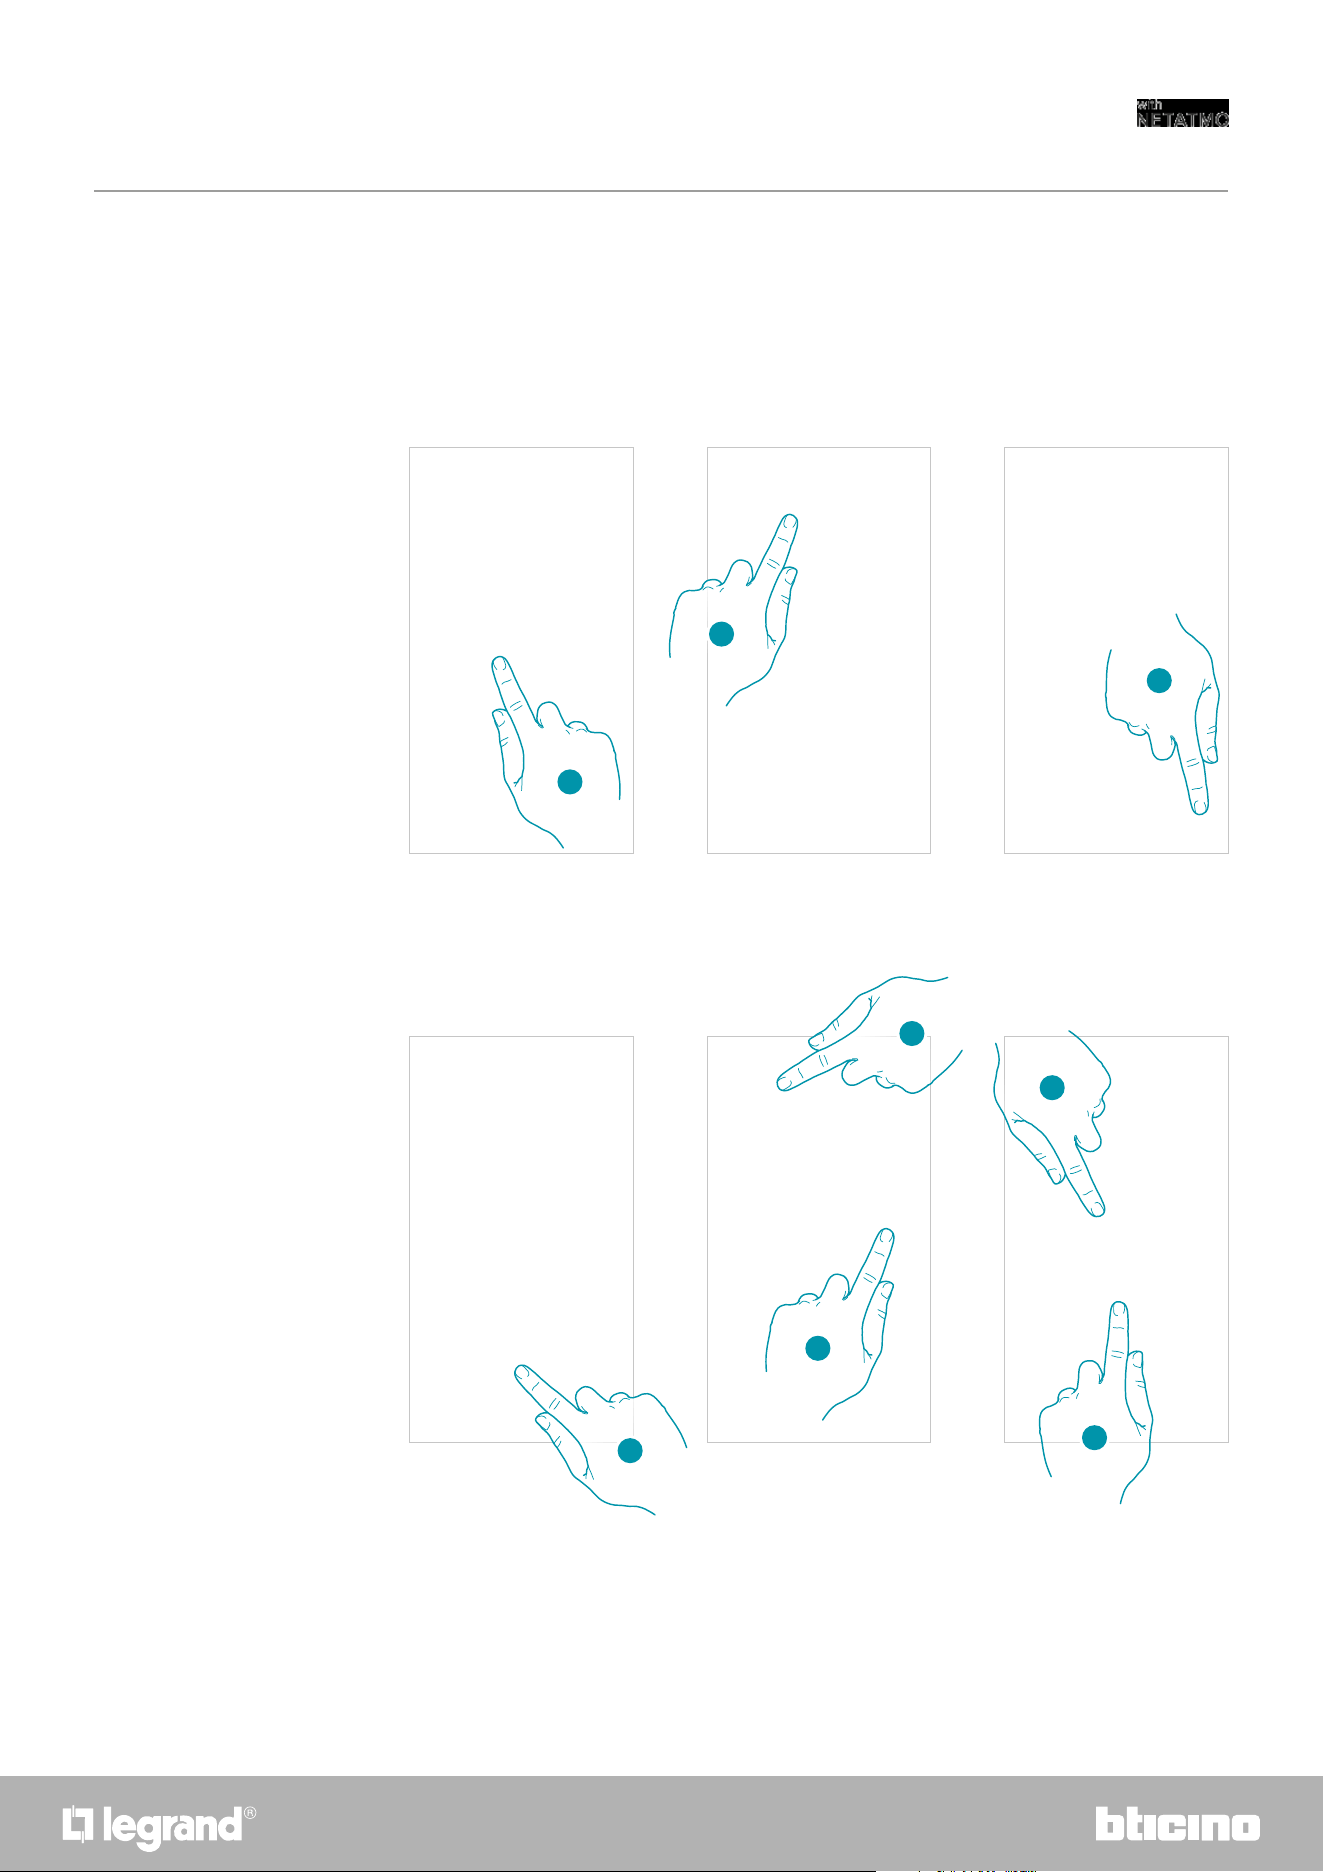
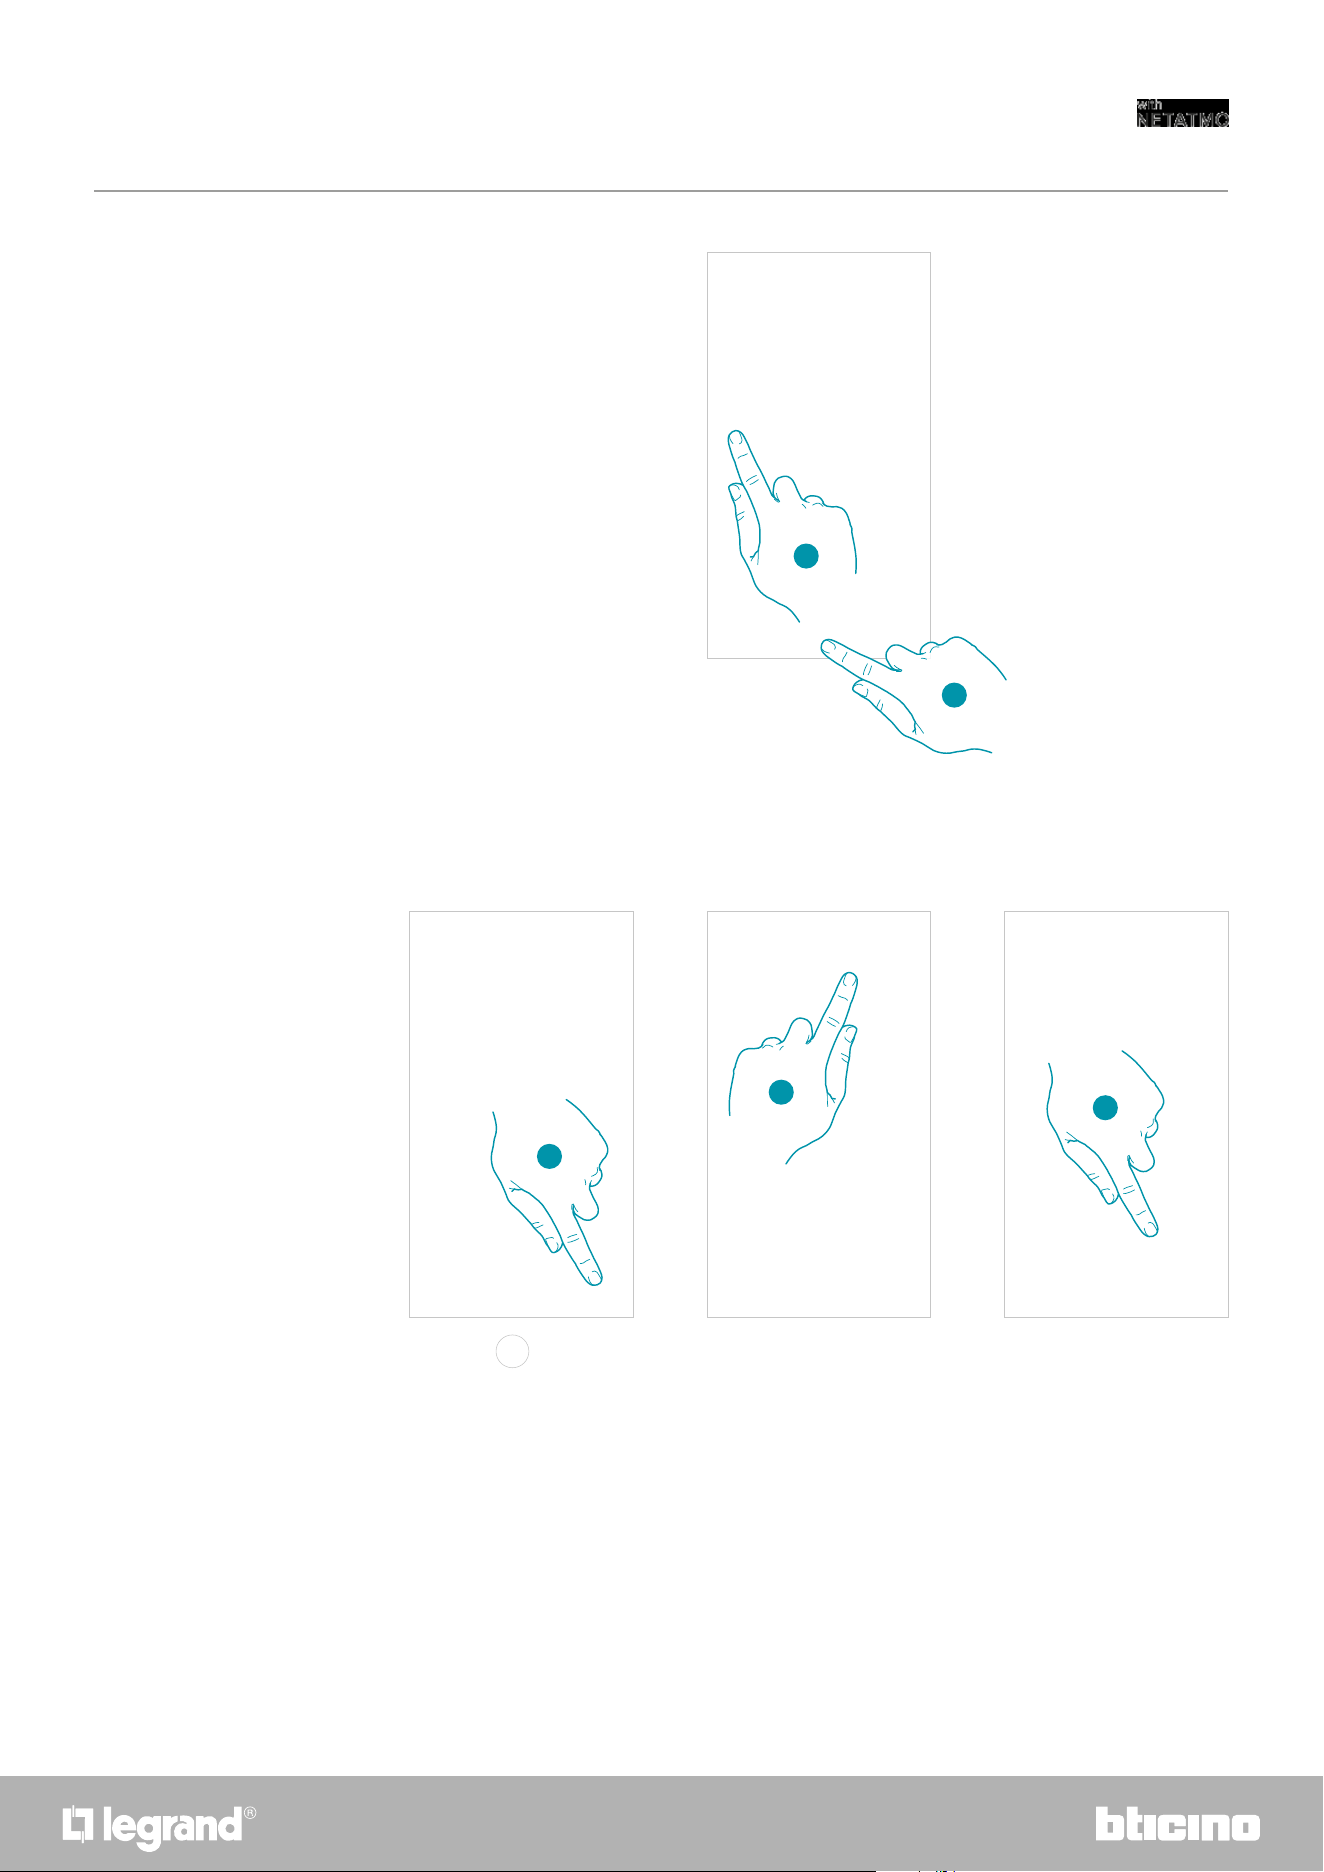
Heat your home immediately (Boost)
You can switch your system on quickly with the BOOST function
ACTIVATION FROM DEVICE or FROM APP
1
1
1. Touch to activate the function
2
2
2. Select the switching-on period from 30/60/90 minutes
3
3
3. A visual indicator will show you the remaining time for which your system will remain on
6
Quick guide
6
Smarther
User and installation manual
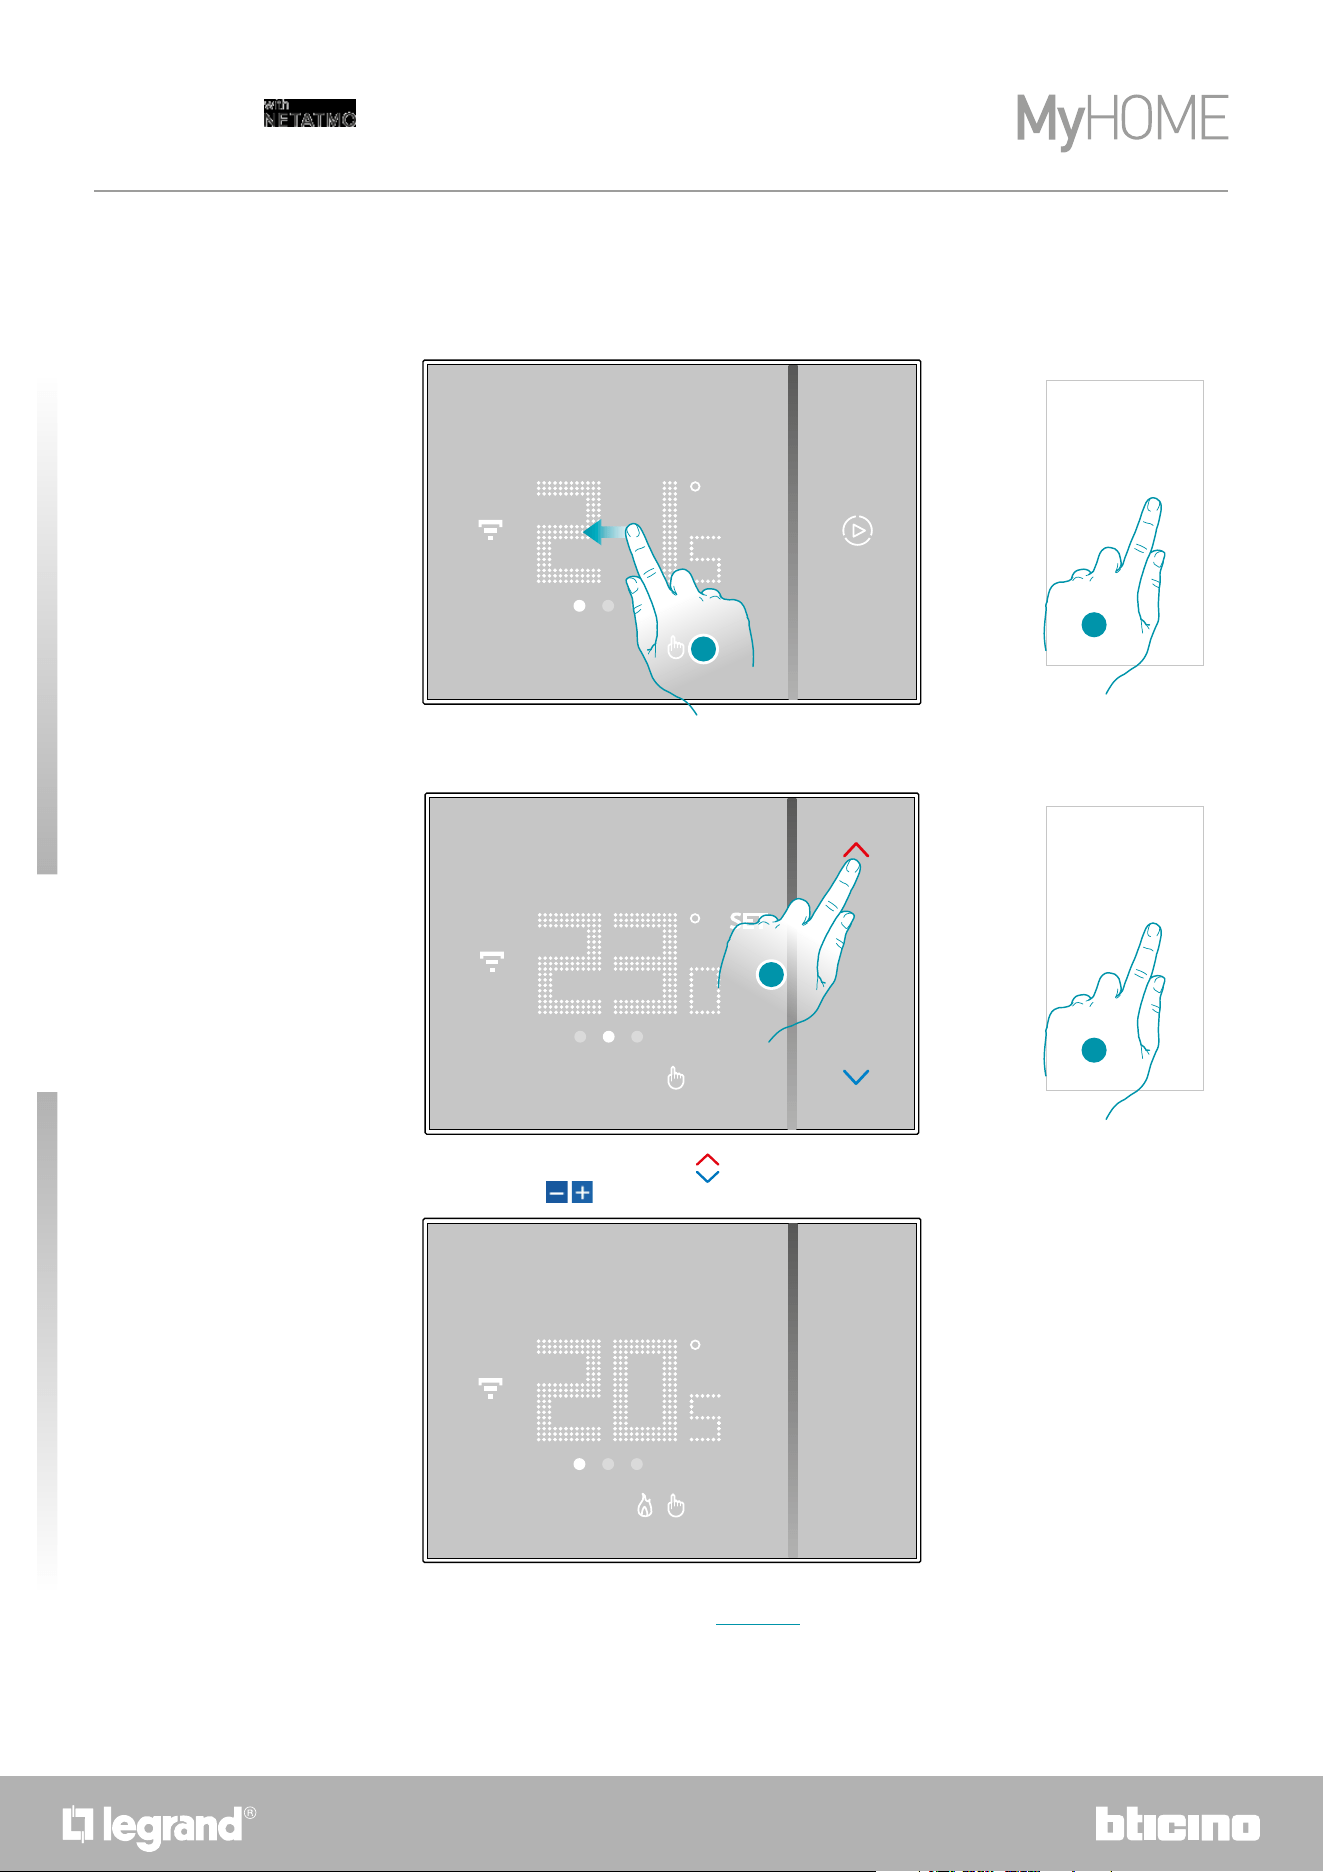
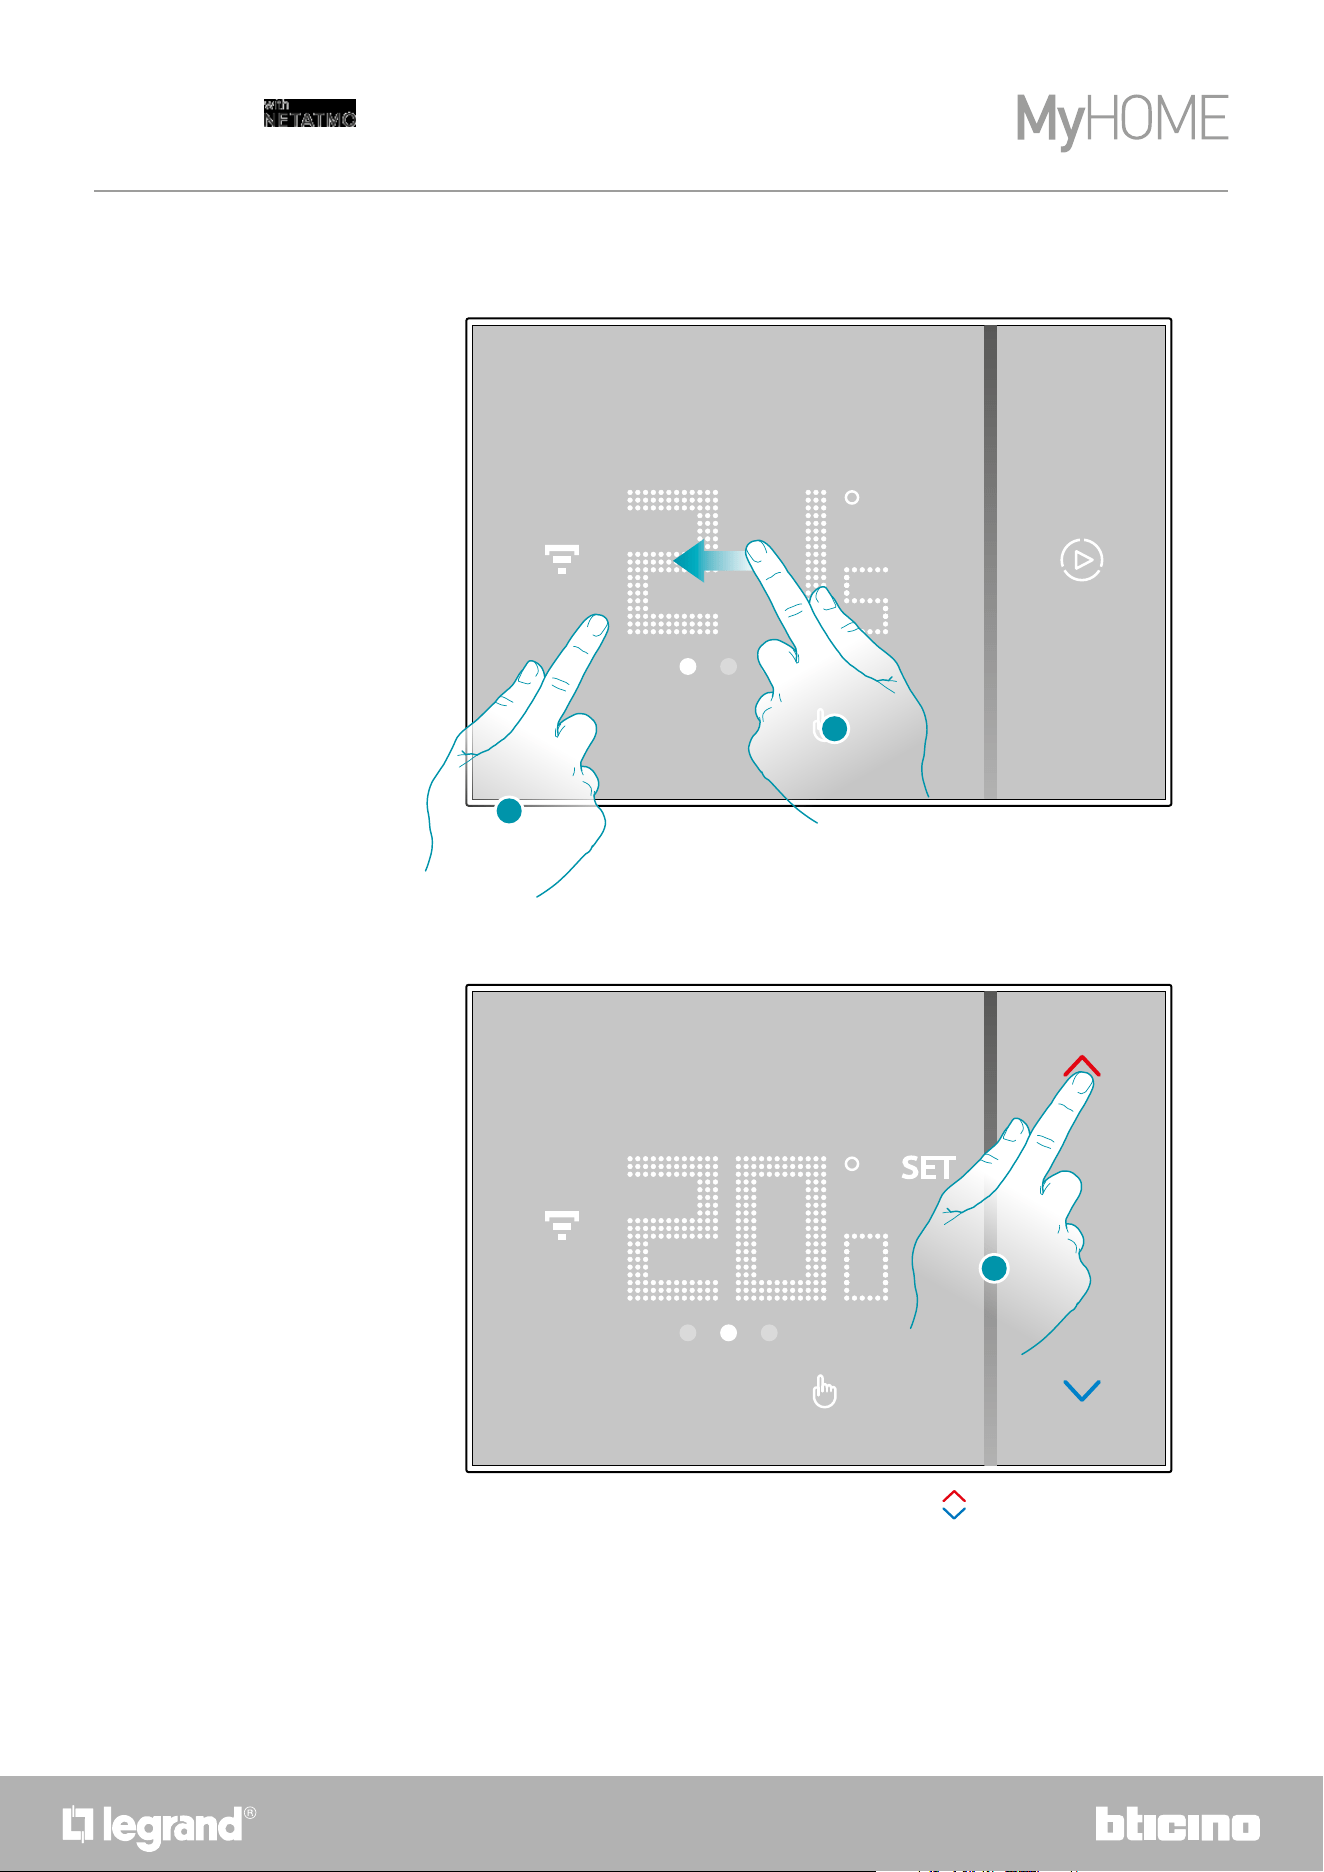
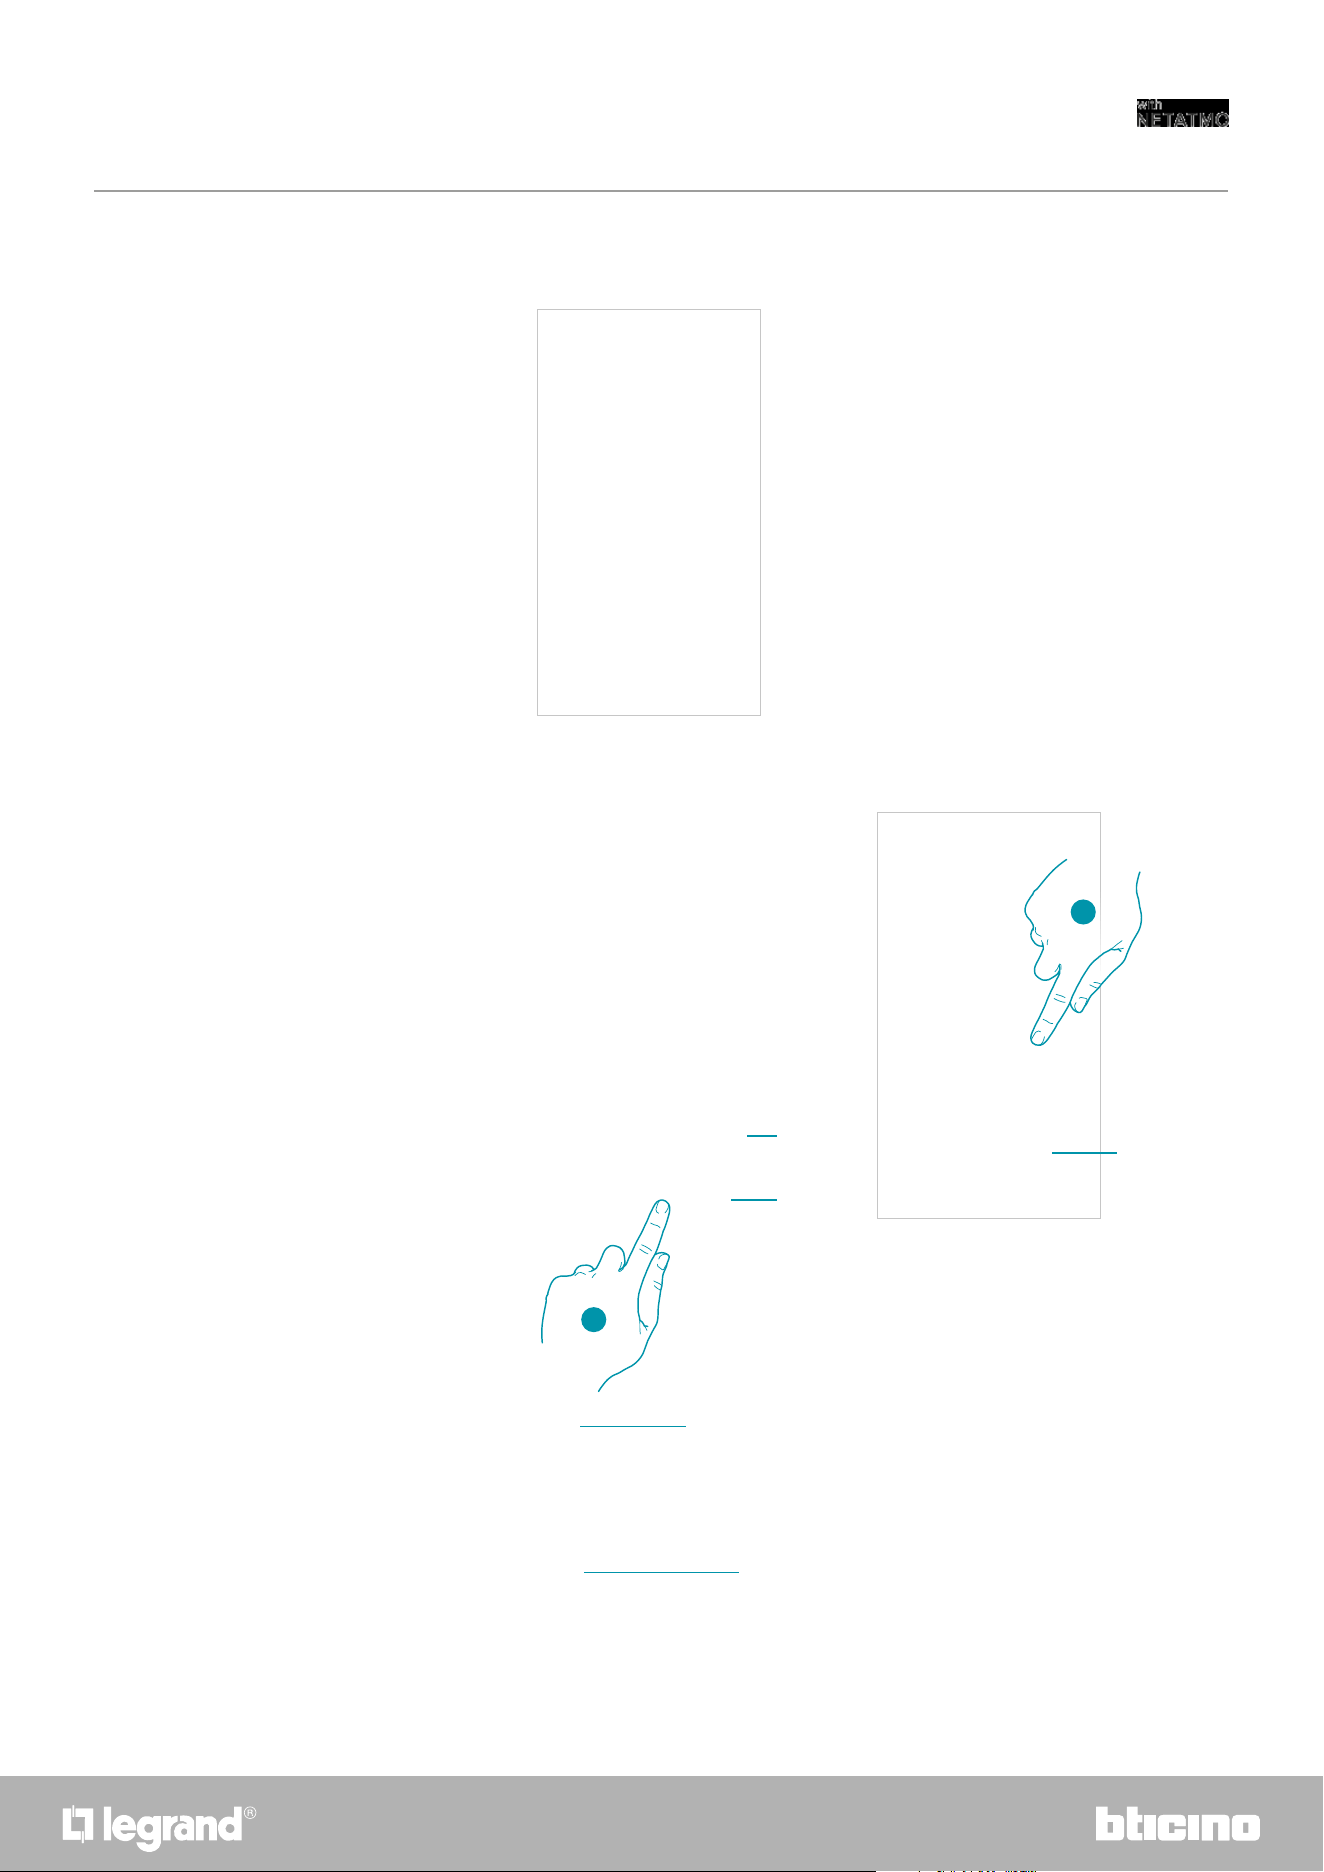
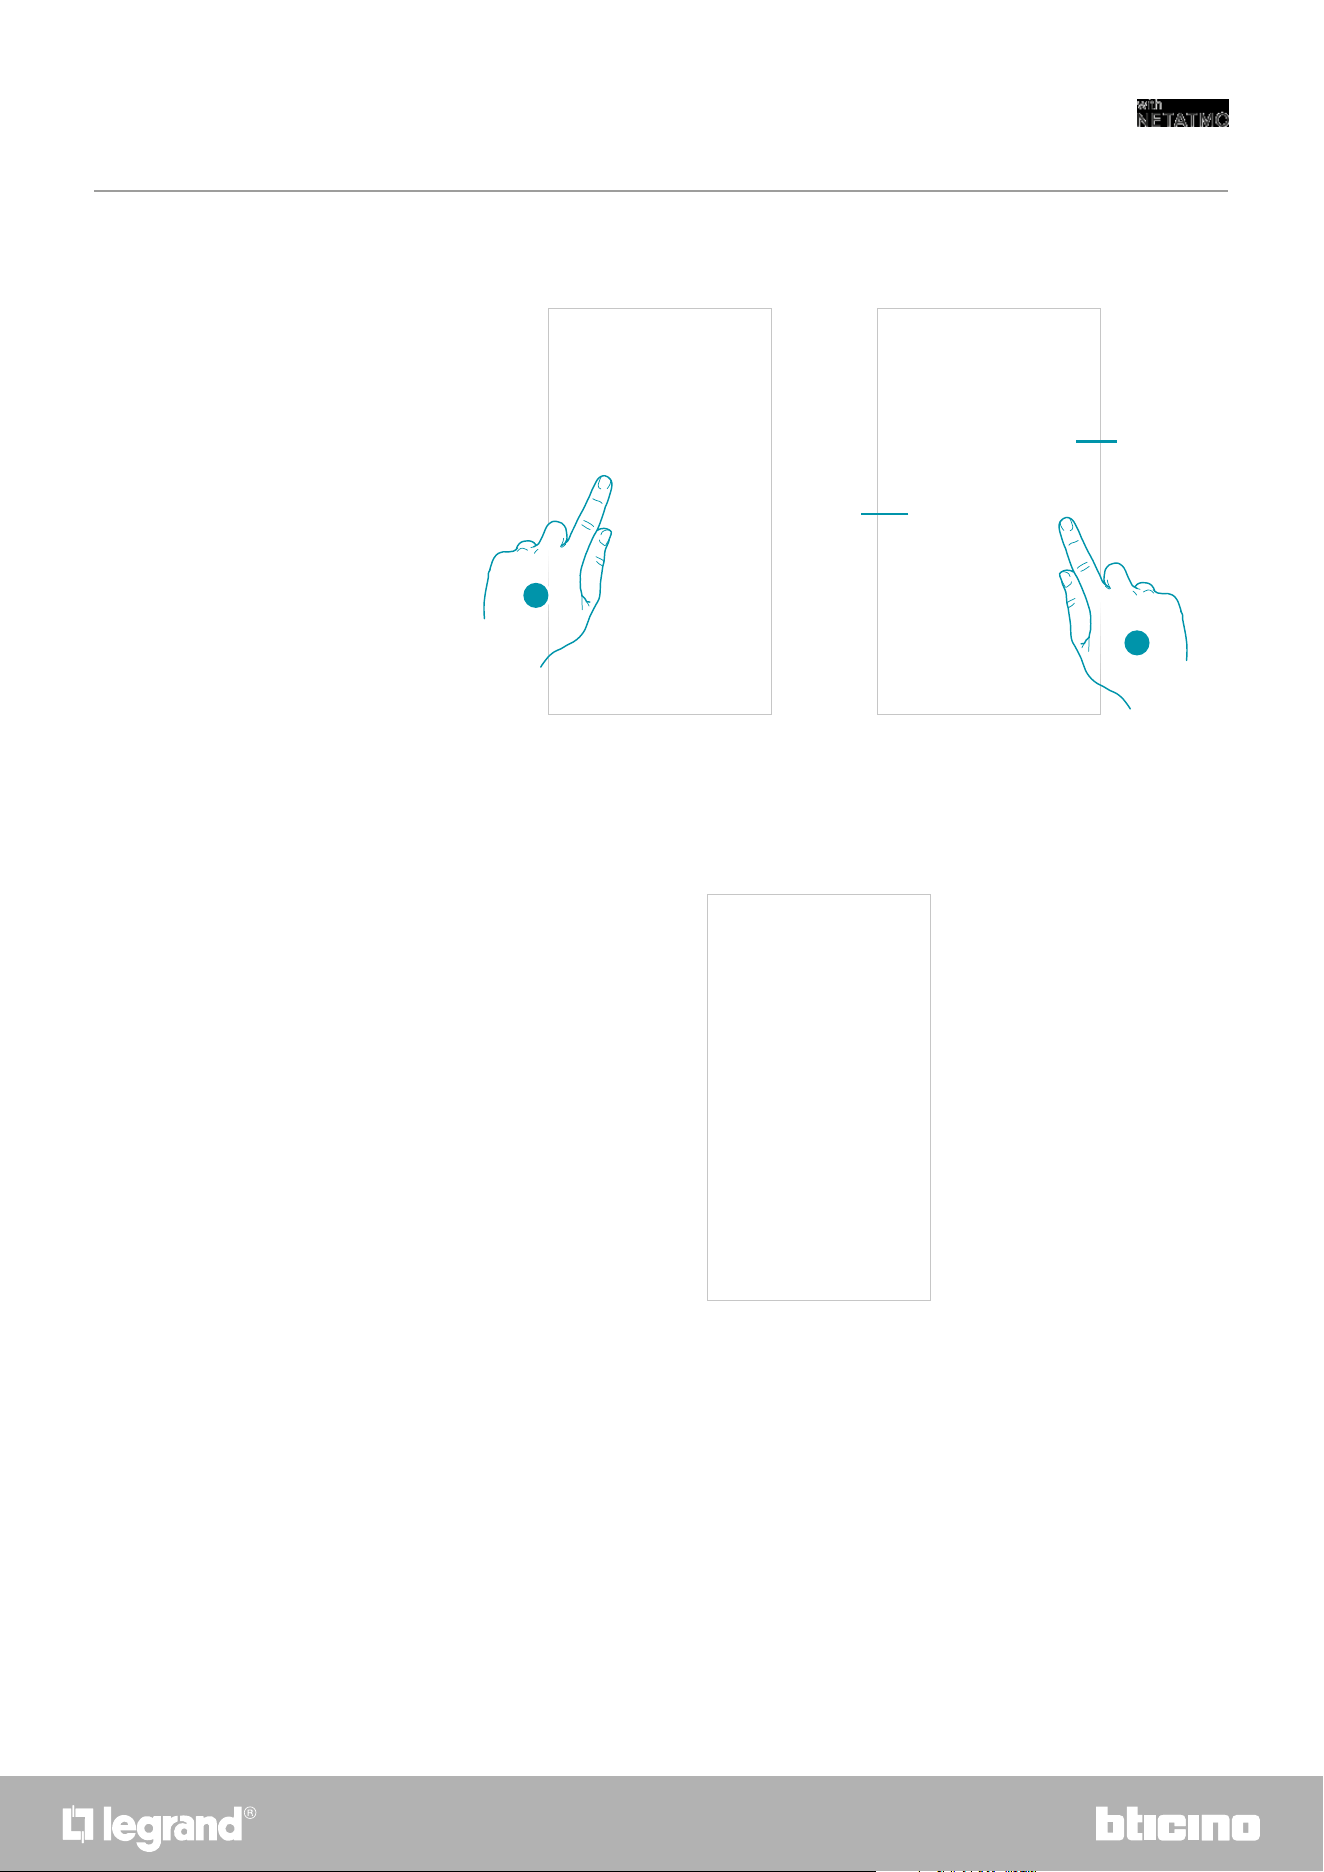
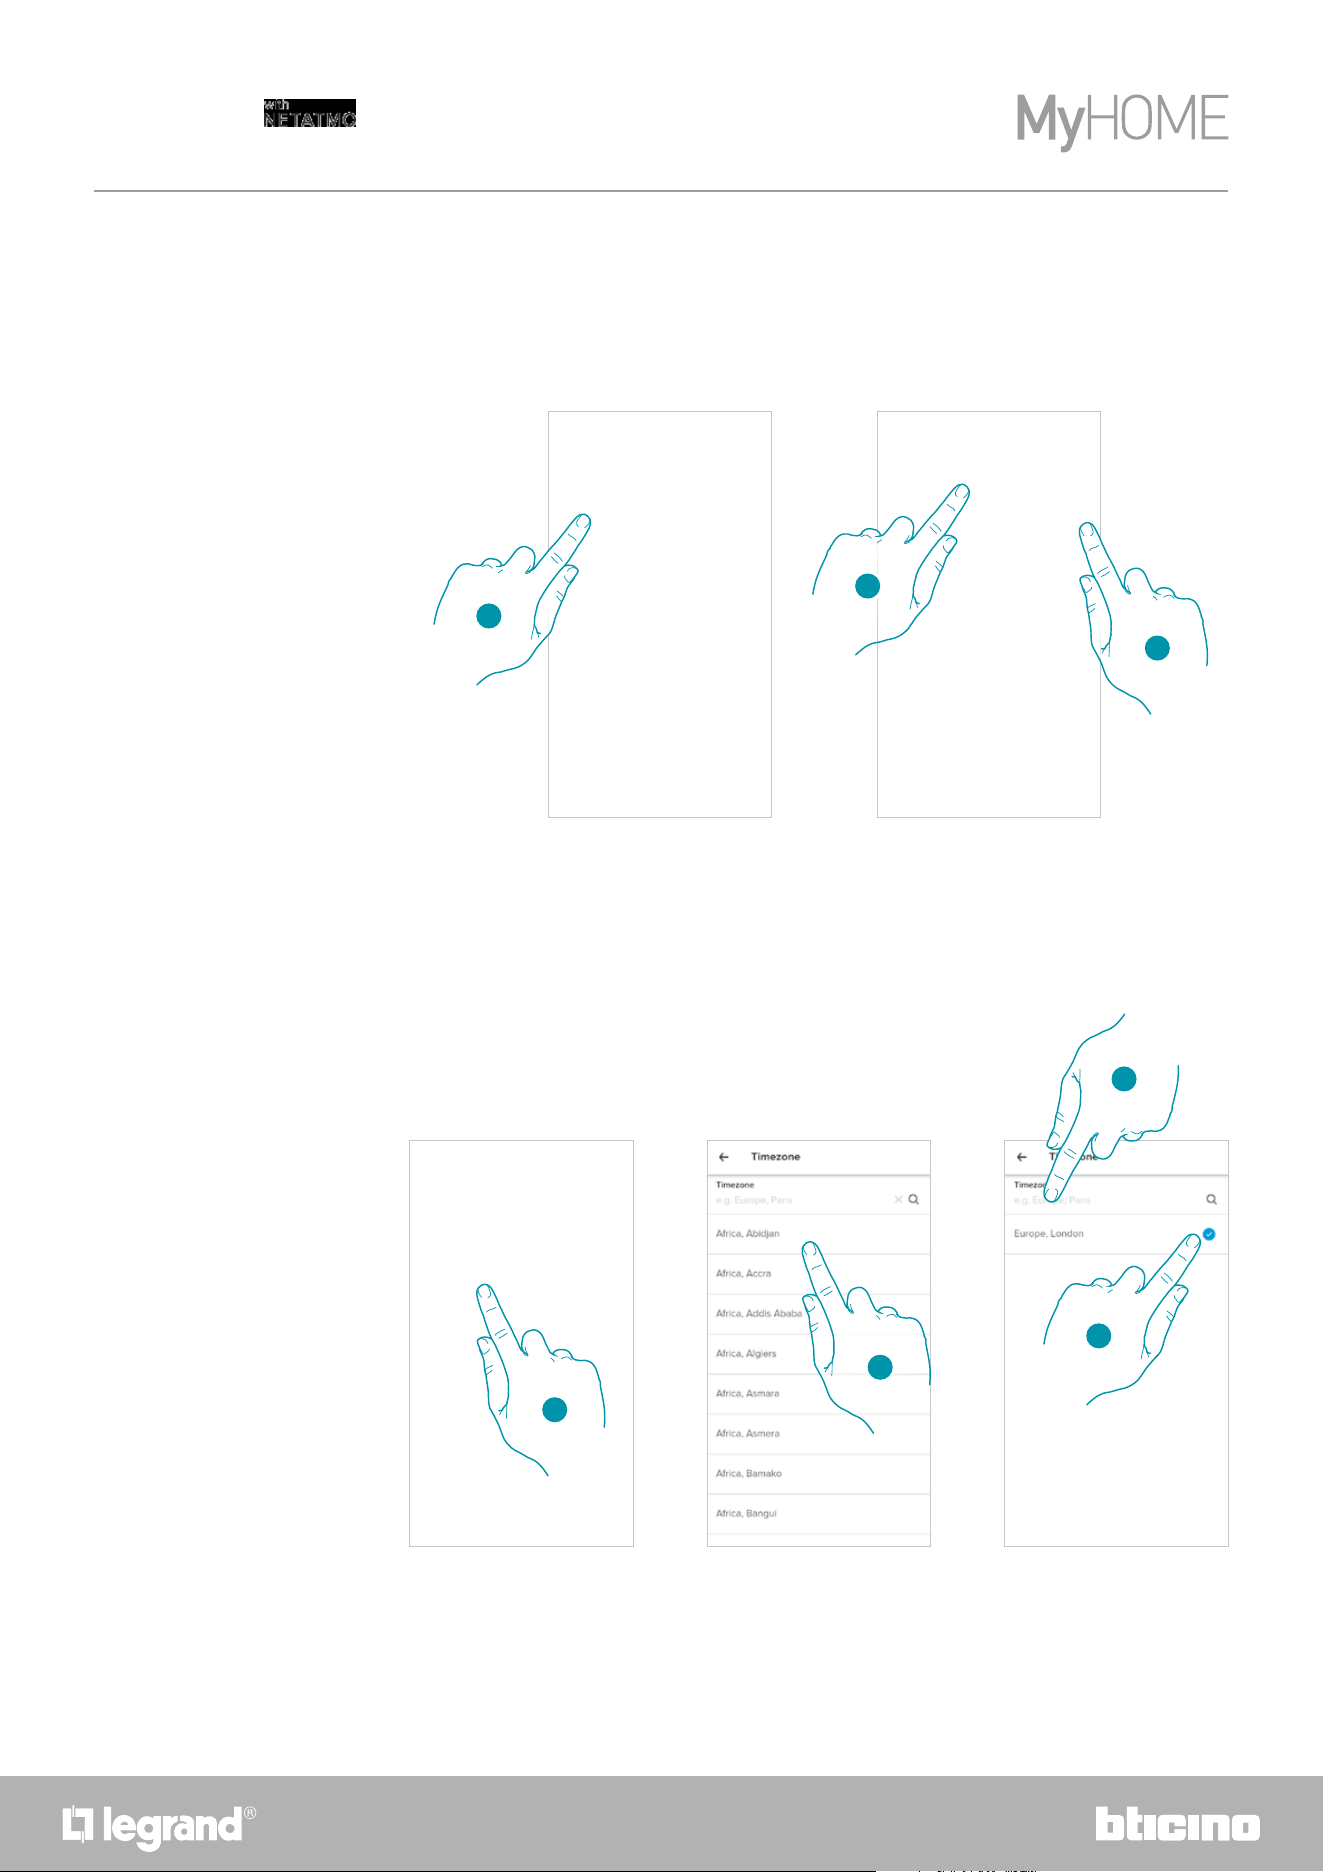
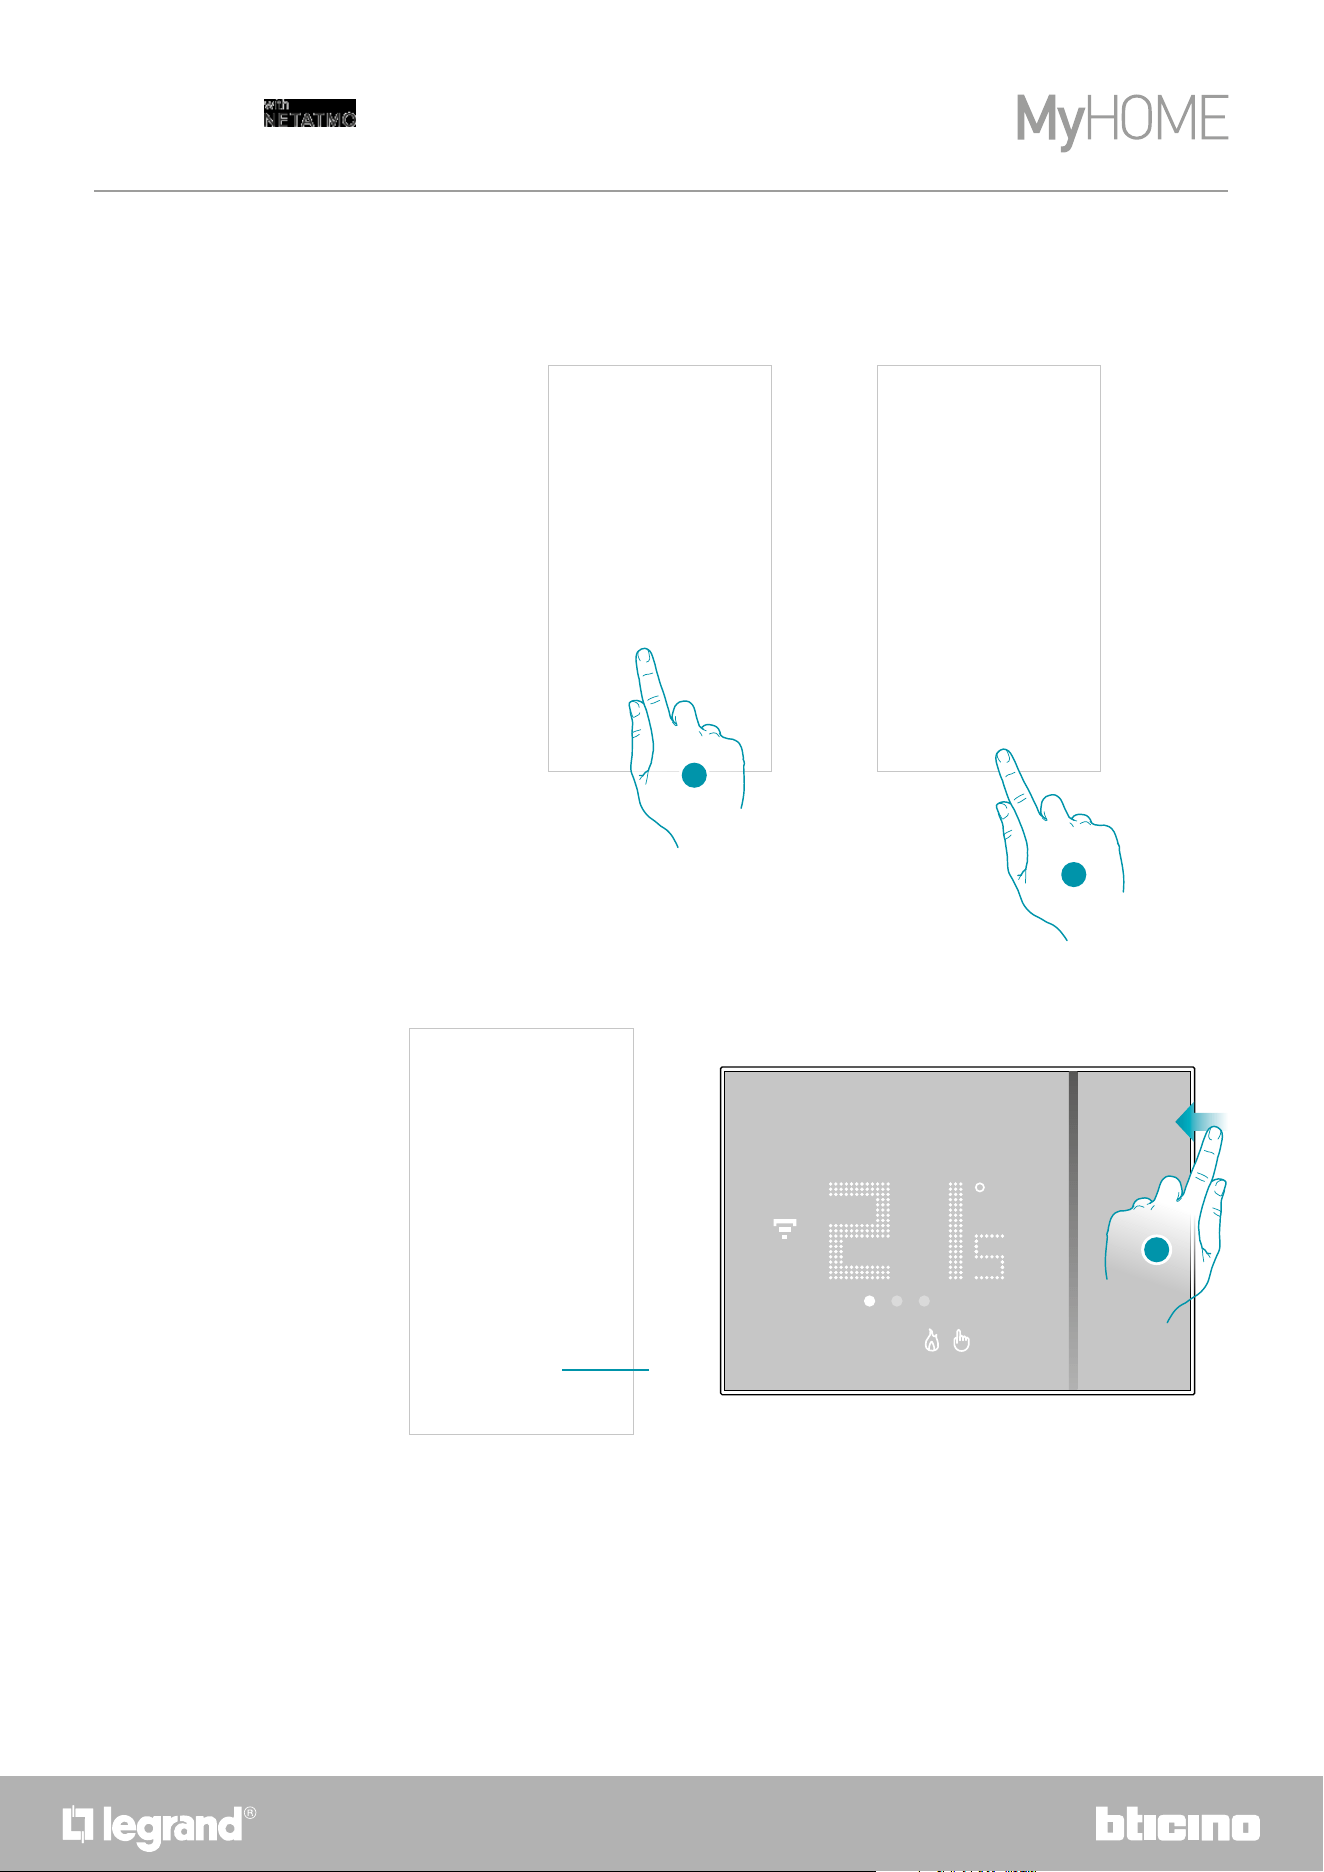
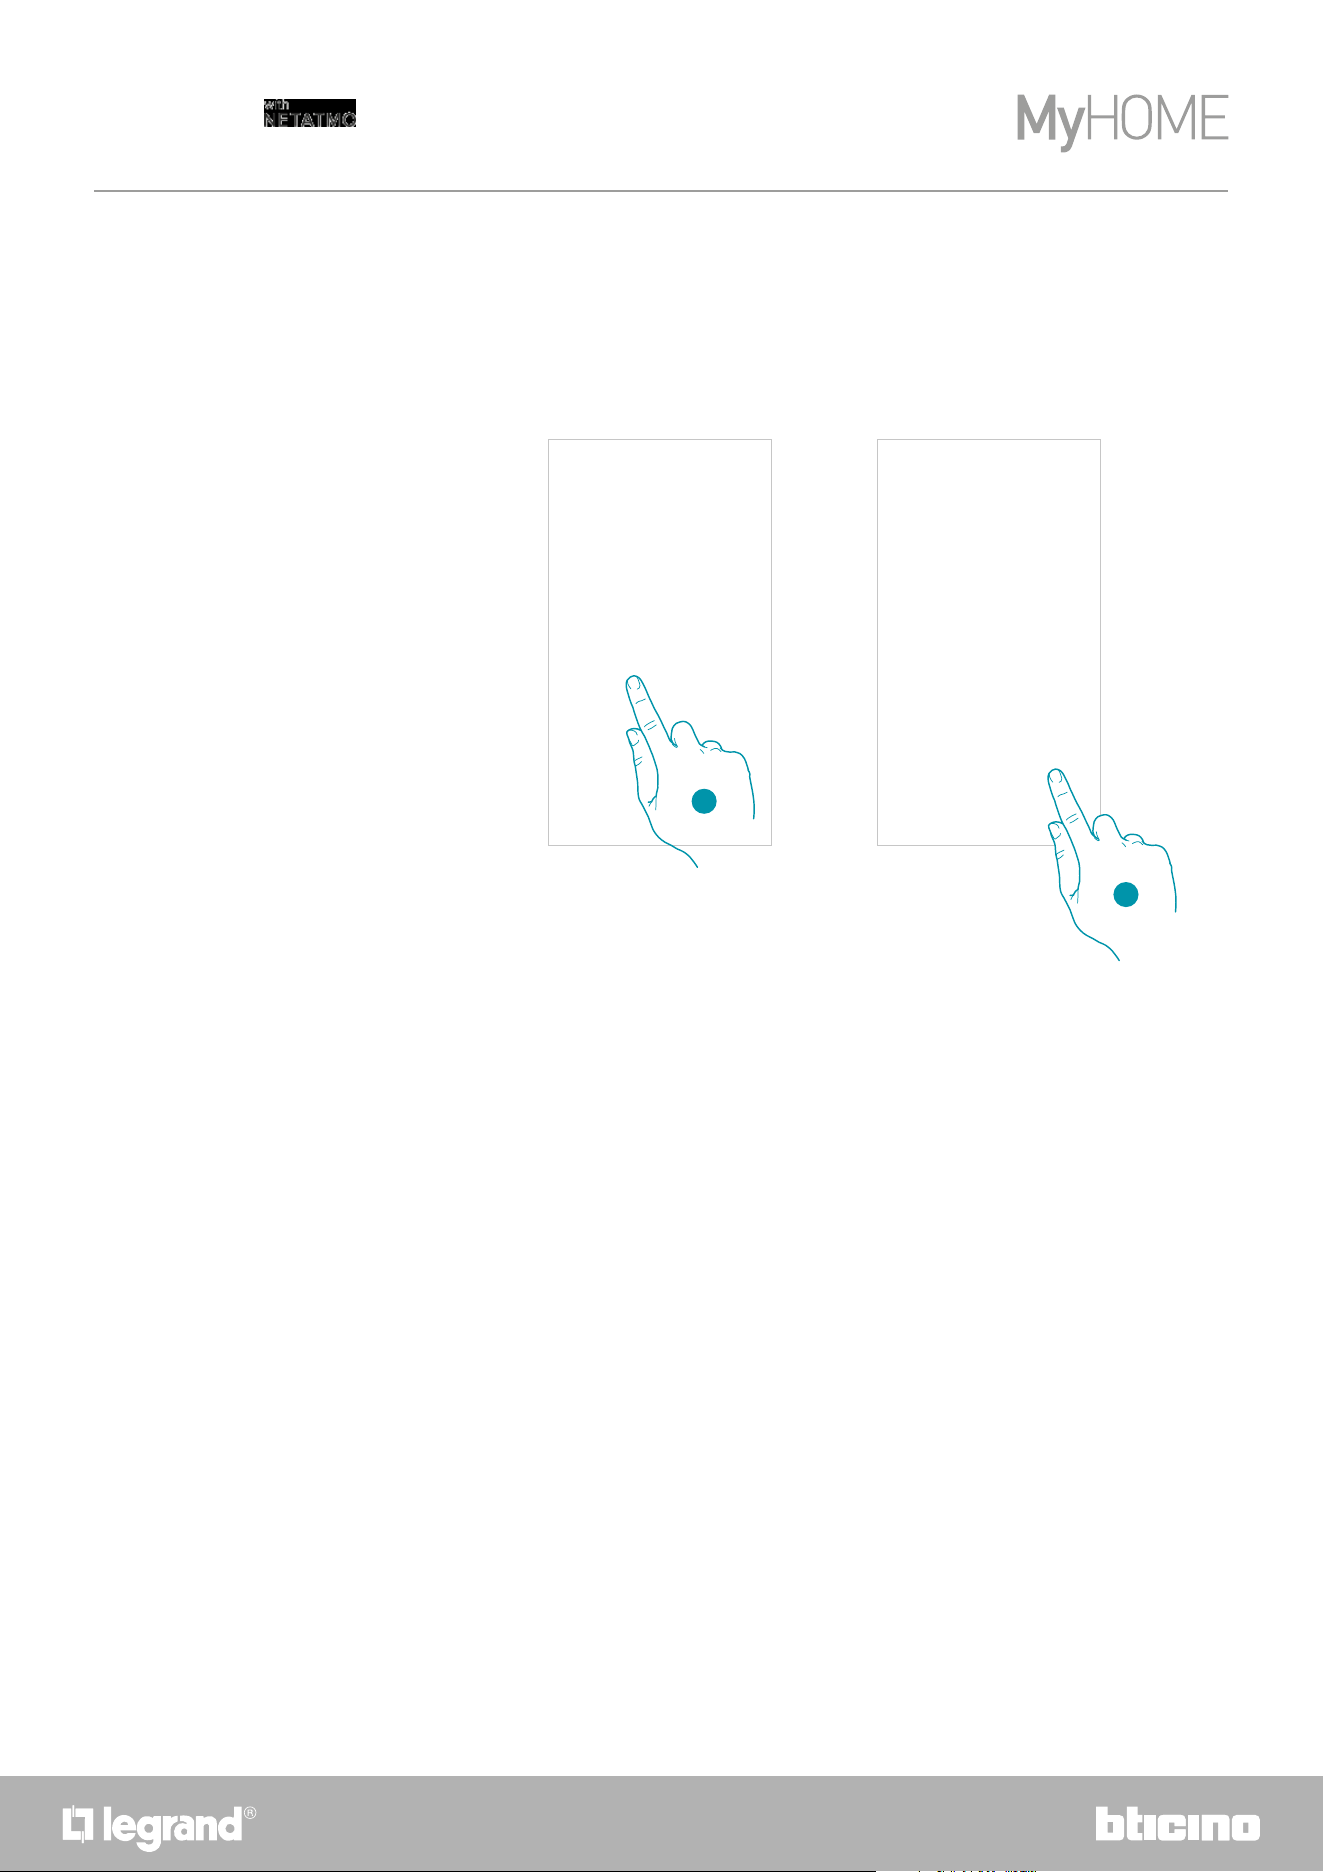
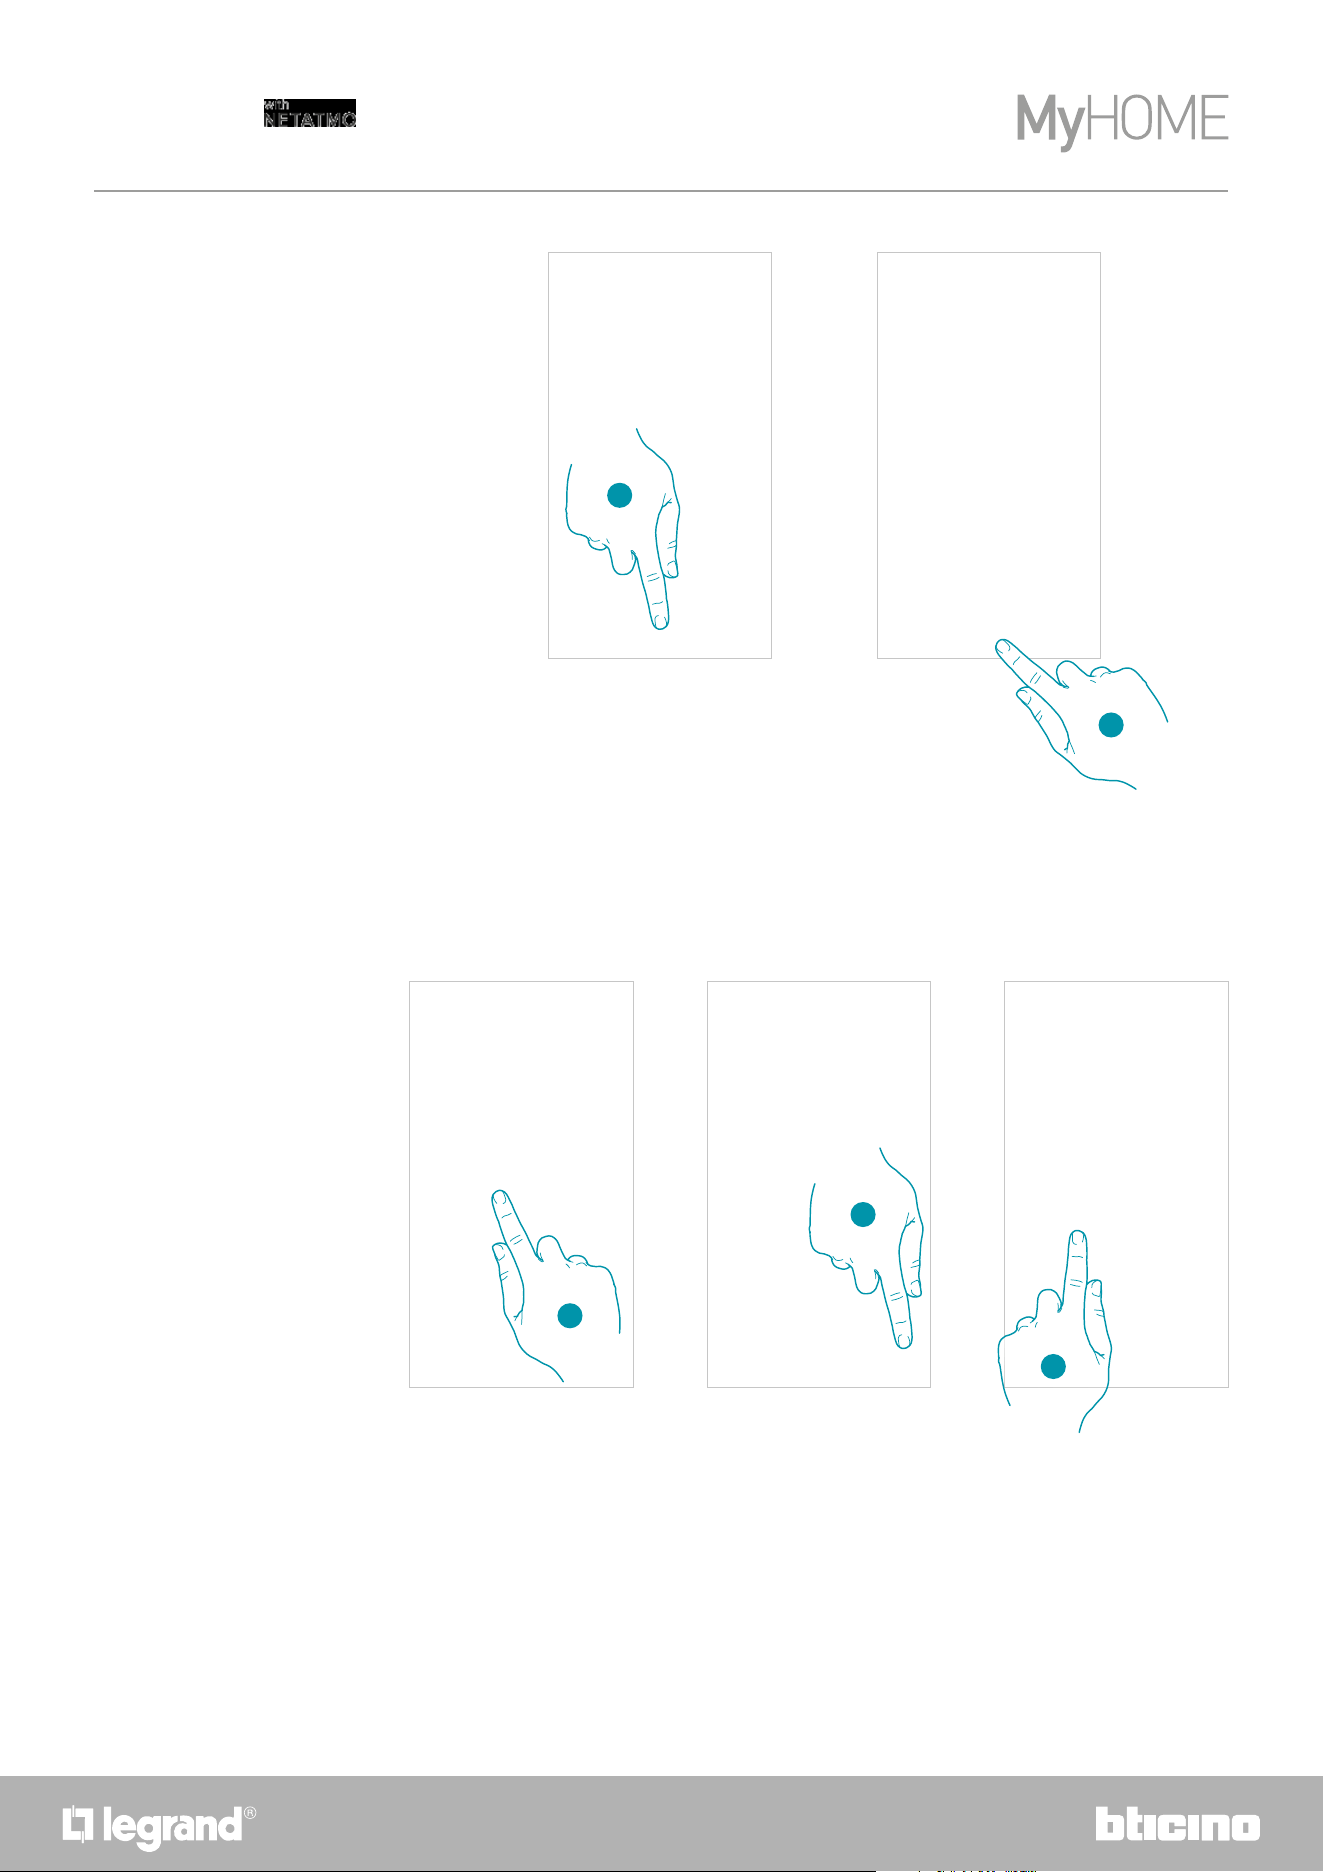
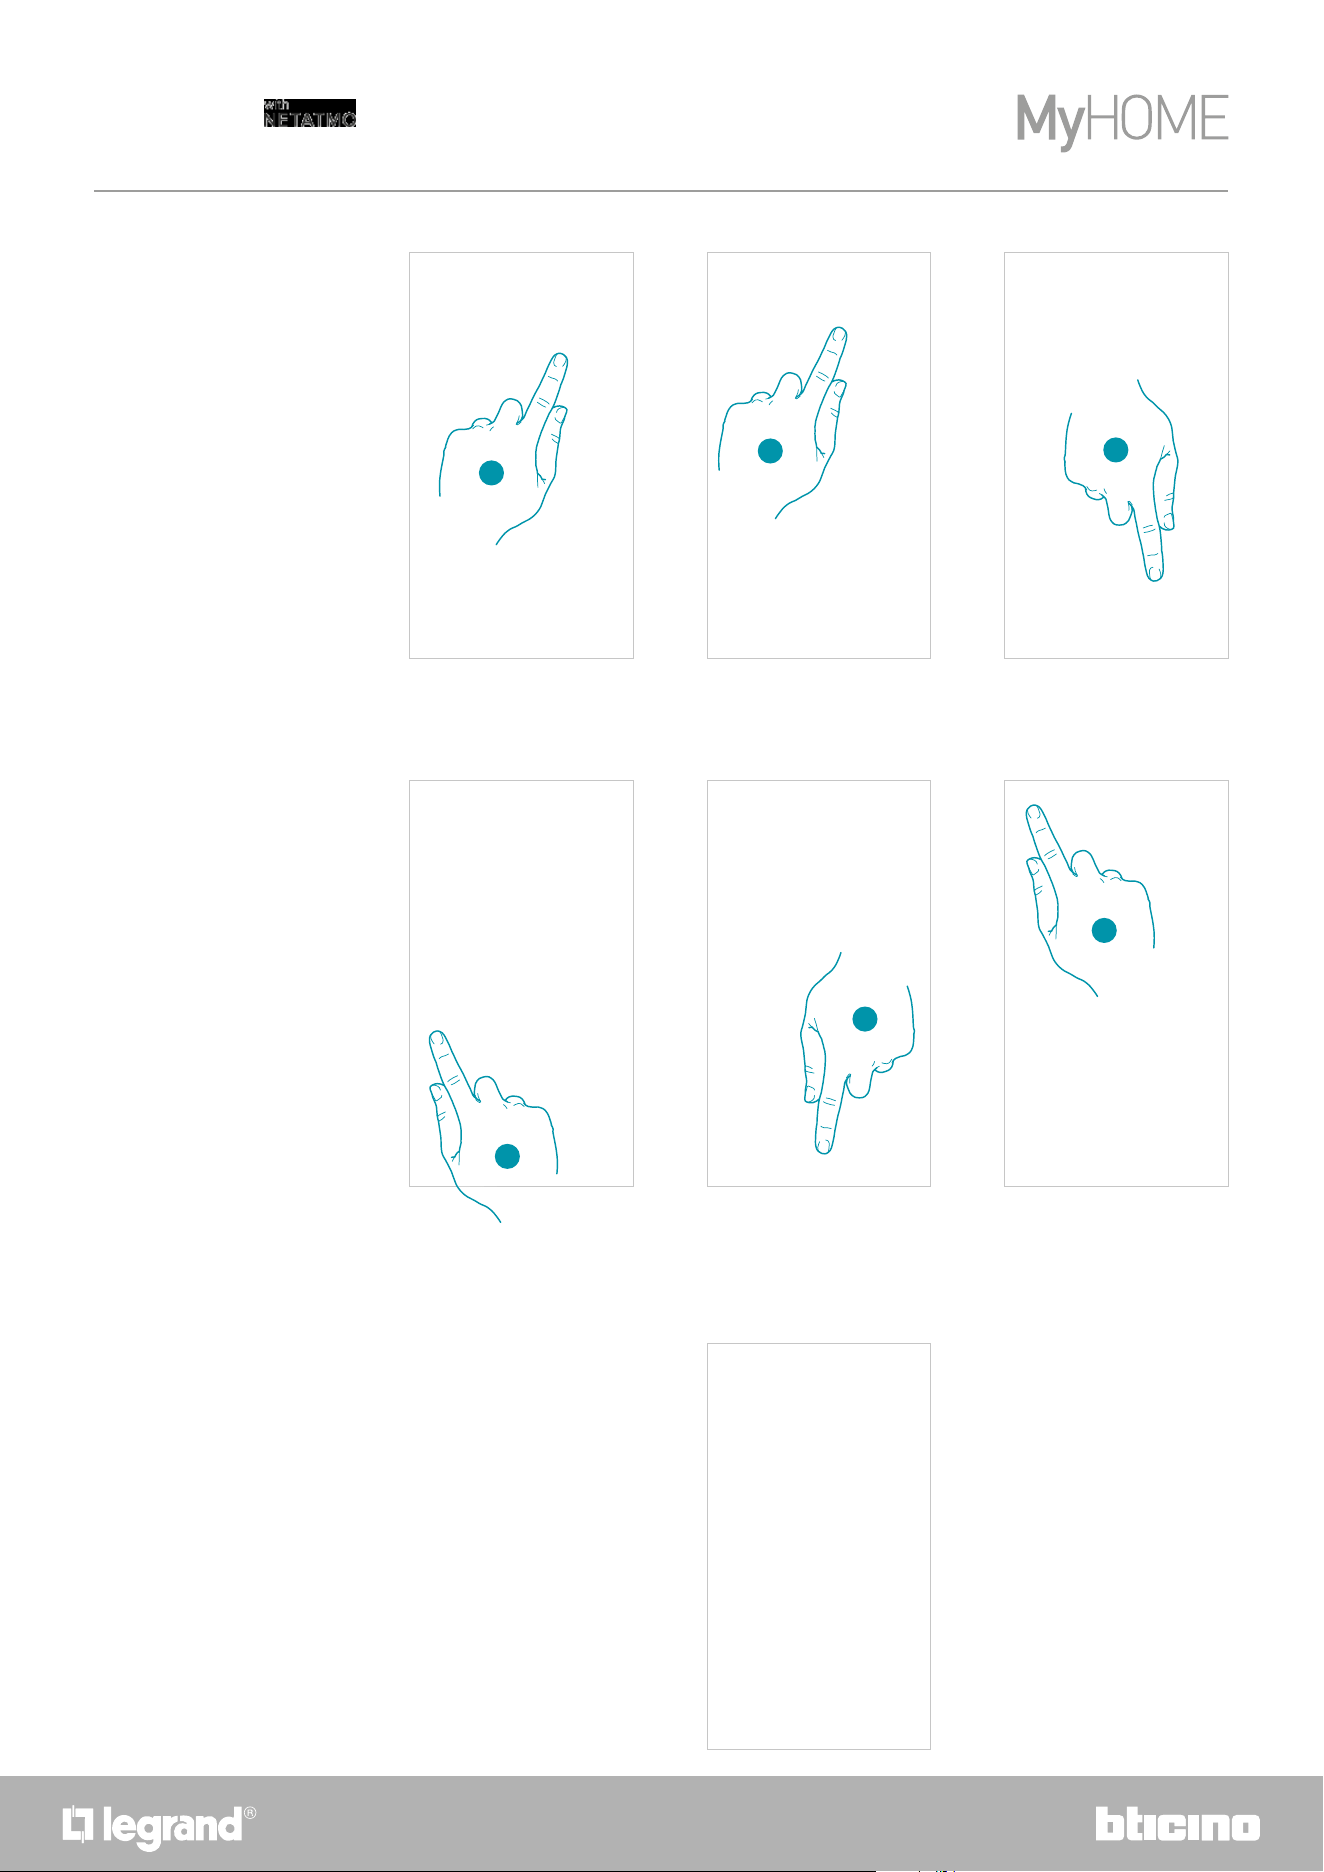
Set the temperature
ACTIVATION FROM DEVICE or FROM APP
1
1
1. From the Smarther scroll to display the temperature setting page or, from the App, touch the
icon
2
2
2. From the Smarther touch the keys to increase or decrease the temperature, or from the
App touch
to increase or decrease the temperature.
Note: when you want to set different temperatures depending on the time and day of the week, you
need to create a special program (see Schedules)
76
Smarther
User and installation manual
6
Installation
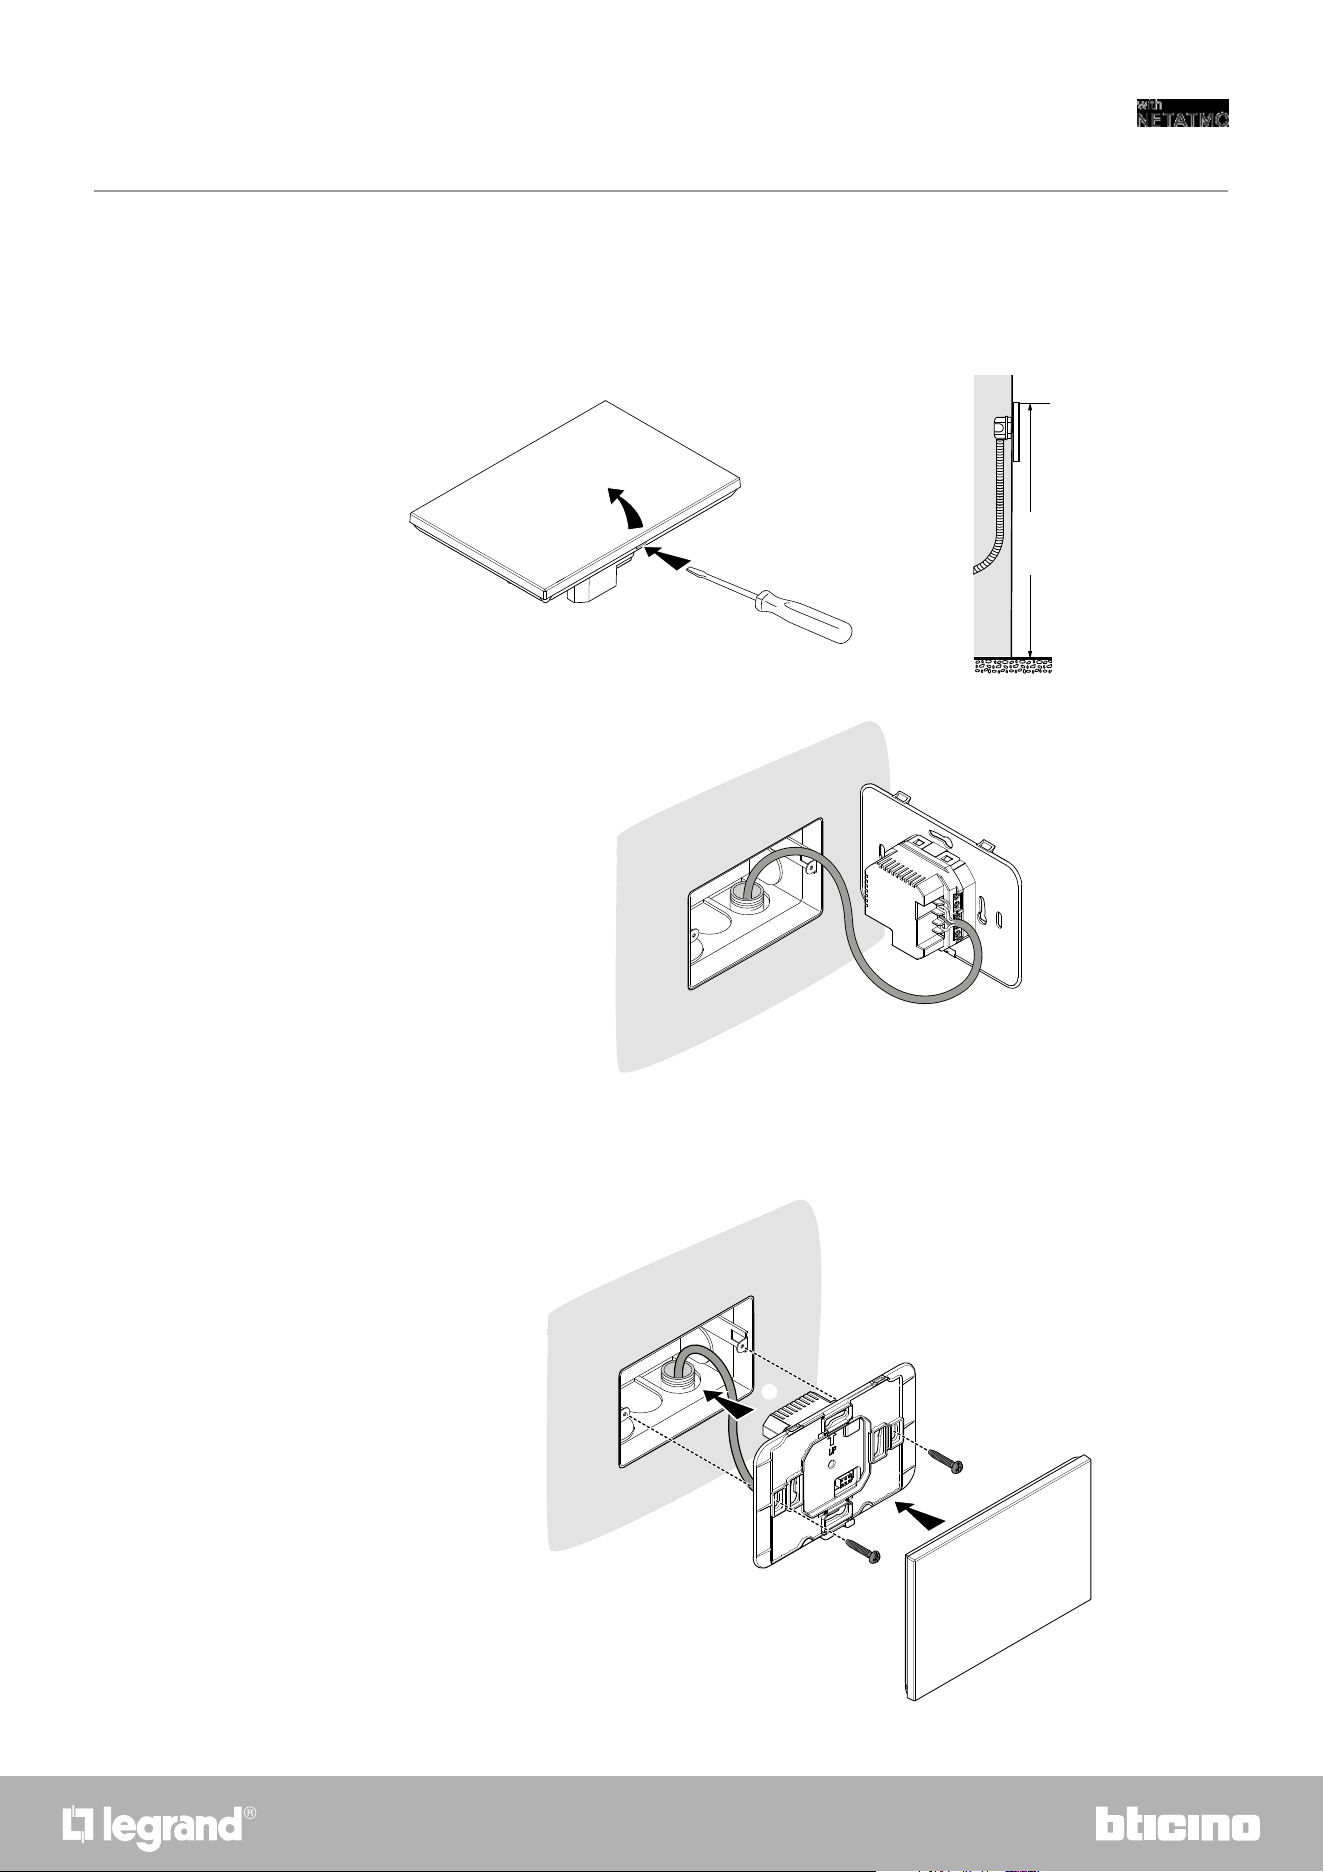
Flush-mounted installation (SXG8002 / SXM8002 / SXW8002)
With 503E boxes
1
2
3
4
5
160 cm
Recommended height,
unless different
regulations are specified
8
Smarther
User and installation manual
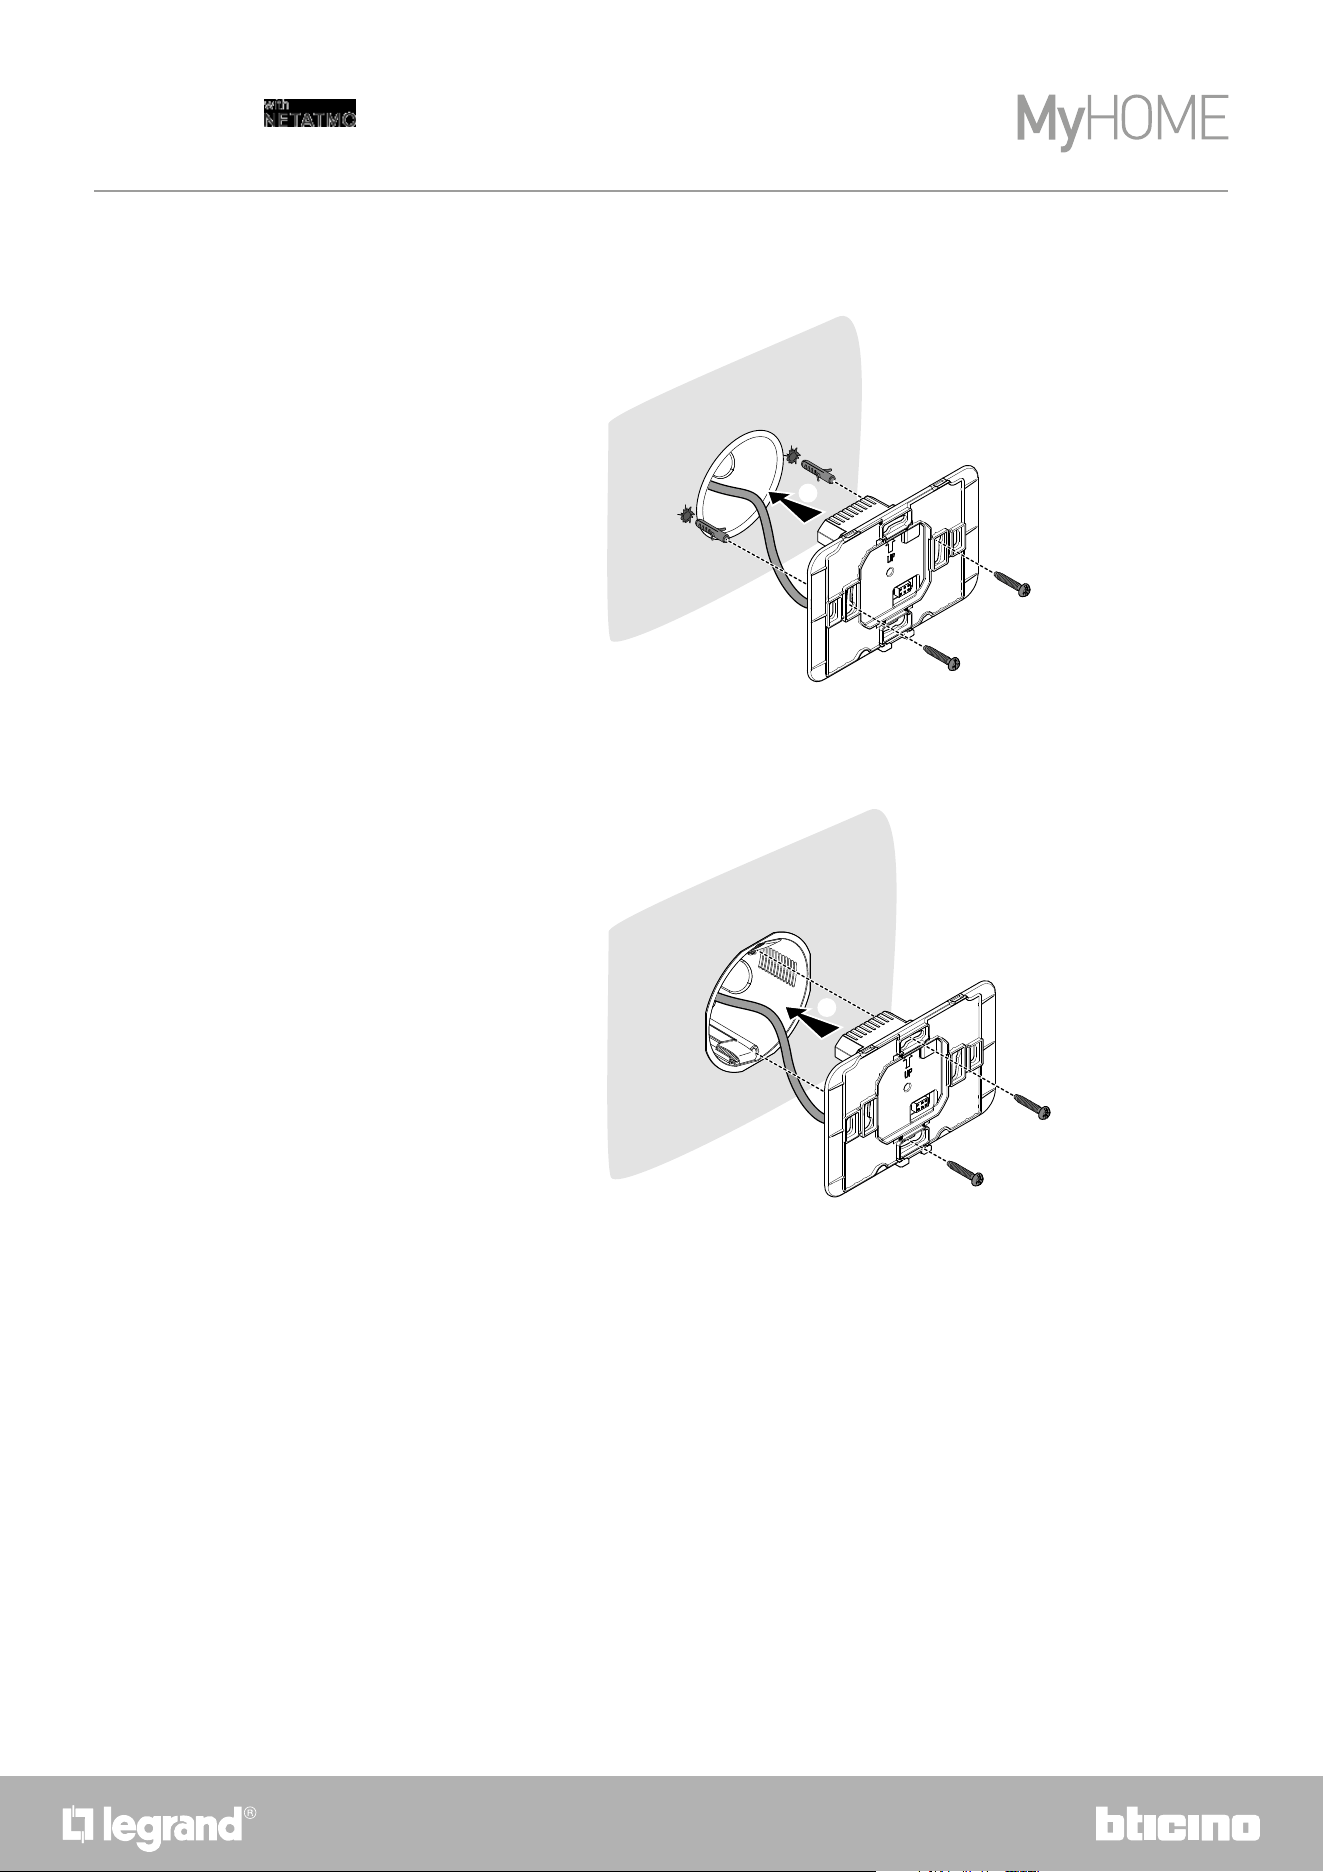
With 500 boxes
With 502PB boxes
4
4
Caution
: avoid tightening the screws too much, in order to prevent any base distortion that may
compromise the correct installation of the device.
The front must be tightly fixed to the base and the fastening clip should lock into place.
Once the installation has been done, wait for 2 hours before checking the read temperature.
98
Smarther
User and installation manual
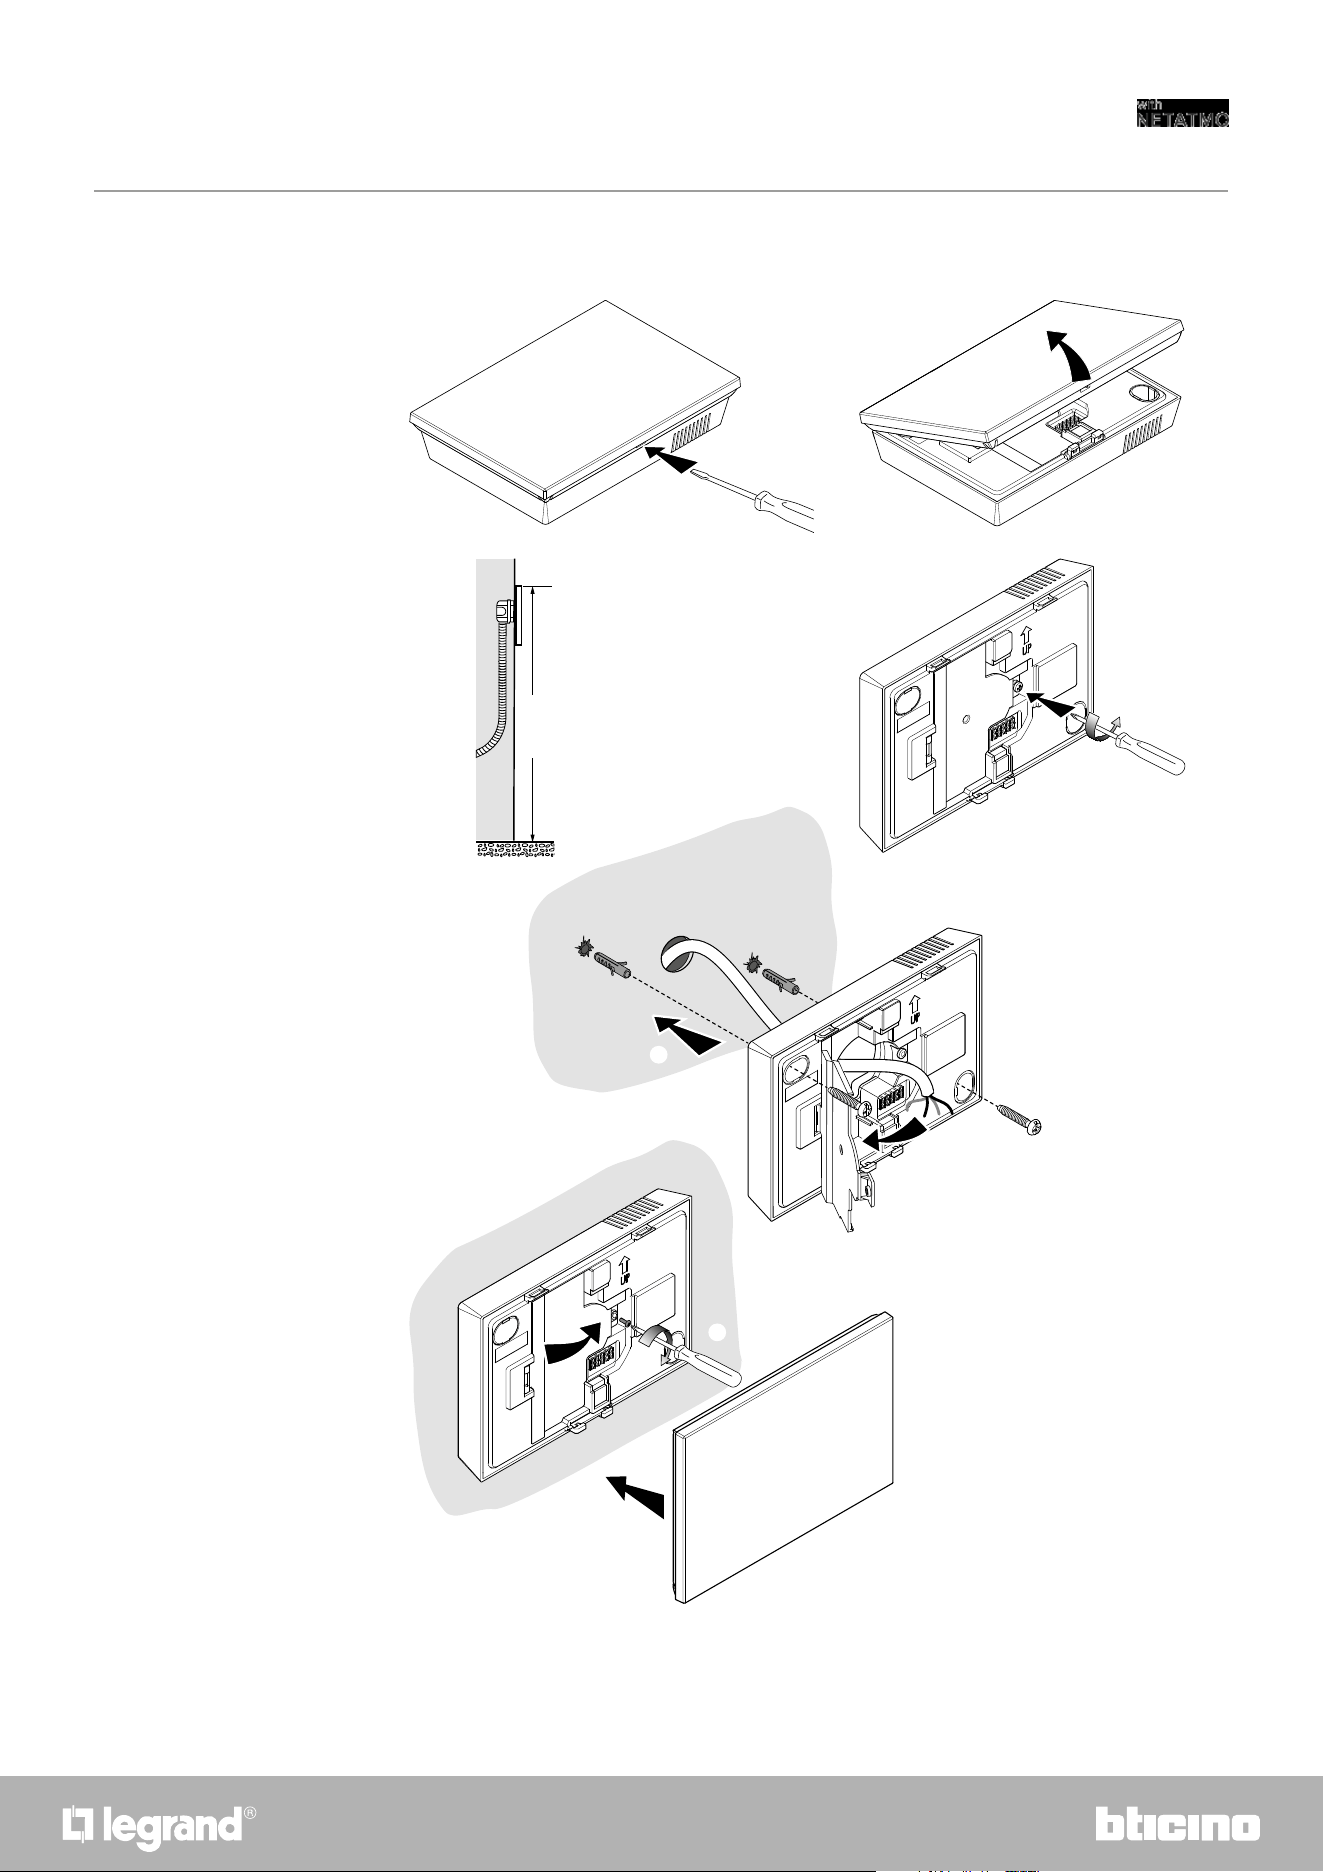
Wall-mounted installation SXW8002W
Caution
: avoid fastening the base on irregular surfaces and excessive screw tightening, in order to
prevent any base distortion that may compromise the correct installation of the device.
The front must be tightly fixed to the base and the fastening clip should lock into place.
Once the installation has been done, wait for 2 hours before checking the read temperature.
1
2
3
5
4
6
7
8
160 cm
Recommended height,
unless different
regulations are specified.
10
Smarther
User and installation manual
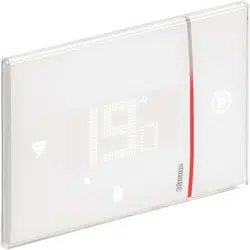
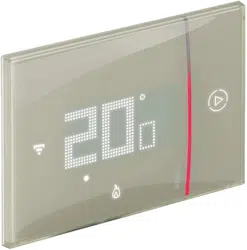
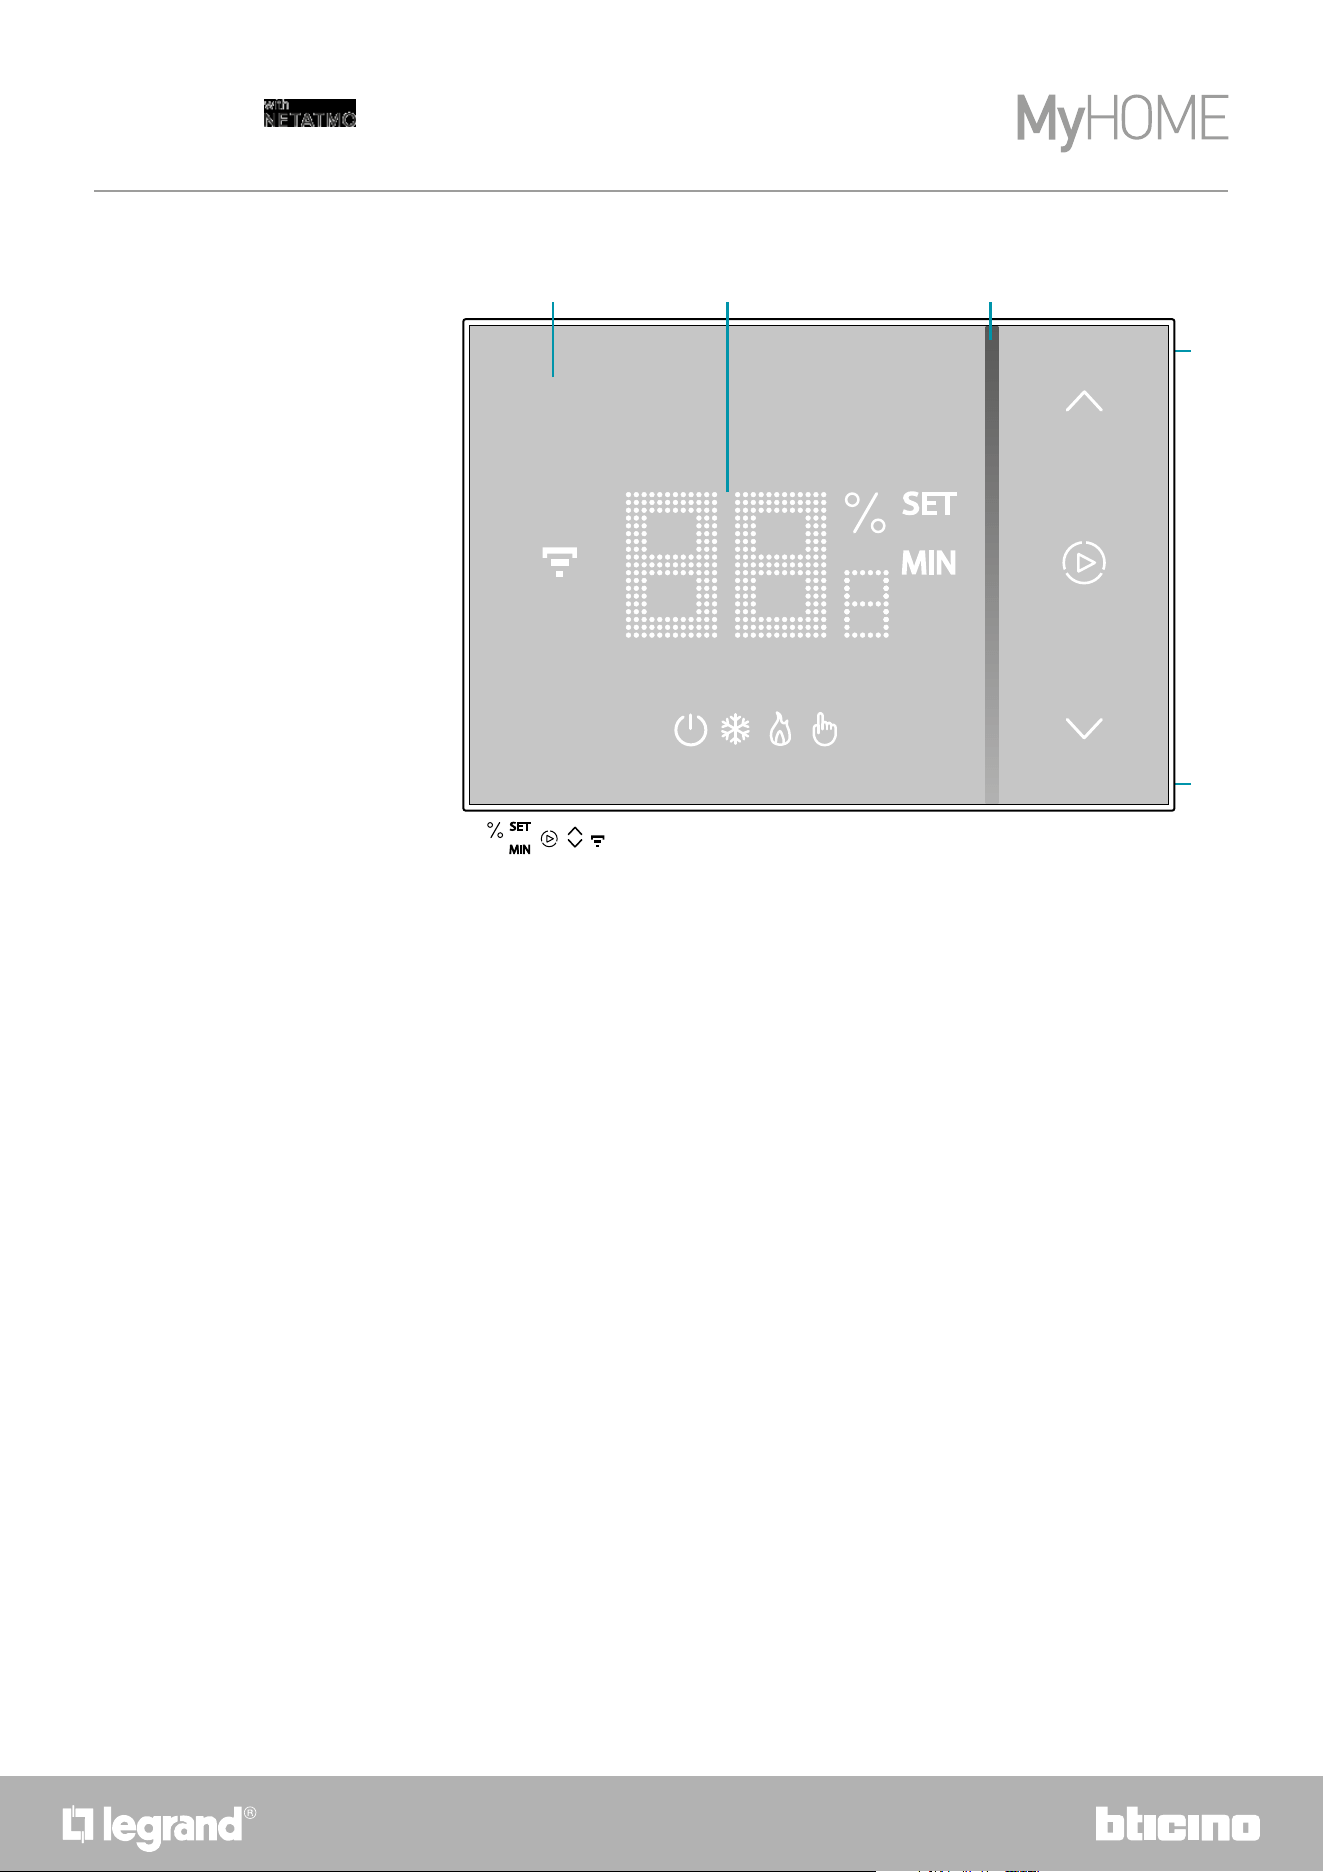
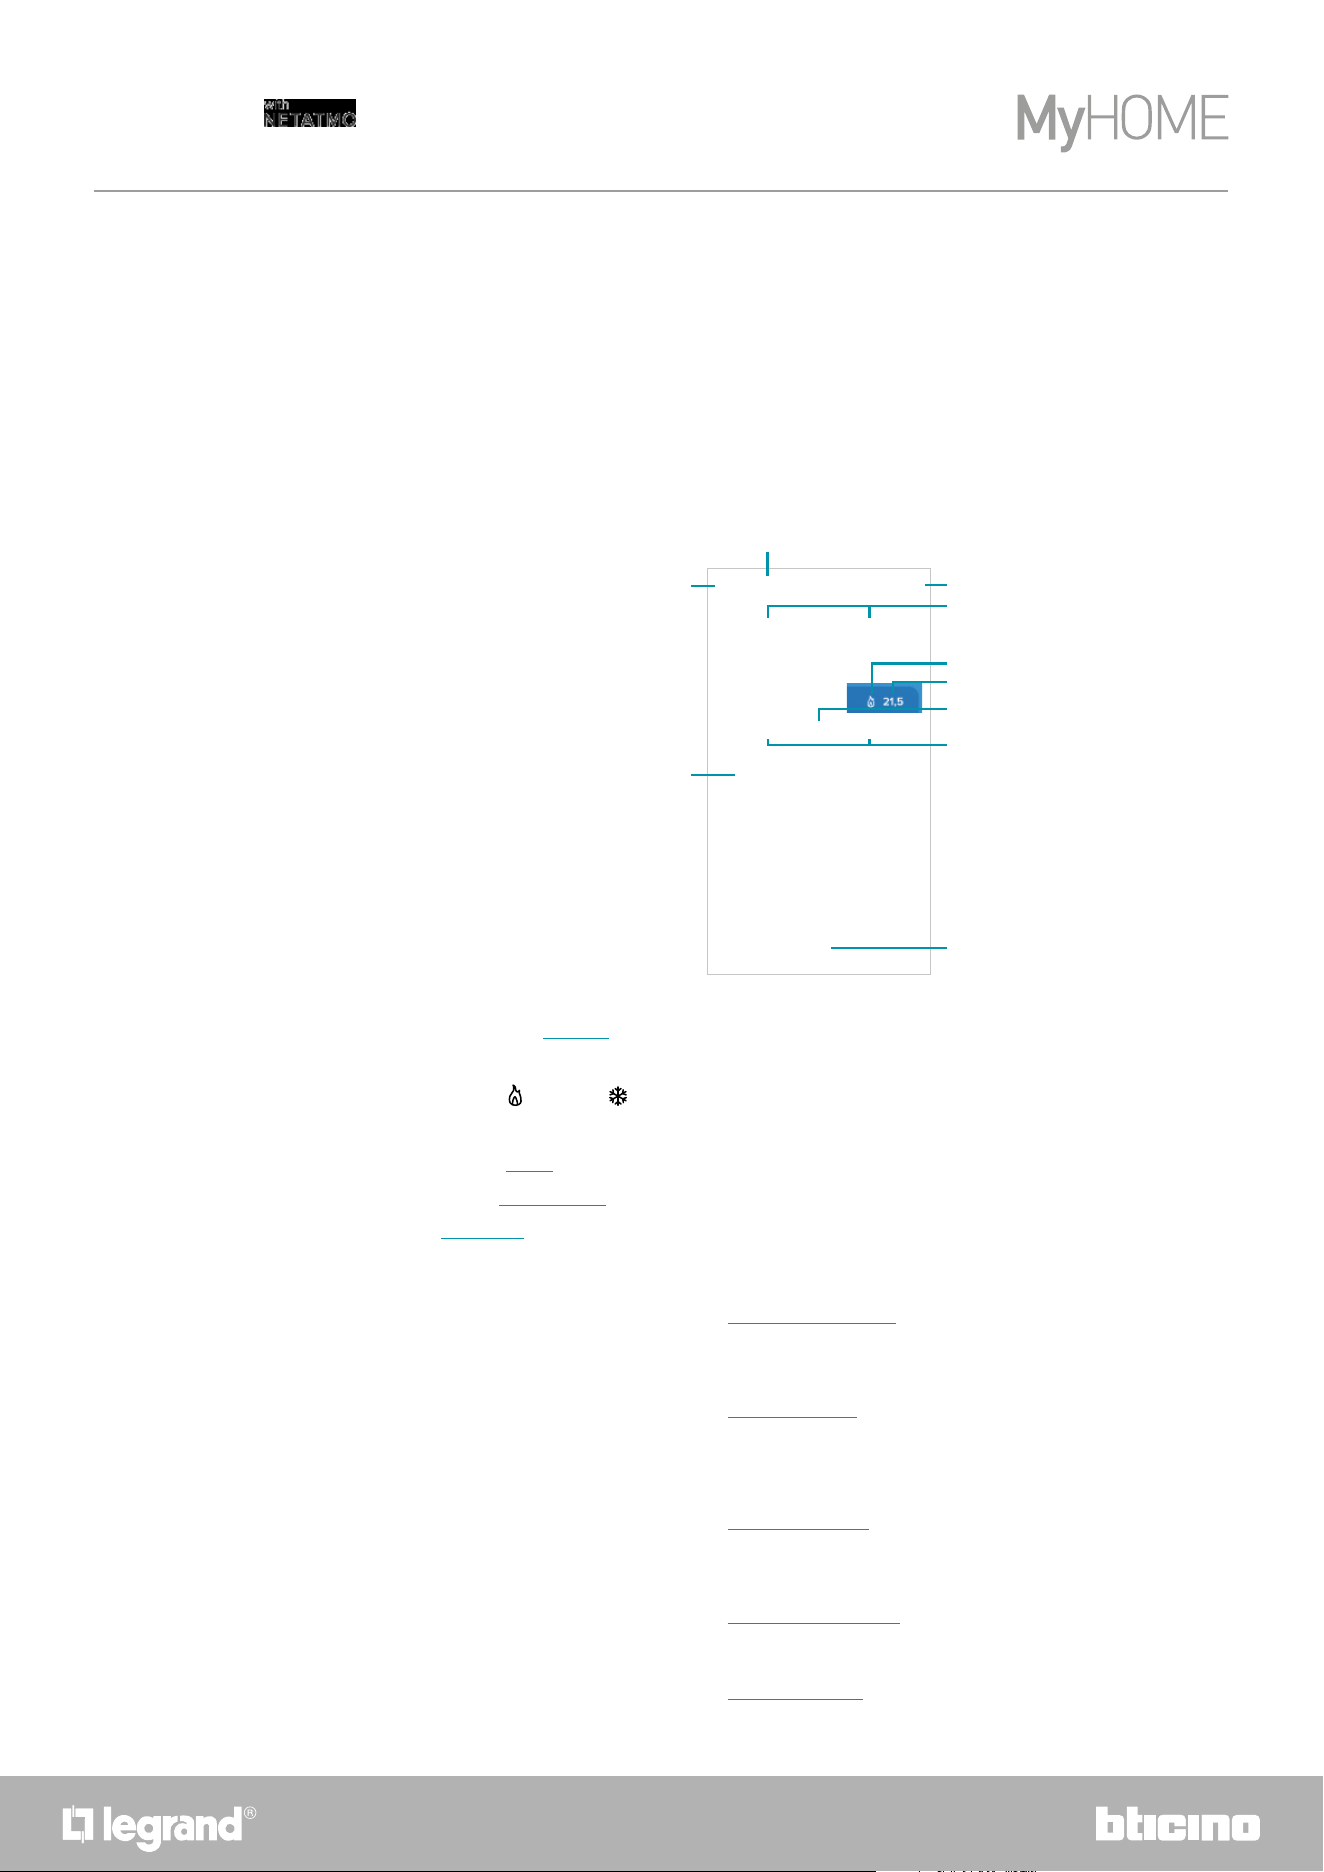
Front view
1. Touch screen display
2. Temperature/humidity display
3. “Boost” mode indicator
4. Wi-Fi connection key
5. Reset Key
Note: the
, , , , icons are only on when the device is on. If the device is in stand by the icons
will be off
4
5
1 2 3
1110
Smarther
User and installation manual
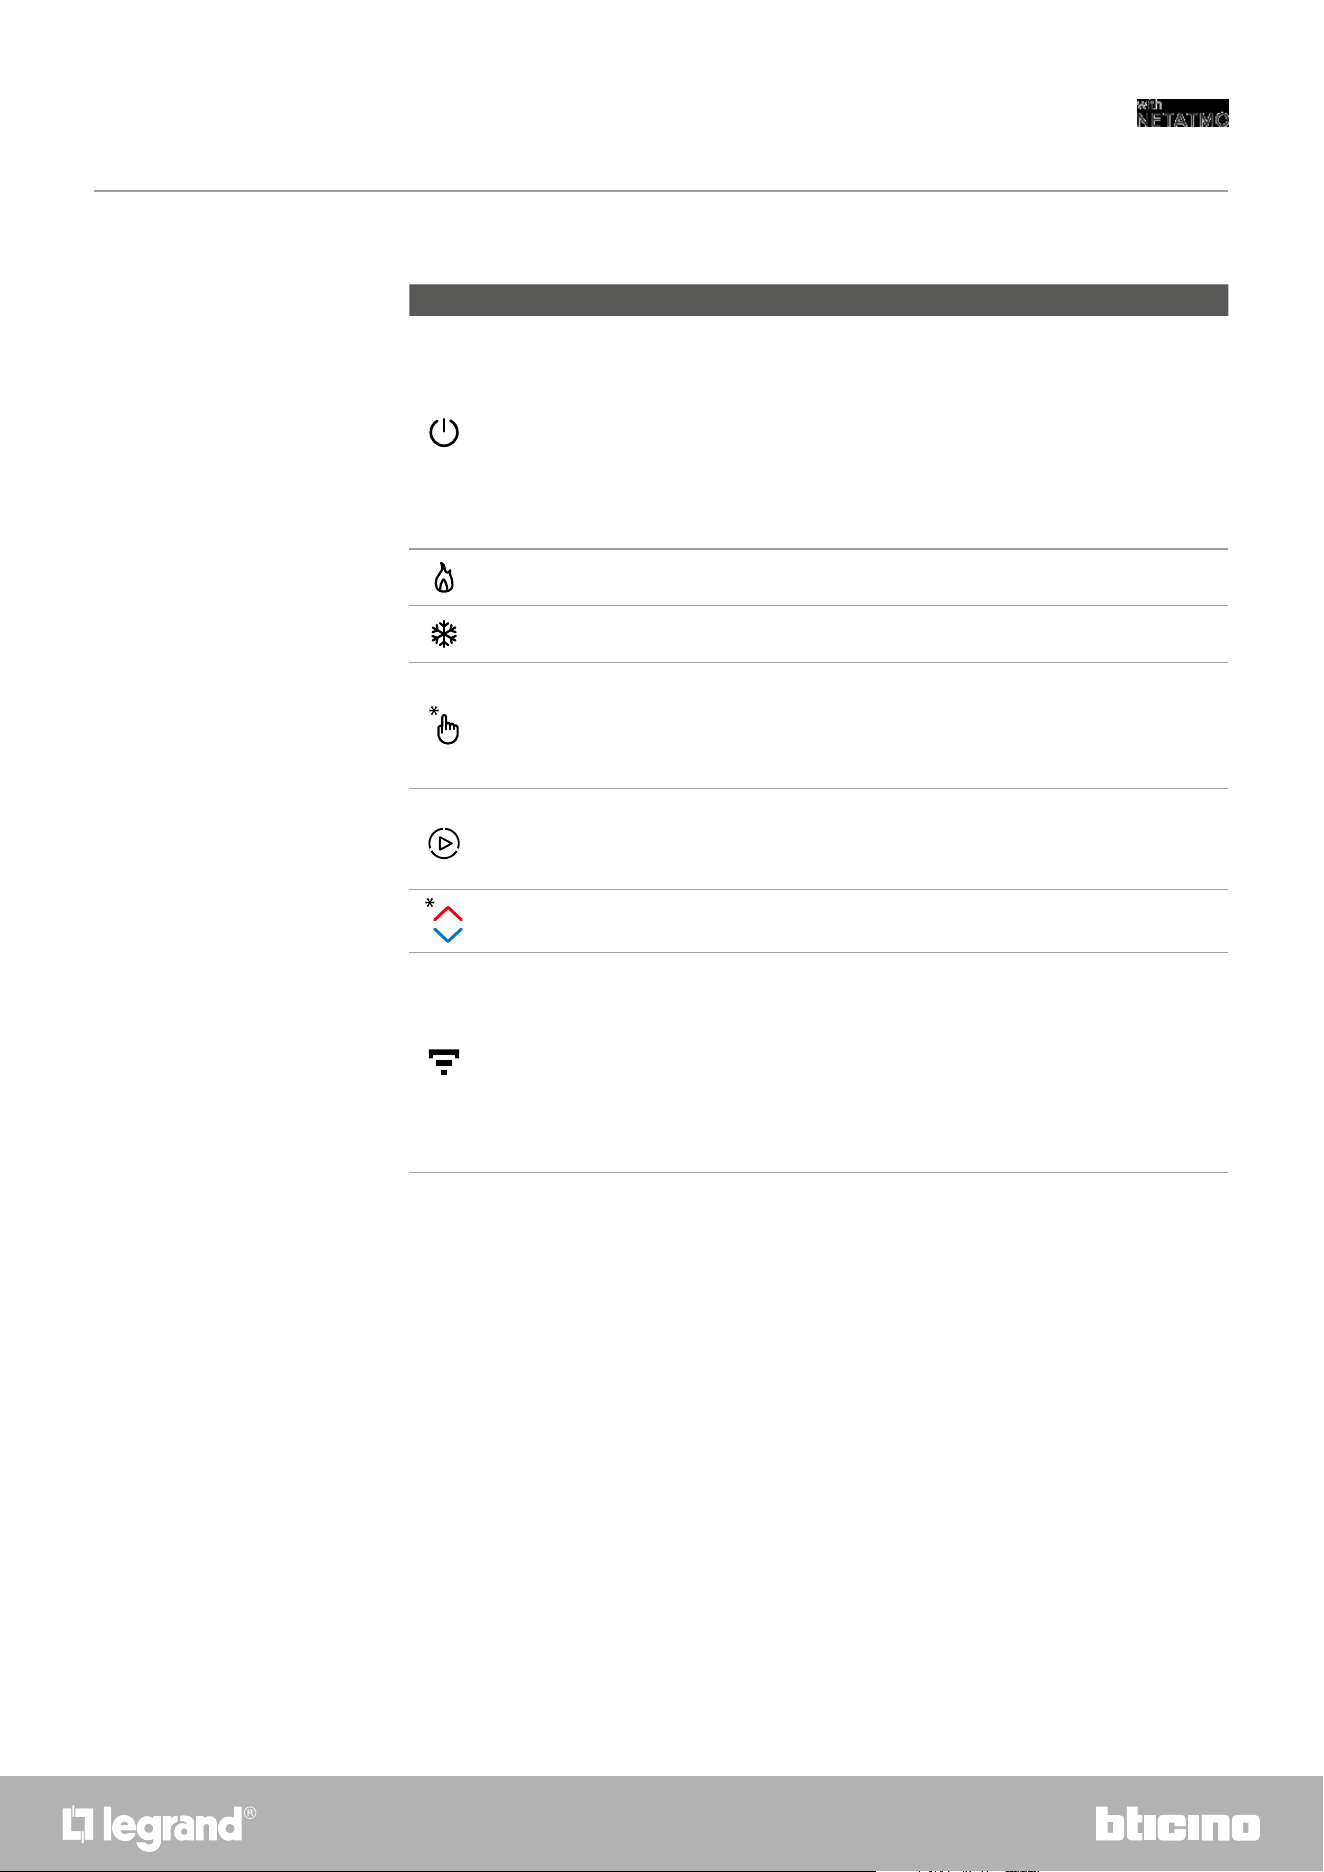
Symbols on the display
Icon Meaning
Smarther "OFF"
SYSTEM IN HEATING MODE:
The Smarther is set with a default temperature of 7
°C winter.
You can set this condition from the App or manually,
increasing or decreasing the temperature to the
default values.
SYSTEM IN COOLING MODE:
The Smarther is OFF
Heating mode operation The system is in heating mode and is ON.
Cooling mode operation The system is in cooling mode and is ON.
Manual mode operation
The manual mode temporarily excludes the hour
programs; using the Home + Control App you can
also set the length of this mode. When this time has
elapsed, operation will start again as in the program
Boost mode activation
The Boost forces the switching on of the system for
a limited time (30, 60 or 90 minutes) independent of
the measured and programmed temperature
Keys for temperature setting
The set value is only valid for the manual mode
operation.
Wi-Fi connection indicator
ON = connected
OFF = disconnected
Blue flashing = it means that the device is ready for
the association to the Home + Control app
White flashing = it identifies the Smarther in some
procedures, in case there is more than one in the
system.
Note
: the images of this manual are only indicative, and therefore may not exactly represent the
characteristics of the product.
12
Smarther
User and installation manual
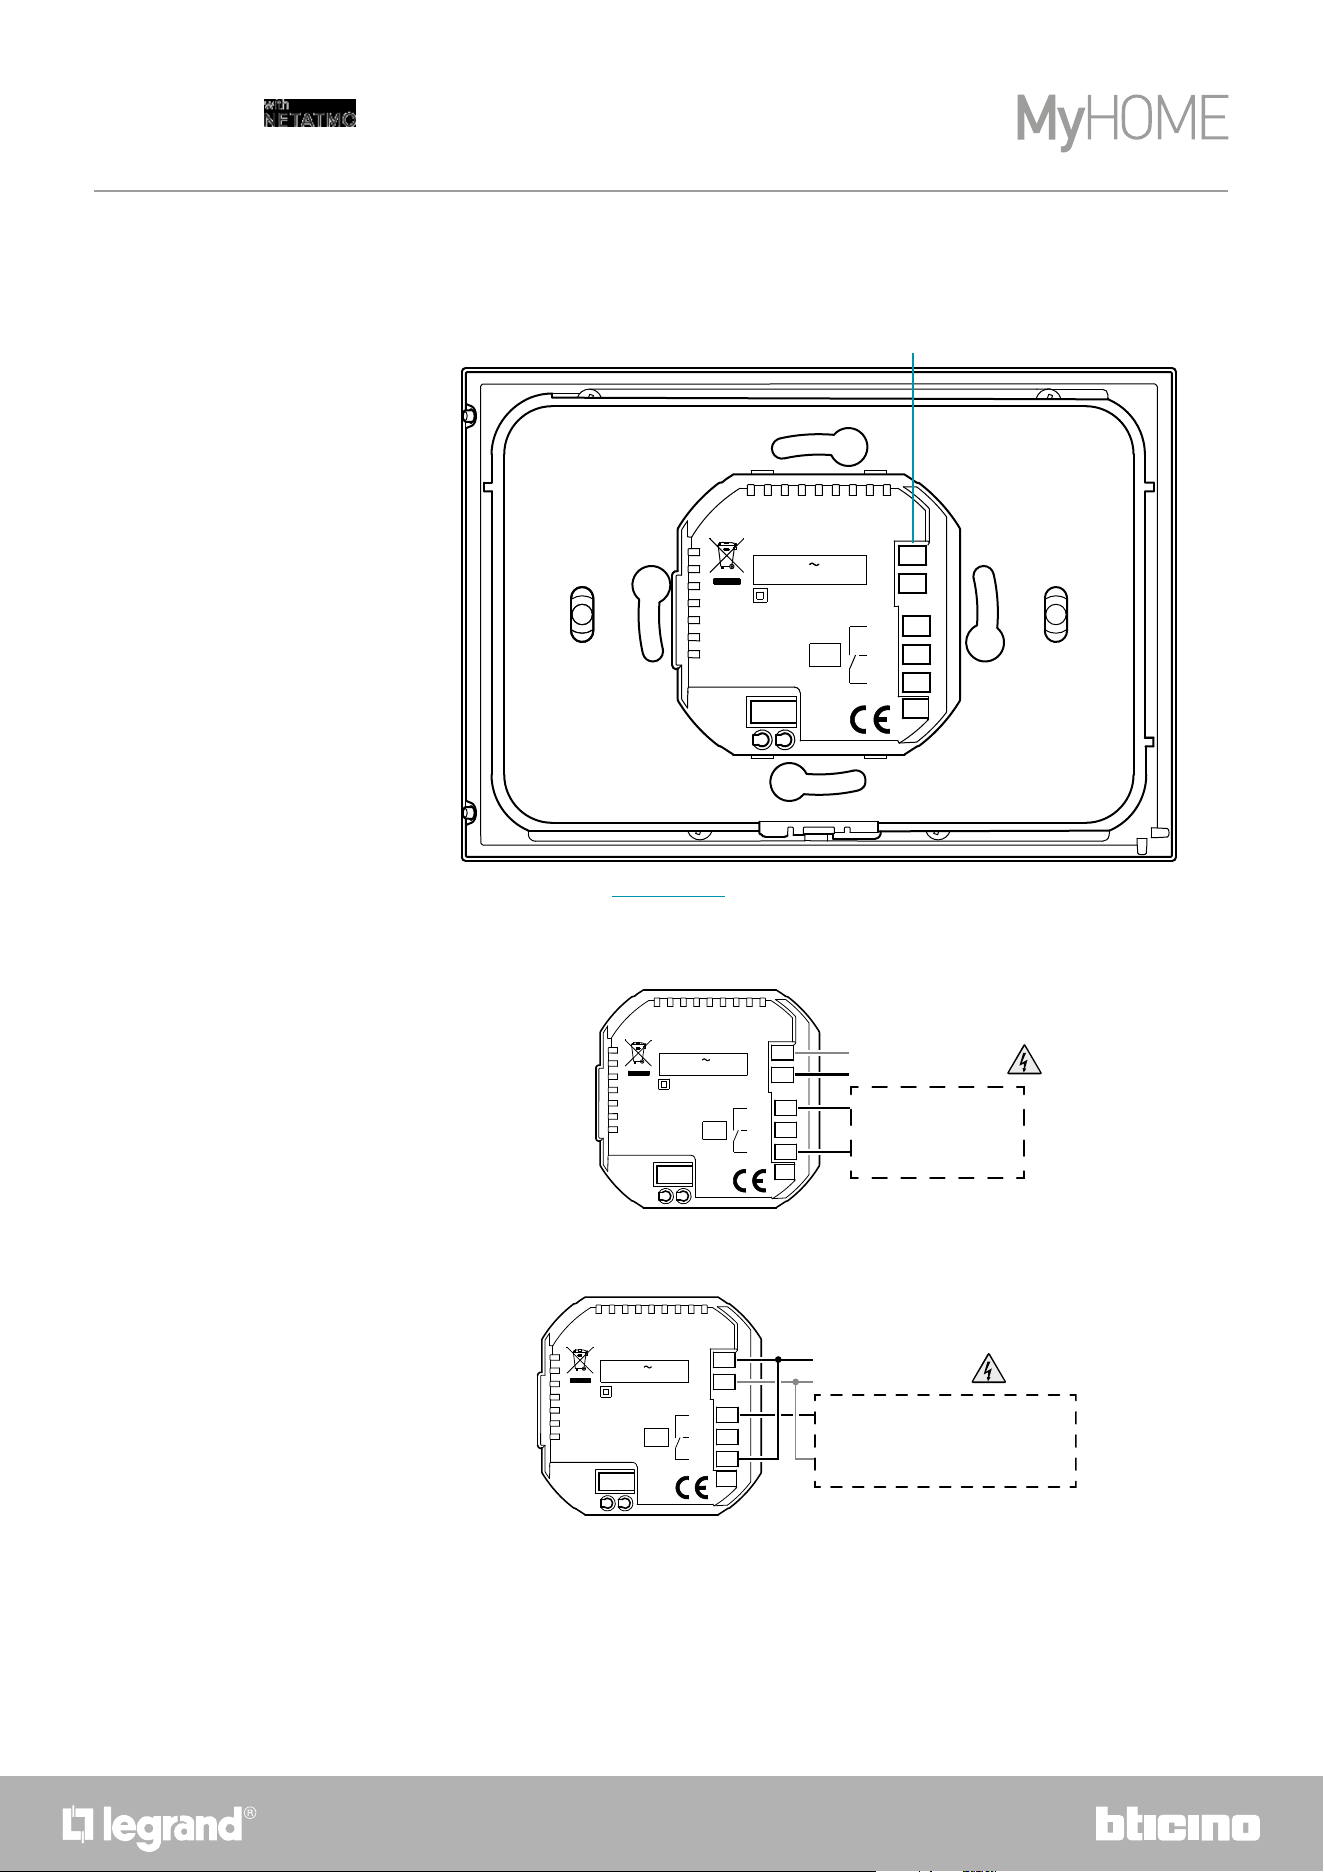
Rear view
SXG8002 / SXM8002 / SXW8002
Wiring diagrams
C
NC
NO
L
N
5(2) A
110 - 240 V 50/60 Hz
2 W max.
BTICINO
V.le Borri, 231
21100 (VA) ITALY
1
1. Connection clamps (see diagrams)
C
NC
NO
L
N
5(2) A
110 - 240 V 50/60 Hz
2 W max.
110 – 240 Vac, 50/60 HZ
TO THE HEATING SYSTEM
(CLEAN CONTACT) (ON/OFF)
BTICINO
V.le Borri, 231
21100 (VA) ITALY
System only for heating with clean contact (e.g. boiler activation)
System only for heating with load to be controlled to the mains voltage (e.g. 230Vac solenoid valve
or other loads, contact output 5(2) A)
C
NC
NO
L
N
5(2) A
110 - 240 V 50/60 Hz
2 W max.
110 – 240 Vac, 50/60 HZ
TO THE HEATING SYSTEM
(LOAD TO BE CONTROLLED TO THE NETWORK VOLTAGE)
BTICINO
V.le Borri, 231
21100 (VA) ITALY
1312
Smarther
User and installation manual
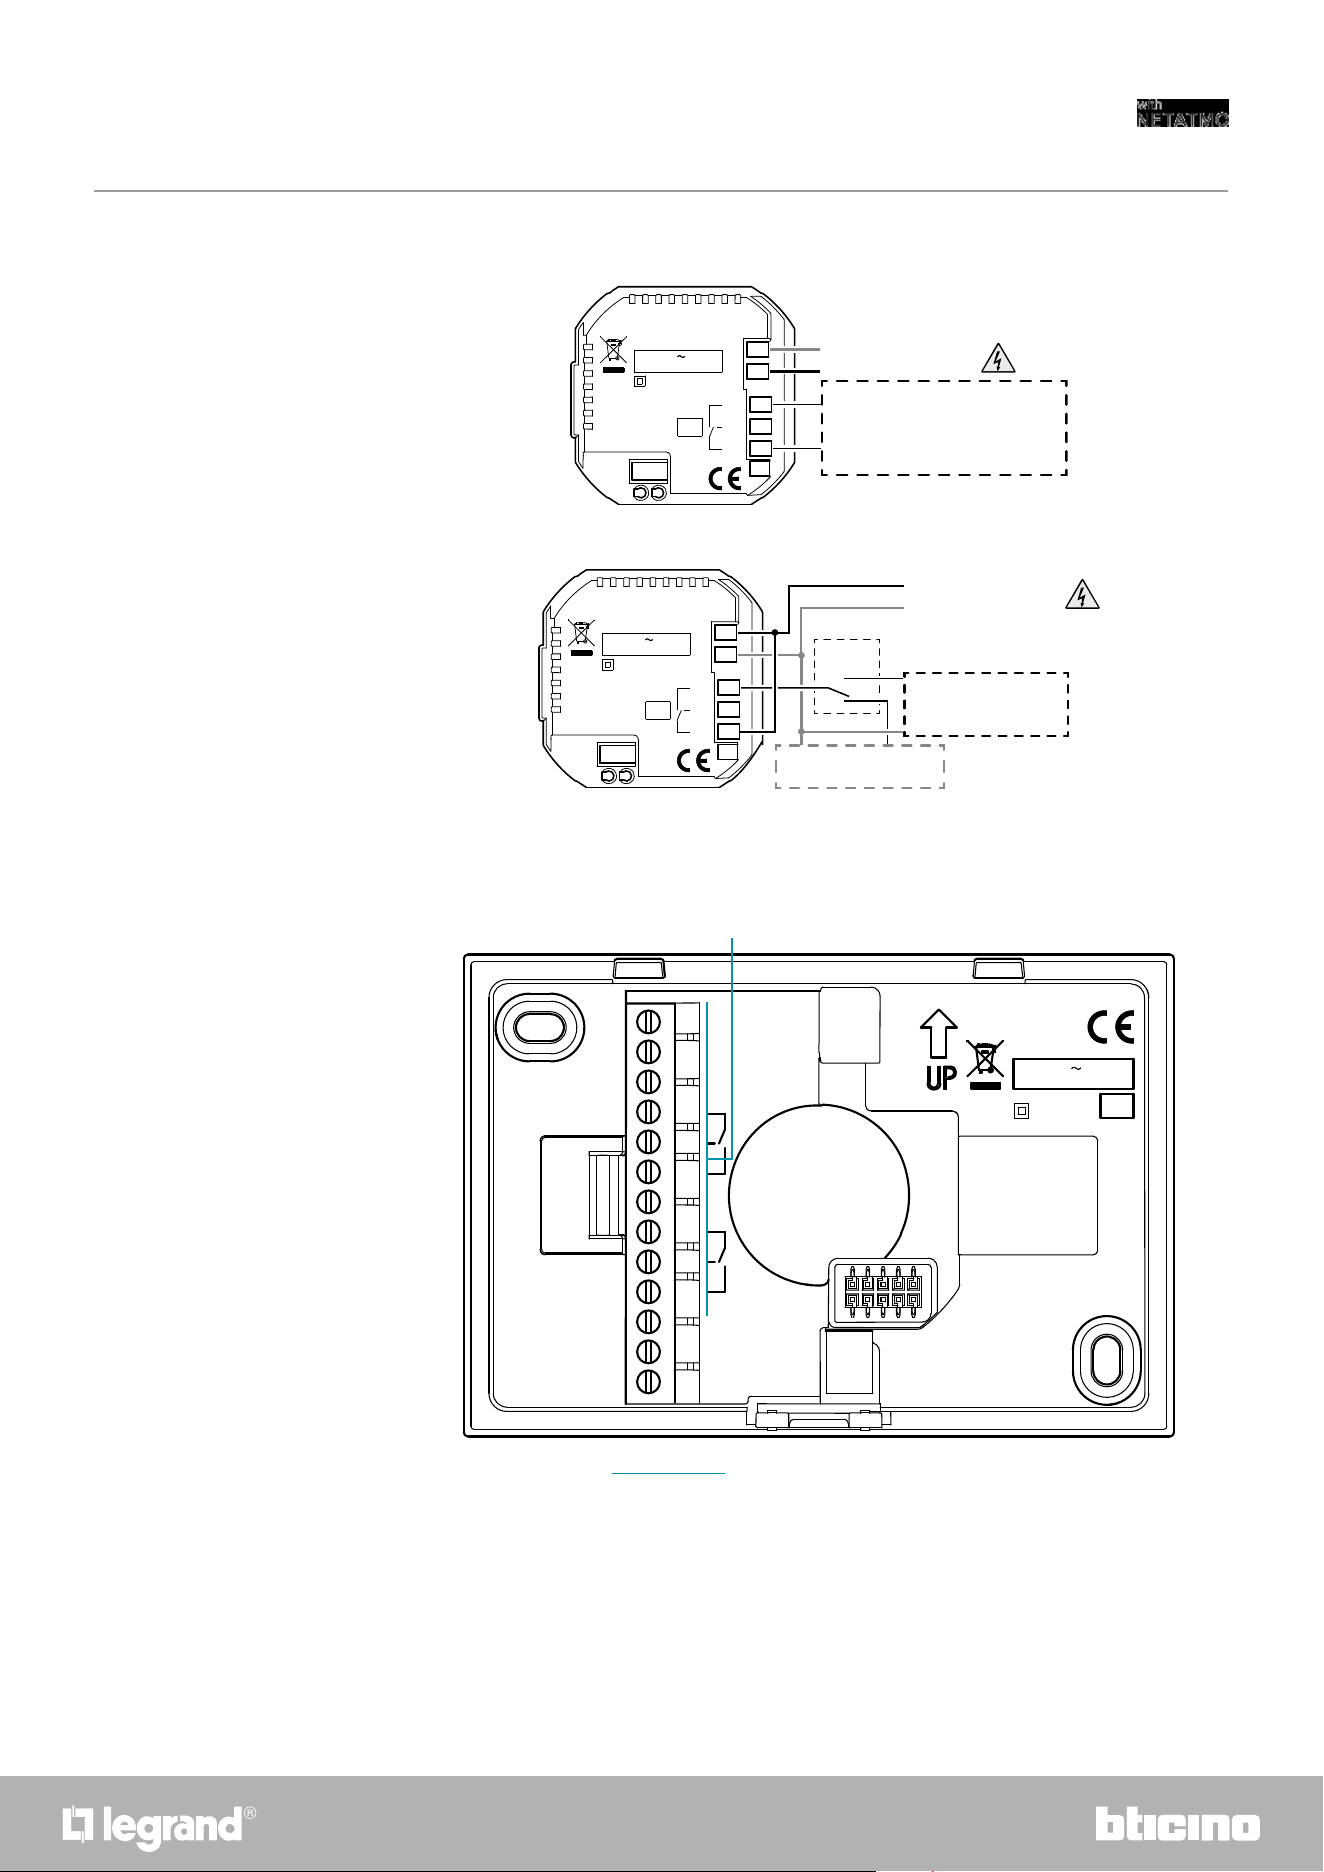
SXW8002W
110 - 240 V 50/60 Hz
N
L
5(2) A
HEATING
COOLING
NC
C
NO
NC
C
NO
2 W max.
BTICINO SpA
Viale Borri, 231
21100 VARESE
ITALY
1
1. Connection clamps (see diagrams)
C
NC
NO
L
N
5(2) A
110 - 240 V 50/60 Hz
2 W max.
110 – 240 Vac, 50/60 HZ
TO THE HEATING AND COOLING SYSTEM
WITH FLOOR SYSTEM
BTICINO
V.le Borri, 231
21100 (VA) ITALY
C
NC
NO
L
N
5(2) A
110 - 240 V 50/60 Hz
2 W max.
110 – 240 Vac, 50/60 HZ
TO THE HEATING SYSTEM
TO THE COOLING SYSTEM
*
BTICINO
V.le Borri, 231
21100 (VA) ITALY
*
External changeover switch must be properly switched when system function is changed from
heating to cooling and vice versa.
Heating and cooling with floor system
Heating and cooling with different systems
14
Smarther
User and installation manual
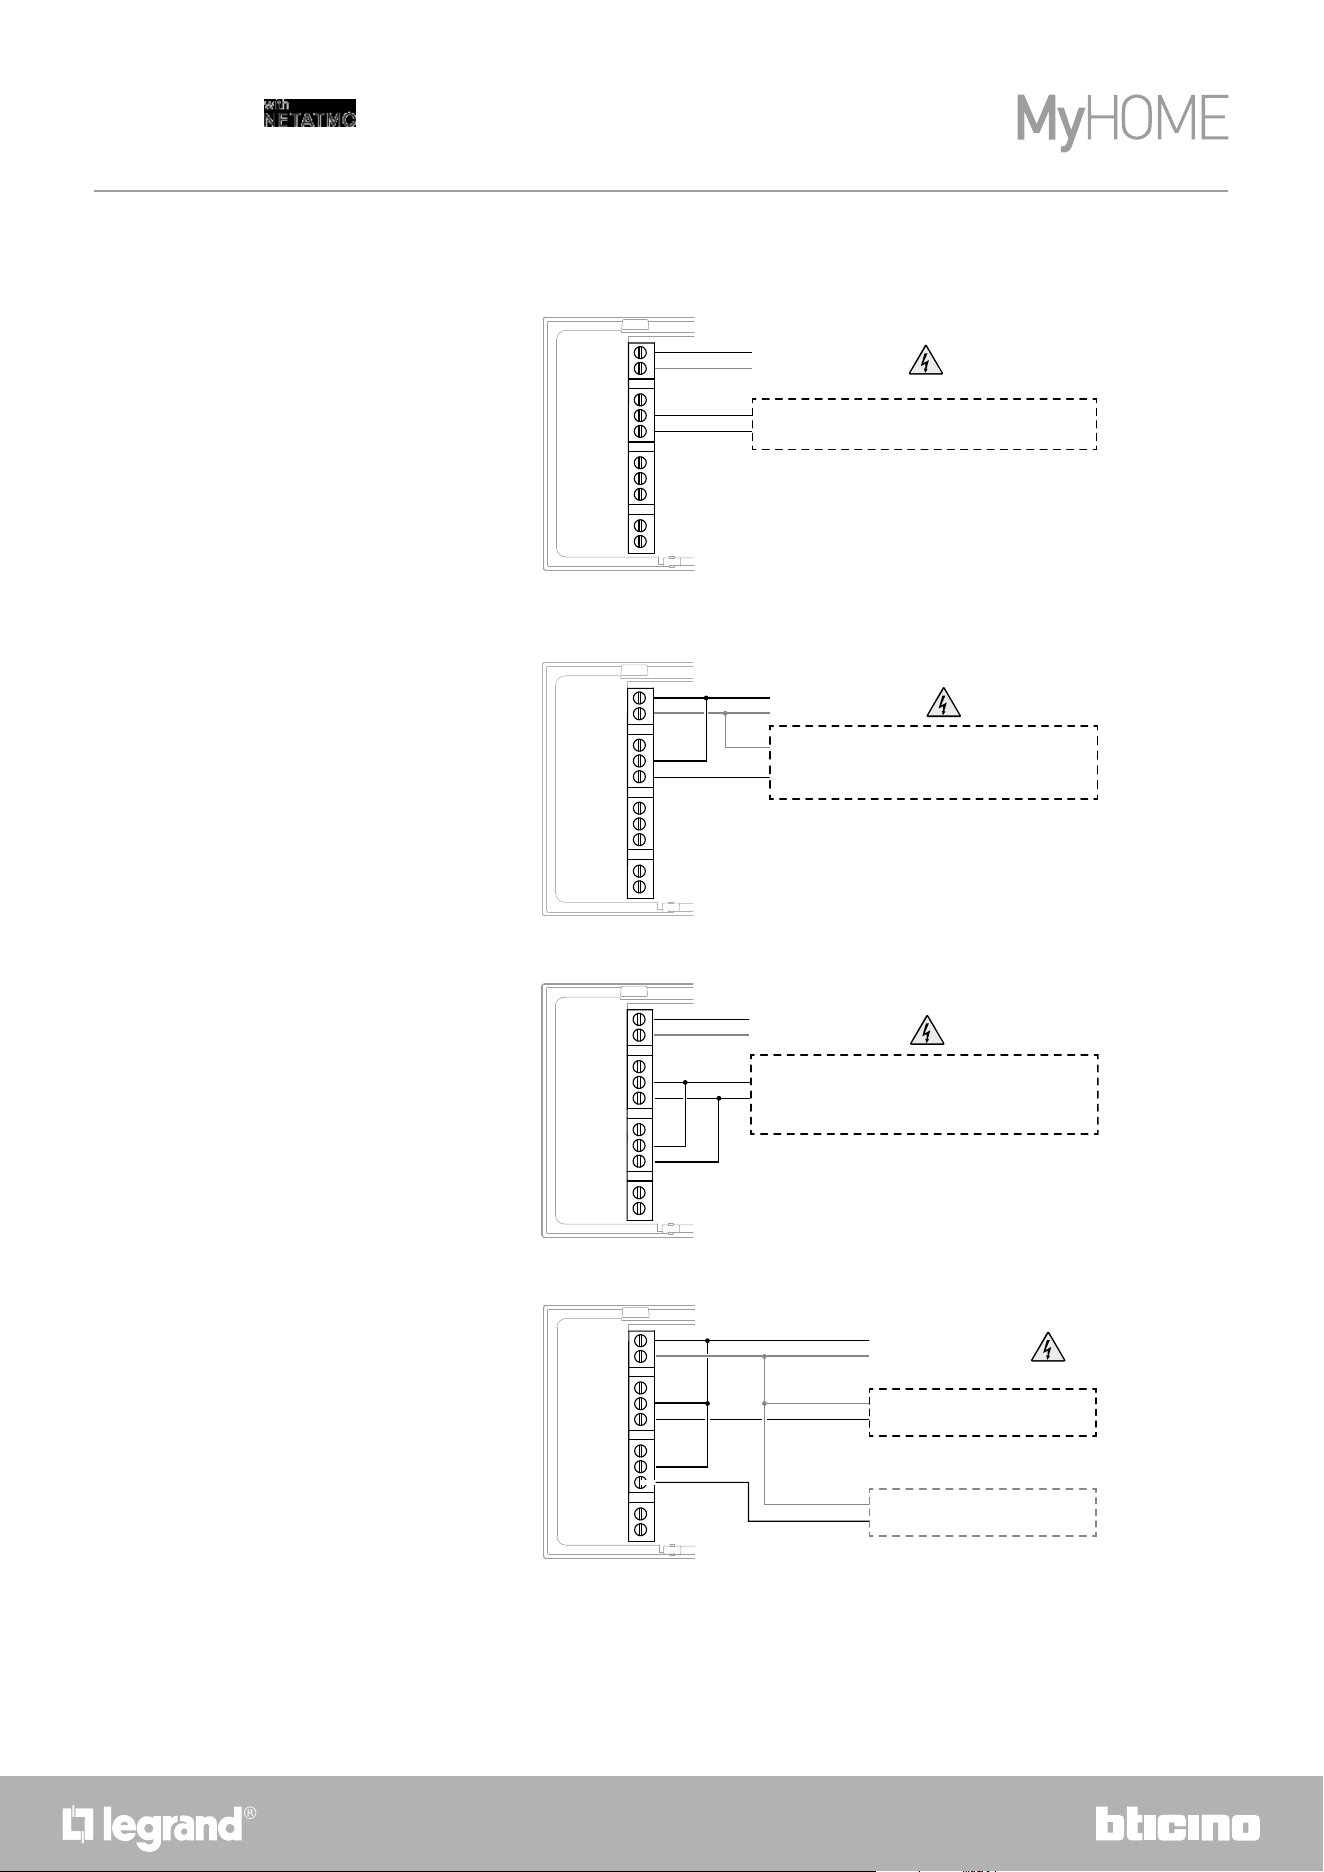
Wiring diagrams
System only for heating with clean contact (e.g. boiler activation)
System only for heating with load to be controlled to the mains voltage (e.g. 230Vac solenoid valve
or other loads, contact output 5(2) A)
Heating and cooling with floor system
Heating and cooling with different systems
C
NC
L
N
NC
NO
C
NO
110 – 240 Vac, 50/60 HZ
TO THE HEATING SYSTEM (CLEAN CONTACT) (ON/OFF)
C
NC
L
N
NC
NO
C
NO
110 – 240 Vac, 50/60 HZ
TO THE HEATING SYSTEM
(LOAD TO BE CONTROLLED TO THE NETWORK VOLTAGE)
C
NC
L
N
NC
NO
C
NO
110 – 240 Vac, 50/60 HZ
TO THE HEATING AND COOLING SYSTEM
WITH FLOOR SYSTEM
C
NC
L
N
NC
NO
C
NO
110 – 240 Vac, 50/60 HZ
TO THE HEATING SYSTEM
TO THE COOLING SYSTEM
1514
Smarther
User and installation manual
Technical data
Power supply 110 – 240 Vac , 50/60Hz
Absorption 2 W max
Maximum cable section 1 x 1,5mm2
Contact output 5(2) A
Operating temperature 5 – 40 °C
Setpoint temperature
5 – 30 °C heating; increase of 0,5 °C
5 – 40 °C cooling; increase of 0,5 °C
Type of operation 1BU
Pollution index 2
Rated pulse voltage 4 kV
Wireless device in compliance with 802.11b/g/n standard, frequency 2.4 – 2.4835 GHz,
transmission power < 20 dBm.
WEP/WPA/WPA2 safety protocol. IPv4 protocol.
Radio connection: short range communication, 868MHz/915MHz frequency, transmission power
< 25mW e.r.p.
Regulatory warnings
Read carefully before use and keep for future reference
Touching the units with wet hands is forbidden
Using liquid cleaners or aerosols is forbidden
Blocking the ventilation openings is forbidden
Modifying the devices is forbidden
Removing protective parts from the devices is forbidden
Installing the units near liquids and powders is forbidden
Installing the units near heat sources is forbidden
Installing the units near harmful gases, metal dusts or similar is forbidden
Fastening the units on unsuitable surfaces is forbidden
Danger of electrical shock
Risk of devices falling because the surface on which they are installed collapses
or inappropriate installation
Switch the power supply OFF before any work on the system
Caution: Installation, configuration, starting-up and maintenance must be
performed exclusively by qualified personnel.
Check that the wall installation has been carried out correctly
Lay out the wires respecting the standards in force
Connect the power supply wires as indicated
Use only the items indicated in the technical specifications for any system
expansions
16
Smarther
User and installation manual
Operation
In basic mode the Smarther allows you to adjust the temperature manually and switch the system on for a limited time (Boost mode).
The advanced functions are available through the Home + Control App, which can be downloaded free from the Stores (for iOS devices
from App Store, for Android devices from Play Store). In advanced mode you can plan the schedules.
The smartphone on which the Home + Control App is installed and the Smarther communicate via the device's Wi-Fi connection. You
therefore do not need wire connections or a mains power supply and connections with the heating system.
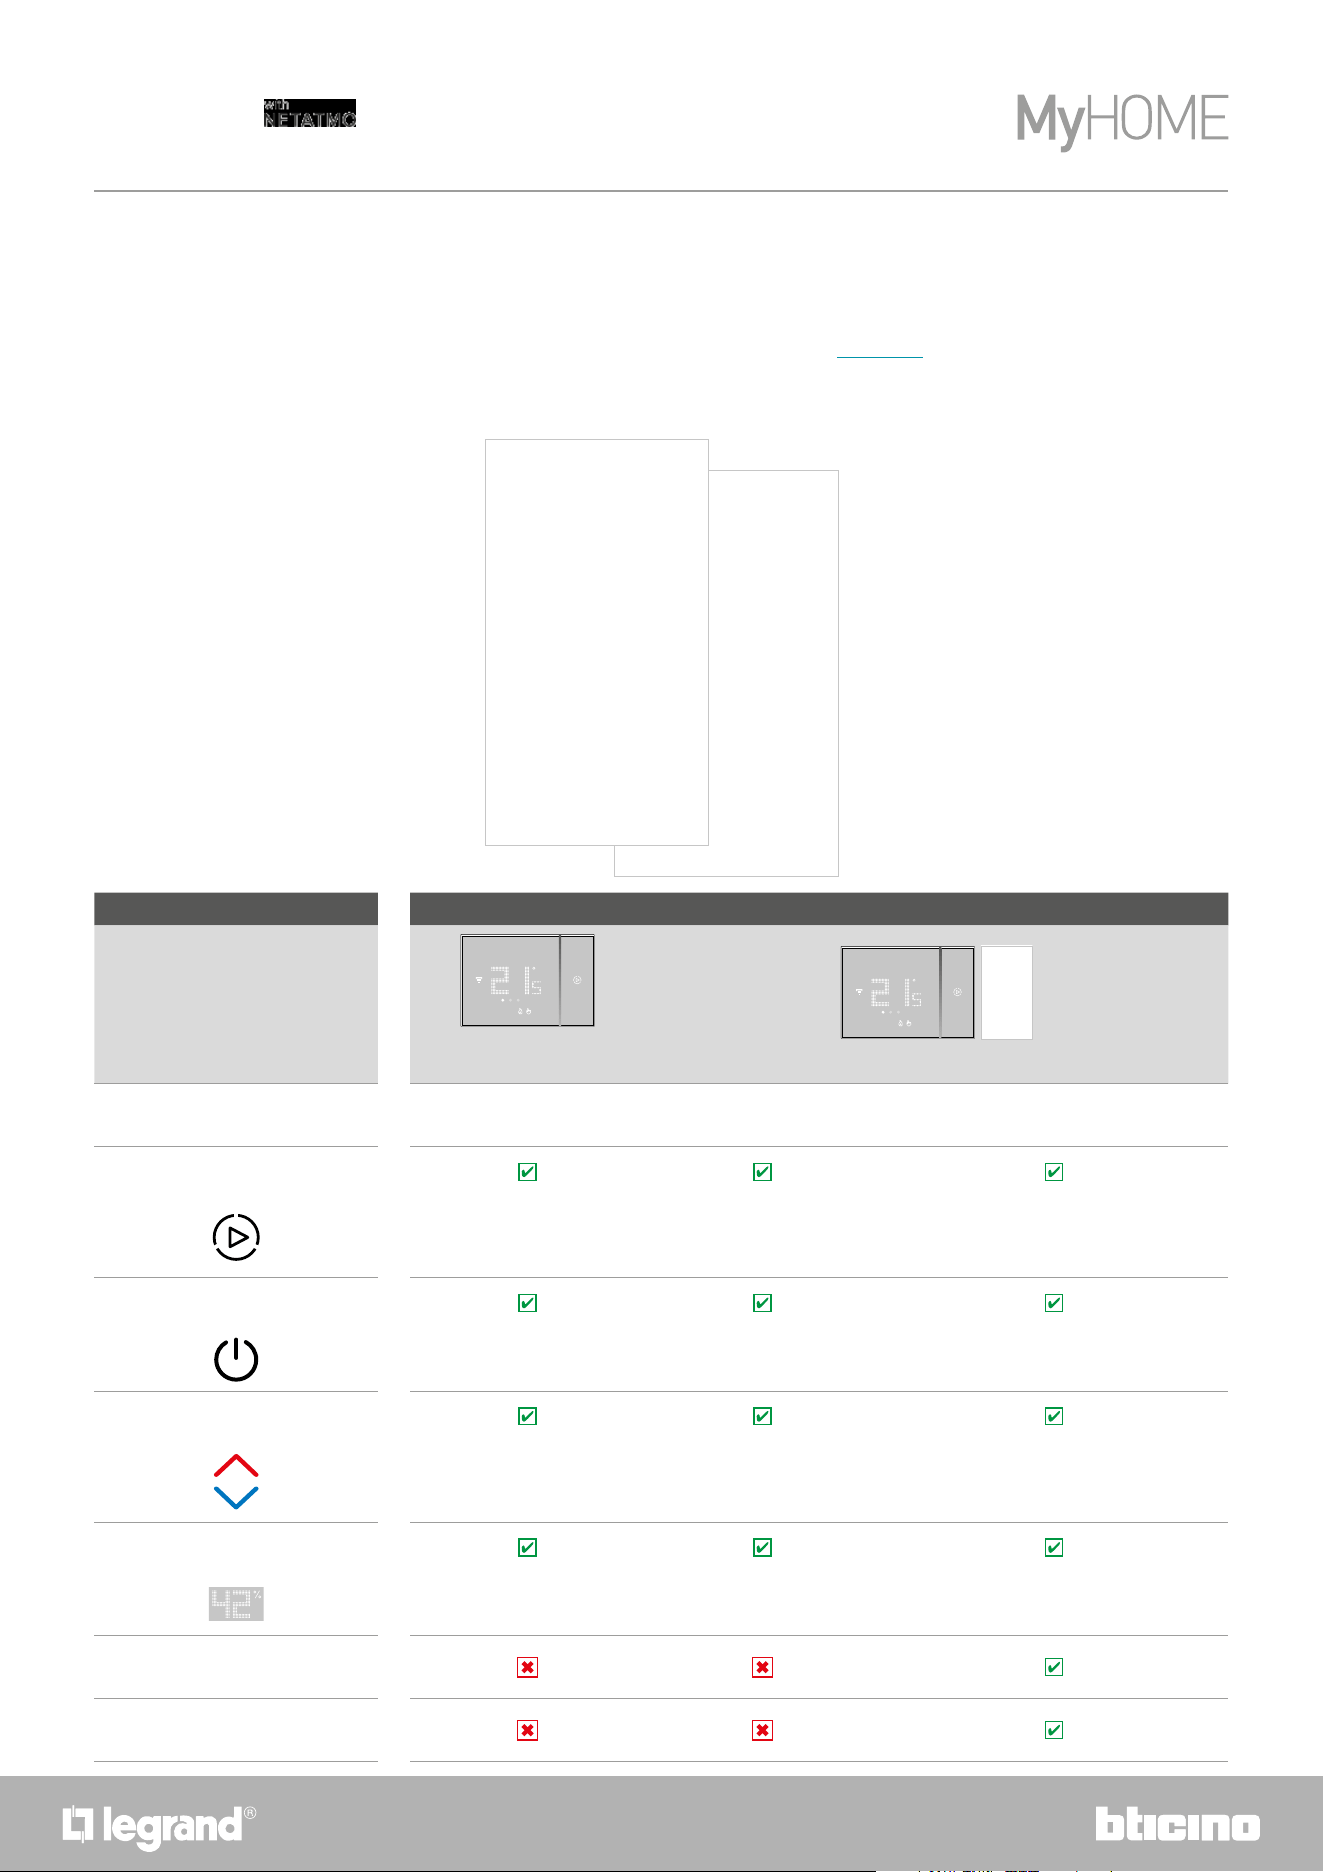
Functions available and differences between newly installed Smarther and Smarther connected with App
Functions
Smarther just installed
(not connected)
Smarther connected with the App
By Smarther By App
Boost
At the end of the set period the
Smarther returns to the mode which
was active before the activation
At the end of the set period the
Smarther returns to the program in
progress.
At the end of the set period the Smarther returns to the
program in progress.
Switching off
The set mode is permanent The set mode is permanent The set mode is permanent
I set the temperature
The set temperature is permanent
The set temperature has a fixed
time (default 3 hours) which can be
modified from the App
The set temperature has a fixed time (default 3 hours)
which can be modified
Display the humidity
Displayed in the third page Displayed in the third page Displayed in the Home Page
Frost guard mode
Absent mode
1716
Smarther
User and installation manual
Note: a domestic Wi-Fi with internet access is needed for the connection between the Smarther and the smartphone. To use the service, the Customer must acquire the technical equipment which allows
access to the Internet, on the basis of an agreement made by the Customer himself with an ISP (Internet Service Provider). BTicino plays no part in this.
Install the dedicated Home + Control application on your smartphone to program and use the Smarther. The services offered by means of the App require being able to interact with Smarther remotely and
through the Internet. In these cases the integration and good working between Smarther and App may depend on:
– a) quality of the Wi-Fi signal;
– b) quality of the data signal;
We would like to inform you that the remote use via the App involves the use of data. The cost linked to data usage depends on the type of contract which the customer has with his ISP (Internet Service
Provider) and is solely the customer’s responsibility.
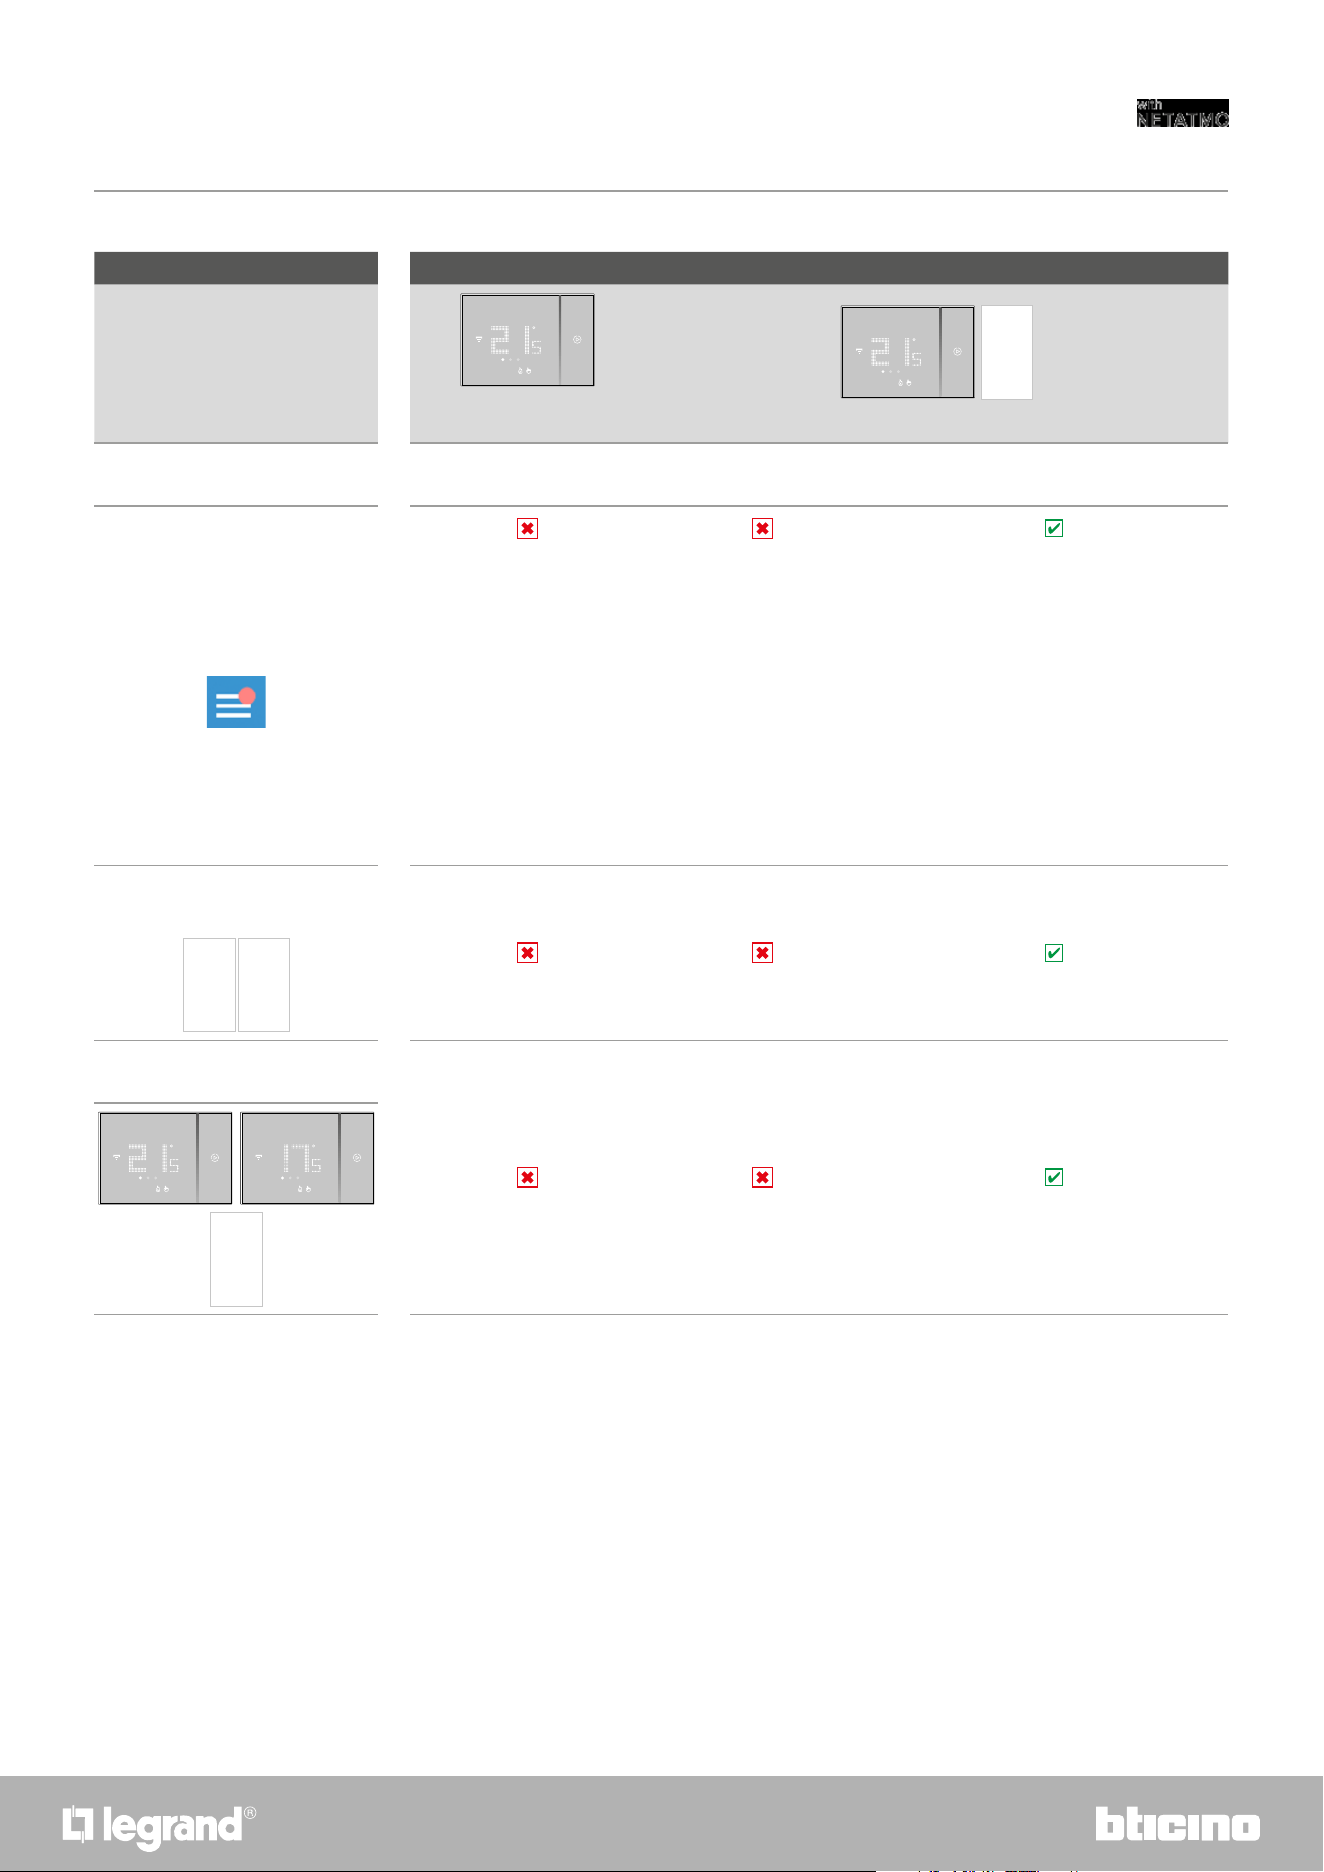
Functions available and differences between newly installed Smarther and Smarther connected with App
Functions
Smarther just installed
(not connected)
Smarther connected with the App
By Smarther By App
Settings
– Heating/cooling switch (default: heating)
– Enable touch interface (default: enabled)
– Display brightness (*) (default: automatic without
switching off)
– Heating protection temperature (default: 7 °C)
– Temperature calibration
– Beep activation (default: disabled)
– Vibration activation (default: enabled)
Program of a daily or weekly temperature
profile
Management of several Smarther and several
houses
(*) display brightness levels: Off, Automatic without switching off, Automatic with switching off, Customised
18
Smarther
User and installation manual
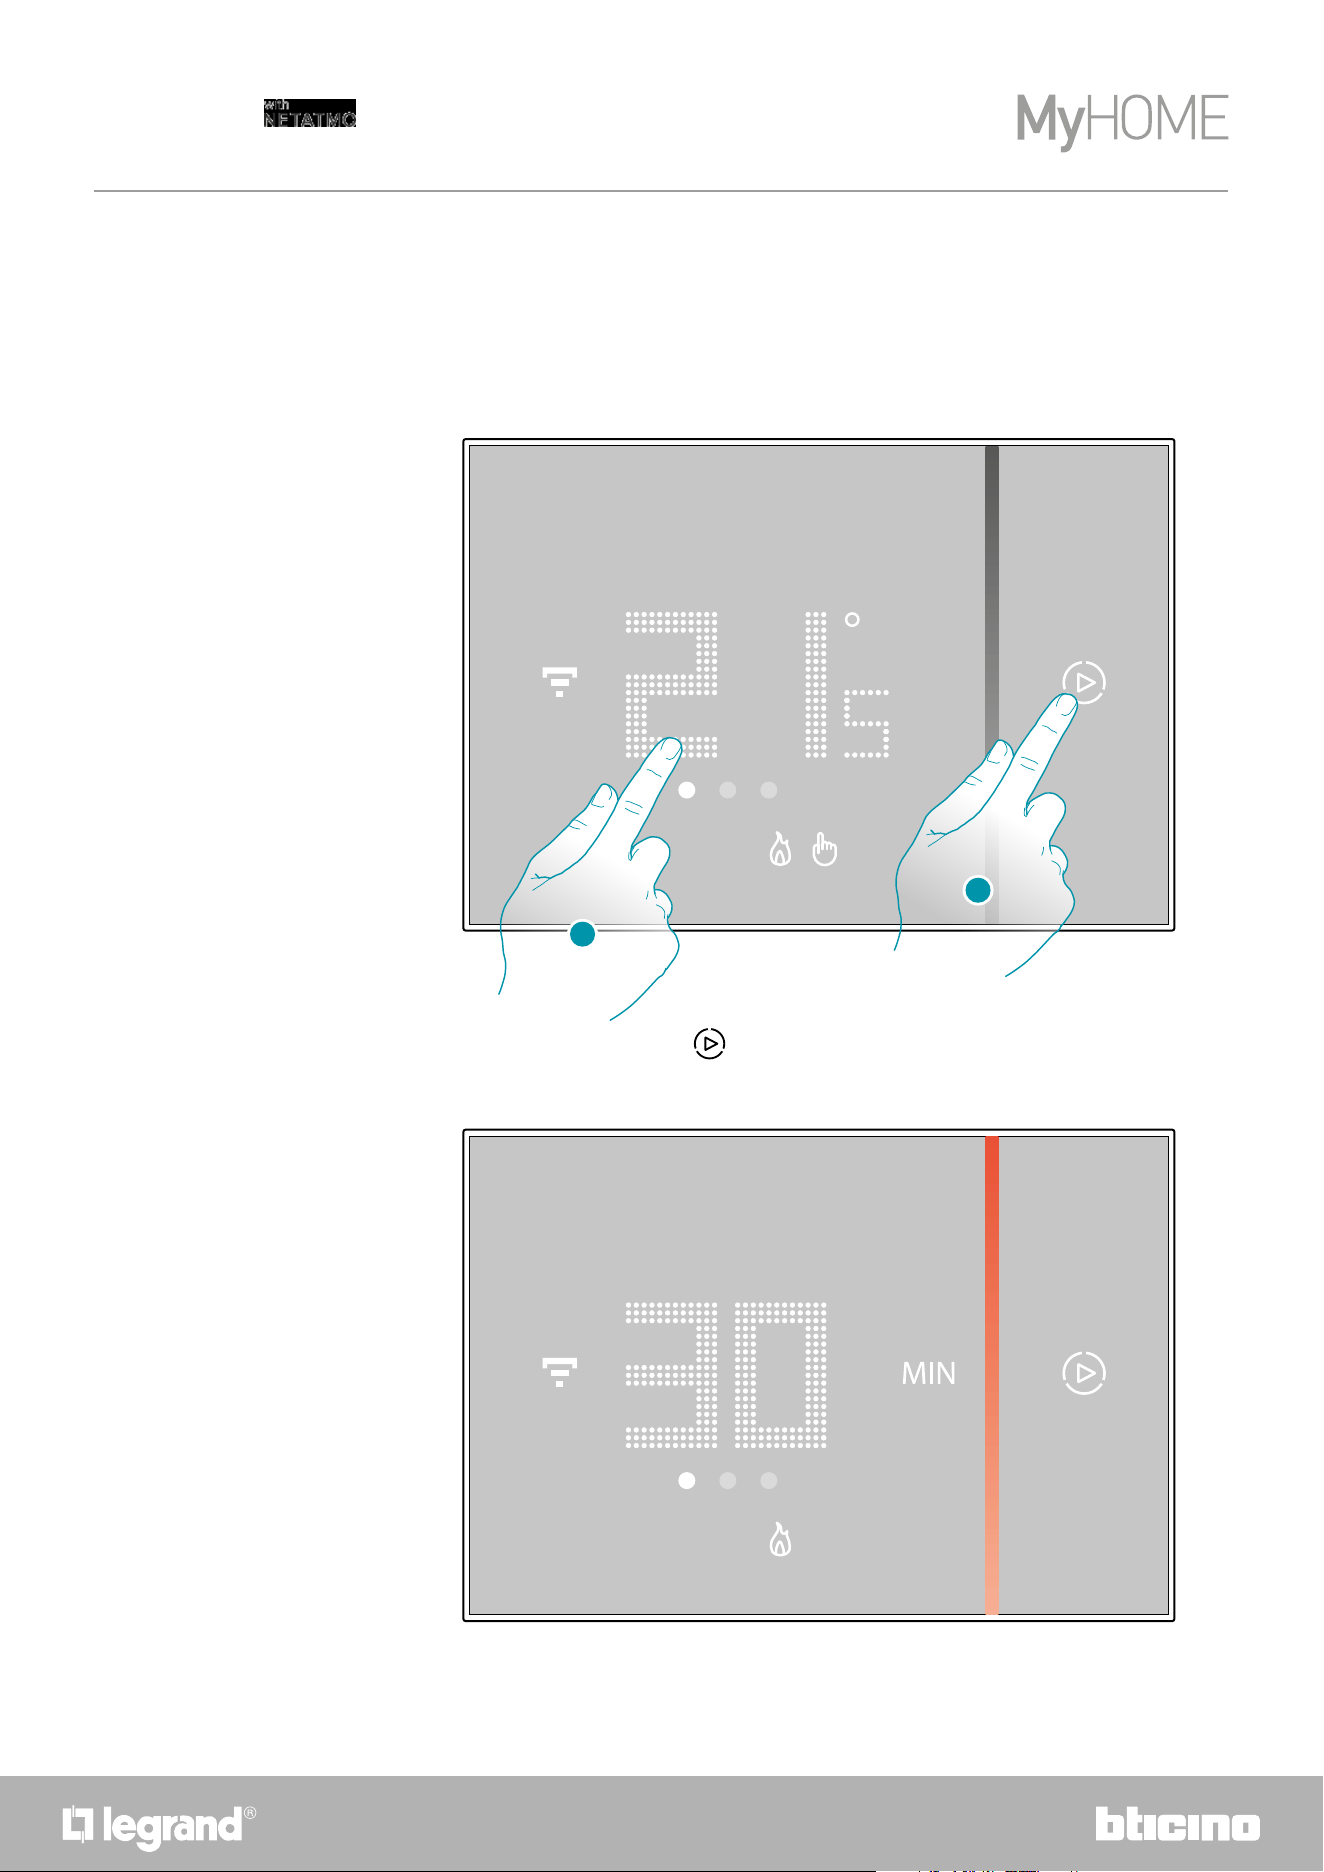
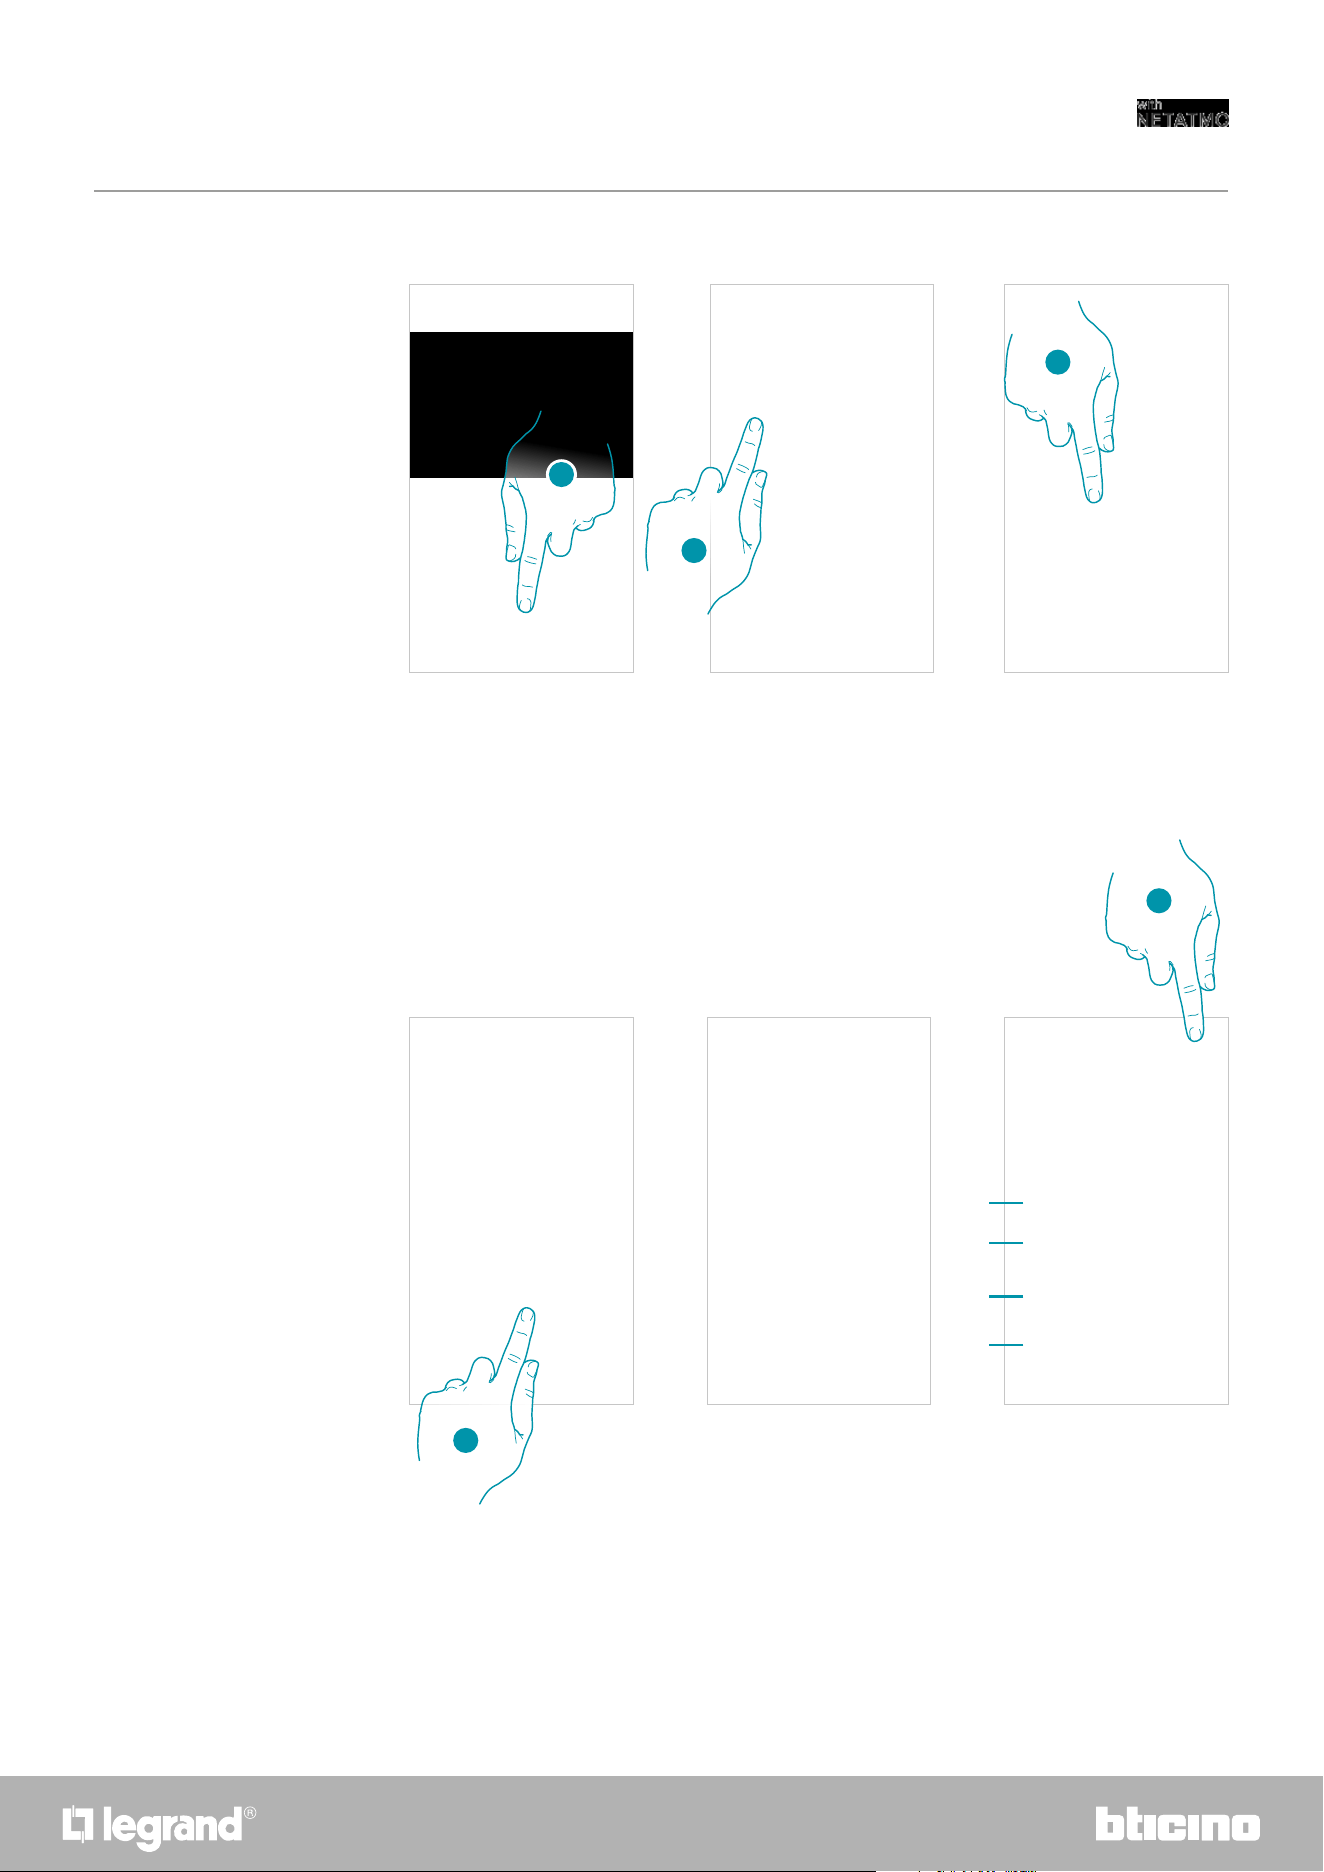
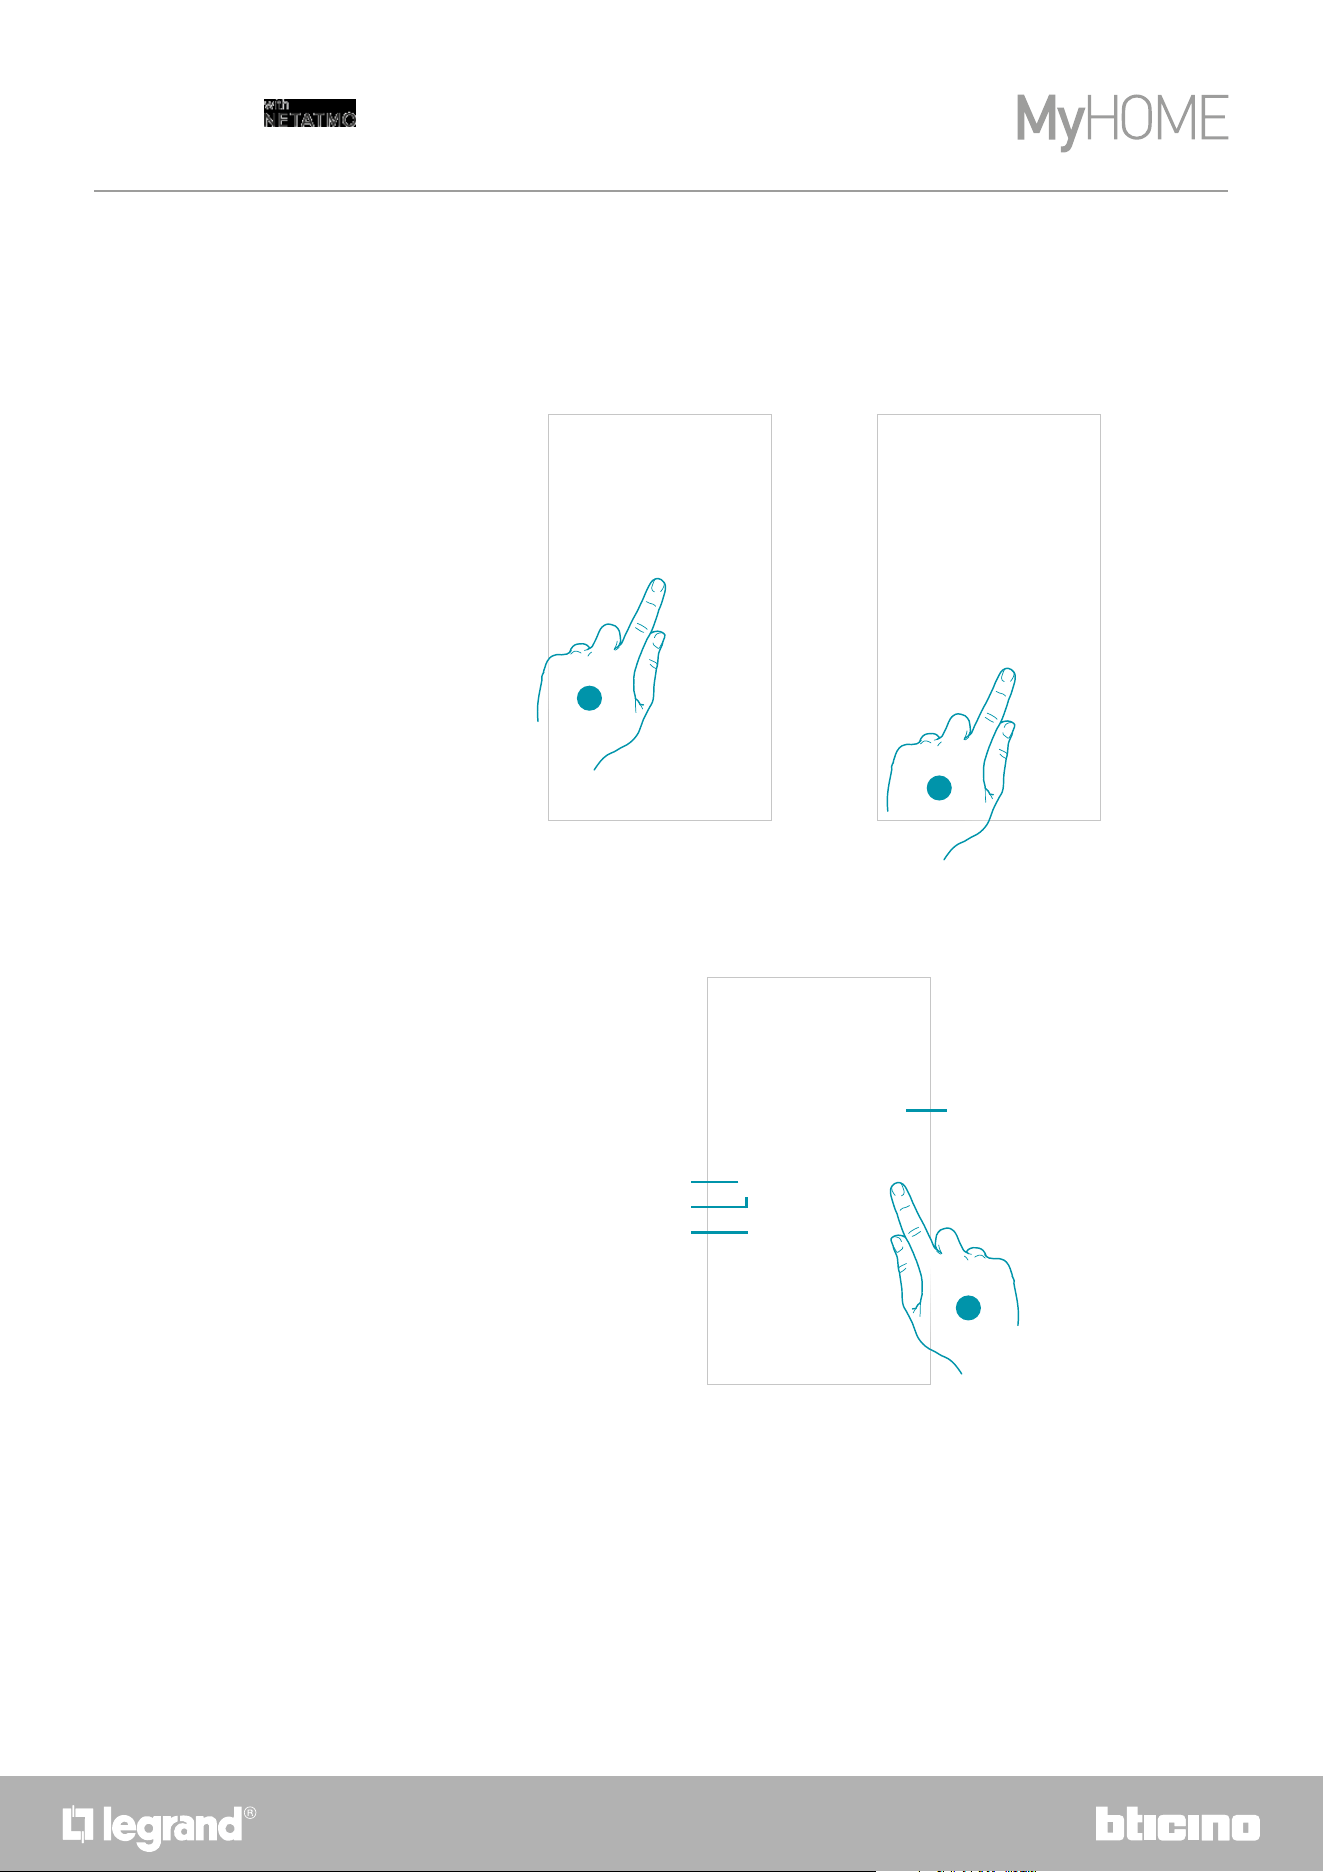
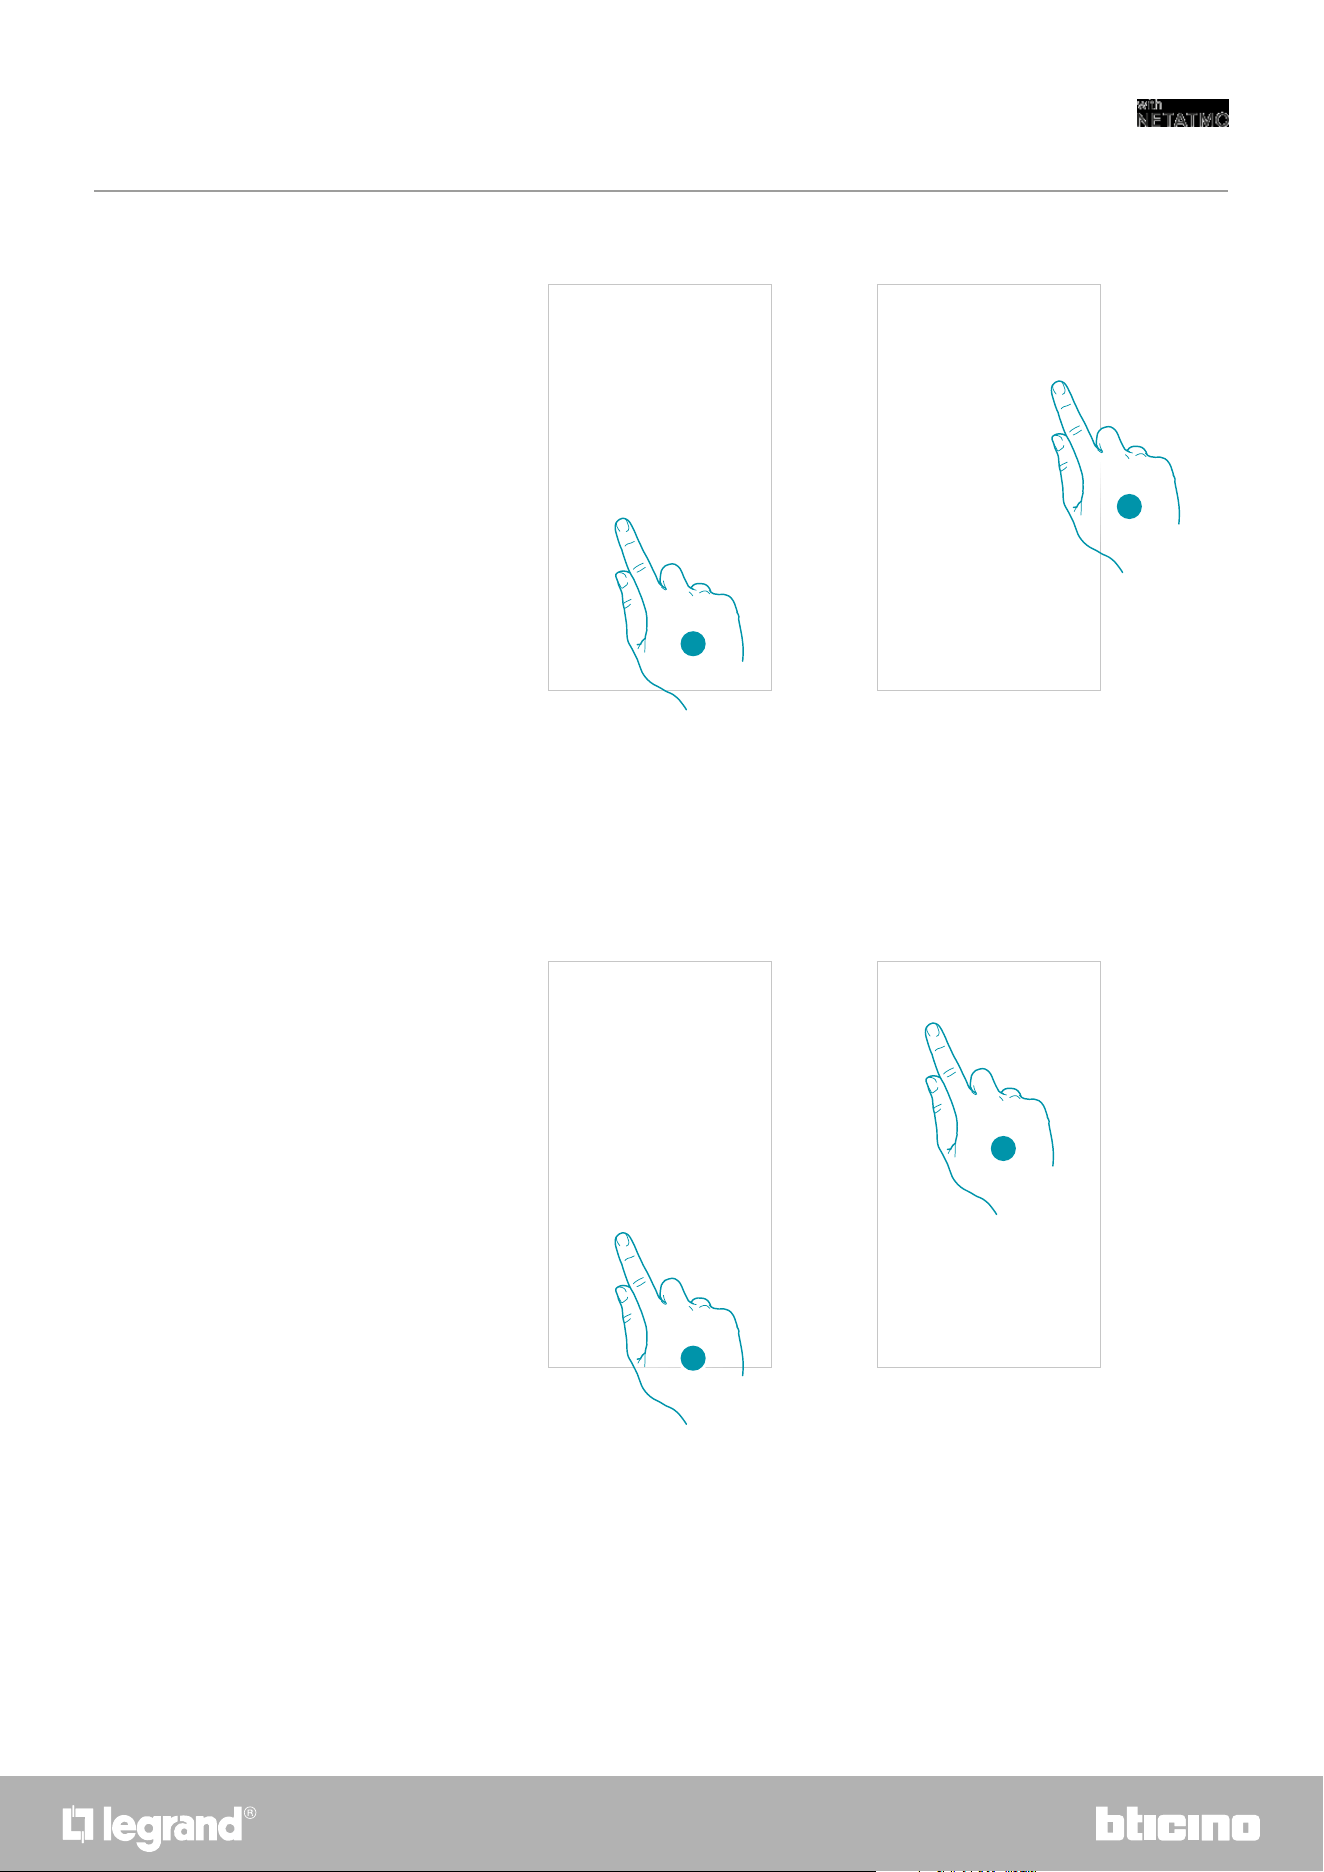
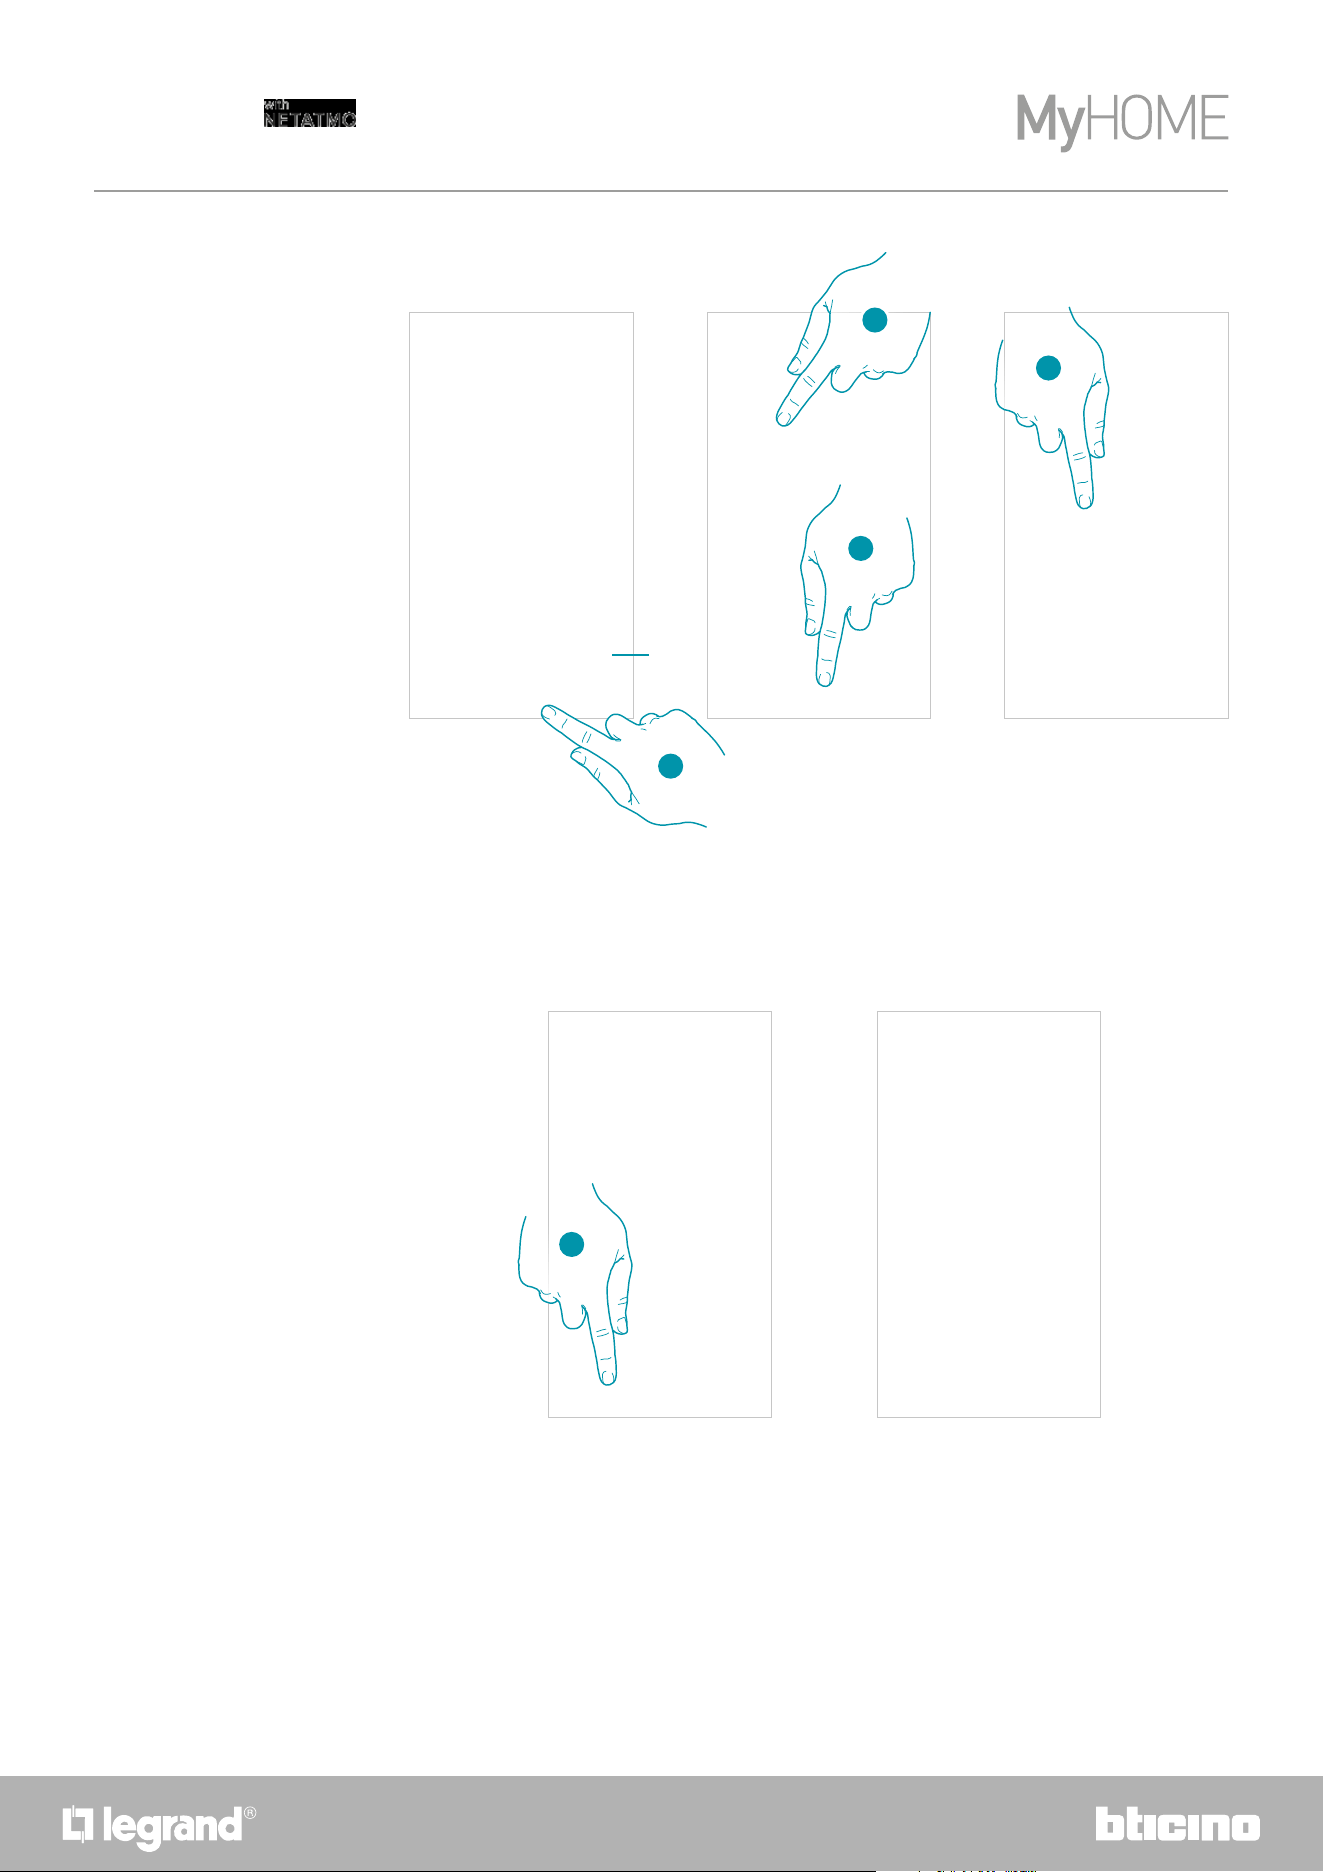
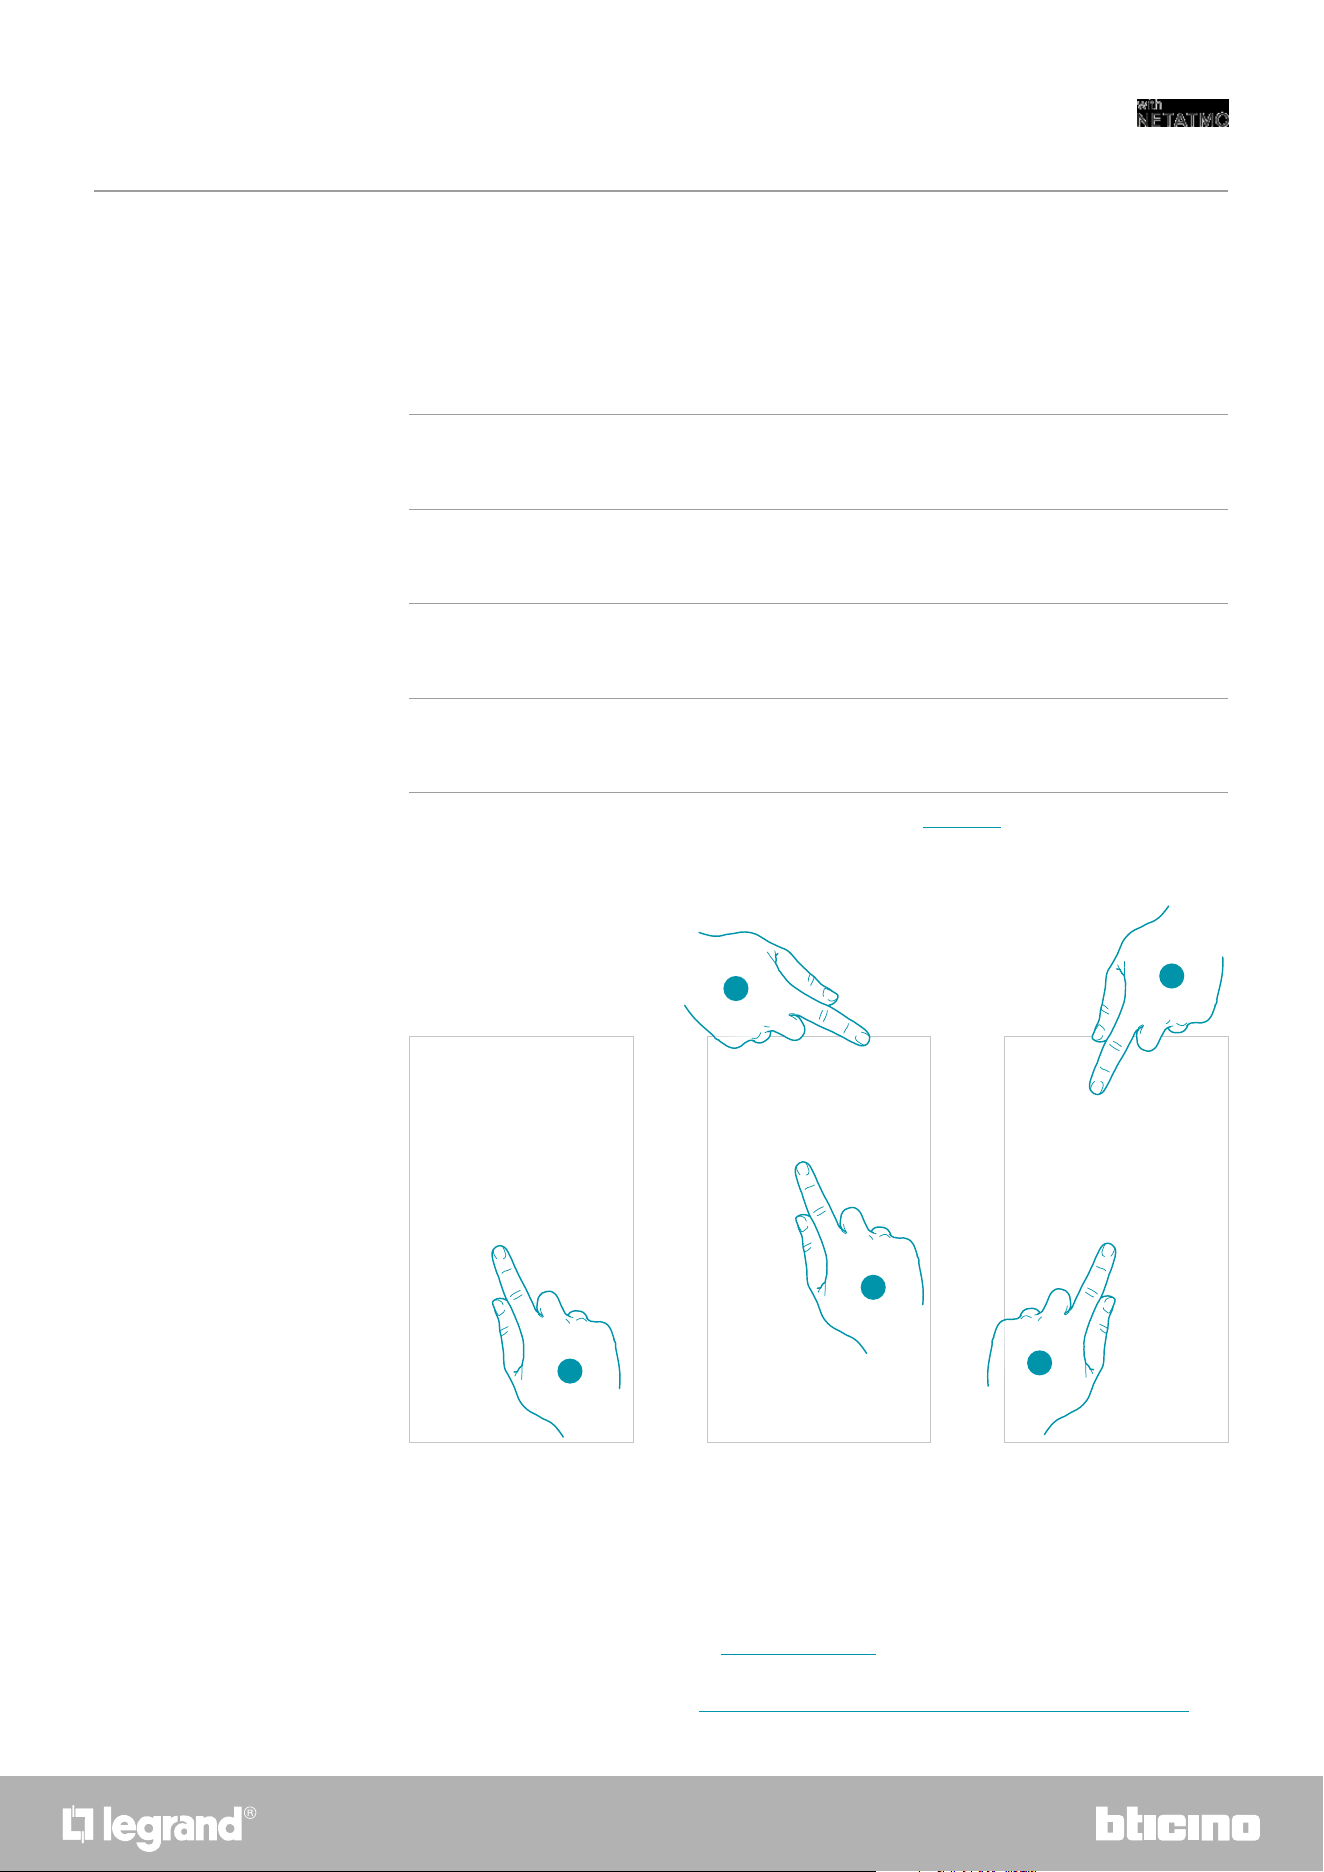
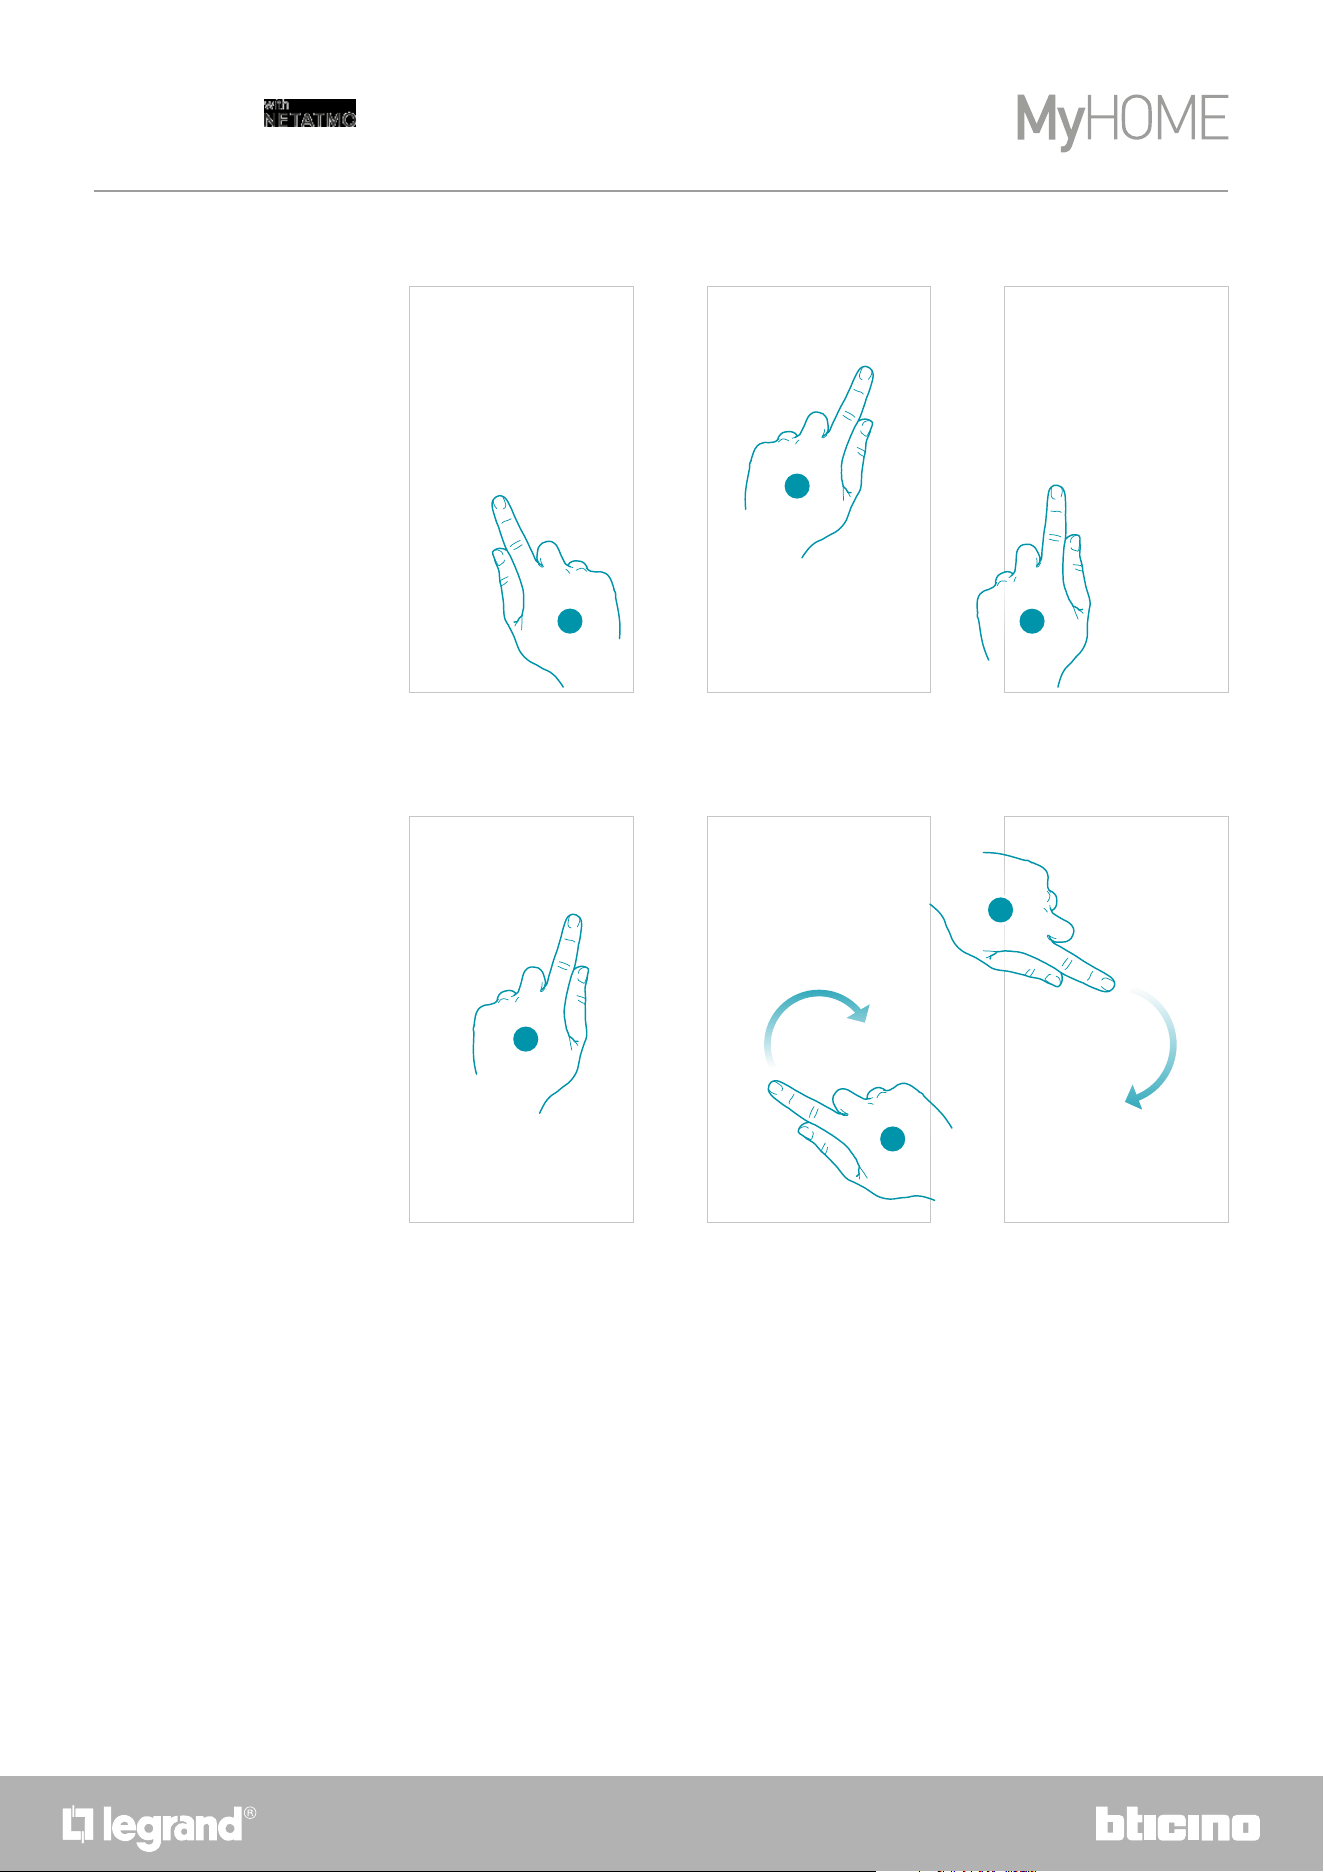
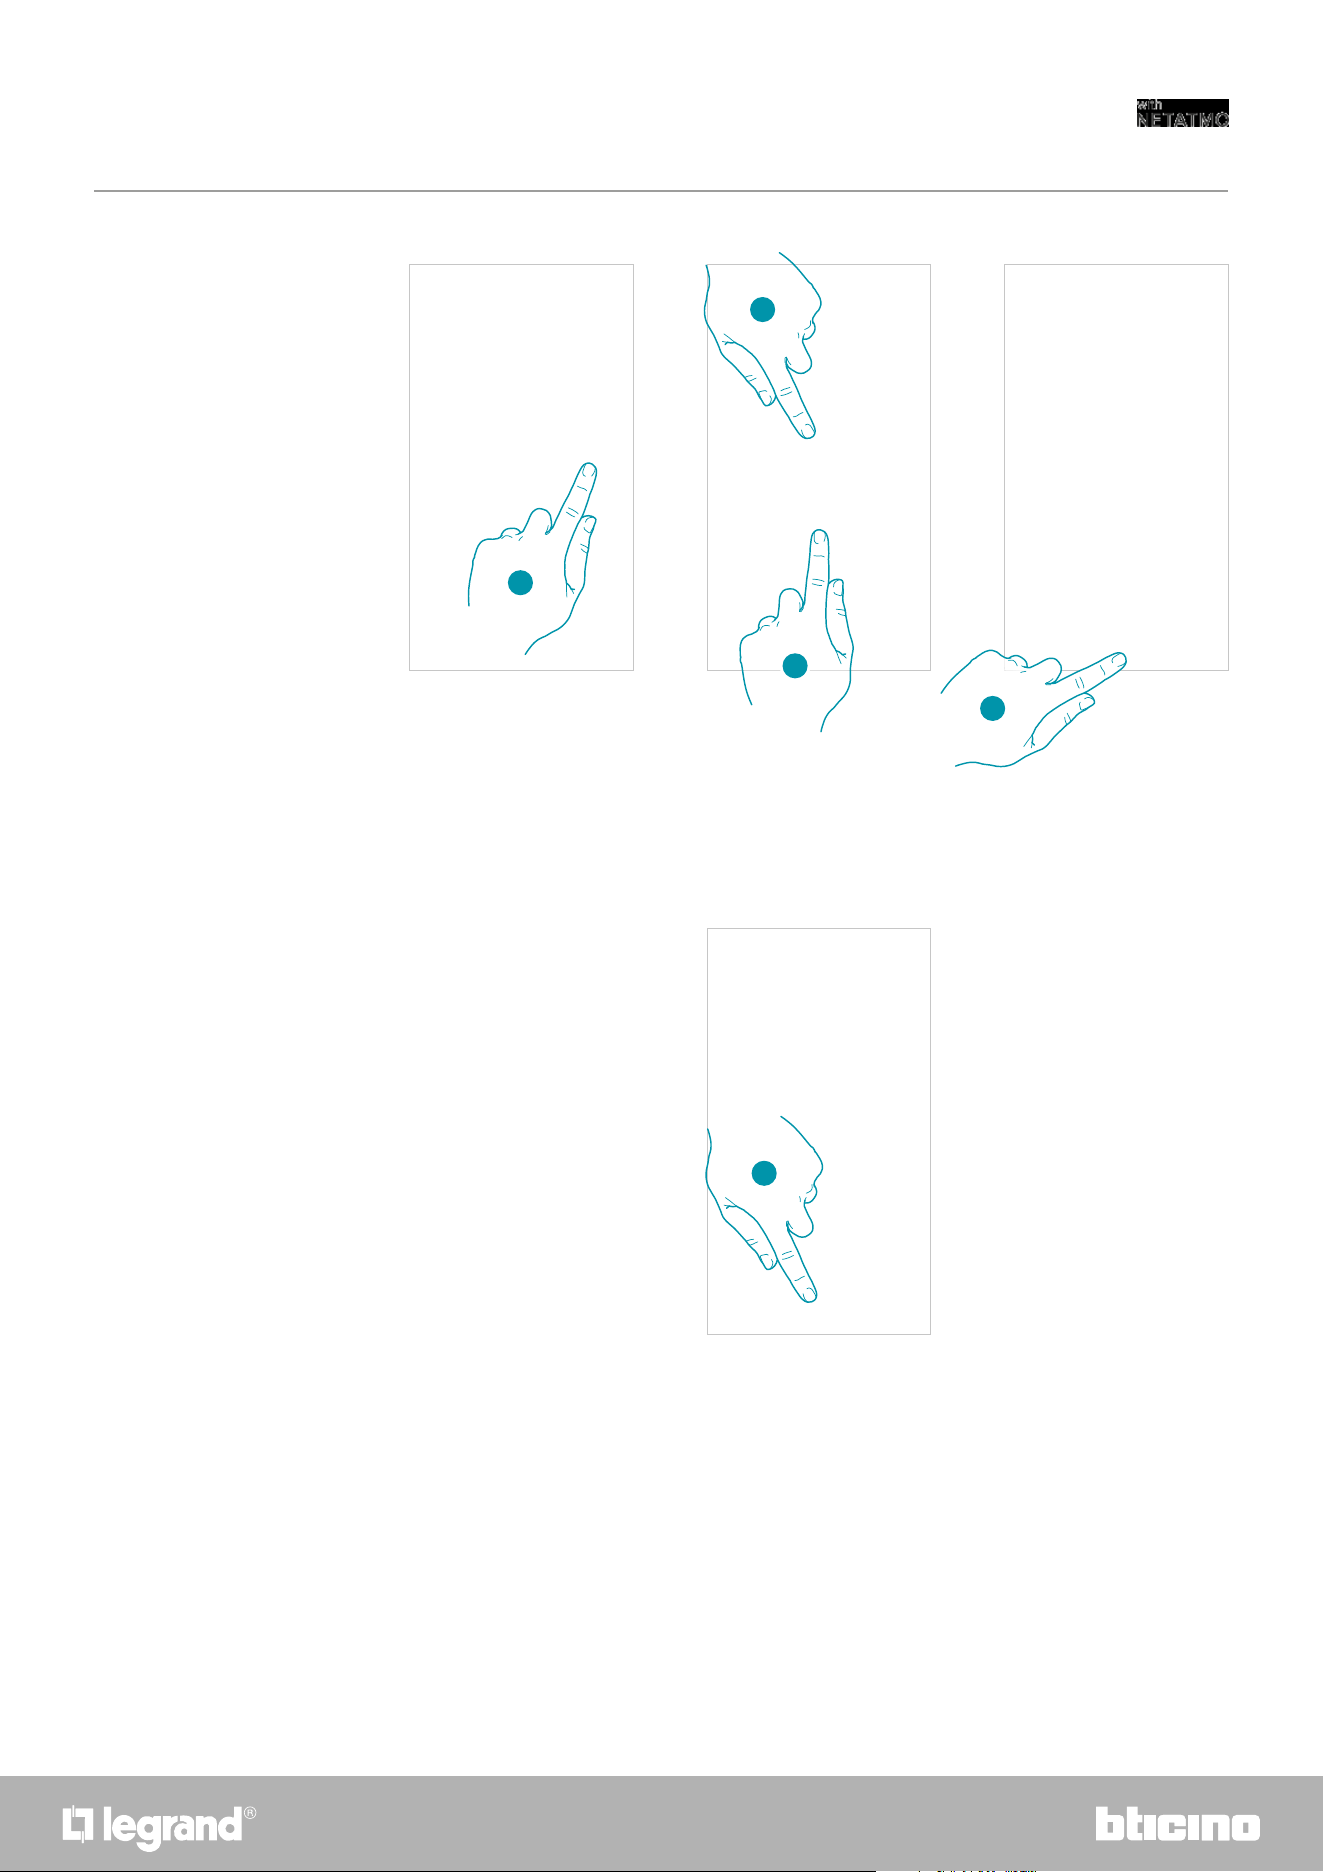
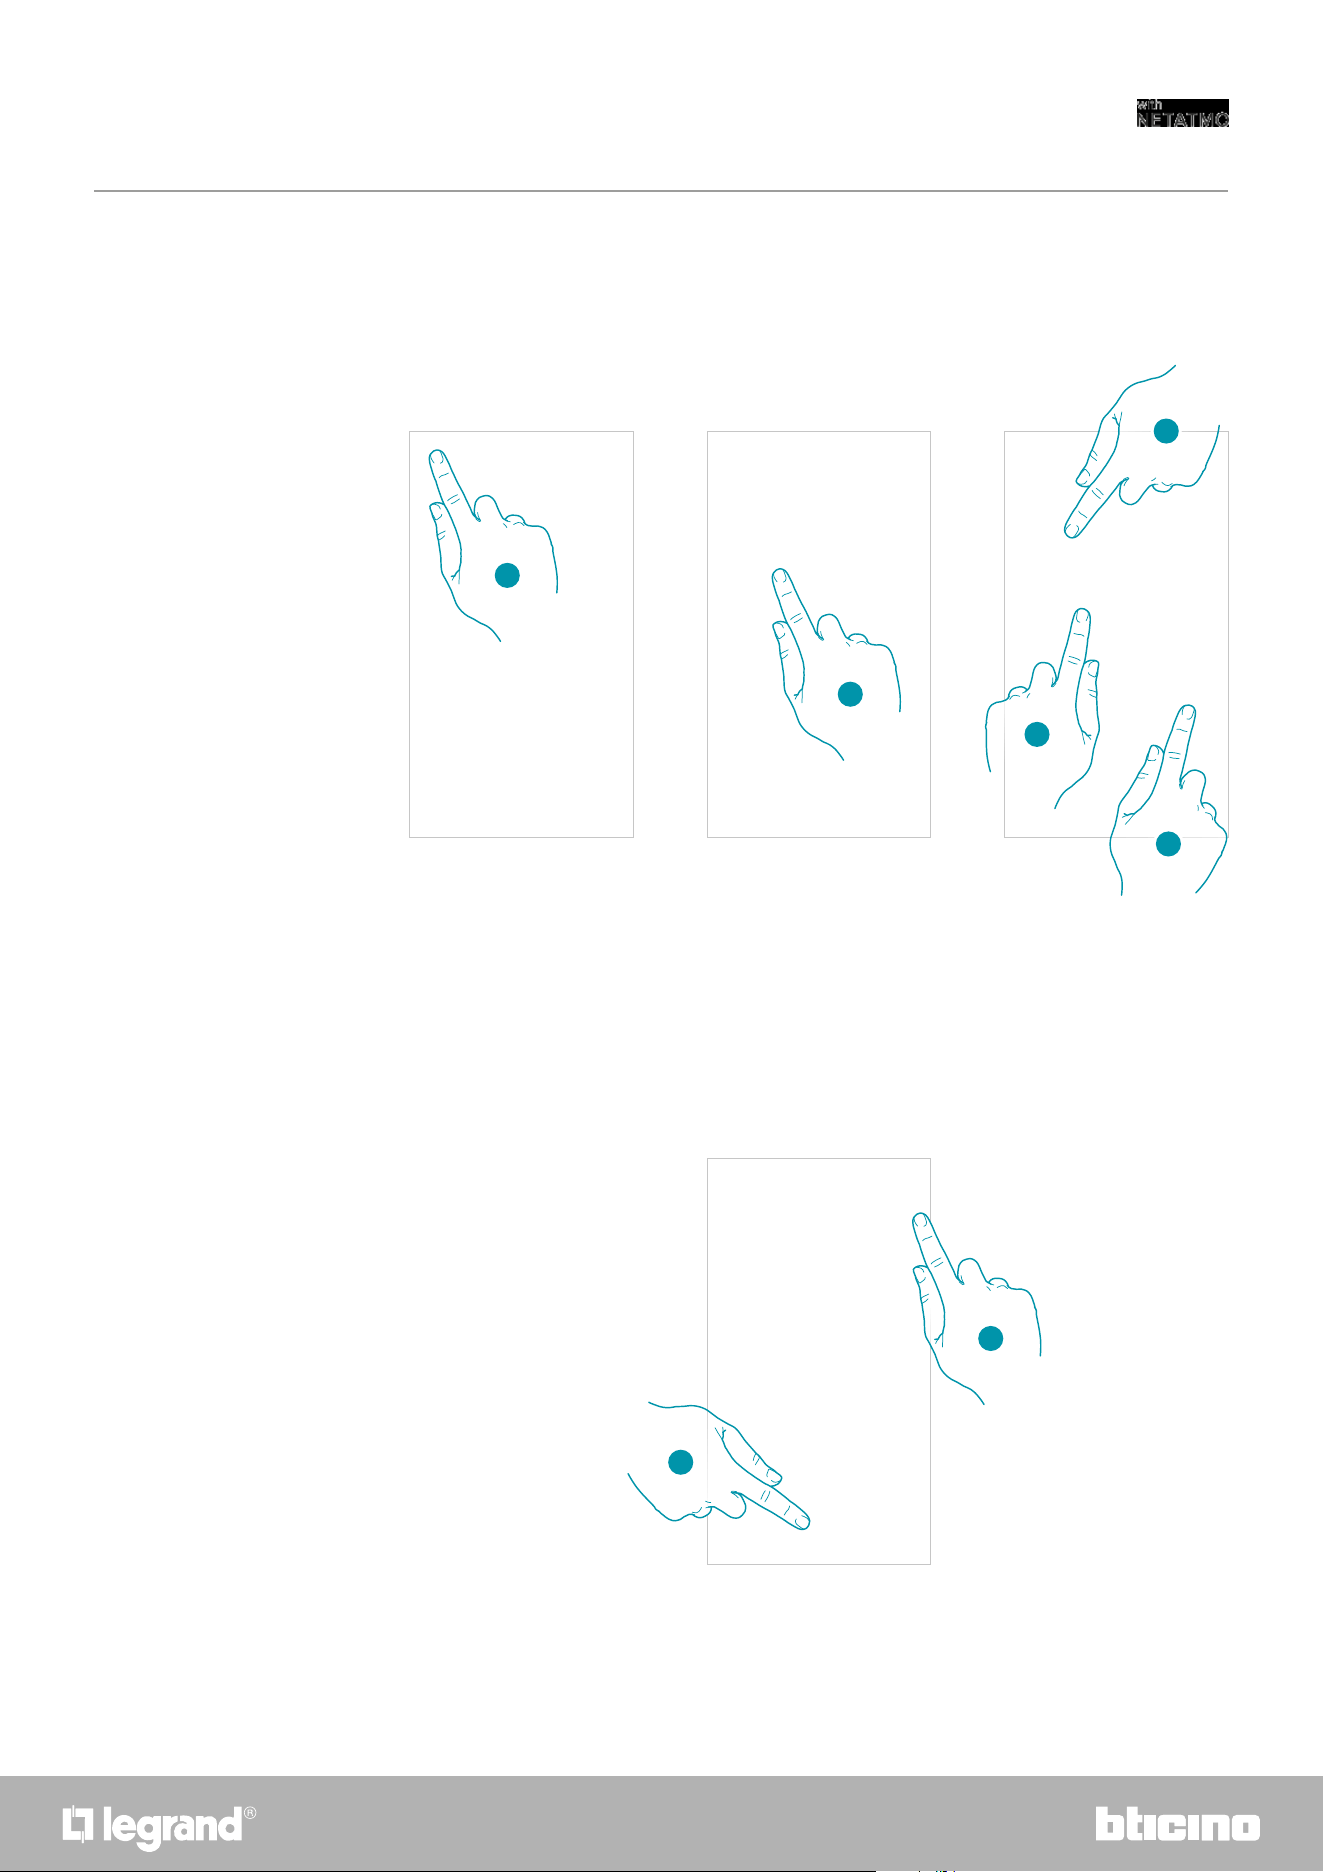
The Boost forces the switching on of the system for a limited time (30, 60 or 90 minutes)
independent of the measured and programmed temperature.
Once the time set has elapsed, Smarther will resume operation according to the previous program.
Basic functions
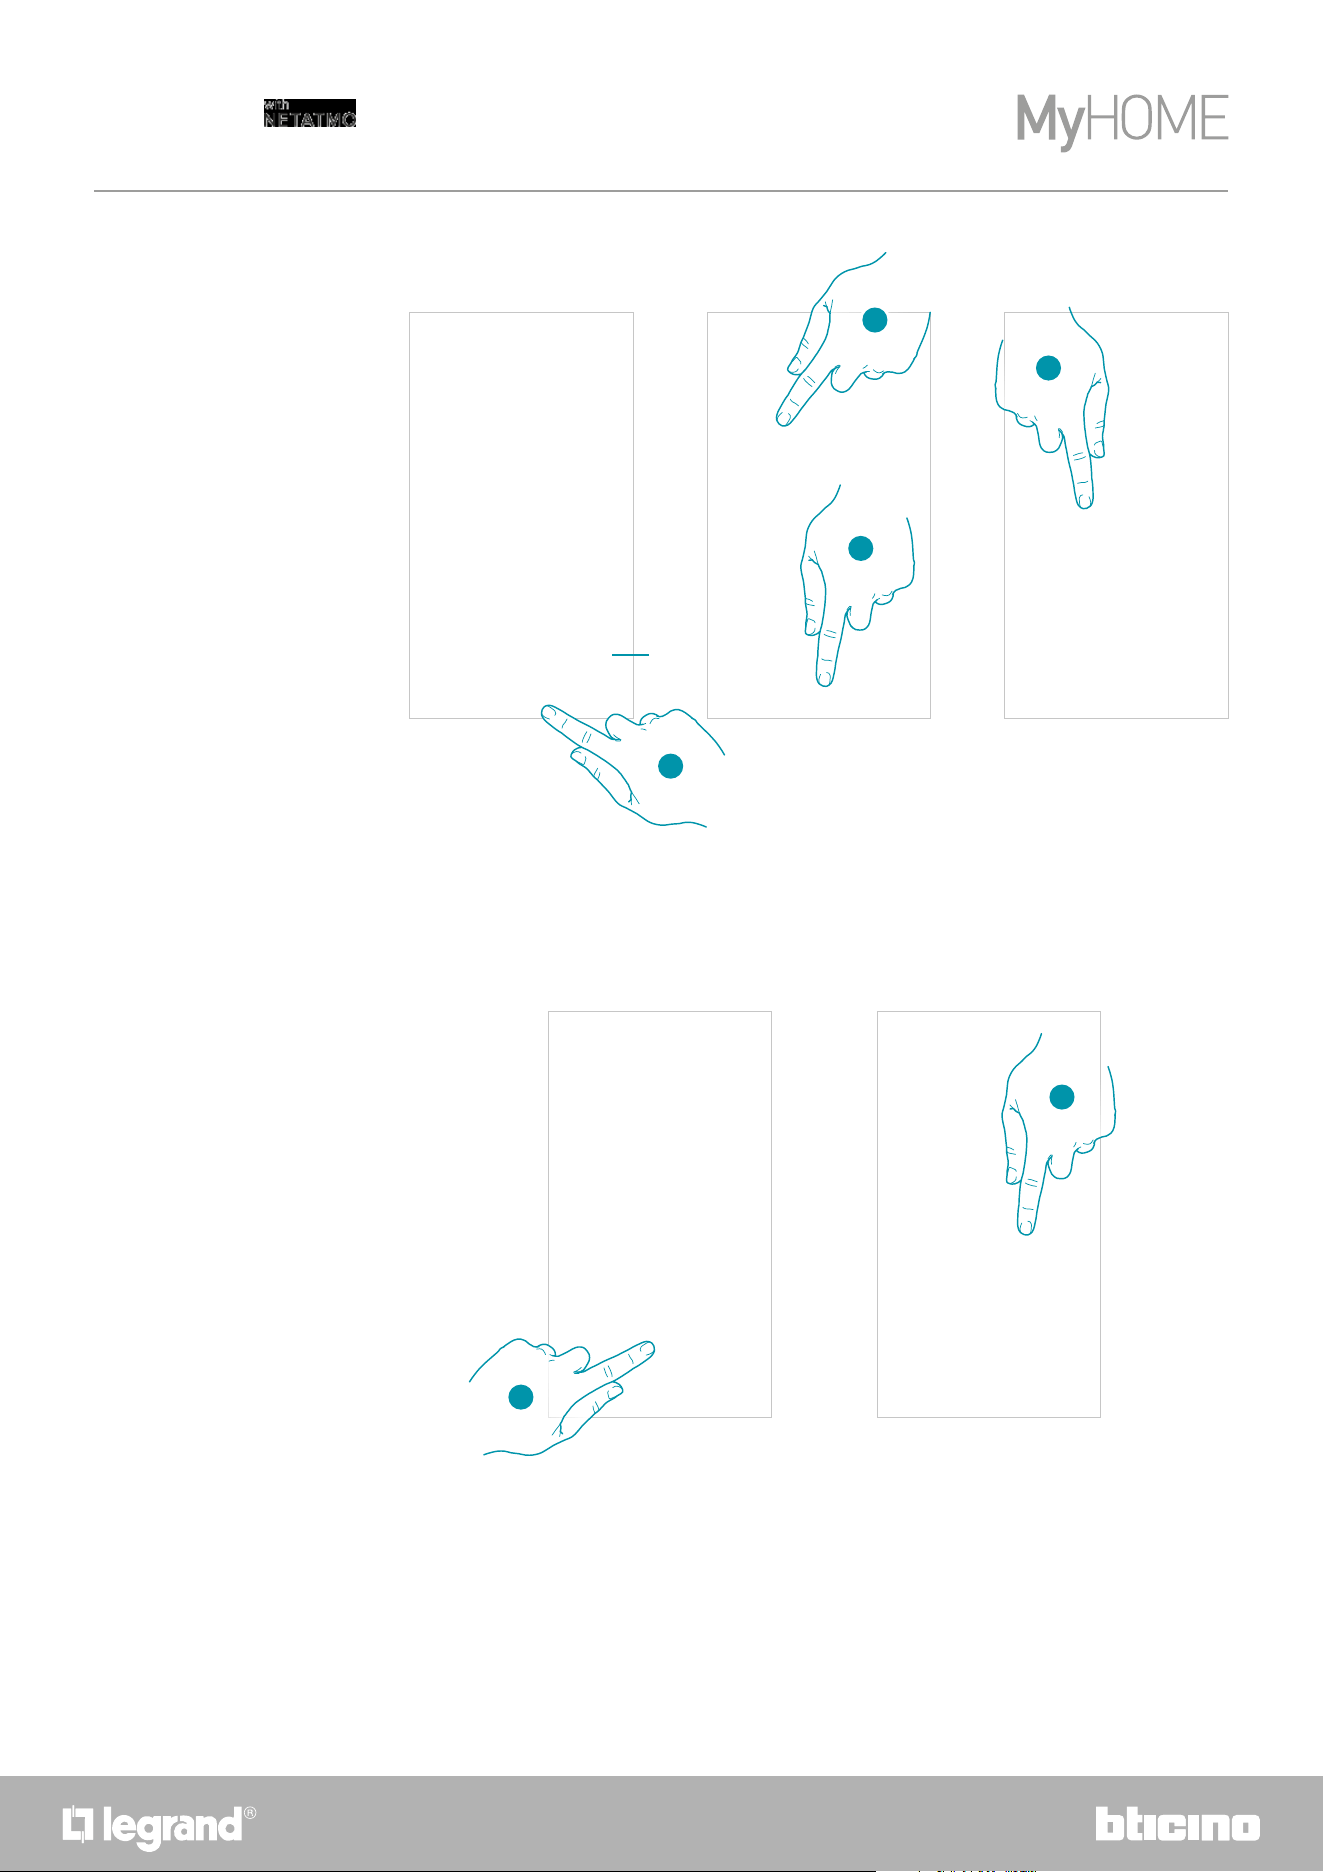
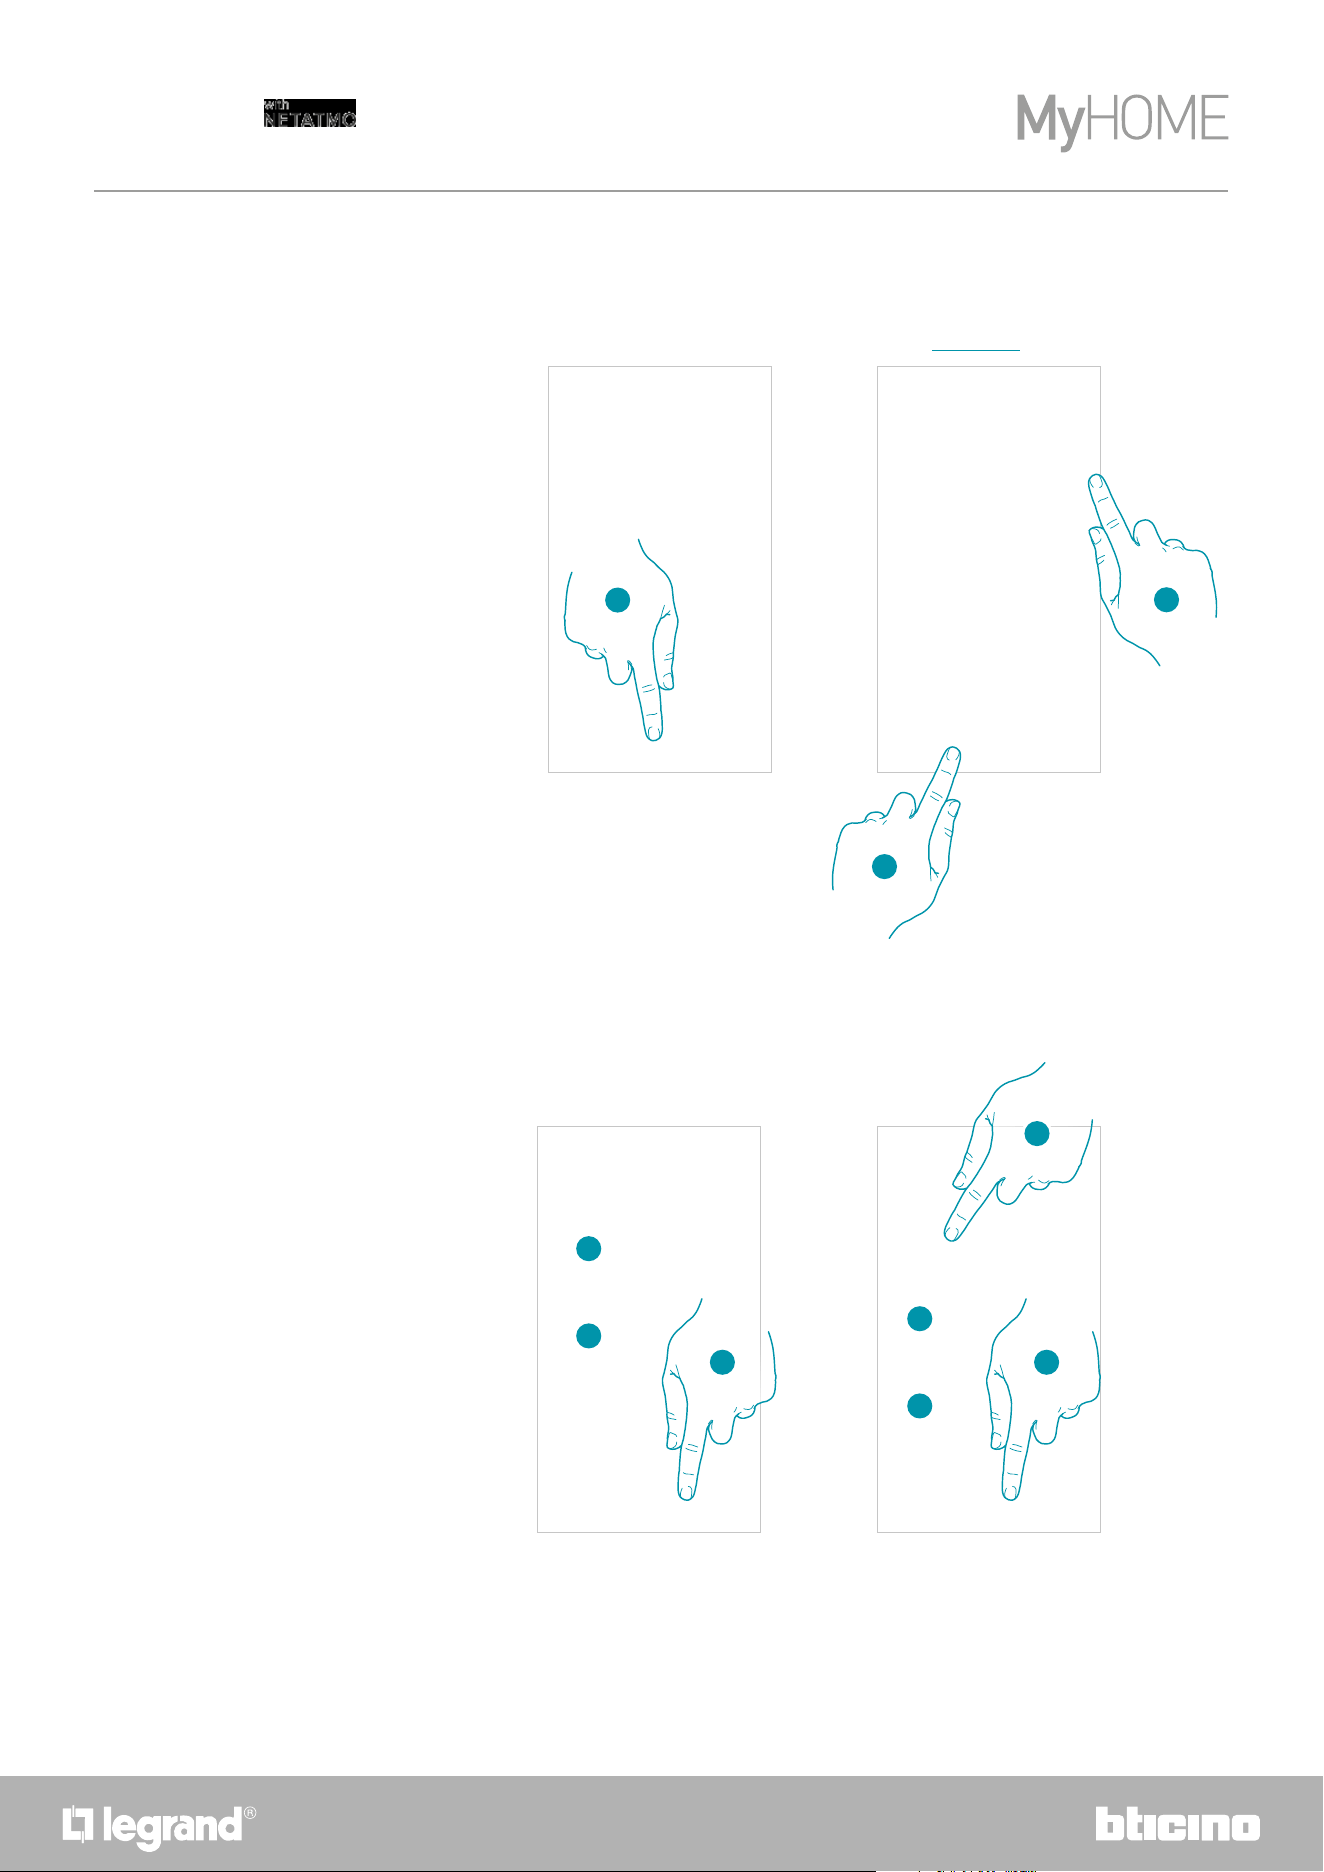
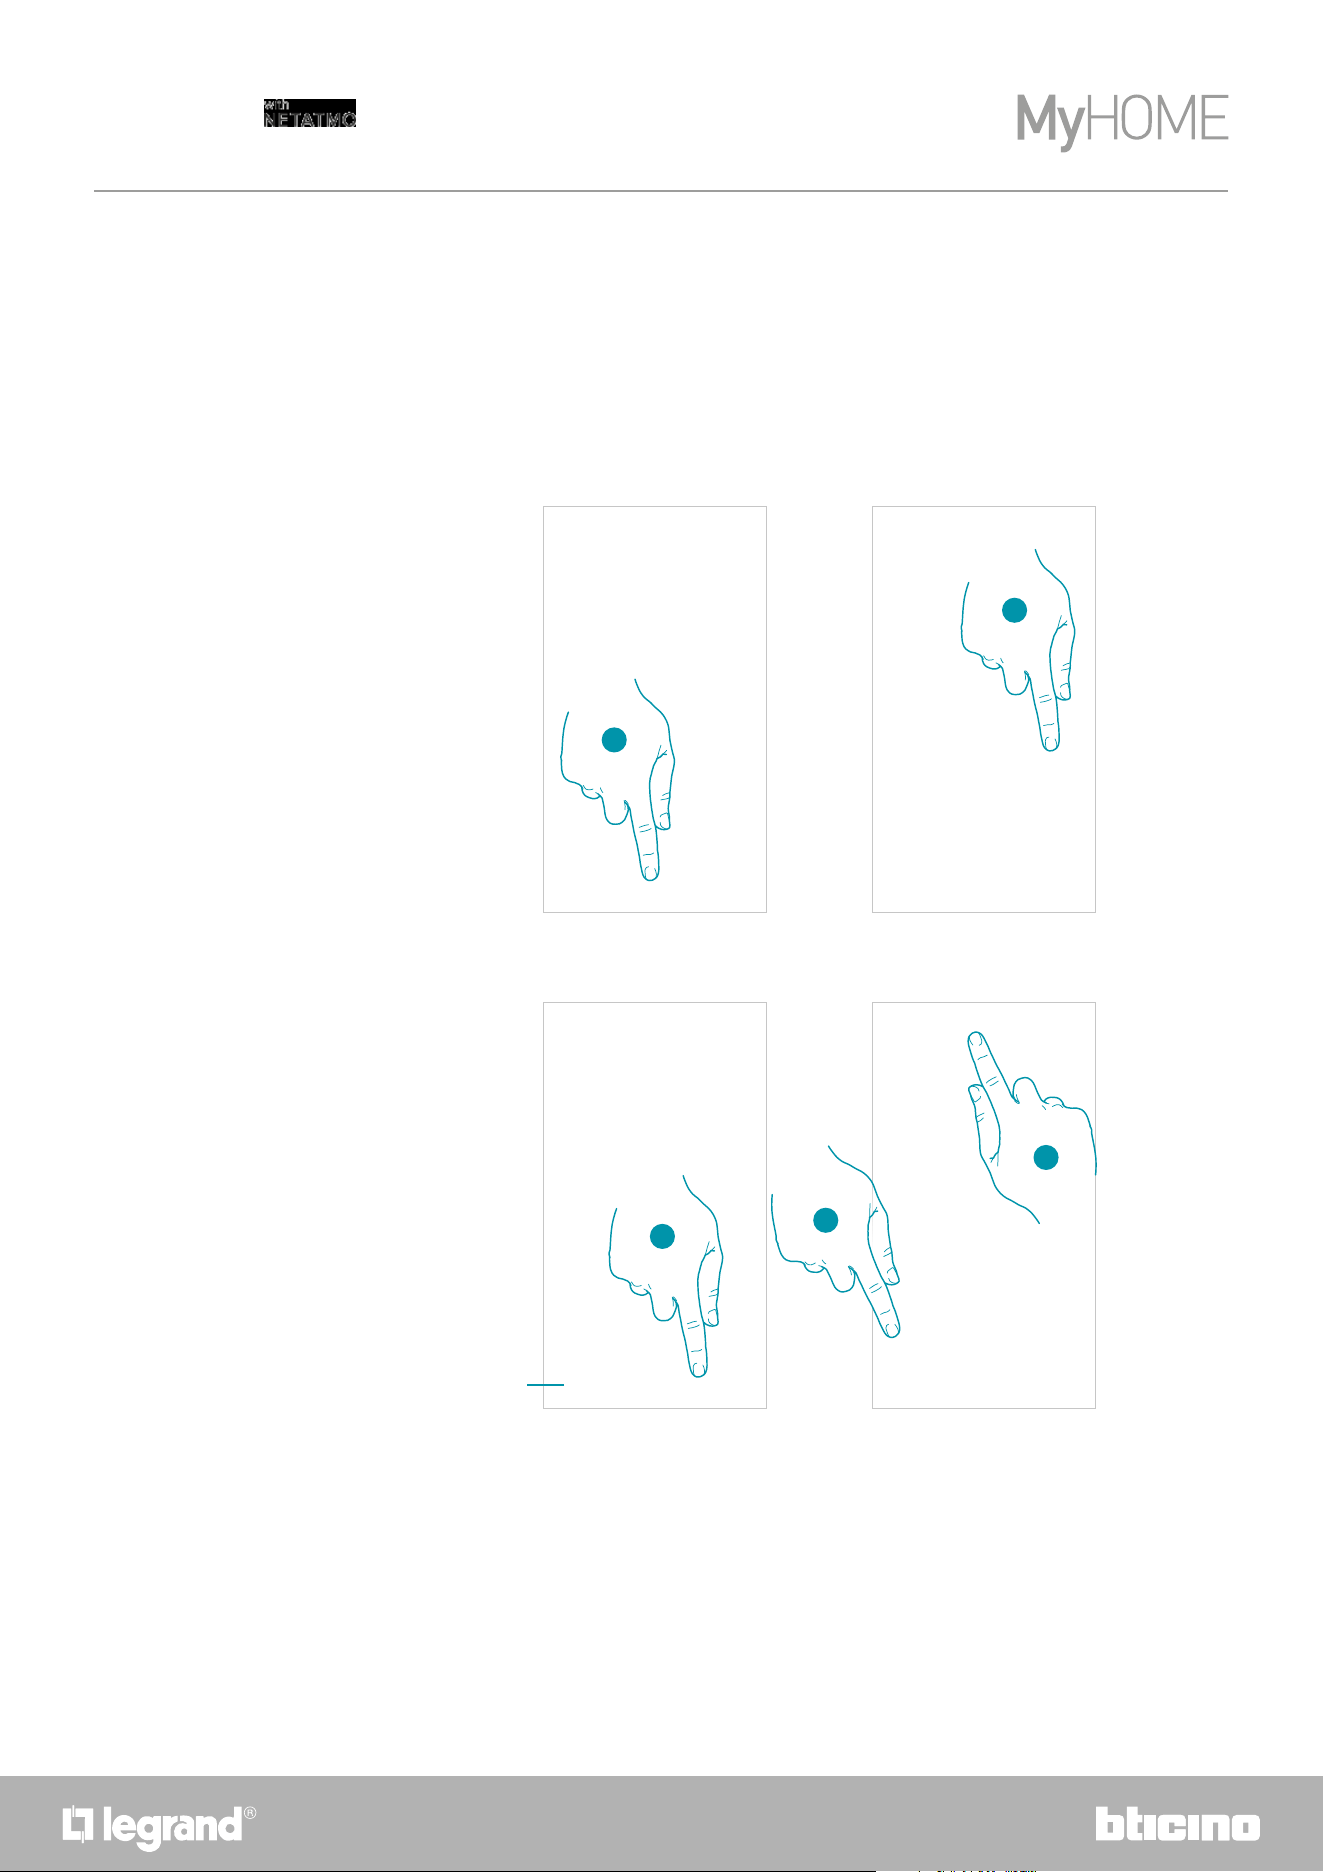
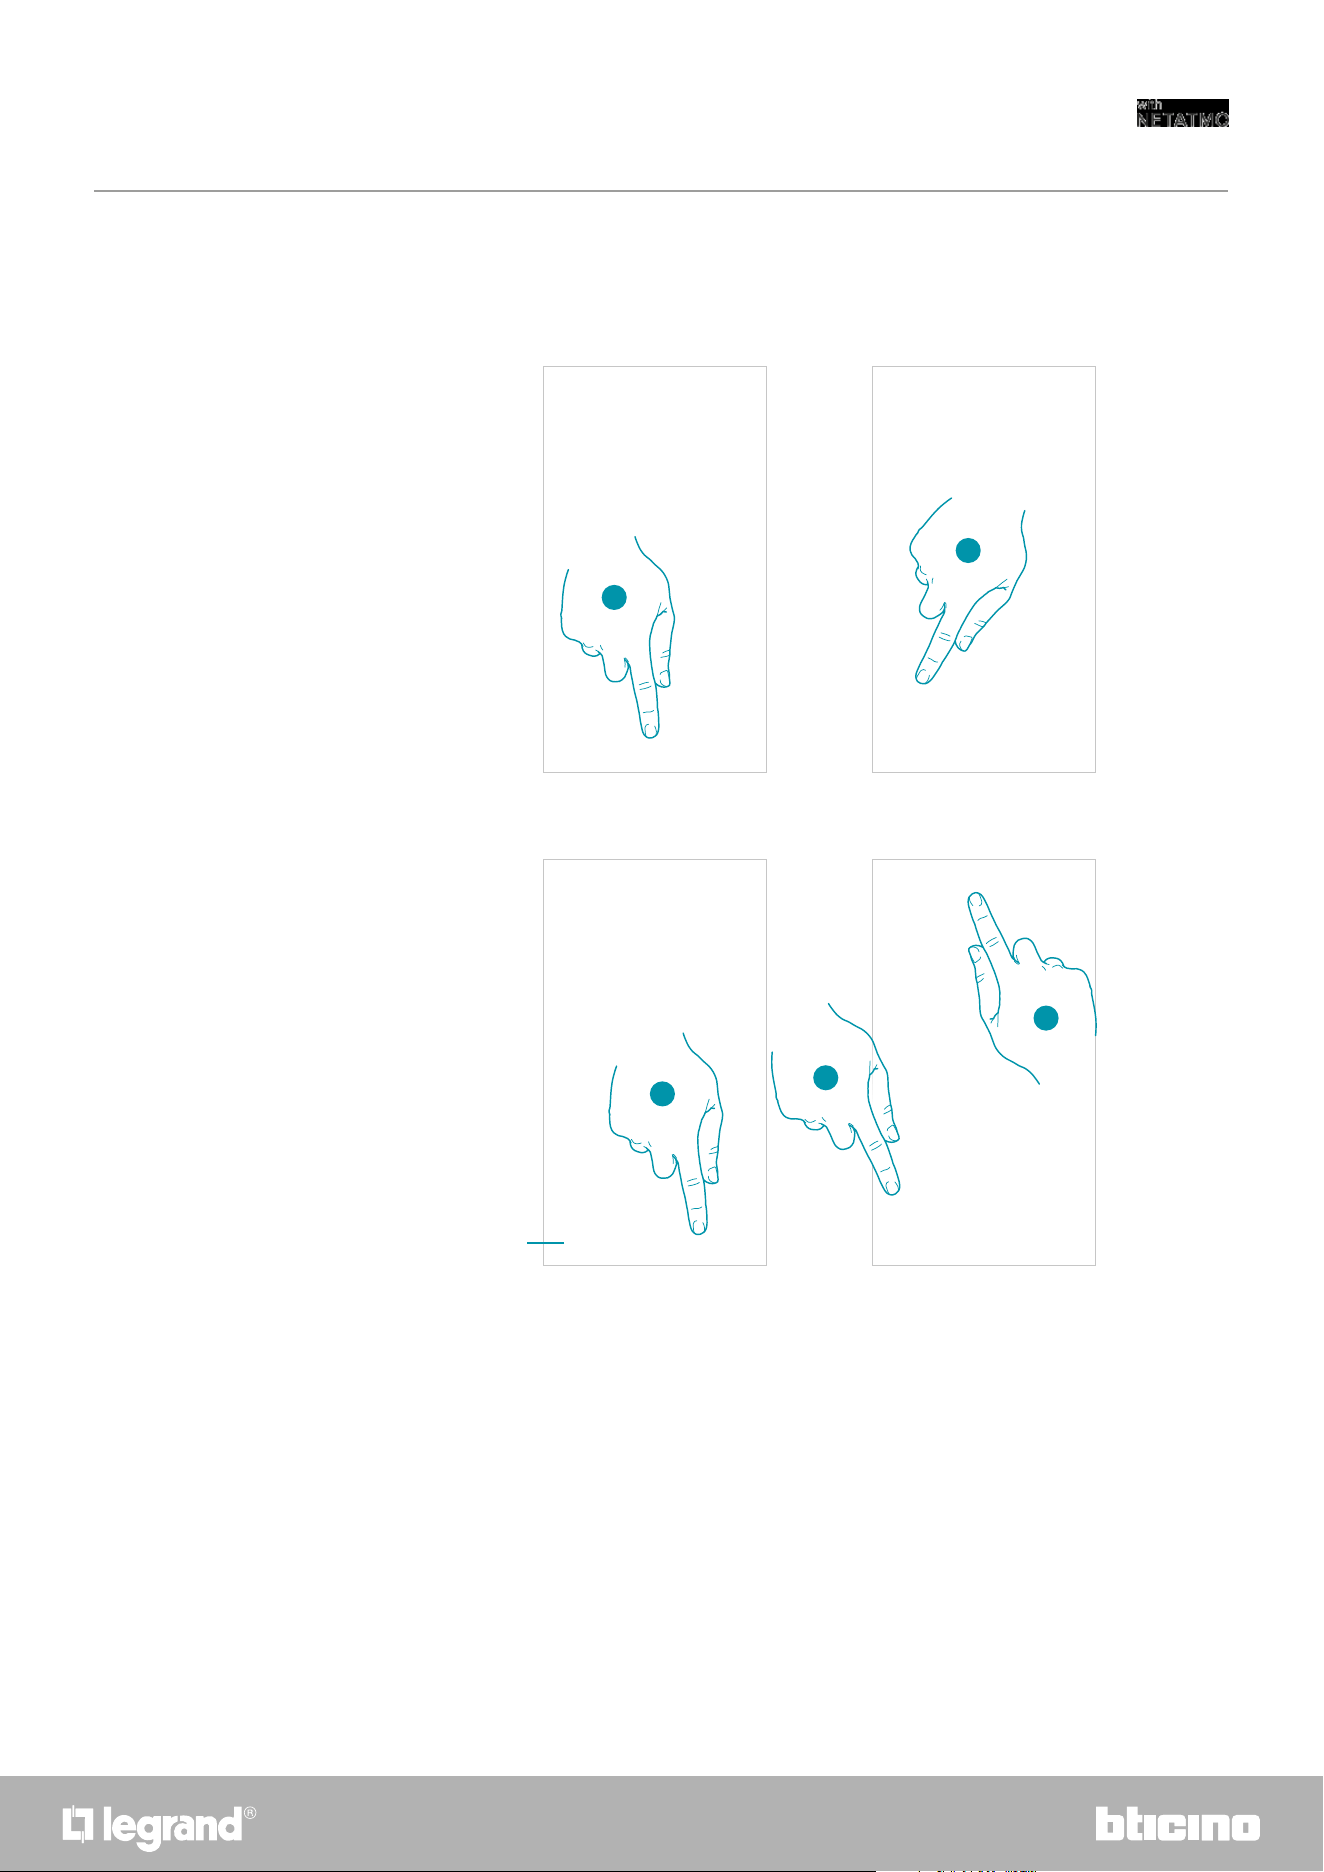
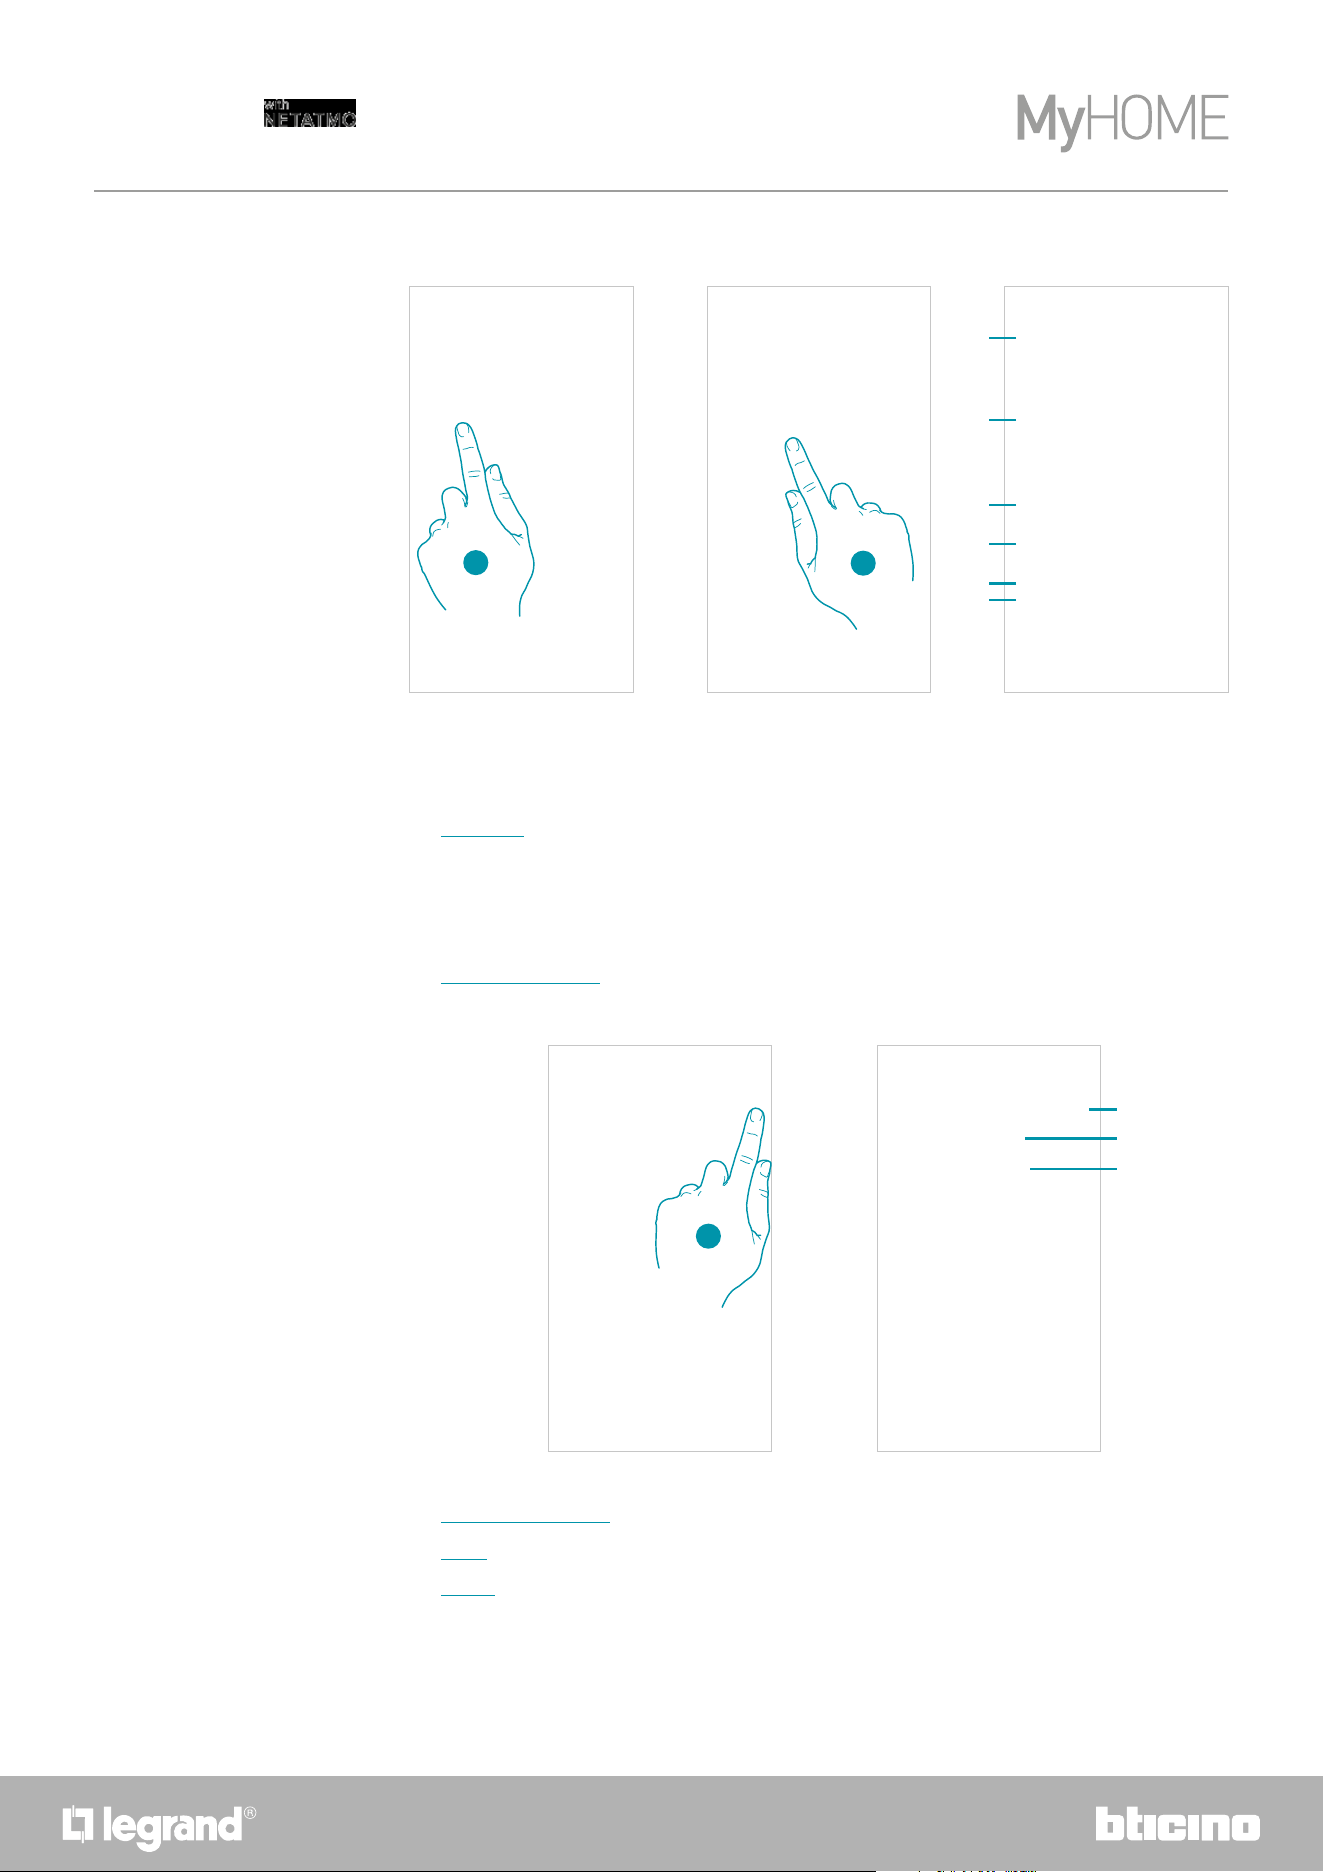
Boost functions
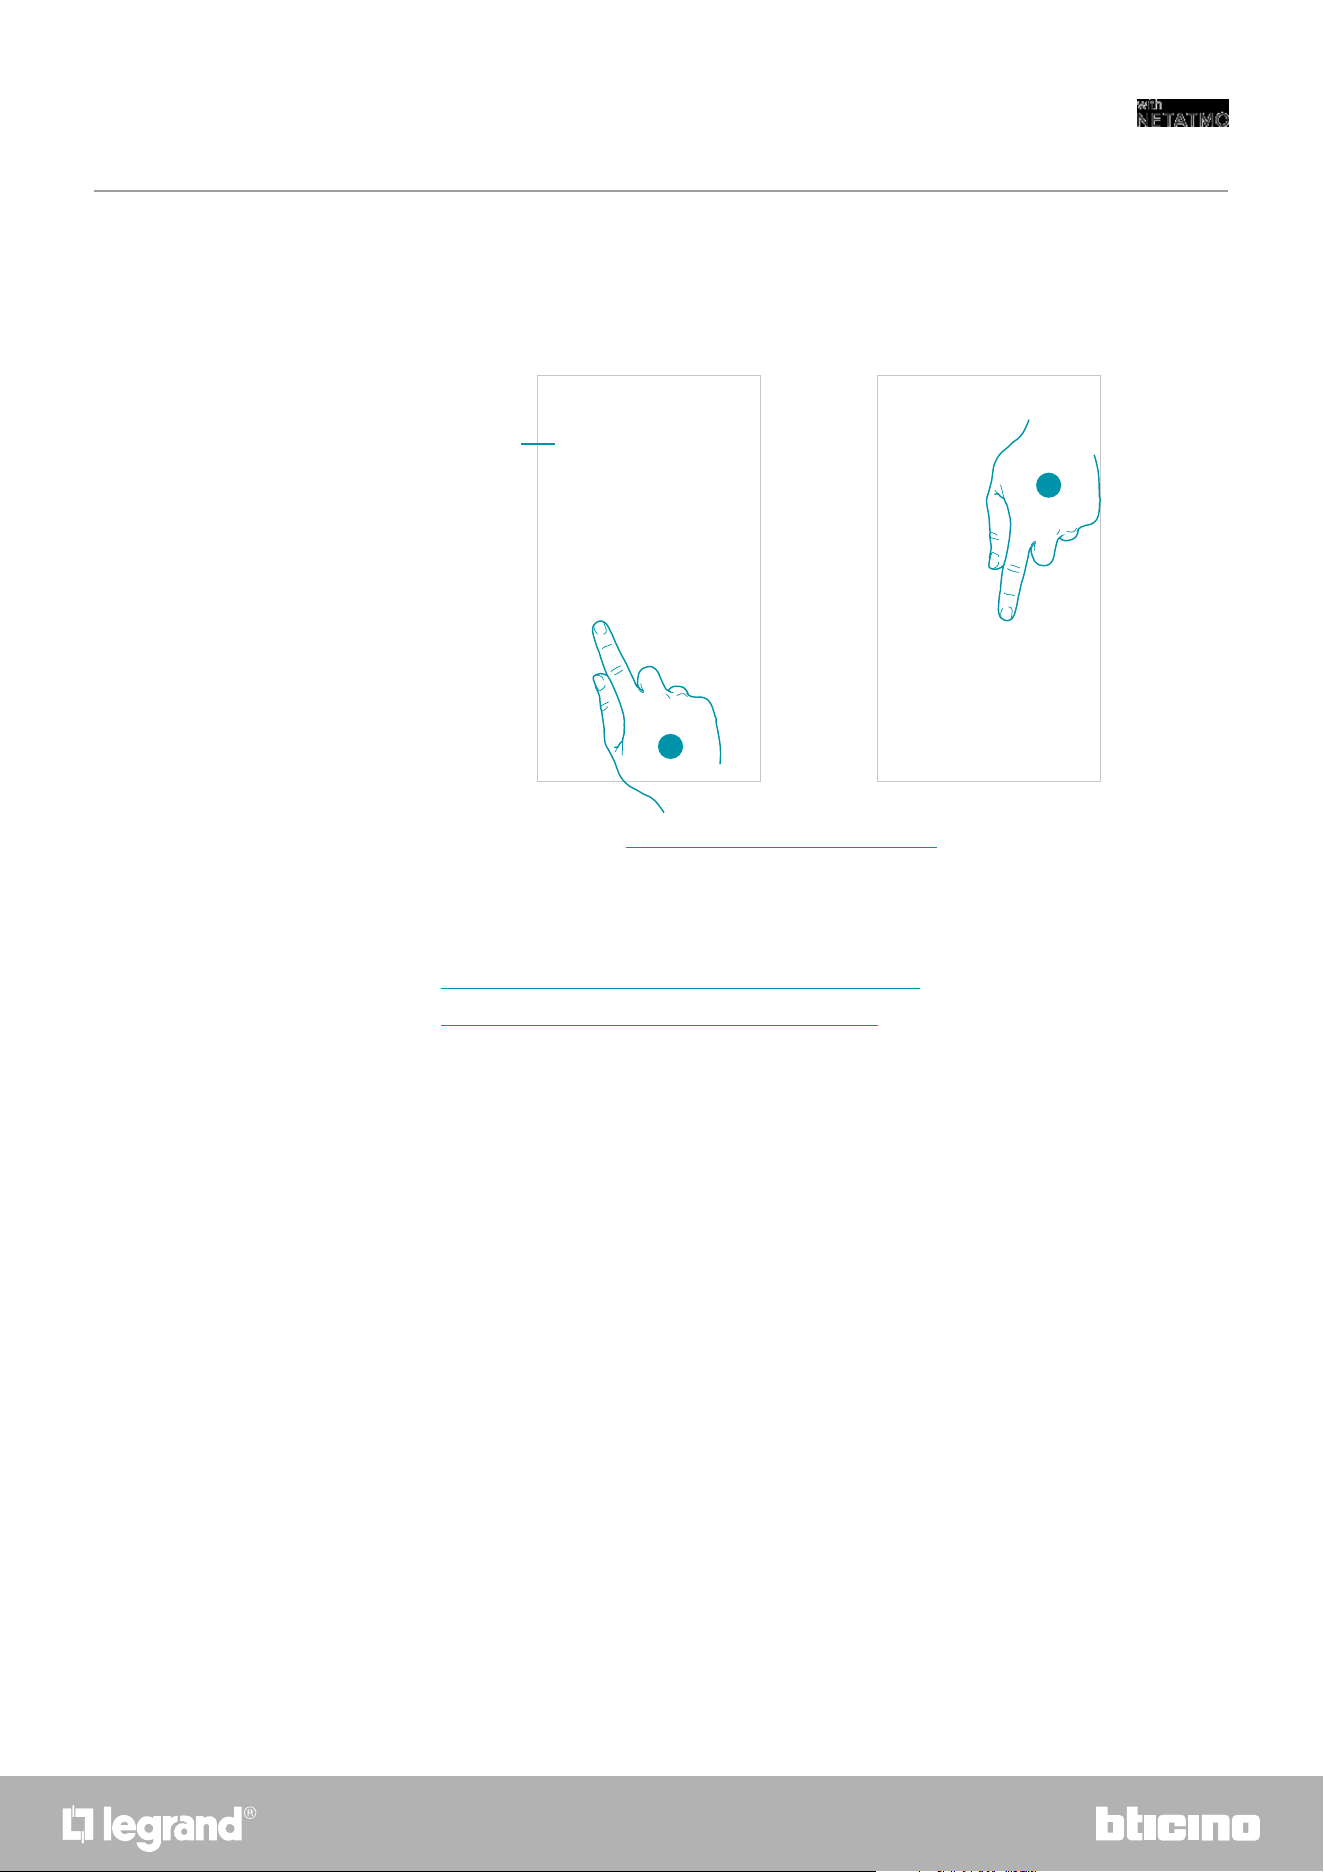
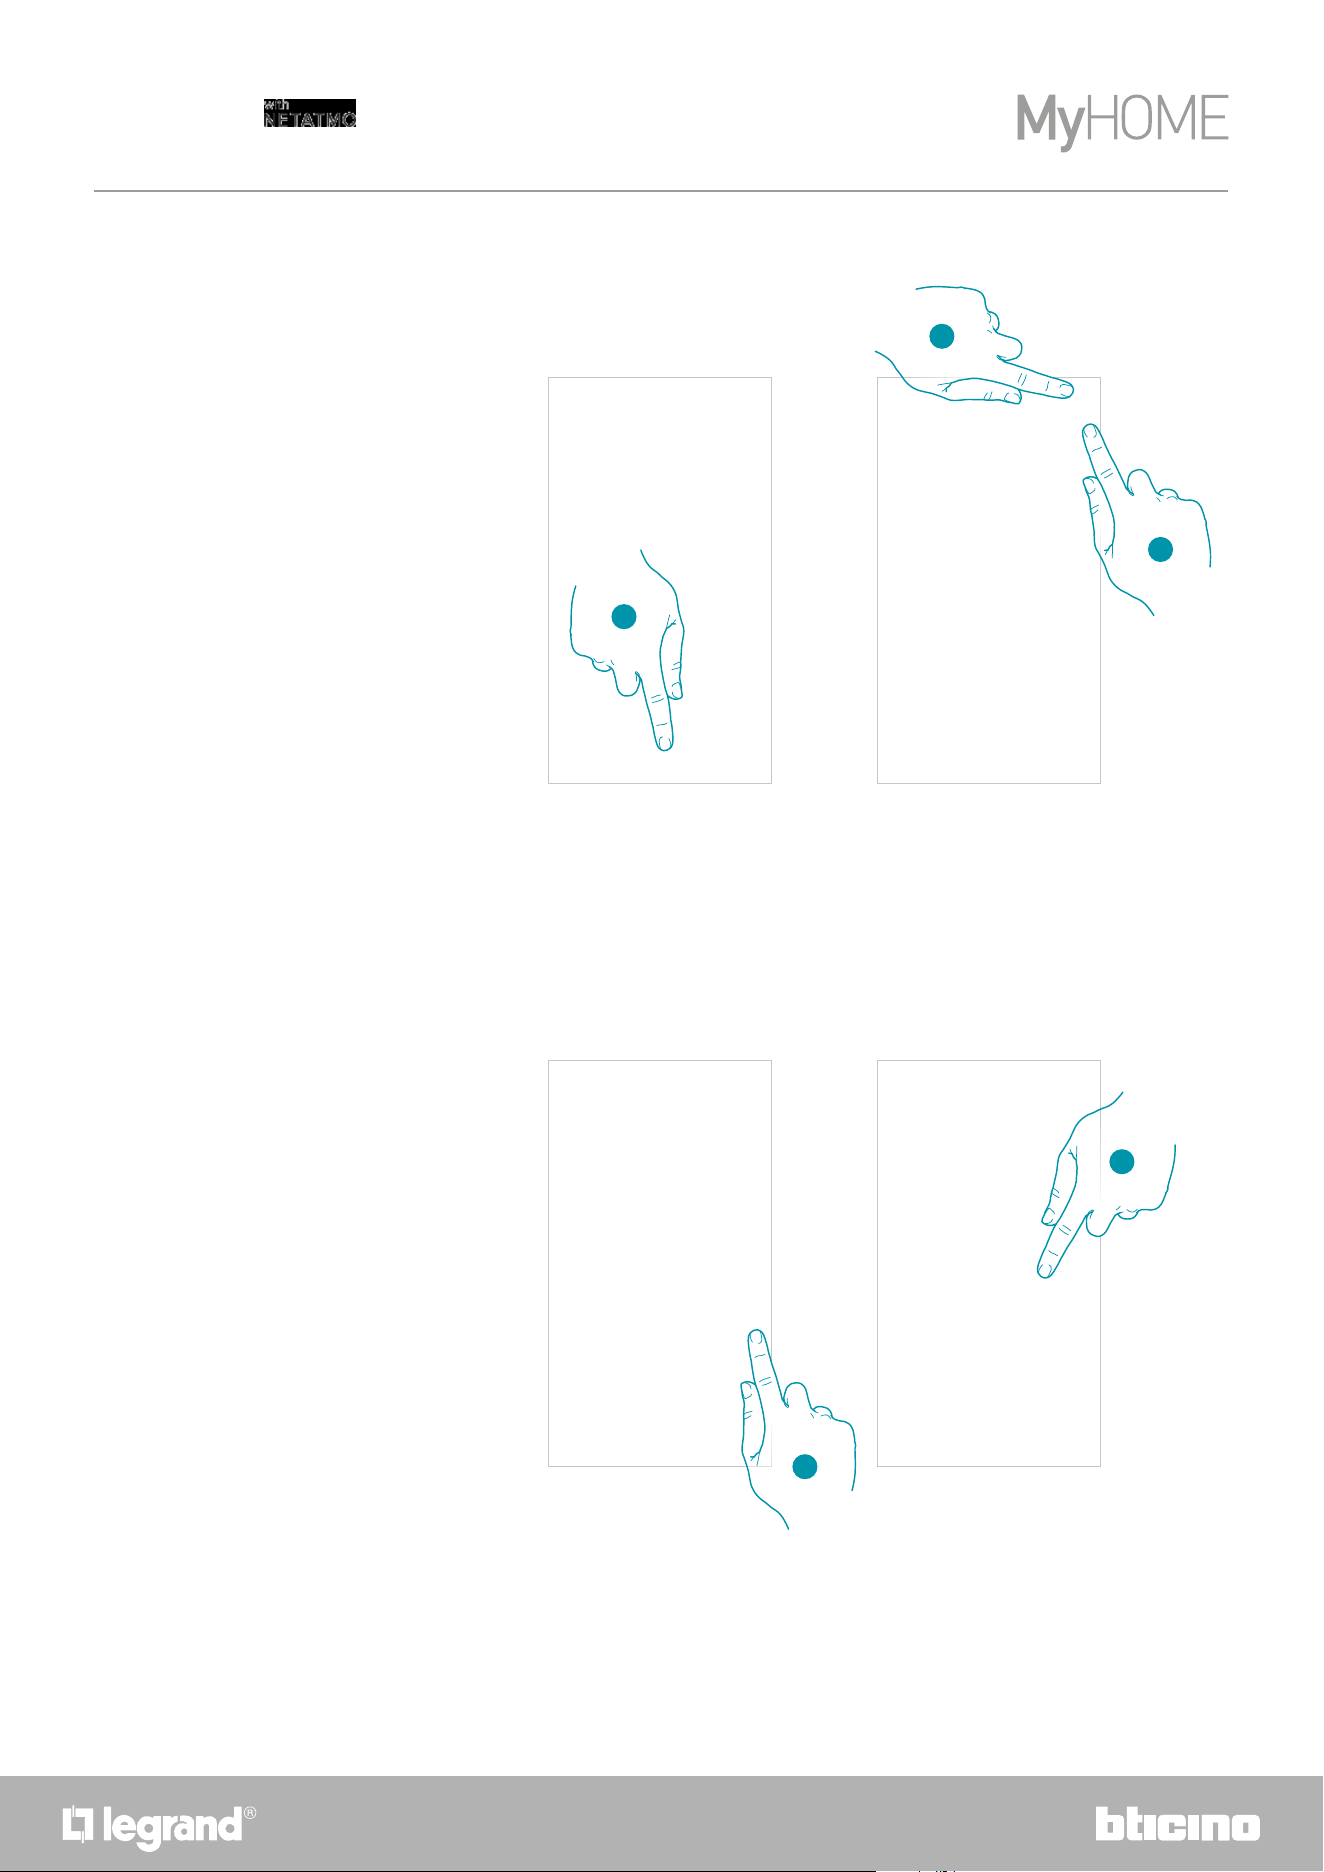
After setting the desired duration (30, 60 or 90 minutes) wait until the digits stop flashing after
which the Boost mode will be activated.
1. Touch the display, the symbol
comes on
2. Touch the symbol once or more to set the function duration; the display shows the set time, at
the same time the LED lights up.
2
1
1918
Smarther
User and installation manual
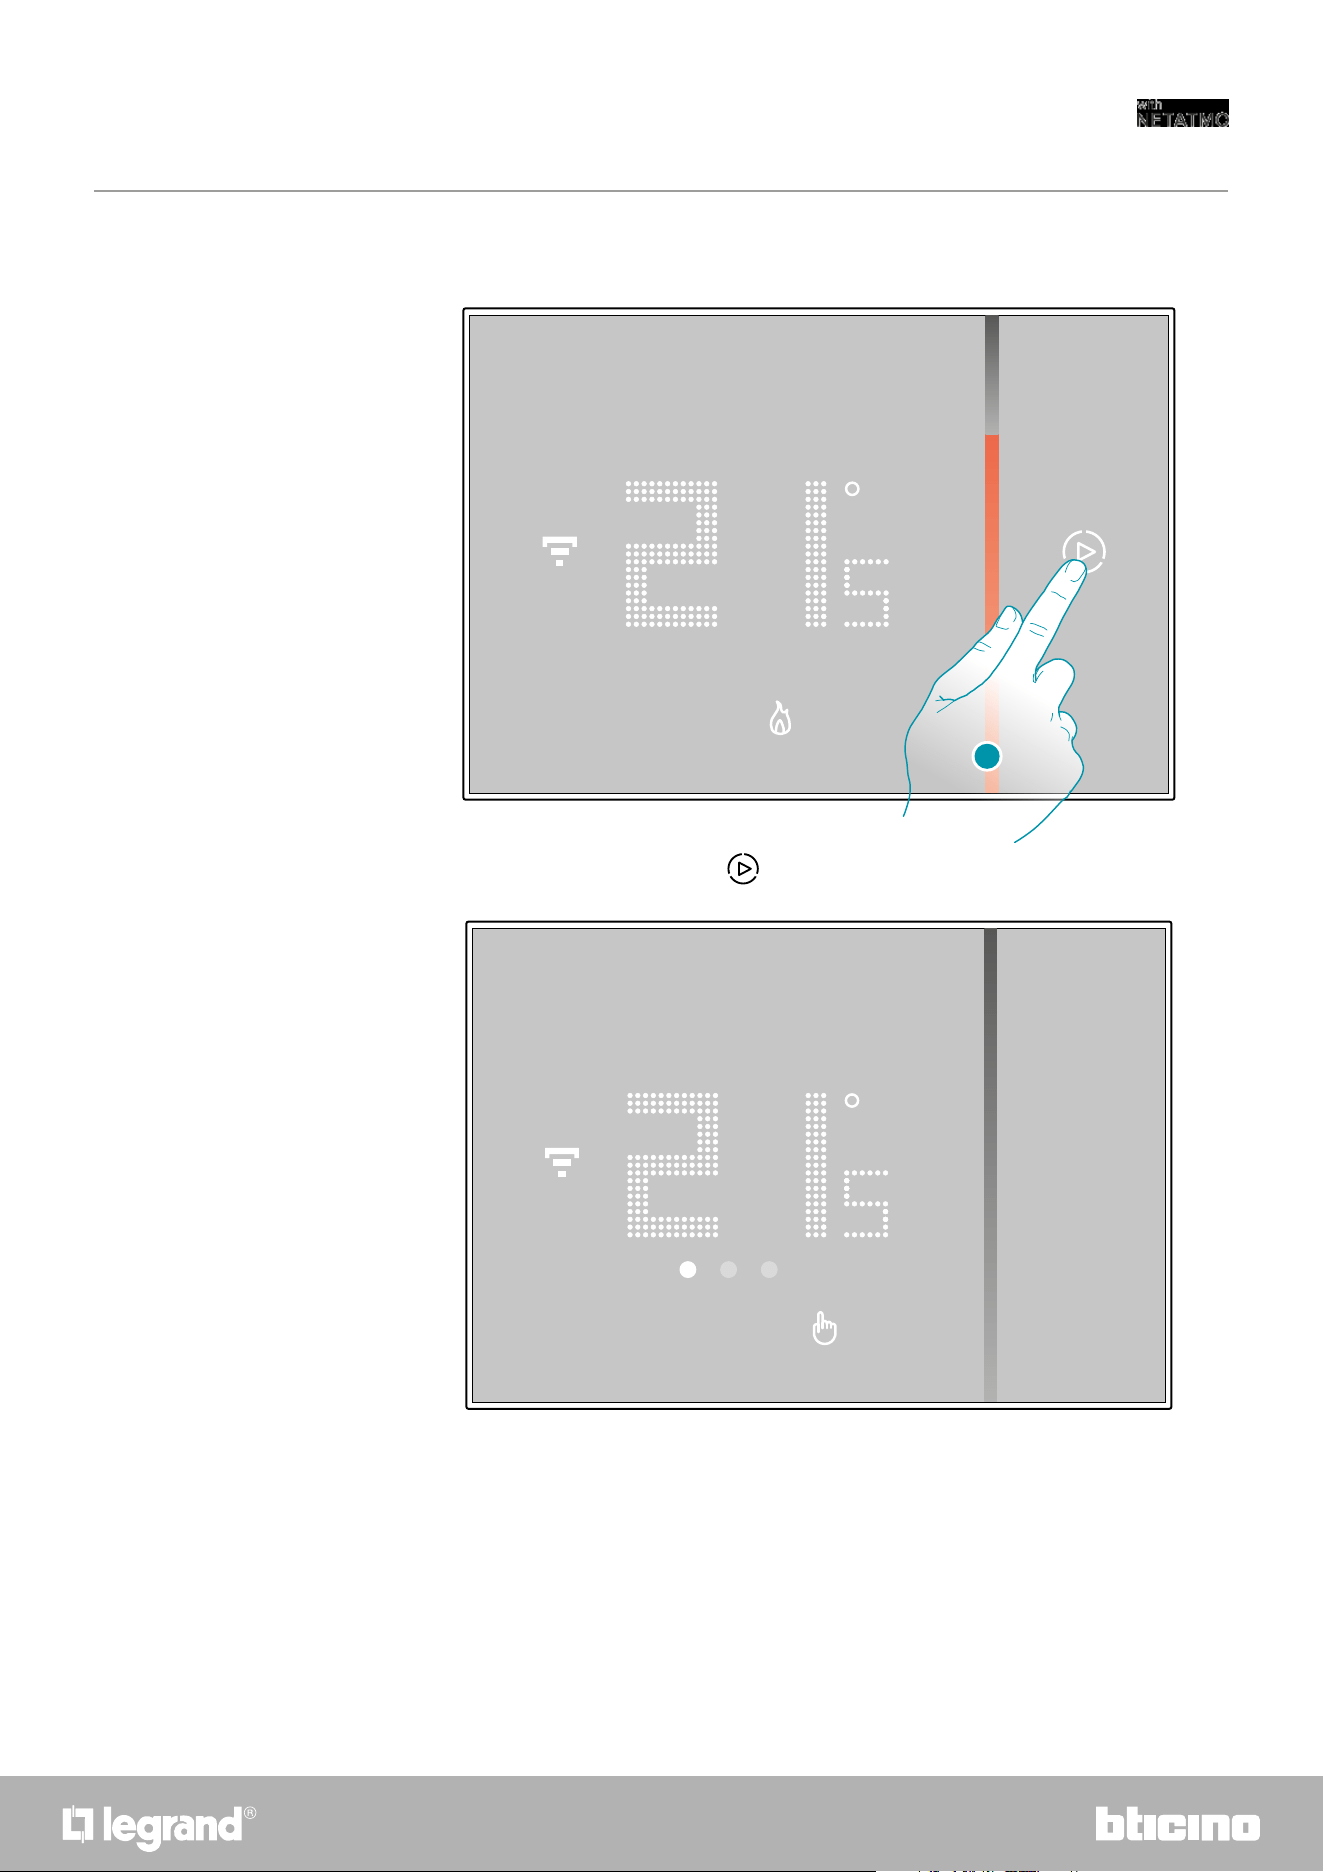
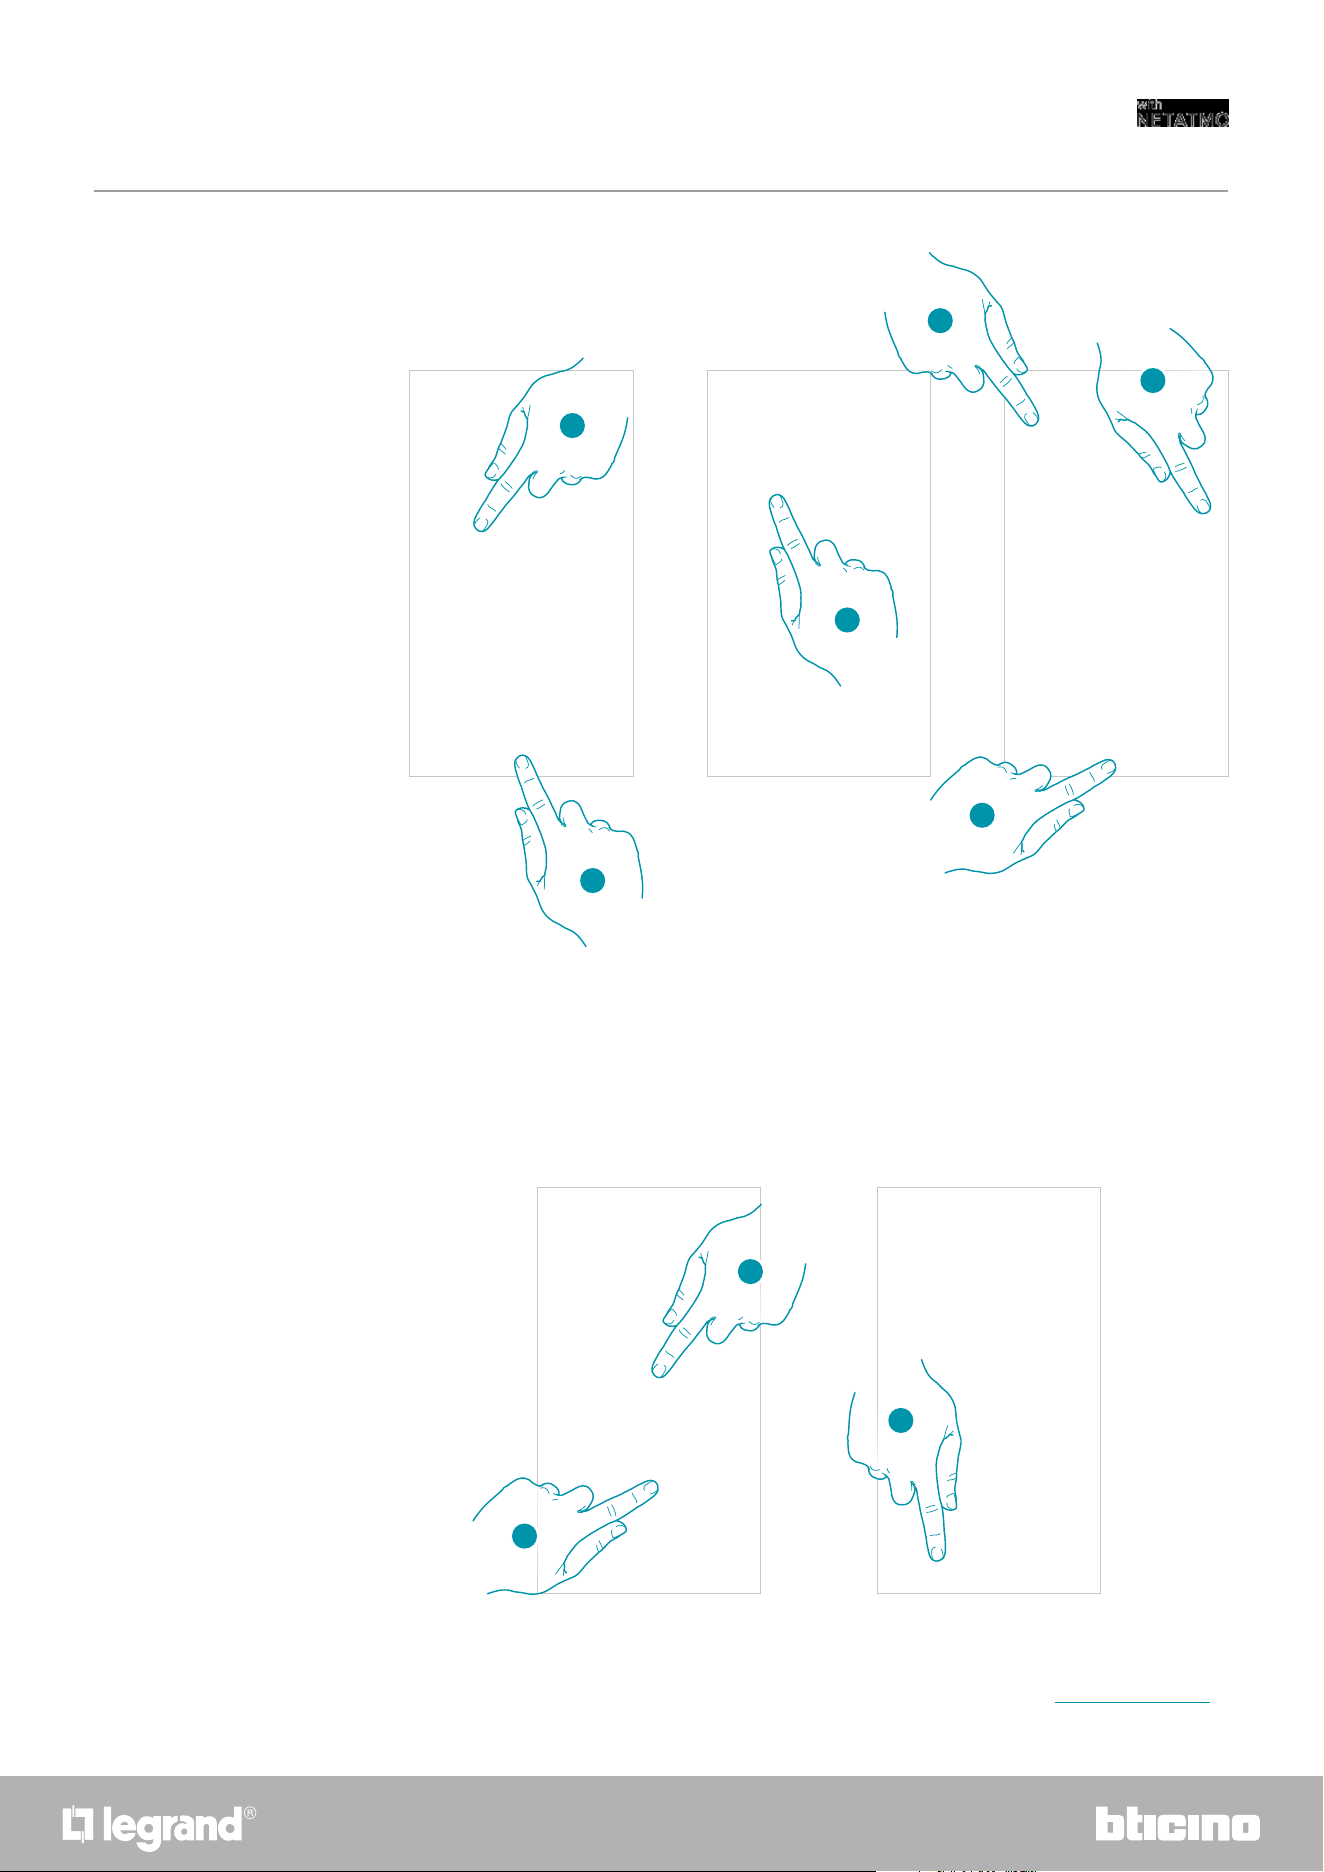
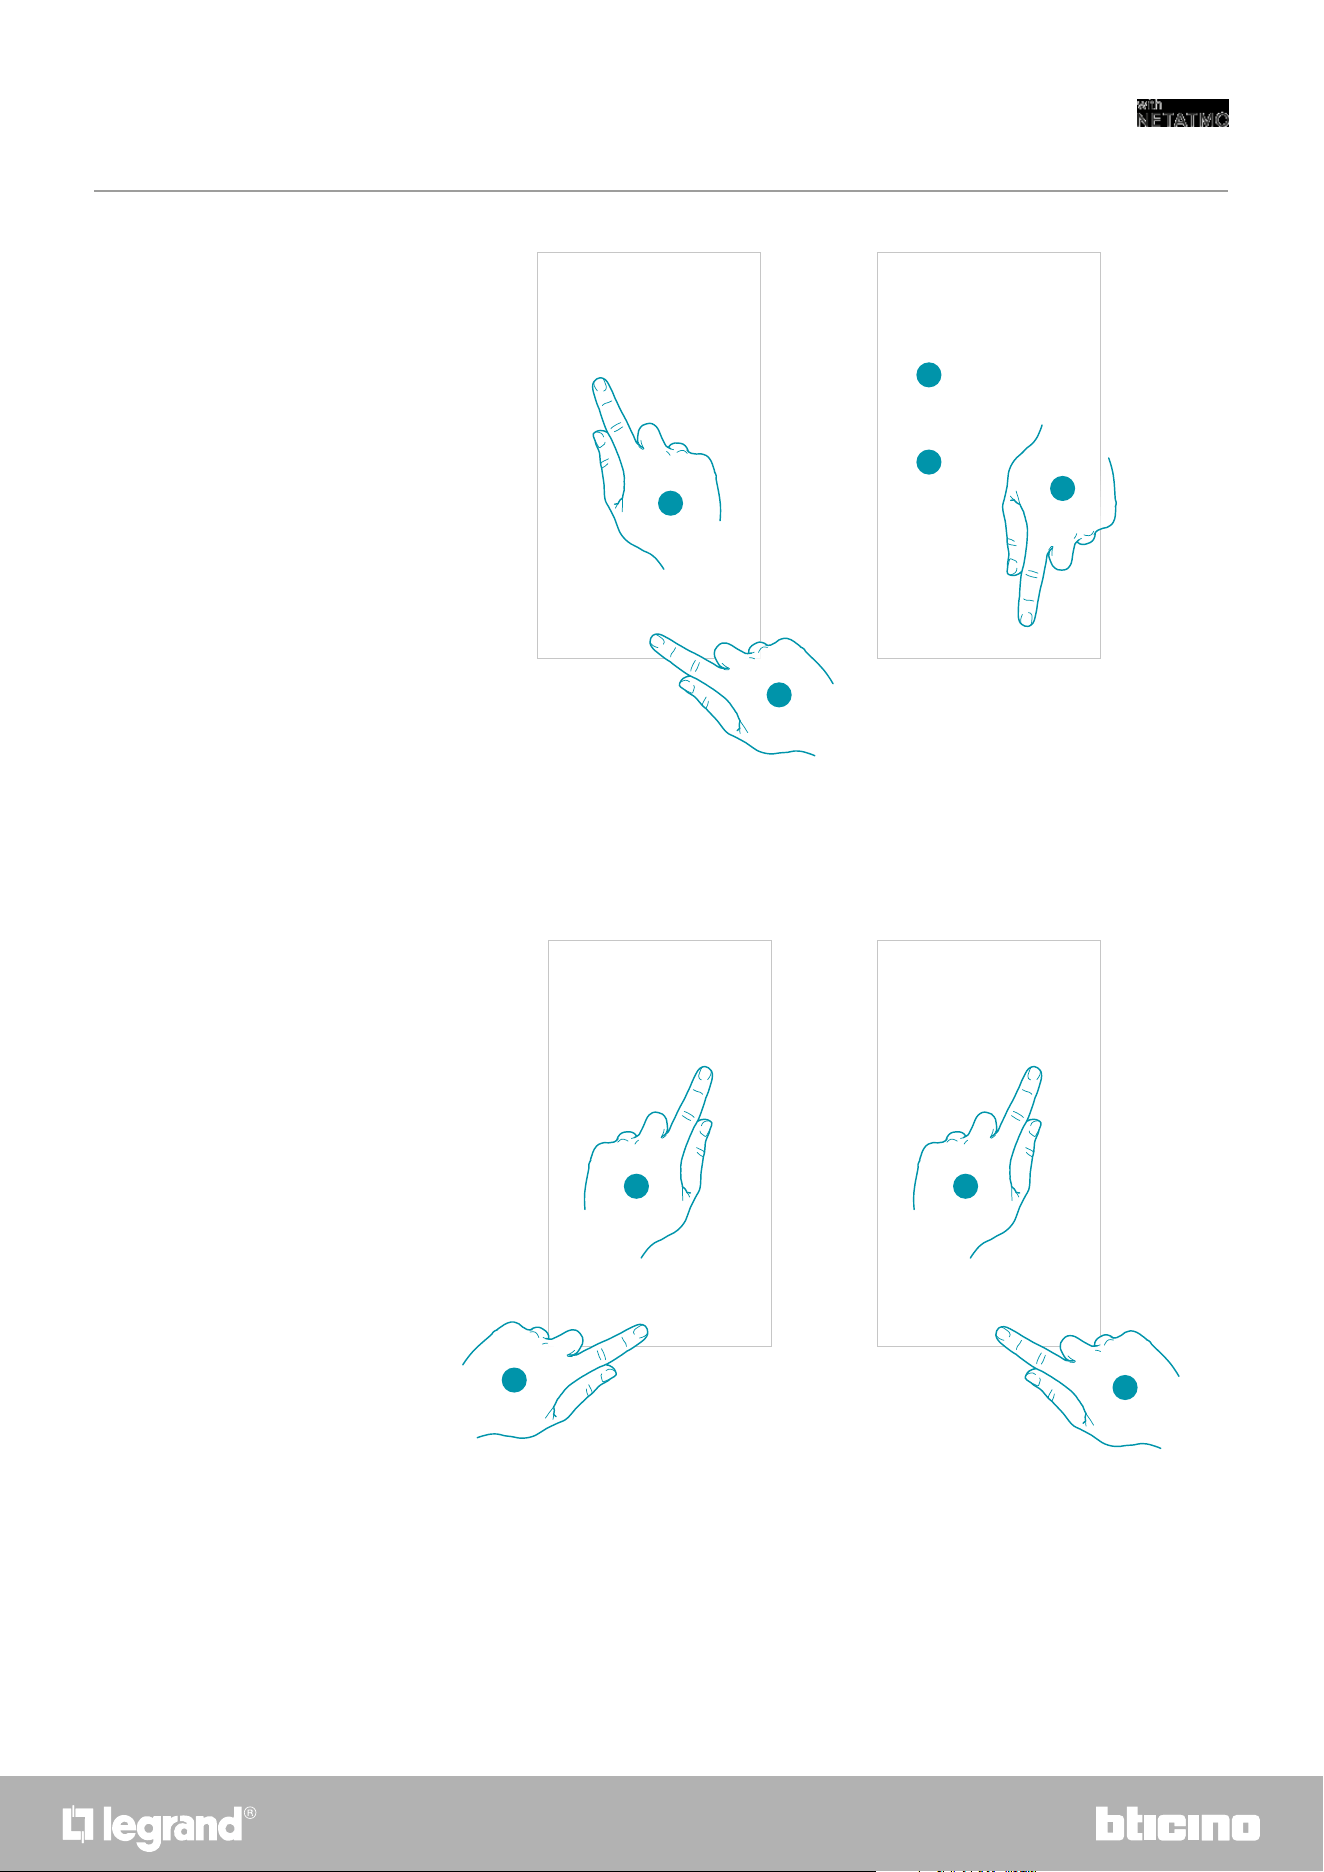
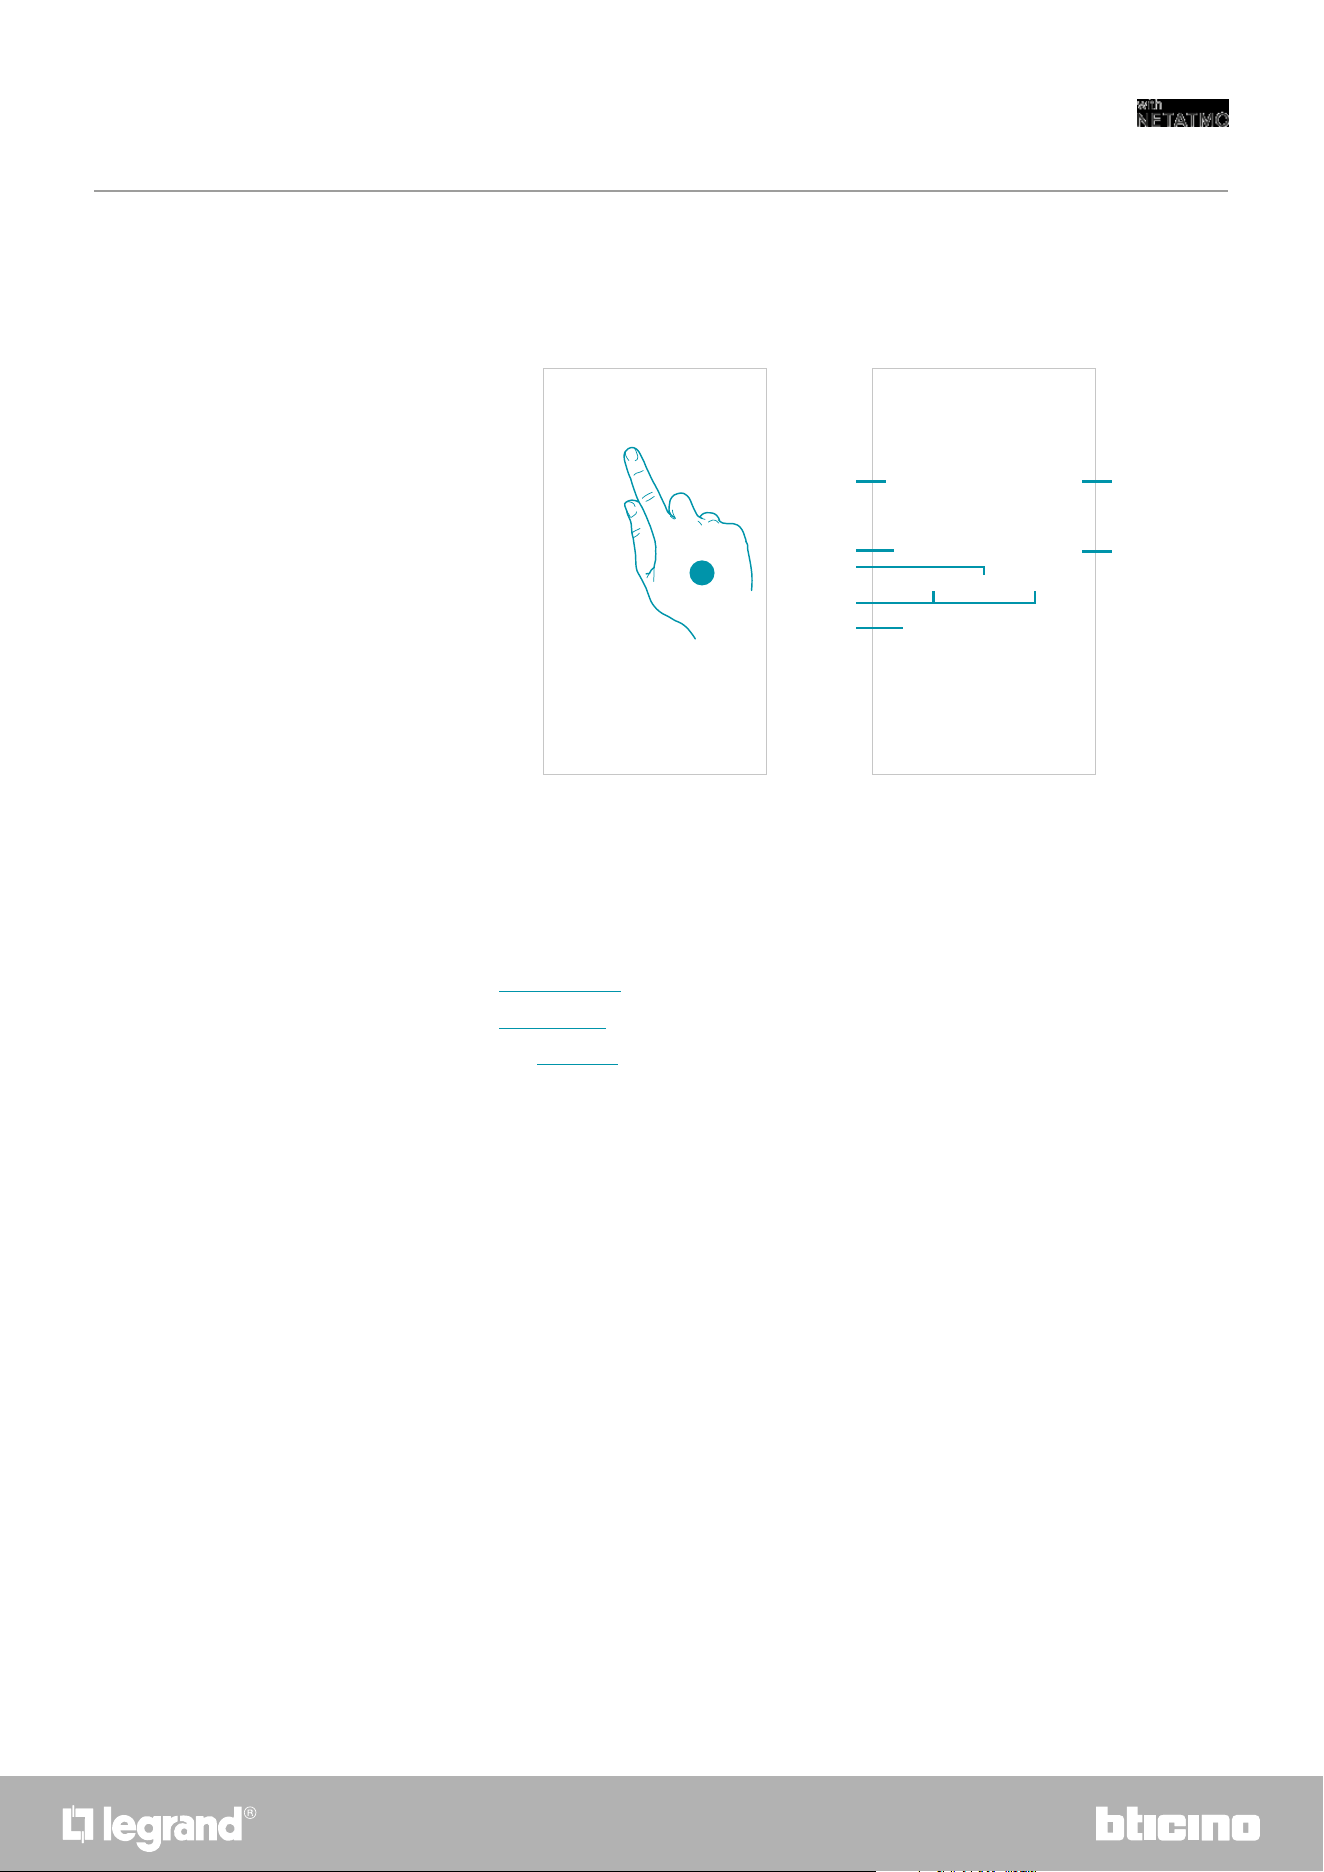
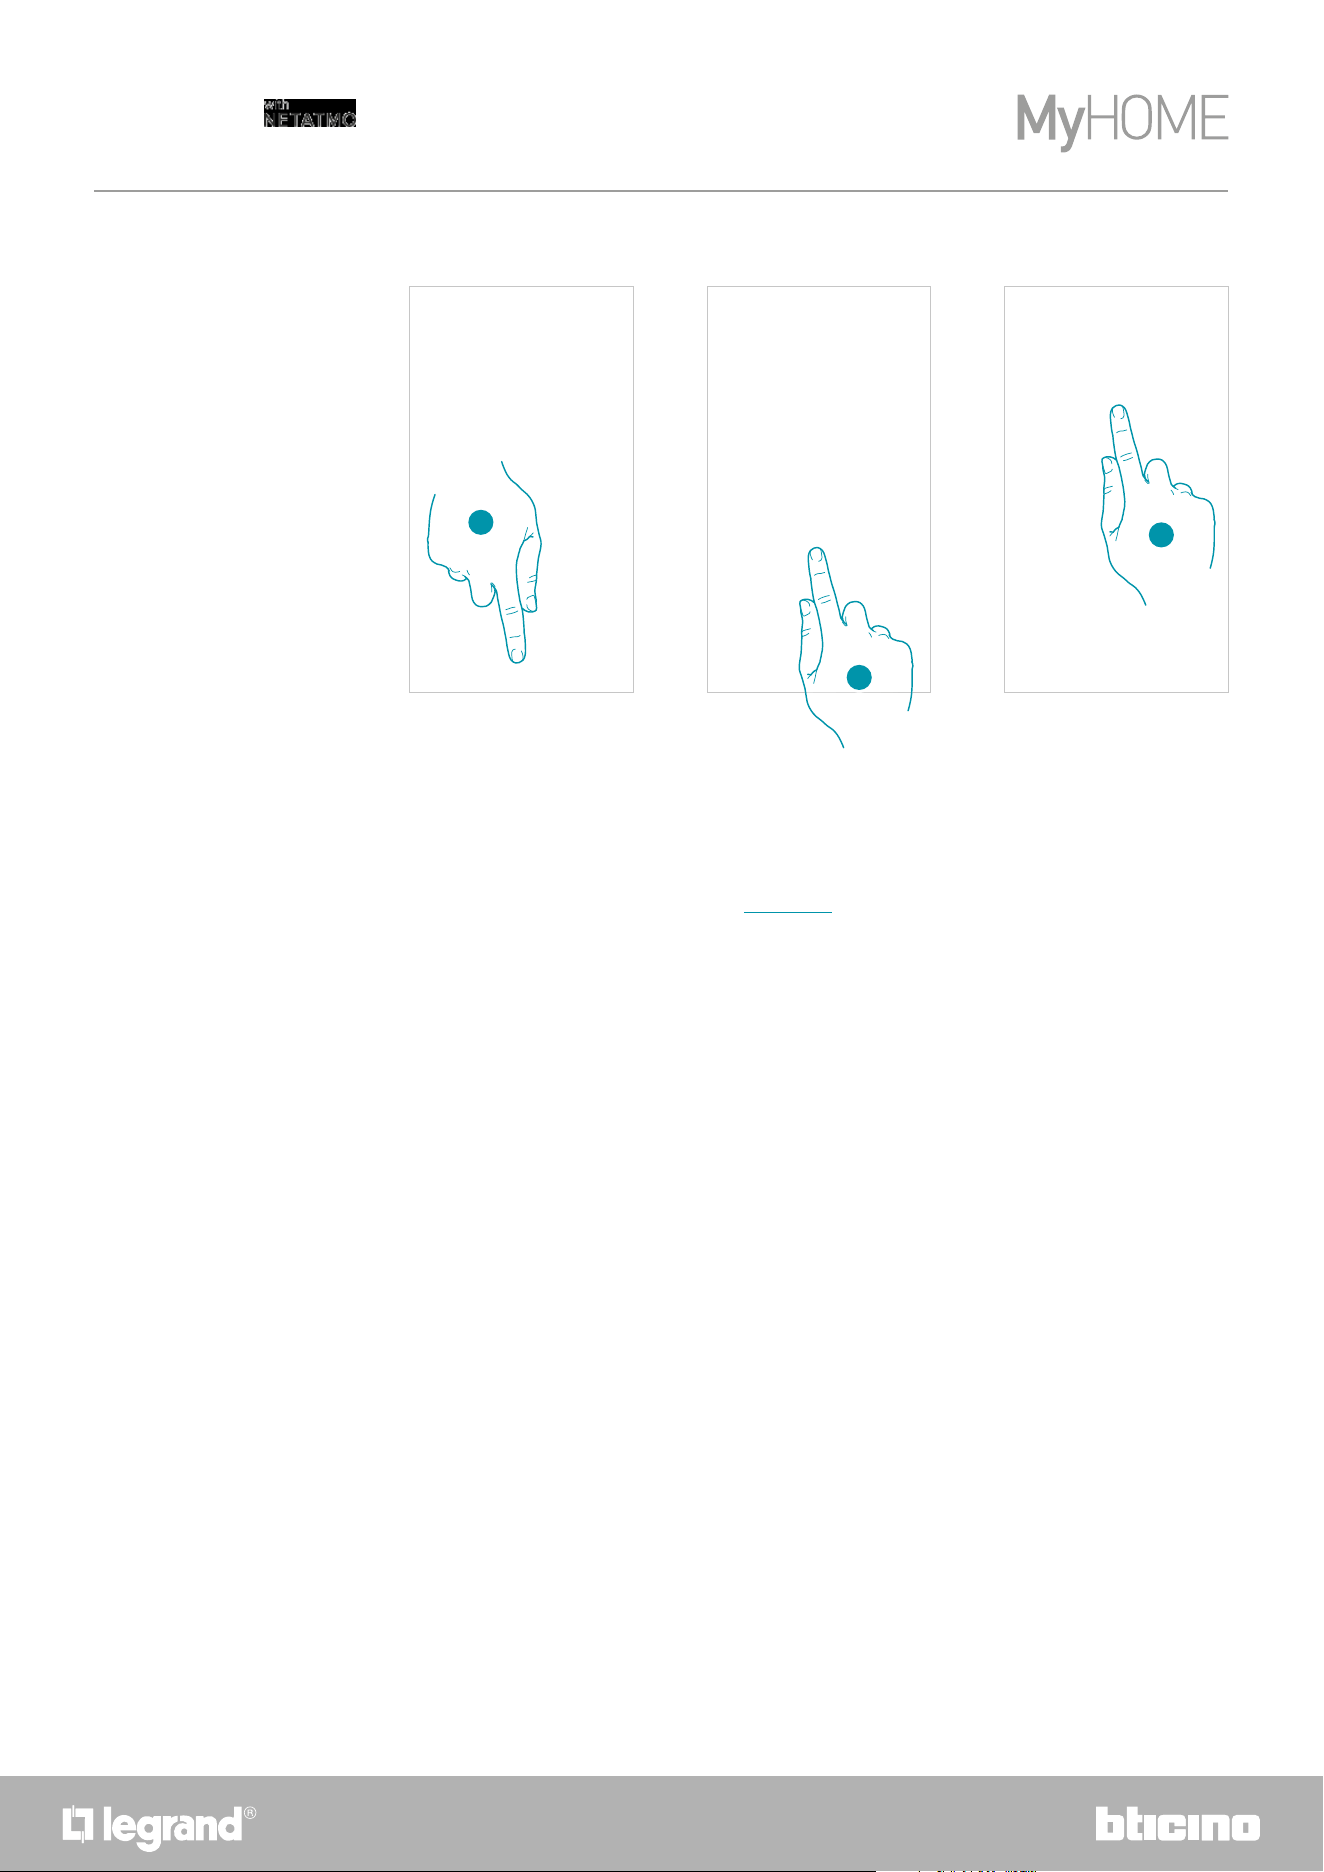
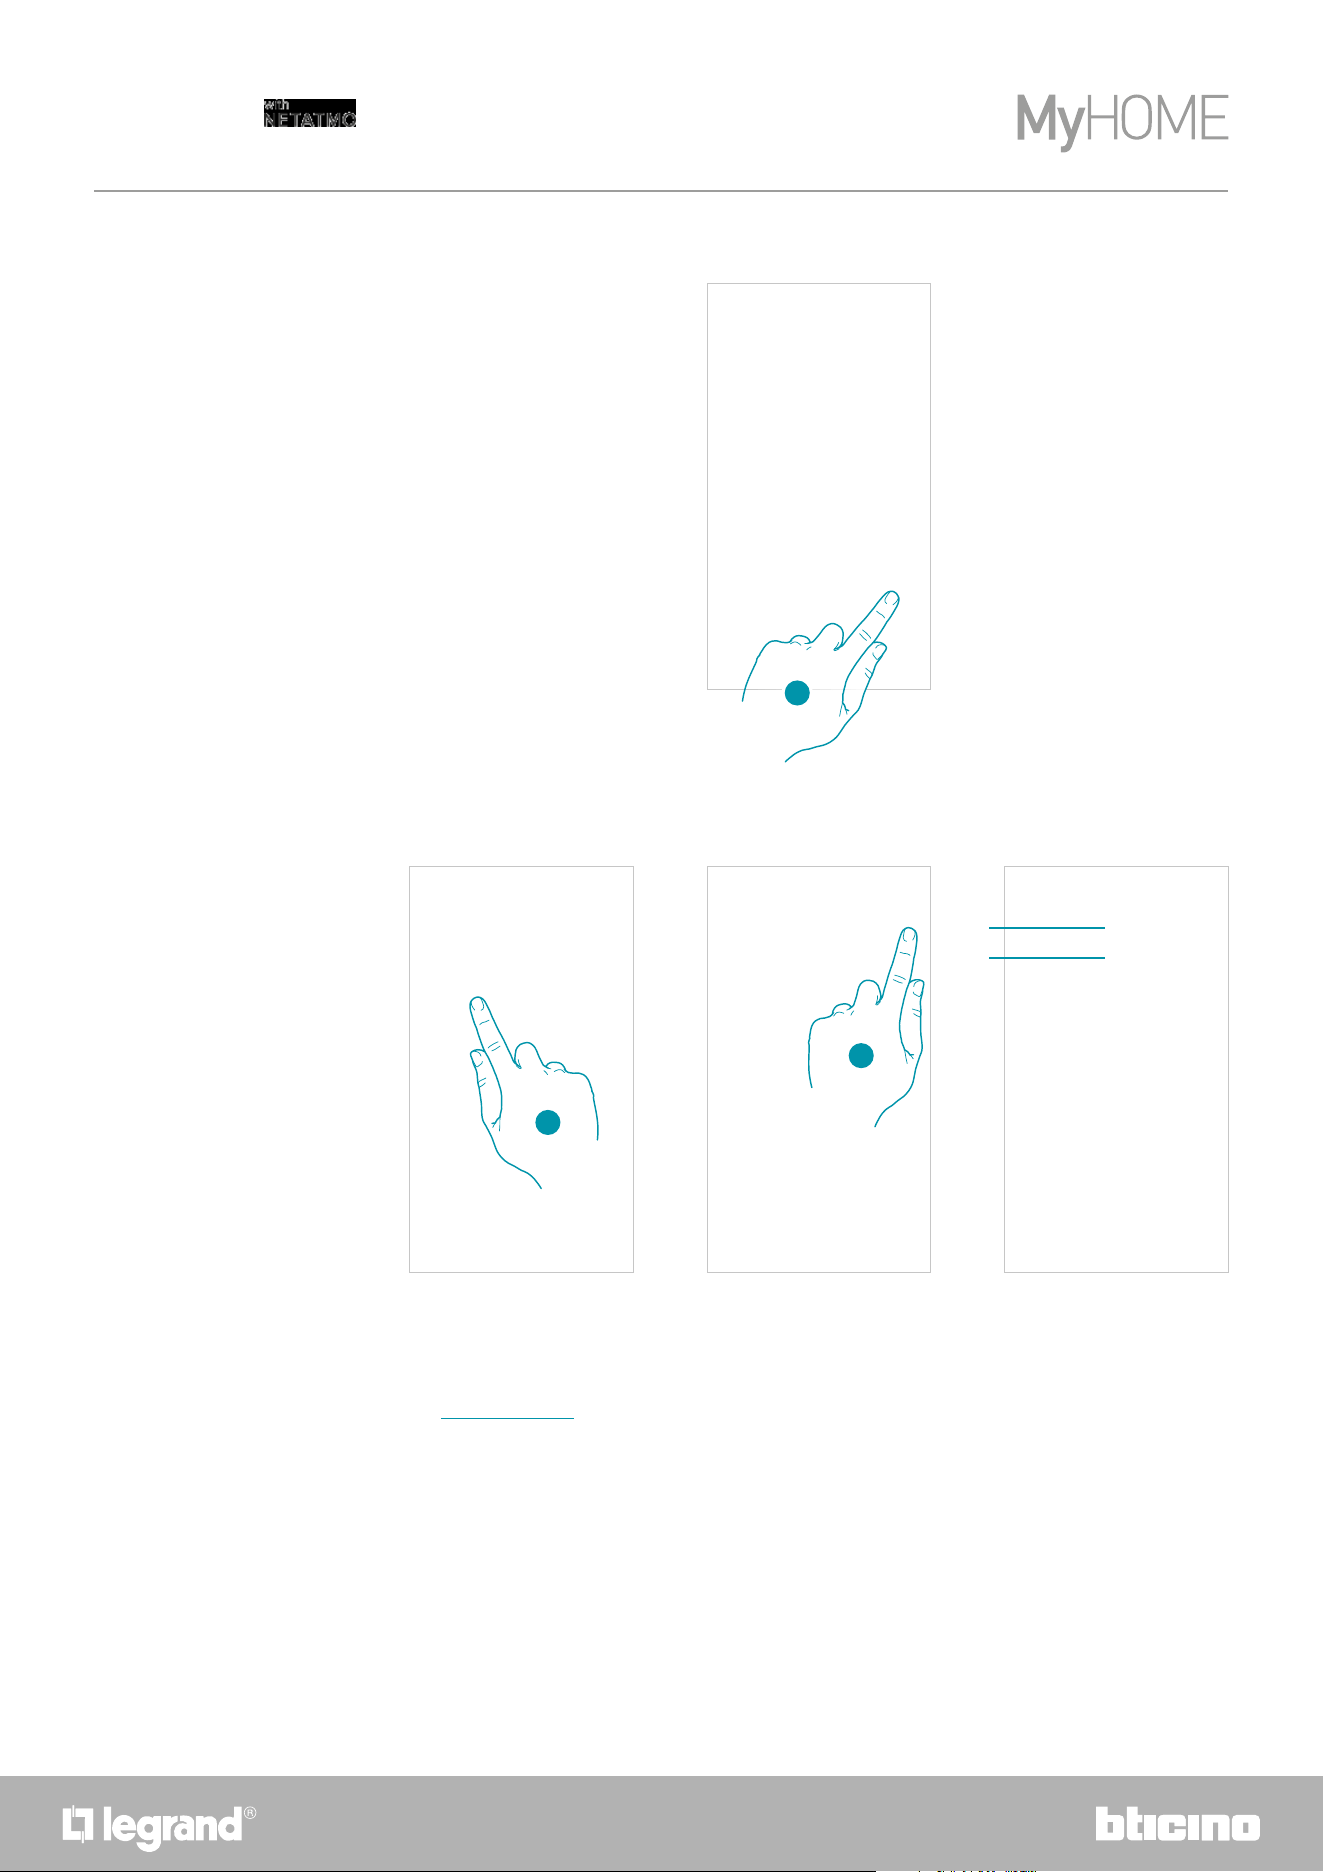
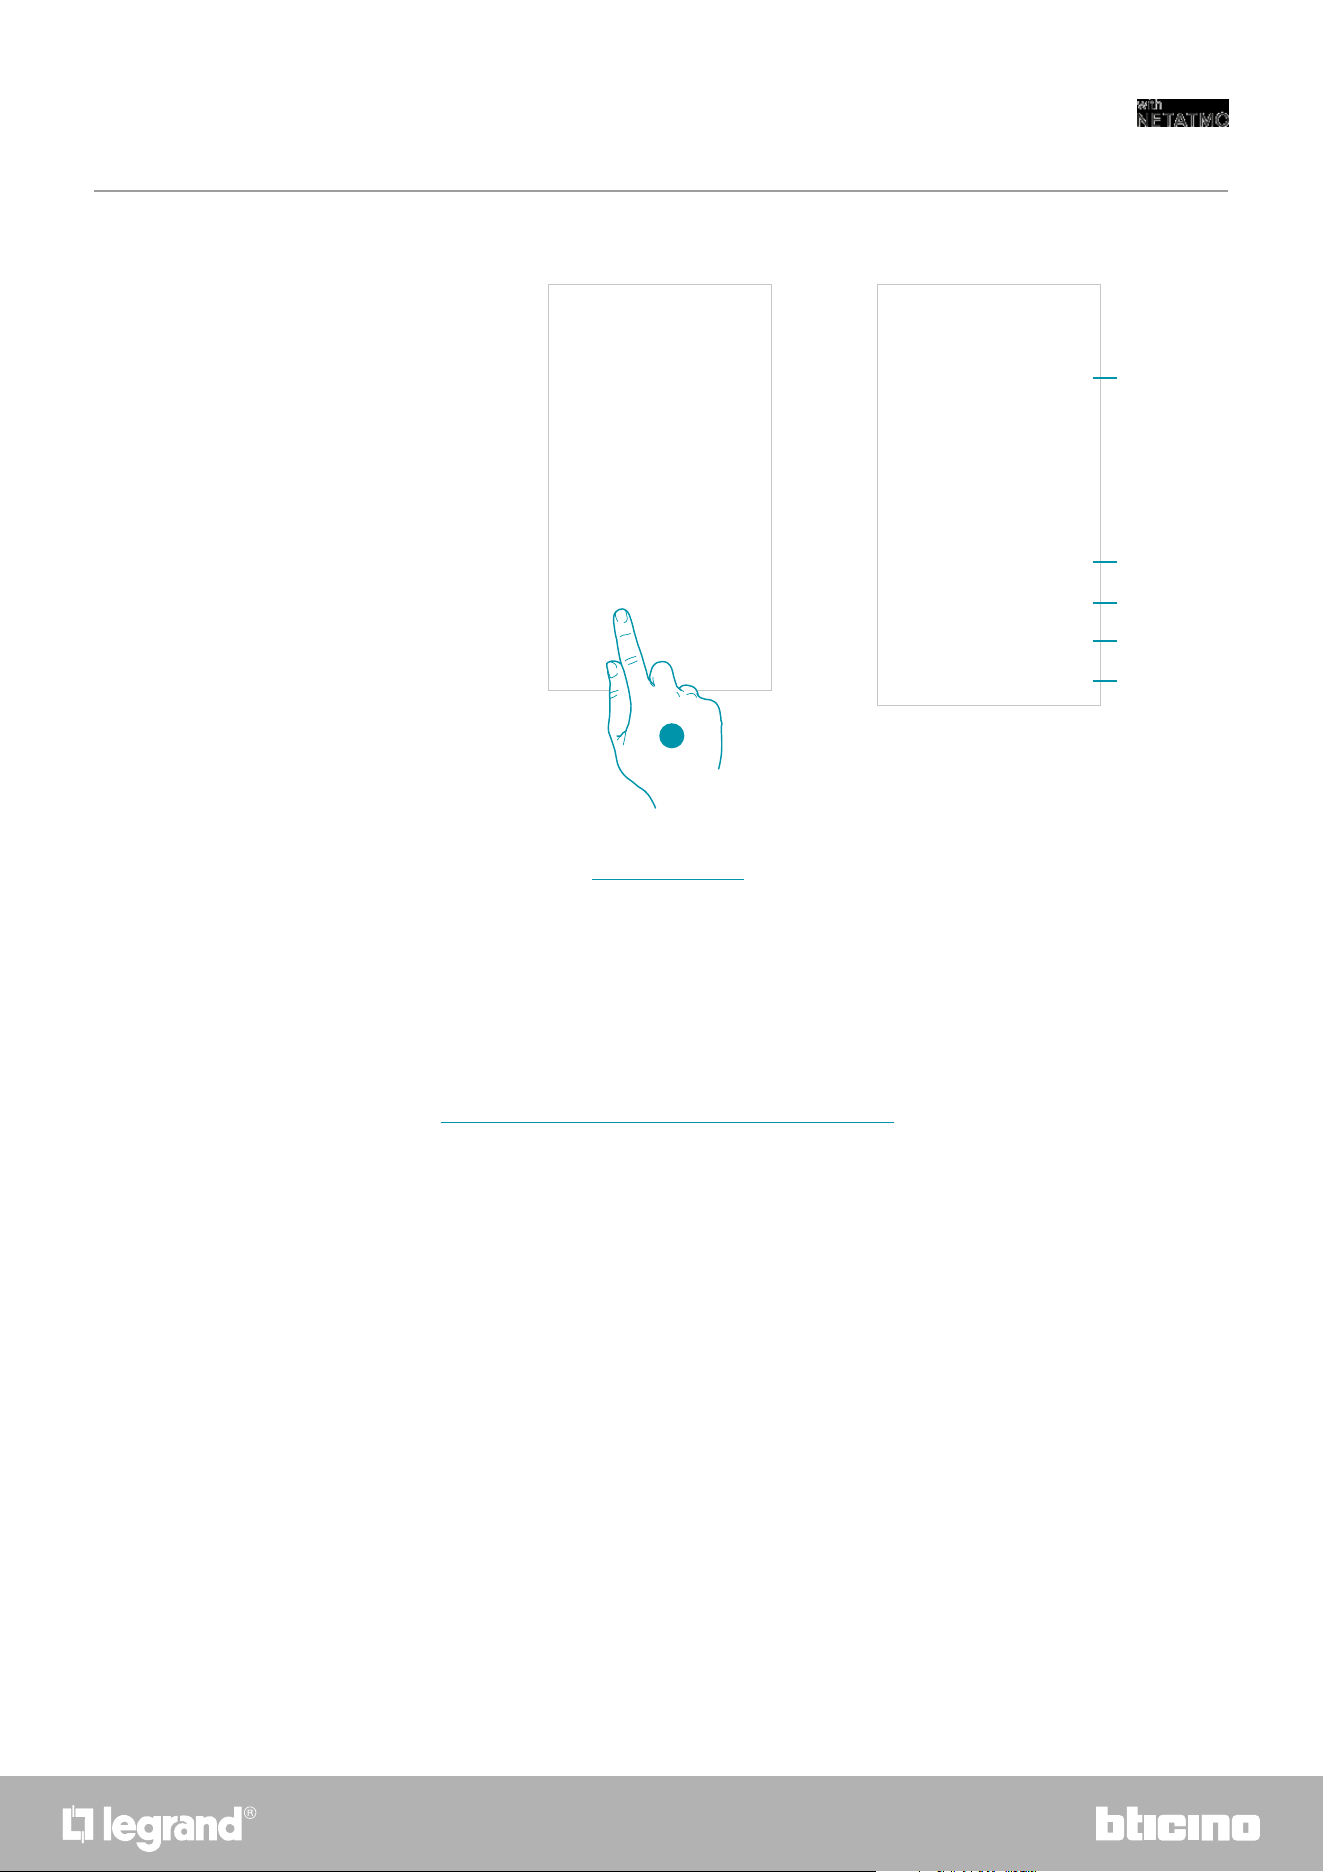
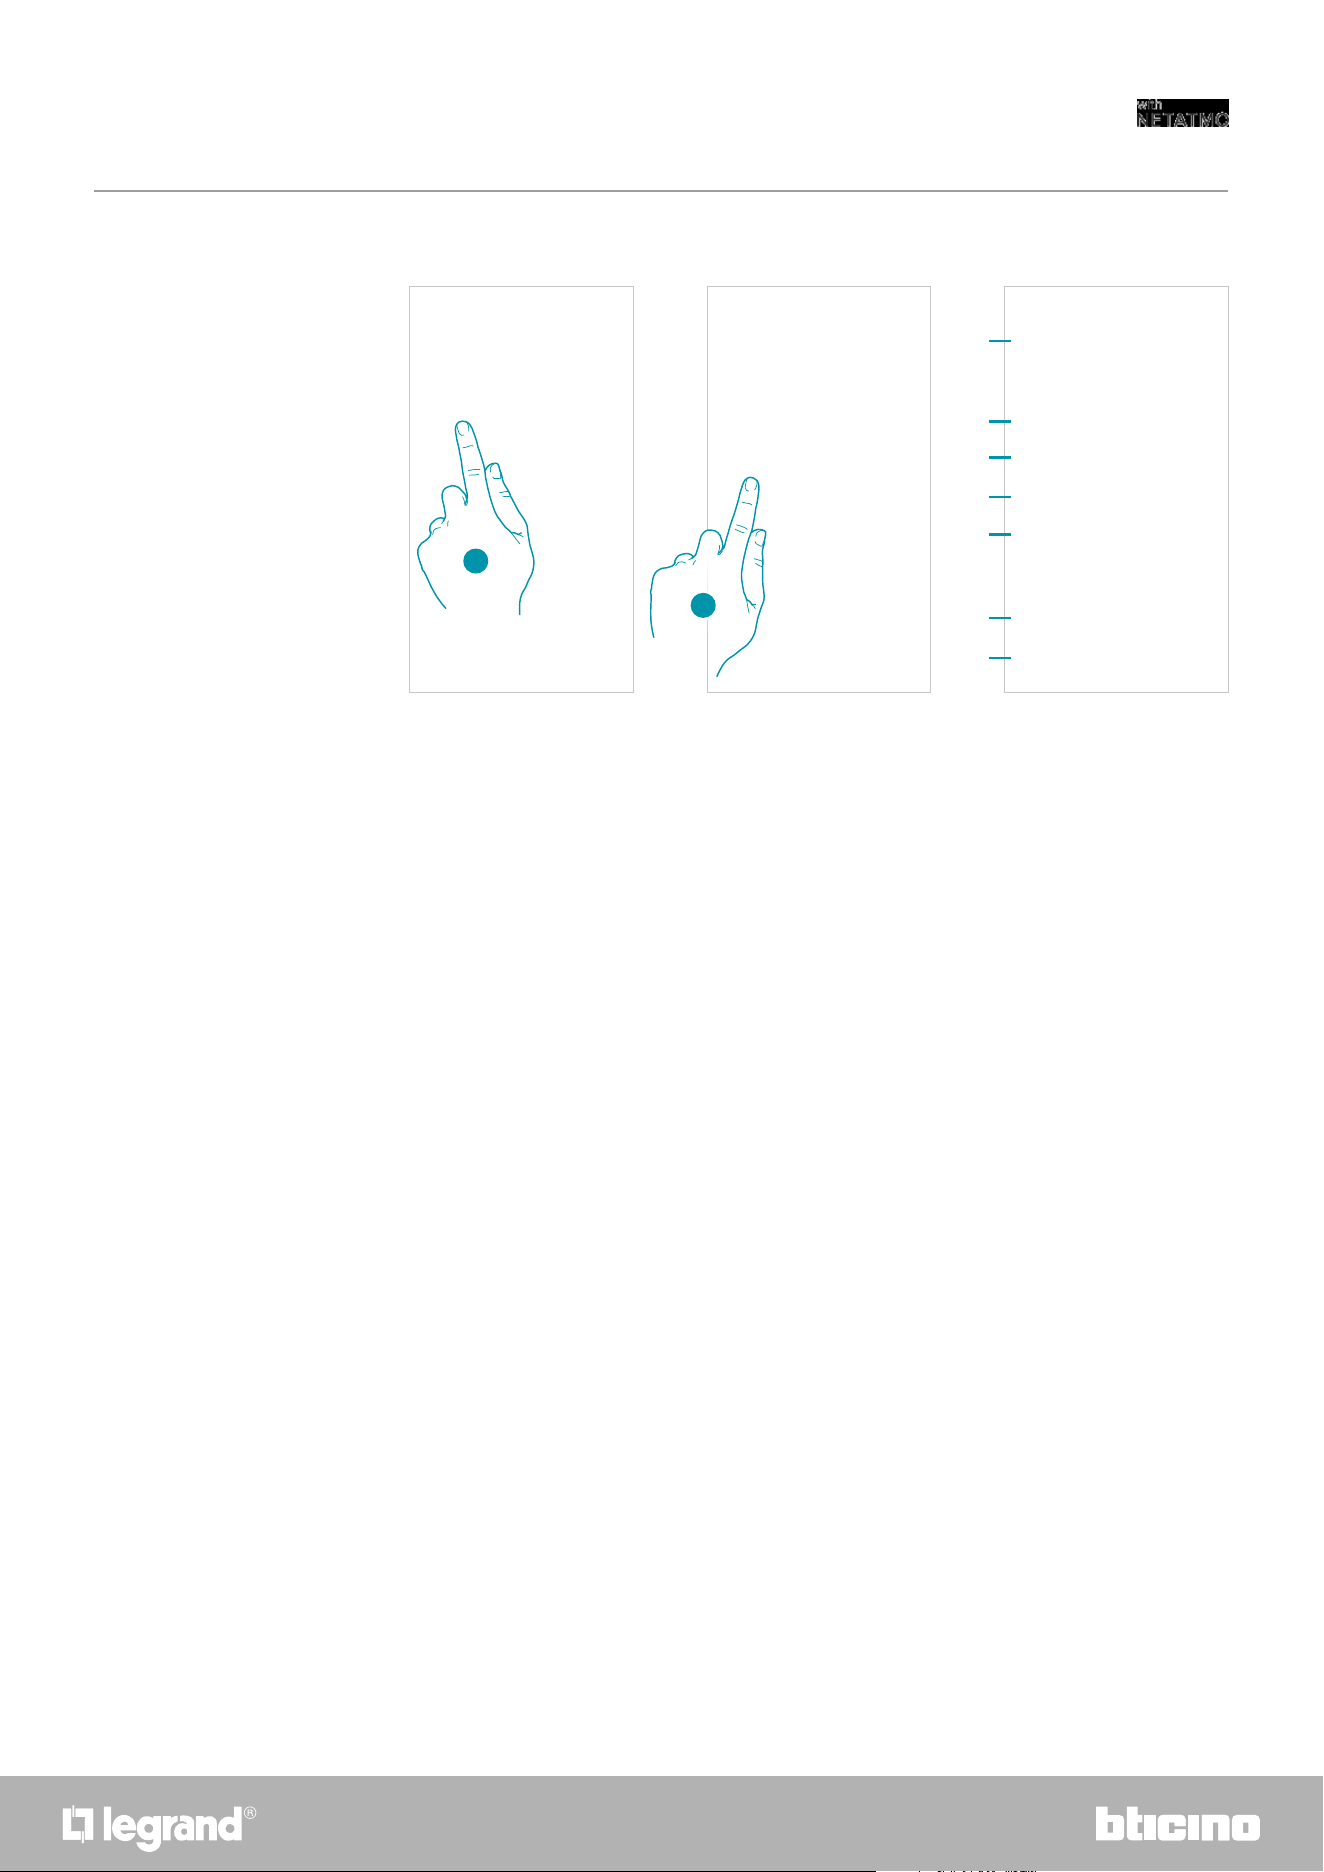
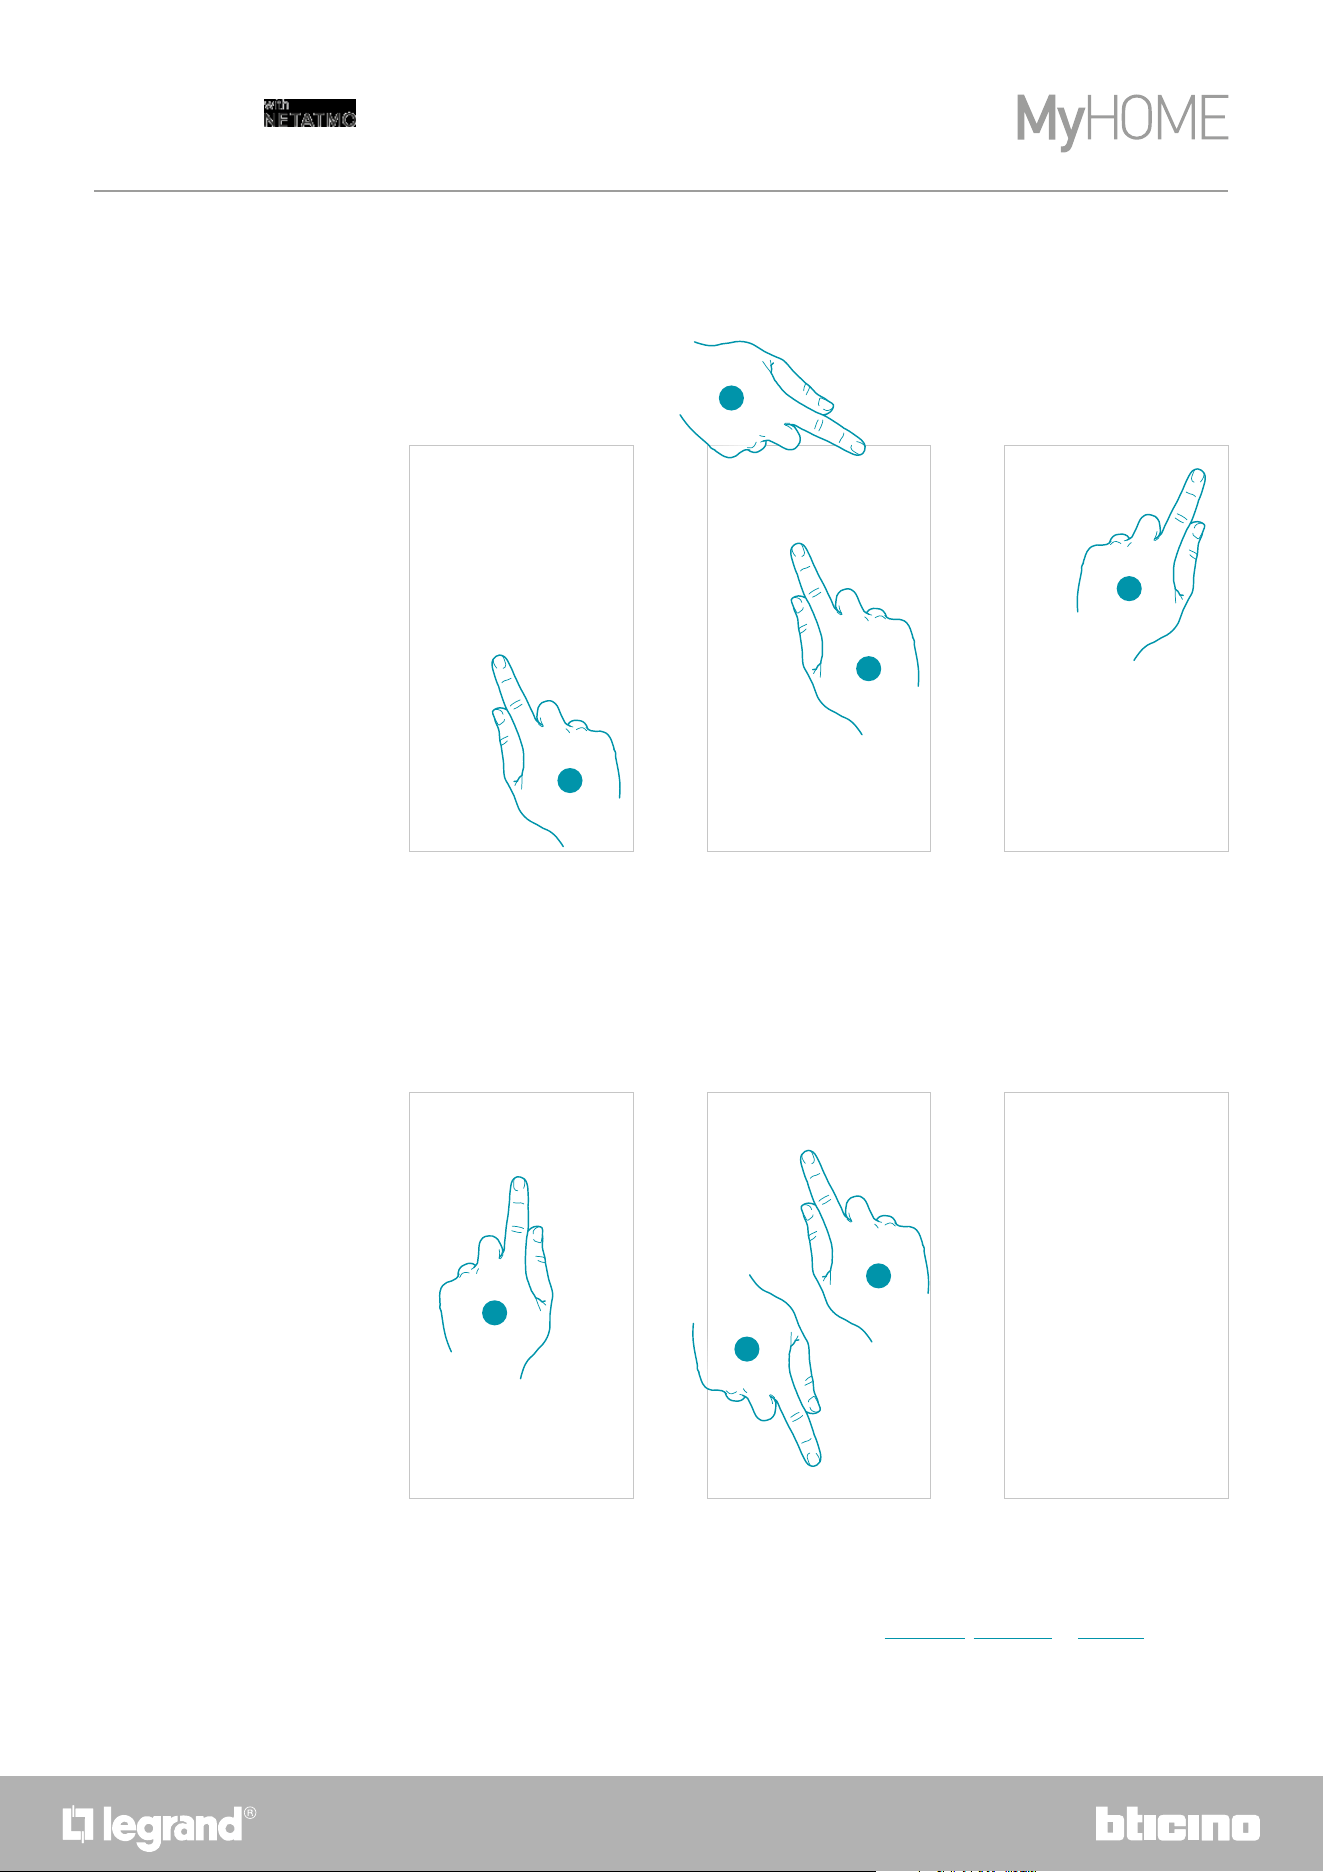
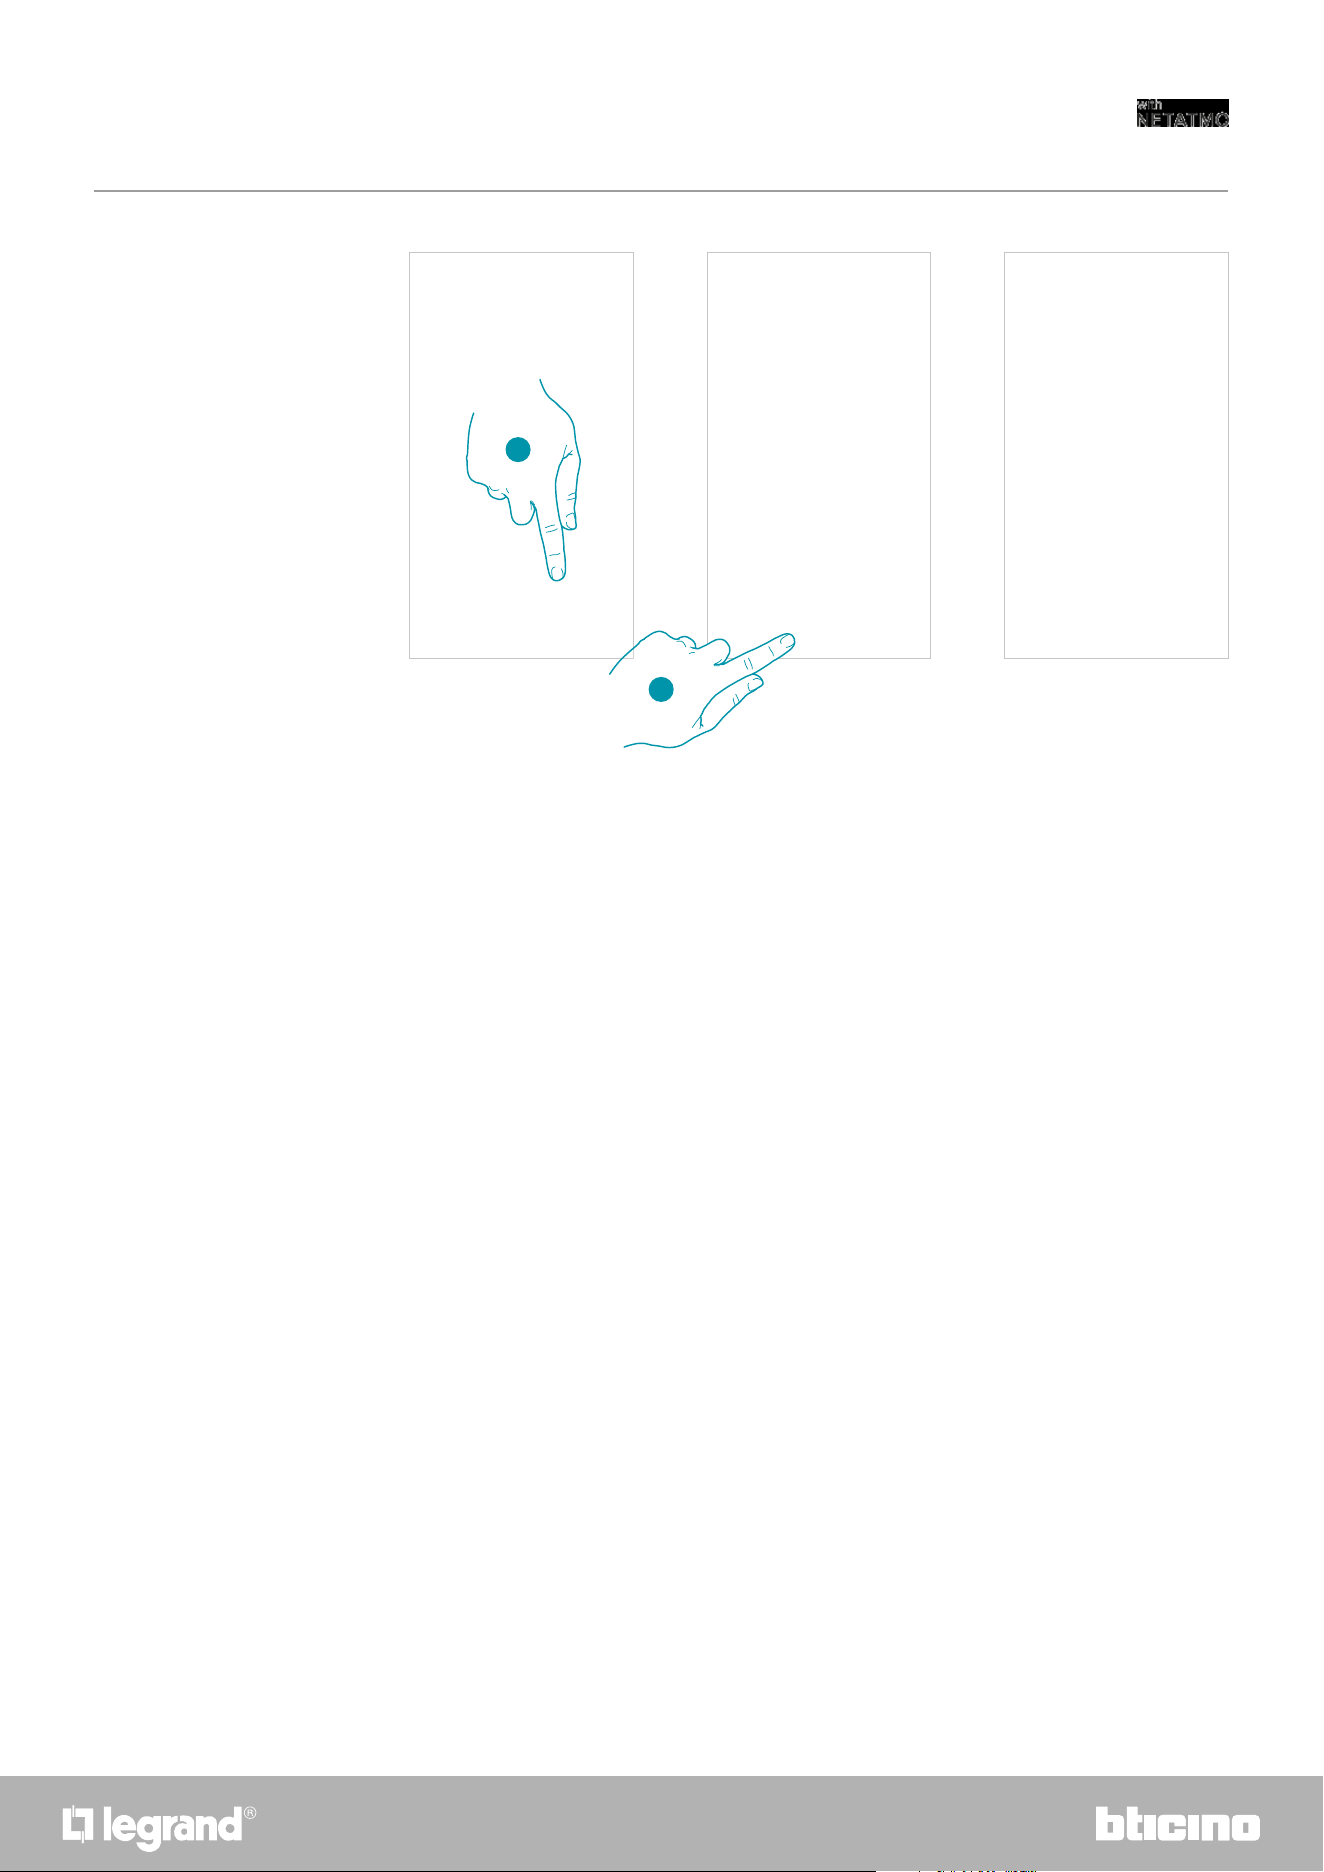
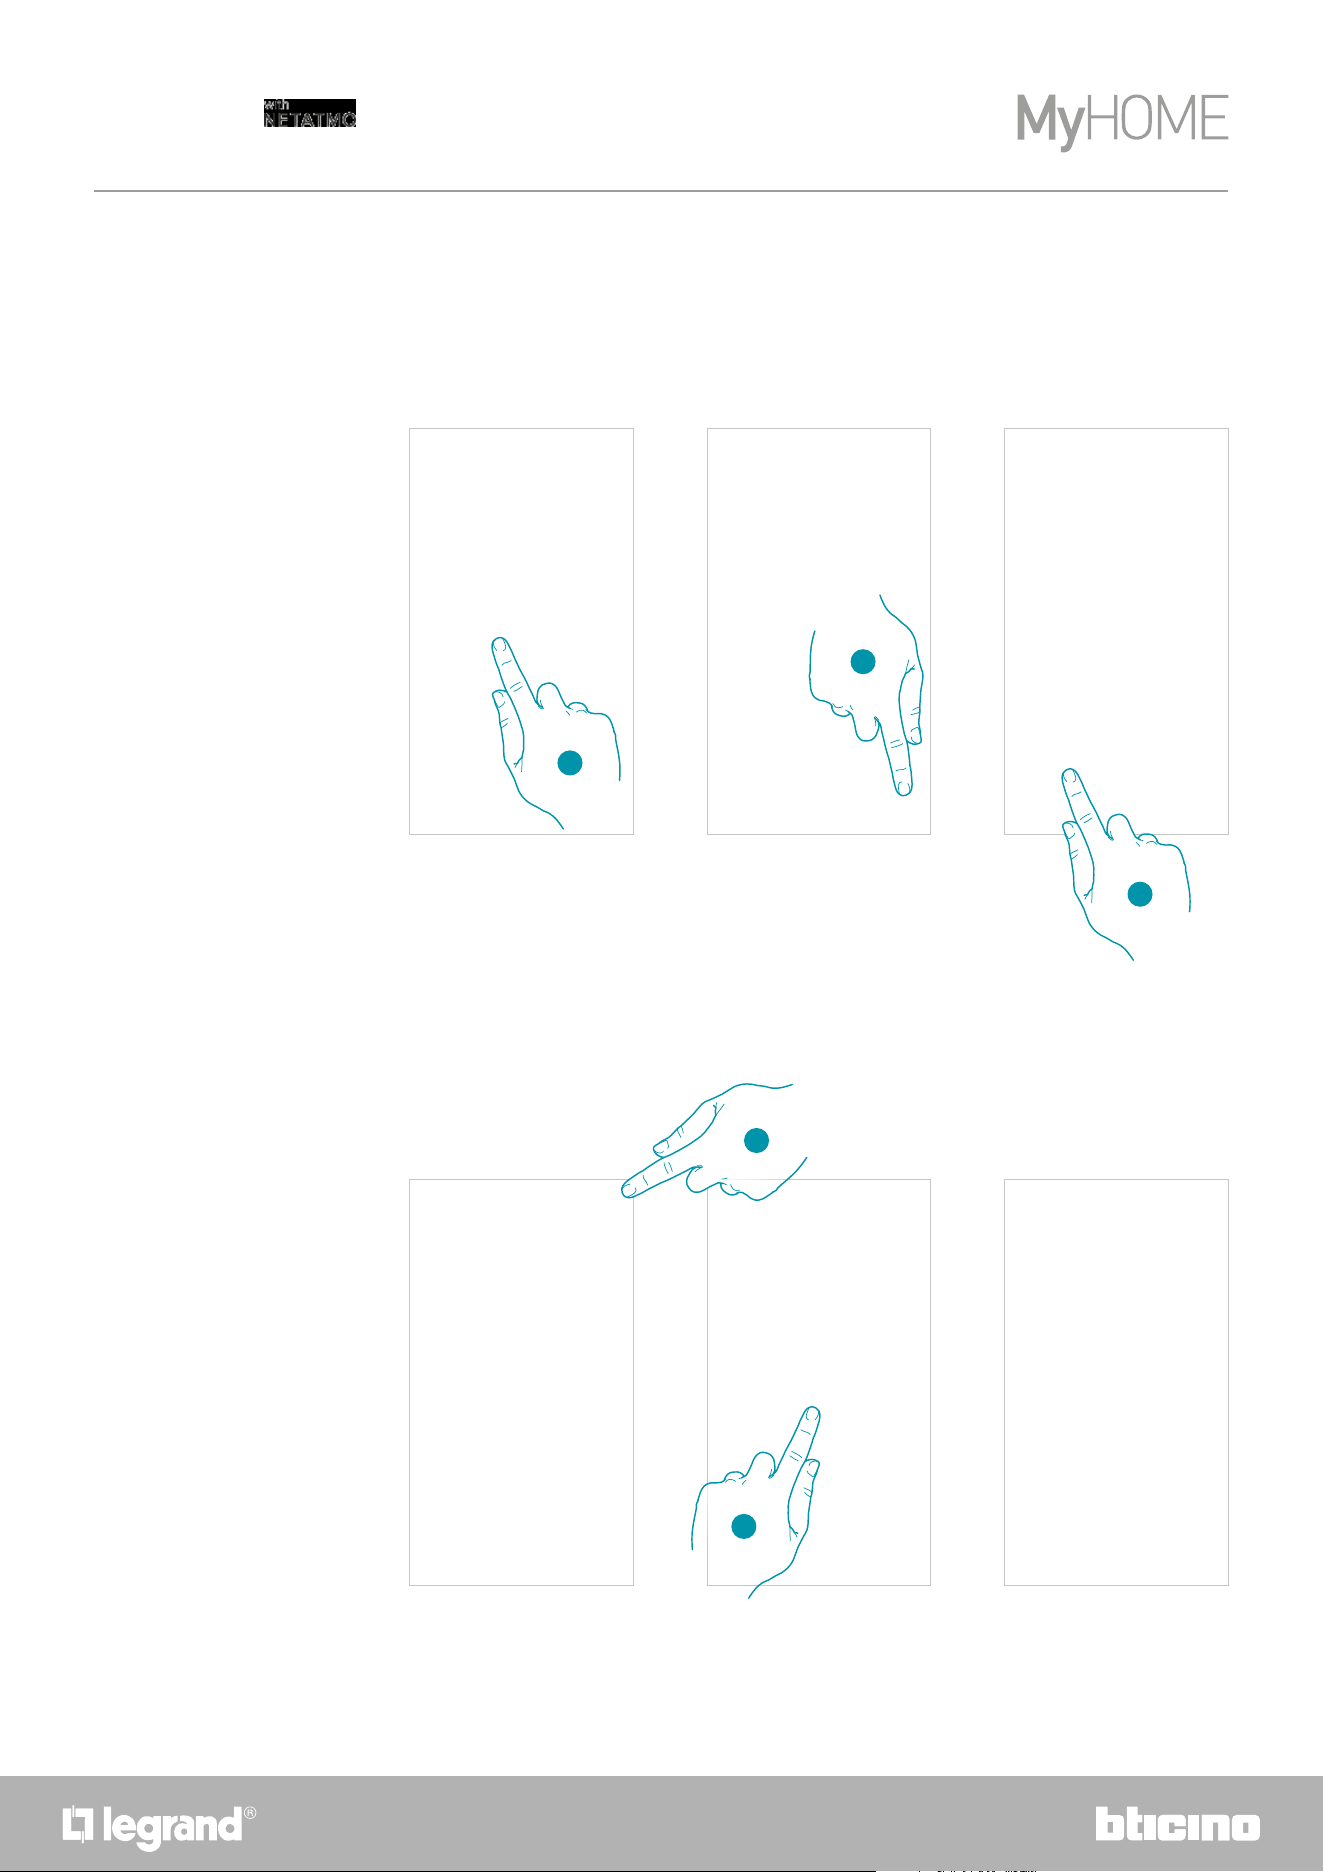
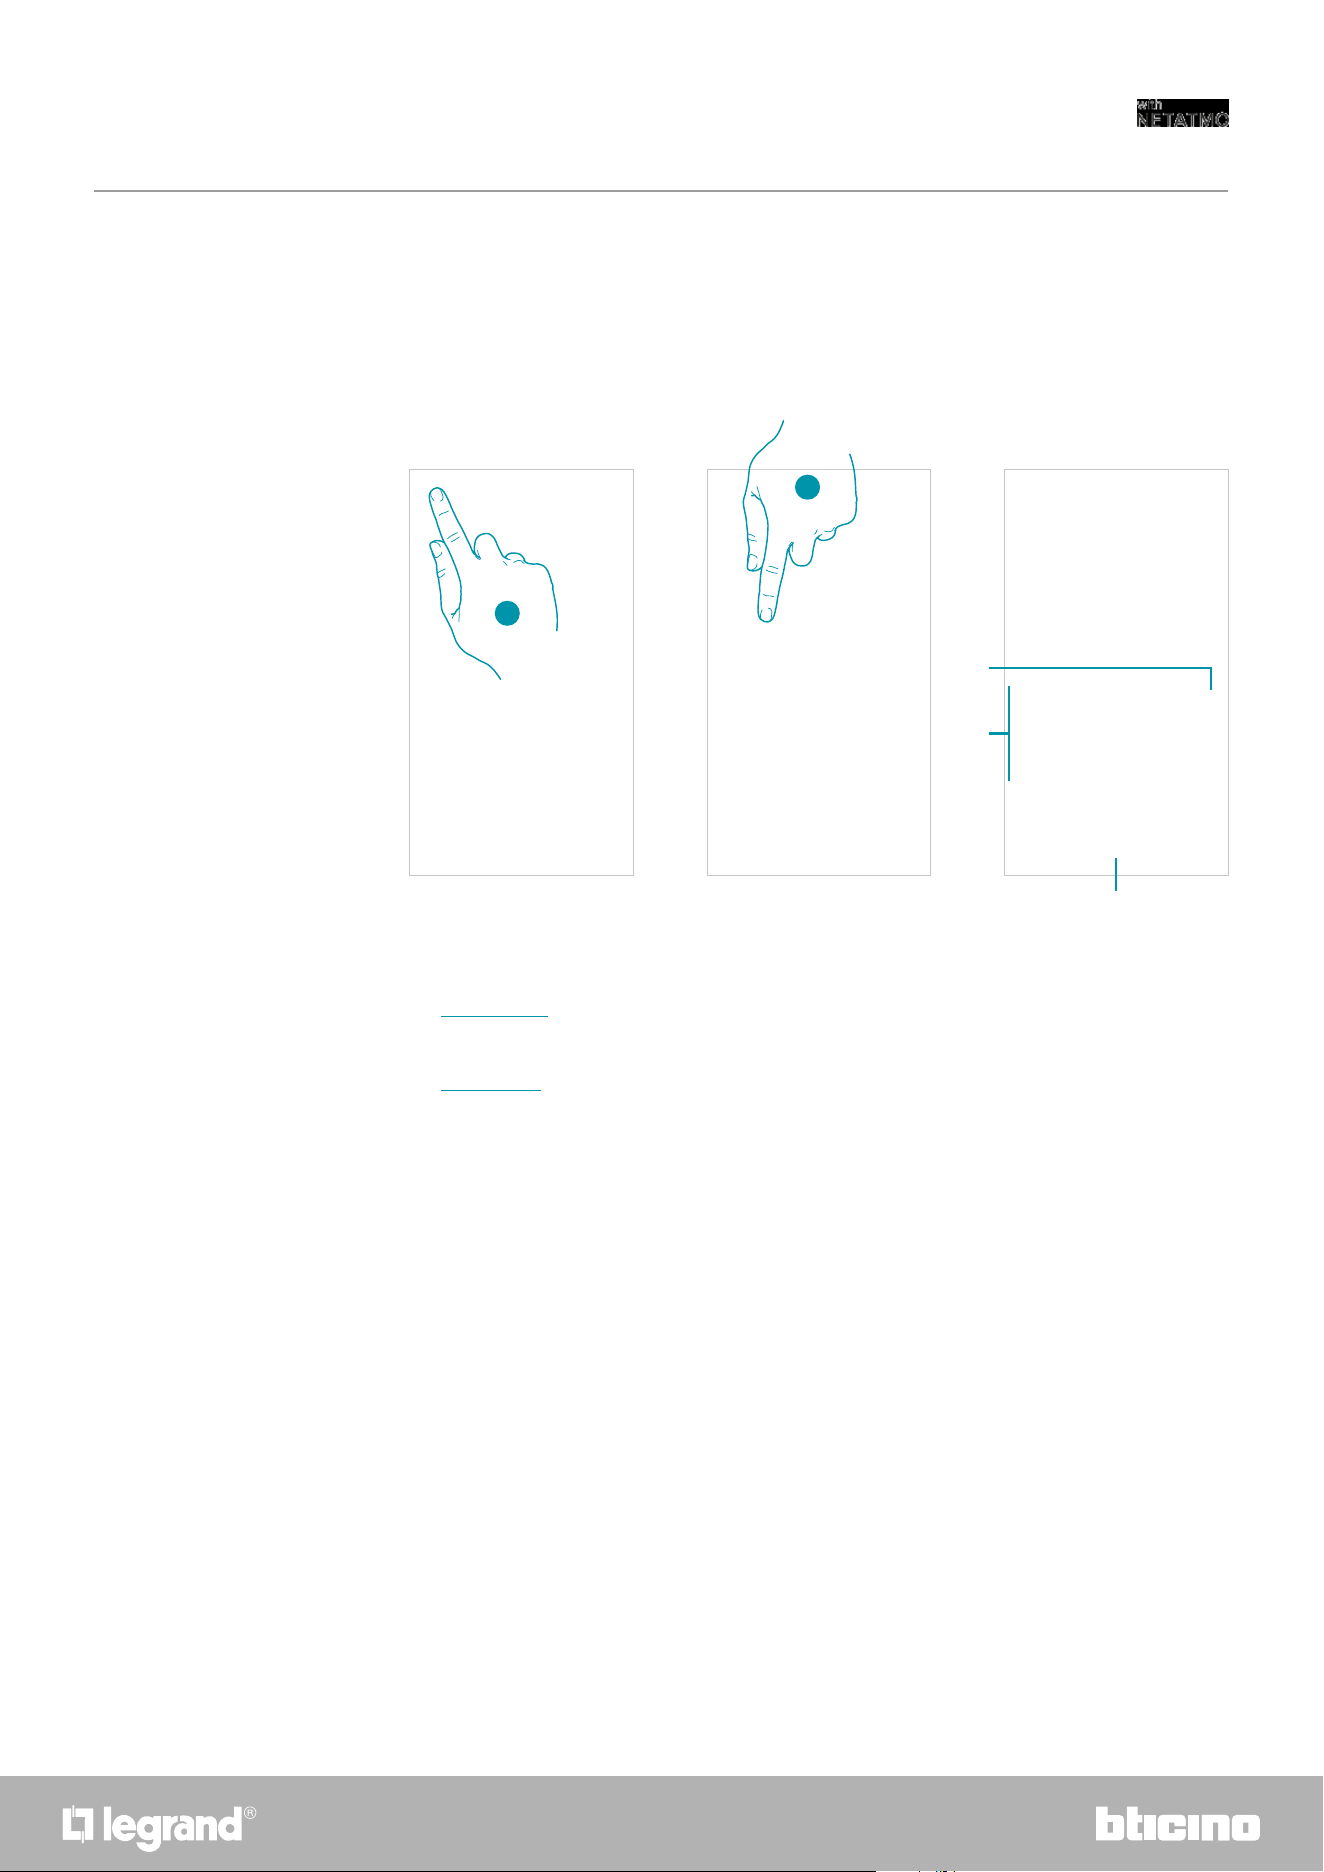
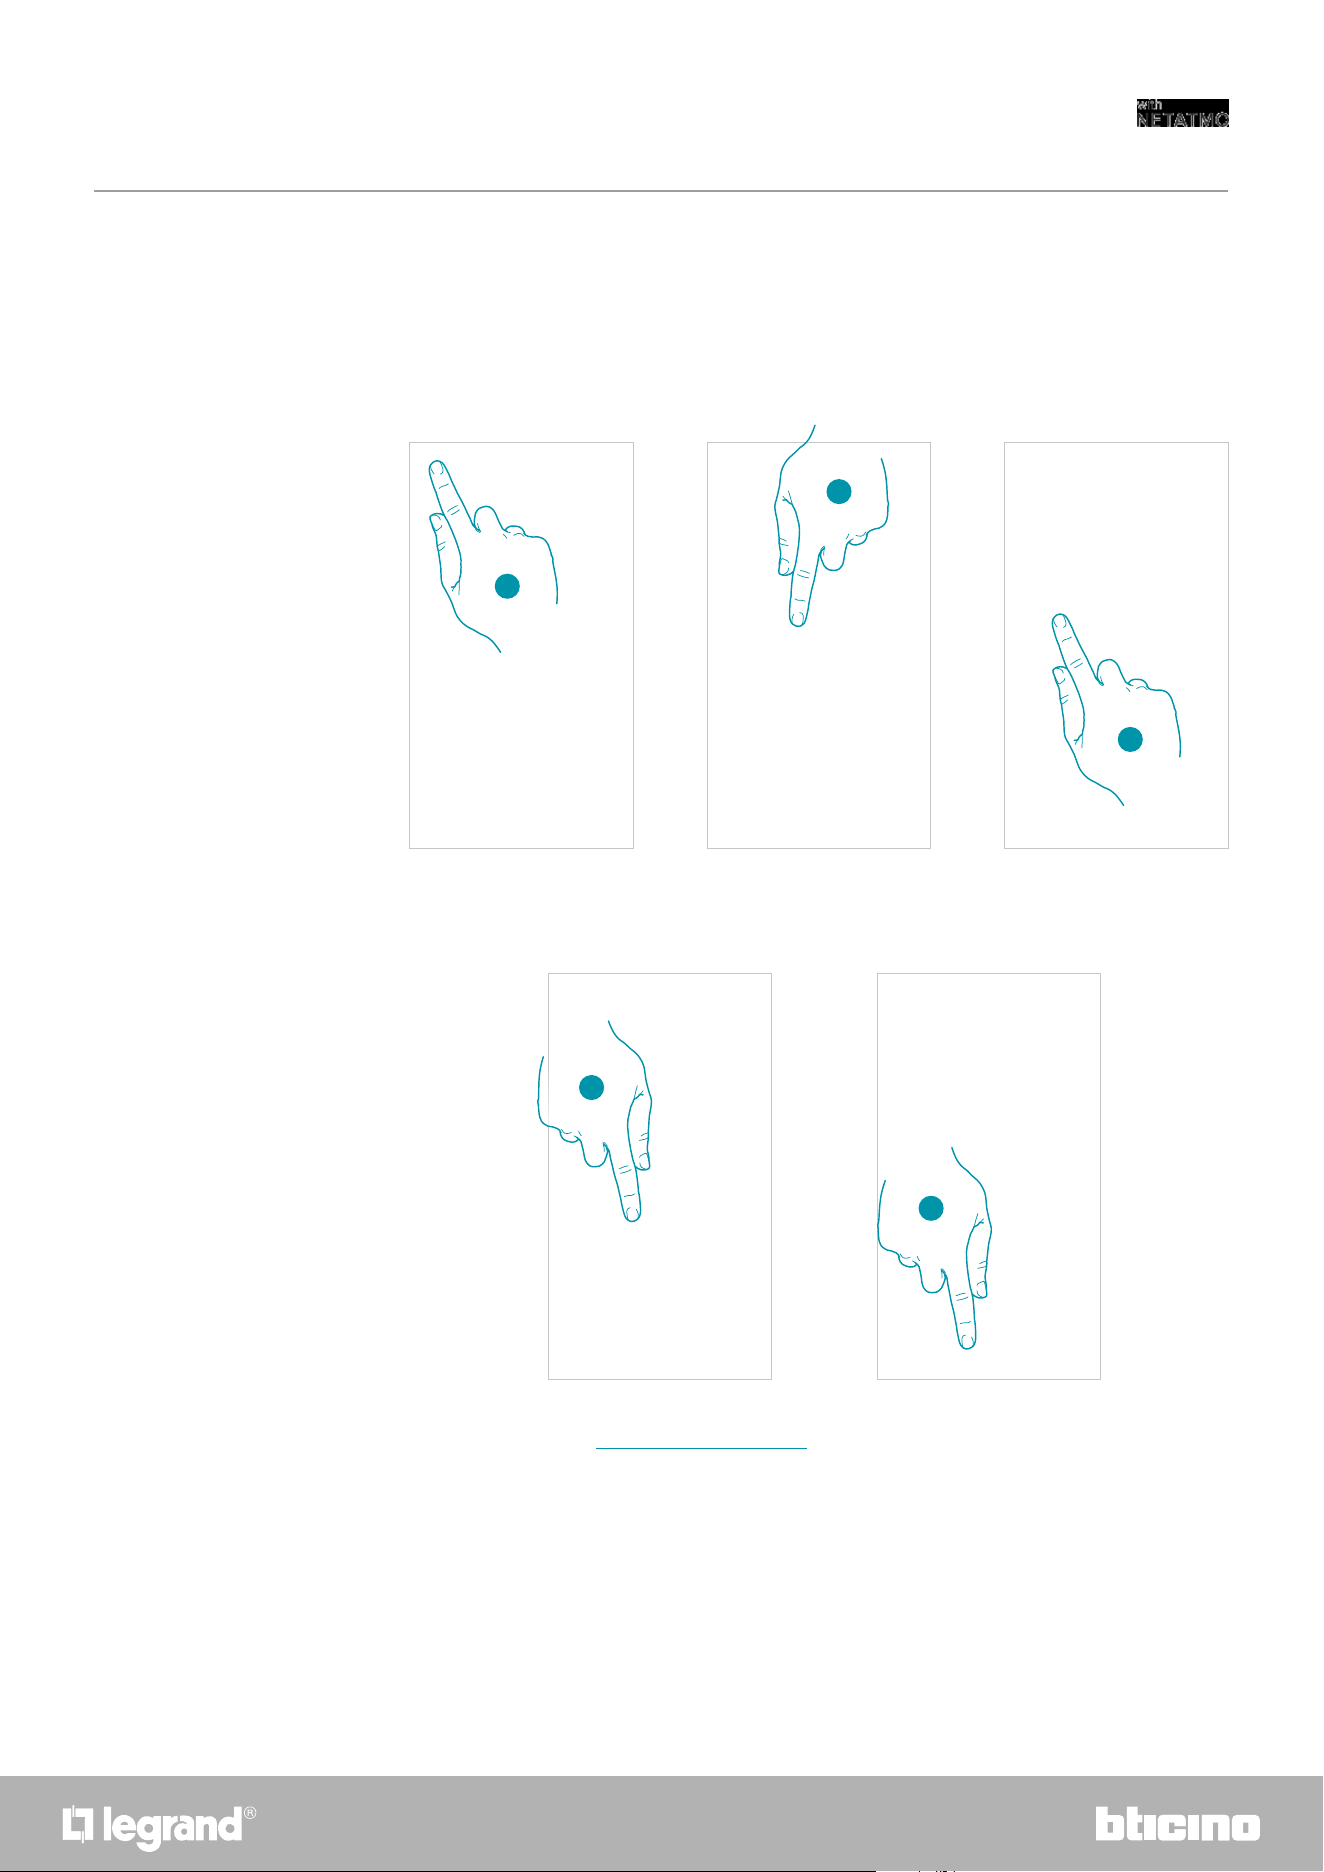
The display shows the measured temperature; the LED gradually switches off while the set time
passes by.
3. To end the setting early touch the
; symbol; Smarther will continue operation according to
the previous program.
3
20
Smarther
User and installation manual
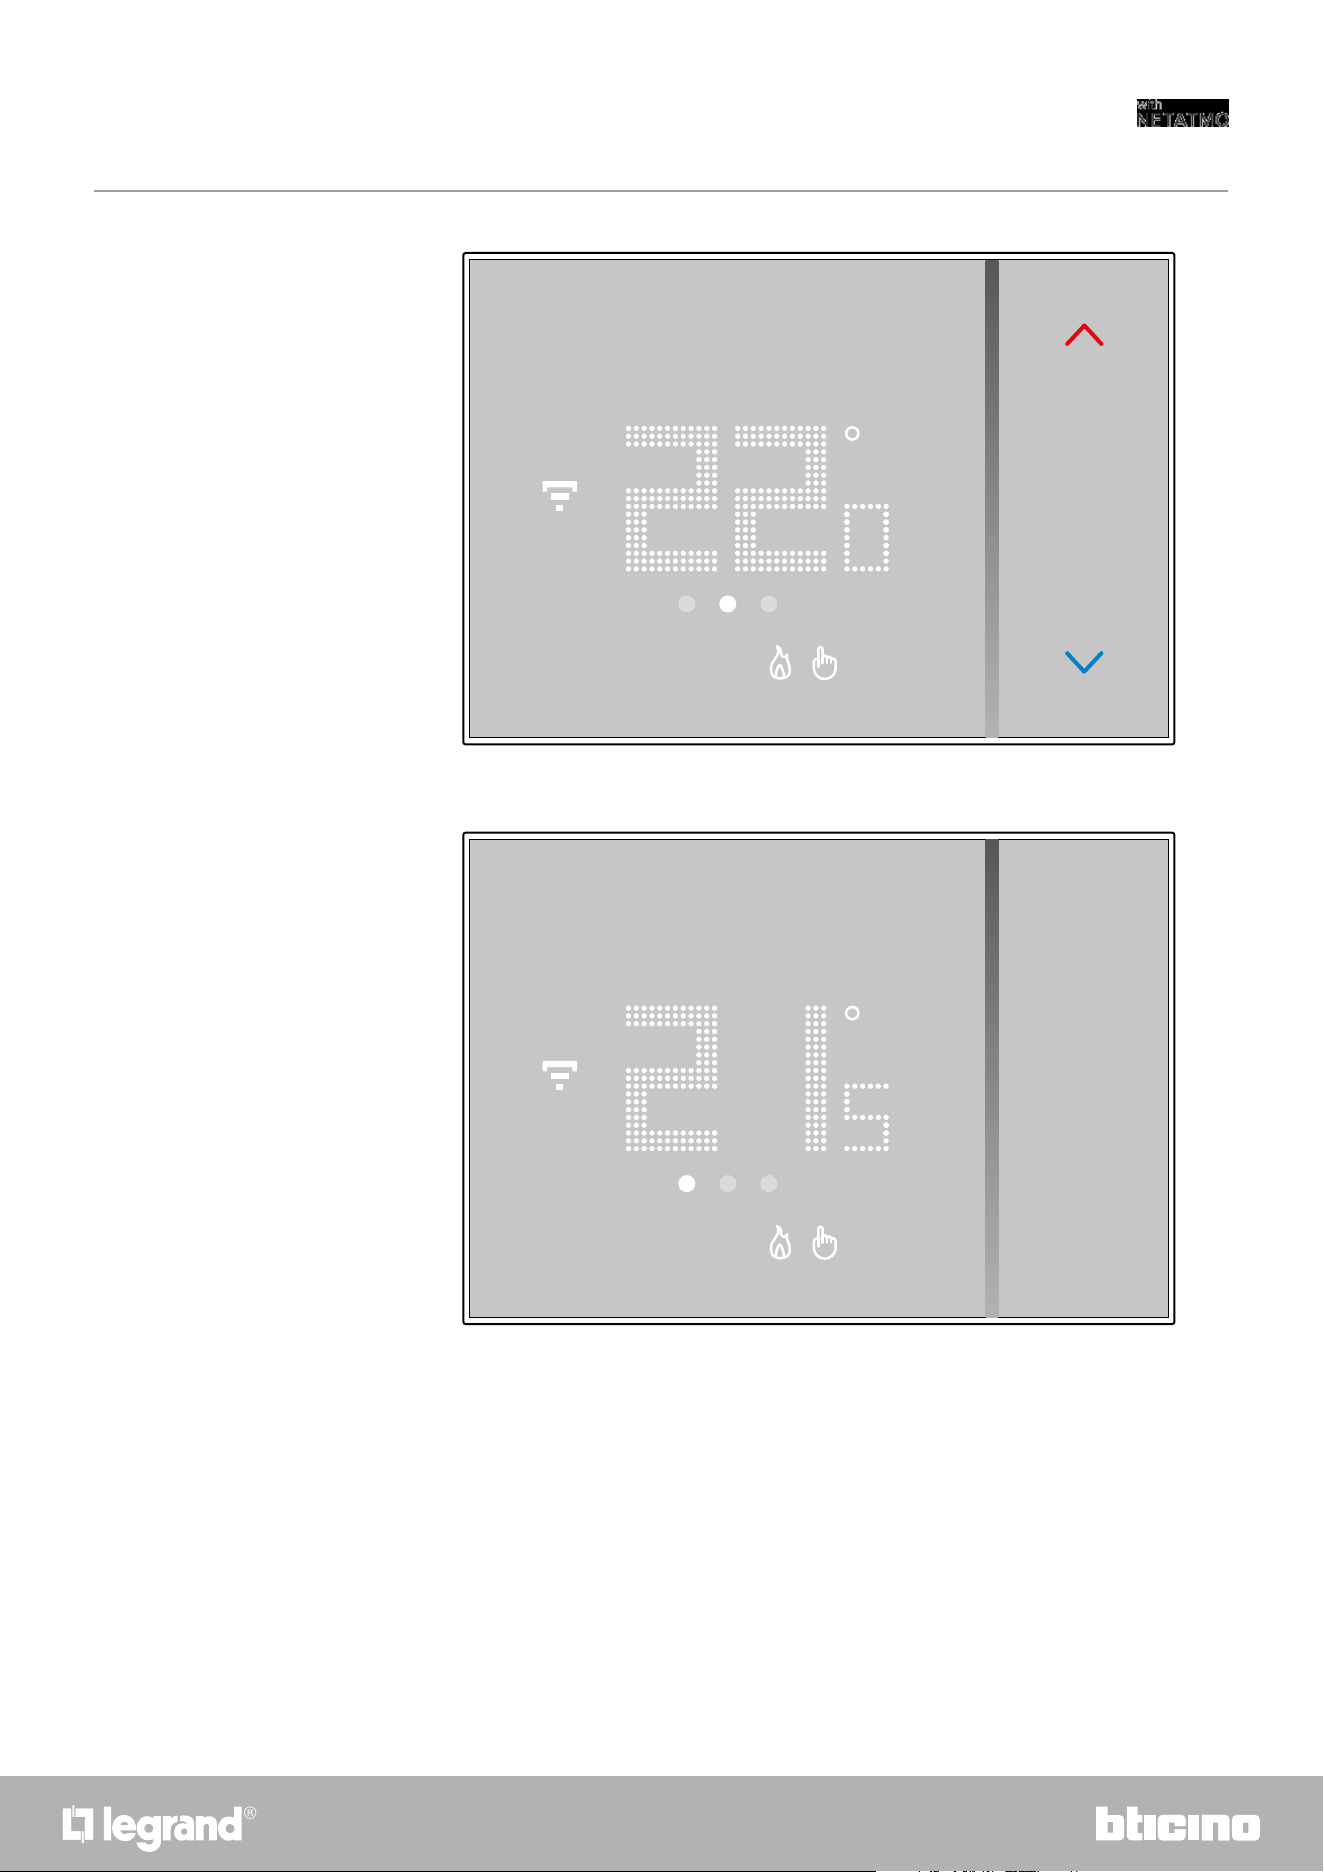
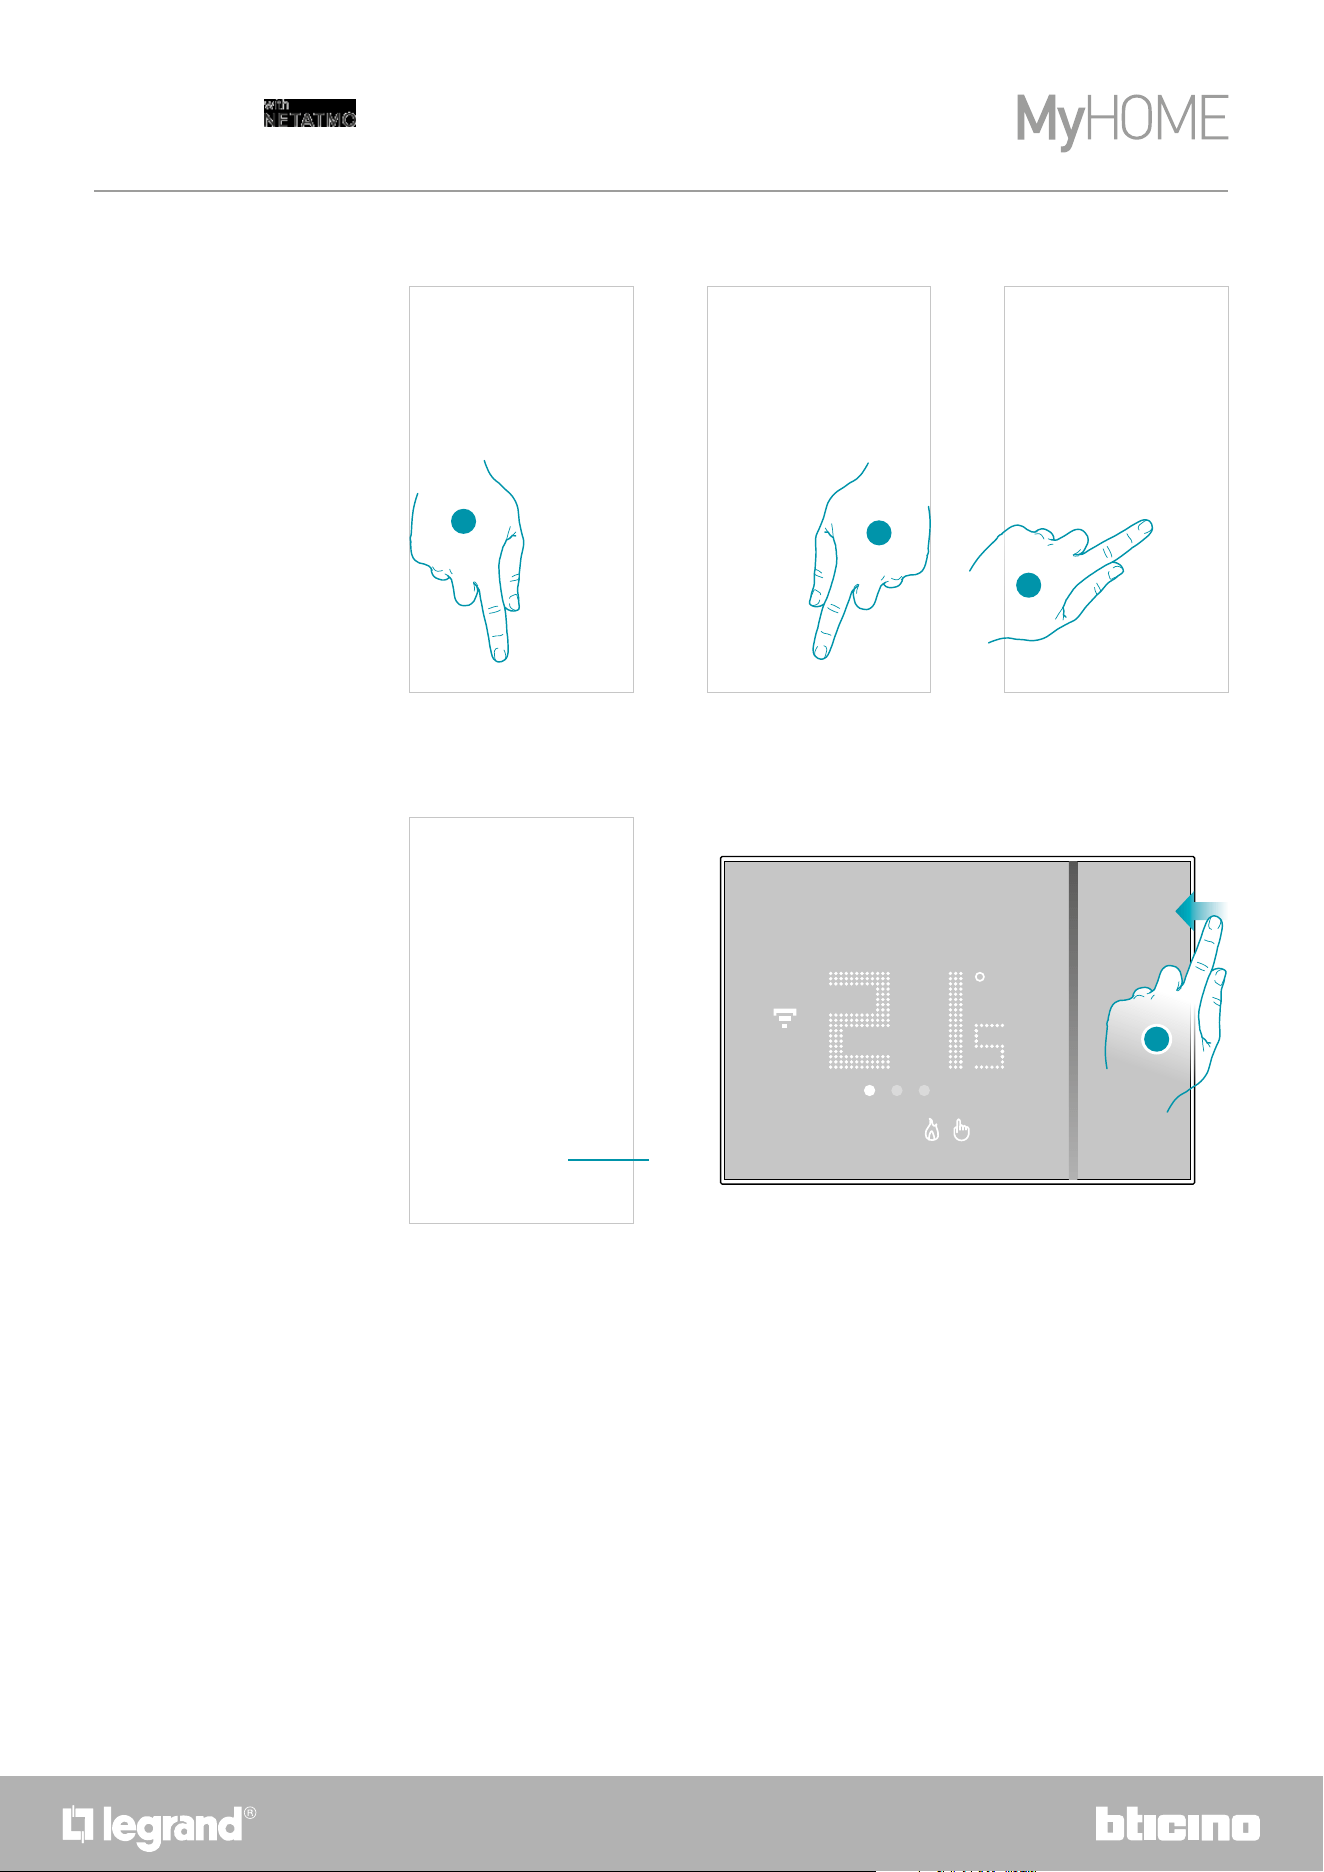
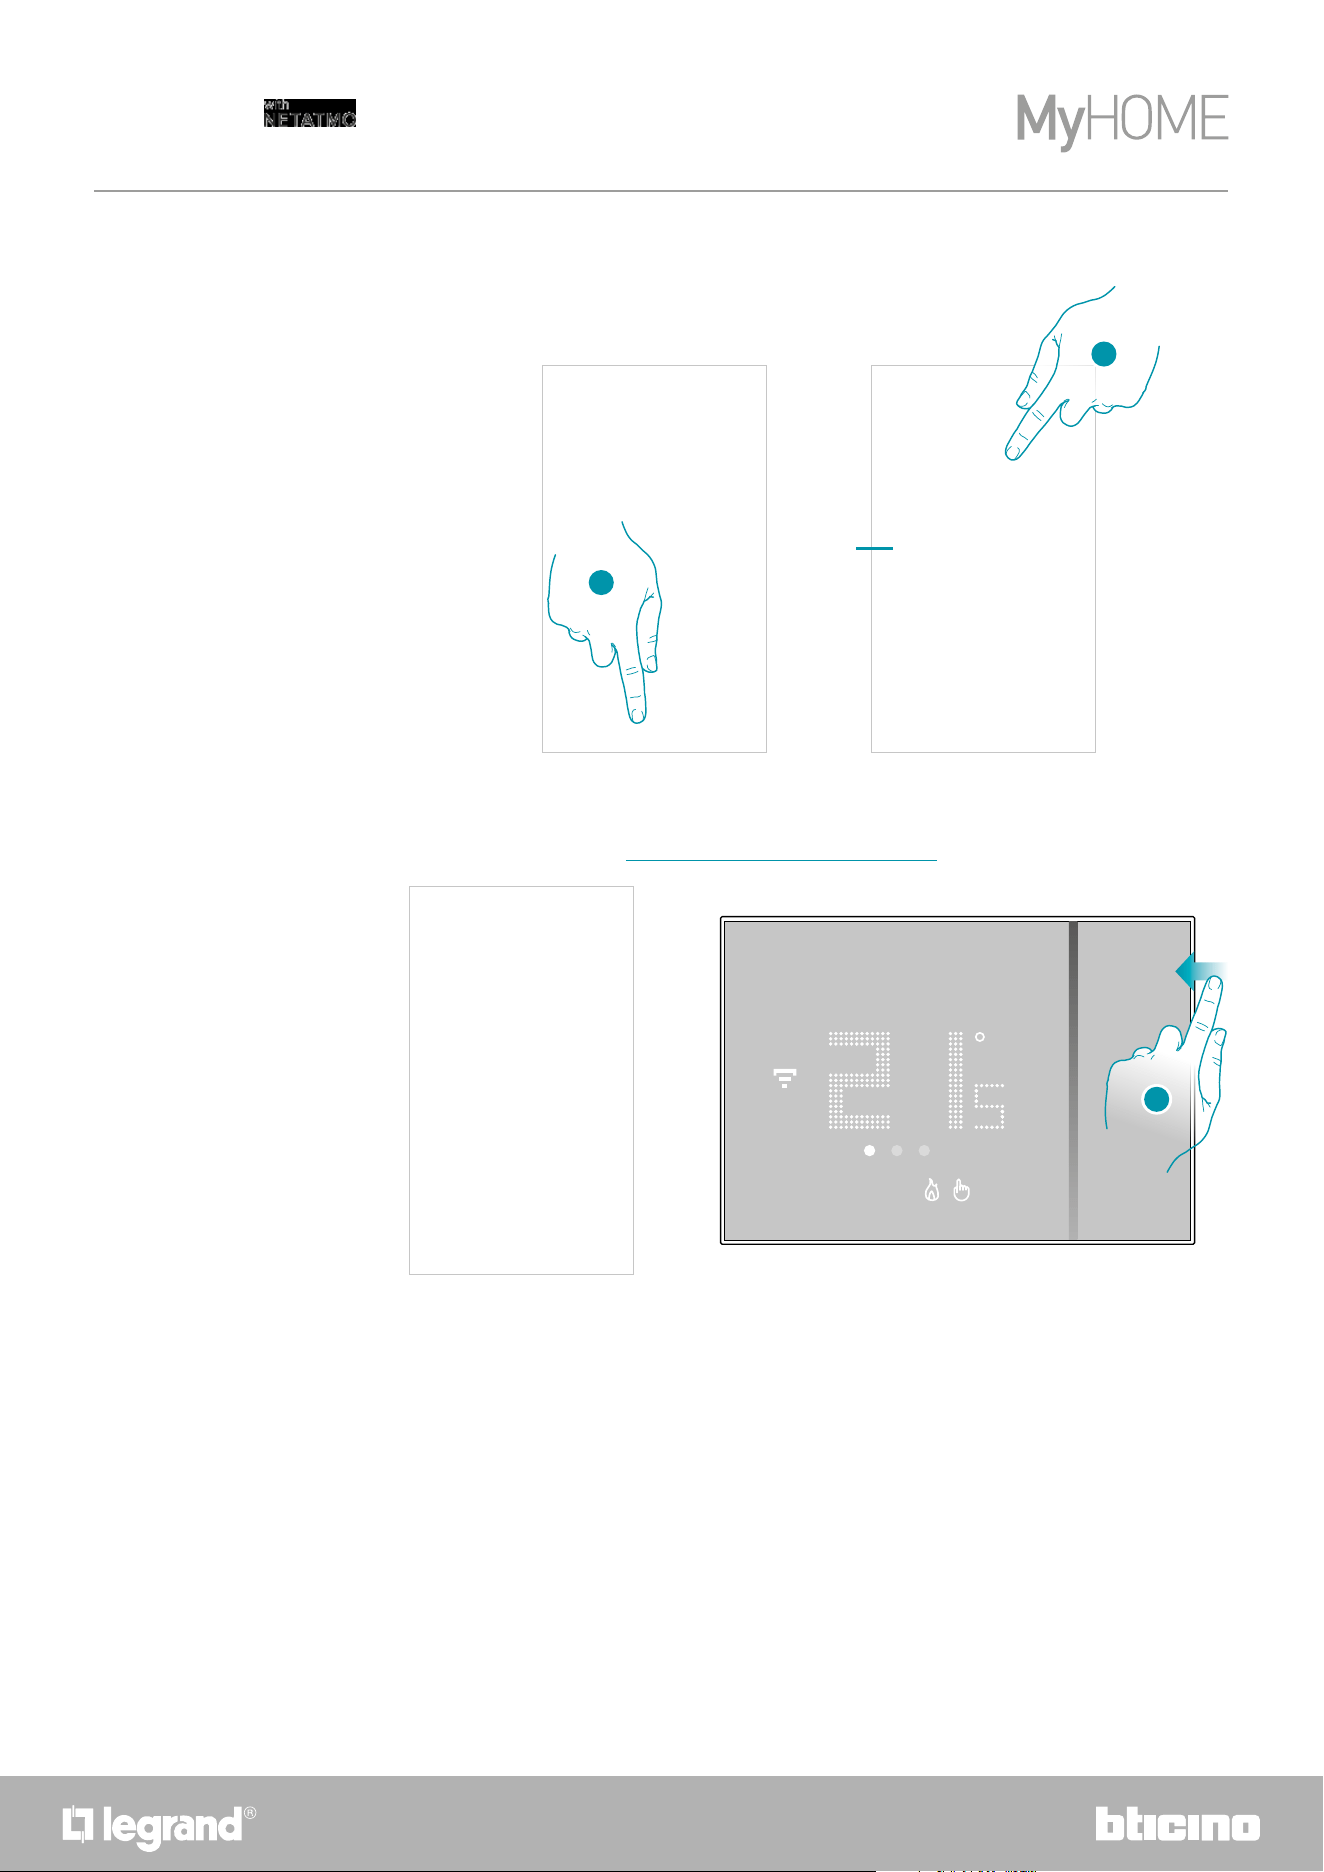
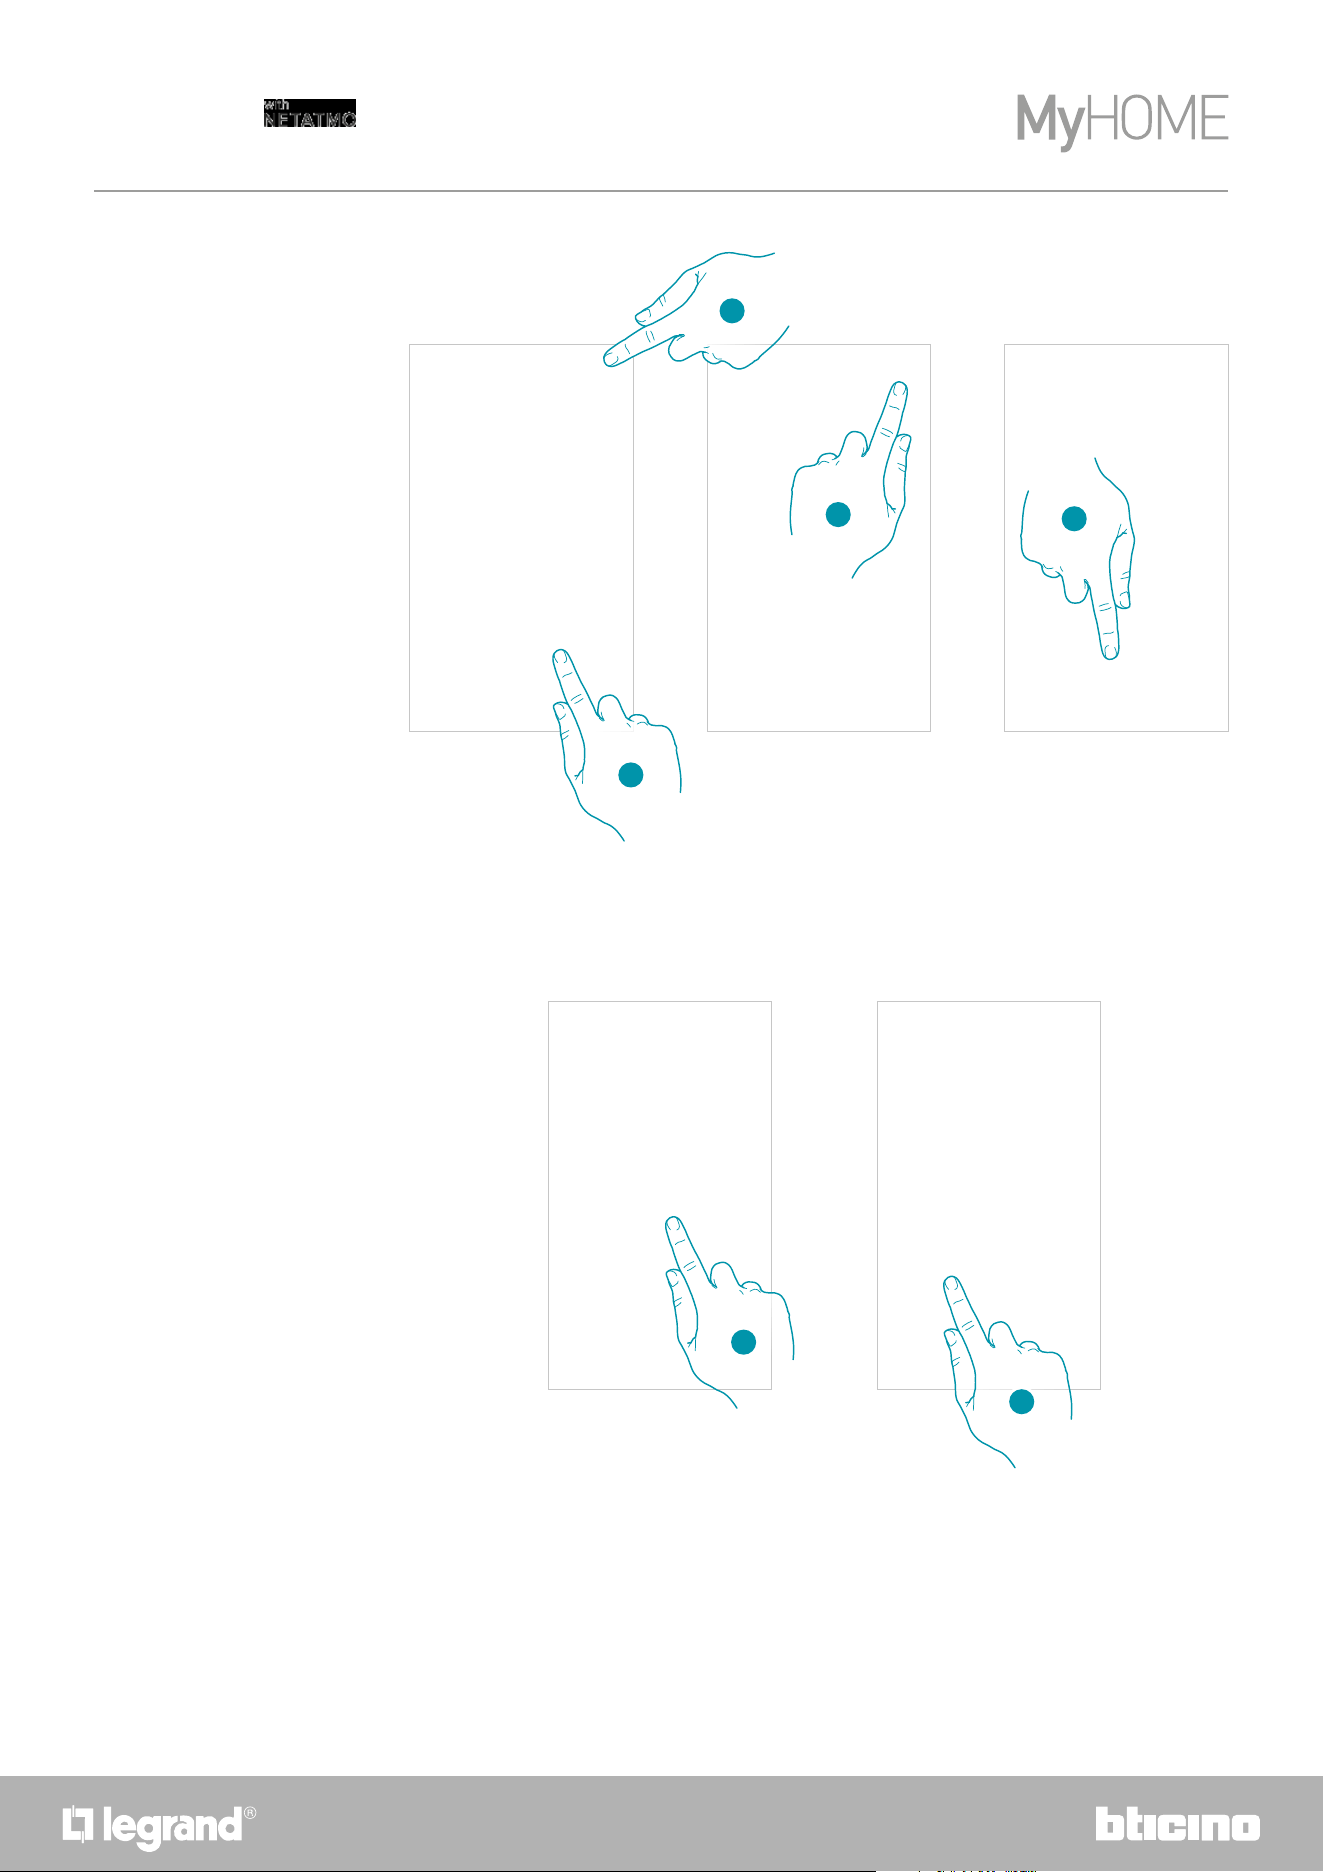
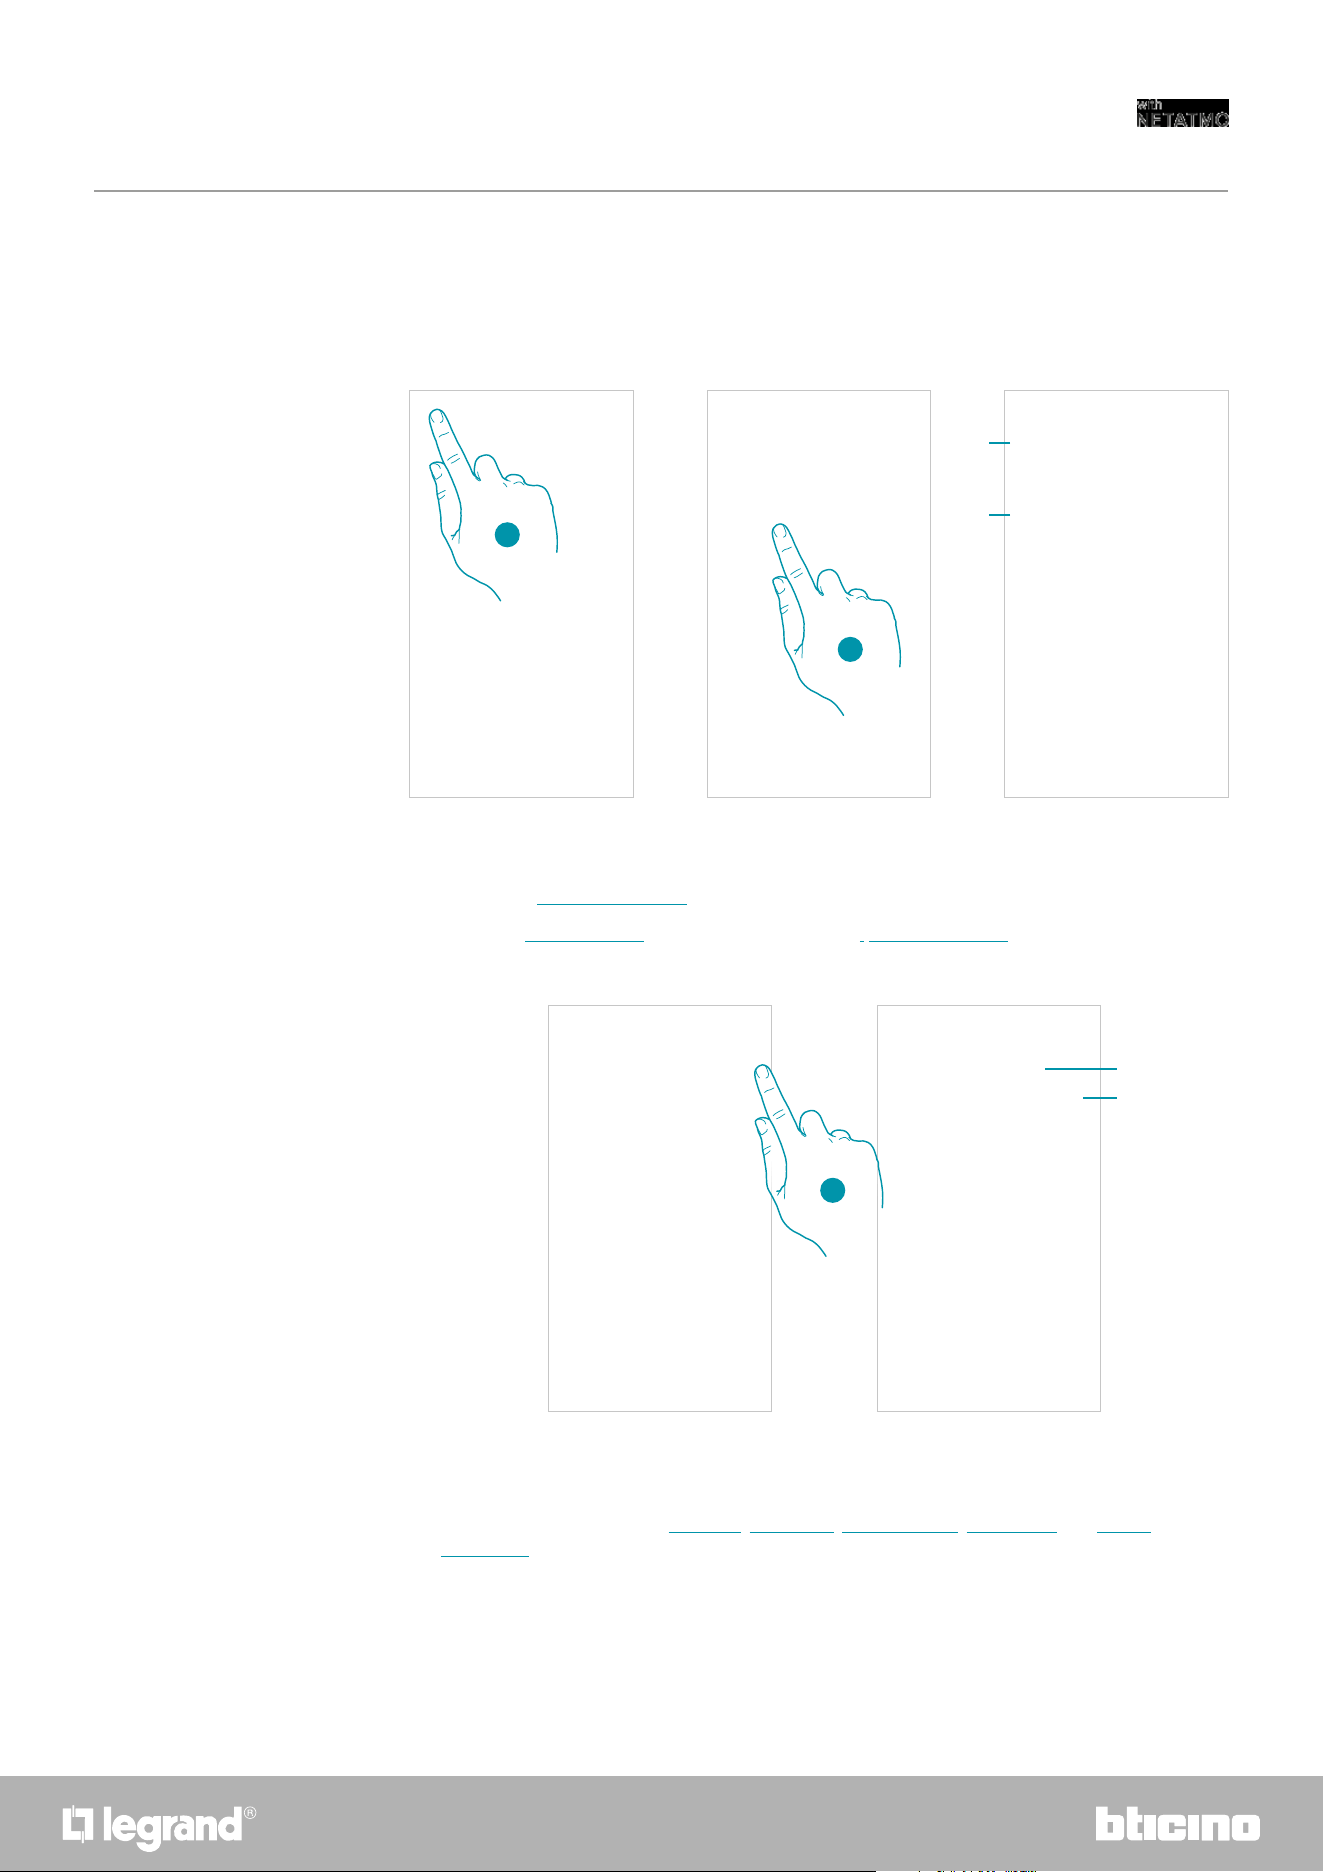
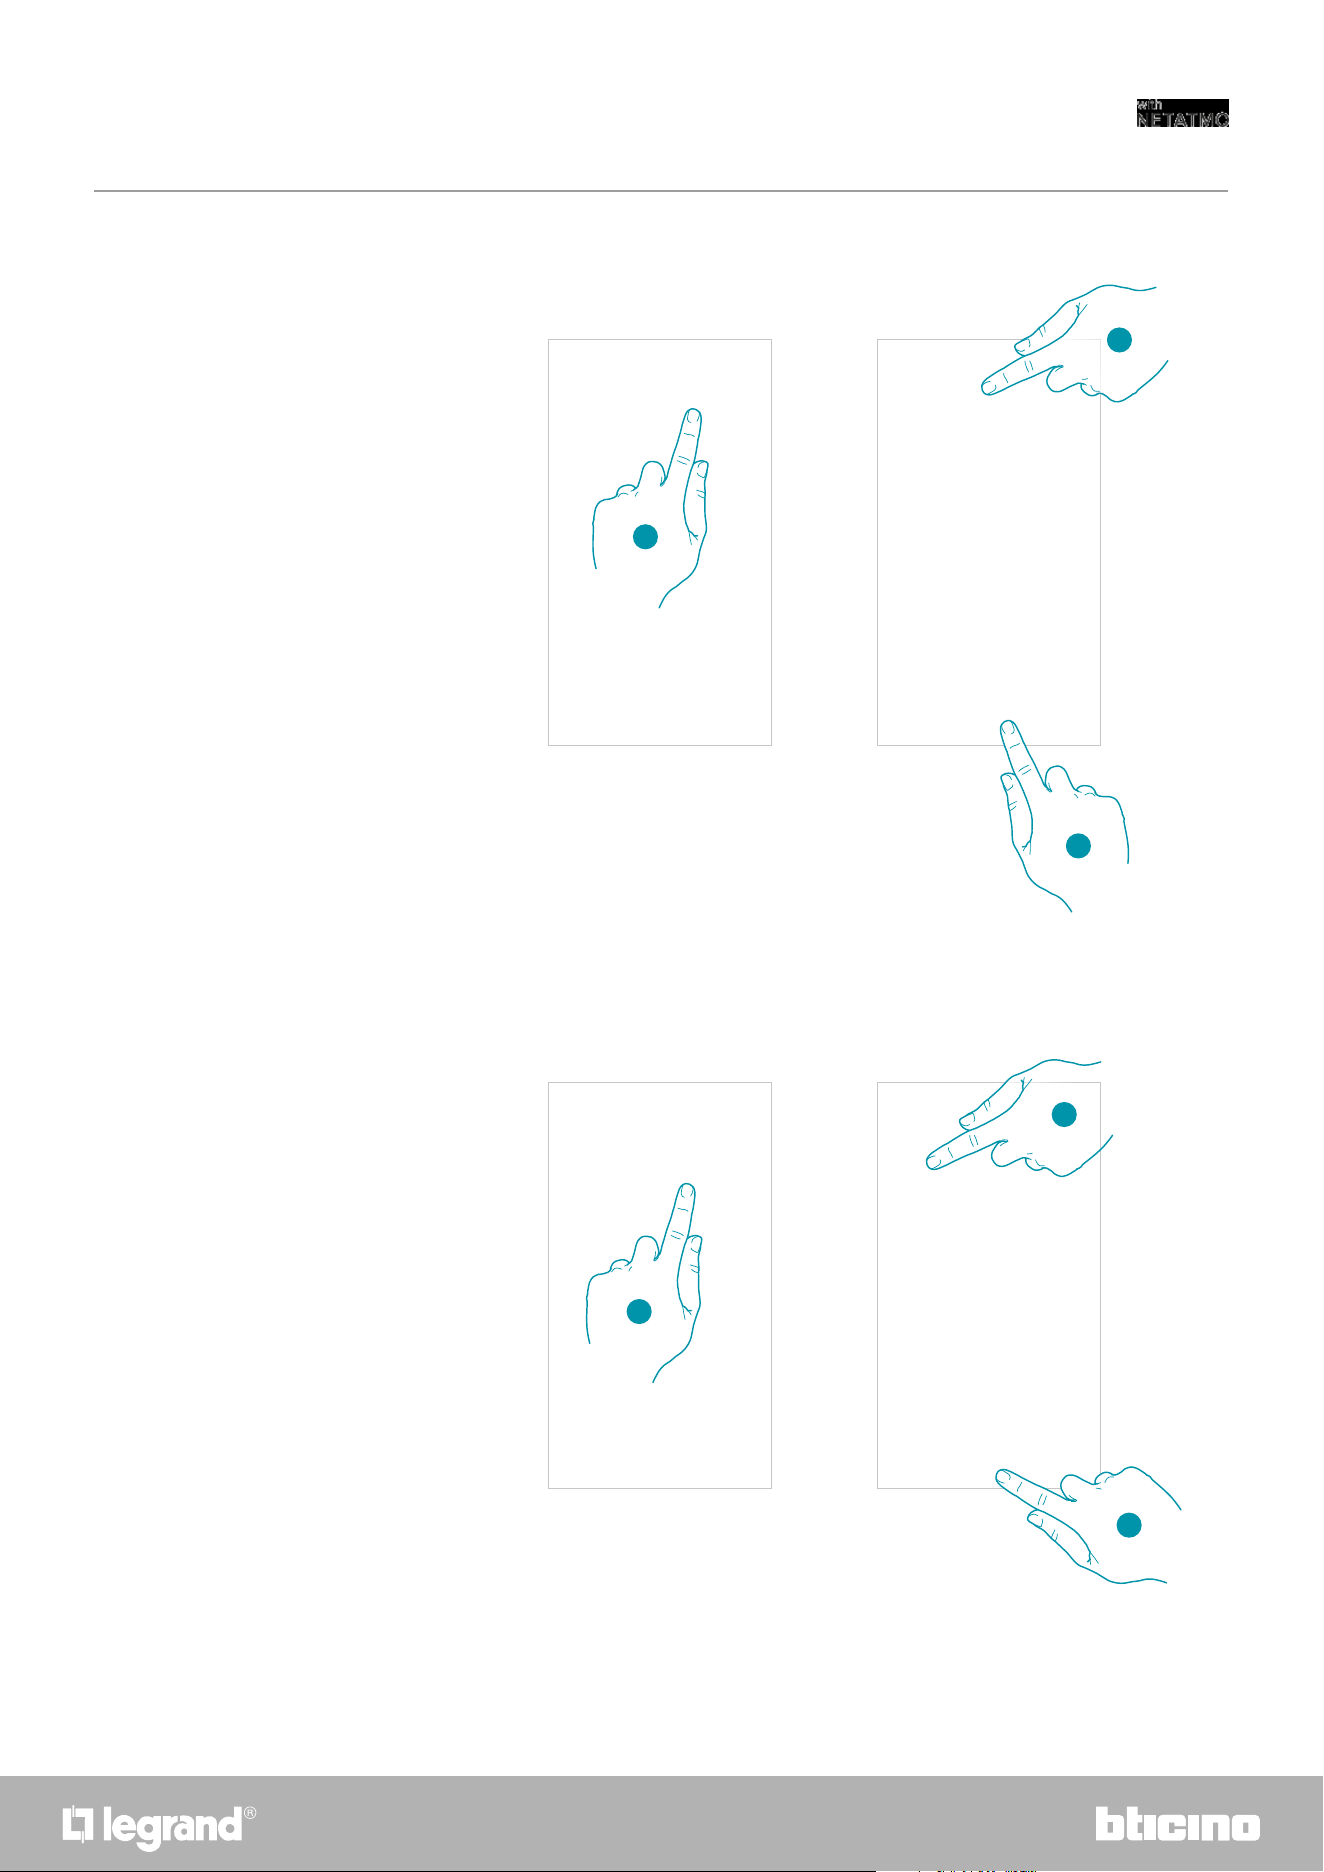
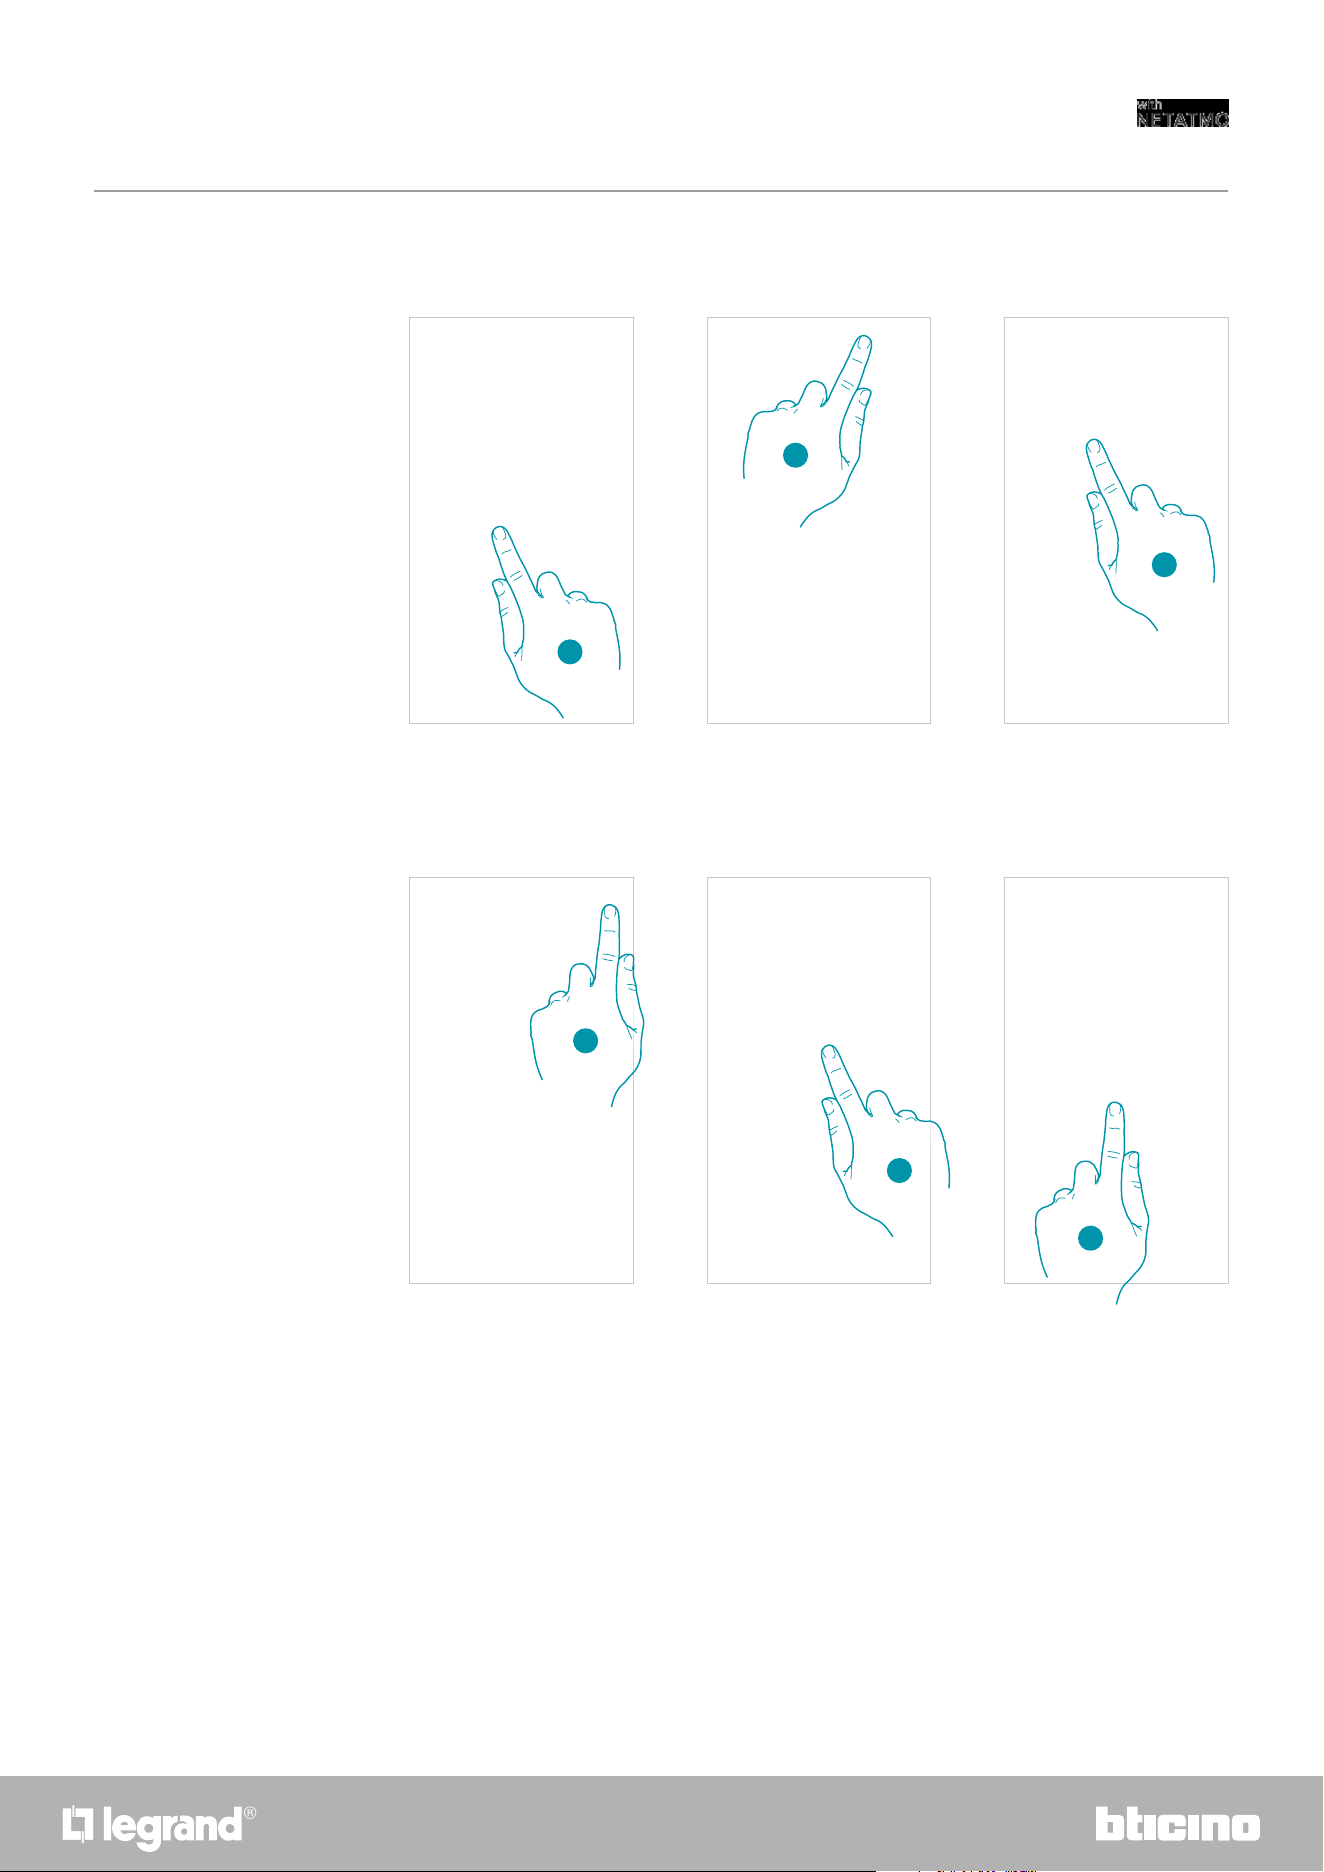
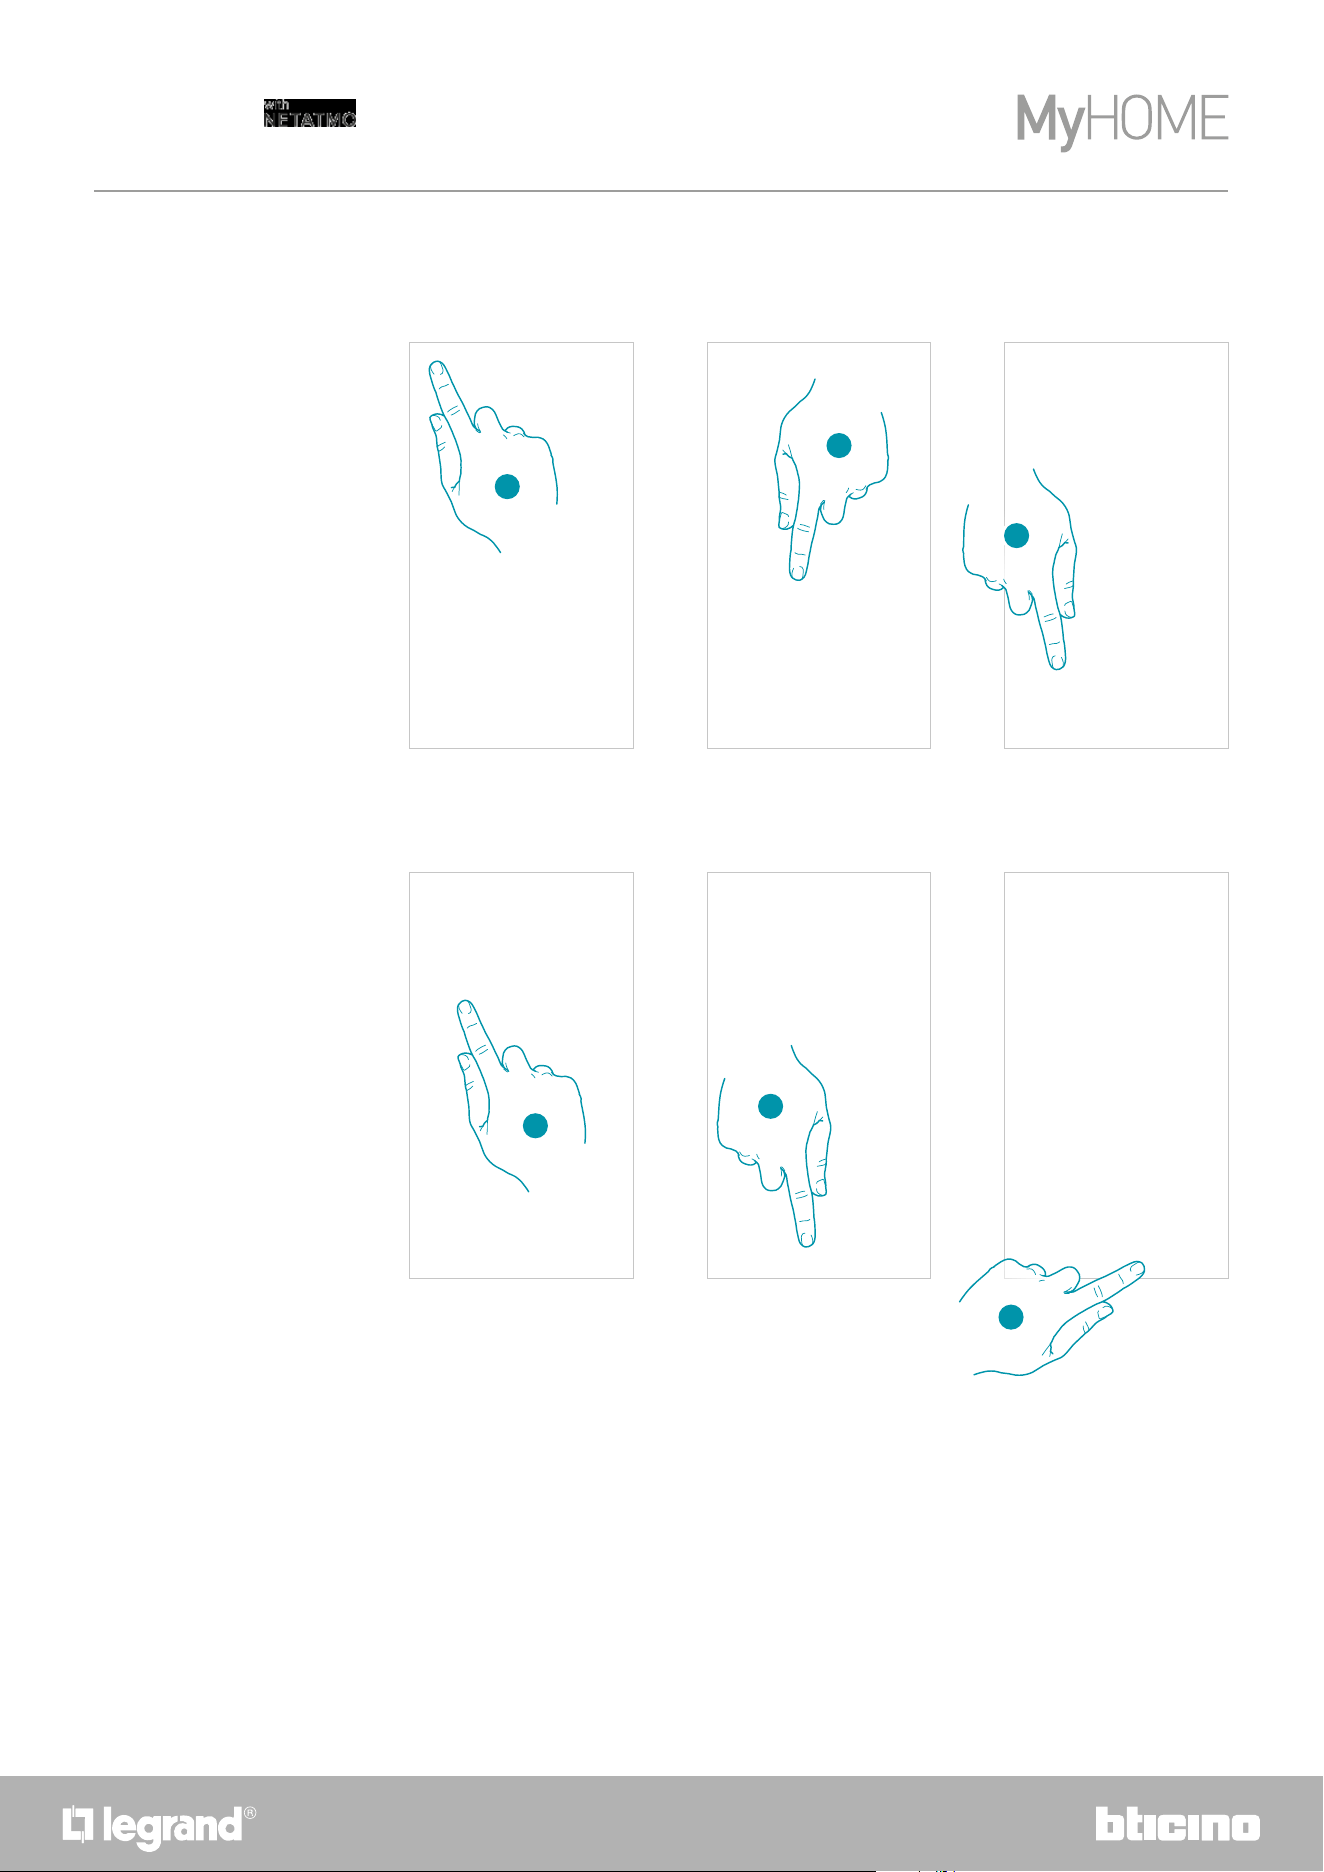
The temperature level that can be locally set refers only to the manual mode operation.
Set the temperature
1. Touch the display
2. Scroll on the display to go to the next page
3. The current setting is displayed, change the setting with the
keys
3
2
1
2120
Smarther
User and installation manual
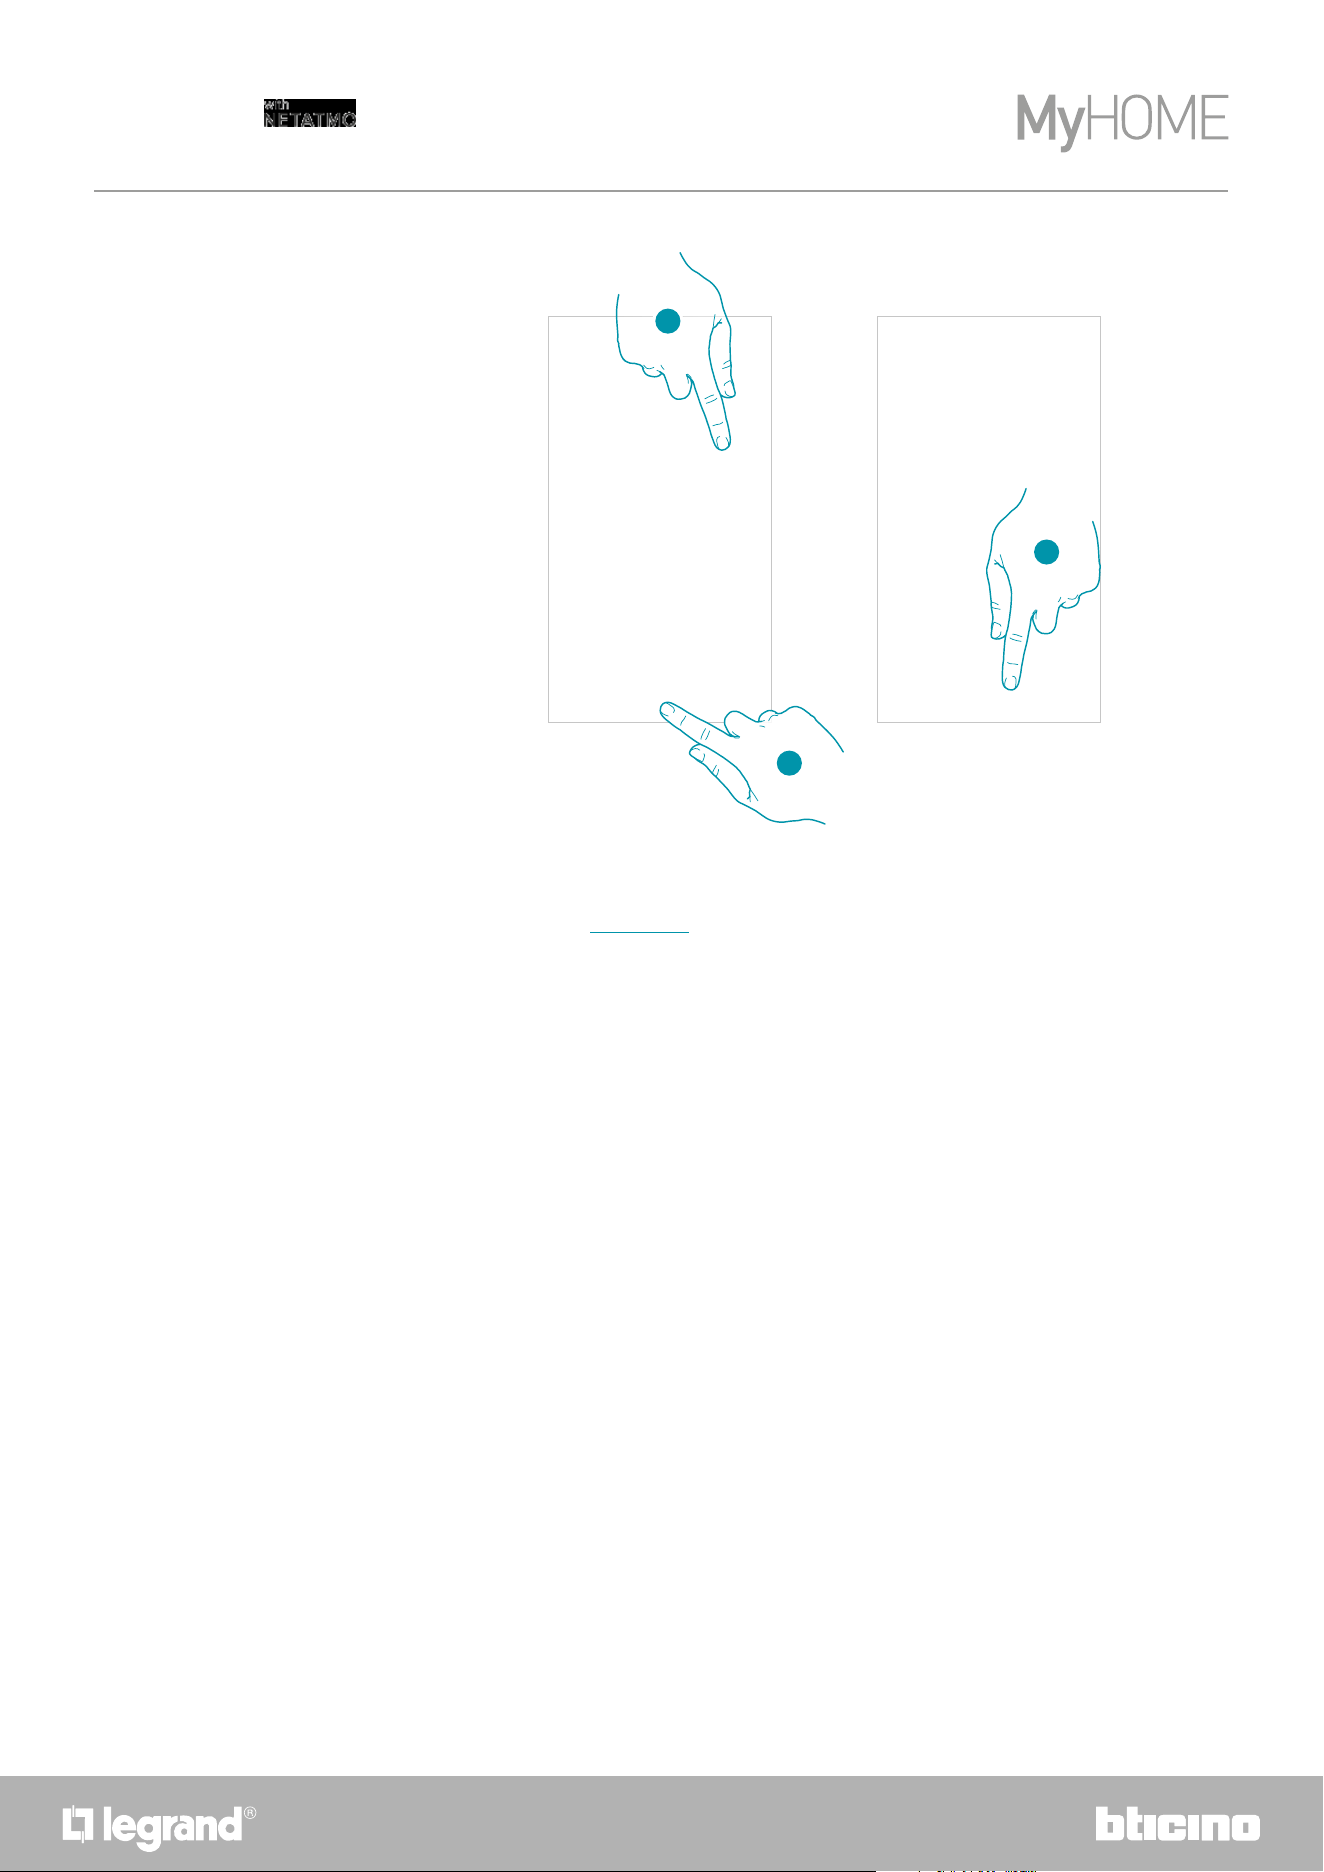
Once the setting is complete wait for a few seconds. The display will show the measured
temperature
22
Smarther
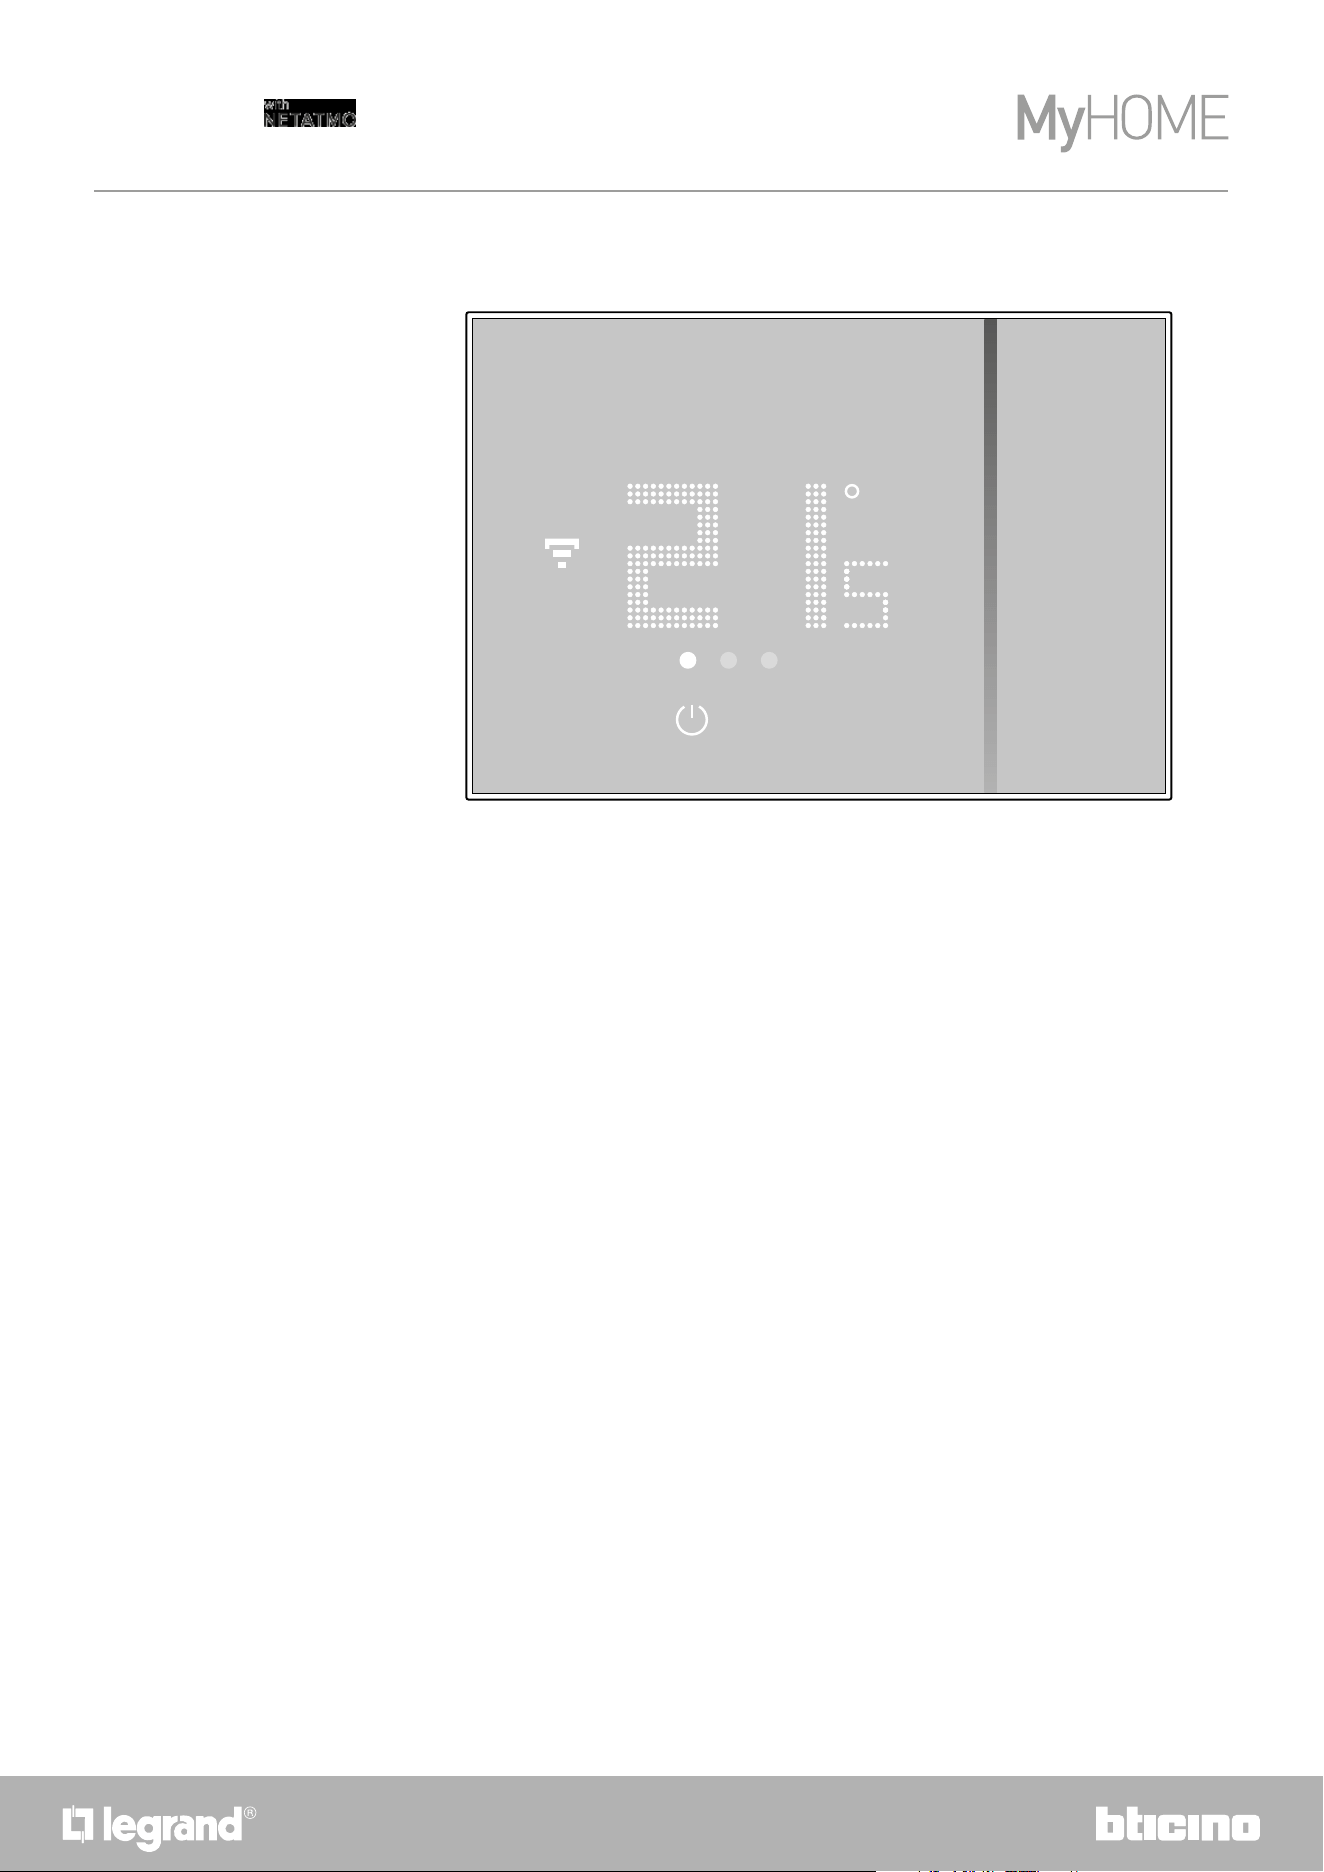
User and installation manual
Note: when the thermal (7 °C) protection temperatures are set, the display will show the switching-off
symbol
2322
Smarther
User and installation manual
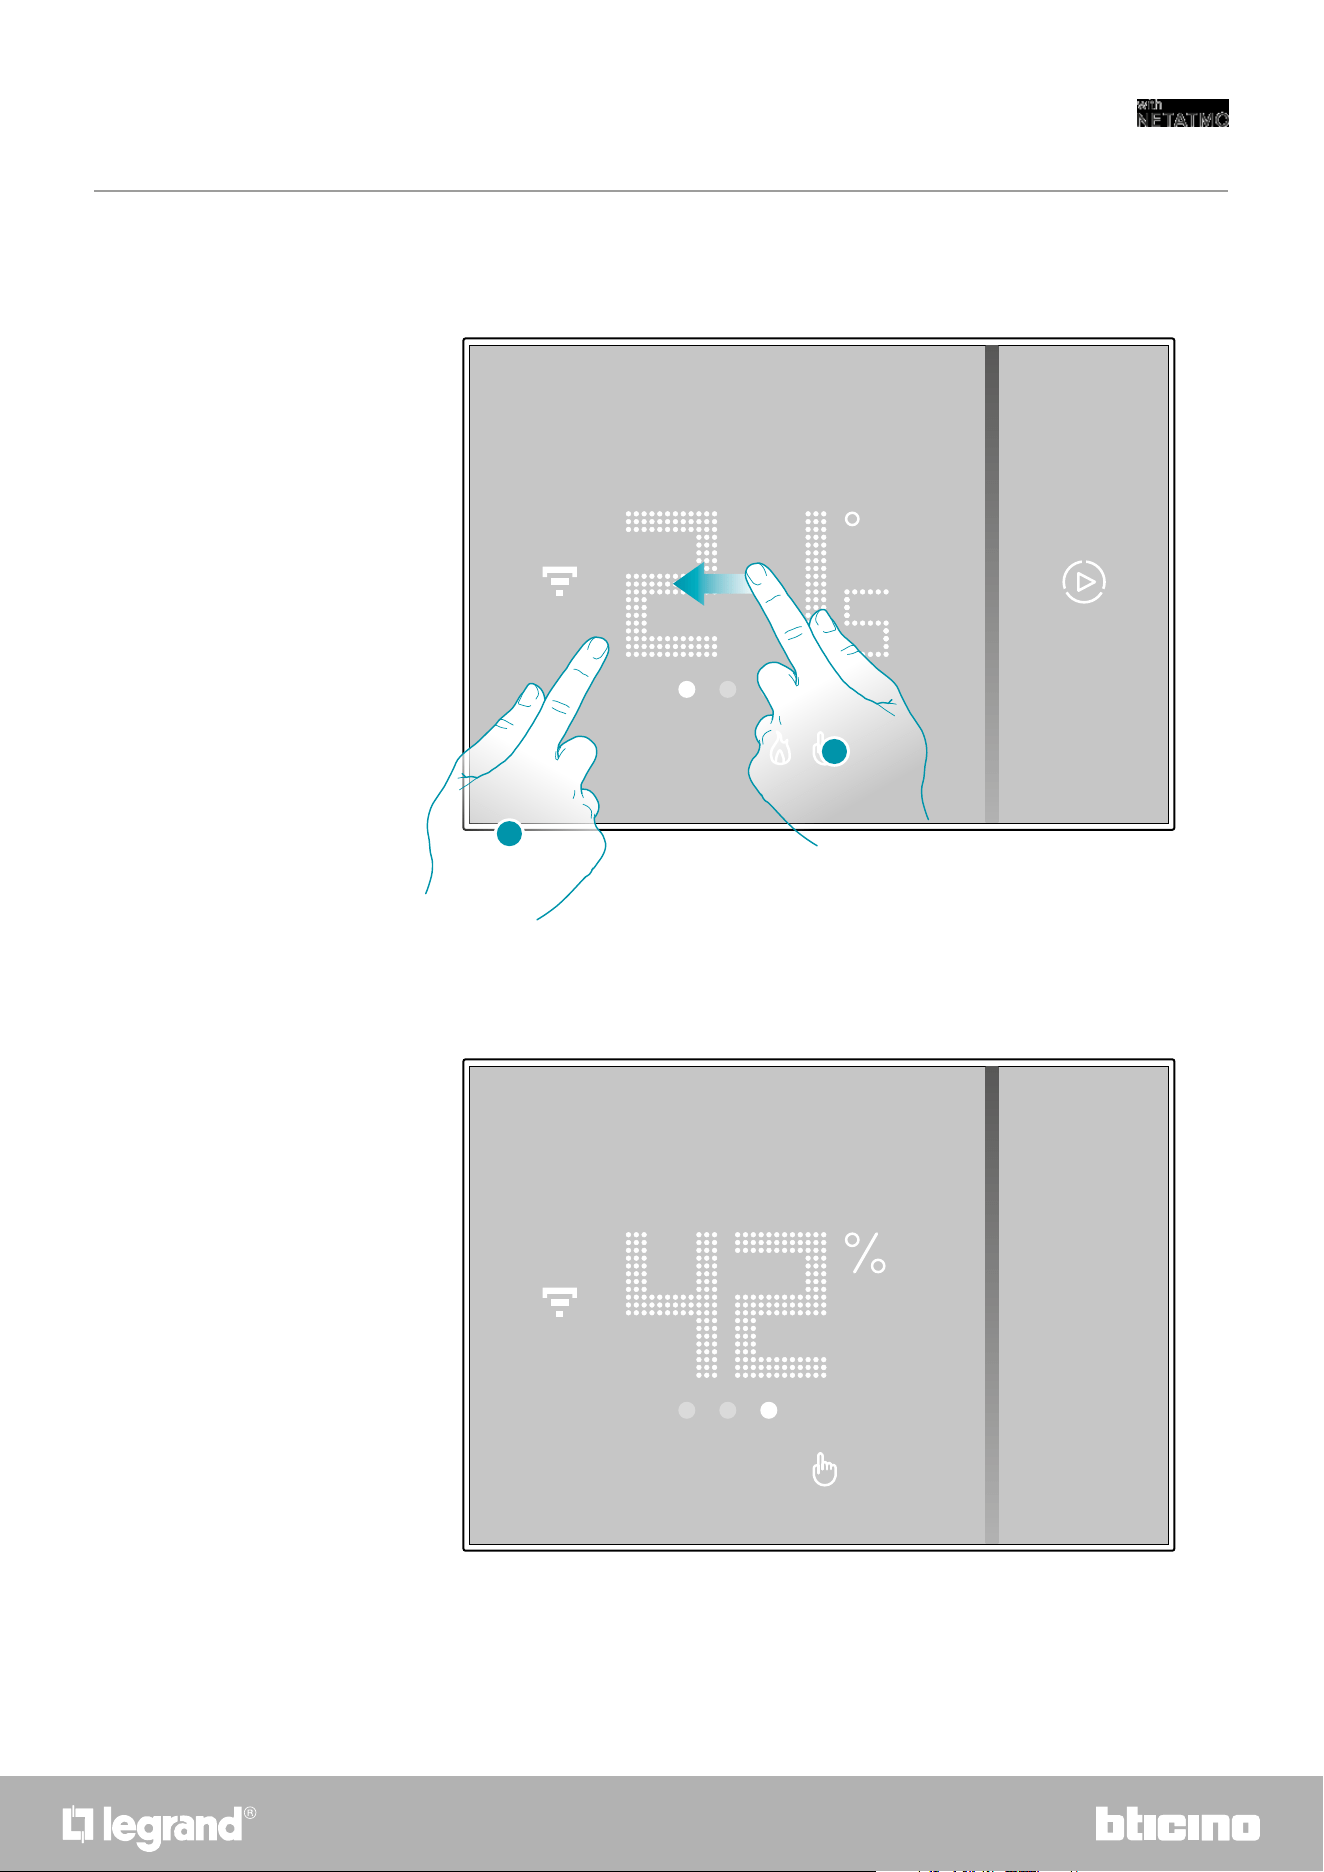
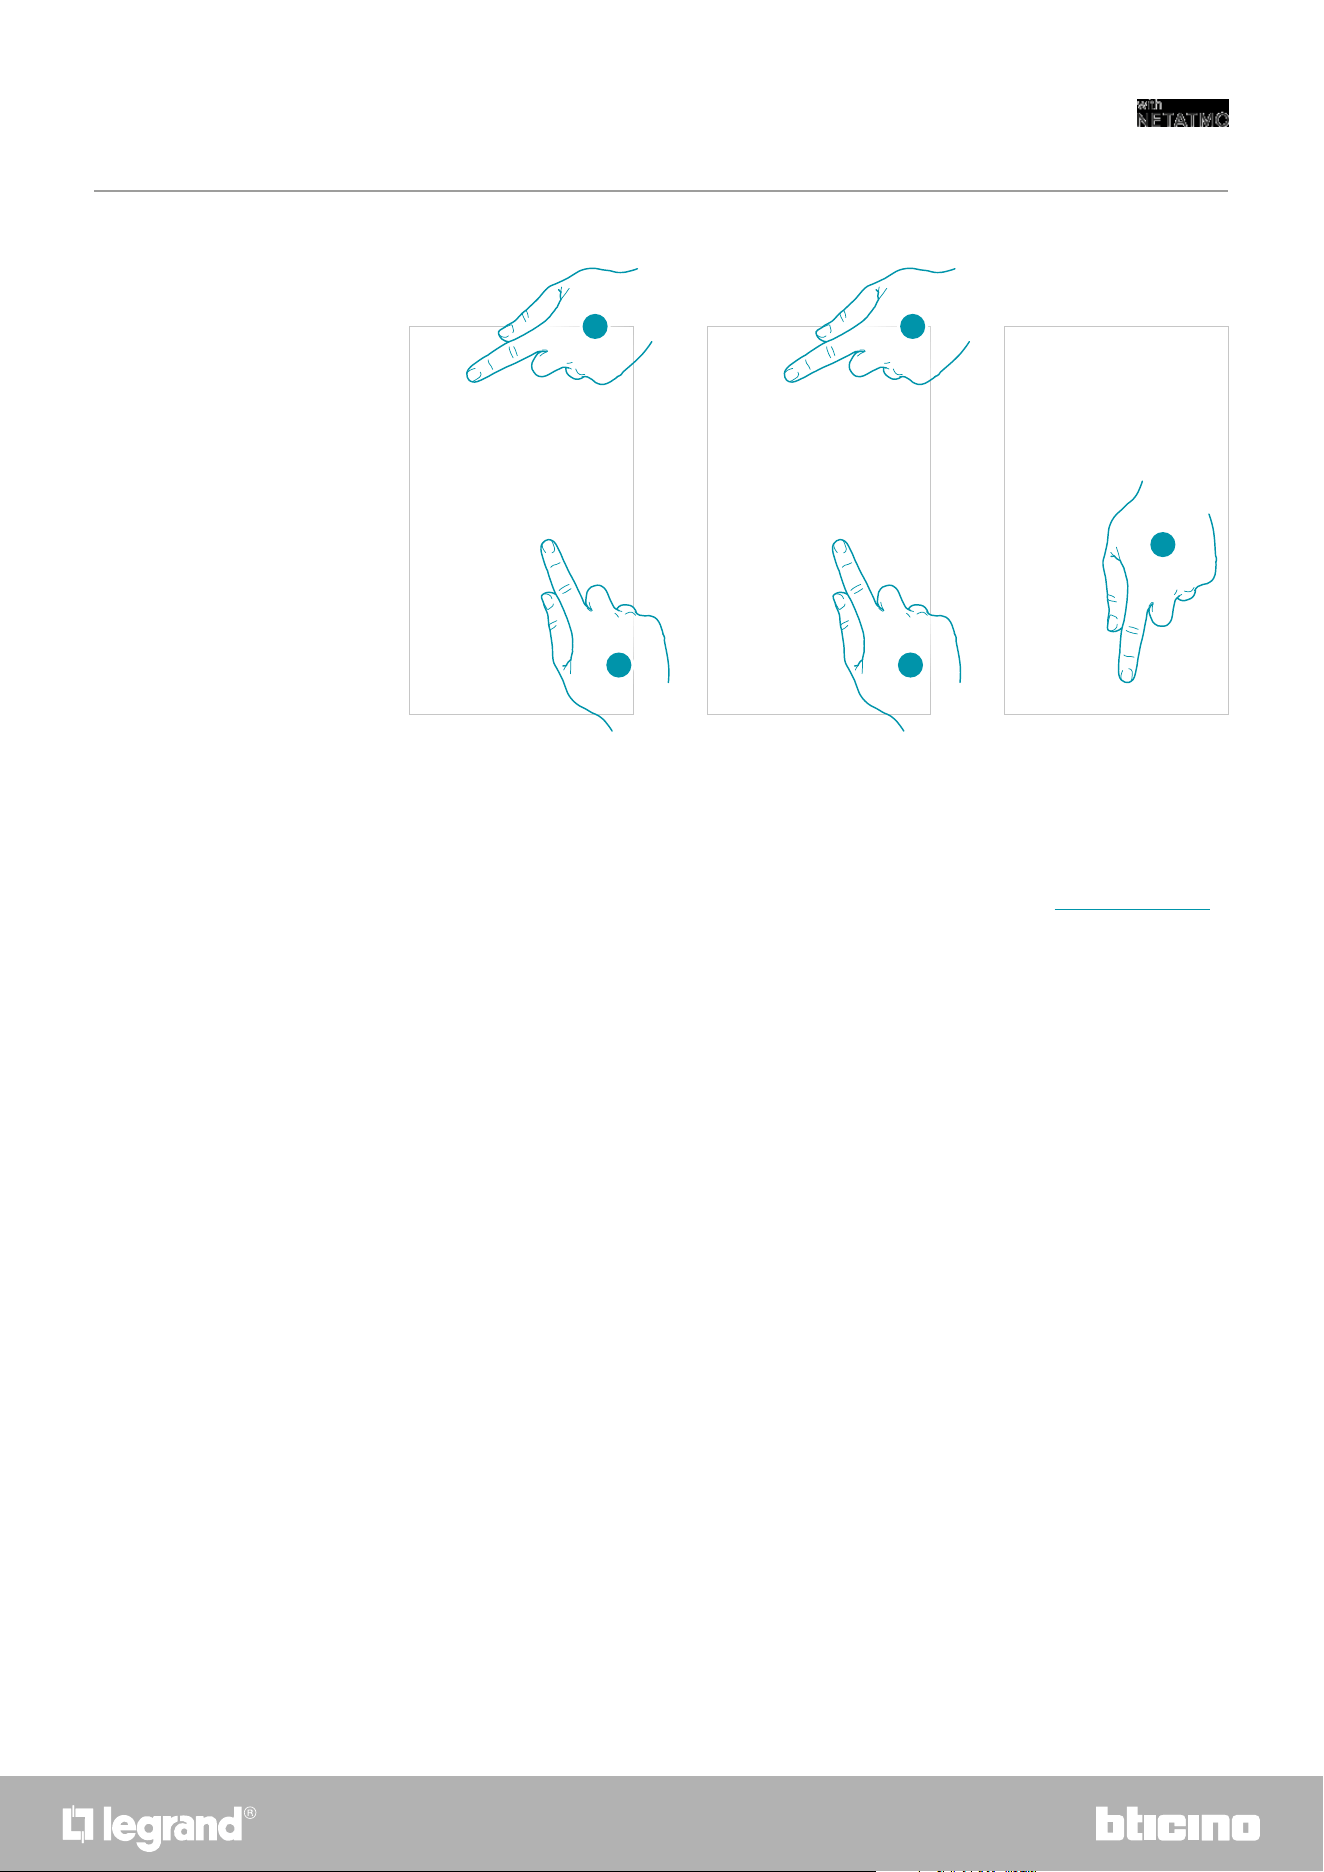
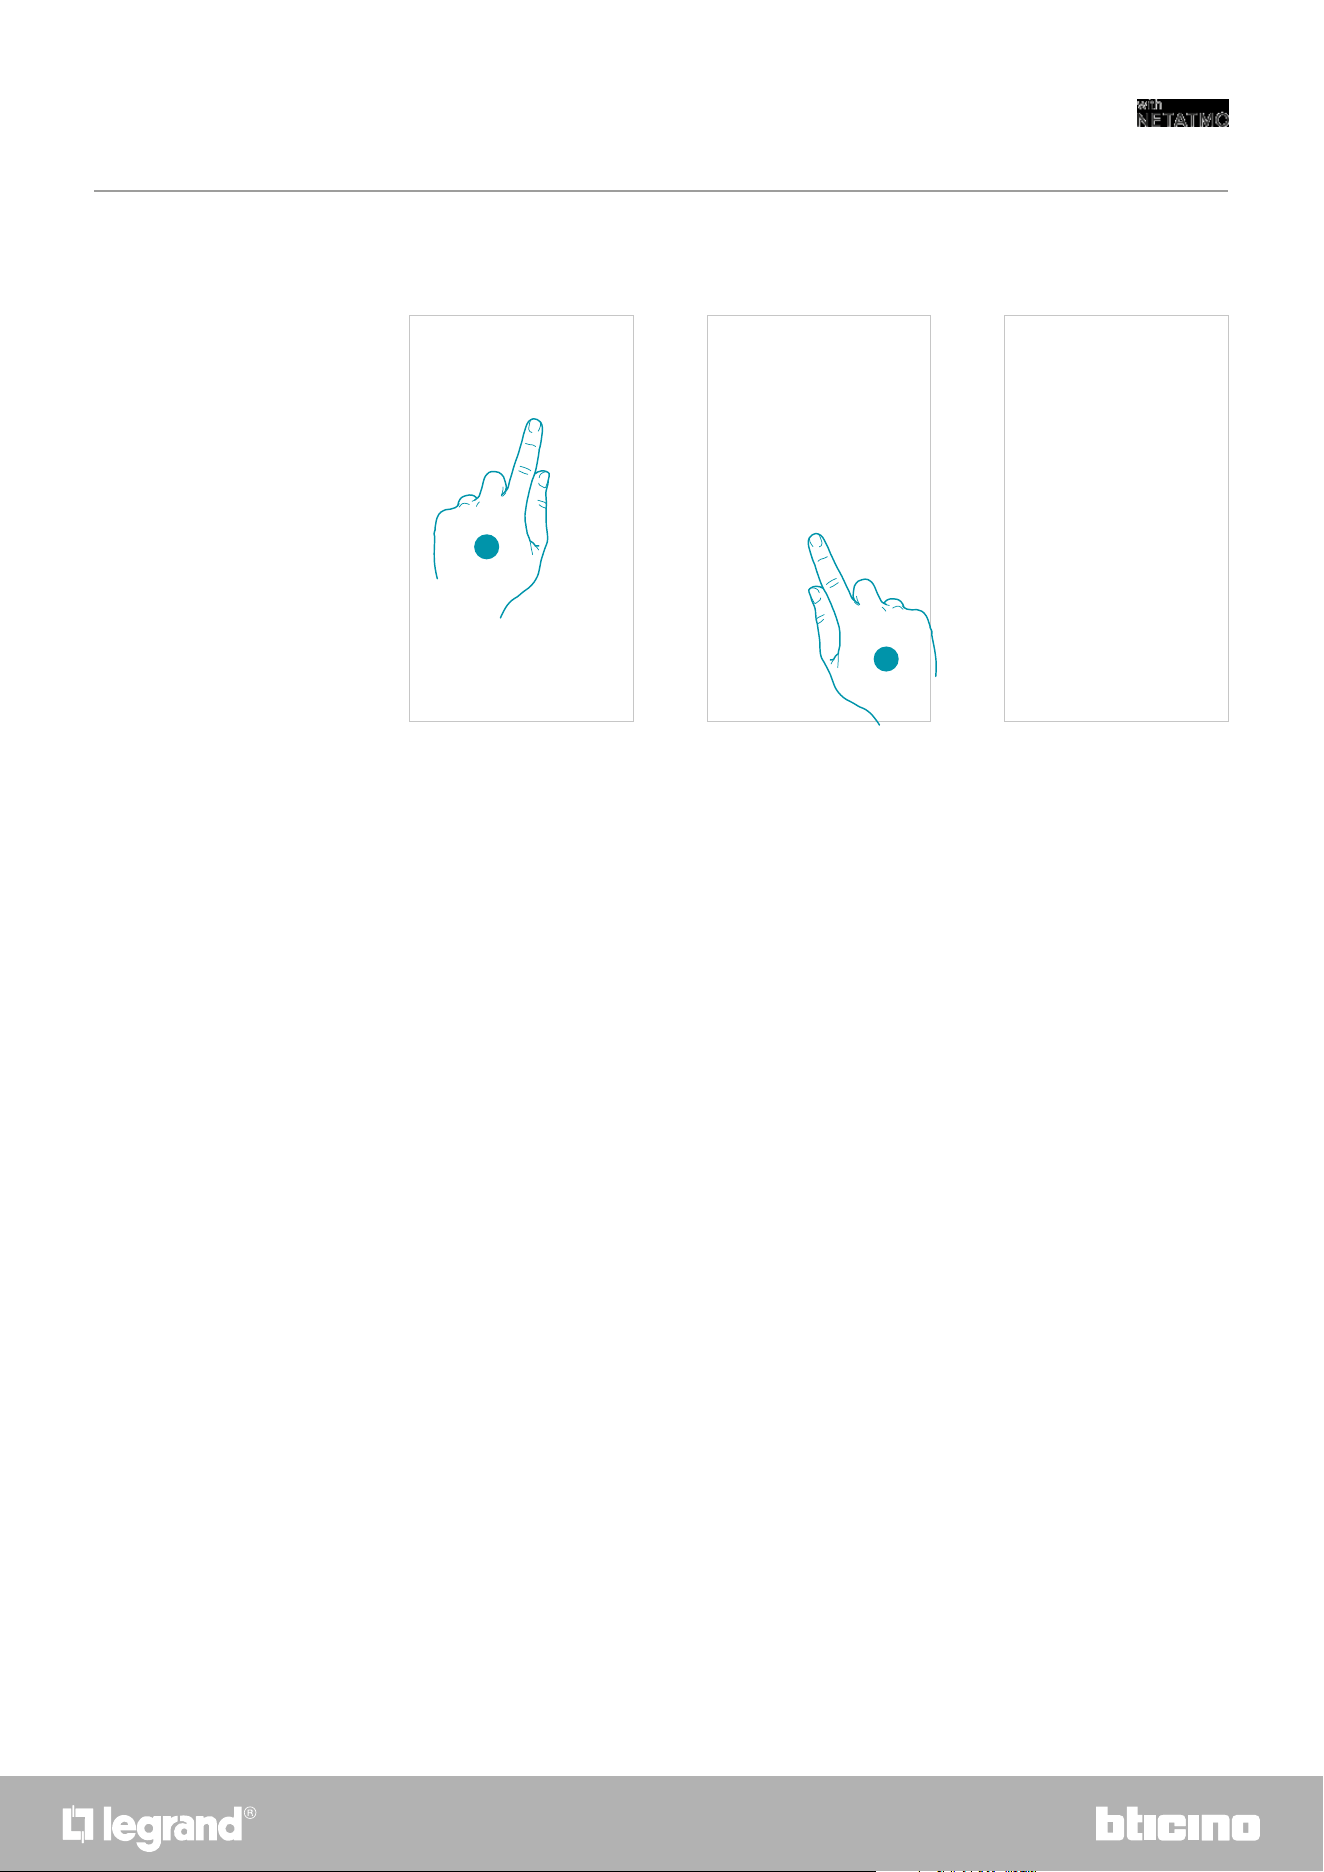
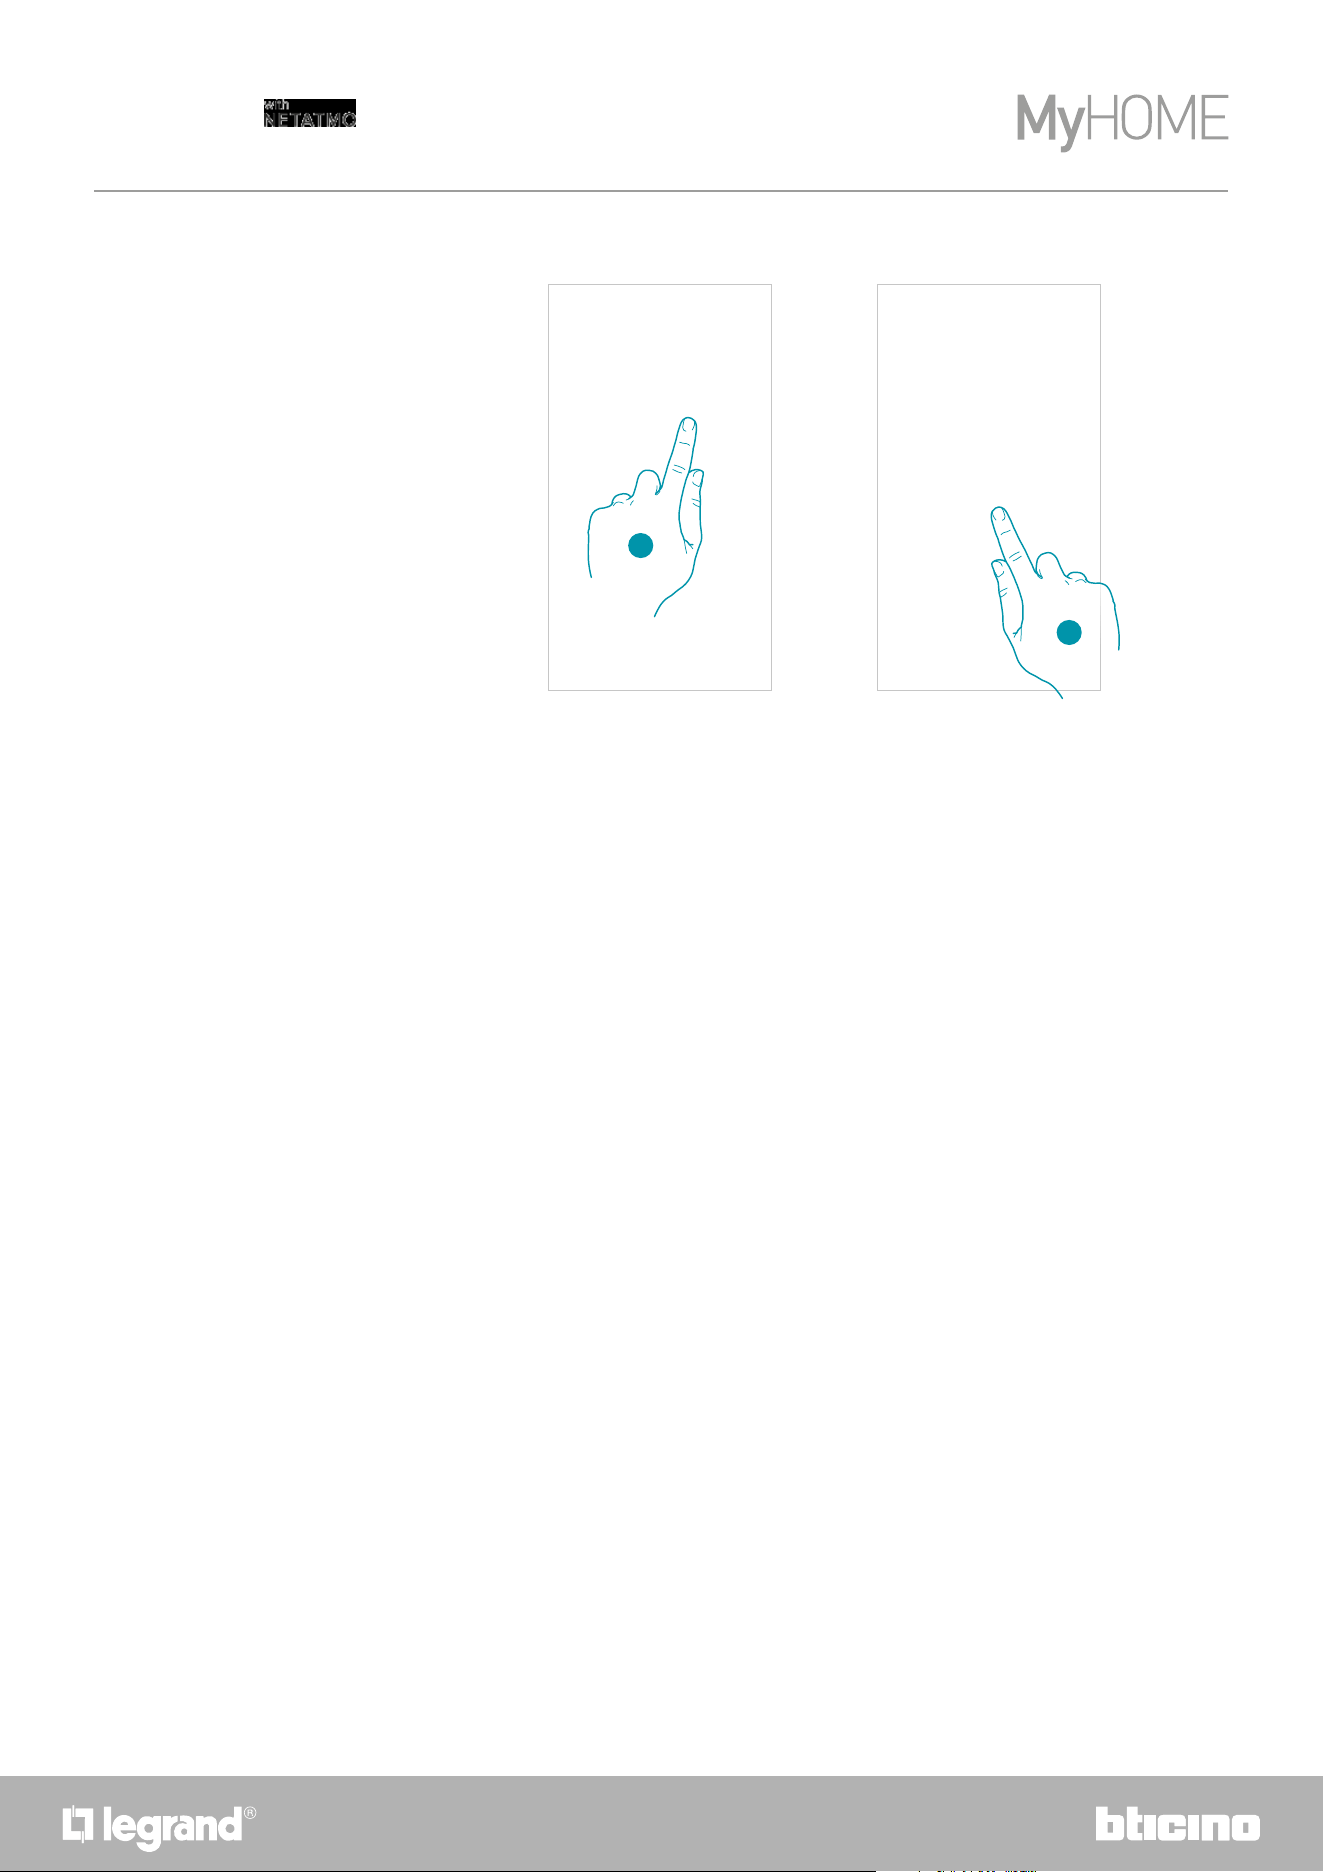
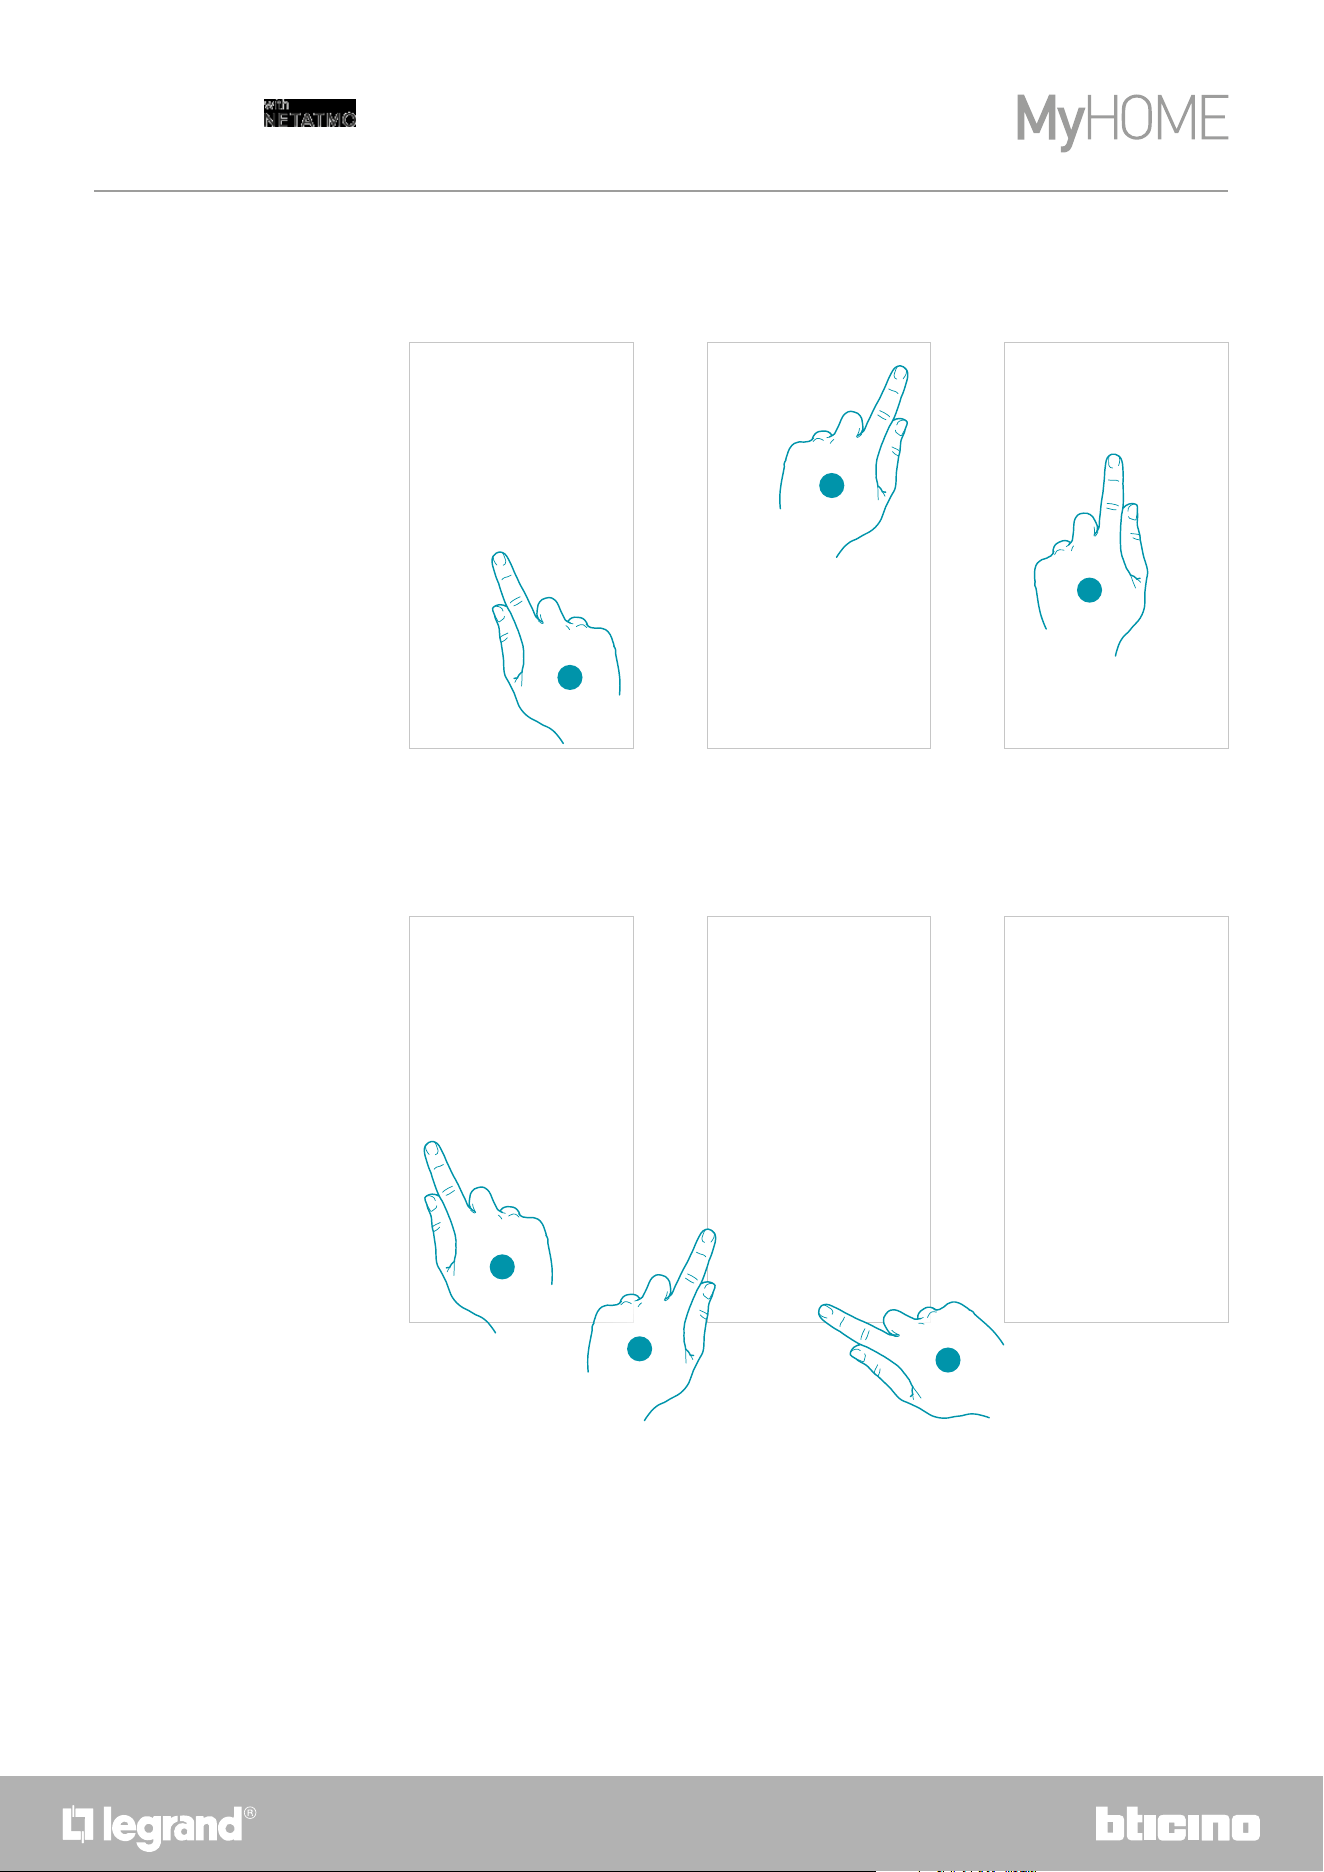
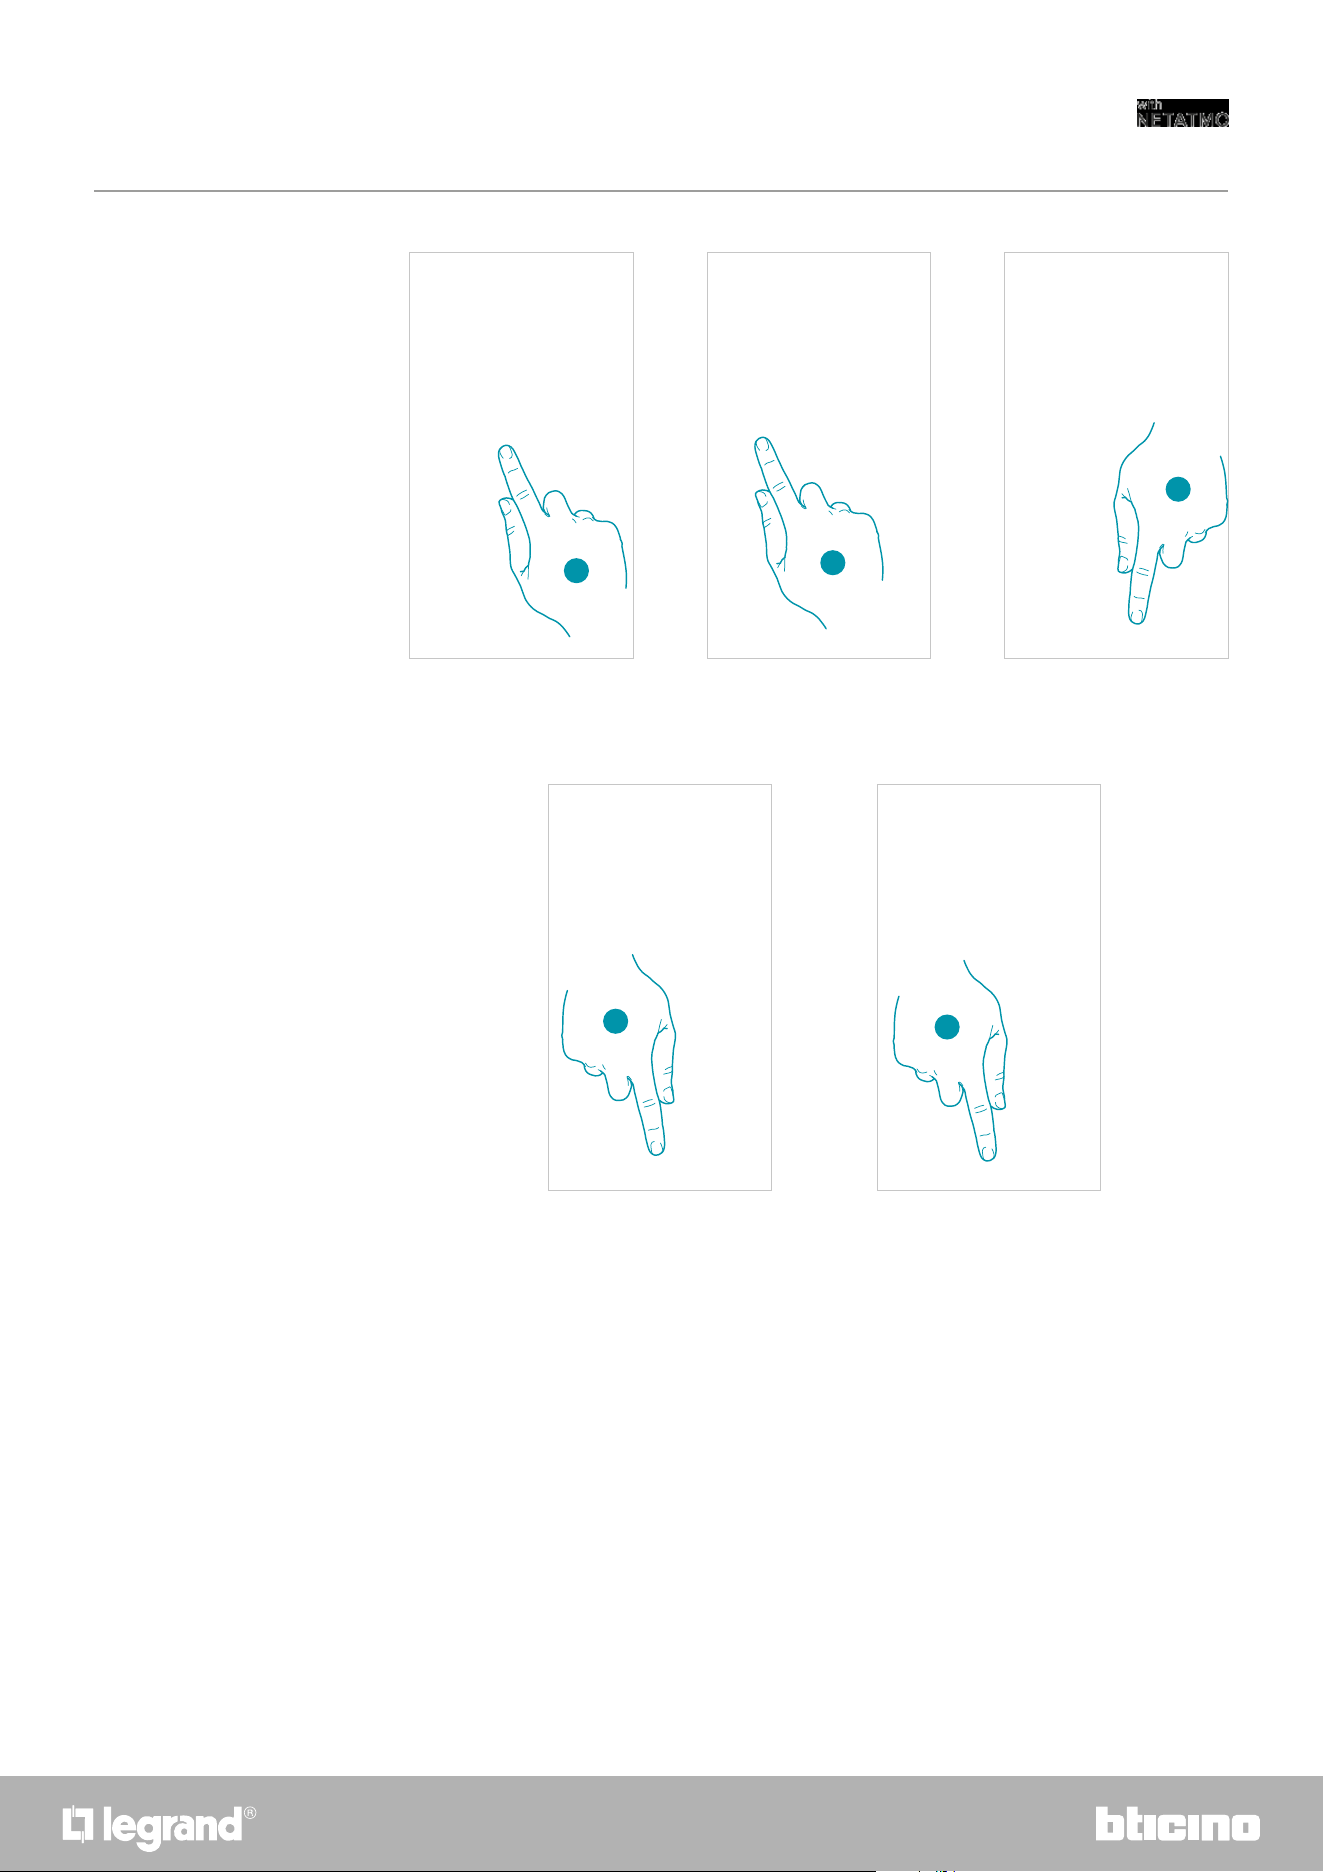
Smarther contains a sensor that detects the humidity percentage in the room; follow the
procedure described below to display the measured value.
Room humidity display
1. Touch the display
2. Scroll twice on the display to go to the dedicated page
The measured humidity percentage is visible for a few seconds, then the measured temperature
display will appear again.
2
1
24
Smarther
User and installation manual
3
1 2
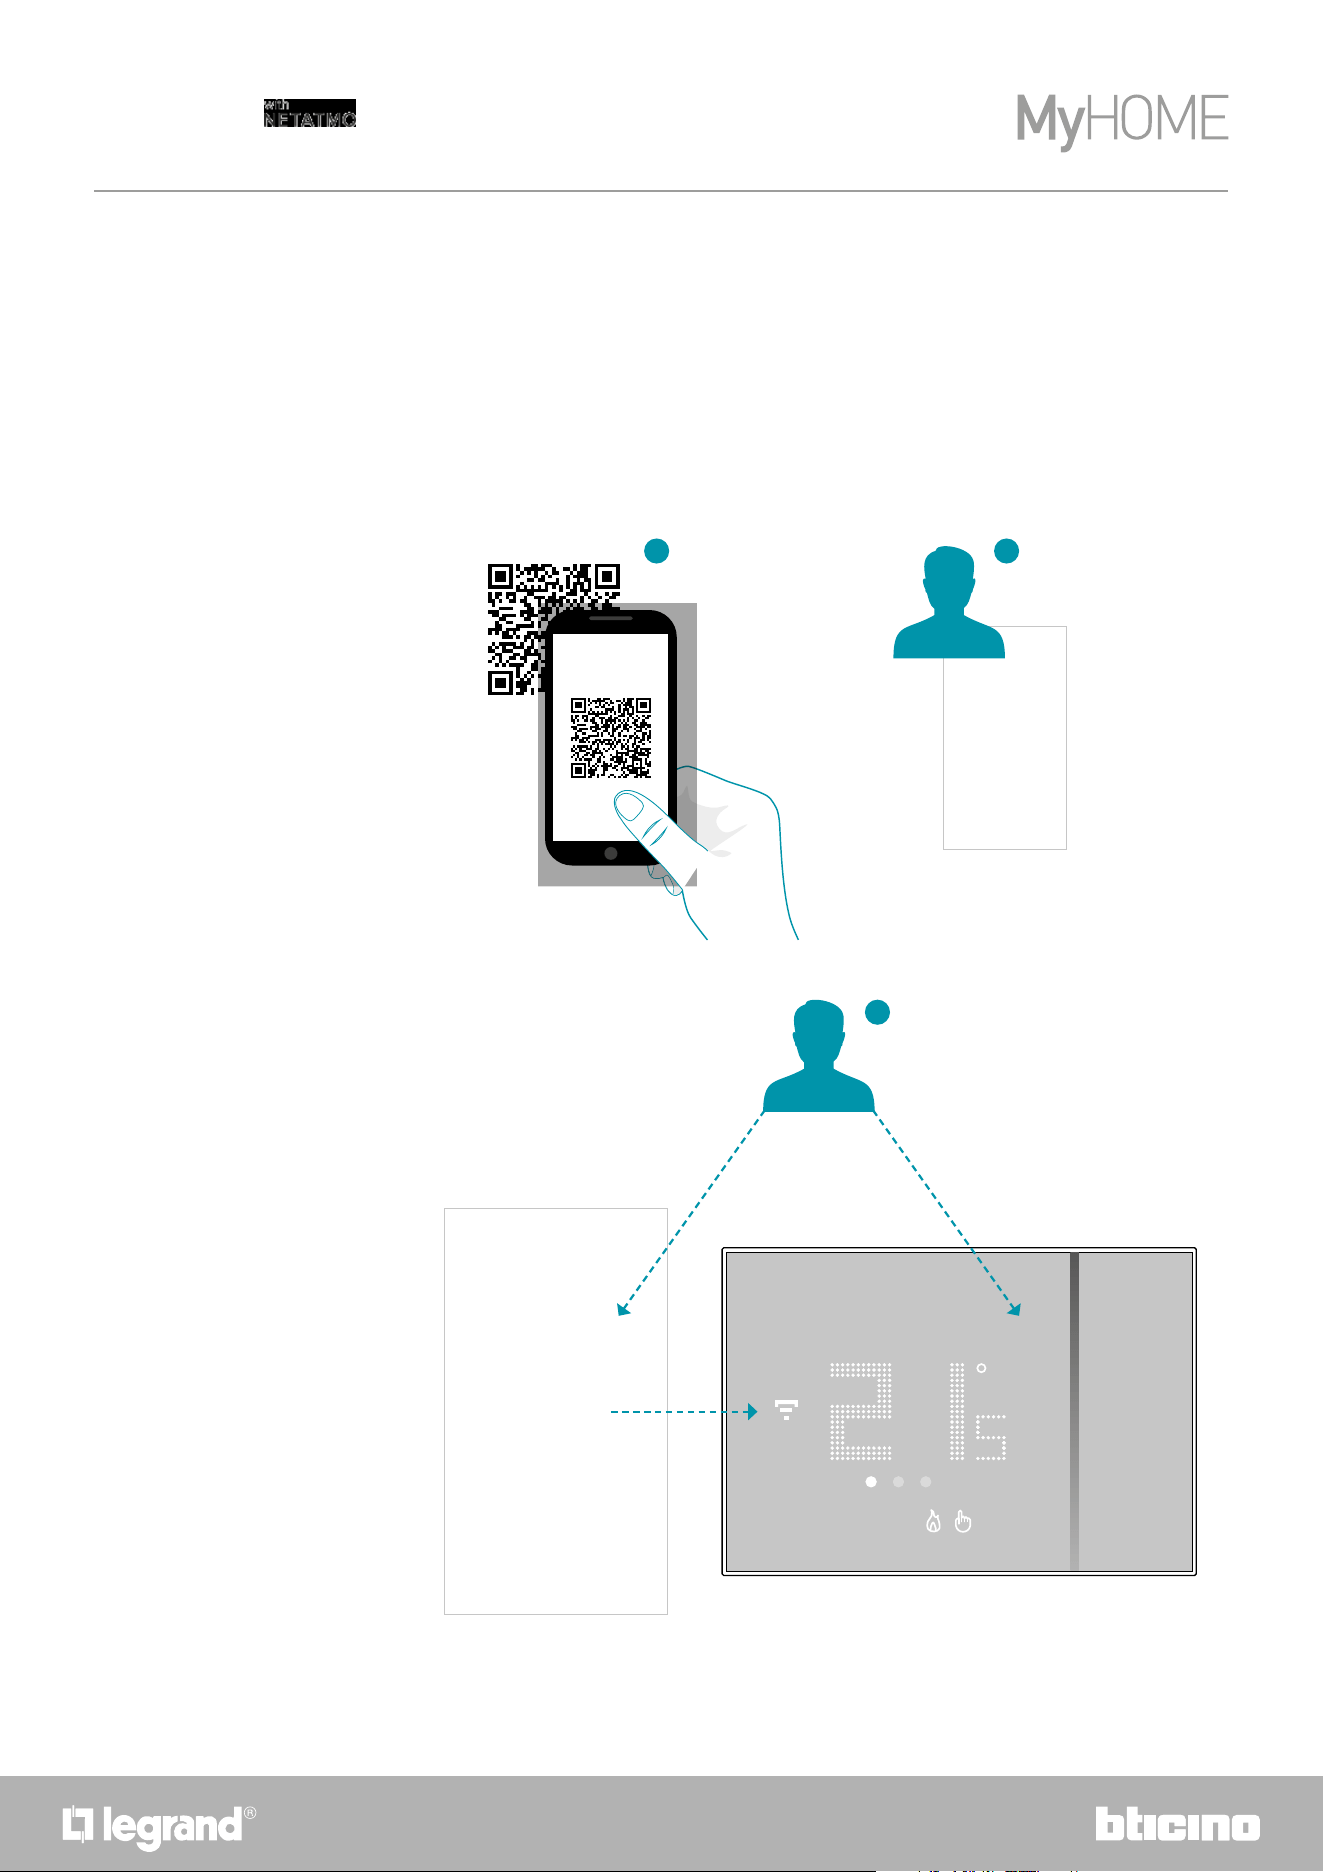
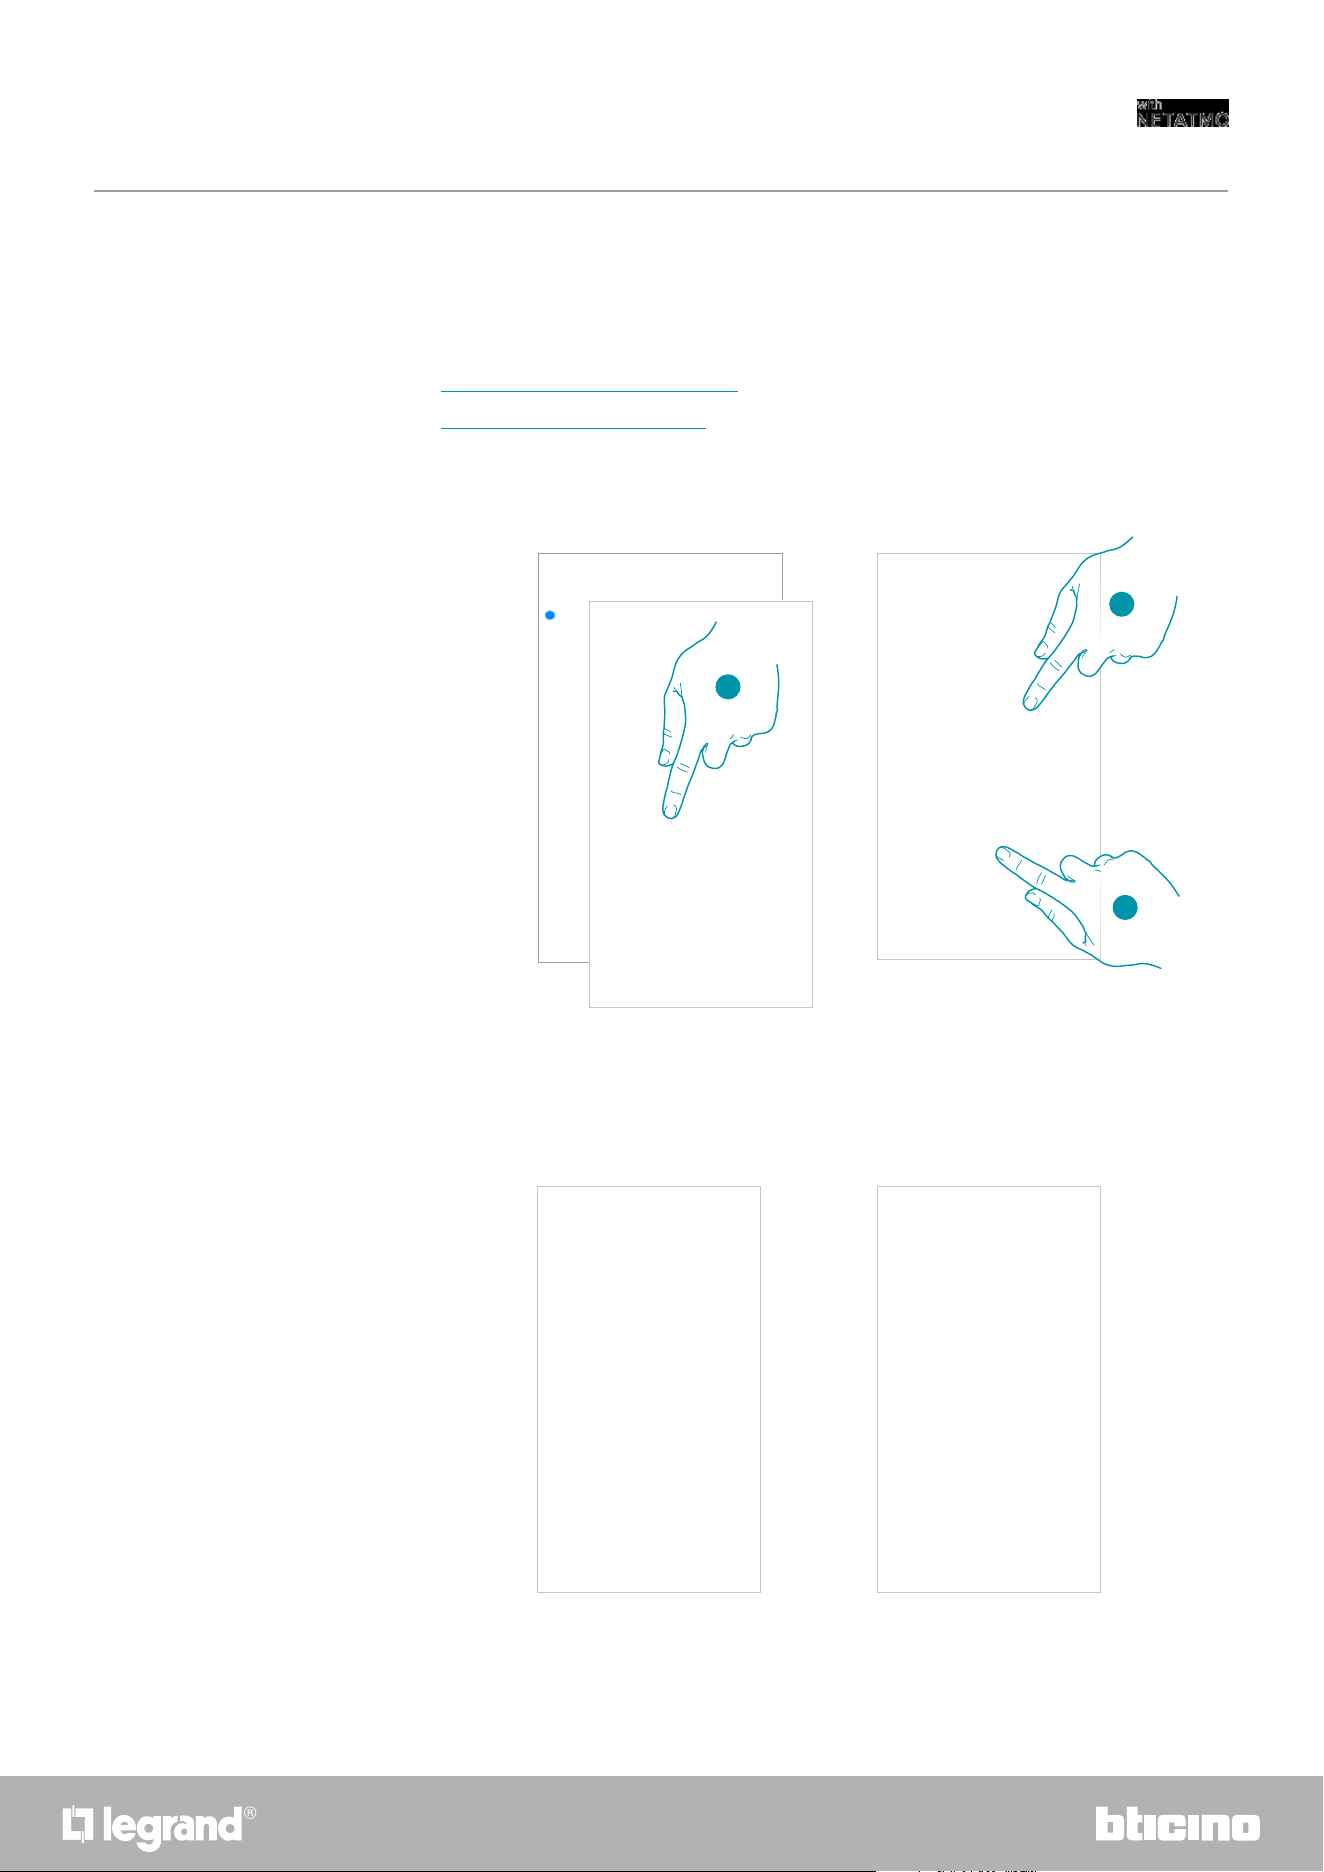
You can program the Smarther with the free Home + Control App. To do this you must:
1. Download the App from the Stores
2. Register and create an account
3. Associate the account to your Smarther via the App
Control the Smarther with Home + Control app
Introduction
2524
Smarther
User and installation manual
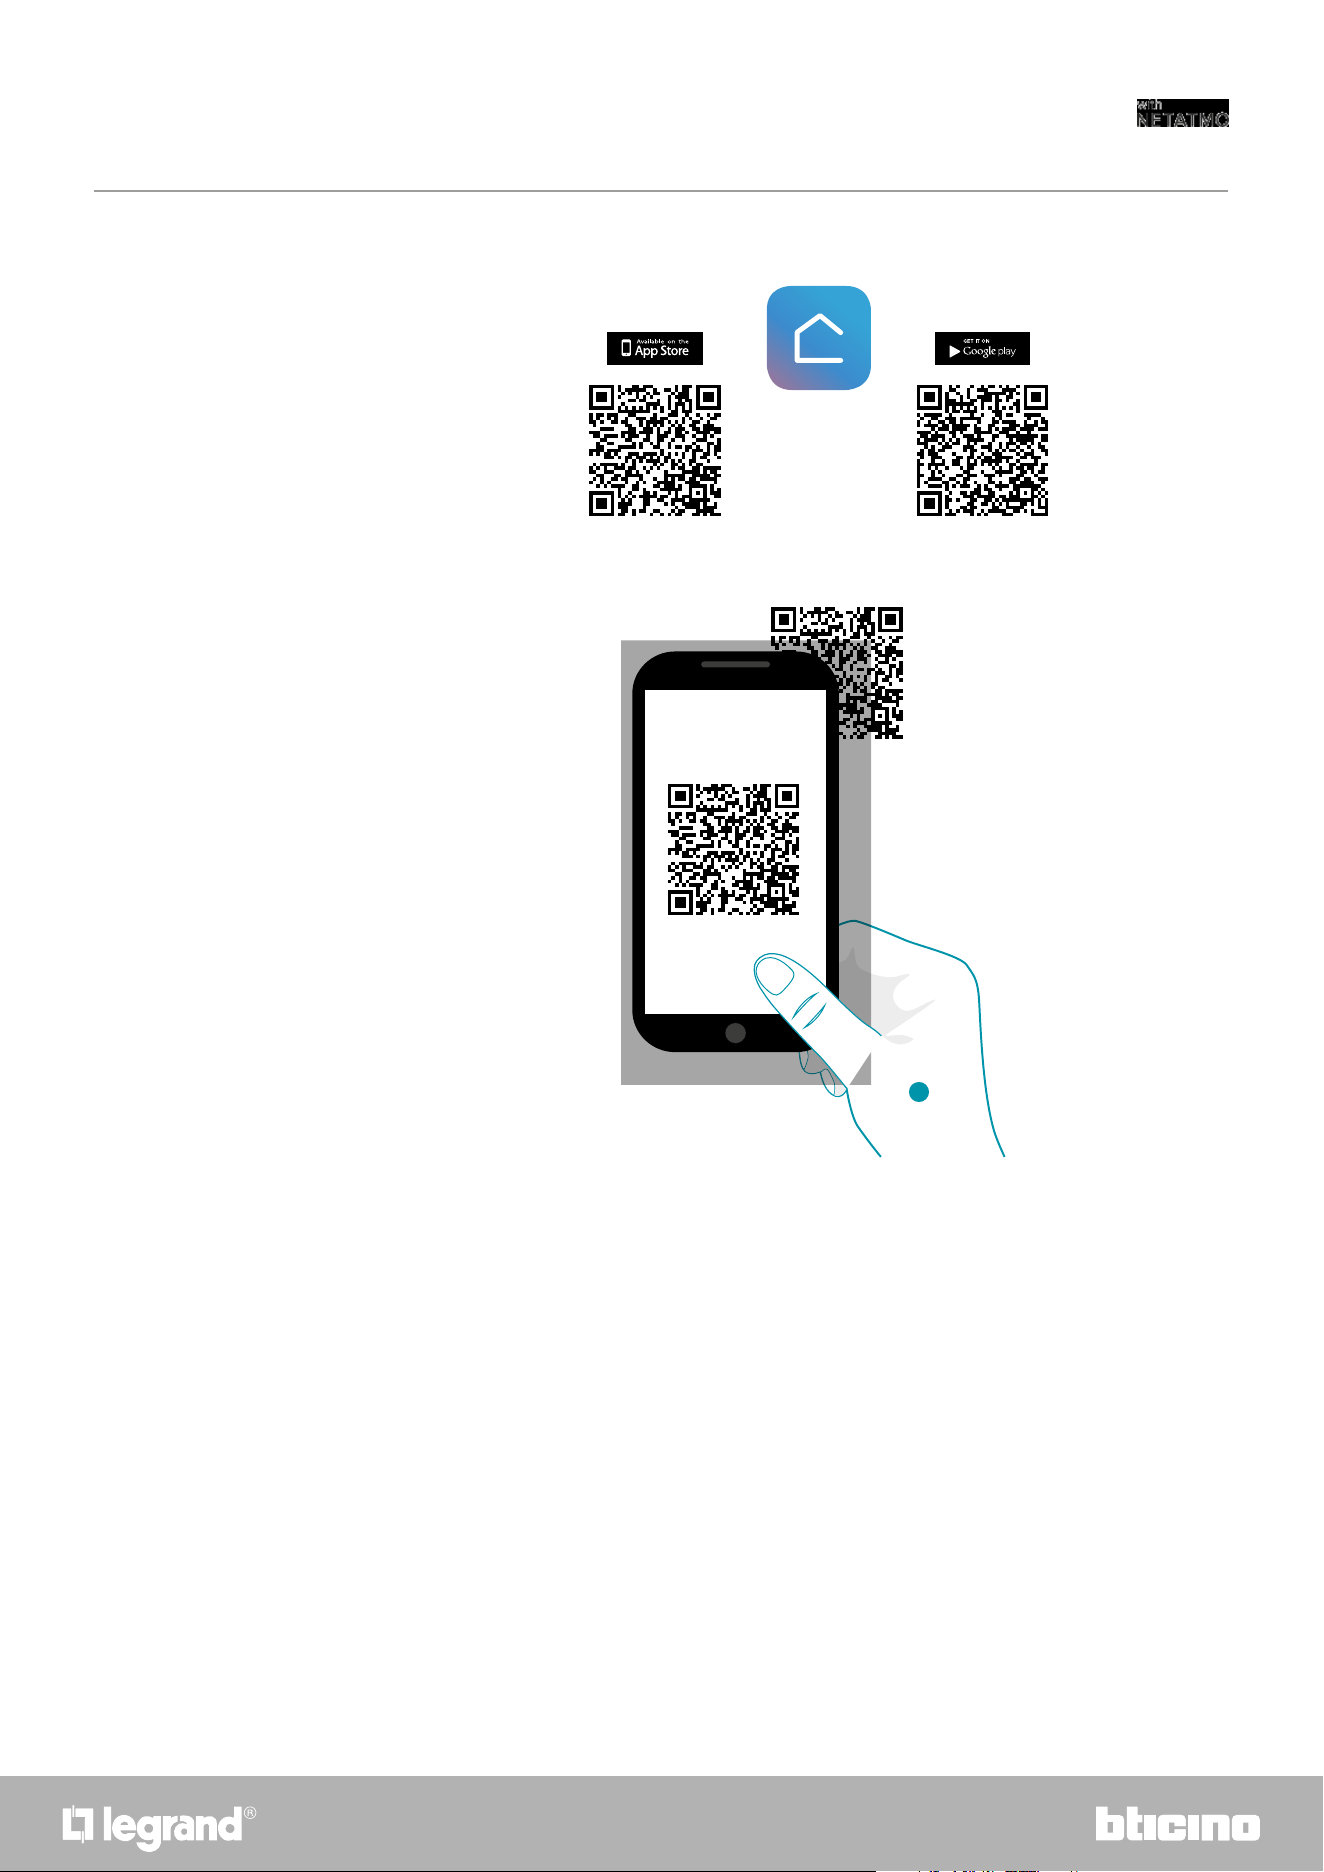
Download the Home + Control app
1. On your Smartphone run the app to read the QR codes and then frame the QR Code, or search
for the Home + Control app in the stores.
In order to remotely control your Smart system, first of all download the app from the Stores (for
iOS® devices from App Store, for Android® devices from Play Store)
1
26
Smarther
User and installation manual
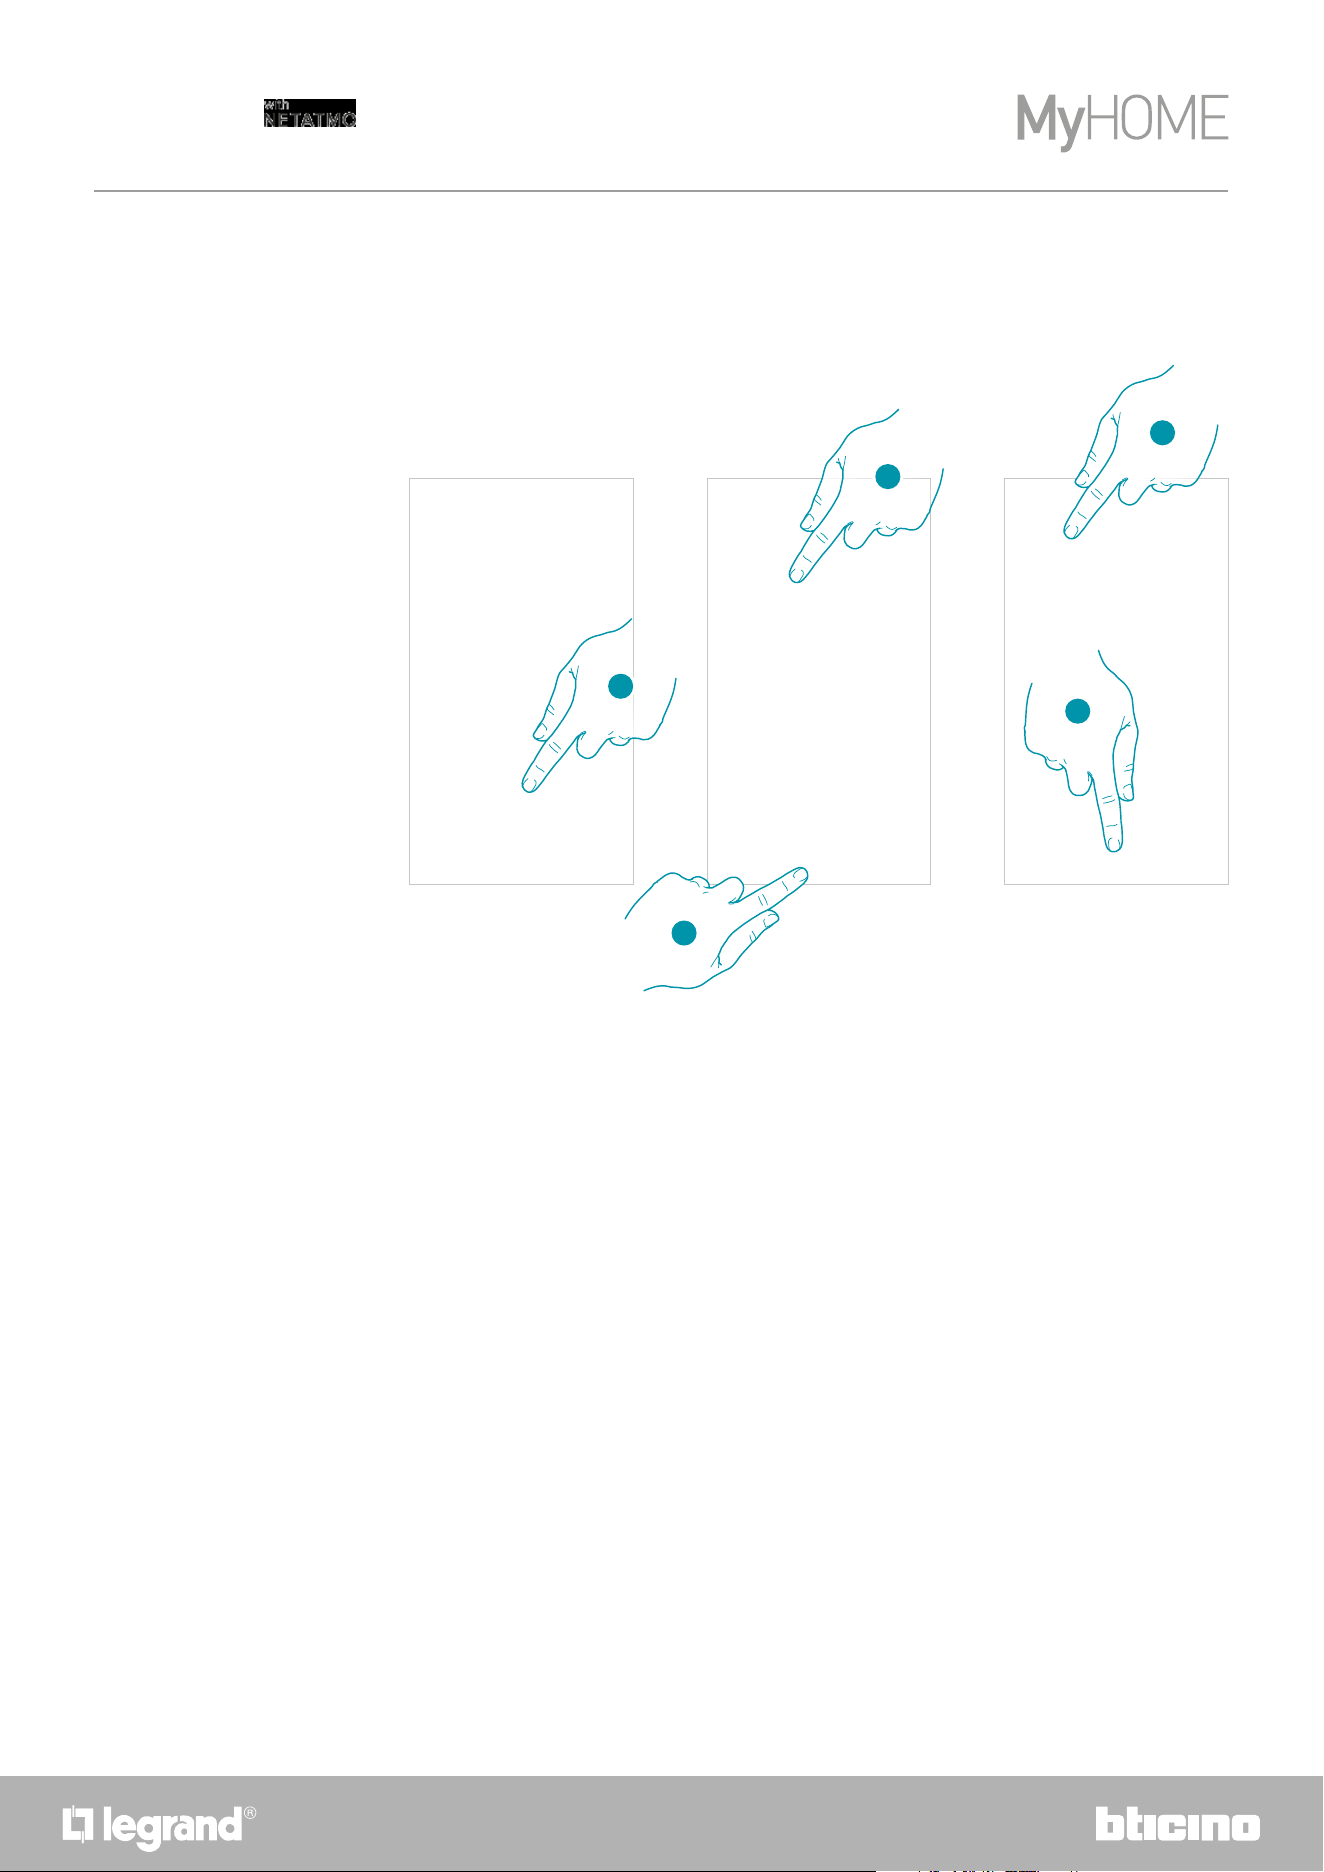
Account registration
You must first register to be able to use the Home + Control App and thus use the Smarther
advanced functions.
After opening the app follow the registration instructions:
1. Touch to register and create an account otherwise use your credentials if you are already
registered
2. Enter the email address that you want to use for the registration
3. Touch to continue
4. Enter a password, which must meet the following requirements:
– at least 8 characters;
– at least one lower case letter (e.g. a);
– at least one upper case letter (e.g. A);
– at least one number (e.g. 1);
– at least one special character (e.g. $);
5. Touch to continue
1
2
4
5
3
2726
Smarther
User and installation manual
6
6. Select the country
A Touch to accept the terms and conditions of use laid down in the associated text (obligatory)
B Touch to enable the forwarding of news and promotions regarding Legrand group products
C Touch to help the Legrand group to improve its products
7. Touch to create an account
– on the back of the instruction sheet
7
A
B
C
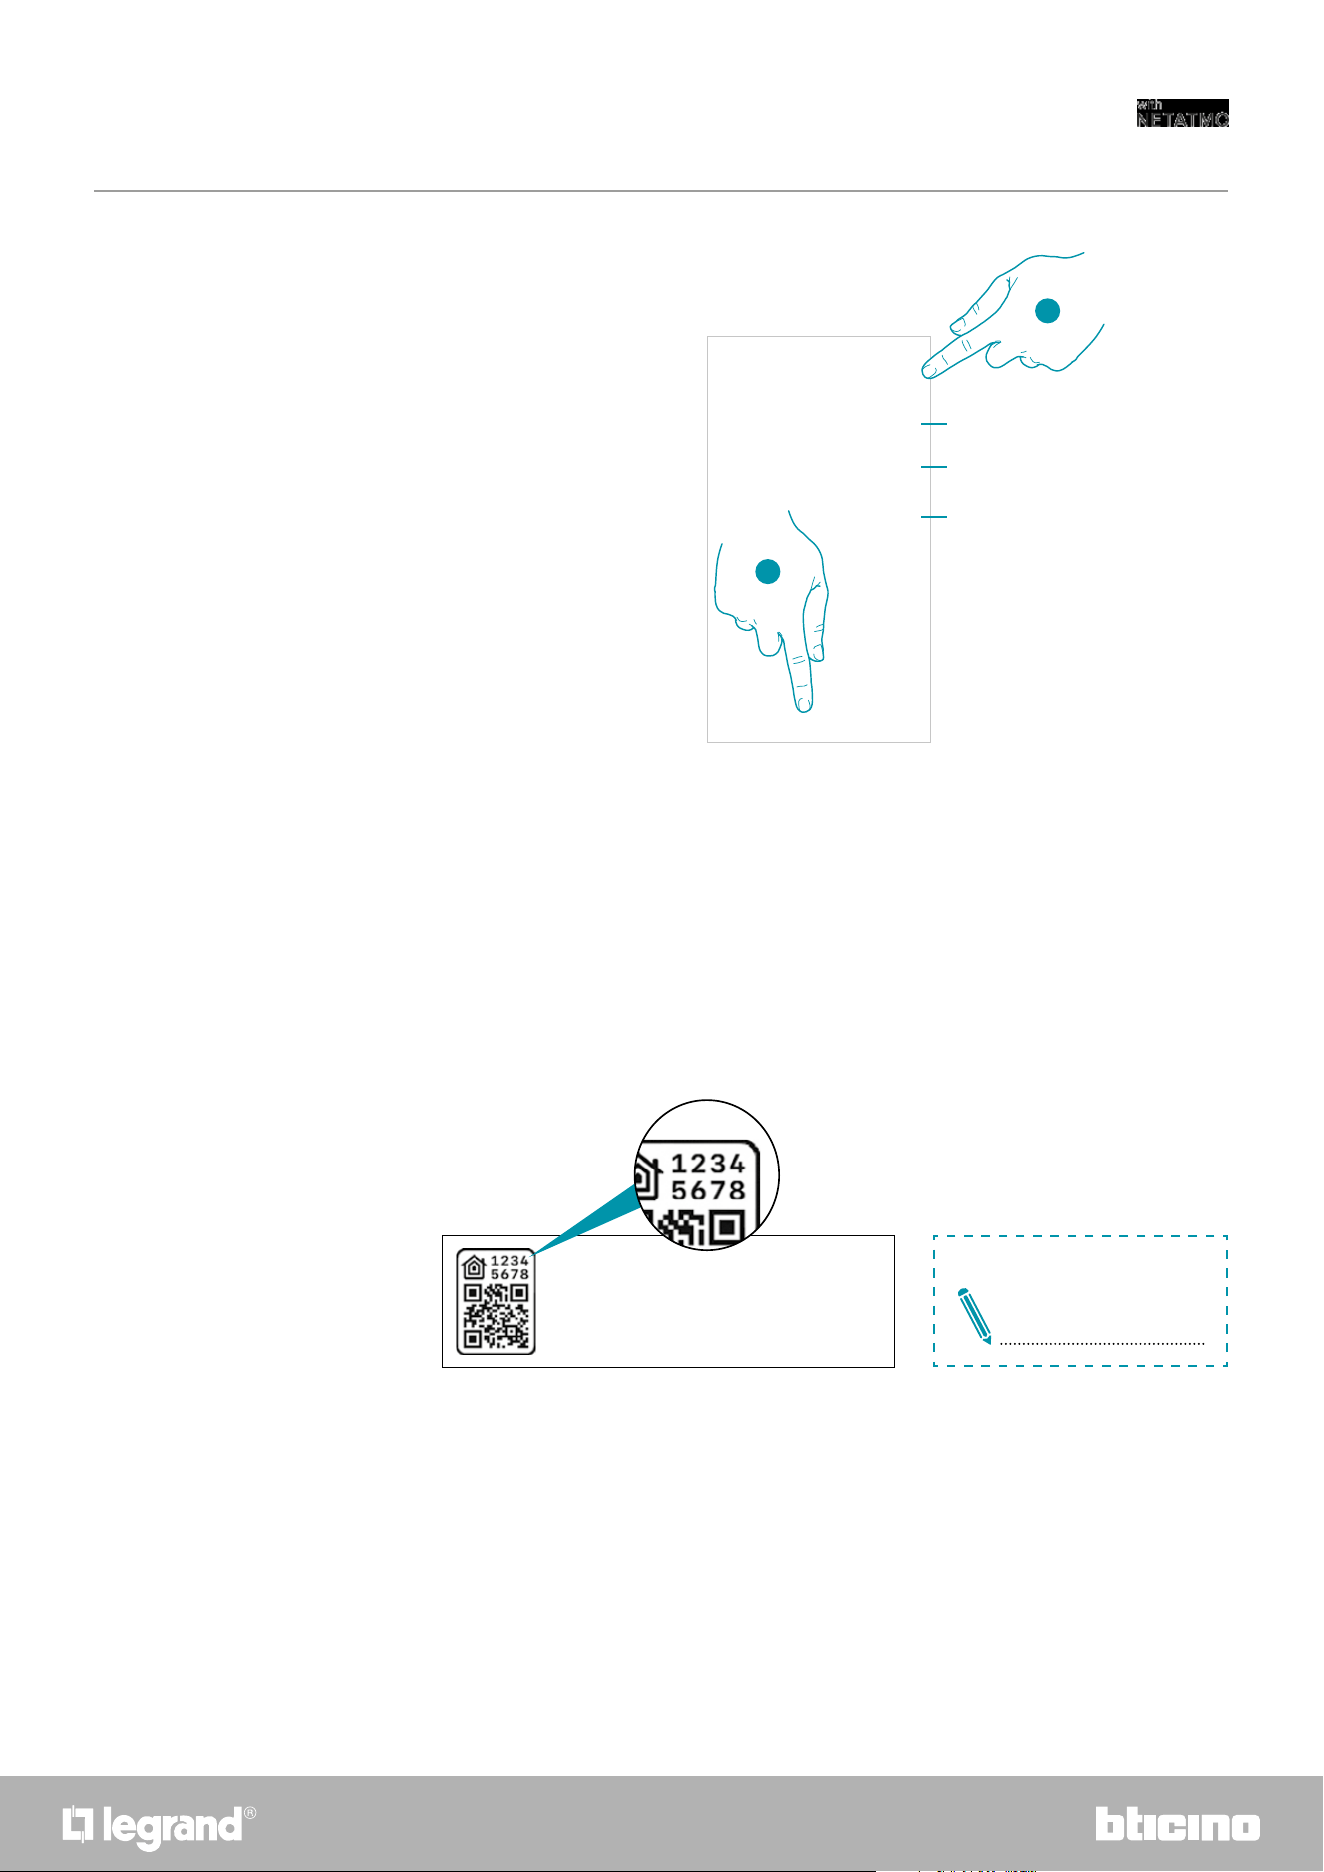
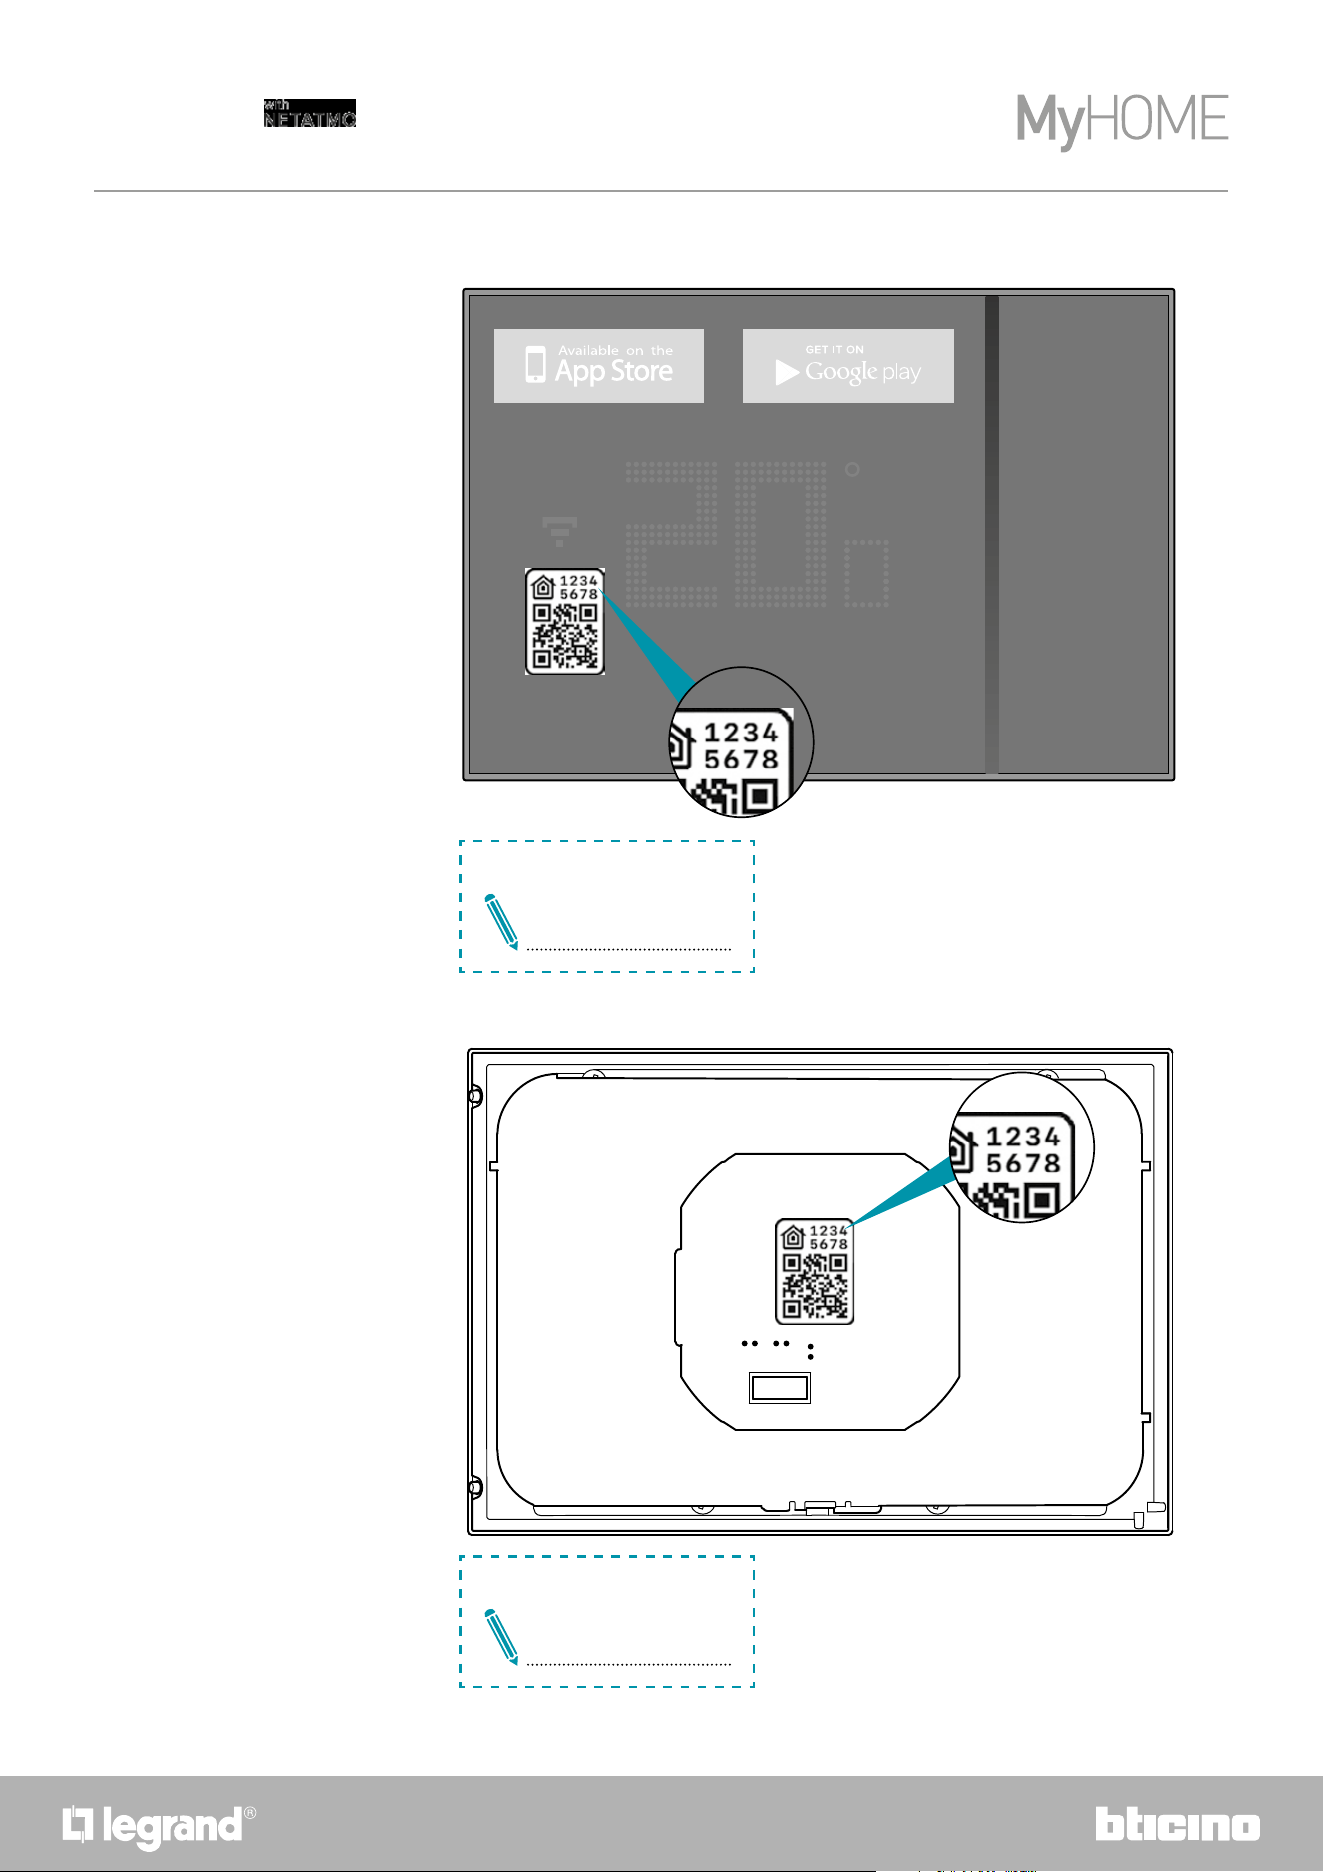
Preliminary operations for the use of a smartphone with iOS operating system
Before the association, prepare the HOMEKIT code to be scanned or note it down in the
appropriate space.
You can find the HOMEKIT code:
8
La tecnologia Apple HomeKit offre un modo semplice e sicuro per controllare i termostati di casa da iPhone, iPad, Apple
Watch, HomePod oppure Mac utilizzando l'app Apple Home. Controlla i tuoi accessori abilitati per HomeKit con la voce
chiedendo a Siri direttamente dal tuo iPhone, iPad, Apple Watch, HomePod oppure Mac.
Apple HomeKit technology provides an easy, secure way to control your home’s thermostats from your iPhone, iPad, Apple
Watch, HomePod, or Mac using the Apple Home app. Control your HomeKit-enabled accessories with your voice by asking
Siri directly from your iPhone, iPad, Apple Watch, HomePod, or Mac.
La technologie AppleHomeKit offre la possibilité, de manière simple et sûre, de contrôler les thermostats de l’habitation
depuis un iPhone, un iPad, un Apple Watch, un HomePod ou un Mac en utilisant l'appli Apple Home. Il devient possible
de contrôler ses propres accessoires prévus pour HomeKit, avec la voix en demandant à Siri directement depuis votre
iPhone, iPad, Apple Watch, HomePod ou Mac.
Die Apple HomeKit-Technologie bietet eine einfache und sichere Möglichkeit, Heimthermostate von Ihrem iPhone, iPad,
Apple Watch, HomePod oder Mac mit der Apple Home App zu steuern. Überprüfen Sie Ihr HomeKit-fähiges Zubehör mit Ihrer
Stimme, indem Sie Siri direkt von Ihrem iPhone, iPad, Apple Watch, HomePod oder Mac aus fragen.
La tecnología Apple HomeKit ofrece un modo sencillo y seguro para controlar los termostatos de casa mediante iPhone,
iPad, Apple Watch, HomePod o Mac utilizando la app Apple Home. Controla tus accesorios habilitados para HomeKit
hablando con Siri directamente desde tu iPhone, iPad, Apple Watch, HomePod o Mac.
De Apple HomeKit-technologie biedt een eenvoudige een veilige wijze voor het controleren van de thermostaten in een
woning met iPhone, iPad, Apple Watch, HomePod of Mac met behulp van de app Apple Home. Controleer met uw stem uw
accessoires die voor HomeKit geactiveerd zijn door dit aan Siri te vragen op uw iPhone, iPad, Apple Watch, HomePod of Mac.
Technologie Apple HomeKit nabízí jednoduchý a bezpečný způsob ovládání domácích termostatů z iPhone, iPad, Apple
Watch, HomePod nebo Mac pomocí aplikace Apple Home. Ovládejte hlasem svá příslušenství aktivovaná pro HomeKit a
požádejte přímo Siri z Vašeho iPhone, iPad, Apple Watch, HomePod nebo Mac.
L'uso del badge Works with Apple significa che un accessorio è stato progettato per funzionare in modo specifico con
la tecnologia identificata nel badge ed è stato certificato dallo sviluppatore per soddisfare gli standard di prestazione
di Apple. Apple non è responsabile del funzionamento di questo dispositivo o della sua conformità con gli standard di
sicurezza e normativi.
Use of the Works with Apple badge means that an accessory has been designed to workspecifically with the technology
identified in the badge and has been certified by thedeveloper to meet Apple performance standards. Apple is not
responsible for the operation of this device or its compliance with safety and regulatory standards.
L'utilisation du badge Works with Apple signifie qu’un accessoire est conçu pour fonctionner de manière spécifique avec
la technologie identifiée sur le badge et qu’il est certifié par le développeur pour satisfaire les standards de performance
Apple. Apple n’est pas responsable du fonctionnement du dispositif ni de sa conformité aux standards de sécurité et aux
dispositions des normes en vigueur.
Die Verwendung des Logos Works with Apple HomeKit bedeutet, dass ein elektronisches Zubehör speziell für den Anschluss
an das auf dem Badge angegebene technologische System entwickelt wurde und vom Entwickler nach den Apple
Leistungsstandards zertifiziert wurde. Apple ist nicht verantwortlich für den Betrieb dieses Geräts oder die Einhaltung von
Sicherheits- und Regulierungsstandards.
El uso del badge Works with Apple significa que un accesorio se ha diseñado para funcionar específicamente con
la tecnología identificada en el badge y que ha sido certificado por el desarrollador para cumplir los estándares de
prestaciones Apple. Apple no es responsable del funcionamiento de este dispositivo o de su conformidad con los
estándares de seguridad y normativos.
Het gebruik van de badge Works with Apple betekent dat een accessoire ontworpen is om specifiek te werken met de
technologie die in de badge beschreven is en dat de ontwikkelaar ervan certificeert dat het aan de prestatie-eisen van
Apple voldoet. Apple is niet verantwoordelijk voor de werking van dit apparaat of de overeenstemming ervan met de
veiligheidsnormen en wettelijke voorschriften.
Používání badge Works s Apple znamená, že příslušenství bylo navrženo tak, aby fungovalo speciálně s technologií
uvedenou v badge a bylo vývojářem certifikováno tak, aby splňovalo výkonové standardy Apple. Společnost Apple
neodpovídá za fungování tohoto zařízení ani za to, zda je v souladu s bezpečnostními a regulačními normami.
Per controllare questo accessorio abilitato per HomeKit, automaticamente e lontano da casa, è richiesto un HomePod, Apple TV,
oppure iPad impostato come hub di casa. Si raccomanda di aggiornare al più recente software e sistema operativo.
Controlling this HomeKit-enabled accessory automatically and away from home requires a HomePod, Apple TV, or iPad set up as a home
hub. It is recommended that you update to the latest software and operating system.
Pour contrôler cet accessoire, prévu pour HomeKit, automatiquement et loin de chez soi, un HomePod, un AppleTV ou un iPad
configuré comme hub d’habitation est nécessaire. Il est recommandé de mettre à jour le logiciel et le système d’exploitation à la
dernière version.
Um dieses HomeKit-fähige Zubehör automatisch und unterwegs zu steuern, benötigen Sie einen HomePod, einen Apple TV oder ein iPad
als Heim-Hub. Wir empfehlen die Software und das Betriebssystem zu aktualisieren.
Para controlar este accesorio habilitado para HomeKit, automáticamente y lejos de casa, se requiere un HomePod, una TV Apple o un
iPad programado como hub de casa. Se recomienda actualizar con el software y el sistema operativo más recientes.
Voor de automatische controle buitenshuis van dit accessoire is een HomePod, Apple TV, of iPad die als hub in huis ingesteld is, vereist. We
adviseren om te updaten naar de meest recente software en besturingssysteem.
Pro ovládání tohoto příslušenství aktivovaného pro HomeKit automaticky a mimo domov je vyžadován HomePod, Apple TV nebo iPad
nastavený jako domácí rozbočovač. Doporučujeme aktualizovat na nejnovější verzi softwaru a operačního systému.
© 2019 Apple Inc. Todos los derechos reservados. Apple, el logo Apple, Apple TV, Apple Watch, HomeKit, iPad, iPhone,
Mac y Siri son marcas de Apple Inc., registradas en los Estados Unidos y en otros países. HomePod, iPadOS, Multi-Touch
y tvOS son marcas registradas de Apple Inc. App Store, iCloud e iTunes Store son marcas de servicio de Apple Inc.,
registradas en los Estados Unidos y en otros países. IOS es una marca o marca registrada de Cisco en los Estados Unidos
y en otros países y se utiliza con licencia. Otros nombres de productos y sociedades, que aparecen citados en el presente
documento, pueden ser marcas registradas de las sociedades respectivas.
Android, Google, Google Play y el logotipo Google Play son marcas registradas de Google LLC.
© 2019 Apple Inc. Alle rechten voorbehouden. Apple, het logo Apple, Apple TV, Apple Watch, HomeKit, iPad, iPhone, Mac en
Siri zijn merknamen van Apple Inc., die in de V.S. en in andere landen zijn geregistreerd. HomePod, iPadOS, Multi-Touch en
tvOSi zijn geregistreerde handelsmerken van Apple Inc. App Store, iCloud e iTunes Store zijn servicemerken van Apple Inc. die
in de V.S. en in andere landen zijn geregistreerd. IOS is een merknaam of geregistreerd handelsmerk van Cisco in de V.S. en
in andere landen en wordt met licentie gebruikt. Andere productnamen en bedrijven die in dit document genoemd worden,
kunnen geregistreerde handelsmerken van de desbetreffende bedrijven zijn.
Android, Google, Google Play en het logo Google Play zijn geregistreerde handelsmerken van Google LLC.
© 2019 Apple Inc. Všechna práva vyhrazena. Apple, logo Apple, Apple TV, Apple Watch, HomeKit, iPad, iPhone, Mac a
Siri jsou ochranné známky společnosti Apple Inc. registrované ve Spojených státech a dalších zemích. HomePod, iPadOS,
Multi-Touch a tvOS jsou registrované ochranné známky společnosti Apple Inc. App Store, iCloud a iTunes Store jsou
servisní značky společnosti Apple Inc. registrované ve Spojených státech a dalších zemích. IOS je ochranná známka nebo
registrovaná ochranná známka společnosti Cisco ve Spojených státech a dalších zemích a používá se na základě licence.
Ostatní názvy produktů a společností uvedené v tomto dokumentu mohou být registrovanými ochrannými známkami
příslušných společností.
Android, Google, Google Play a logo Google Play jsou ochranné známky společnosti Google LLC.
© 2019 Apple Inc. Tutti i diritti riservati. Apple, il logo Apple, Apple TV, Apple Watch, HomeKit, iPad,
iPhone, Mac e Siri sono marchi di Apple Inc., registrati negli Stati Uniti e in altri Paesi. HomePod,
iPadOS, Multi-Touch e tvOS sono marchi registrati di Apple Inc. App Store, iCloud e iTunes Store sono
marchi di servizio di Apple Inc., registrati negli Stati Uniti e in altri Paesi. IOS è un marchio o marchio
registrato di Cisco negli Stati Uniti e in altri Paesi ed è utilizzato su licenza. Altri nomi di prodotti e
società citati nel presente documento possono essere marchi registrati delle rispettive società.
Android, Google, Google Play e il logo Google Play sono marchi registrati di Google LLC.
© 2019 Apple Inc. All rights reserved. Apple, the Apple logo, Apple TV, Apple Watch, HomeKit, iPad,
iPhone, Mac, and Siriare trademarks of Apple Inc., registered in the U.S. and other countries. HomePod,
iPadOS, Multi-Touch, and tvOS are trademarks of Apple Inc. App Store, iCloud, and iTunes Store are
service marks of Apple Inc., registered in the U.S. and other countries. IOS is a trademark or registered
trademark of Cisco in the U.S. and other countries and is used under license. Other product and company
names mentioned herein may be trademarks of their respective companies.
Google, Google Play, Android, and related marks and logos are trademarks of Google LLC.
© 2019 Apple Inc. Tous droits réservés. Apple, le logo Apple, Apple TV, Apple Watch, HomeKit, iPad,
iPhone, Mac et Siri sont des marques de Apple Inc., déposées aux États-Unis et dans d’autres pays.
HomePod, iPadOS, Multi-Touch et tvOS sont des marques déposées de Apple Inc. App Store, iCloud et
iTunes Store sont des marques de service de Apple Inc., déposées aux États-Unis et dans d’autres pays.
IOS est une marque de Cisco déposée aux États-Unis et dans d’autres pays et utilisée sous licence. Les
autres noms de produits et de sociétés figurant dans le présent document peuvent être des marques
déposées par leurs propriétaires respectifs.
Android, Google, Google Play et le logo Google Play sont des marques déposées de Google LLC.
© 2019 Apple Inc. Alle Rechte vorbehalten. Apple, das Apple-Logo, Apple TV, Apple Watch, HomeKit,
iPad, iPhone, Mac und Siri sind Marken von Apple Inc. und in den USA und anderen Ländern eingetragen.
HomePod, iPadOS, Multi-Touch und tvOS sind eingetragene Marken der Apple Inc. und in den Vereinigten
Staaten und anderen Ländern registriert. IOS ist eine Marke oder eingetragene Marke von Cisco in den
Vereinigten Staaten und anderen Ländern und wird unter Lizenz verwendet. Andere hierin erwähnte
Produkt- und Firmennamen können Marken oder eingetragene Marken ihrer jeweiligen Unternehmen
sein.
Android, Google, Google Play und das Logo Google Play sind eingetragene Marken von Google LLC.
Attenzione: Codice unico d’installazione HomeKit Apple da conservare.
HomeKit Apple: Durante l’installazione dell’app mobile iOS, verrà richiesto questo codice.
Warning:
Unique Apple HomeKit installation code to be stored somewhere safe.
Apple HomeKit: The user will be asked for this code during the installation of the iOS mobile app.
Attention : code unique d’installation HomeKit Apple à conserver.
HomeKit Apple : L’utilisateur devra fournir ce code lors de la mise en service du produit avec l’app iOS.
Achtung: Einzigartiger Apple HomeKit Installationscode zum Aufbewahren.
HomeKit Apple: Während der Installation der iOS mobile App werden Sie nach diesem Code gefragt.
Atención: Código único de instalación HomeKit Apple que conservar.
HomeKit Apple: Durante la instalación de la app mobile iOS, se pedirá este código.
Opgelet: Bewaar de unieke installatiecode HomeKit Apple.
HomeKit Apple: Tijdens de installatie van de mobiele app iOS moet u deze code invoeren.
Pozor: Jedinečný instalační kód HomeKit Apple je třeba uchovat.
HomeKit Apple: Při instalaci app mobile iOS bude tento kód vyžadován.
Il fabbricante, BTicino S.p.A., dichiara che il tipo di apparecchiatura radio Smarther with Netatmo art. XW8002/XM8002/XG8002 è conforme alla direttiva 2014/53/UE. Il testo completo della dichiarazione di conformità UE è disponibile al seguente indirizzo Internet:
www.bticino.it/red
Hereby, BTicino S.p.A., declares that the radio equipment type Smarther with Netatmo item XW8002/XM8002/XG8002 is in compliance with Directive 2014/53/EU. The full text of the EU declaration of conformity is available at the following internet address: www.bticino.it/red
HOMEKIT CODE
1 2 3 4 5 6 7 8
28
Smarther
User and installation manual
– on the back of the Smarther
– on the protective film of the Smarther
Download HOME + CONTROL App
Download HOME + CONTROL App
HOMEKIT CODE
1 2 3 4 5 6 7 8
HOMEKIT CODE
1 2 3 4 5 6 7 8
2928
Smarther
User and installation manual
Note: before starting the association with the system, establish the connection with the home Wi-Fi
At this point the system will show you a tutorial to help you associate to your Smarther.
the configuration procedure differs based on the smartphone operating system:
– if you use a smartphone with Android operating system
– if you use a smartphone with iOS operating system
Associate the Smarther
A Touch if you have been invited to manage the home by a user
1. Touch to select the brand of the product to install
2. Touch to select the Smarther
1
2
A
30
Smarther
User and installation manual
3
4
3. Touch to start the configuration
4. Touch to enable the device location
5. Touch to allow Home + Control to access the Smartphone position
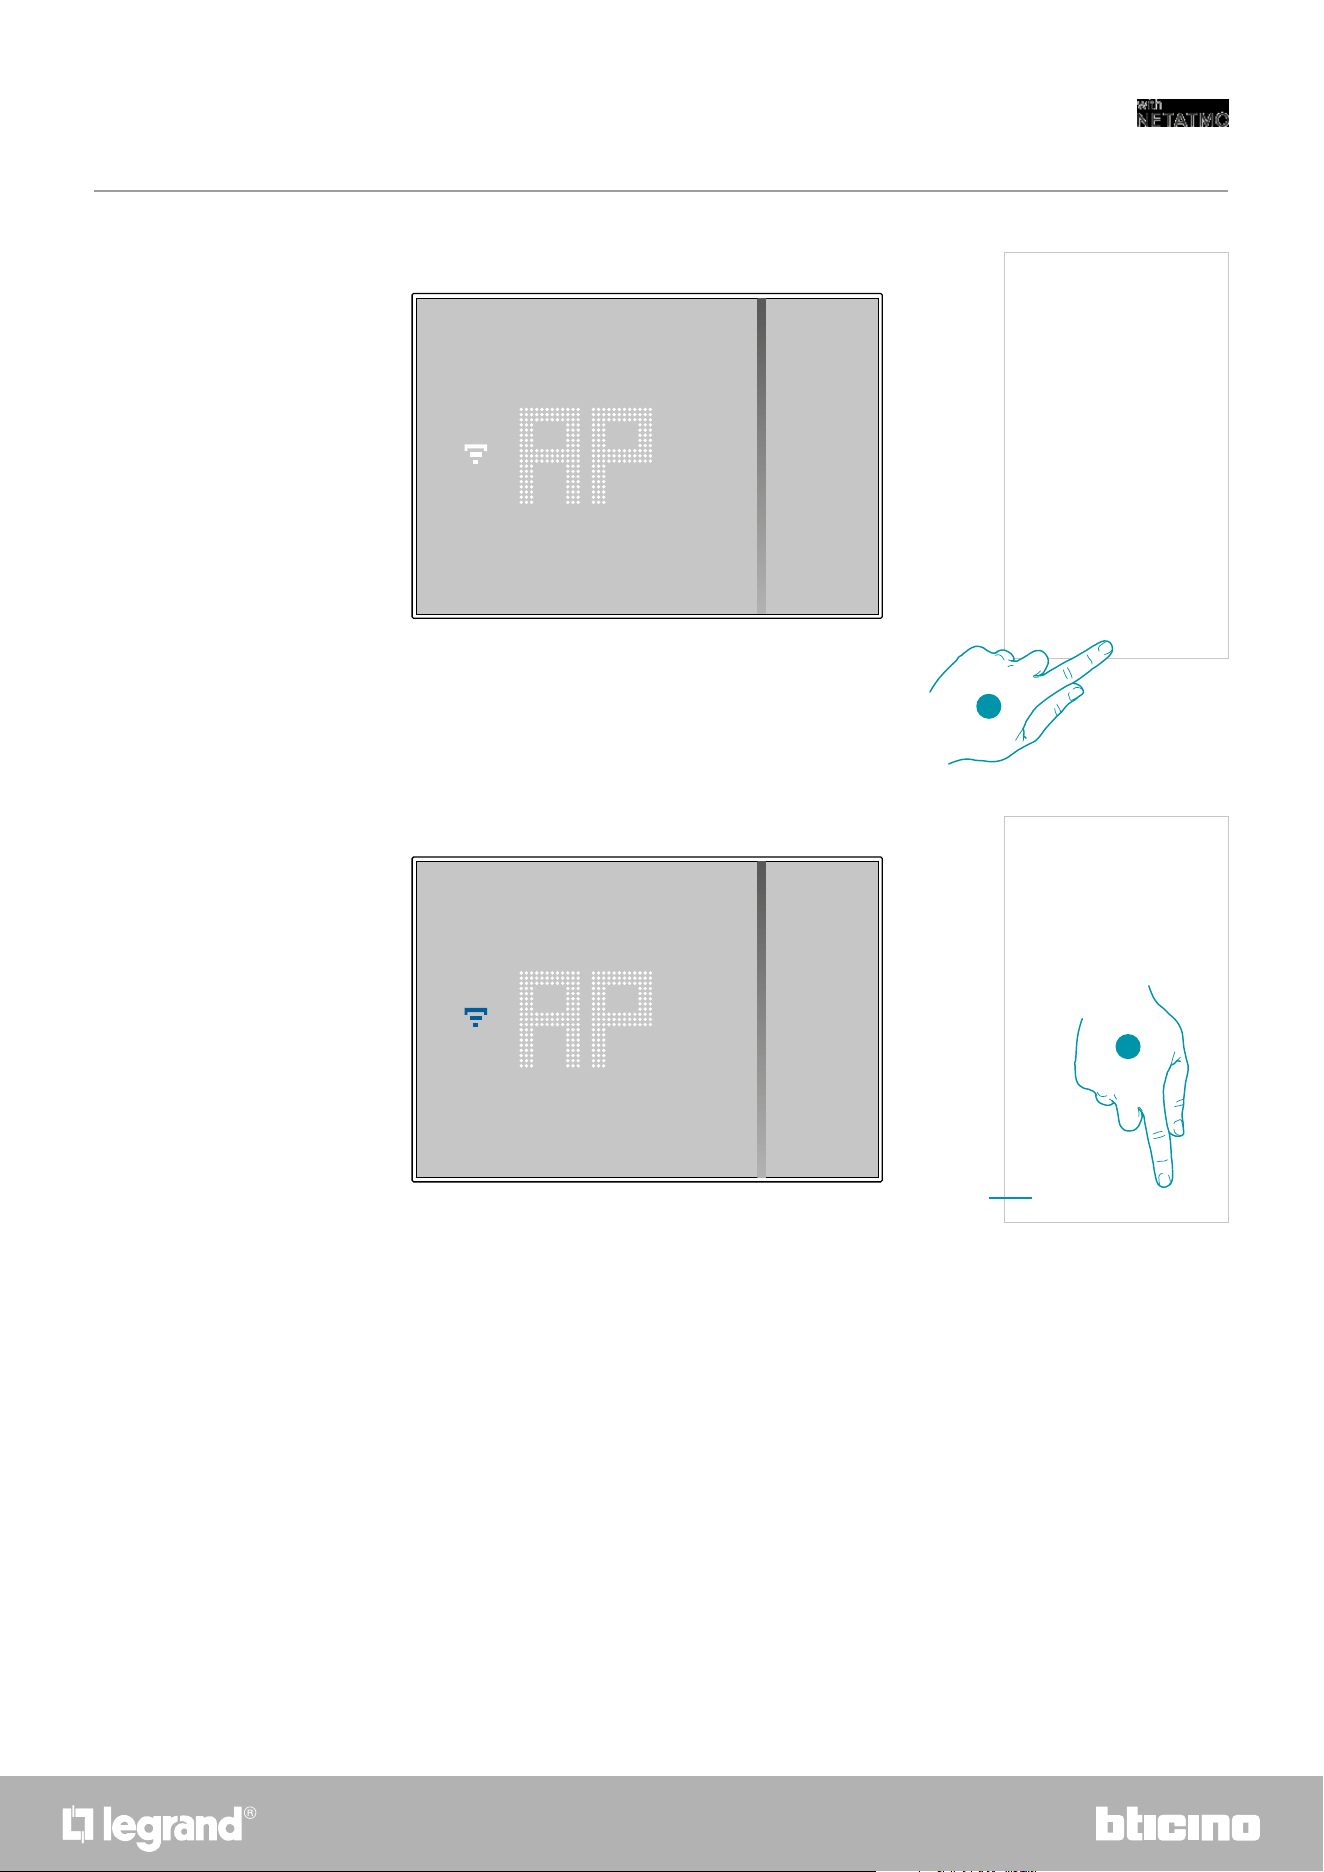
if you use a smartphone with Android operating system
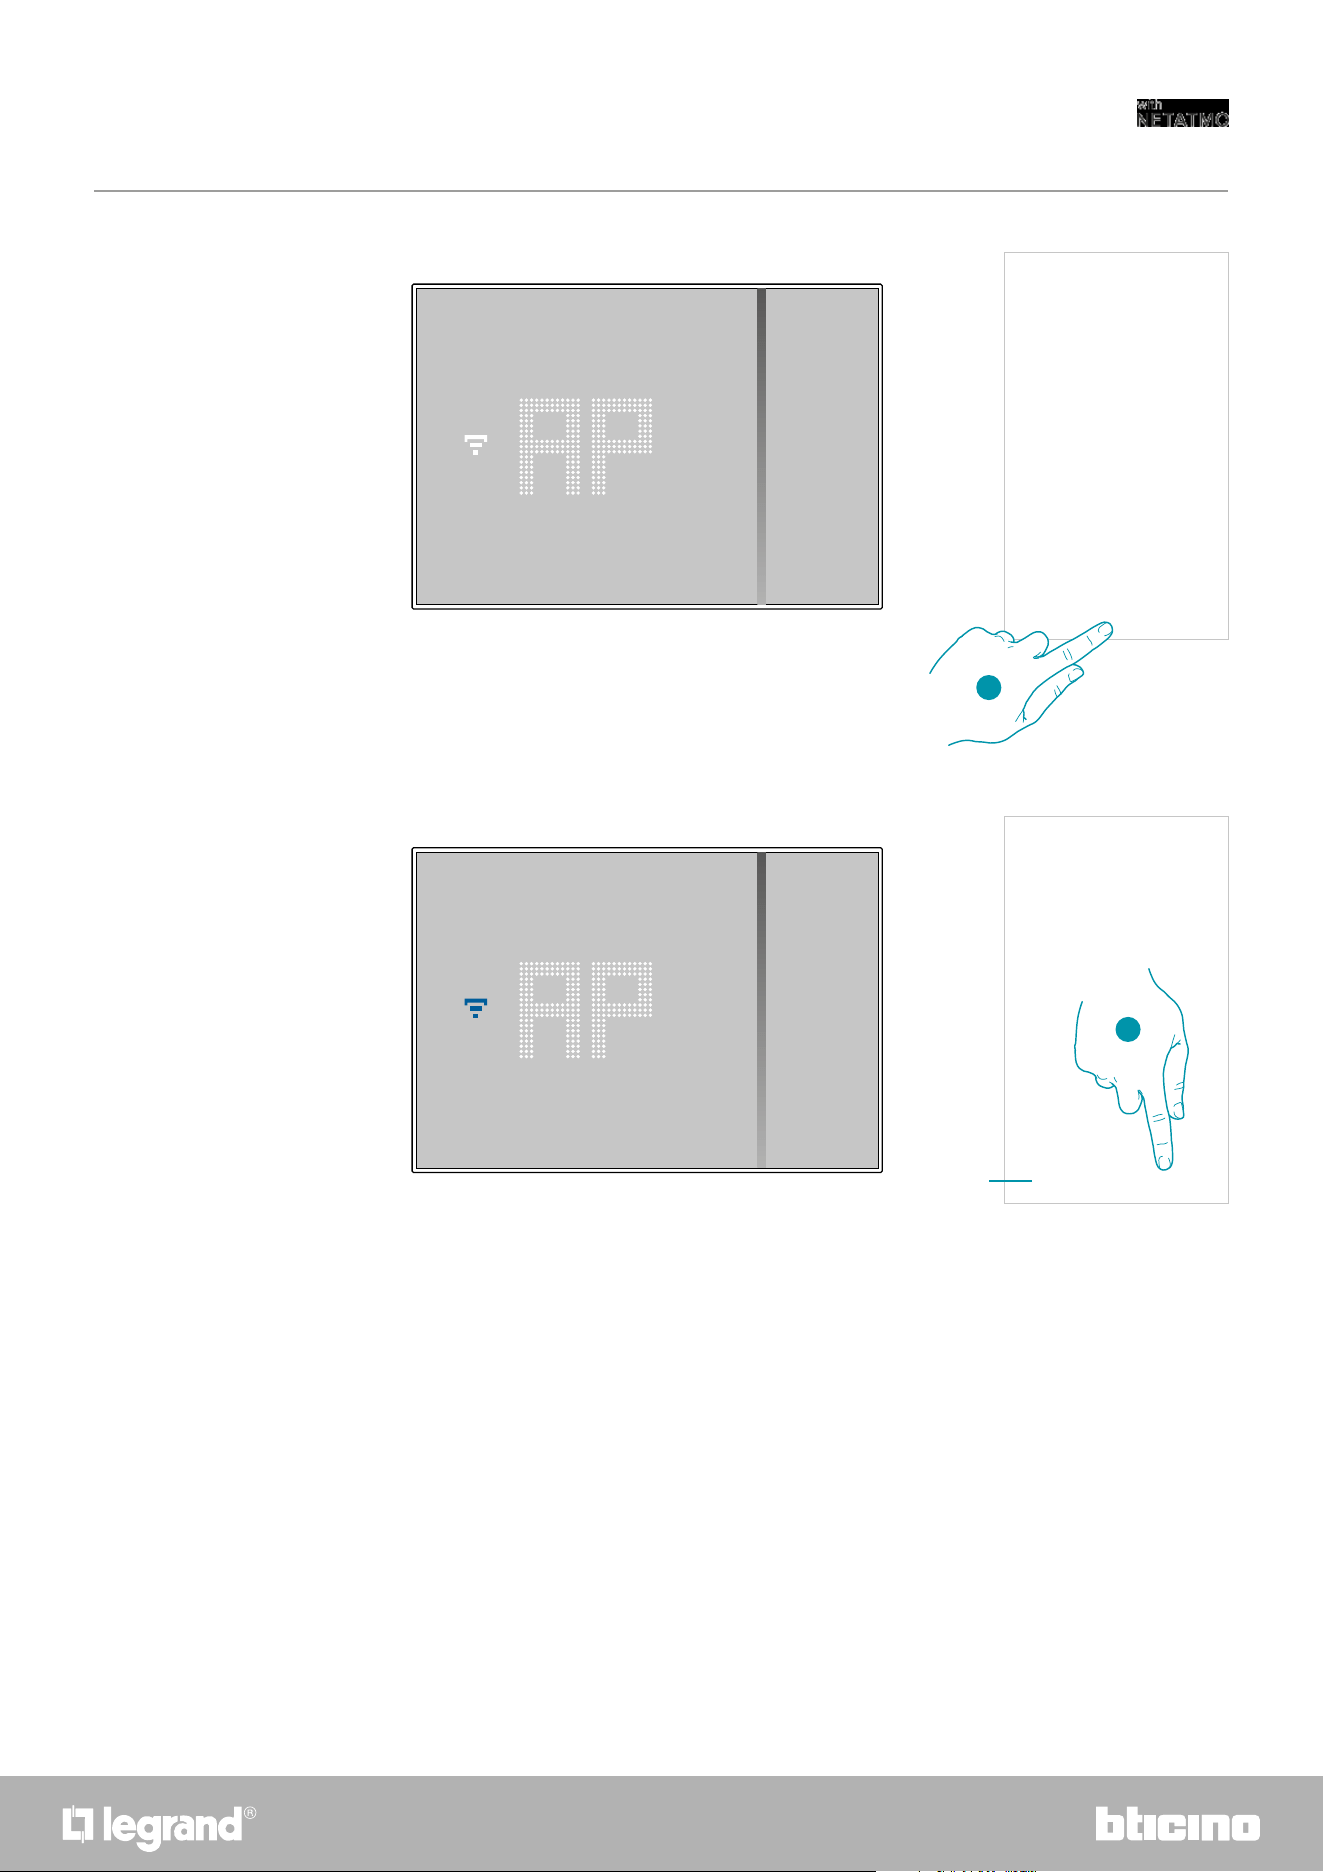
6. Keep the upper Smarther pushbutton pressed until “AP” appears
6
A Opens the FAQ to help in the resolution of the problem
A
5
3130
Smarther
User and installation manual
7. Press to continue
8. The Smarther shows the blue Wi-Fi symbol. Touch it to continue the configuration
8
7
A
A Indicates that you are trying to complete the association using an incorrect App
32
Smarther
User and installation manual
9. Touch to confirm the suggested home Wi-Fi network, otherwise touch (A) to select a different
one
10. Enter the home Wi-Fi password
11. Touch to continue
12. Select the Smarther
13. Touch if this is the first Smarther installation
14. Touch to confirm that this is the first installation
9
10
11
12
13
14
A
Caution: all the existing data will be deleted
3332
Smarther
User and installation manual
15. Enter a name for the home
16. Touch to create a new Home + Control home
17. Touch to create a new room
18. Select the type of room where the Smarther has been installed
19. If necessary touch to rename the room
20. Touch to confirm
15
17
20
19
18
16
21. Customise the Smarther name
22. Touch to confirm
23. The Smarther is configured correctly; touch to create a program using the guided procedure
(the same for both Android and iOS systems)
22
21
23
3534
Smarther
User and installation manual
6. Press to continue
7. The Smarther shows the blue Wi-Fi symbol. Touch it to continue the configuration
A Indicates that you are trying to complete the association using an incorrect App
6
7
A
36
Smarther
User and installation manual
8. Enter a name for the home
9. Press to continue
10. Press to scan the HOMEKIT code
11. Scan the HOMEKIT code
Prepare the HOMEKIT code (see Preliminary operations for the use of a smartphone with iOS
operating system)
9
8
10
Download HOME + CONTROL App
11
Download HOME + CONTROL App
3736
Smarther
User and installation manual
12. If the code is not detected automatically, or if it cannot be scanned, touch to open the manual
entry page
13. Touch the Smarther detected nearby
14. Touch to allow the Smarther to access the Wi-Fi network
15. Manually enter the HOMEKIT code
A Rename the Smarther for the heating function
B Rename the Smarther for the humidity detection function
C Select the room/create a new one where to insert the Smarther within the HOMEKIT App
D Add/remove from favorites
16. Touch to continue
Or
13
15
14
12
16
A
B
C
D
38
Smarther
User and installation manual
17. Touch to select the scenarios where you want to include the Smarther
18. Touch to continue.
19. Touch to end the configuration of the HOMEKIT App
20. Touch if this is the first Smarther installation
21 Touch to confirm that this is the first installation
22. Touch to select the type of room where to install the Smarther
19
20
21
22
17
18
3938
Smarther
User and installation manual
23. If necessary touch to rename the room
24. Touch to confirm
25. Customise the Smarther name
26. Touch to confirm
27. The Smarther is configured correctly; touch to create a program using the guided procedure
(the same for both Android and iOS systems)
23 25
24 26
27
40
Smarther
User and installation manual
1. Touch to start the guided procedure
2. Select if the program is for a heating or a cooling system
3. Touch to continue
1
At this point, through questions you have to answer, the procedure proposes to create a program
to adjust the temperature.
It is possible to learn more about the program operation in the Schedules chapter
Create a program using the guided procedure
2
3
4
4
5
7
7
8
6
4. Set the time interval time limits (when you get up and when you go to bed during the week)
5. Touch to continue.
6. Select if during the day you are at home or not.
7. Set the times which delimit the time intervals
8. Touch to continue.
4140
Smarther
User and installation manual
11
11
12
9. Select if during the week you normally come back home for lunch or not.
10. Touch to confirm
11. Set the time interval time limits (when you get up and when you go to bed during the
weekend)
12. Touch to continue.
9
10
13. Select if you are normally home on Saturday or not.
14. Touch to continue.
15. Select if you are normally home on Sunday or not.
16. Touch to continue.
13
14
15
16
4342
Smarther
User and installation manual
– Download the app from the Stores
– Register and create an account
– Accept the invitation sent by email by your installer or family member
– Access the App with the credentials just created
– Control your Smart system with the app
1. Touch the link in the email received from the system following an invitation
2. Enter your registration details
3. Touch to access
You can access the Smart system created by your installer, or one of your family members,
following the steps shown below.
Access your home through invitation
Note: all the users have the same control, invitation and modification authorities.
A message and an email will confirm that the invitation has been accepted. Open the App and
enter the authentication data
2
3
1
44
Smarther
User and installation manual
Forgotten password
After confirming, the system will send the link to modify the password to the email address that
you have indicated
5. Touch to modify the password
6. Enter the new password, which must meet the following requirements:
– at least 8 characters;
– at least one lower case letter (e.g. a);
– at least one upper case letter (e.g. A);
– at least one number (e.g. 1);
– at least one special character (e.g. $);
7. Touch to confirm
When you have forgotten the password:
2
1. Touch to open the login page
2. Touch to activate the password recovery procedure
3. Enter the email address, to which the system will send the link for changing the password
4. Touch to send a link
1
4
3
6
7
5
4544
Smarther
User and installation manual
A Touch to create a new account
1. Touch to open the login page
2. Enter email and password
3. Touch to access
B Touch to start the password recovery procedure
Authentication
After registering with the portal, you can authenticate by entering email and password.
A
B
A message will confirm that the password has been changed successfully; open the App to insert
the authentication data
1
2
B
46
Smarther
User and installation manual
After logging in, from this page you can manage the temperature inside your home, using the
Smarther and/or the Netatmo valves.
The elements displayed in the Home Page depend on your home setup, for example split into
rooms, with a device for every room, or several devices in the same room, and therefore the
temperature management controls available; there are in fact:
– Controls for single device
– Room controls
– Home controls
The sample Home Page below shows one single device in a single room
Home Page
A Home name/display homes
B It opens the "Graphic" section where it is possible to view your heating system consumptions
C Measured temperature and measured humidity percentage
D Heating
or cooling contact switched
E Set temperature
F Set the “Boost” function
G Set the Temperature
H Schedules and selection of absent, frost guard, program change function)
I Display the currently active Smarther functions
L Settings pull-down menu
L
I
A
C
F
E
B
D
G
H
Program in progress
Boost functions
Manual Function
Frost guard Function
Absent Function
4746
Smarther
User and installation manual
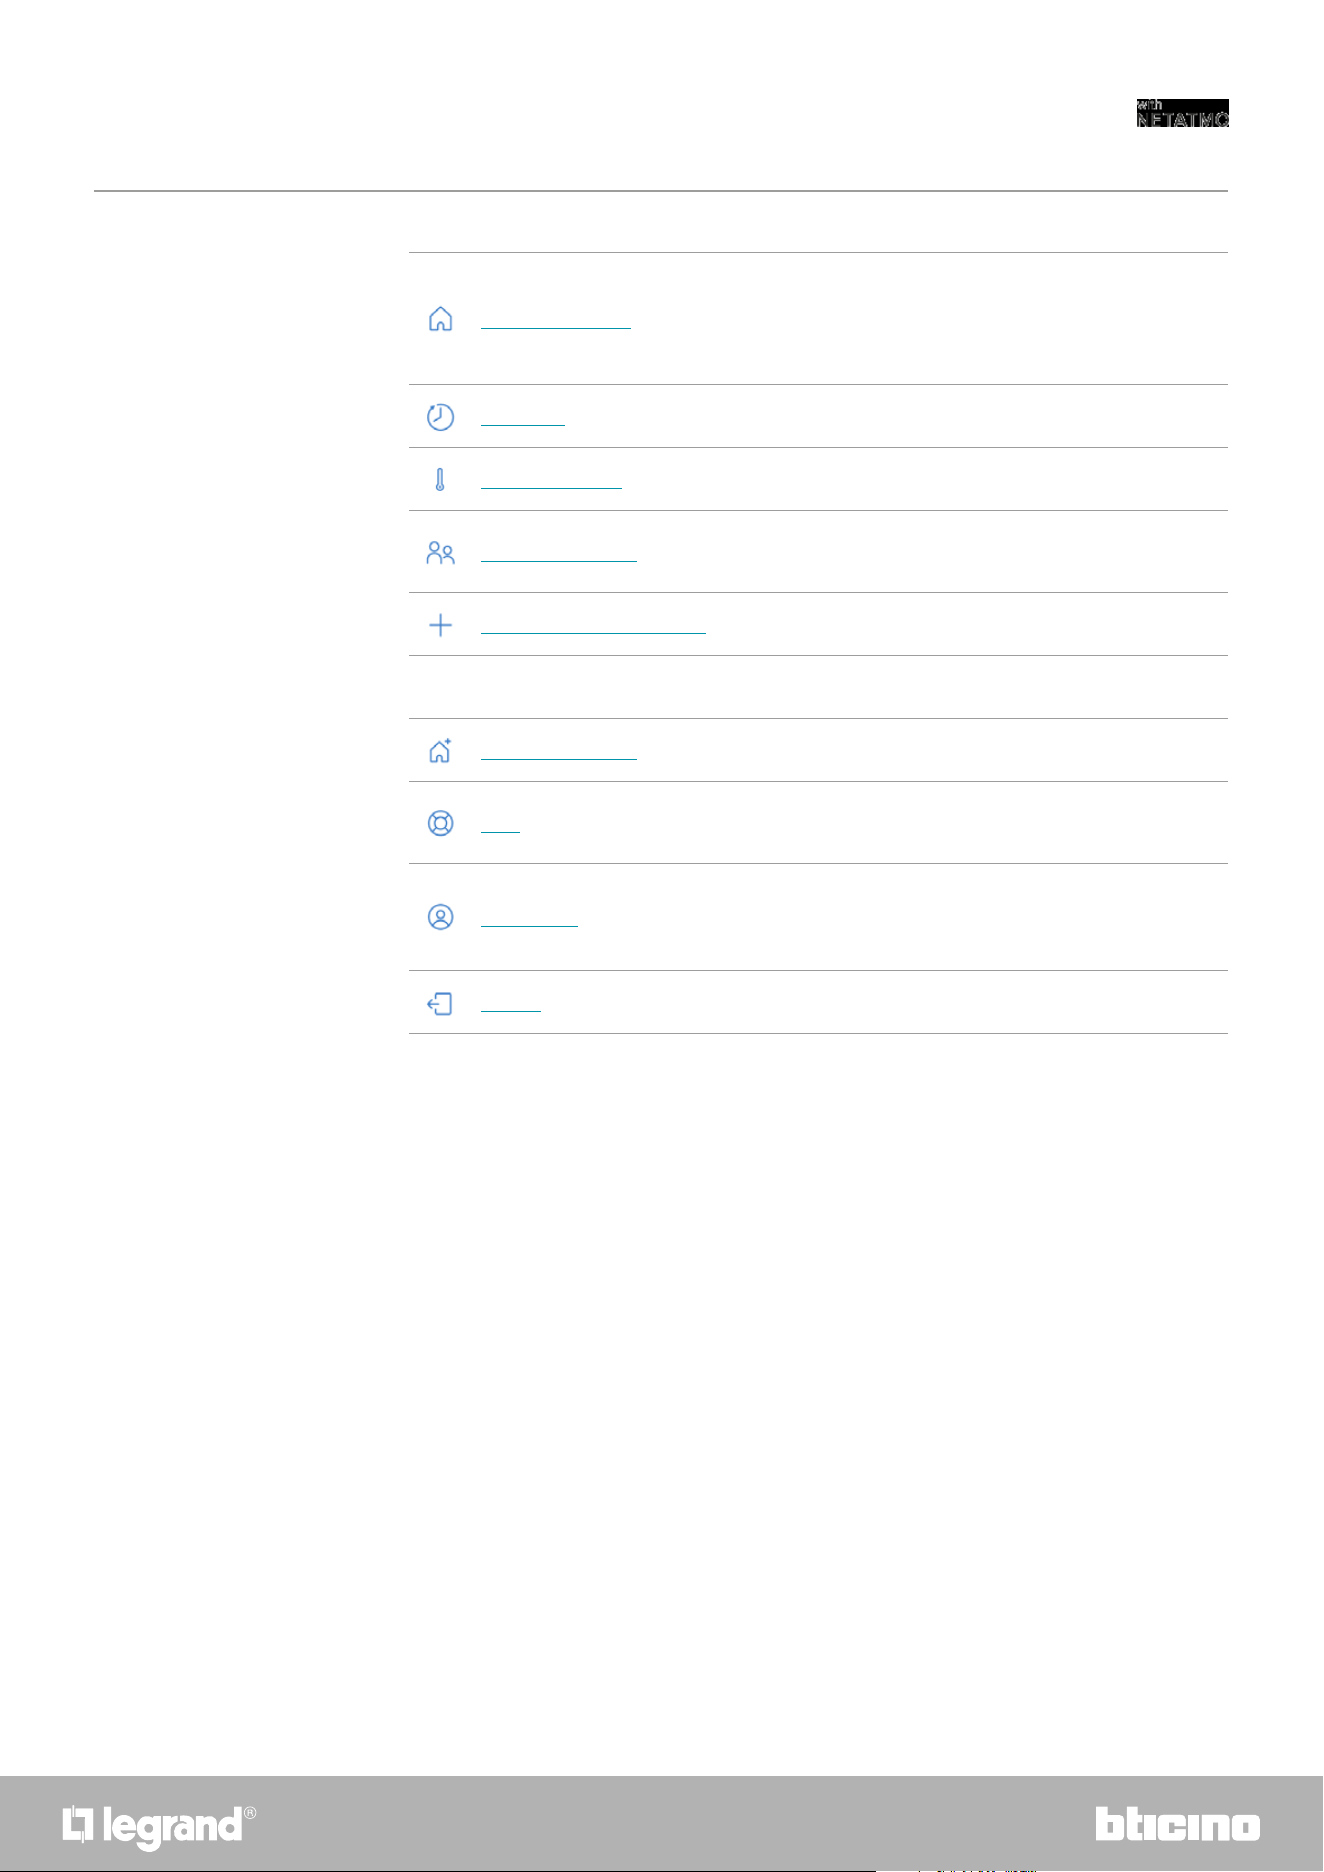
Manage my home
It opens a section where it is possible to change some settings
regarding the individual rooms and devices, or the settings of
the whole home.
It is also possible to set some Smarther parameters
Schedules
It opens the section, where it is possible to create and manage
the programs
Thermal comfort
It opens the section, where it is possible to manage some
Smarther parameters
Manage my guests
Open the section where you can display those users which can
interact with your Smarther, invite new ones or if necessary
delete them.
Add a product to this home
It opens the section where it is possible to add devices
connected to your system.
Advanced
Install a new home
It opens the section where it is possible to install a new home
associated with your account (e.g. mountain home)
Help
It opens the section where it is possible to display FAQ (and
their answers) regarding the use of the Home +Control app.
My account
It opens the section where it is possible to view your account,
and change the password
Logout Logout from the Home + Control app
48
Smarther
User and installation manual
Set the temperature
Control a single device
This function allows to set a temperature
A visual and text indication will indicate the remaining time.
You can also modify the setting before the end via the function.
It is possible to set the temperature and activate boost operation. The settings will only affect the
device inside the room
The temperature is now set
1. Touch to set the temperature
2. Scroll to set for how long it should be maintained (default 3 hours, maximum 12 hours)
3. Touch to quit the current mode and return to the programmed mode
A Set temperature
B Time indication bar: it indicates the remaining time in a chart format
C Setting end time
D Set mode indication
1
2
D
C
B
A
3
4948
Smarther
User and installation manual
Decreasing the temperature below 7.5 °C will cause the activation of the Frost guard function,
which on a heating system only allows to keep a minimum safety temperature.
The function is now set
1. Touch until the indication of the set temperature falls below 7.5 °C
2. Touch to switch the device back on
1
A Set mode indication
A
A
2
50
Smarther
User and installation manual
Set the Boost function
This function forces the switching on of the system (both heating and cooling) for a limited time
(30, 60 or 90 minutes) independent of the measured or programmed temperature.
Once the time set has elapsed, the Smarther will resume operation according to the previous
program.
The function is now set
1. Touch to set the function
2. Scroll until reaching the desired time among 30, 60 and 90 minutes (default 90 minutes)
3. Touch to quit the current mode and return to the programmed mode
A Set mode indication
B Time indication bar: it indicates the remaining time in a chart format
C Setting end time
D Set mode indication
1
3
2
D
C
B
A
5150
Smarther
User and installation manual
Control all the devices in the room
Control all the devices in the room
It is possible to set the temperature and activate boost operation. The settings will affect all the
devices in the room, or select a program for the whole home.
1. Touch to manage the room temperature
A Temperature measured in the room.
B Measured humidity percentage
C Indication of the number and the types of devices in the room
D Temperature set in the room
E Set the Boost function for the whole room
F Set the Temperature in the room
G It opens the Programs section where it is possible to manage the schedules for the whole home
Note: in case of need to individually adjust the temperature for each room device, it will be necessary to
create additional rooms and enter a device for each of them.
For example, it is possible to use the room creation tool to create “living room - south” and “living room -
north”, enter a Netatmo valve in each one, and manage them separately.
1
A
C
E
F
G
D
B
52
Smarther
User and installation manual
Absent Function
Control all the home devices
A Touch to set the devices in Absent mode until you change the setting manually.
3. Touch to select a date and time for the end of the “Absent” function
4. Select until what day and time the “Absent” function should remain active
5. Touch to confirm
4
5
3
A
The “Absent” function is now active on all the home devices
1. Touch to access the Schedules section
2. Touch to set the “Absent” function
1
2
Using the home page central button, it is possible to adjust the temperature of the home, sending
commands that will affect all the devices.
You can therefore activate the Frost guard Function , the "Absent" function or a program for all the
home devices
This setting allows to enable the “Absent” function on the Smarther (temperature 12°C).
The Absent function is very useful when going out for a medium-long period of time and it is
necessary to keep an acceptable temperature, avoiding pointless energy waste.
5352
Smarther
User and installation manual
Frost guard Function
A Touch to set the devices in frost guard mode until you change the setting manually.
3. Touch to select a date and time for the end of the “Frost guard” function
4. Select until what day and time the “Frost guard” function should remain active
5. Touch to confirm
3
4
5
The “Frost guard” function is now active on all the home devices
This setting allows to enable the “Frost guard” function (temperature 7°C).
The Frost guard function is very useful when going out for a medium-long period of time and it is
necessary to keep a temperature that will prevent problems in the home system.
A
1. Touch to access the Schedules section
2. Touch to set the “Frost guard” function
1
2
54
Smarther
User and installation manual
Set a program for all the home devices
The selected program function is now active on all the home devices
To create or manage new programs, see Schedules chapter.
1. Touch to access the Schedules section
2. Touch to select a program among the ones available
3. Touch to confirm
1
2
3
5554
Smarther
User and installation manual
Settings
Manage my home
Home parameters
1
2
1. Touch to open the Settings menu
2. Touch to access the home management page
A It opens the Home parameters section
B Opens the Room settings and device settings section (Smarther/Valves)
1. Touch to access the home parameters
A A Touch to change the home description
B Set advanced parameters as Location, Time zone, Energy source, Home type and Home
dimension.
In this section it is possible to change the settings of the individual rooms and devices, or the
whole home. It is also possible to set some parameters of the devices inside the home.
A
B
1
A
B
56
Smarther
User and installation manual
Advanced settings
1. Touch to set your home position
2. Enter the address and select it among the suggested ones
1. Touch to set the reference time zone.
2. Scroll the zone list
3. Touch to enable the automatic geolocation
3. Enter the zone
4. Touch to select
Or
Or
Location
Time zone
1
1
2
3
4
In this section it is possible to set the geographical position of your home, the reference time zone,
the energy source used for your home, the home type and its size.
3
2
5756
Smarther
User and installation manual
Energy source
Home type
1
1
1. Touch to select the energy source to use for your home
2. Select the energy source among:
– Electric boiler;
– Gas;
– Oil;
– Heating pump;
– Wood;
1. Select the type of home in which you live
2. Select the type among:
– Apartment;
– Single home;
2
2
5958
Smarther
User and installation manual
Delete the room
In this section, it is possible to delete a room.
Note: in order to remove a room, it will first be necessary to remove all the products installed inside the
same.
1. Touch to delete the room
2. Touch to confirm
1
2
60
Smarther
User and installation manual
Smarther settings
1. Touch to access the room where the Smarther has been inserted
2. Touch to access the device management page
A Display the Smarther available options
B Advanced
C Display the device serial number
D Display the firmware version
E Display the Wi-Fi signal
F Configure the Wi-Fi
1. Touch to manage the device
A Rename the product
B Move
C Delete
2
A
B
C
B
A
C
D
E
F
Manage the Smarther
1
1
6160
Smarther
User and installation manual
Rename the product
Move
1
1
2
2
3
1. Touch to rename the Smarther
2. Rename the Smarther with an identification name
3. Touch to confirm
1. Touch to move the Smarther into another room
2. Touch to select the room where you want to insert the Smarther
3. Touch to confirm
3
62
Smarther
User and installation manual
Delete
1
2
1. Touch to remove the Smarther from your home
2. Touch to confirm
6362
Smarther
User and installation manual
Advanced
1. Touch to enter the advanced parameters section
A Touch to select the heating algorithm
B Enable/disable the Smarther touch interface and the actual physical keys. If the function is disabled,
it will no longer be possible to interact with the Smarther physical interface but only to display the
information.
This function can be useful if you don’t want the settings to be modified from the Smarther, but only
from the App (e.g. children's bedroom or public establishment).
C Enable/disable the sound when touching the keys (both the screen keys and the physical keys).
D Enable/disable the vibration when touching the keys (both the screen keys and the physical keys).
E Adjust the lighting level when the display is in stand-by
1
C
B
A
E
D
64
Smarther
User and installation manual
1. Touch to select the algorithm to use based on the type of system:
2. Touch to select the advanced algorithm: the thermostat manages the temperature in
advanced mode controlling the opening of the valves, using some parameters which depend
on the type of system installed; comfort can thus be optimised and consumptions rationalised
in the best way.
3. Select the minimum time during which the thermostat will activate the system. This function
is useful to avoid pointless system activations. For example, if the controlled thermostat valve
has an opening time of 2 minutes, it is recommended that this parameter is set to 2 minutes.
1. Touch to select the algorithm to use based on the type of system:
2. Touch to select the hysteresis algorithm: the capacity of a structure to change its temperature
more or less slowly depending on the type of system and then according to the speed that the
installed devices use to heat/cool.
3. Select the hysteresis value:
0,1°C: factory setting suitable for high hysteresis (slow) heating and cooling systems.
1°C: setting suitable for low hysteresis (fast) heating and cooling systems.
Note: the menu setting for the selection of the advanced algorithm only appears a period of time after
the thermostat has been installed in the operating system.
This allows the thermostat to calculate the necessary parameters.
The system will normally need at least 15 days before completing these calculations.
Advanced heating algorithm
Heating algorithm Hysteresis threshold
1
1
2
2
3
3

6564
Smarther
User and installation manual
1. Touch to select the display lighting operating logic
Display brightness
2
3. Select the customised mode
4. Scroll to adjust the brightness in stand-by precisely
5. Touch to save
After 10 seconds, the display switches off, goes to stand-by mode and performs the selected
operating logic.
It switches off
Depending on the room brightness, it adjusts the display and, in case of
low brightness, adjusts it to minimum
Depending on the room brightness, it adjusts the display and, in case of
low brightness, turns it off (e.g. night)
It adjusts the display in a precise and user-configurable way (see below)
2. Select the mode among
3
4
5
1
66
Smarther
User and installation manual
3. Keep the upper Smarther pushbutton pressed until “AP” appears
3
A Opens the FAQ to help in the resolution of the problem
A
2
1. Touch to change the Wi-Fi network to which the Smarther is connected
2. Touch to start
Configure the network
In this section it is possible to set to which Wi-Fi network the Smarther is connected.
This function is useful for example when replacing the router, or when you want to connect the
Smarther to a network other than the one selected during the first installation.
1

6766
Smarther
User and installation manual
4. Press to continue
4
5. The Smarther shows the blue Wi-Fi symbol. Touch it to continue the configuration
5
A
A Indicates that you are trying to complete the association using an incorrect App
68
Smarther
User and installation manual
6. Touch to confirm the suggested home Wi-Fi network, otherwise touch (A) to select a different
one
7. Enter the home Wi-Fi password
8. Touch to continue
9. Select the Smarther
9
10. The Smarther is configured correctly; touch to end the procedure
A
6
7
8
10
6968
Smarther
User and installation manual
Valve settings
1. Touch to access the room where the Netatmo thermostat valve has been inserted
2. Touch to access the device management page
A Display the Netatmo thermostat valve available options
B Display the device serial number
C Display the firmware version
D Display the radio signal
E Display the battery level
F When pressed, the valve shows an identification number
G When pressed, the valve calibration procedure starts
A sound from the Valve (motor element movement) indicates that the calibration is being
performed.
B
A
C
D
E
F
G
1
2

7170
Smarther
User and installation manual
Move
1
2
1. Touch to move the Netatmo thermostat valve into another room
2. Touch to select the room where you want to insert the Netatmo thermostat valve
3. Touch to confirm
3
Delete
1
2
1. Touch to remove the Netatmo thermostat valve from your home
2. Touch to confirm
72
Smarther
User and installation manual
Parameters
Real time
1
1. Touch to access the section of the real temperature as measured by the Smarther
2. Select the real temperature measured
Depending on the position of the thermostat or the valve, it is possible to note differences
between the temperature displayed on the thermostat and the temperature displayed, for
example, on a thermometer; this function can be used to select the temperature displayed on the
thermostat that best represents the room temperature.
2
7372
Smarther
User and installation manual
1. Touch to access the Programs section
2. Touch to open the Programs menu
3. Touch to create a new program
4. Enter a name for the program
5. Touch to confirm
Schedules
During the association of your Smarther with your Smartphone, through the answers to some
questions regarding your living habits the tutorial has allowed you to create a program that
manages the temperature inside the home based on your needs.
The created program sets different temperatures based on time and week day; available preset
temperatures are:
It is possible to change the set points, or create new ones; see Set point
Now create a new program using the guided procedure.
ECO Temperature to set when you are not at home
COMFORT
Temperature to set when you are at home
COMFORT +1
Temperature to set when you are cold
NOTTE
Temperature to set at night
Create a new program
1
2
3
4
5
Note: in addition to creating a new program through the guided procedure, it is also possible to
customise an existing program (see "Example of creation of a new program from an existing one")
74
Smarther
User and installation manual
1. Touch to access the Programs section and create a new program* by duplication
2. Touch to select the program to copy
3. Select the program to copy
4. Touch to duplicate the program
5. Select to duplicate the program
6. Enter a description for the program
7. Touch to confirm
1
4
6
7
Via this function you can copy and if necessary modify an existing program
Now the program appears in the program list and can be activated, modified or deleted.
*Caution: each Smarther can manage up to 10 programs, 150 weekly temperature variations and 12
different temperatures
5
2
3
Duplicate a program

7574
Smarther
User and installation manual
1. Touch to access the Programs section
2. Touch to display the program options
3. Touch to rename the program
4. Rename the program
5. Touch to confirm
Rename a program
1
2
3
4
5
This function allows to rename a program.
76
Smarther
User and installation manual
Change a time interval
1
2
1. Touch to access the Programs section
2. Touch to select one of the available programs
3. Touch to select the time interval to modify
4. Touch to select the interval end date and time
5. Select the interval end hour
6. Select the interval end minutes
3
4
5
6
7776
Smarther
User and installation manual
7. Touch to confirm the selected hours and minutes
8. Touch to confirm the modification
7
8

78
Smarther
User and installation manual
Activate a program
After creating the programs you must activate the one you want
1. Touch to open the Schedules menu
2. Select the program to activate
3. Touch to close the Schedules menu
The program is now active
1
2
3
7978
Smarther
User and installation manual
Delete a program
1. Touch to access the Programs section
2. Touch to select on of the available programs
3. Select the program to delete
4. Touch to delete the program
5. Delete the program
6. Touch to confirm the program deletion
1
This function gives the possibility of definitively removing an existing program.
2
3
4
5
6
Note: active programs cannot be deleted.
80
Smarther
User and installation manual
Copy-paste the days
In this example, the Friday profile is also repeated on Saturday and Sunday
1. Touch to enter the Programs section
2. Touch to display the available functions for the program
3. Touch to select the function that will allow you to copy-paste the days
4. Select the day with the profile to copy
5. Select the day or the days on which you want to repeat the profile
6. Touch to confirm
1
4
2
3
This function gives the possibility of copying the profile created for a certain day to one or more
days of the week.
5
6
8180
Smarther
User and installation manual
Add a set point
1. Touch to enter the Programs section
2. Enter the day in which you want to insert the custom set point
3. Touch to enter the customised set point
4. Touch to add a set point
5. Customise the name
6. Touch to select the set point temperature
7. Scroll to select the temperature
8. Touch to confirm
1
2
This function gives the possibility of adding set points, customising the temperature and name
based on personal needs. The set point is only added to the current program.
It is possible to add or delete custom set points, for a better management of the programs on your
Smarther, in addition to changing the default set point temperature.
6
5
7
8
3
4
Set point
82
Smarther
User and installation manual
9. Touch to create the customised set point
10. Touch to confirm
9
Change a set point
1. Touch to enter the Programs section
2. Touch to change the set point temperature
3. Select the set point for which you want to change the temperature
1
This function allows to change the temperature of an existing set point.
E.g. 2°C increase of the comfort set point, which therefore goes from 19°C to 21°C
3
2
10
8382
Smarther
User and installation manual
4. Touch to select the set point temperature
5. Scroll to select the desired temperature
6. Touch to confirm
7. Touch to confirm the modified set point
4
5
6
7
8. Touch to confirm the modification of the set point
8
84
Smarther
User and installation manual
Delete a set point
1. Touch to enter the Programs section
2. Touch to display all the available set points for the selected program
3. Select the set point to delete
4. Touch to permanently delete the set point
5. Touch to confirm
1
This function allows to delete the created set point.
5
4
2
3
Note: set points cannot be changed by default (Comfort / Comfort + / Eco / Night).
Note: only set points not appearing in a program can be deleted.
Set points appearing in a program can only be deleted after being deleted from the programs for the
individual days.
8584
Smarther
User and installation manual
Example of creation of a new program from an existing one
Note: Smarter updates its own internal time once a day using the server NTP.
This procedure requires that at the moment of the request Smarter is powered and that the Internet
connection is working.
In case of lack of power supply, the internal Smarter own time is preserved for one day using the internal
battery. After this, and as soon as available Smarther will recover the clock data from the NTP server.
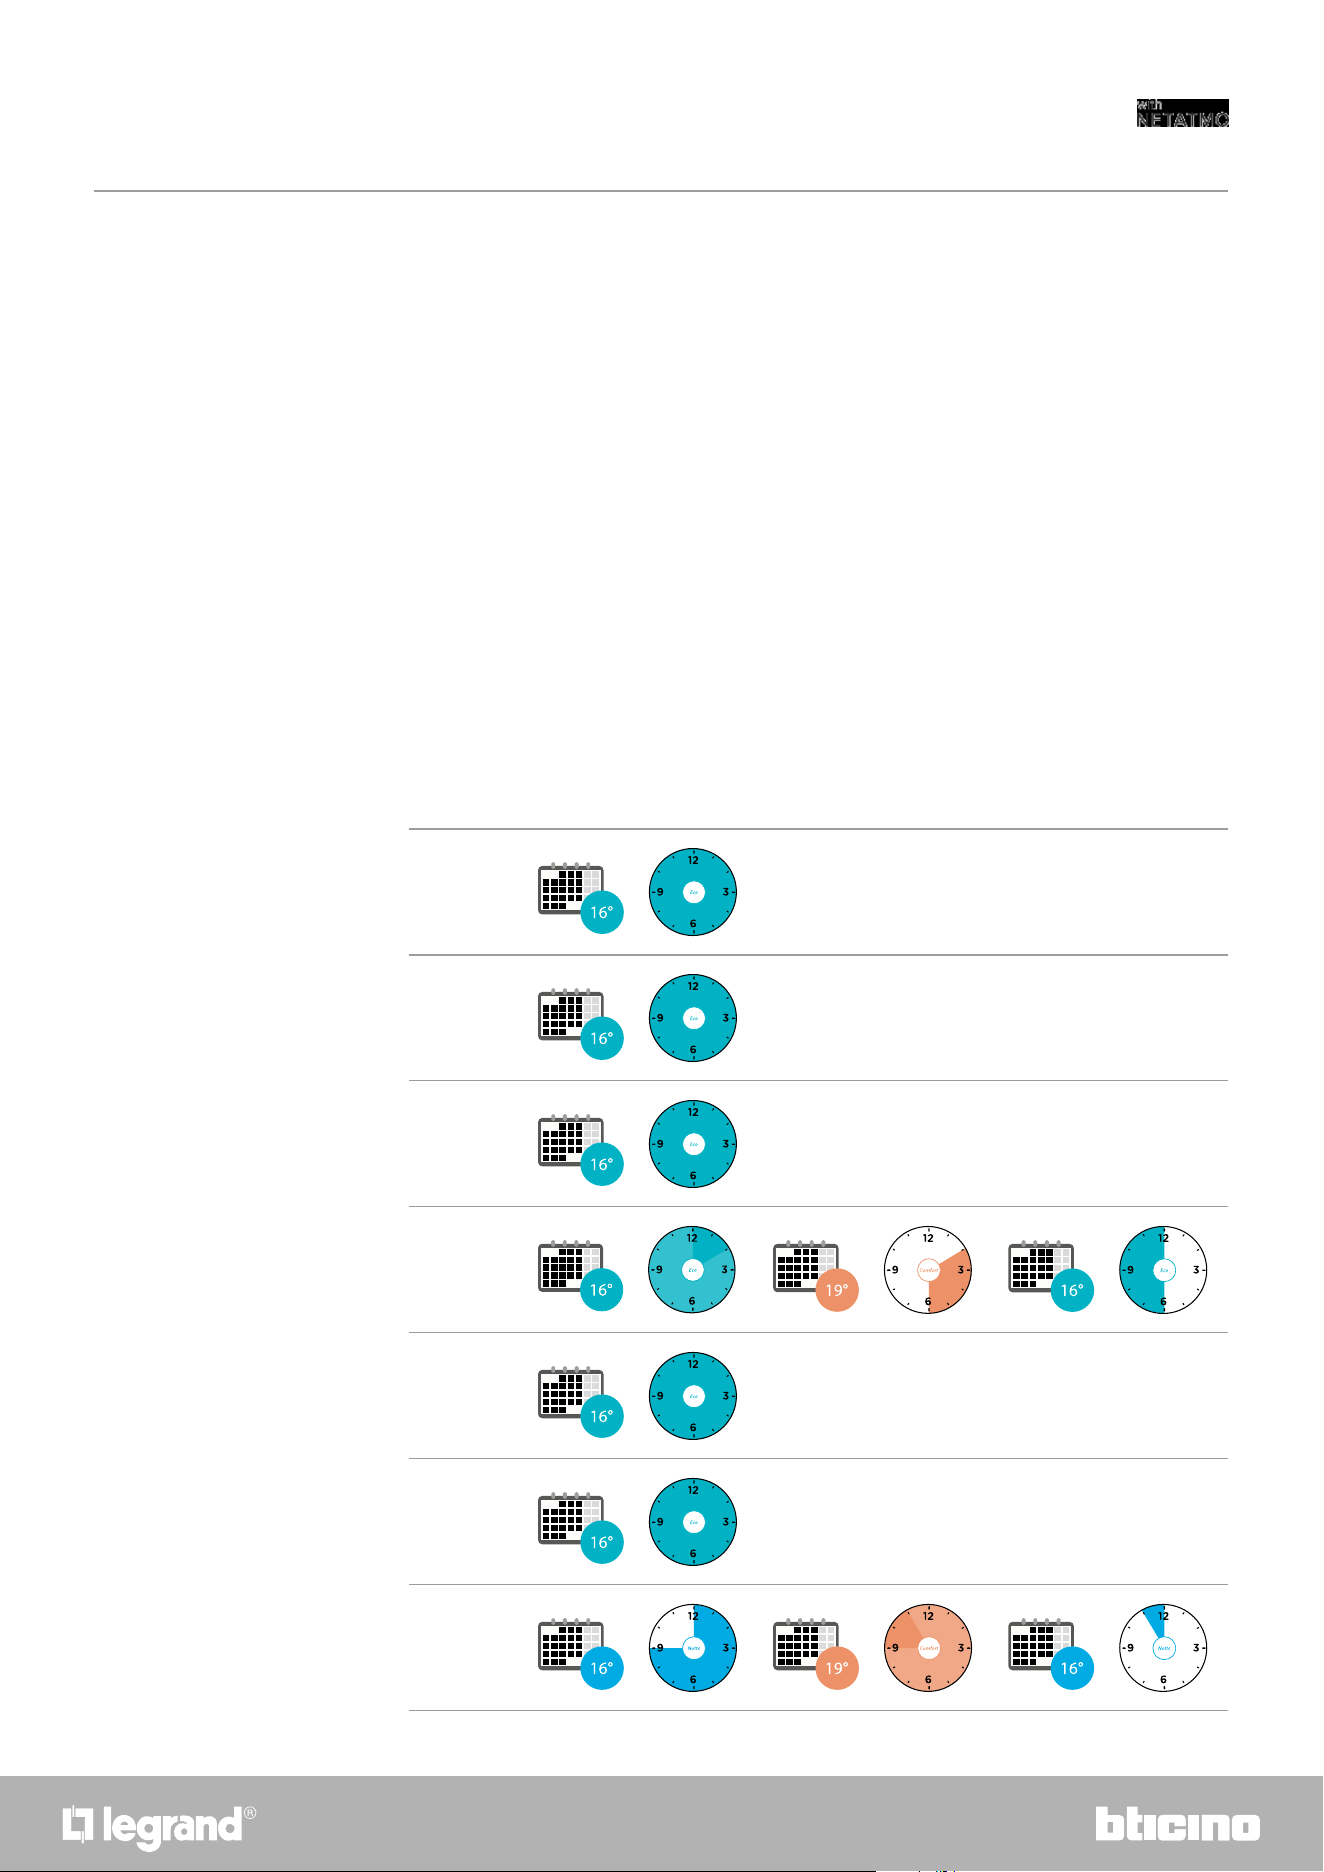
1. from 00:00 on Sunday to 14:00 on Wednesday the temperature must be set to the “eco”
setpoint (16°C)
2. from 14:00 on Wednesday to 18:00 on Wednesday the temperature must be set to the
“Comfort” setpoint (19°C)
3. from 18:00 on Wednesday to 23:45 on Friday the temperature must be set to the “eco” setpoint
(16°C)
4. Saturday follows the same temperature of the existing program
It is possible to change a program defining the various parameters which make up the program
(temperature levels, time intervals and days of application) specifically and in a totally free way.
Let’s now see how we can change an existing program so that it includes the following settings:
– away from home for one week;
– change the profile on Wednesday, the day when the maid will visit;
– guarantee optimum temperature upon return.
Sunday
00:00 - 24:00
Monday
00:00 - 24:00
Tuesday
00:00 - 24:00
Wednesday
00:00 - 14:00
14:00 - 18:00
18:00 - 24:00
Thursday
00:00 - 24:00
Friday
00:00 - 24:00
Saturday
00:00 - 09:00 09:00 - 23:00 23:00 - 24:00
86
Smarther
User and installation manual
1
2
4
3
6
1. Touch to access the Programs section
2. Touch to select the program to change
3. Select the program to change
4. Touch the day of the week
5. Touch
to enter the start and end times for the first interval*
6. Touch to select the interval start time
5
1. From 00:00 on Sunday to 14:00 on Wednesday set the temperature to the “Eco” setpoint (16°C)
In order to create a new program meeting the previously described conditions, copy the existing
program and then customise it:
*Note: it is possible to enter up to 8 intervals in a single program
8786
Smarther
User and installation manual
7. Select the interval start hour
8. Select the interval start minutes
9. Touch to confirm
10. Touch to select the interval end date and time
11. Select the interval end day
12. Select the interval end hour and minutes and confirm
13. Select the temperature set point to use for the days and times just created
10
7
9
8
14. Touch to confirm
12
11
13
14
88
Smarther
User and installation manual
15. Select the day of the week when the maid will visit
16. Touch
to enter the start and end times for the second interval
17. Touch to select the interval start time
18. Select the interval start hour and minutes and confirm
19. Touch to select the interval end time
20. Select the interval end hour and minutes and confirm
16
15
17
18 20
19
2. From 14:00 on Wednesday to 18:00 on Wednesday set the temperature to the “Comfort”
setpoint (19°C)
8988
Smarther
User and installation manual
21. Select the temperature set point to use for the days and times just created
22. Touch to confirm
23. Touch
to enter the start and end times for the third interval
24. Touch to select the interval start time
25. Select the interval start hour and minutes and confirm
21
25
22
24
23
3. From 18:00 on Wednesday to 23:45 on Friday set the temperature to the “ECO” setpoint (16°C)
90
Smarther
User and installation manual
26. Touch to select the interval end date and time
27. Select the interval end day
28. Select the interval end hour and minutes and confirm
29. Select the temperature set point to use for the days and times just created
30. Touch to confirm
31. Touch to display the created week
28
29
31
27
26
30
9190
Smarther
User and installation manual
In this section it is possible to set the default time during which the manual temperature setting
function will remain active. It is also possible to activate the self-adaptive forecast of the time
required for reaching a certain temperature at a certain time.
Thermal comfort
1
2
1. Touch to open the Settings menu
2. Touch to access the Thermal comfort page
3. Scroll to set the default time during which the temperature manual setting function will
remain active.
4. Scroll to set the default time for the duration of the boost function.
5. Touch to access the function that automatically calculates in how long the programmed
temperature will be reached..
3
4
5
6. Touch to activate the function; by default, the system is started 30’ before the set time. The
correct value will then be calculated based on the environmental parameters.
The final result is that the set temperature will be reached exactly at the programmed time.
7. Touch to confirm
6
7

92
Smarther
User and installation manual
1. Touch to access the graphic page
A Day
B Time
C Set-point
D Select room and temperature/humidity
1
Chart
In this section it is possible to display the Smarther and Netatmo thermostat valve switching on
and switching off charts.
A B DC
9392
Smarther
User and installation manual
Manage my guests
In this section you can display the users who can interact with your Smarther, invite new ones or
if necessary delete them (the user will not be deleted, just the possibility of interacting with this
Smarther).
Note: if Home + Control includes several connected devices, the invited users will have the possibility of
interacting with all of them.
1. Touch to open the Settings menu
2. Touch to access the guest management page
A Delete a user
B List of users
C Invite a user
1
2
C
B
A
94
Smarther
User and installation manual
Delete a user
Invite a user
1. Touch to delete the user
2. Touch to confirm. The user can no longer control the Smarther.
1. Touch to invite one or more people to control your home devices
2. Touch to add the contact using the address book of your smartphone, or enter the email
address
Once the guests accept the invitation, register and access the App, they can be found in the list of
enabled users.
Note: the contact saved in the address book must contain the email address
3. Touch to send the invitation
1
1
2
2
3
9594
Smarther
User and installation manual
Add a product to this home
In this section it is possible to add connected devices.
This procedure is necessary for both adding a new device and replacing and existing one
1. Touch to open the Settings menu
2. Touch to add a product into the home
3. Touch to select the brand of the product to install
4. Touch to select the Smarther
5. Touch to start, see Associate your Smarther
Note: the procedure below is only valid for adding or replacing a Smarther.
In order to add or replace other connected devices, refer to the specific manual.
1
2
4
5
3
96
Smarther
User and installation manual
Note: if the valves are not detected, remove and reinsert the batteries.
1. Touch to open the Settings menu
2. Touch to add a product into the home
3. Touch to select the brand of the product to install
4. Touch to select the Netatmo thermostat valves associated with the Smarther
5. Insert the batteries in the Netatmo thermostat valve and touch to continue
6. Touch to confirm that all the Netatmo thermostat valves of the home have been displayed
1
2
3
Add valves to the Smarther thermostat
In this section it is possible to add Netatmo thermostat valves installed in the home in
combination with the Smarther thermostat.
6
5
4
9796
Smarther
User and installation manual
7
7. Touch to install the Netatmo thermostat valve
8. Select the room where the Netatmo thermostat valve is located
9. Give the Netatmo thermostat valve a custom name and touch to continue
10. Install the valve on the radiator following the Netatmo manual and touch to confirm
11. Touch to end the installation of the Netatmo thermostat valve
8
9
10
11
98
Smarther
User and installation manual
A A warning message appears if the calibration fails. The calibration can be performed in the valve
settings section, or wait a few minutes for the automatic calibration.
B Measured temperature
C Set temperature
D Set the Boost function
E Set the Temperature
F It opens the Programs section where it is possible to manage the schedules for the whole home
It is possible to change some parameters of the Netatmo Valve in the Netatmo Valve settings
section
A
B
C
D
E
F
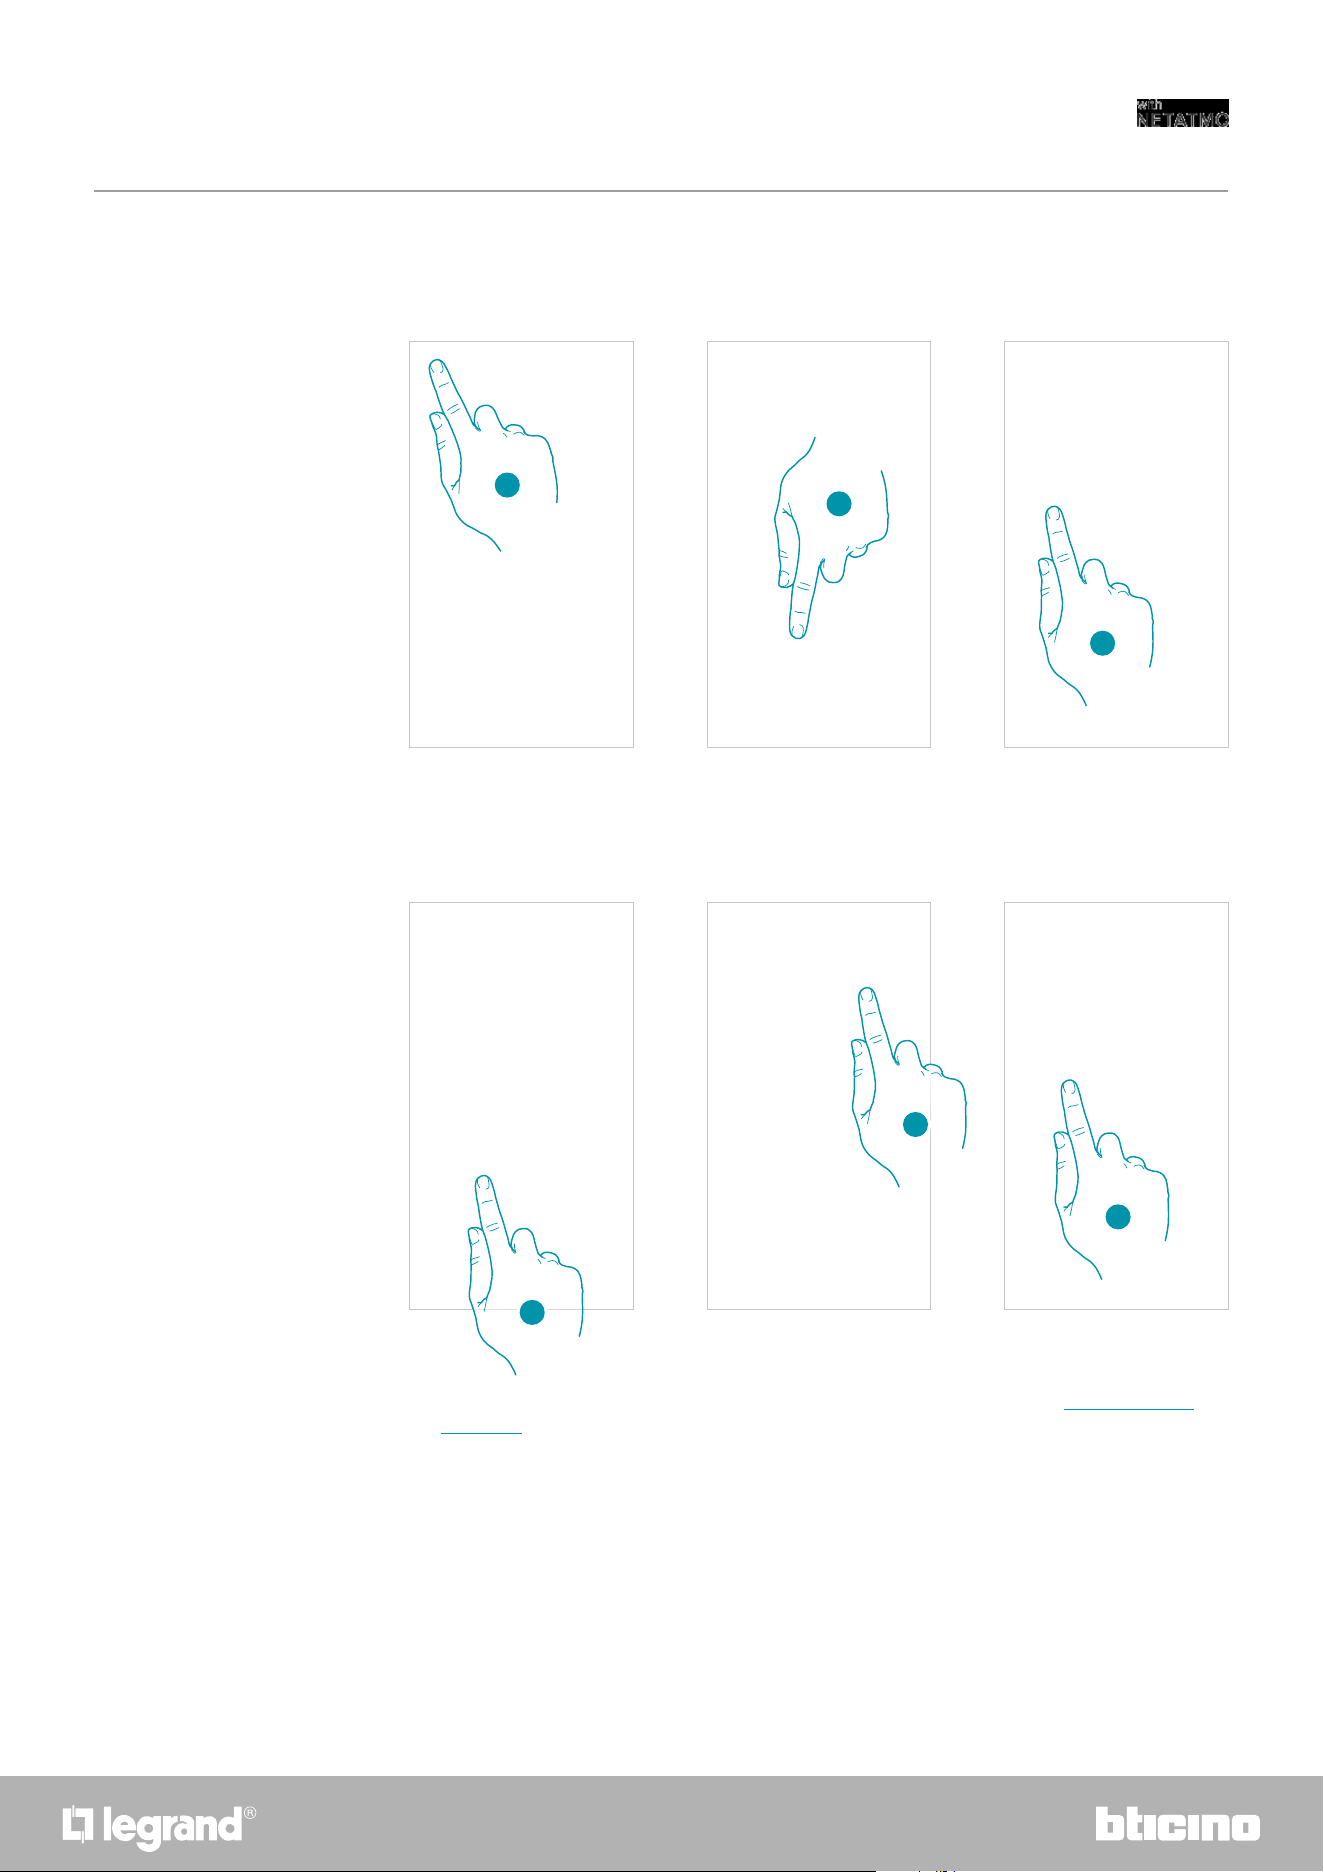
9998
Smarther
User and installation manual
Install a new home
This function allows to install a new home associated with your account (e.g. Mountain home)
After installing a new home, it will be possible to select which home to display and control
1. Touch to open the Settings menu
2. Touch to install a new home
3. Touch to select the brand of the product to install
4. Touch to select the Smarther and complete the procedure described in the Associate your
Smarther procedure
5. Touch to display the homes available
6. Touch to select the home to display and control
1
2
5
6
4
3

100
Smarther
User and installation manual
1. Touch to enter the quick selections section
2. Touch to start the configuration of the quick selections
3. Select the type of quick selection to add to your smartphone Home page
4. Touch to add the quick selection to the Home page
5. Touch to activate the quick selection
A A notification confirms that the quick selection has been activated
1
5
Quick selections
This section can be used to add to your smartphone Home page some preset quick selections to
control your Smarther
3
4
A
2
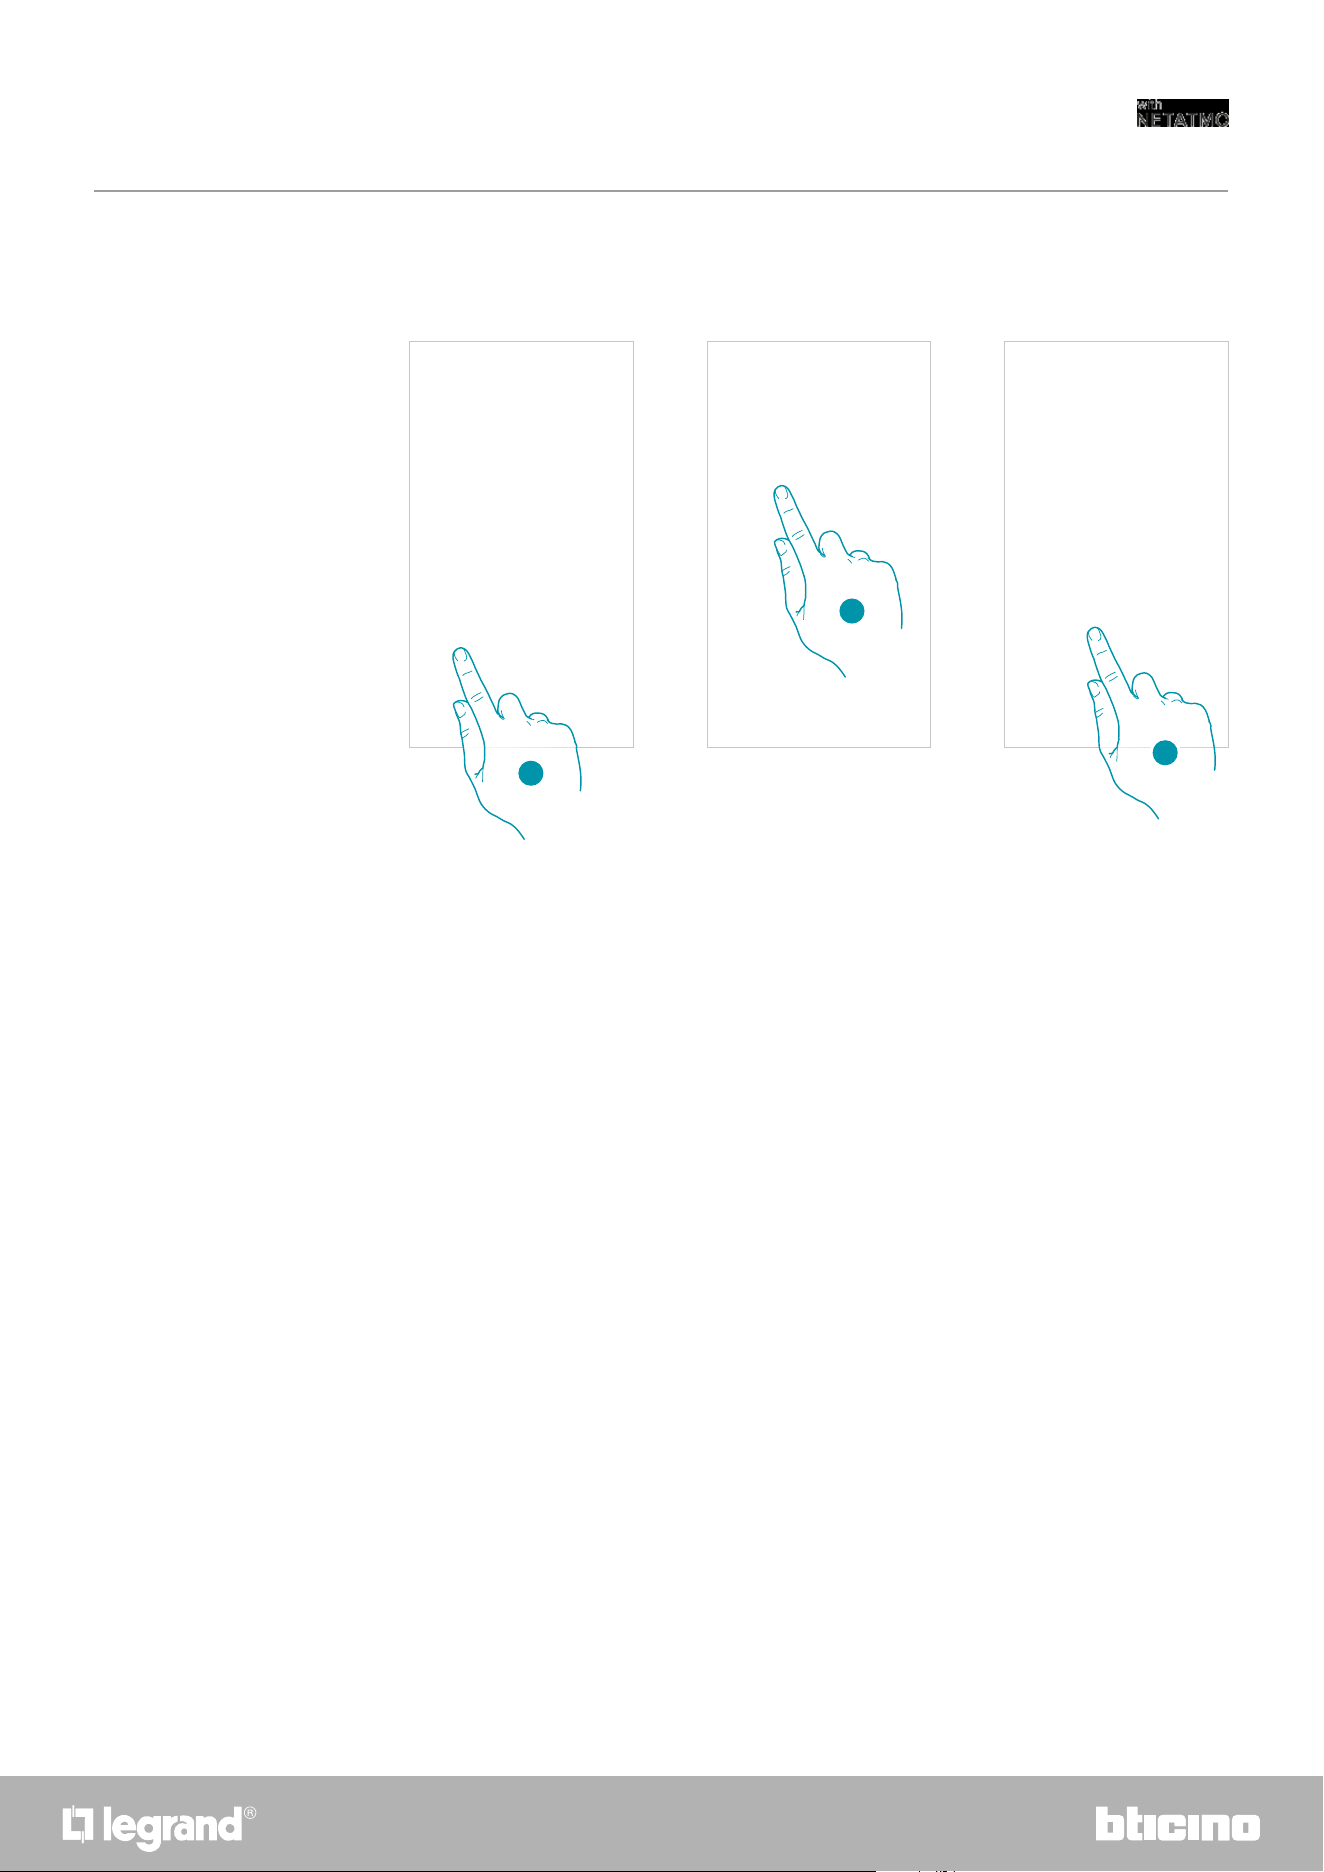
101100
Smarther
User and installation manual
Help
In this section it is possible to display FAQ (and their answers) regarding the use of the Home +
Control app.
1. Touch to enter FAQ section
2. Touch to select the product for which you need help
3. Select the topic on which you require clarifications
1
2
3
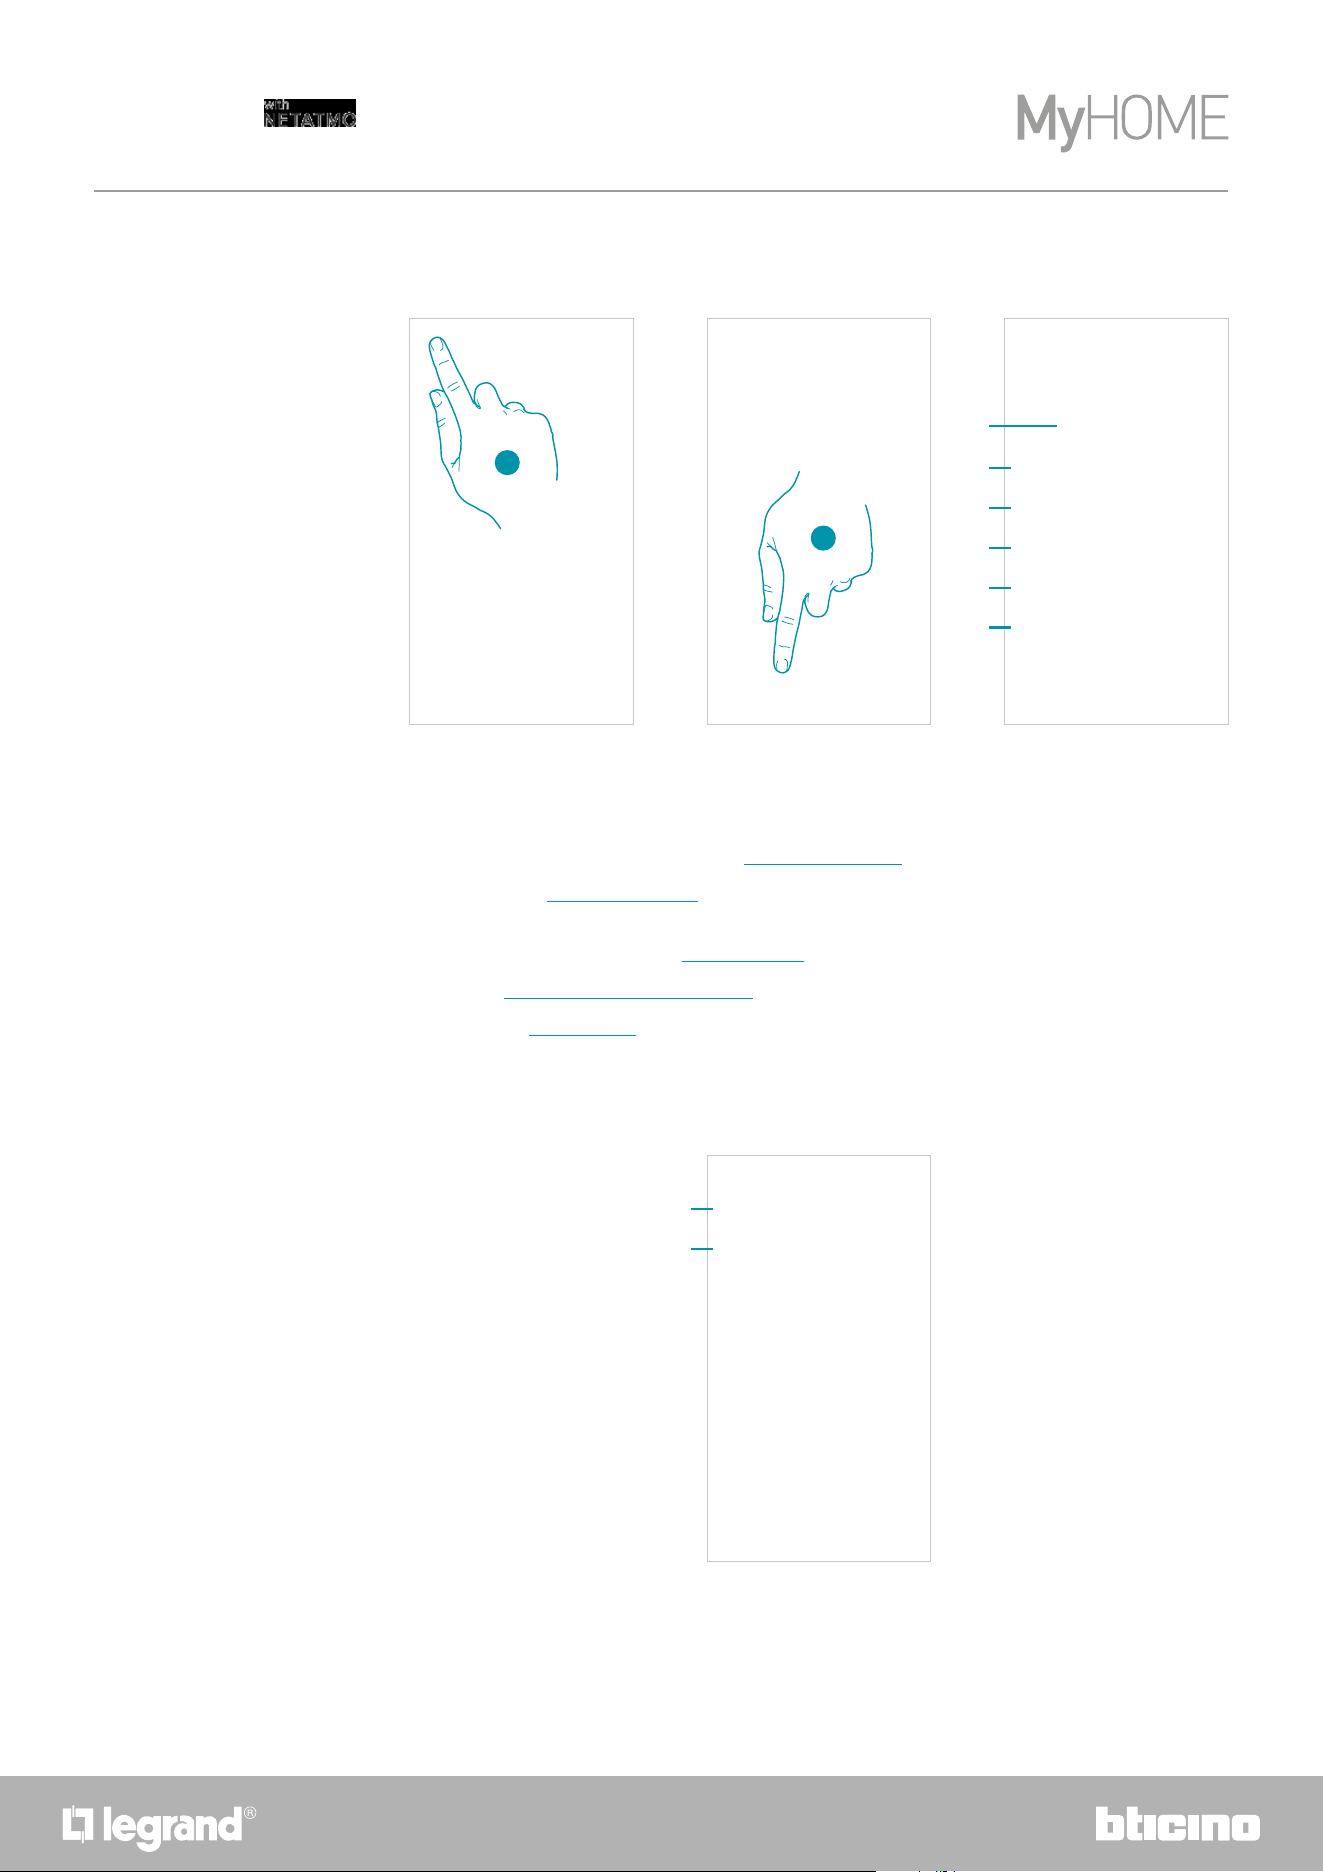
102
Smarther
User and installation manual
My account
1. Touch to open the Settings menu
2. Touch to enter the account section
1
2
A
B
A Current email/account
B Nation of residence
A Account Login/Email address
B Display/modify your Legrand account registration details
C Modify some safety parameters of your account, such as password and disconnection from all
devices
D Manage your communication authorisations and other aspects of your personal details
E Display contract terms and conditions regarding the Legrand apps that you are using
F Manage le partner apps to which your account is connected (e.g. Google Home etc.)
B
A
C
D
E
F
In this section it is possible to view and display some functions regarding your account.
Personal data
This section may be used to change some data of the account currently managing the device, or to
replace it with another registered Legrand account.
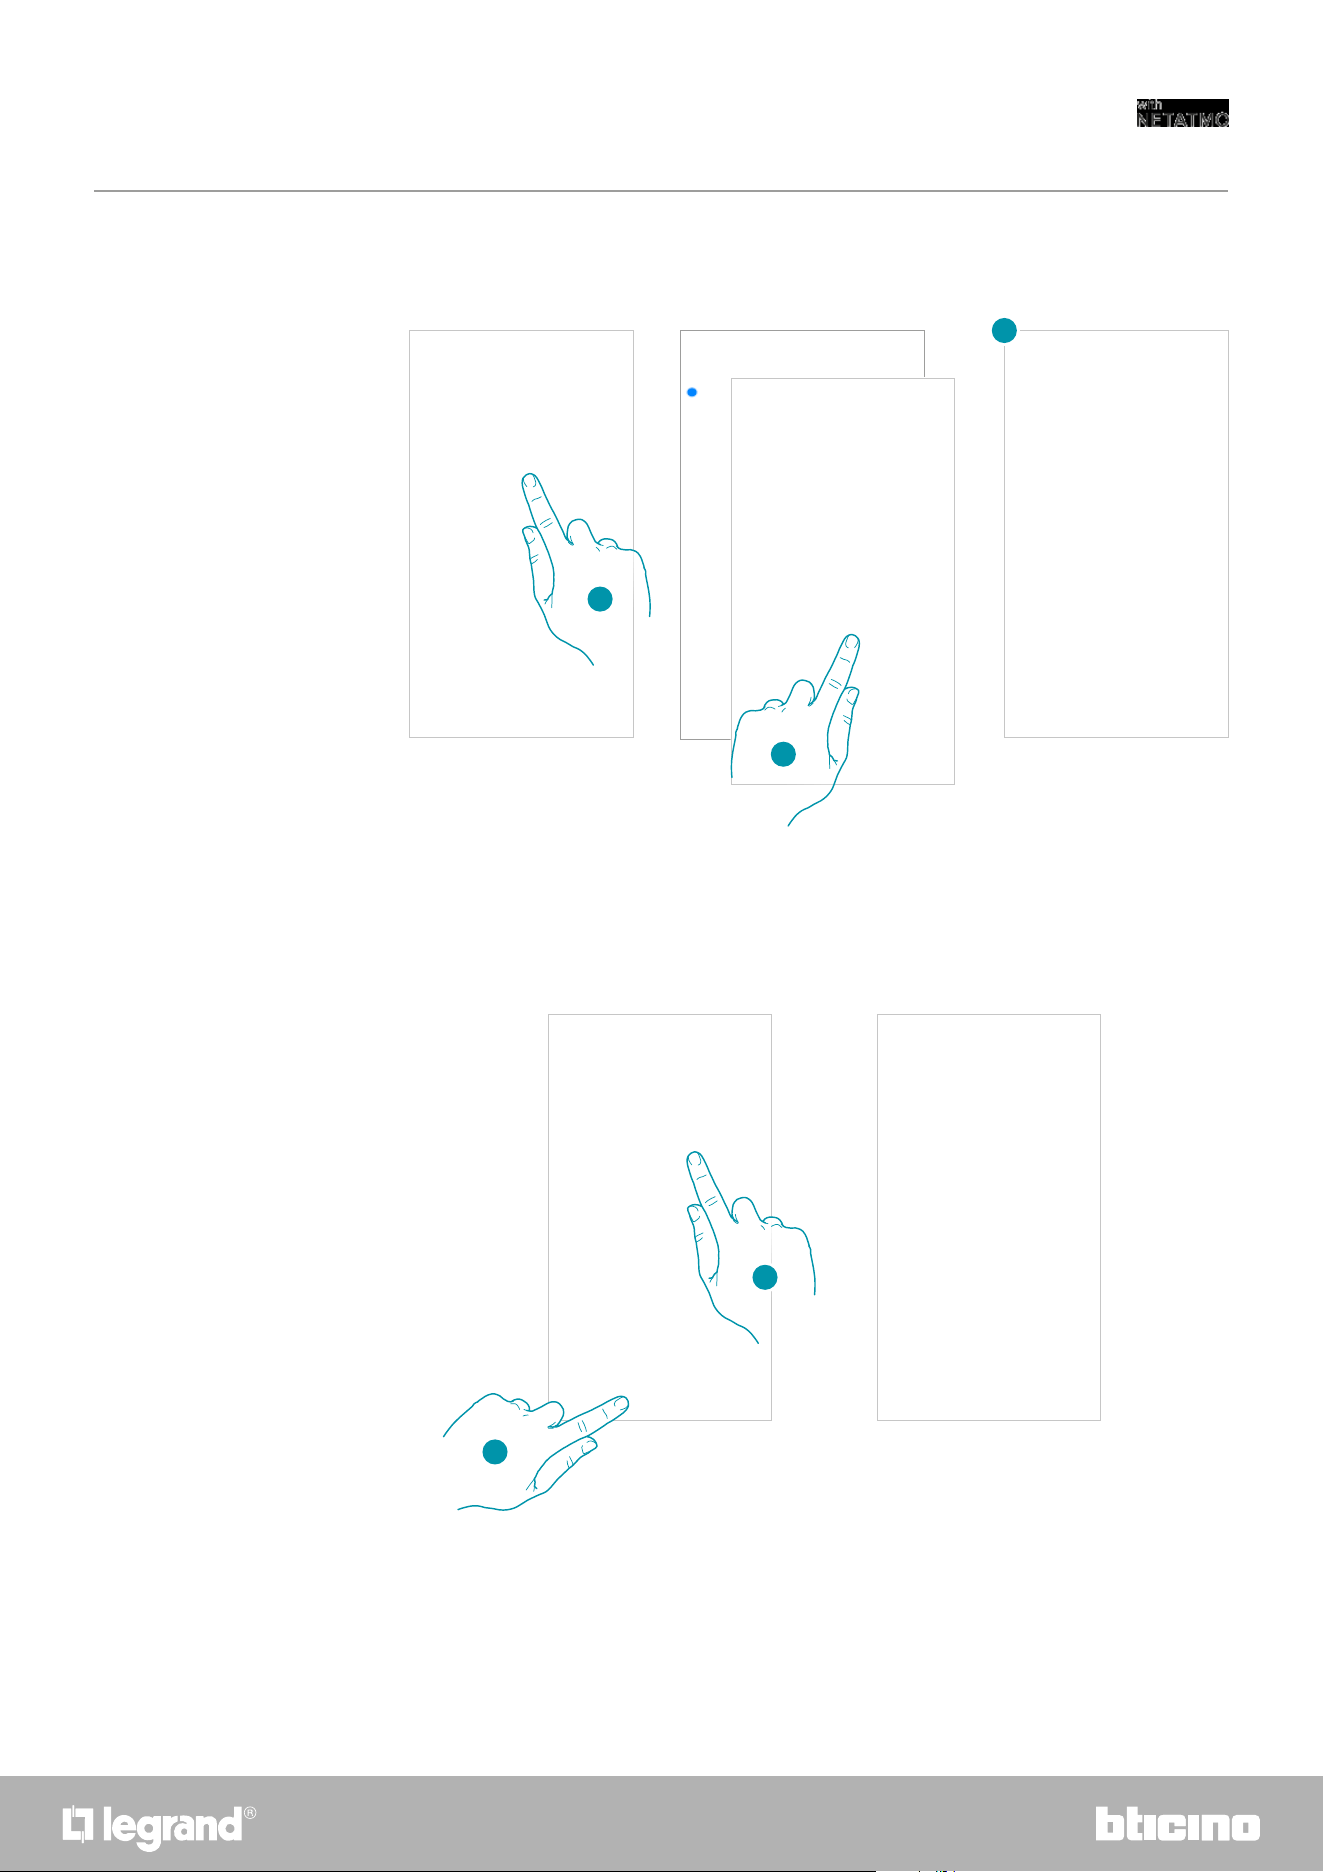
103102
Smarther
User and installation manual
Emain/account (validate your email/account)
Email/account (change of the device management email/account)
1. Touch to receive the validation link email
2. Touch the link in the email received from the system
3. The screen confirming the validation of your email address appears
1. Enter the login details (email and password) of the new registered Legrand account to be used
to manage the device
2. Touch to confirm
1
1
To receive communications from the Legrand group it is necessary to validate the email address
To change the access email address
3
2
2
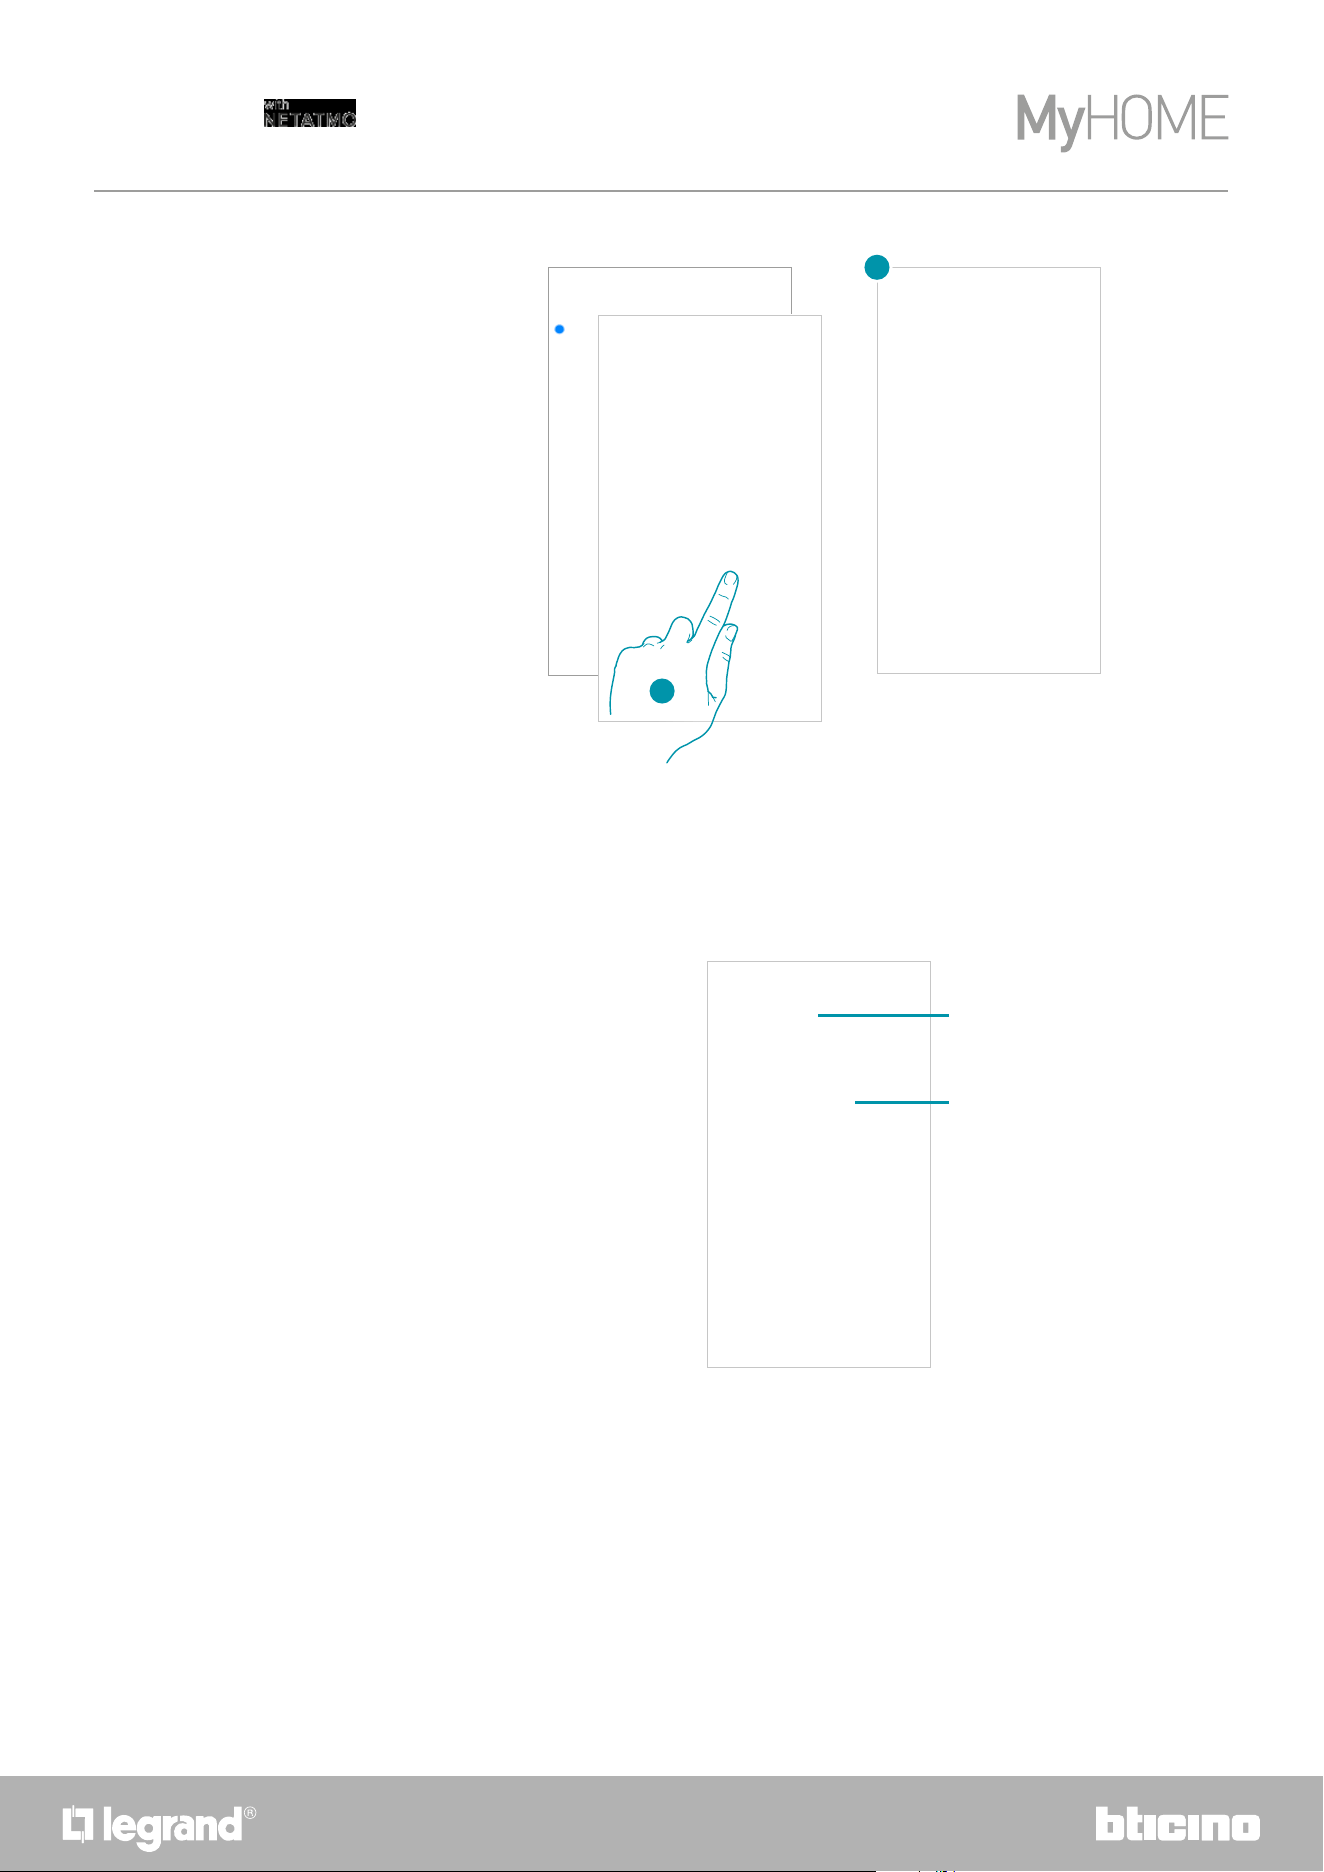
104
Smarther
User and installation manual
3. Touch the link in the email received from the system
4. The screen confirming the validation of the email address appears
3
4
Safety
This section can be used to change the password of your account and to disconnect it from all devices.
The disconnection of your account from all devices is useful in case one of your devices is lost or stolen.
A Complete the password change procedure
B Disconnect from all devices
A
B
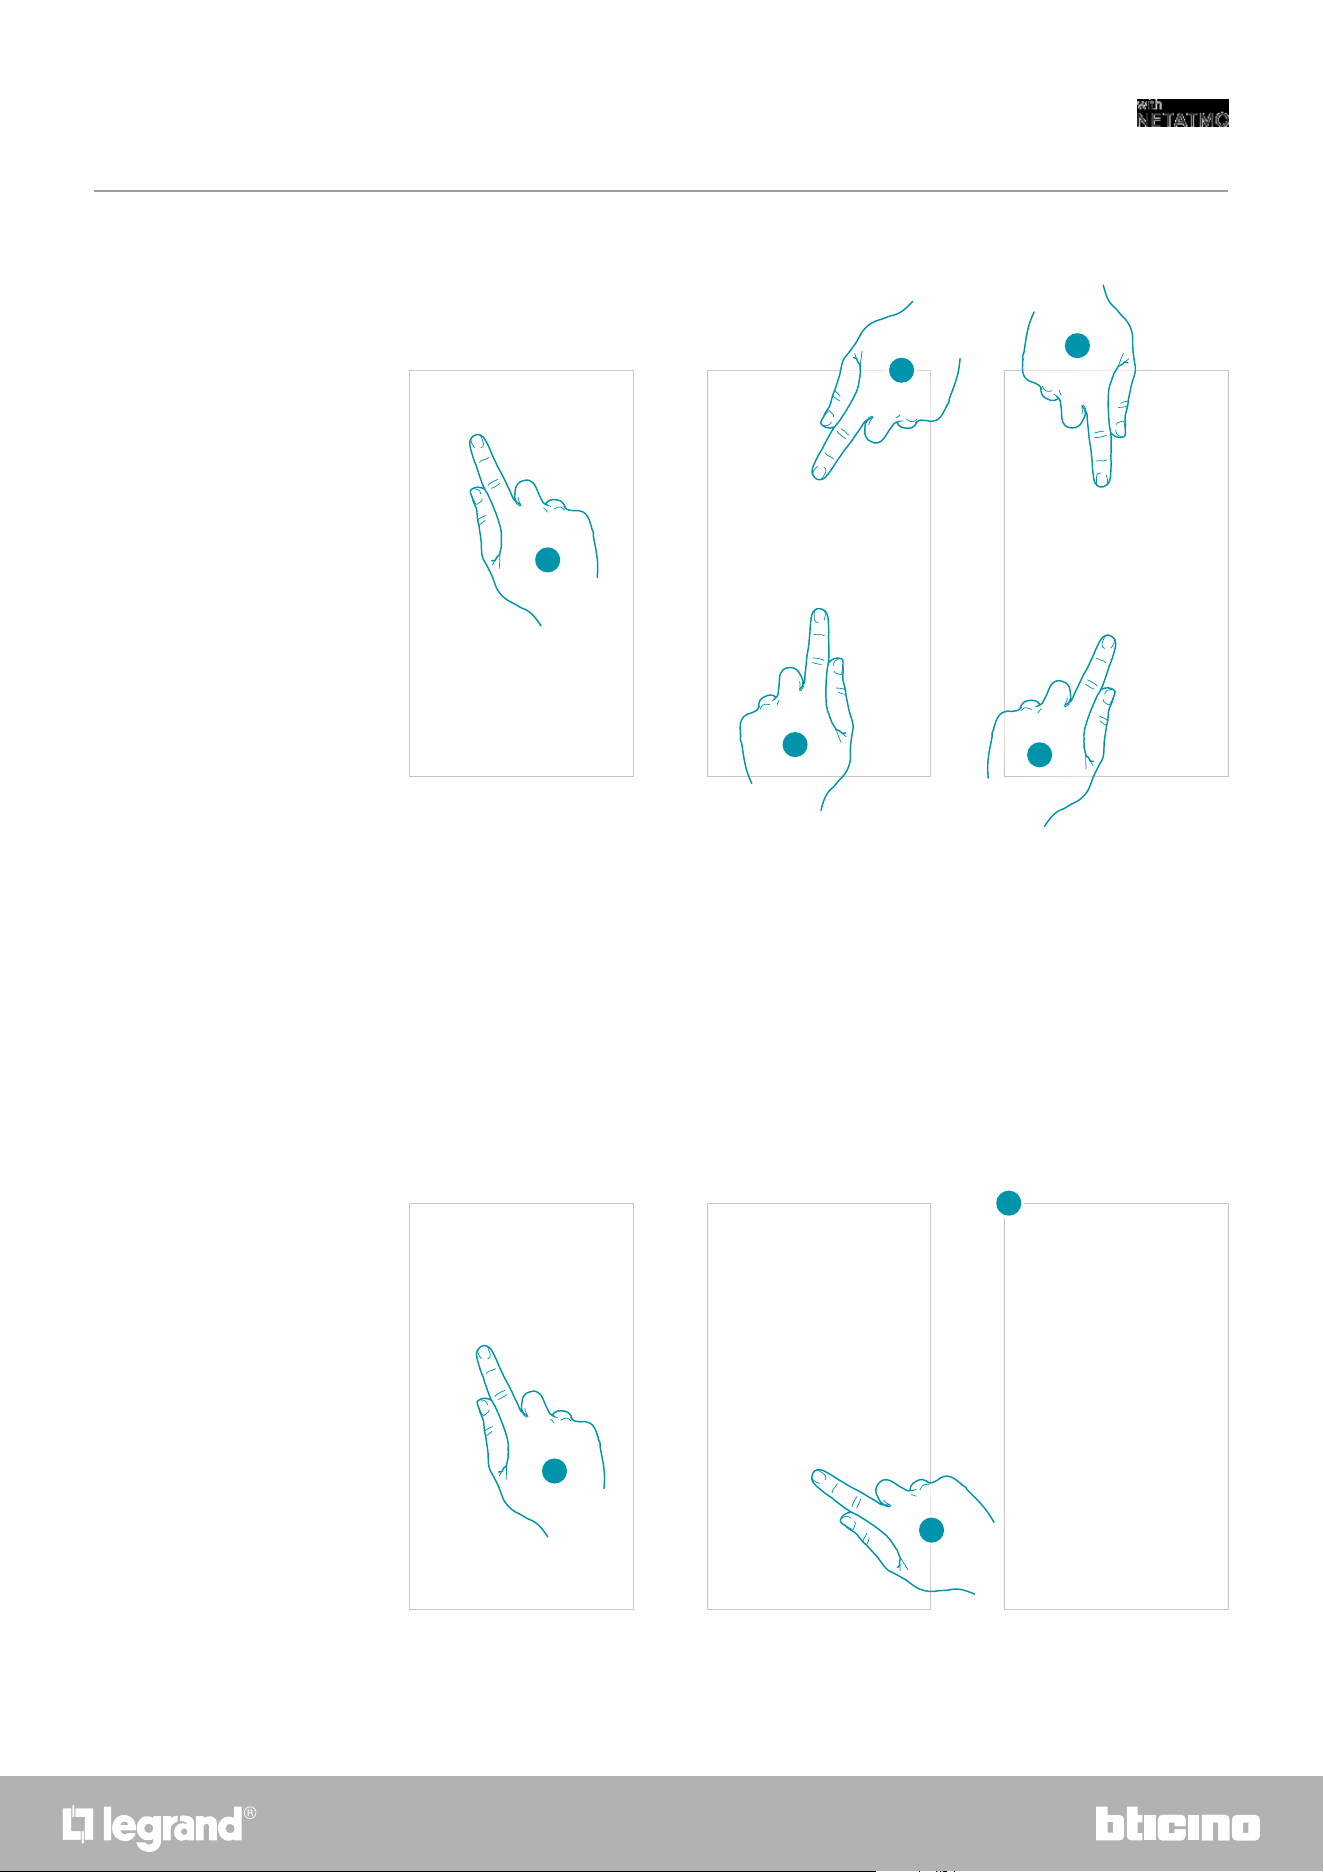
105104
Smarther
User and installation manual
3
2
5
4
1
Modify password
1. Touch to modify the password
2. Enter the current password
3. Touch to continue.
4. Enter the new password, which must meet the following requirements:
– at least 8 characters;
– at least one lower case letter (e.g. a);
– at least one upper case letter (e.g. A);
– at least one number (e.g. 1);
– at least one special character (e.g. $);
5. Touch to confirm
Disconnect from all devices
1. Touch to activate the procedure
2. Touch to disconnect your account from all the devices and all the third-party applications.
3. The system automatically logs out from the application and the Home Page appears.
2
1
2
3
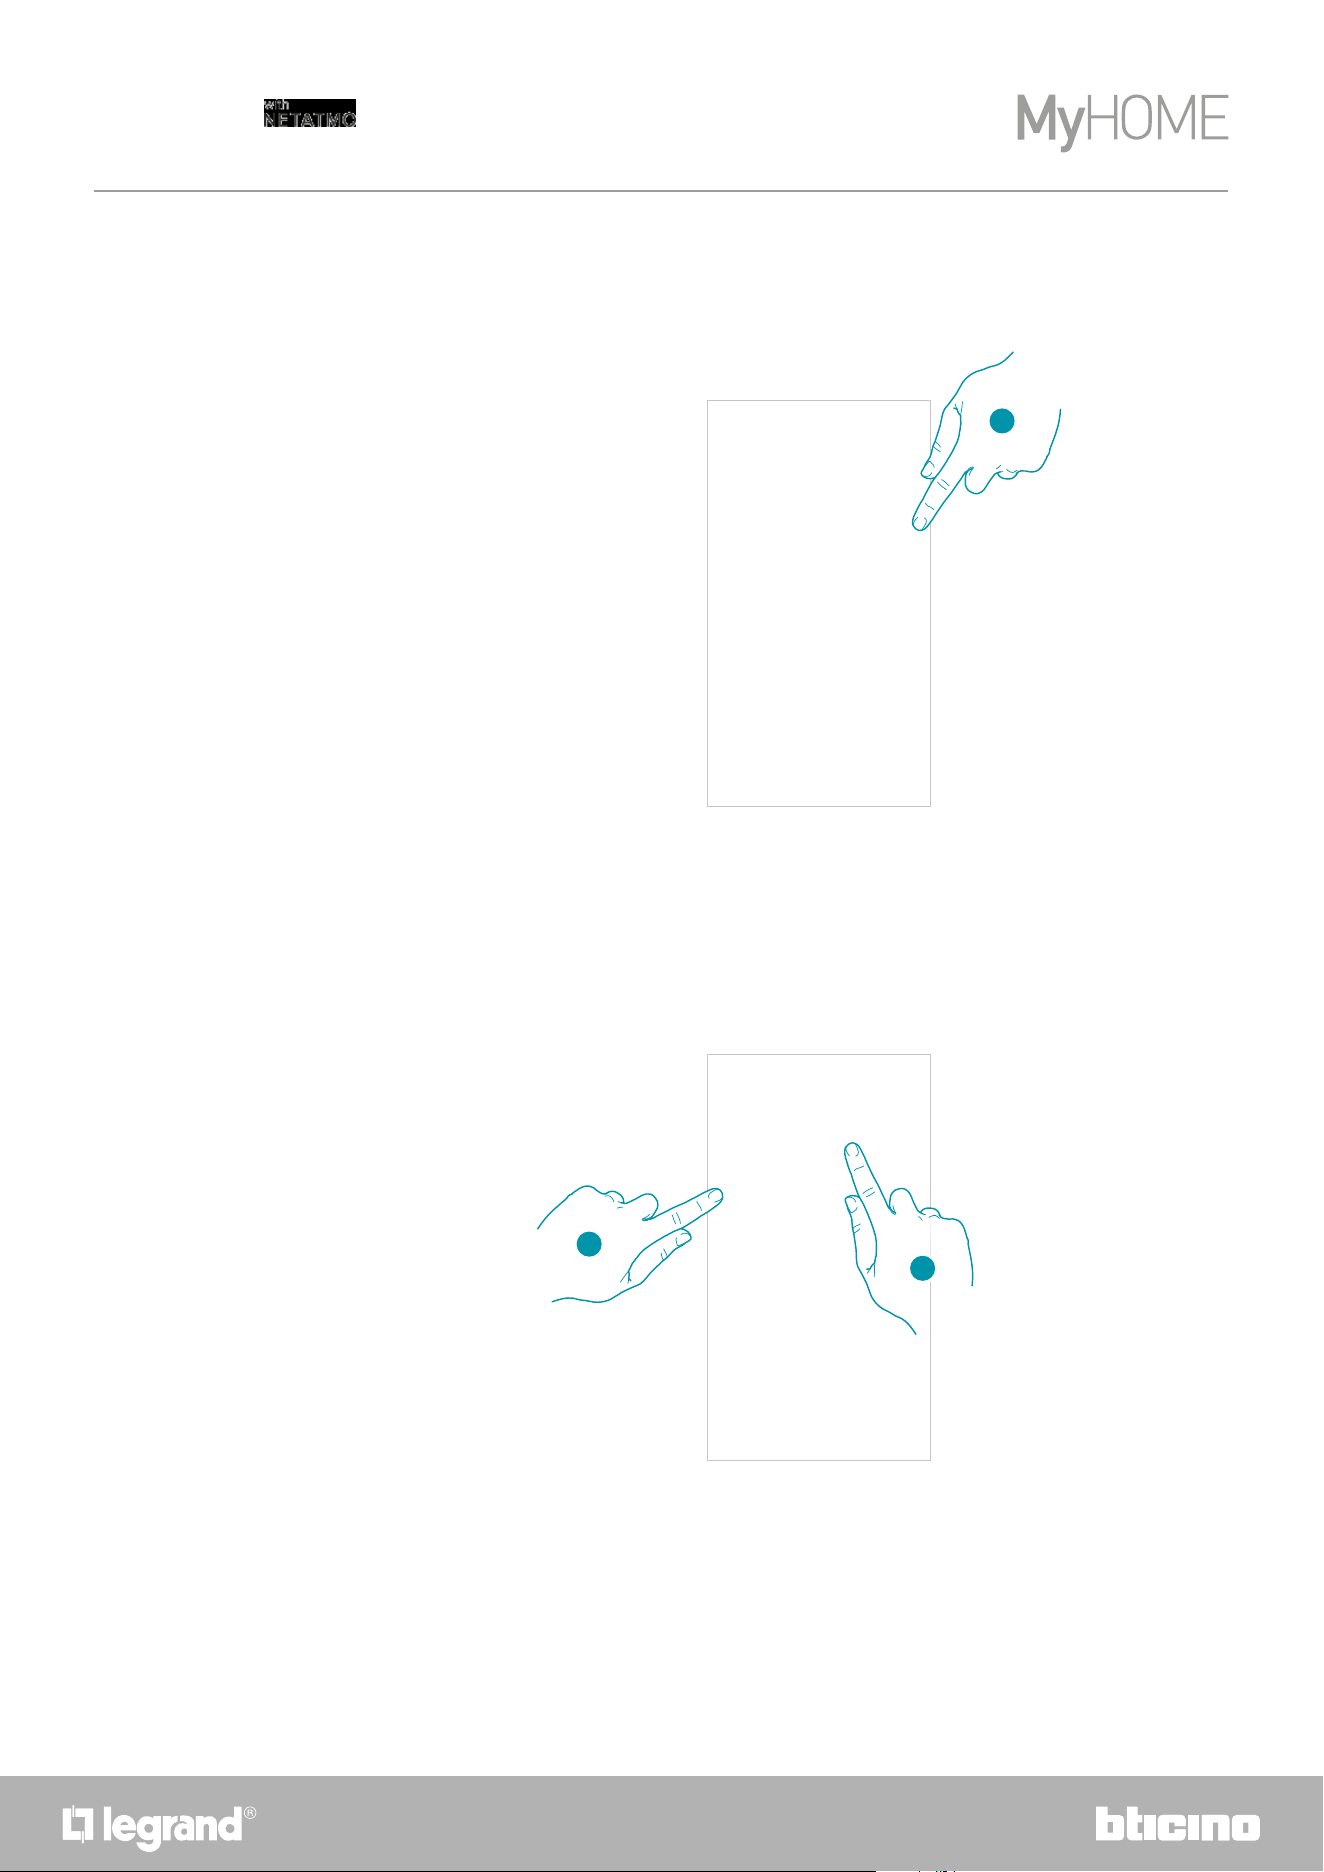
106
Smarther
User and installation manual
1
Authorisation
This section can be used to enable the reception of communications from Legrand and the sharing
of the App usage data.
1. Touch to enable data sharing.
2
1
Legal information
Using this section you will be able to view terms and conditions of use and privacy information for
each App to which your Legrand account is associated
1. Touch to display Terms and Conditions
2. Touch to view Privacy information
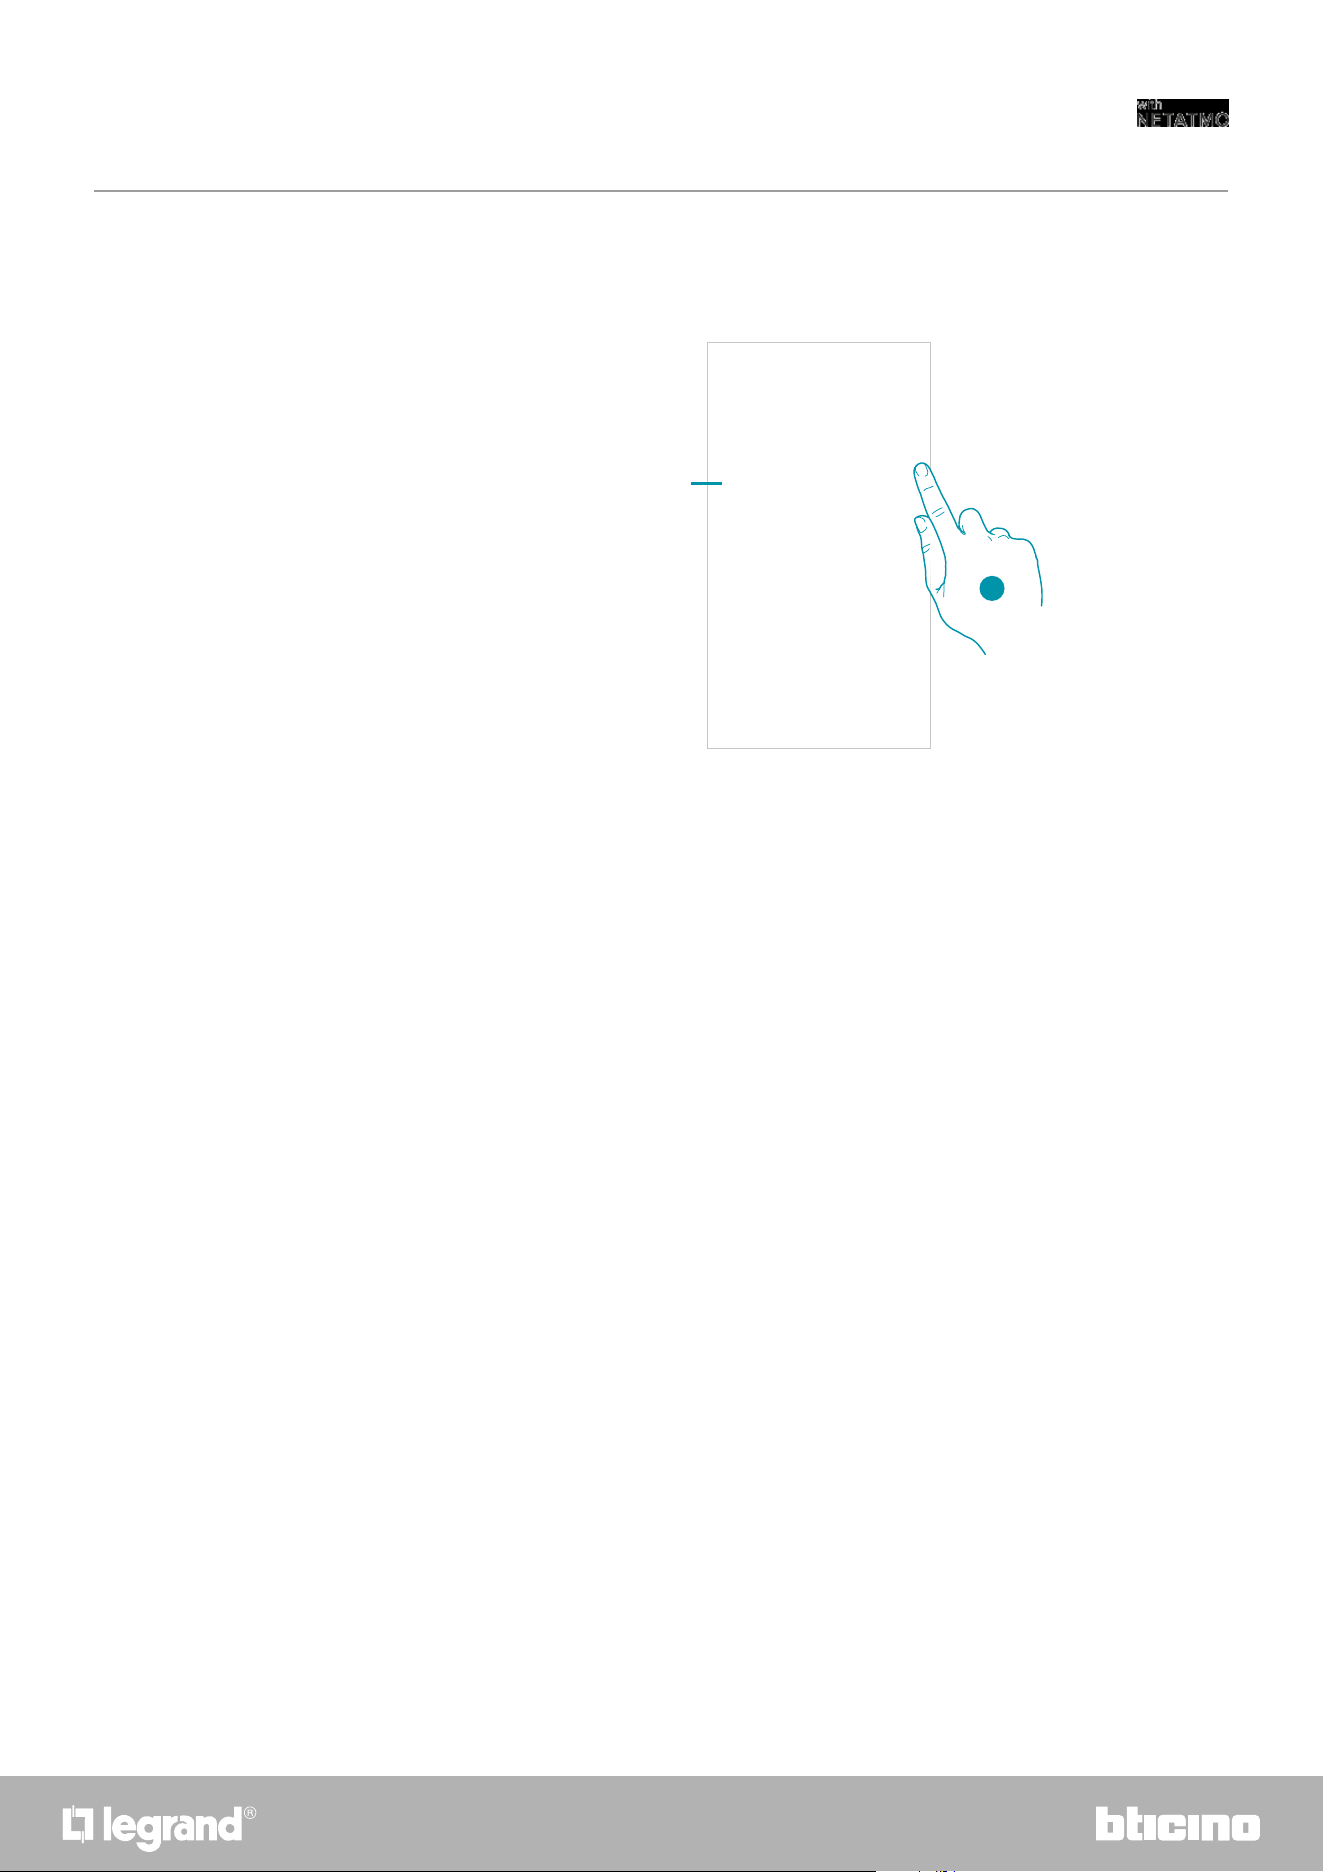
107106
Smarther
User and installation manual
A
Partner apps
In this section you can display all the third parties to whom you granted rights to operate on your
connected devices. (E.g.: HOMEKIT, Google home etc.)
1. Touch to remove the access of sites or Apps to some of your account data
A Display more information regarding the access to your system by partner Apps.
1
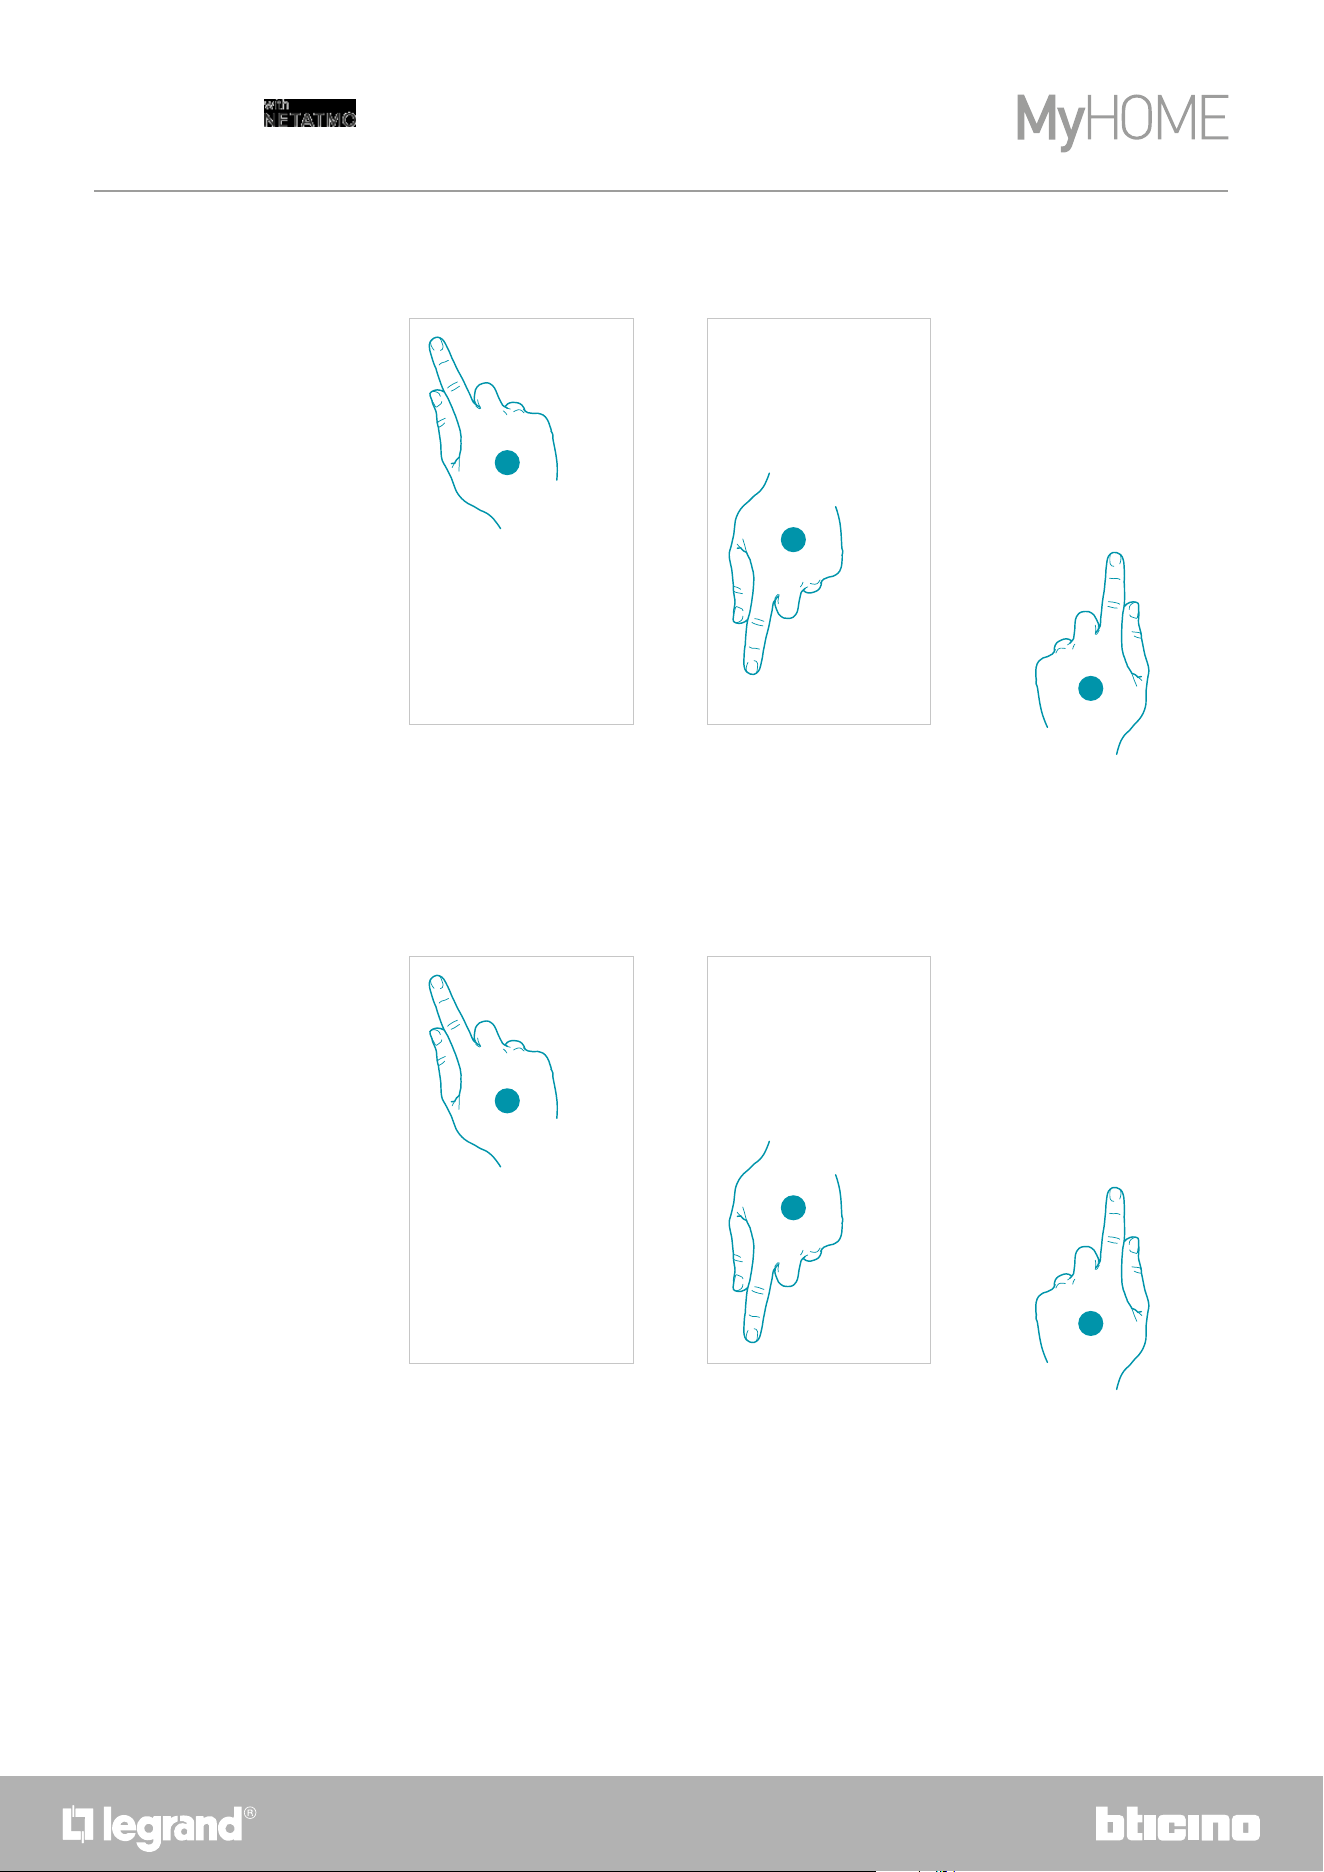
108
Smarther
User and installation manual
Tell us what you think!
This section can be used to rate the application.
1. Touch to open the Settings menu
2. Click to rate the App
3. Touch the stars to rate the App from 1 to 5.
1
2
3
Logout
In this section it is possible to log out from the Home + Control App
1. Touch to open the Settings menu
2. Touch to exit the App
3. Touch to confirm the intention to leave the App. The login screen will then be displayed
1
2
3
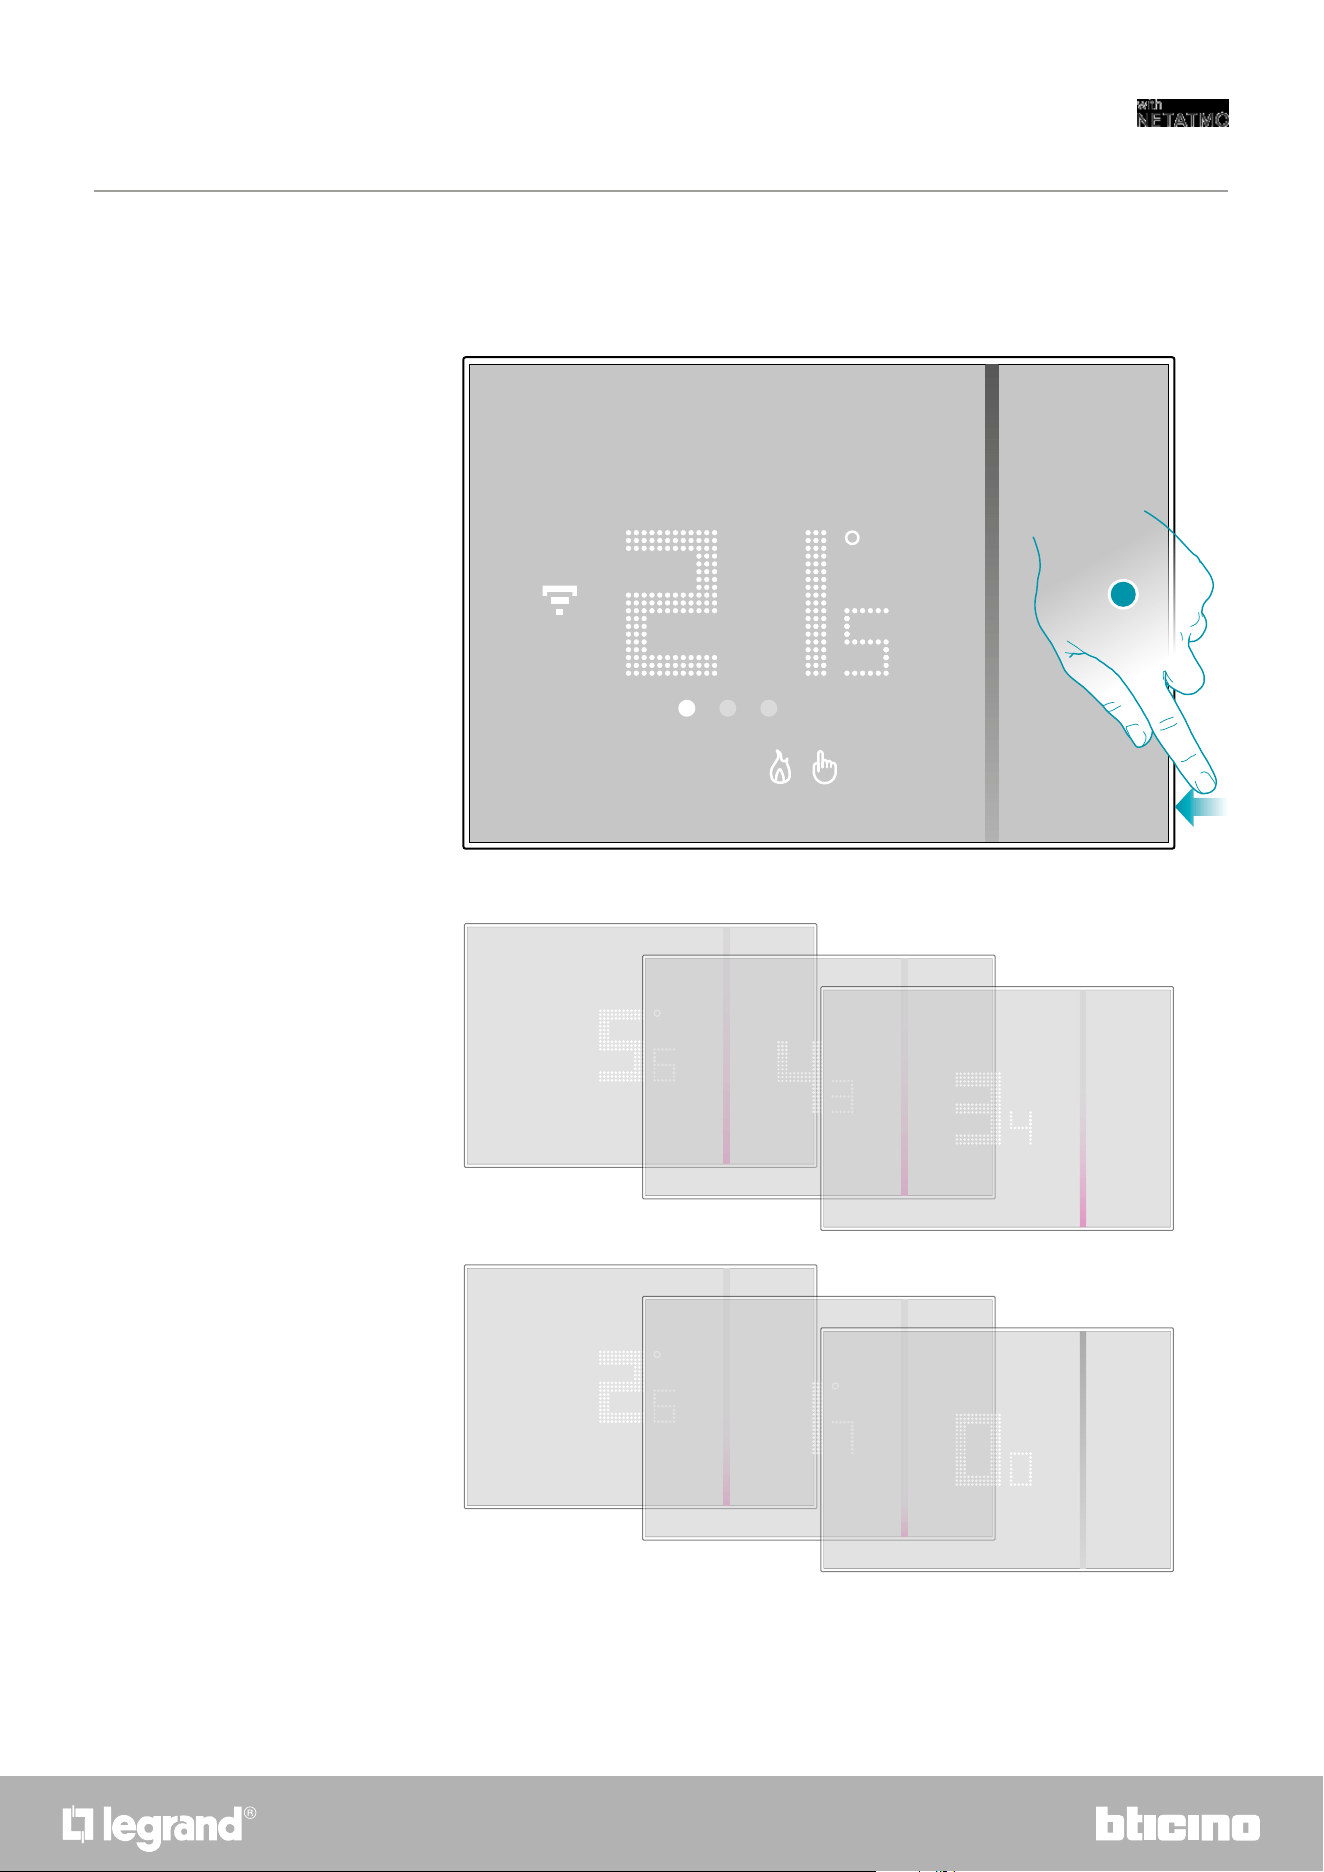
109108
Smarther
User and installation manual
This action deletes the Wi-Fi configuration and the HOMEKIT settings
Resetting the Wi-Fi configuration and the HOMEKIT settings
Reset
1. Keep pressed the reset pushbutton on the side of the Smarther
A countdown will start (about 5 seconds) at the end of which you will hear a confirmation beep.
1
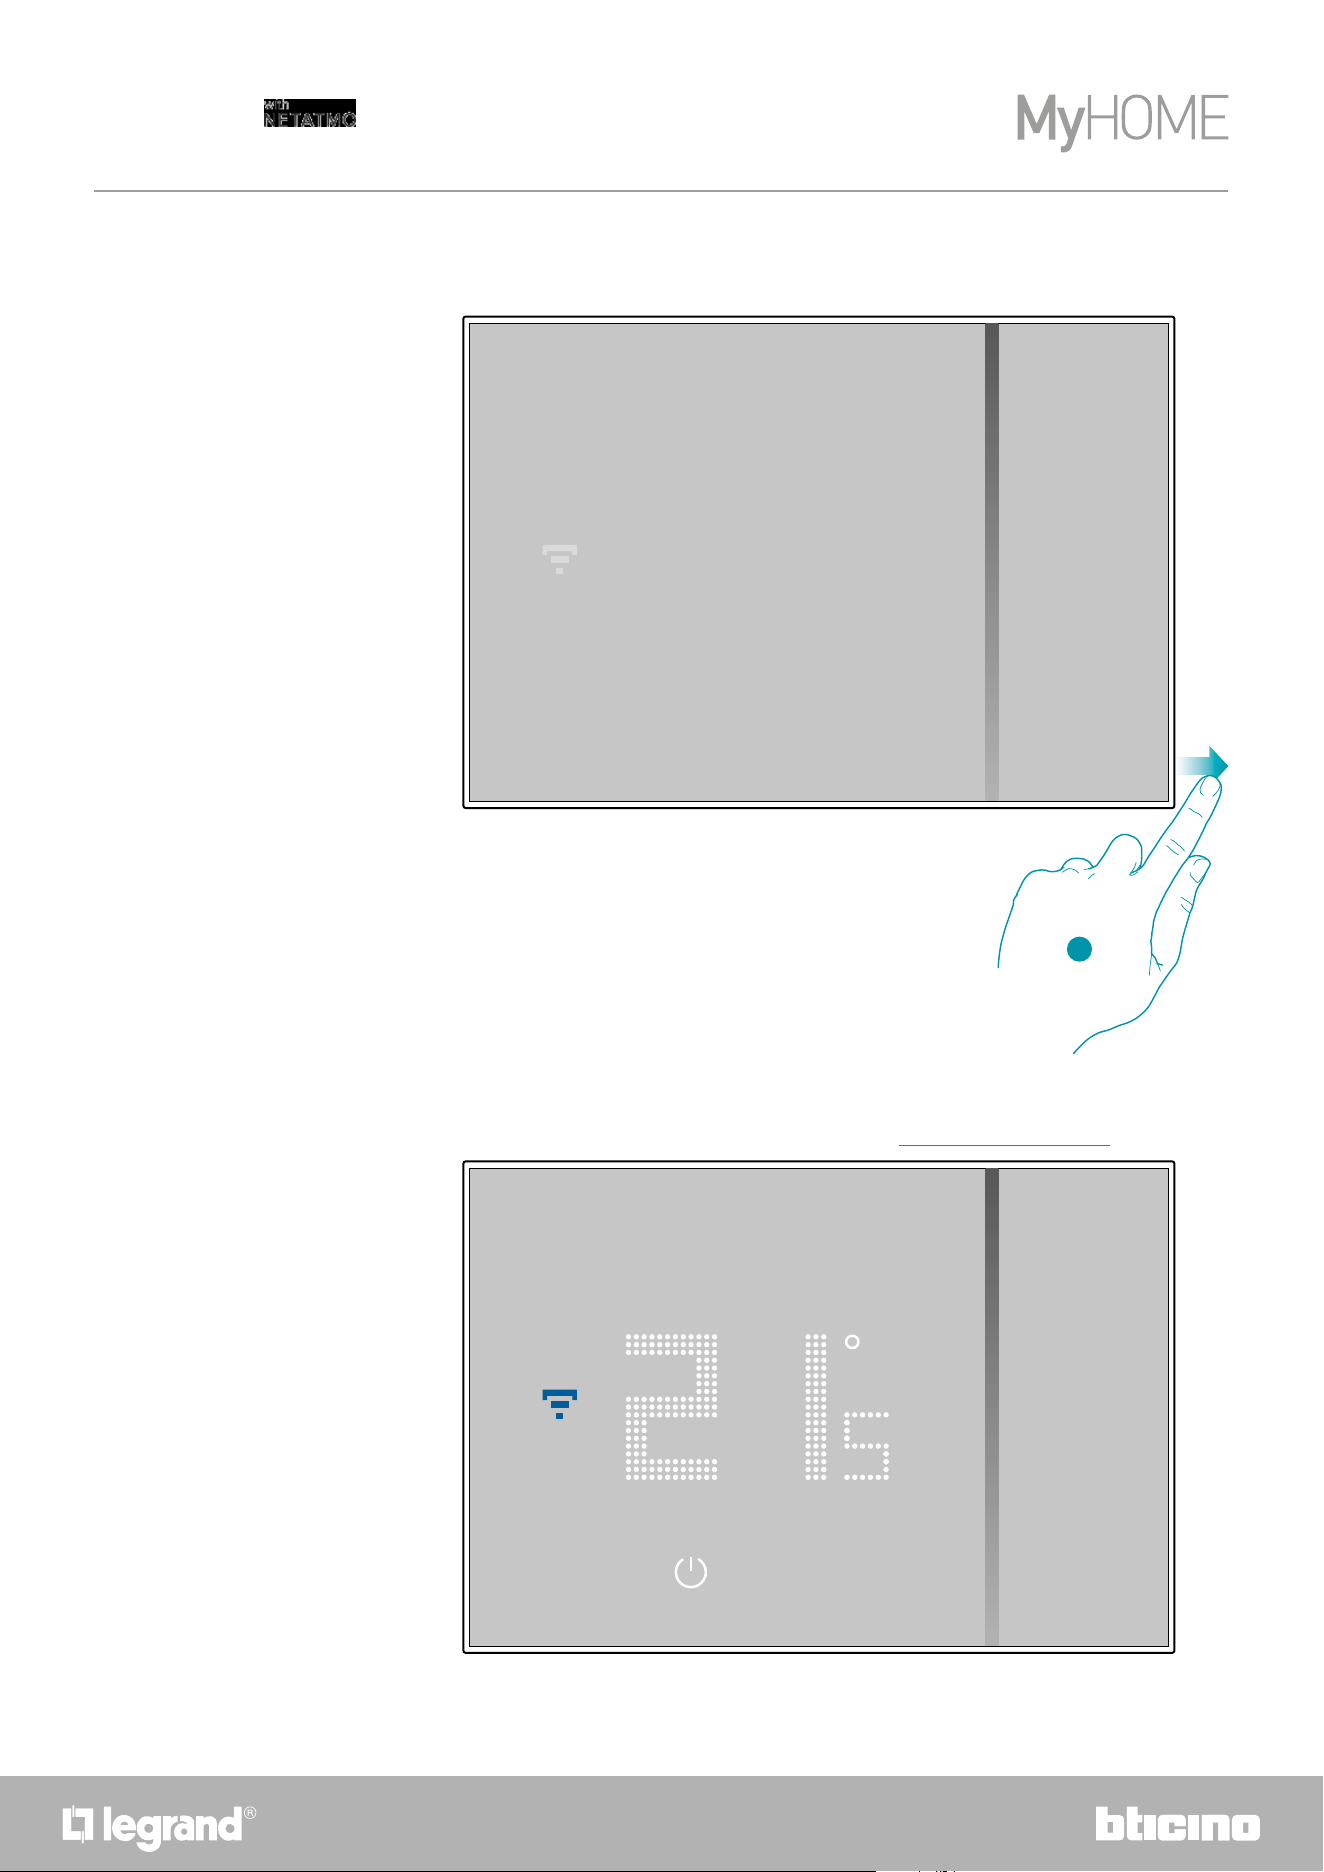
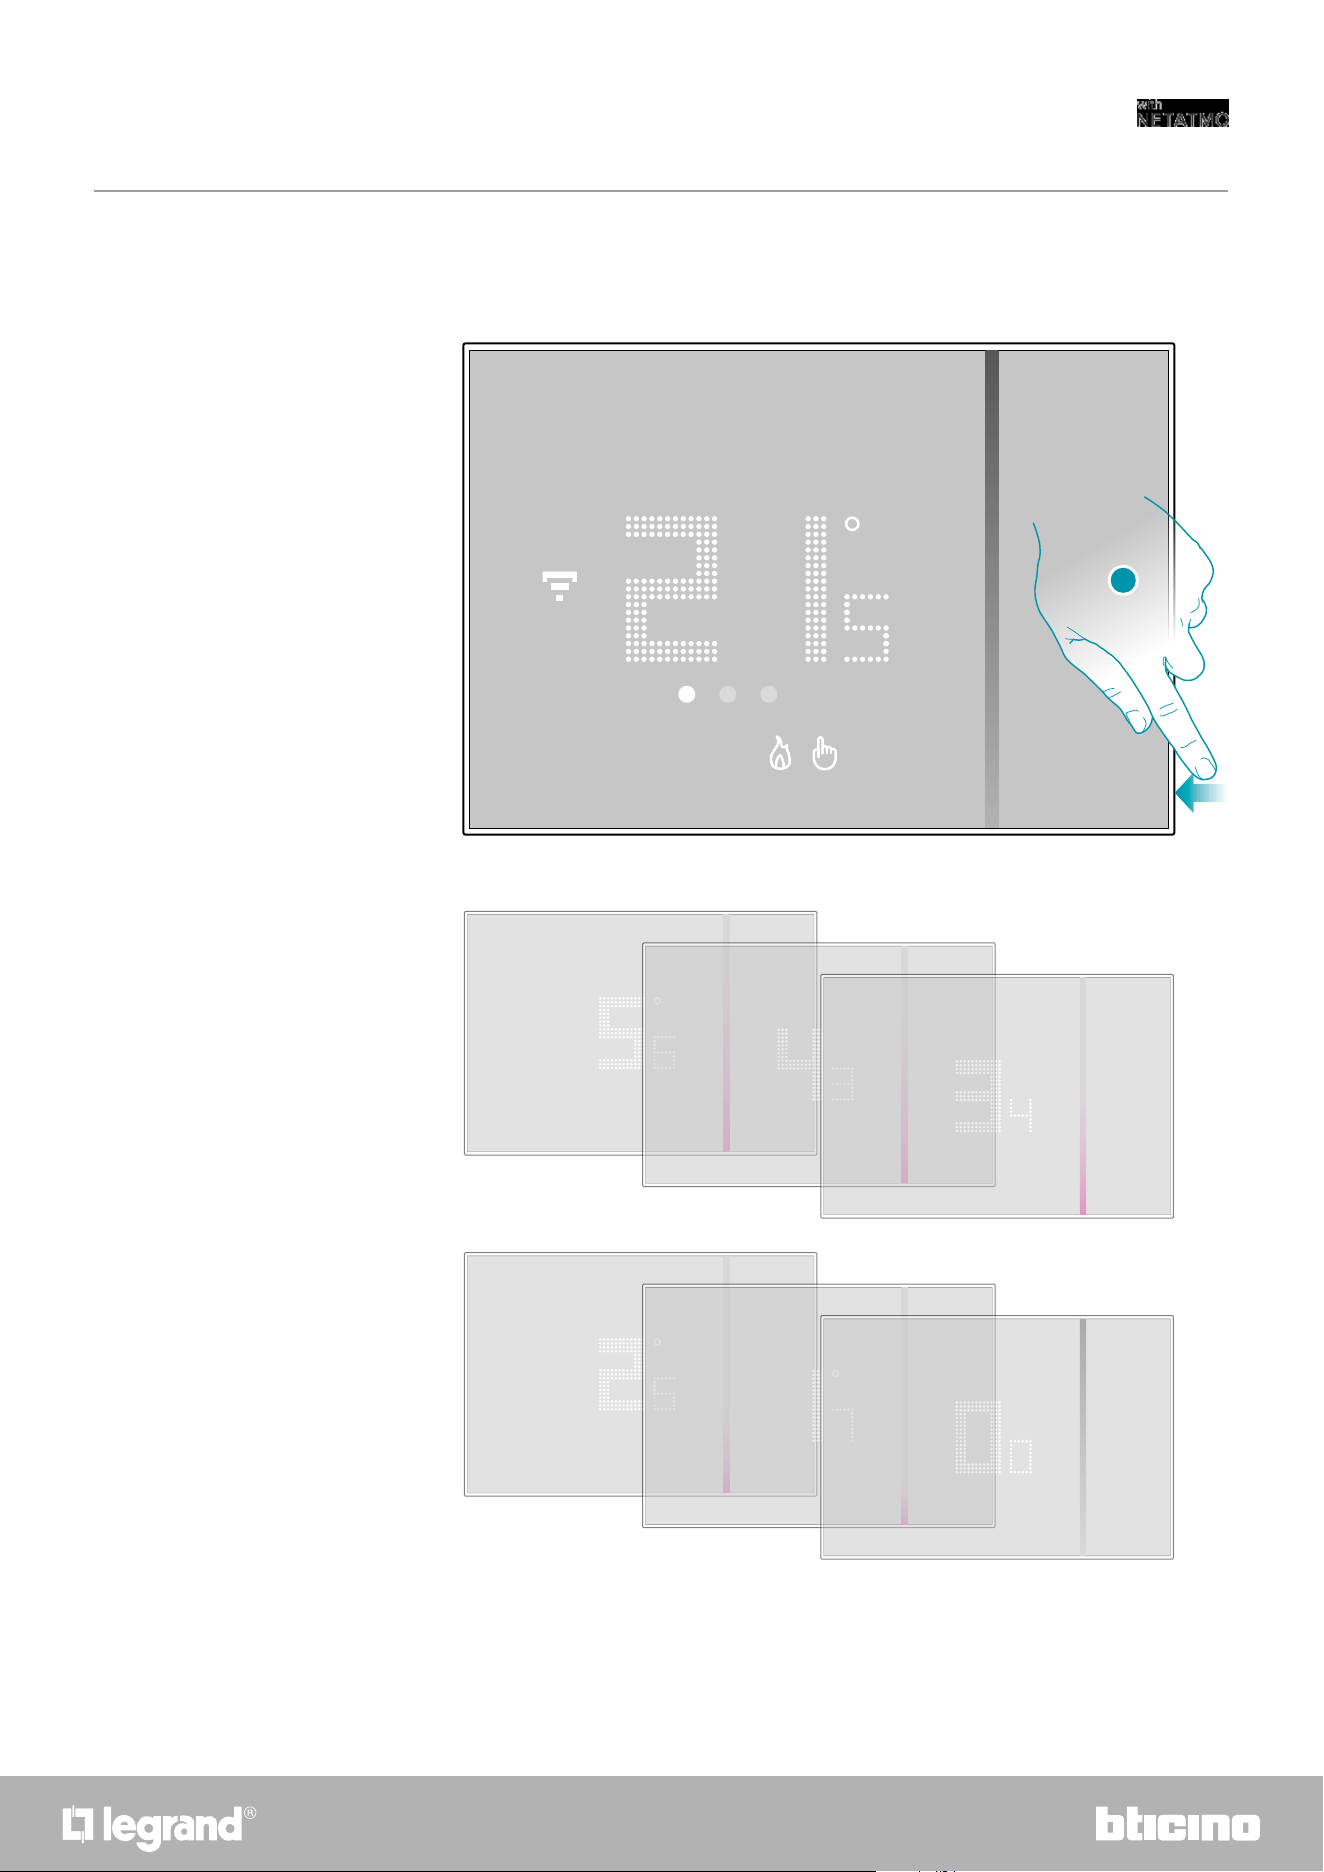
111110
Smarther
User and installation manual
This operation restores the Smarther factory settings and all programs and associations will be
deleted
Reset to the factory settings
1. Keep pressed the reset pushbutton on the side of the Smarther
A countdown will start (about 5 seconds) at the end of which you will hear a confirmation beep.
1
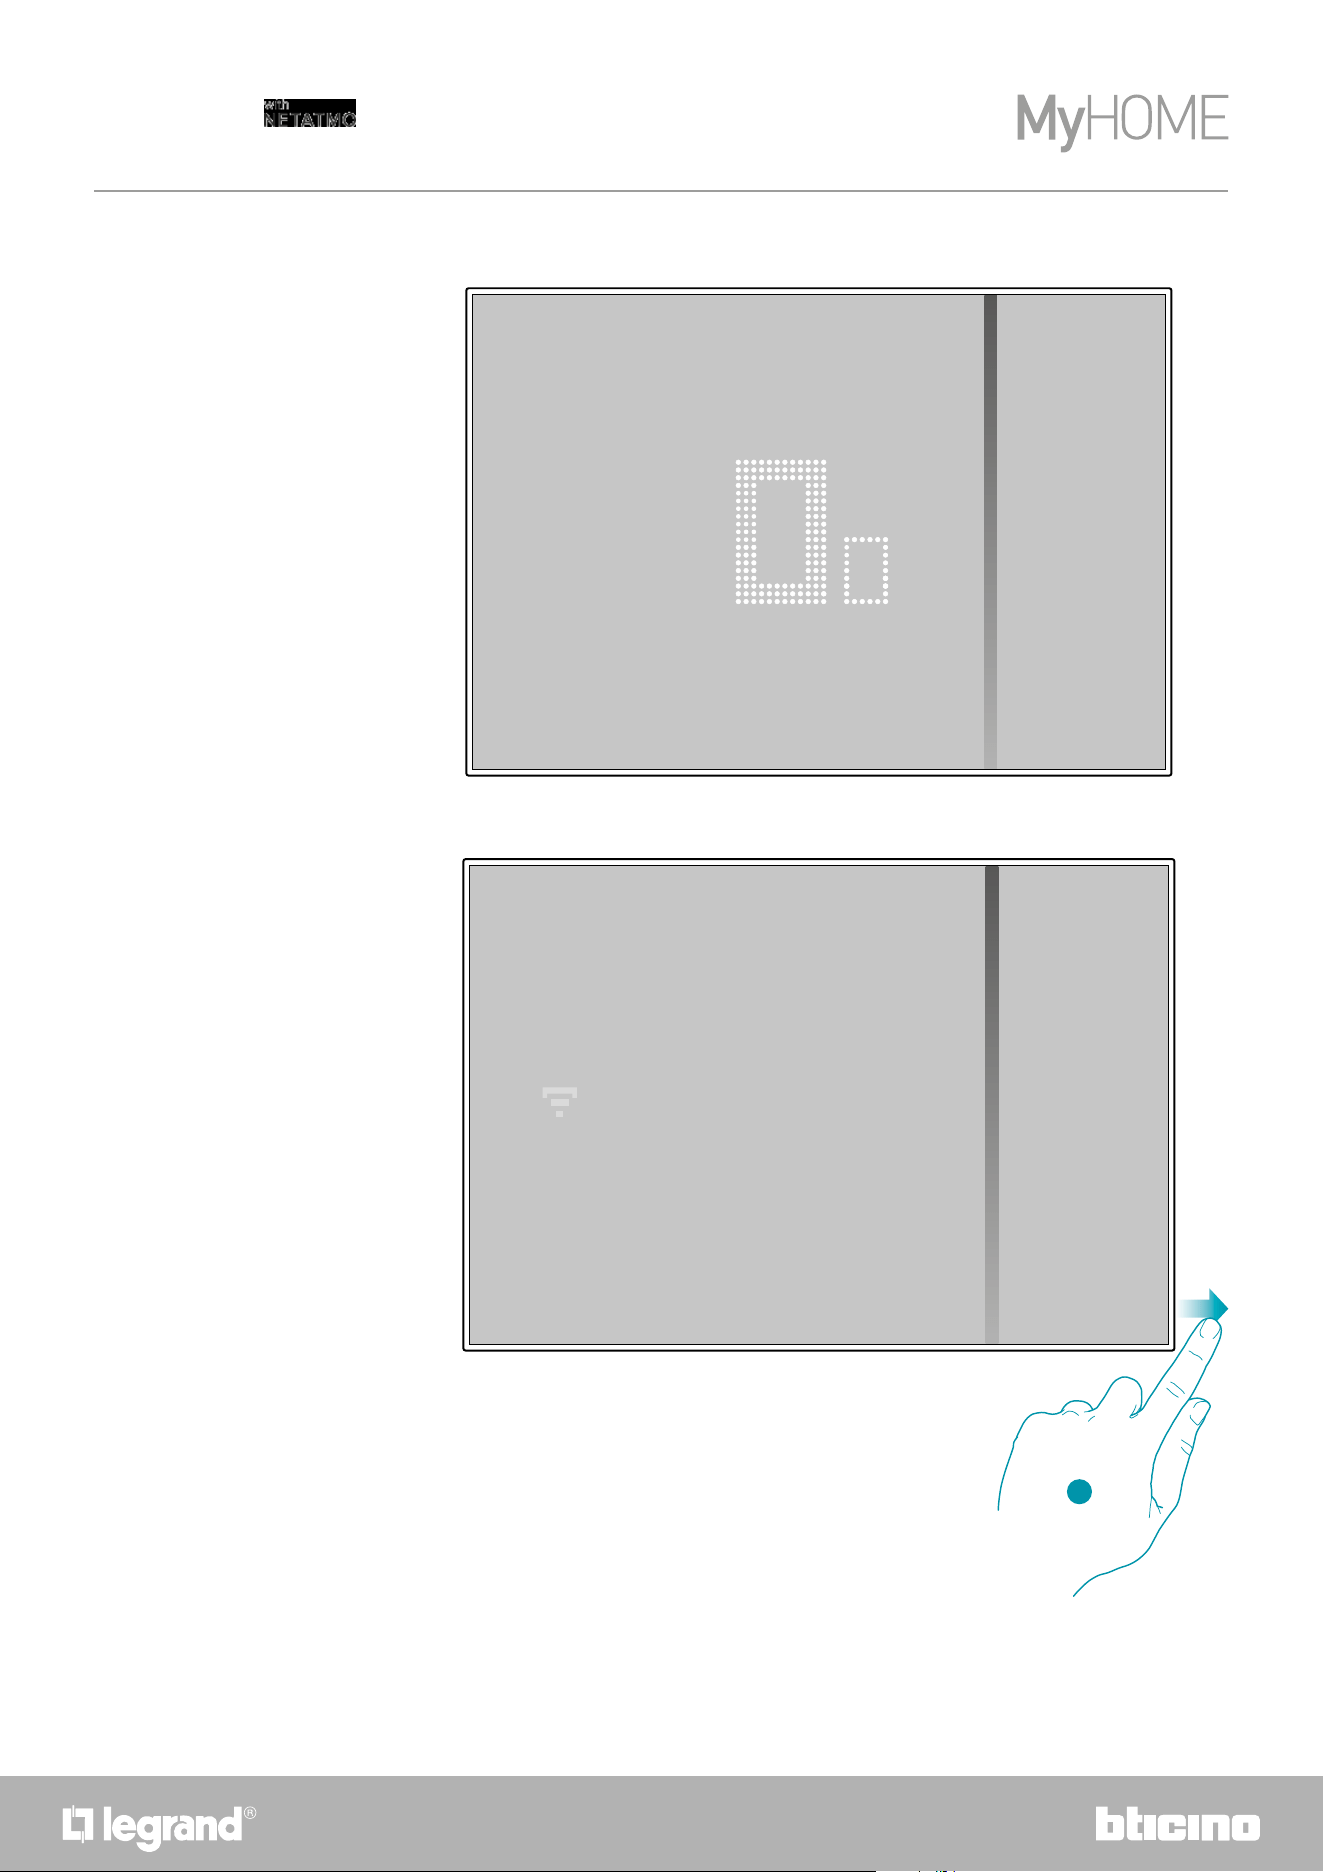
112
Smarther
User and installation manual
0.0 flashes on the Smarther display...
… until a confirmation beep is heard.
The display of the Smarther switches off
3. Release the reset pushbutton.
3
Note: in some cases the device reset can last up to one minute.
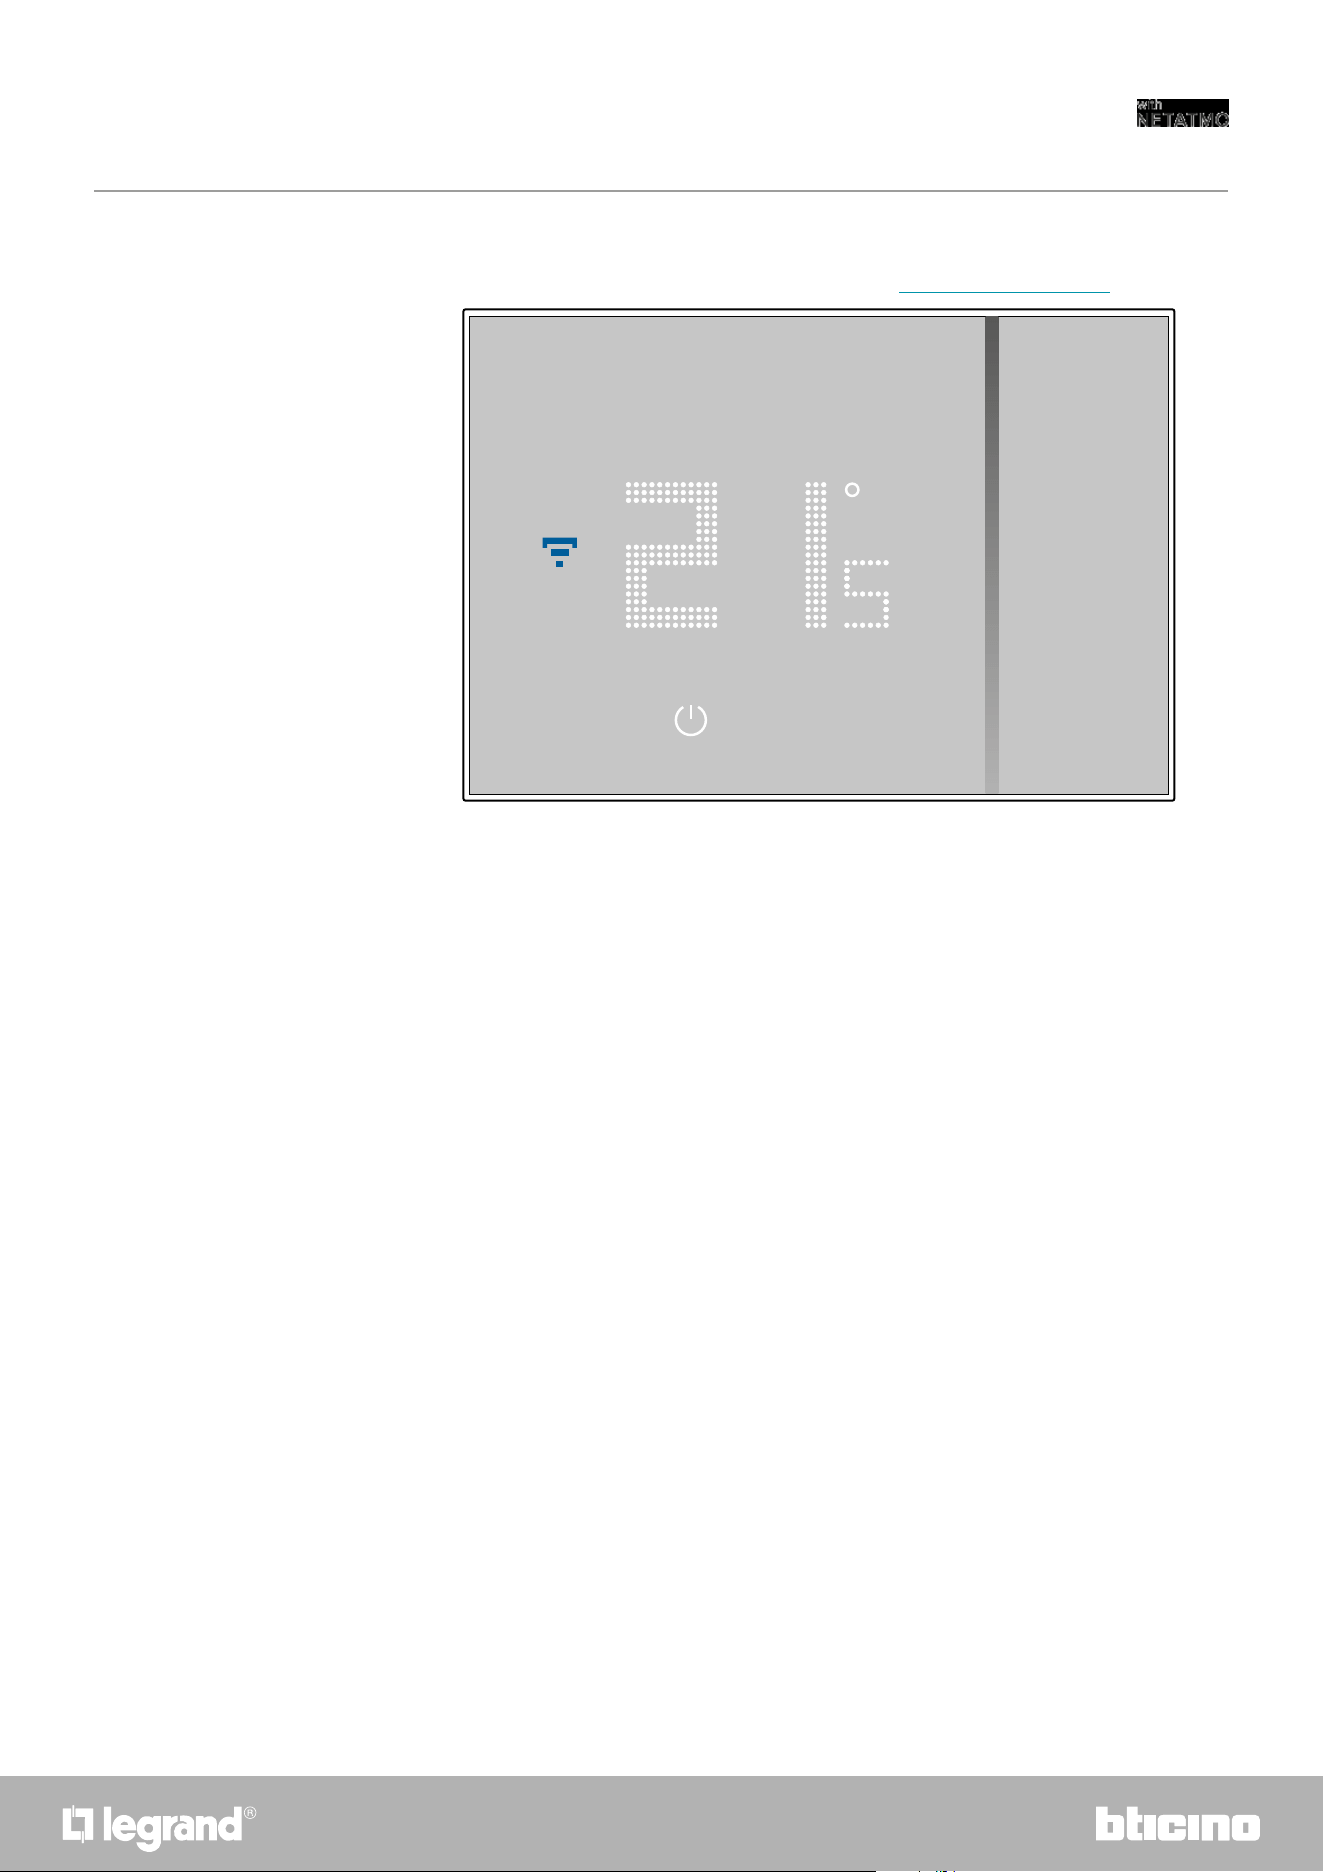

114
Smarther
User and installation manual
Manage your Smarther with third-party apps
Integration with third parties allows to take advantage of the voice control function, in addition to
the already many functionalities of your Smarther:
1 you can increase/decrease the Smarther temperature, set it manually or automatically; you
can request the Smarther set temperature; you can switch it on or off, or set the absolute
temperature.
2 you can include the above commands in a scenario.
Bathroom
Living room
Corridor
Garden
Box
Kitchen
Bedroom
Hi Siri®...
set the ground
floor Smarther to
twenty degrees
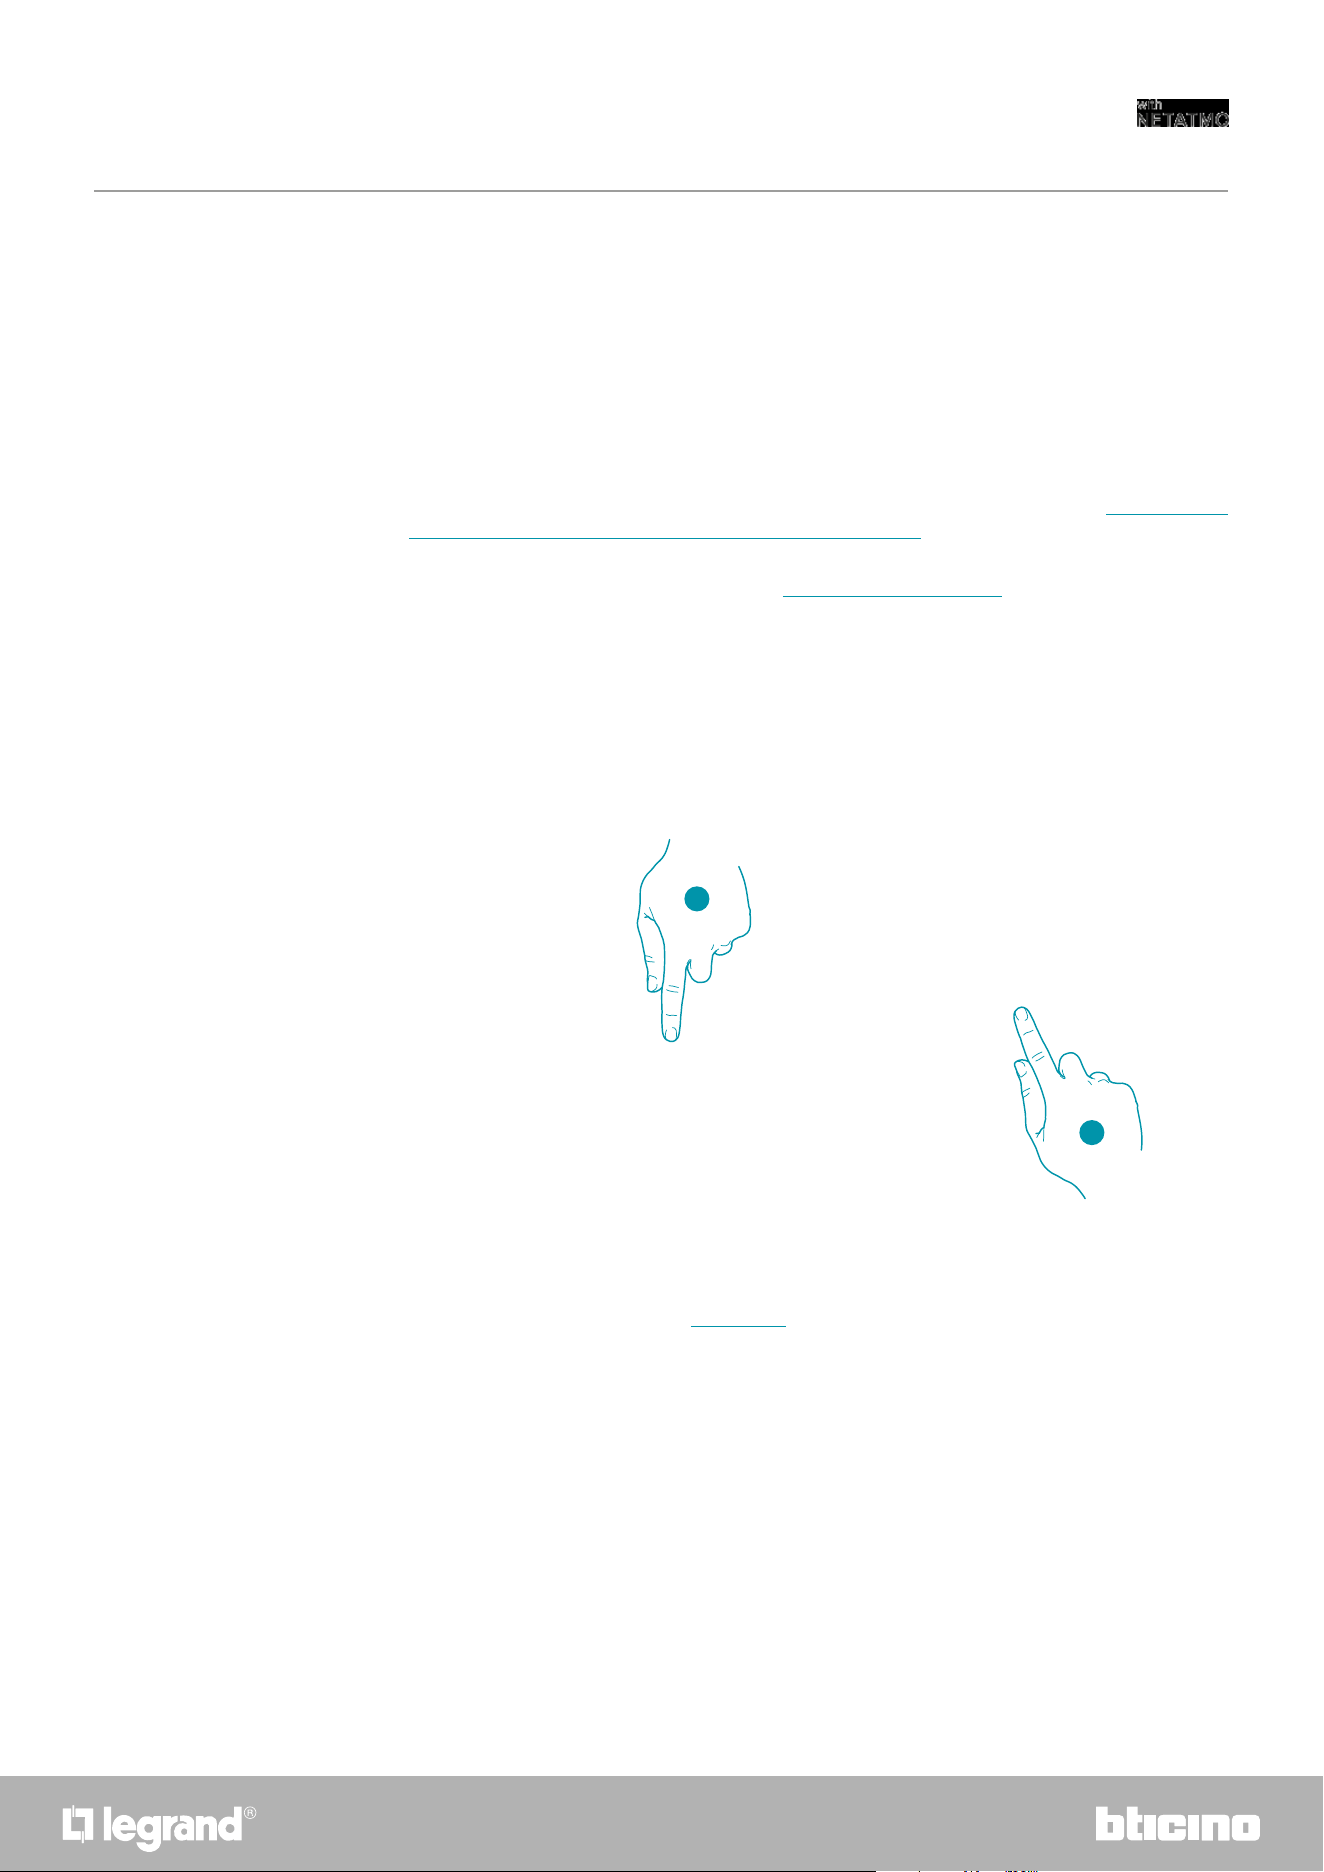
115114
Smarther
User and installation manual
Control your Smarther with HOMEKIT
Thanks to third-party integration, you can also control your Smarther using the HOMEKIT app.
The HOMEKIT app allows you to add some functions to your Smart system:
Associate the Smart system to HOMEKIT app
– you can also increase/decrease the Smarther temperature with your voice, using the Siri® voice
assistant
– you can create new scenarios, in addition to those contemplated by Home + Control
– the created scenarios can be used to also control third-party devices compatible with HOMEKIT
1. Open the HOMEKIT App and touch to start the association with the Smart system
2. Touch to start the association procedure
Note: to take advantage of the Home + Control integration, it will be necessary to first allow access to
the HOMEKIT data during the association of Home + Control with the Smart system (see Associate your
Smarther / If you use a smartphone with iOS operating system, or follow the procedure below)
Note: if you have associated your Smarter with the Home + Control App, this process has already been
completed automatically, go to the Home Page section
Note: this manual describes the procedure for association with the Smarther; in order to know all the
functions in details refer to the Apple® manual (https://support.apple.com)
Note: check that the bluetooth connection is active
1
2
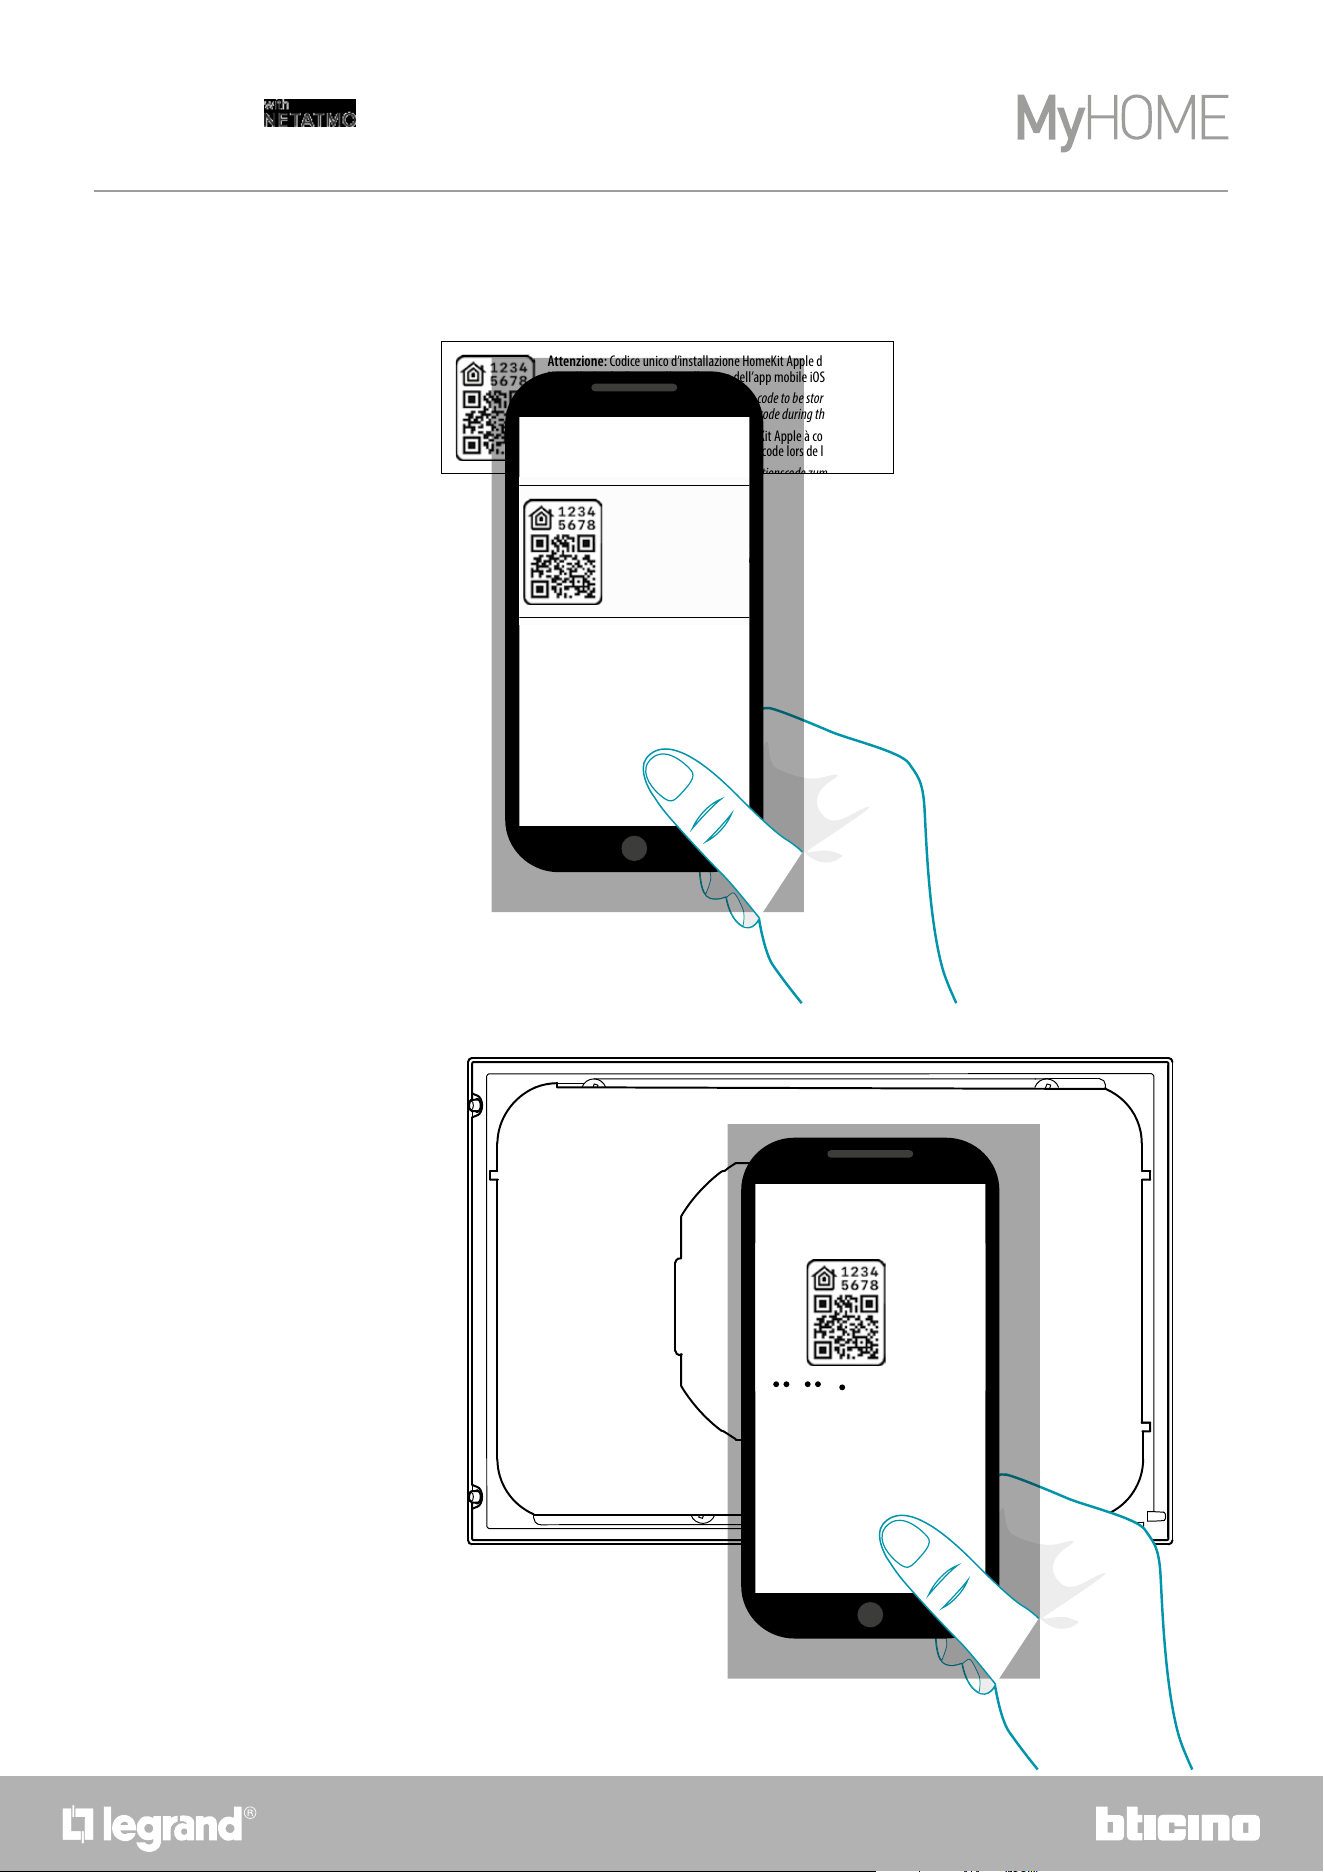
116
Smarther
User and installation manual
It is now necessary to enter the HOMEKIT code.
You can find the HOMEKIT code:
– on the back of the instruction sheet
– on the back of the Smarther
8
La tecnologia Apple HomeKit offre un modo semplice e sicuro per controllare i termostati di casa da iPhone, iPad, Apple
Watch, HomePod oppure Mac utilizzando l'app Apple Home. Controlla i tuoi accessori abilitati per HomeKit con la voce
chiedendo a Siri direttamente dal tuo iPhone, iPad, Apple Watch, HomePod oppure Mac.
Apple HomeKit technology provides an easy, secure way to control your home’s thermostats from your iPhone, iPad, Apple
Watch, HomePod, or Mac using the Apple Home app. Control your HomeKit-enabled accessories with your voice by asking
Siri directly from your iPhone, iPad, Apple Watch, HomePod, or Mac.
La technologie AppleHomeKit offre la possibilité, de manière simple et sûre, de contrôler les thermostats de l’habitation
depuis un iPhone, un iPad, un Apple Watch, un HomePod ou un Mac en utilisant l'appli Apple Home. Il devient possible
de contrôler ses propres accessoires prévus pour HomeKit, avec la voix en demandant à Siri directement depuis votre
iPhone, iPad, Apple Watch, HomePod ou Mac.
Die Apple HomeKit-Technologie bietet eine einfache und sichere Möglichkeit, Heimthermostate von Ihrem iPhone, iPad,
Apple Watch, HomePod oder Mac mit der Apple Home App zu steuern. Überprüfen Sie Ihr HomeKit-fähiges Zubehör mit Ihrer
Stimme, indem Sie Siri direkt von Ihrem iPhone, iPad, Apple Watch, HomePod oder Mac aus fragen.
La tecnología Apple HomeKit ofrece un modo sencillo y seguro para controlar los termostatos de casa mediante iPhone,
iPad, Apple Watch, HomePod o Mac utilizando la app Apple Home. Controla tus accesorios habilitados para HomeKit
hablando con Siri directamente desde tu iPhone, iPad, Apple Watch, HomePod o Mac.
De Apple HomeKit-technologie biedt een eenvoudige een veilige wijze voor het controleren van de thermostaten in een
woning met iPhone, iPad, Apple Watch, HomePod of Mac met behulp van de app Apple Home. Controleer met uw stem uw
accessoires die voor HomeKit geactiveerd zijn door dit aan Siri te vragen op uw iPhone, iPad, Apple Watch, HomePod of Mac.
Technologie Apple HomeKit nabízí jednoduchý a bezpečný způsob ovládání domácích termostatů z iPhone, iPad, Apple
Watch, HomePod nebo Mac pomocí aplikace Apple Home. Ovládejte hlasem svá příslušenství aktivovaná pro HomeKit a
požádejte přímo Siri z Vašeho iPhone, iPad, Apple Watch, HomePod nebo Mac.
L'uso del badge Works with Apple significa che un accessorio è stato progettato per funzionare in modo specifico con
la tecnologia identificata nel badge ed è stato certificato dallo sviluppatore per soddisfare gli standard di prestazione
di Apple. Apple non è responsabile del funzionamento di questo dispositivo o della sua conformità con gli standard di
sicurezza e normativi.
Use of the Works with Apple badge means that an accessory has been designed to workspecifically with the technology
identified in the badge and has been certified by thedeveloper to meet Apple performance standards. Apple is not
responsible for the operation of this device or its compliance with safety and regulatory standards.
L'utilisation du badge Works with Apple signifie qu’un accessoire est conçu pour fonctionner de manière spécifique avec
la technologie identifiée sur le badge et qu’il est certifié par le développeur pour satisfaire les standards de performance
Apple. Apple n’est pas responsable du fonctionnement du dispositif ni de sa conformité aux standards de sécurité et aux
dispositions des normes en vigueur.
Die Verwendung des Logos Works with Apple HomeKit bedeutet, dass ein elektronisches Zubehör speziell für den Anschluss
an das auf dem Badge angegebene technologische System entwickelt wurde und vom Entwickler nach den Apple
Leistungsstandards zertifiziert wurde. Apple ist nicht verantwortlich für den Betrieb dieses Geräts oder die Einhaltung von
Sicherheits- und Regulierungsstandards.
El uso del badge Works with Apple significa que un accesorio se ha diseñado para funcionar específicamente con
la tecnología identificada en el badge y que ha sido certificado por el desarrollador para cumplir los estándares de
prestaciones Apple. Apple no es responsable del funcionamiento de este dispositivo o de su conformidad con los
estándares de seguridad y normativos.
Het gebruik van de badge Works with Apple betekent dat een accessoire ontworpen is om specifiek te werken met de
technologie die in de badge beschreven is en dat de ontwikkelaar ervan certificeert dat het aan de prestatie-eisen van
Apple voldoet. Apple is niet verantwoordelijk voor de werking van dit apparaat of de overeenstemming ervan met de
veiligheidsnormen en wettelijke voorschriften.
Používání badge Works s Apple znamená, že příslušenství bylo navrženo tak, aby fungovalo speciálně s technologií
uvedenou v badge a bylo vývojářem certifikováno tak, aby splňovalo výkonové standardy Apple. Společnost Apple
neodpovídá za fungování tohoto zařízení ani za to, zda je v souladu s bezpečnostními a regulačními normami.
Per controllare questo accessorio abilitato per HomeKit, automaticamente e lontano da casa, è richiesto un HomePod, Apple TV,
oppure iPad impostato come hub di casa. Si raccomanda di aggiornare al più recente software e sistema operativo.
Controlling this HomeKit-enabled accessory automatically and away from home requires a HomePod, Apple TV, or iPad set up as a home
hub. It is recommended that you update to the latest software and operating system.
Pour contrôler cet accessoire, prévu pour HomeKit, automatiquement et loin de chez soi, un HomePod, un AppleTV ou un iPad
configuré comme hub d’habitation est nécessaire. Il est recommandé de mettre à jour le logiciel et le système d’exploitation à la
dernière version.
Um dieses HomeKit-fähige Zubehör automatisch und unterwegs zu steuern, benötigen Sie einen HomePod, einen Apple TV oder ein iPad
als Heim-Hub. Wir empfehlen die Software und das Betriebssystem zu aktualisieren.
Para controlar este accesorio habilitado para HomeKit, automáticamente y lejos de casa, se requiere un HomePod, una TV Apple o un
iPad programado como hub de casa. Se recomienda actualizar con el software y el sistema operativo más recientes.
Voor de automatische controle buitenshuis van dit accessoire is een HomePod, Apple TV, of iPad die als hub in huis ingesteld is, vereist. We
adviseren om te updaten naar de meest recente software en besturingssysteem.
Pro ovládání tohoto příslušenství aktivovaného pro HomeKit automaticky a mimo domov je vyžadován HomePod, Apple TV nebo iPad
nastavený jako domácí rozbočovač. Doporučujeme aktualizovat na nejnovější verzi softwaru a operačního systému.
© 2019 Apple Inc. Todos los derechos reservados. Apple, el logo Apple, Apple TV, Apple Watch, HomeKit, iPad, iPhone,
Mac y Siri son marcas de Apple Inc., registradas en los Estados Unidos y en otros países. HomePod, iPadOS, Multi-Touch
y tvOS son marcas registradas de Apple Inc. App Store, iCloud e iTunes Store son marcas de servicio de Apple Inc.,
registradas en los Estados Unidos y en otros países. IOS es una marca o marca registrada de Cisco en los Estados Unidos
y en otros países y se utiliza con licencia. Otros nombres de productos y sociedades, que aparecen citados en el presente
documento, pueden ser marcas registradas de las sociedades respectivas.
Android, Google, Google Play y el logotipo Google Play son marcas registradas de Google LLC.
© 2019 Apple Inc. Alle rechten voorbehouden. Apple, het logo Apple, Apple TV, Apple Watch, HomeKit, iPad, iPhone, Mac en
Siri zijn merknamen van Apple Inc., die in de V.S. en in andere landen zijn geregistreerd. HomePod, iPadOS, Multi-Touch en
tvOSi zijn geregistreerde handelsmerken van Apple Inc. App Store, iCloud e iTunes Store zijn servicemerken van Apple Inc. die
in de V.S. en in andere landen zijn geregistreerd. IOS is een merknaam of geregistreerd handelsmerk van Cisco in de V.S. en
in andere landen en wordt met licentie gebruikt. Andere productnamen en bedrijven die in dit document genoemd worden,
kunnen geregistreerde handelsmerken van de desbetreffende bedrijven zijn.
Android, Google, Google Play en het logo Google Play zijn geregistreerde handelsmerken van Google LLC.
© 2019 Apple Inc. Všechna práva vyhrazena. Apple, logo Apple, Apple TV, Apple Watch, HomeKit, iPad, iPhone, Mac a
Siri jsou ochranné známky společnosti Apple Inc. registrované ve Spojených státech a dalších zemích. HomePod, iPadOS,
Multi-Touch a tvOS jsou registrované ochranné známky společnosti Apple Inc. App Store, iCloud a iTunes Store jsou
servisní značky společnosti Apple Inc. registrované ve Spojených státech a dalších zemích. IOS je ochranná známka nebo
registrovaná ochranná známka společnosti Cisco ve Spojených státech a dalších zemích a používá se na základě licence.
Ostatní názvy produktů a společností uvedené v tomto dokumentu mohou být registrovanými ochrannými známkami
příslušných společností.
Android, Google, Google Play a logo Google Play jsou ochranné známky společnosti Google LLC.
© 2019 Apple Inc. Tutti i diritti riservati. Apple, il logo Apple, Apple TV, Apple Watch, HomeKit, iPad,
iPhone, Mac e Siri sono marchi di Apple Inc., registrati negli Stati Uniti e in altri Paesi. HomePod,
iPadOS, Multi-Touch e tvOS sono marchi registrati di Apple Inc. App Store, iCloud e iTunes Store sono
marchi di servizio di Apple Inc., registrati negli Stati Uniti e in altri Paesi. IOS è un marchio o marchio
registrato di Cisco negli Stati Uniti e in altri Paesi ed è utilizzato su licenza. Altri nomi di prodotti e
società citati nel presente documento possono essere marchi registrati delle rispettive società.
Android, Google, Google Play e il logo Google Play sono marchi registrati di Google LLC.
© 2019 Apple Inc. All rights reserved. Apple, the Apple logo, Apple TV, Apple Watch, HomeKit, iPad,
iPhone, Mac, and Siriare trademarks of Apple Inc., registered in the U.S. and other countries. HomePod,
iPadOS, Multi-Touch, and tvOS are trademarks of Apple Inc. App Store, iCloud, and iTunes Store are
service marks of Apple Inc., registered in the U.S. and other countries. IOS is a trademark or registered
trademark of Cisco in the U.S. and other countries and is used under license. Other product and company
names mentioned herein may be trademarks of their respective companies.
Google, Google Play, Android, and related marks and logos are trademarks of Google LLC.
© 2019 Apple Inc. Tous droits réservés. Apple, le logo Apple, Apple TV, Apple Watch, HomeKit, iPad,
iPhone, Mac et Siri sont des marques de Apple Inc., déposées aux États-Unis et dans d’autres pays.
HomePod, iPadOS, Multi-Touch et tvOS sont des marques déposées de Apple Inc. App Store, iCloud et
iTunes Store sont des marques de service de Apple Inc., déposées aux États-Unis et dans d’autres pays.
IOS est une marque de Cisco déposée aux États-Unis et dans d’autres pays et utilisée sous licence. Les
autres noms de produits et de sociétés figurant dans le présent document peuvent être des marques
déposées par leurs propriétaires respectifs.
Android, Google, Google Play et le logo Google Play sont des marques déposées de Google LLC.
© 2019 Apple Inc. Alle Rechte vorbehalten. Apple, das Apple-Logo, Apple TV, Apple Watch, HomeKit,
iPad, iPhone, Mac und Siri sind Marken von Apple Inc. und in den USA und anderen Ländern eingetragen.
HomePod, iPadOS, Multi-Touch und tvOS sind eingetragene Marken der Apple Inc. und in den Vereinigten
Staaten und anderen Ländern registriert. IOS ist eine Marke oder eingetragene Marke von Cisco in den
Vereinigten Staaten und anderen Ländern und wird unter Lizenz verwendet. Andere hierin erwähnte
Produkt- und Firmennamen können Marken oder eingetragene Marken ihrer jeweiligen Unternehmen
sein.
Android, Google, Google Play und das Logo Google Play sind eingetragene Marken von Google LLC.
Attenzione: Codice unico d’installazione HomeKit Apple da conservare.
HomeKit Apple: Durante l’installazione dell’app mobile iOS, verrà richiesto questo codice.
Warning:
Unique Apple HomeKit installation code to be stored somewhere safe.
Apple HomeKit: The user will be asked for this code during the installation of the iOS mobile app.
Attention : code unique d’installation HomeKit Apple à conserver.
HomeKit Apple : L’utilisateur devra fournir ce code lors de la mise en service du produit avec l’app iOS.
Achtung: Einzigartiger Apple HomeKit Installationscode zum Aufbewahren.
HomeKit Apple: Während der Installation der iOS mobile App werden Sie nach diesem Code gefragt.
Atención: Código único de instalación HomeKit Apple que conservar.
HomeKit Apple: Durante la instalación de la app mobile iOS, se pedirá este código.
Opgelet: Bewaar de unieke installatiecode HomeKit Apple.
HomeKit Apple: Tijdens de installatie van de mobiele app iOS moet u deze code invoeren.
Pozor: Jedinečný instalační kód HomeKit Apple je třeba uchovat.
HomeKit Apple: Při instalaci app mobile iOS bude tento kód vyžadován.
Il fabbricante, BTicino S.p.A., dichiara che il tipo di apparecchiatura radio Smarther with Netatmo art. XW8002/XM8002/XG8002 è conforme alla direttiva 2014/53/UE. Il testo completo della dichiarazione di conformità UE è disponibile al seguente indirizzo Internet:
www.bticino.it/red
Hereby, BTicino S.p.A., declares that the radio equipment type Smarther with Netatmo item XW8002/XM8002/XG8002 is in compliance with Directive 2014/53/EU. The full text of the EU declaration of conformity is available at the following internet address: www.bticino.it/red
8
La tecnologia Apple HomeKit offre un modo semplice e sicuro per controllare i termostati di casa da iPhone, iPad, Apple
Watch, HomePod oppure Mac utilizzando l'app Apple Home. Controlla i tuoi accessori abilitati per HomeKit con la voce
chiedendo a Siri direttamente dal tuo iPhone, iPad, Apple Watch, HomePod oppure Mac.
Apple HomeKit technology provides an easy, secure way to control your home’s thermostats from your iPhone, iPad, Apple
Watch, HomePod, or Mac using the Apple Home app. Control your HomeKit-enabled accessories with your voice by asking
Siri directly from your iPhone, iPad, Apple Watch, HomePod, or Mac.
La technologie AppleHomeKit offre la possibilité, de manière simple et sûre, de contrôler les thermostats de l’habitation
depuis un iPhone, un iPad, un Apple Watch, un HomePod ou un Mac en utilisant l'appli Apple Home. Il devient possible
de contrôler ses propres accessoires prévus pour HomeKit, avec la voix en demandant à Siri directement depuis votre
iPhone, iPad, Apple Watch, HomePod ou Mac.
Die Apple HomeKit-Technologie bietet eine einfache und sichere Möglichkeit, Heimthermostate von Ihrem iPhone, iPad,
Apple Watch, HomePod oder Mac mit der Apple Home App zu steuern. Überprüfen Sie Ihr HomeKit-fähiges Zubehör mit Ihrer
Stimme, indem Sie Siri direkt von Ihrem iPhone, iPad, Apple Watch, HomePod oder Mac aus fragen.
La tecnología Apple HomeKit ofrece un modo sencillo y seguro para controlar los termostatos de casa mediante iPhone,
iPad, Apple Watch, HomePod o Mac utilizando la app Apple Home. Controla tus accesorios habilitados para HomeKit
hablando con Siri directamente desde tu iPhone, iPad, Apple Watch, HomePod o Mac.
De Apple HomeKit-technologie biedt een eenvoudige een veilige wijze voor het controleren van de thermostaten in een
woning met iPhone, iPad, Apple Watch, HomePod of Mac met behulp van de app Apple Home. Controleer met uw stem uw
accessoires die voor HomeKit geactiveerd zijn door dit aan Siri te vragen op uw iPhone, iPad, Apple Watch, HomePod of Mac.
Technologie Apple HomeKit nabízí jednoduchý a bezpečný způsob ovládání domácích termostatů z iPhone, iPad, Apple
Watch, HomePod nebo Mac pomocí aplikace Apple Home. Ovládejte hlasem svá příslušenství aktivovaná pro HomeKit a
požádejte přímo Siri z Vašeho iPhone, iPad, Apple Watch, HomePod nebo Mac.
L'uso del badge Works with Apple significa che un accessorio è stato progettato per funzionare in modo specifico con
la tecnologia identificata nel badge ed è stato certificato dallo sviluppatore per soddisfare gli standard di prestazione
di Apple. Apple non è responsabile del funzionamento di questo dispositivo o della sua conformità con gli standard di
sicurezza e normativi.
Use of the Works with Apple badge means that an accessory has been designed to workspecifically with the technology
identified in the badge and has been certified by thedeveloper to meet Apple performance standards. Apple is not
responsible for the operation of this device or its compliance with safety and regulatory standards.
L'utilisation du badge Works with Apple signifie qu’un accessoire est conçu pour fonctionner de manière spécifique avec
la technologie identifiée sur le badge et qu’il est certifié par le développeur pour satisfaire les standards de performance
Apple. Apple n’est pas responsable du fonctionnement du dispositif ni de sa conformité aux standards de sécurité et aux
dispositions des normes en vigueur.
Die Verwendung des Logos Works with Apple HomeKit bedeutet, dass ein elektronisches Zubehör speziell für den Anschluss
an das auf dem Badge angegebene technologische System entwickelt wurde und vom Entwickler nach den Apple
Leistungsstandards zertifiziert wurde. Apple ist nicht verantwortlich für den Betrieb dieses Geräts oder die Einhaltung von
Sicherheits- und Regulierungsstandards.
El uso del badge Works with Apple significa que un accesorio se ha diseñado para funcionar específicamente con
la tecnología identificada en el badge y que ha sido certificado por el desarrollador para cumplir los estándares de
prestaciones Apple. Apple no es responsable del funcionamiento de este dispositivo o de su conformidad con los
estándares de seguridad y normativos.
Het gebruik van de badge Works with Apple betekent dat een accessoire ontworpen is om specifiek te werken met de
technologie die in de badge beschreven is en dat de ontwikkelaar ervan certificeert dat het aan de prestatie-eisen van
Apple voldoet. Apple is niet verantwoordelijk voor de werking van dit apparaat of de overeenstemming ervan met de
veiligheidsnormen en wettelijke voorschriften.
Používání badge Works s Apple znamená, že příslušenství bylo navrženo tak, aby fungovalo speciálně s technologií
uvedenou v badge a bylo vývojářem certifikováno tak, aby splňovalo výkonové standardy Apple. Společnost Apple
neodpovídá za fungování tohoto zařízení ani za to, zda je v souladu s bezpečnostními a regulačními normami.
Per controllare questo accessorio abilitato per HomeKit, automaticamente e lontano da casa, è richiesto un HomePod, Apple TV,
oppure iPad impostato come hub di casa. Si raccomanda di aggiornare al più recente software e sistema operativo.
Controlling this HomeKit-enabled accessory automatically and away from home requires a HomePod, Apple TV, or iPad set up as a home
hub. It is recommended that you update to the latest software and operating system.
Pour contrôler cet accessoire, prévu pour HomeKit, automatiquement et loin de chez soi, un HomePod, un AppleTV ou un iPad
configuré comme hub d’habitation est nécessaire. Il est recommandé de mettre à jour le logiciel et le système d’exploitation à la
dernière version.
Um dieses HomeKit-fähige Zubehör automatisch und unterwegs zu steuern, benötigen Sie einen HomePod, einen Apple TV oder ein iPad
als Heim-Hub. Wir empfehlen die Software und das Betriebssystem zu aktualisieren.
Para controlar este accesorio habilitado para HomeKit, automáticamente y lejos de casa, se requiere un HomePod, una TV Apple o un
iPad programado como hub de casa. Se recomienda actualizar con el software y el sistema operativo más recientes.
Voor de automatische controle buitenshuis van dit accessoire is een HomePod, Apple TV, of iPad die als hub in huis ingesteld is, vereist. We
adviseren om te updaten naar de meest recente software en besturingssysteem.
Pro ovládání tohoto příslušenství aktivovaného pro HomeKit automaticky a mimo domov je vyžadován HomePod, Apple TV nebo iPad
nastavený jako domácí rozbočovač. Doporučujeme aktualizovat na nejnovější verzi softwaru a operačního systému.
© 2019 Apple Inc. Todos los derechos reservados. Apple, el logo Apple, Apple TV, Apple Watch, HomeKit, iPad, iPhone,
Mac y Siri son marcas de Apple Inc., registradas en los Estados Unidos y en otros países. HomePod, iPadOS, Multi-Touch
y tvOS son marcas registradas de Apple Inc. App Store, iCloud e iTunes Store son marcas de servicio de Apple Inc.,
registradas en los Estados Unidos y en otros países. IOS es una marca o marca registrada de Cisco en los Estados Unidos
y en otros países y se utiliza con licencia. Otros nombres de productos y sociedades, que aparecen citados en el presente
documento, pueden ser marcas registradas de las sociedades respectivas.
Android, Google, Google Play y el logotipo Google Play son marcas registradas de Google LLC.
© 2019 Apple Inc. Alle rechten voorbehouden. Apple, het logo Apple, Apple TV, Apple Watch, HomeKit, iPad, iPhone, Mac en
Siri zijn merknamen van Apple Inc., die in de V.S. en in andere landen zijn geregistreerd. HomePod, iPadOS, Multi-Touch en
tvOSi zijn geregistreerde handelsmerken van Apple Inc. App Store, iCloud e iTunes Store zijn servicemerken van Apple Inc. die
in de V.S. en in andere landen zijn geregistreerd. IOS is een merknaam of geregistreerd handelsmerk van Cisco in de V.S. en
in andere landen en wordt met licentie gebruikt. Andere productnamen en bedrijven die in dit document genoemd worden,
kunnen geregistreerde handelsmerken van de desbetreffende bedrijven zijn.
Android, Google, Google Play en het logo Google Play zijn geregistreerde handelsmerken van Google LLC.
© 2019 Apple Inc. Všechna práva vyhrazena. Apple, logo Apple, Apple TV, Apple Watch, HomeKit, iPad, iPhone, Mac a
Siri jsou ochranné známky společnosti Apple Inc. registrované ve Spojených státech a dalších zemích. HomePod, iPadOS,
Multi-Touch a tvOS jsou registrované ochranné známky společnosti Apple Inc. App Store, iCloud a iTunes Store jsou
servisní značky společnosti Apple Inc. registrované ve Spojených státech a dalších zemích. IOS je ochranná známka nebo
registrovaná ochranná známka společnosti Cisco ve Spojených státech a dalších zemích a používá se na základě licence.
Ostatní názvy produktů a společností uvedené v tomto dokumentu mohou být registrovanými ochrannými známkami
příslušných společností.
Android, Google, Google Play a logo Google Play jsou ochranné známky společnosti Google LLC.
© 2019 Apple Inc. Tutti i diritti riservati. Apple, il logo Apple, Apple TV, Apple Watch, HomeKit, iPad,
iPhone, Mac e Siri sono marchi di Apple Inc., registrati negli Stati Uniti e in altri Paesi. HomePod,
iPadOS, Multi-Touch e tvOS sono marchi registrati di Apple Inc. App Store, iCloud e iTunes Store sono
marchi di servizio di Apple Inc., registrati negli Stati Uniti e in altri Paesi. IOS è un marchio o marchio
registrato di Cisco negli Stati Uniti e in altri Paesi ed è utilizzato su licenza. Altri nomi di prodotti e
società citati nel presente documento possono essere marchi registrati delle rispettive società.
Android, Google, Google Play e il logo Google Play sono marchi registrati di Google LLC.
© 2019 Apple Inc. All rights reserved. Apple, the Apple logo, Apple TV, Apple Watch, HomeKit, iPad,
iPhone, Mac, and Siriare trademarks of Apple Inc., registered in the U.S. and other countries. HomePod,
iPadOS, Multi-Touch, and tvOS are trademarks of Apple Inc. App Store, iCloud, and iTunes Store are
service marks of Apple Inc., registered in the U.S. and other countries. IOS is a trademark or registered
trademark of Cisco in the U.S. and other countries and is used under license. Other product and company
names mentioned herein may be trademarks of their respective companies.
Google, Google Play, Android, and related marks and logos are trademarks of Google LLC.
© 2019 Apple Inc. Tous droits réservés. Apple, le logo Apple, Apple TV, Apple Watch, HomeKit, iPad,
iPhone, Mac et Siri sont des marques de Apple Inc., déposées aux États-Unis et dans d’autres pays.
HomePod, iPadOS, Multi-Touch et tvOS sont des marques déposées de Apple Inc. App Store, iCloud et
iTunes Store sont des marques de service de Apple Inc., déposées aux États-Unis et dans d’autres pays.
IOS est une marque de Cisco déposée aux États-Unis et dans d’autres pays et utilisée sous licence. Les
autres noms de produits et de sociétés figurant dans le présent document peuvent être des marques
déposées par leurs propriétaires respectifs.
Android, Google, Google Play et le logo Google Play sont des marques déposées de Google LLC.
© 2019 Apple Inc. Alle Rechte vorbehalten. Apple, das Apple-Logo, Apple TV, Apple Watch, HomeKit,
iPad, iPhone, Mac und Siri sind Marken von Apple Inc. und in den USA und anderen Ländern eingetragen.
HomePod, iPadOS, Multi-Touch und tvOS sind eingetragene Marken der Apple Inc. und in den Vereinigten
Staaten und anderen Ländern registriert. IOS ist eine Marke oder eingetragene Marke von Cisco in den
Vereinigten Staaten und anderen Ländern und wird unter Lizenz verwendet. Andere hierin erwähnte
Produkt- und Firmennamen können Marken oder eingetragene Marken ihrer jeweiligen Unternehmen
sein.
Android, Google, Google Play und das Logo Google Play sind eingetragene Marken von Google LLC.
Attenzione:
Codice unico d’installazione HomeKit Apple da conservare.
HomeKit Apple: Durante l’installazione dell’app mobile iOS, verrà richiesto questo codice.
Warning:
Unique Apple HomeKit installation code to be stored somewhere safe.
Apple HomeKit: The user will be asked for this code during the installation of the iOS mobile app.
Attention :
code unique d’installation HomeKit Apple à conserver.
HomeKit Apple : L’utilisateur devra fournir ce code lors de la mise en service du produit avec l’app iOS.
Achtung: Einzigartiger Apple HomeKit Installationscode zum Aufbewahren.
HomeKit Apple: Während der Installation der iOS mobile App werden Sie nach diesem Code gefragt.
Atención: Código único de instalación HomeKit Apple que conservar.
HomeKit Apple: Durante la instalación de la app mobile iOS, se pedirá este código.
Opgelet: Bewaar de unieke installatiecode HomeKit Apple.
HomeKit Apple: Tijdens de installatie van de mobiele app iOS moet u deze code invoeren.
Pozor: Jedinečný instalační kód HomeKit Apple je třeba uchovat.
HomeKit Apple: Při instalaci app mobile iOS bude tento kód vyžadován.
Il fabbricante, BTicino S.p.A., dichiara che il tipo di apparecchiatura radio Smarther with Netatmo art. XW8002/XM8002/XG8002 è conforme alla direttiva 2014/53/UE. Il testo completo della dichiarazione di conformità UE è disponibile al seguente indirizzo Internet:
www.bticino.it/red
Hereby, BTicino S.p.A., declares that the radio equipment type Smarther with Netatmo item XW8002/XM8002/XG8002 is in compliance with Directive 2014/53/EU. The full text of the EU declaration of conformity is available at the following internet address: www.bticino.it/red
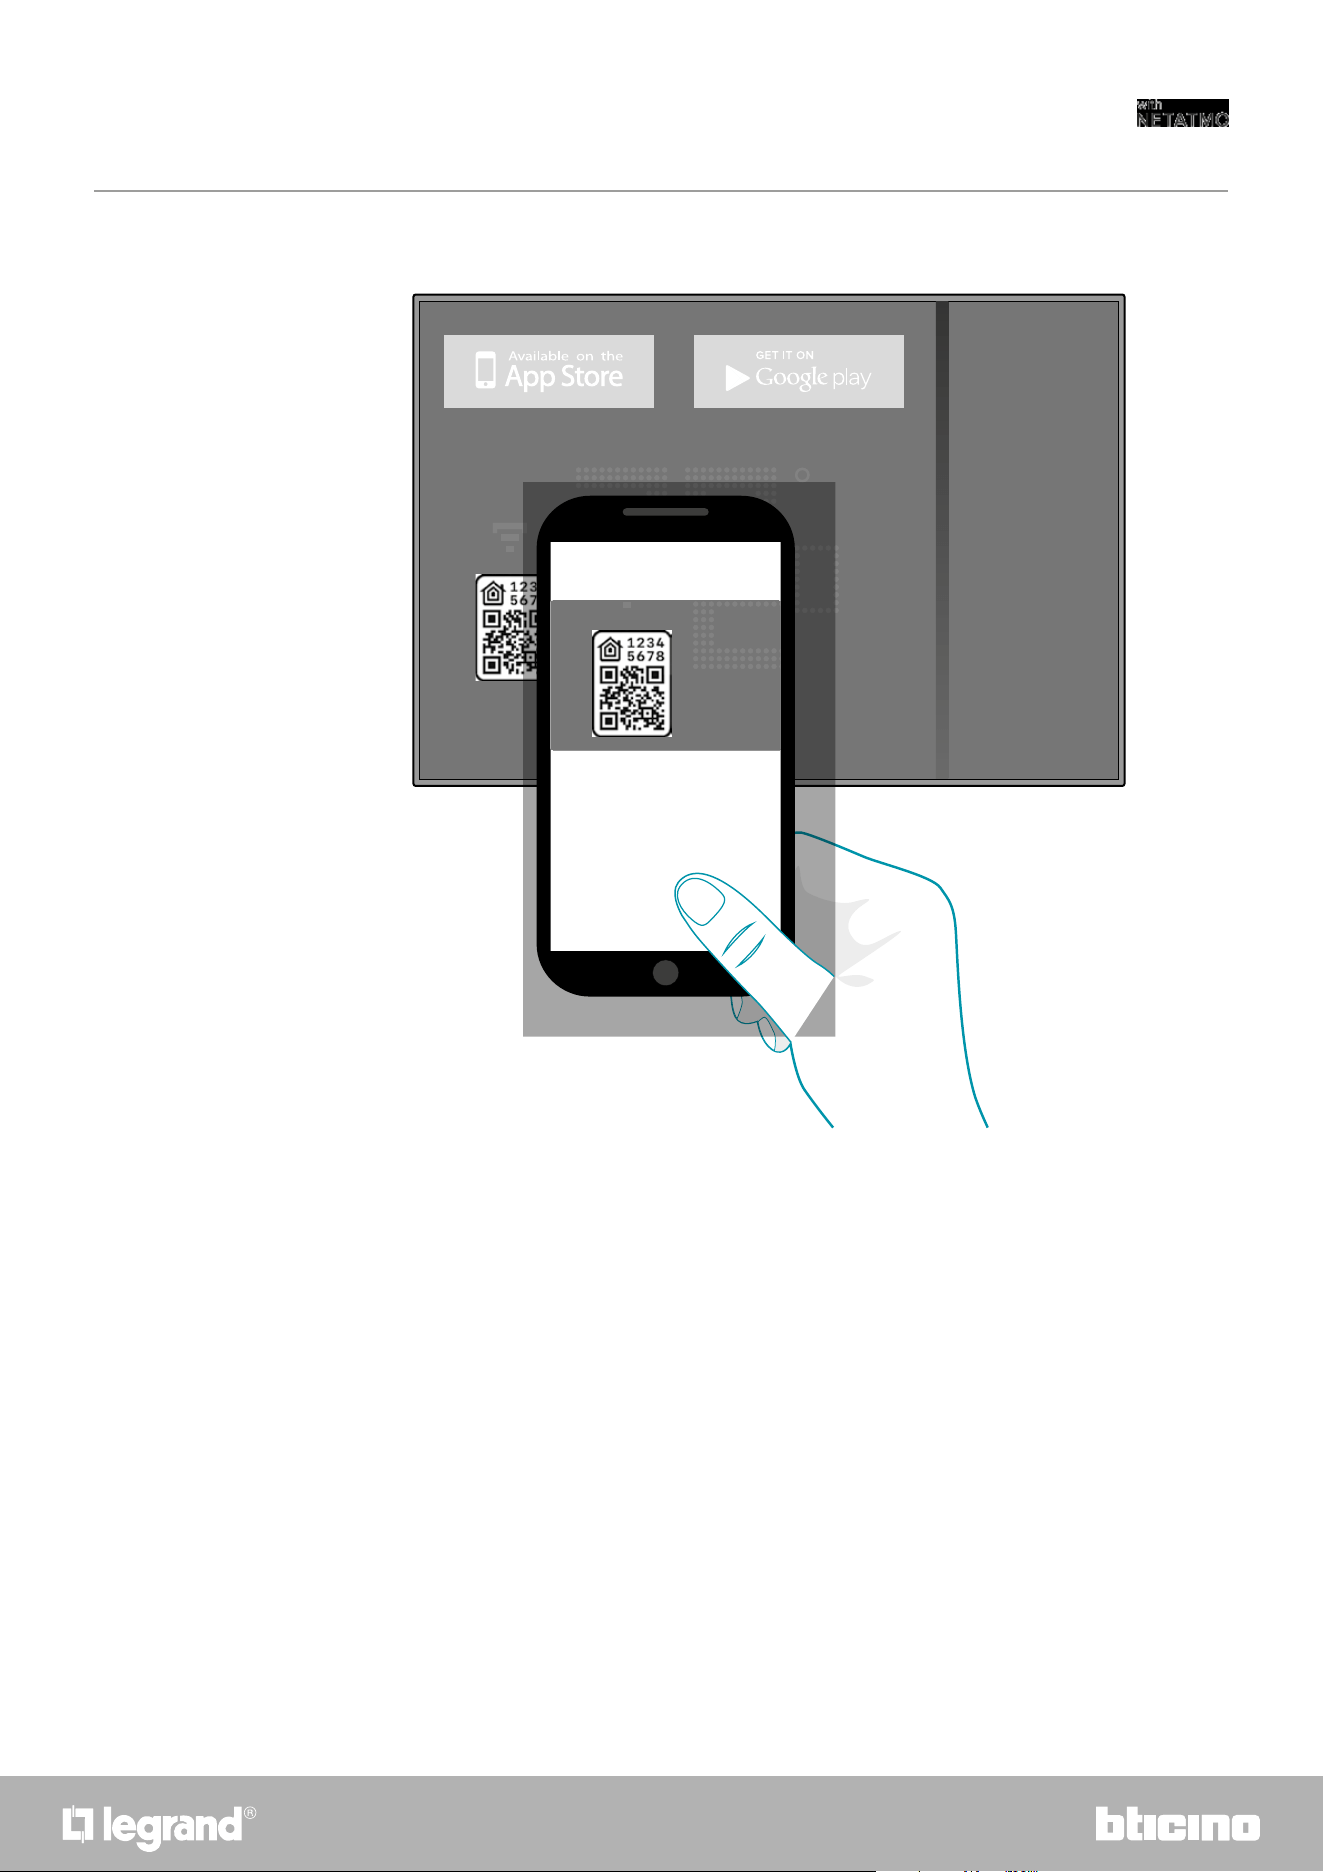
117116
Smarther
User and installation manual
Frame the code on the Smarther: the code will be detected automatically
Download HOME + CONTROL App
– on the protective film of the Smarther
Download HOME + CONTROL App
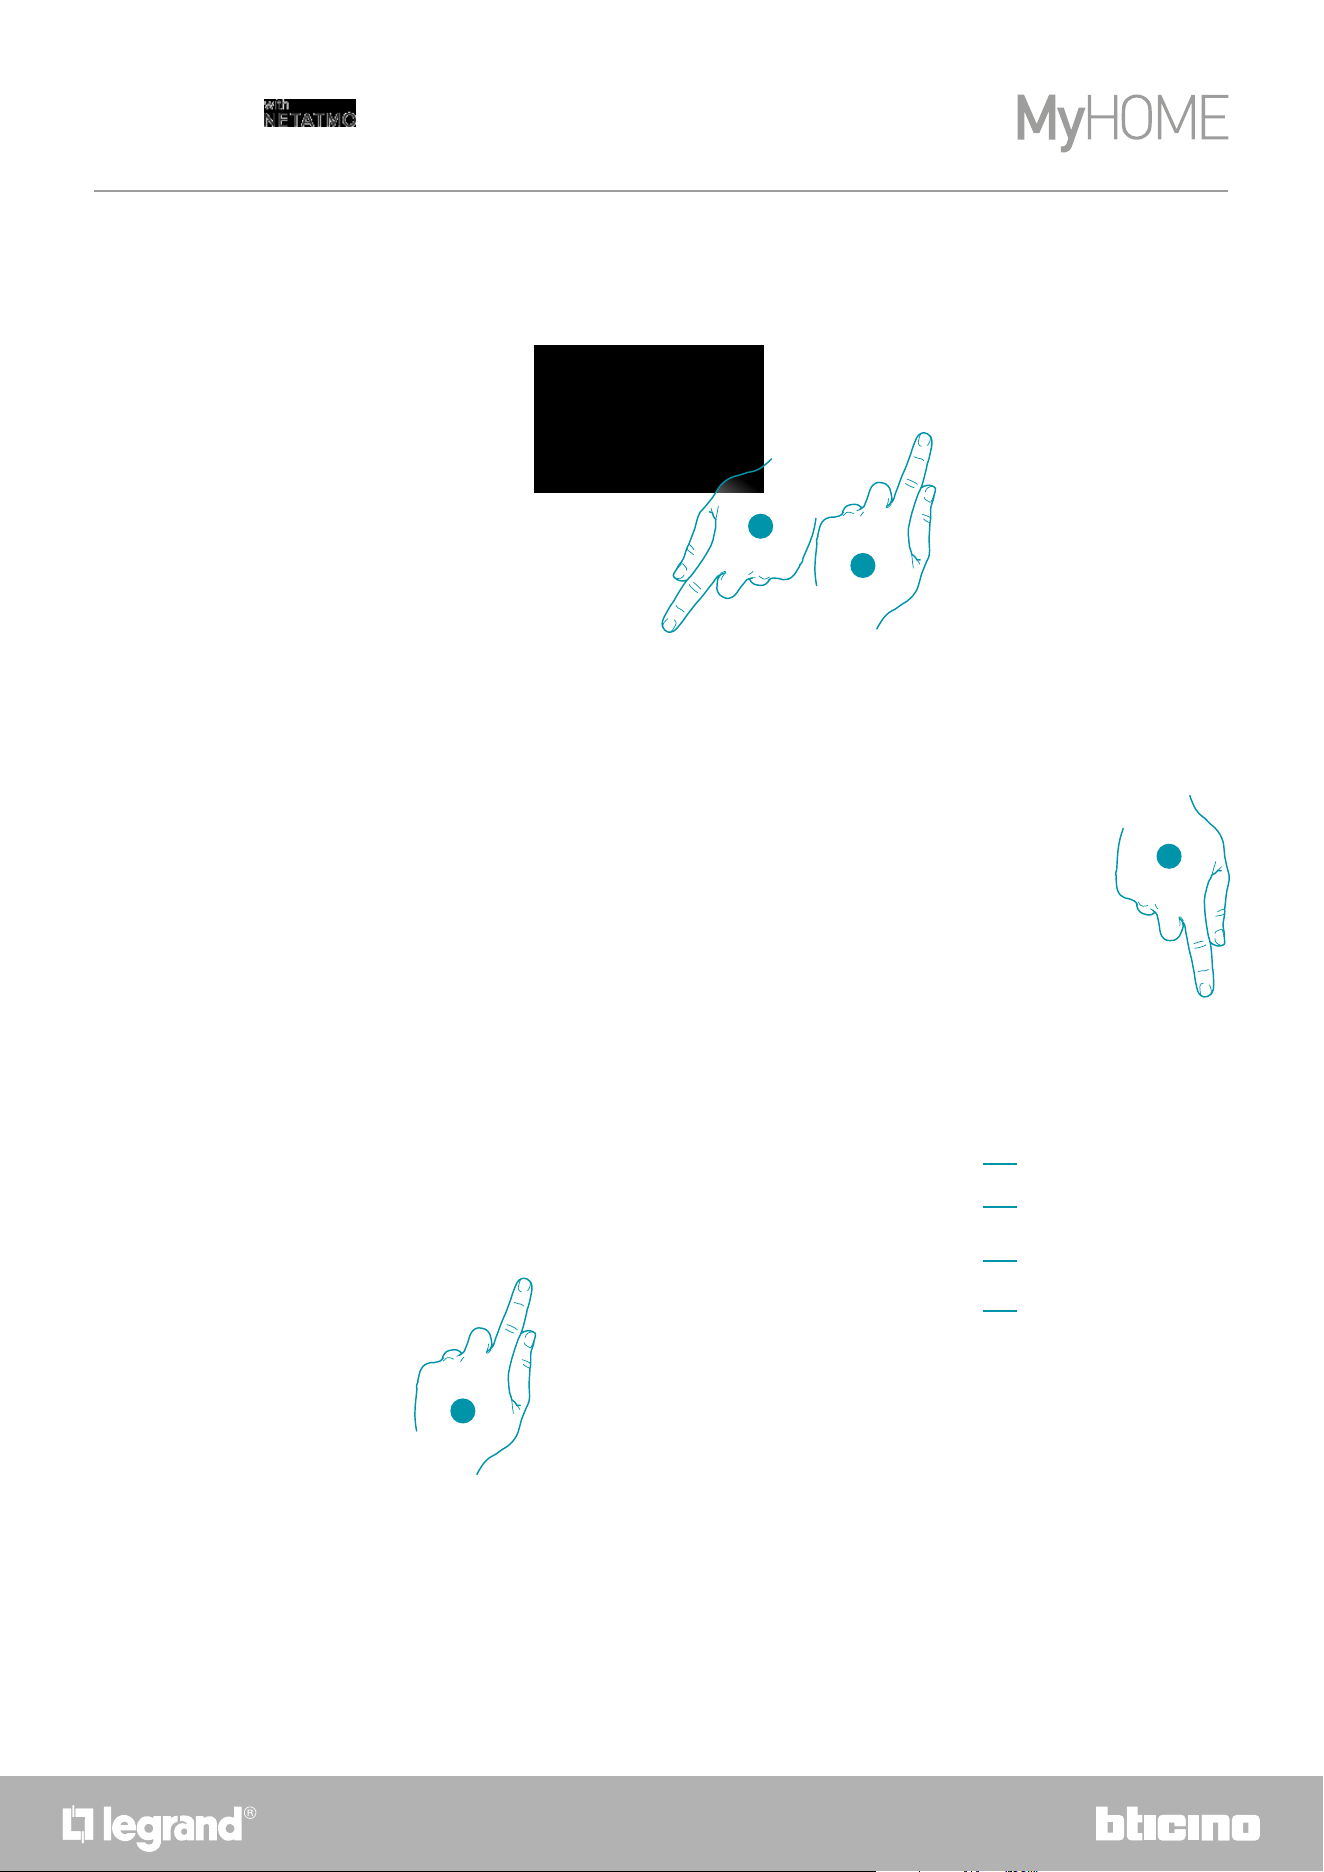
118
Smarther
User and installation manual
If the code is not detected automatically, or if it cannot be scanned
3. Touch to open the manual entering page
4. Touch the Smarther detected nearby
5. Manually enter the HOMEKIT code
Make sure that the smartphone is being charged and within the range of the Gateway.
A Rename the Smarther for the heating function
B Rename the Smarther for the humidity detection function
C Select the room/create a new one where to insert the Smarther within the HOMEKIT App
D Add/remove from favorites
6. Touch to continue
3
4
5
6
A
B
C
D
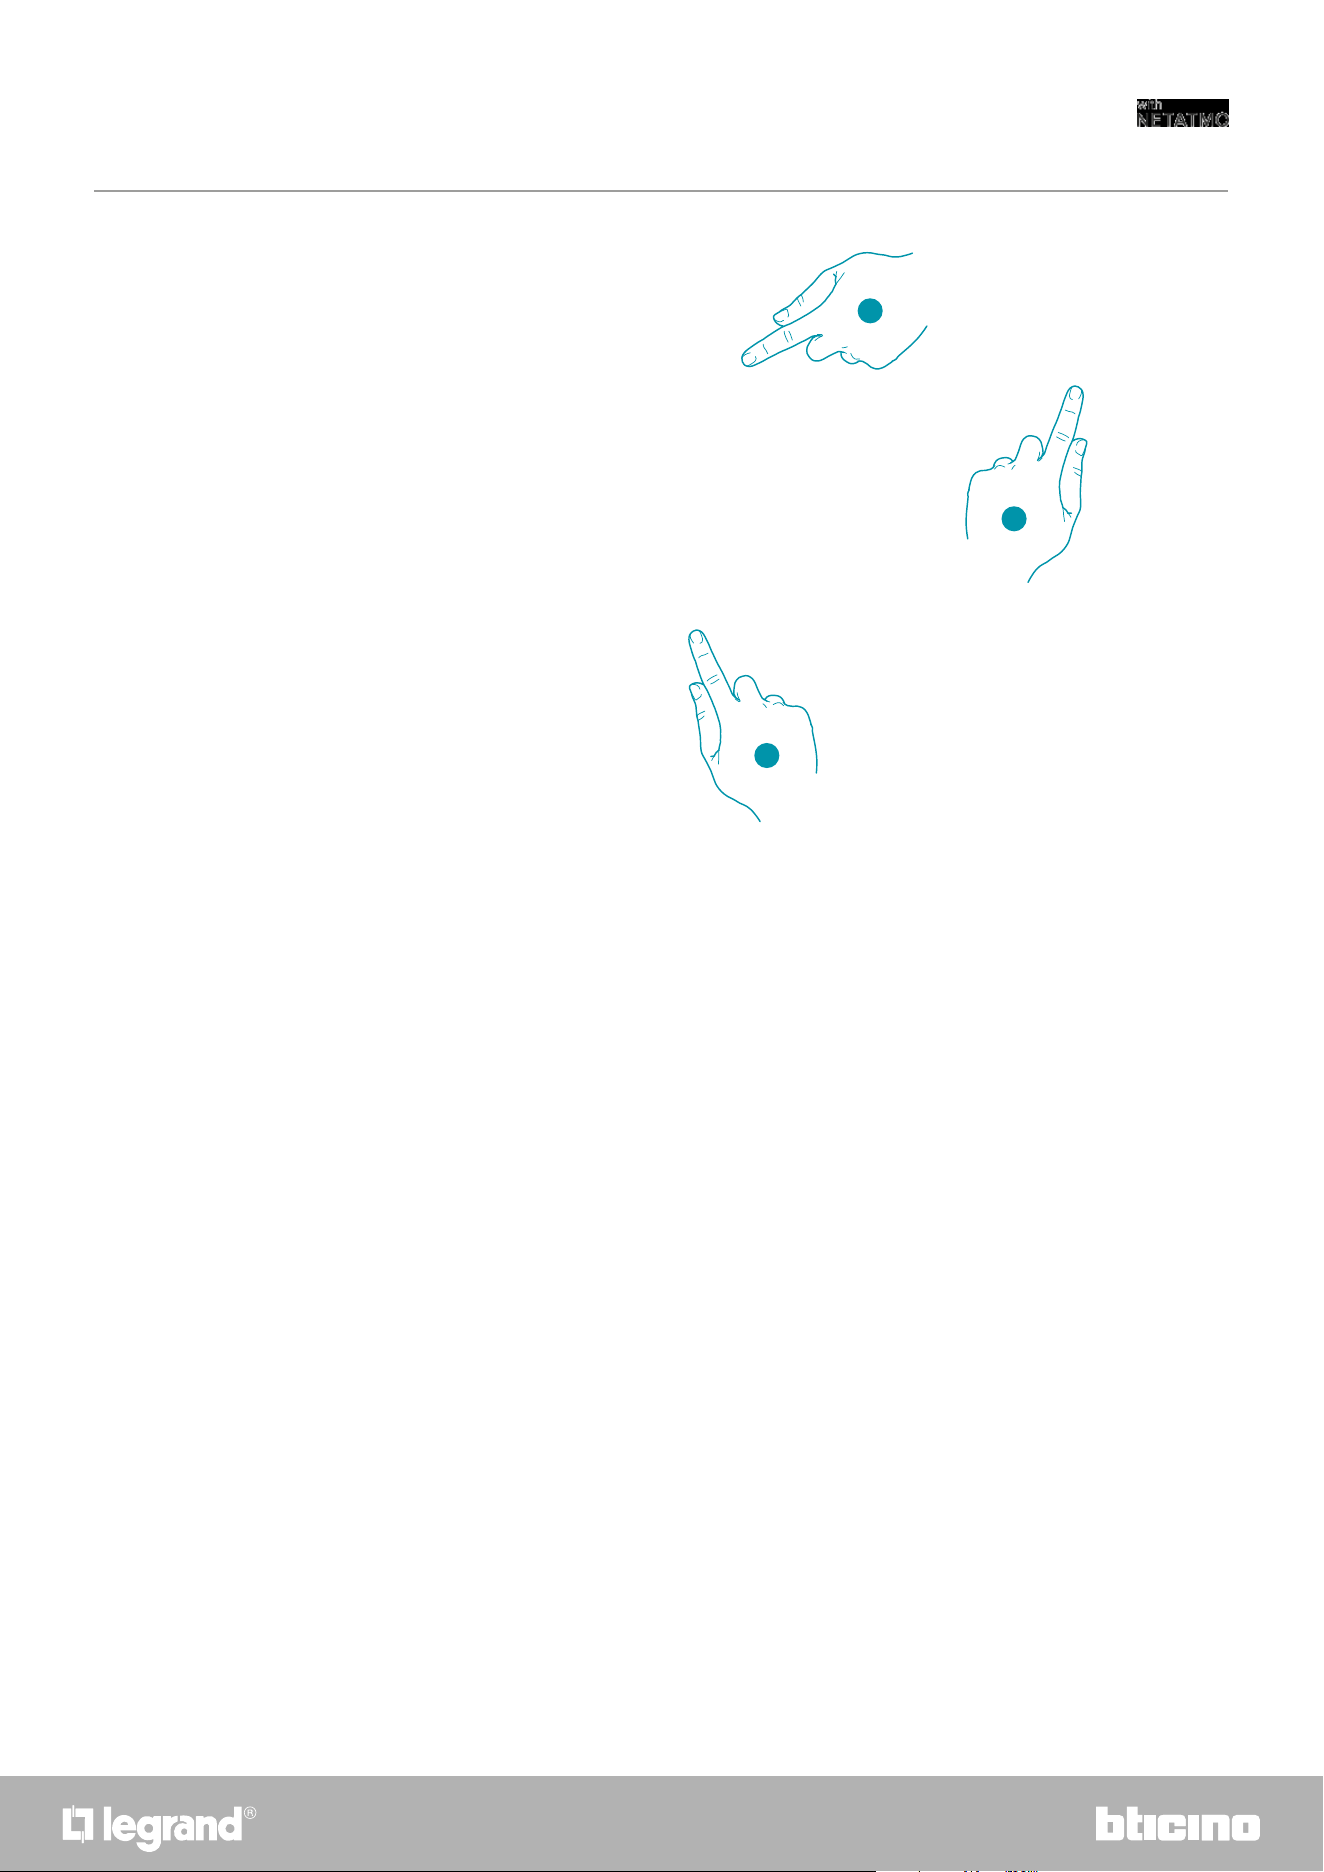
119118
Smarther
User and installation manual
7. Touch to select the scenarios where you want to include the Smarther
8. Touch to continue.
9. Touch to end the configuration of the HOMEKIT App
7
8
9
From the Home Page of the HOMEKIT app, it is possible to safely control the devices, organised
into room and installed in your home.
For a detailed knowledge of all the functions refer to the Apple® documentation.

Legrand SNC reserves at any time the right to modify the contents of this booklet and to communicate, in any form and
modality, the changes brought to the same.
Legrand SNC
128, av. du Maréchal-de-Lattre-de-Tassigny
87045 Limoges Cedex - France
www.legrand.com
BTicino SpA
Viale Borri, 231
21100 Varese
www.bticino.com