Loading ...
Loading ...
Loading ...
ALIGNMENT
ALIGNING FENCE PARALLEL TO
MITER SLOT
ALIGNING FENCE
PERPENDICULAR TO THE TABLE
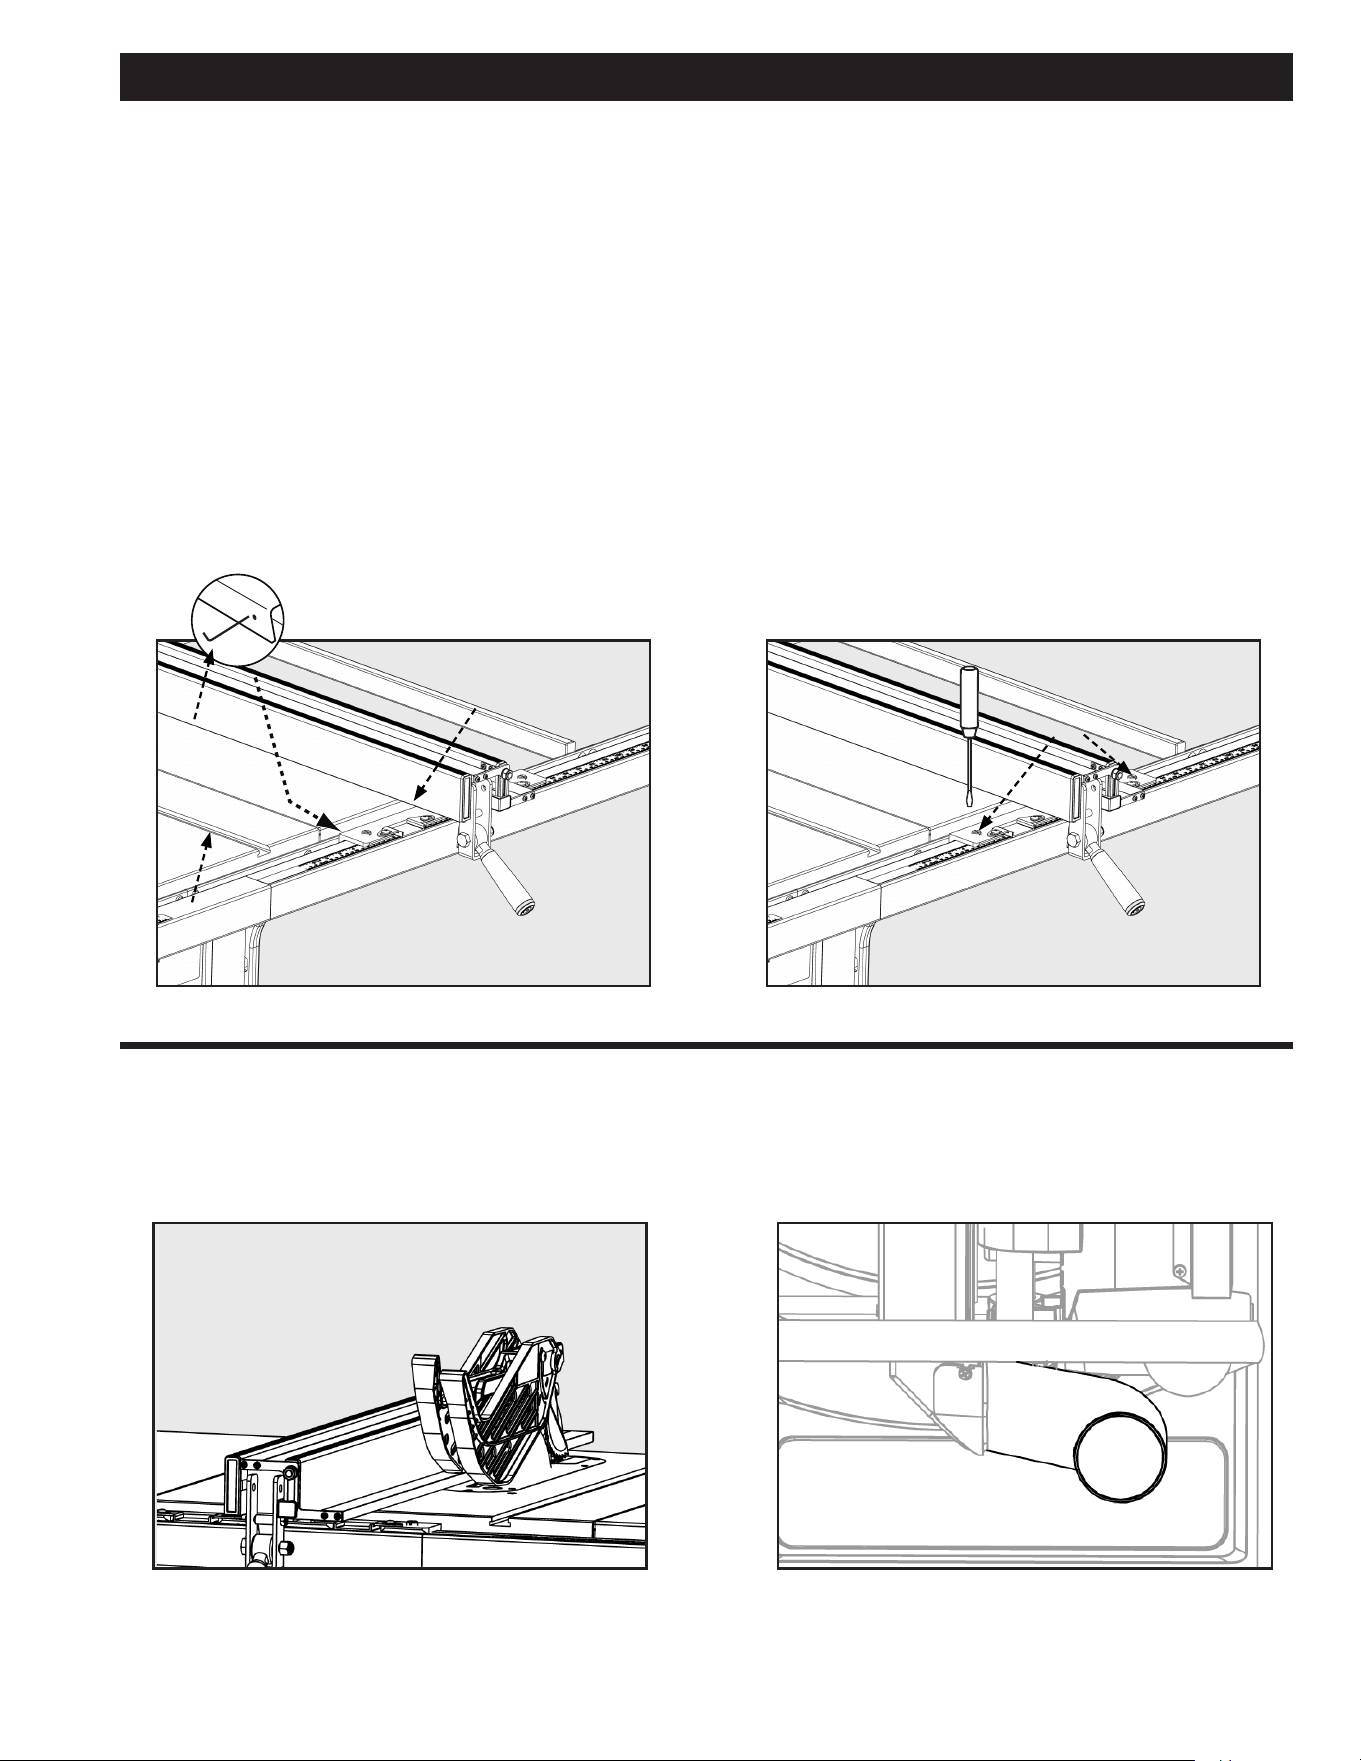
1. Move fence adjacent to right miter gauge and secure to
the guide tube by lowering the fence clamping lever.
2. If the fence face (A) gure 42, is not parallel to the
miter slot (B), raise the clamping lever and lift the fence
and place it on the saw table.
3. Adjust the one or both of the set screws (C) 1/4 turn or
less.
4. Replace fence on guide tube and repeat steps 1 through
3. If fence is closer to parallel, turn the set screw in the
same direction but a little less. If the fence is further out
of parallel, turn the set screw in the opposite direction.
5. Repeat steps 1 through 3.
1. Move fence over the cast iron table and secure to the
guide tube by lowering the fence clamping lever.
2. Use a square to check that the fence face is
perpendicular to the table.
3. If the fence face is not perpendicular to the table,
release the clamping lever and slightly adjust one of the
slotted set screws (A) gure 43 until the fence face is
perpendicular to the table.
4. Secure the fence to the guide tube to insure the fence
remains perpendicular. If not, repeat steps 1 through 4.
FIGURE 43
FIGURE 44 FIGURE 45
A
FIGURE 42
C
B
A
Dust Collection
1. Connect a shop vacuum or dust collection hose to dust
port on back of saw for best dust collection.
Auxiliary Fence
For thin materials use the fence on the left of the blade. Fold
down the thin fence to allow use of blade guard. Subtract 2
inches from the scale for accurate measurement.
31
Loading ...
Loading ...
Loading ...