
Important Safeguards
1
When using electrical appliances, basic safety precautions
should always be followed. These instructions should be saved
for future reference:
• Read and familiarise yourself with all operating instructions
before using this microwave oven.
• Before plugging your unit into the mains, visually check that
the unit is intact and has not suered any transit damage.
• Check that the voltage indicated on the data plate
corresponds with that of the local network before connecting
the appliance to the mains power supply.
• Close supervision is required when using this appliance near
children.
• This appliance can be used by children aged from 8
years and above and persons with reduced physical,
sensory or mental capabilities or lack of experience and
knowledge if they have been given supervision or instruction
concerning use of the appliance in a safe way and
understand the hazards involved. Children shall not play
with the appliance. Cleaning and user maintenance shall
not be made by children unless they are older than 8 and
supervised.
• Keep the appliance and its cord out of reach of children less
than 8 years.
• Do not touch hot surfaces. The outer surfaces are liable to get
hot during use. Always use the handles and knobs.
• Do not immerse the appliance or its cord in water or any other
liquids.
• Do not leave the appliance unattended during use.
• Do not leave the appliance unattended whilst connected to
the mains supply.
• Always use this appliance on a solid, level, non-ammable
surface.
• Do not use this appliance outdoors.
• Do not use this Microwave Oven with a programmer, timer,

2
separate remote-control system or any other device that
switches the appliance on automatically.
• It is imperative to unplug the power cord after the appliance
has been used, before it is cleaned and whilst being repaired.
• Repairs to electrical appliances should only be performed
by a qualied electrician. Improper repairs may place user at
serious risk.
• Do not operate this appliance with a damaged plug or cord,
after a malfunction or after being dropped or damaged in any
way.
• Regular, periodic checks should be carried out on the mains
cable to ensure no damage is evident. Should there be any
signs of damage the appliance should not be used.
• If the power cable is damaged, it should only be replaced by
the manufacturer or a suitable qualied after-sales-service in
order to avoid a hazard.
• Do not allow the mains cable to hang over sharp edges or
come in contact with hot surfaces.
• Do not run the mains cable under carpets, rugs, etc.
• Allow the unit to cool before storage.
• Before cleaning, disconnect the appliance from the mains
supply and allow to cool.
• This appliance is intended for household use only and should
not be used for industrial purposes.
• Do not use any accessories or attachments with this
appliance other than those supplied or recommended by
supplier.
• Do not use this appliance for anything other than its intended
use.
• Do not push objects into any openings as damage to the
appliance and/or electric shock may occur.
• Ensure appliance is situated in an open area, do not allow it
to come in contact with Cupboards, Curtains, wall coverings,
clothing or other ammable materials.
• Unplug after each use. Grasp the plug, not the cord.

• Metallic containers for food and beverages are not allowed
during microwave cooking.
• When heating food in plastic containers or paper containers,
keep and eye on the oven due to the possibility of ignition.
• The contents of feeding bottles and baby food jars shall
be stirred or shaken and the temperature checked before
consumption, in order to avoid burns.
• This appliance shall not be cleaned with a steam cleaner.
• The microwave oven is intended to be used free-standing.
• Do not place this microwave into a cabinet.
Caution
• Do not overcook food.
• Remove wire twists from paper and plastic bags before
placing in the oven.
• Do not heat oil or fat for deep frying in the oven as the
temperature of the fat can’t be controlled.
• After use wipe the waveguide cover with a damp cloth,
followed by a dry cloth to remove any food splashes and
grease. Built up grease may overheat and smoke or ignite.
• If materials inside the oven smoke or ignite, keep the door
closed, turn oven o and disconnect the power supply in
order to stie any ames.
• WARNING: Liquids and other foods must not be heated in
sealed containers since they are liable to explode; Baby
bottles tted with a screw cap or teat are considered sealed
containers.
• Liquids should be heated in a wide mouthed container
and left for a short period after the heating cycle to avoid
possible hazards such as delayed eruptive boiling of the
liquid. Therefore care must be taken when handling the
container.
• Potatoes, sausage and other skinned foods should be pierced
before heating.
• Eggs in their shell and whole hard-boiled eggs should not be
heated in microwave ovens since they may explode, even
3

4
after the microwave heating has ended.
• Only use utensils suitable for use in a microwave oven.
• Do not store food or other items in the oven.
• Do not operate the oven without any food or liquid inside, this
may damage the oven.
• WARNING: If the door or door seals are damaged or if the
oven has malfunctioned, the oven must not be operated until
it has been repaired by a competent person. It is hazardous
for anybody other than a suitably qualied person to carry
out any service or repair that involves the removal of a cover
which gives protection against exposure to microwave energy.
• This microwave oven is intended for the heating of food
and beverages. The drying of clothes, heating of warming
pads, slippers, sponges and cloths may lead to risk of injury,
ignition and re.
• The oven should be cleaned regularly and any food deposits
removed.
• Failure to maintain the oven in a clean condition could lead to
deterioration of the surface that could adversely aect the life
of the appliance and possibly result in a hazardous situation.
Installation
• Select a level surface no less than 85cm (33 inches) from the
oor, that provides enough space for the outlet vents.
• A minimum clearance of 5cm (2 inches) is required between
the oven and any adjacent wall, with a minium clearance of
10cm (4 inches) between the rear of the microwave and the
wall.
• Leave a minimum clearance of 20cm (8 inches) above the
oven.
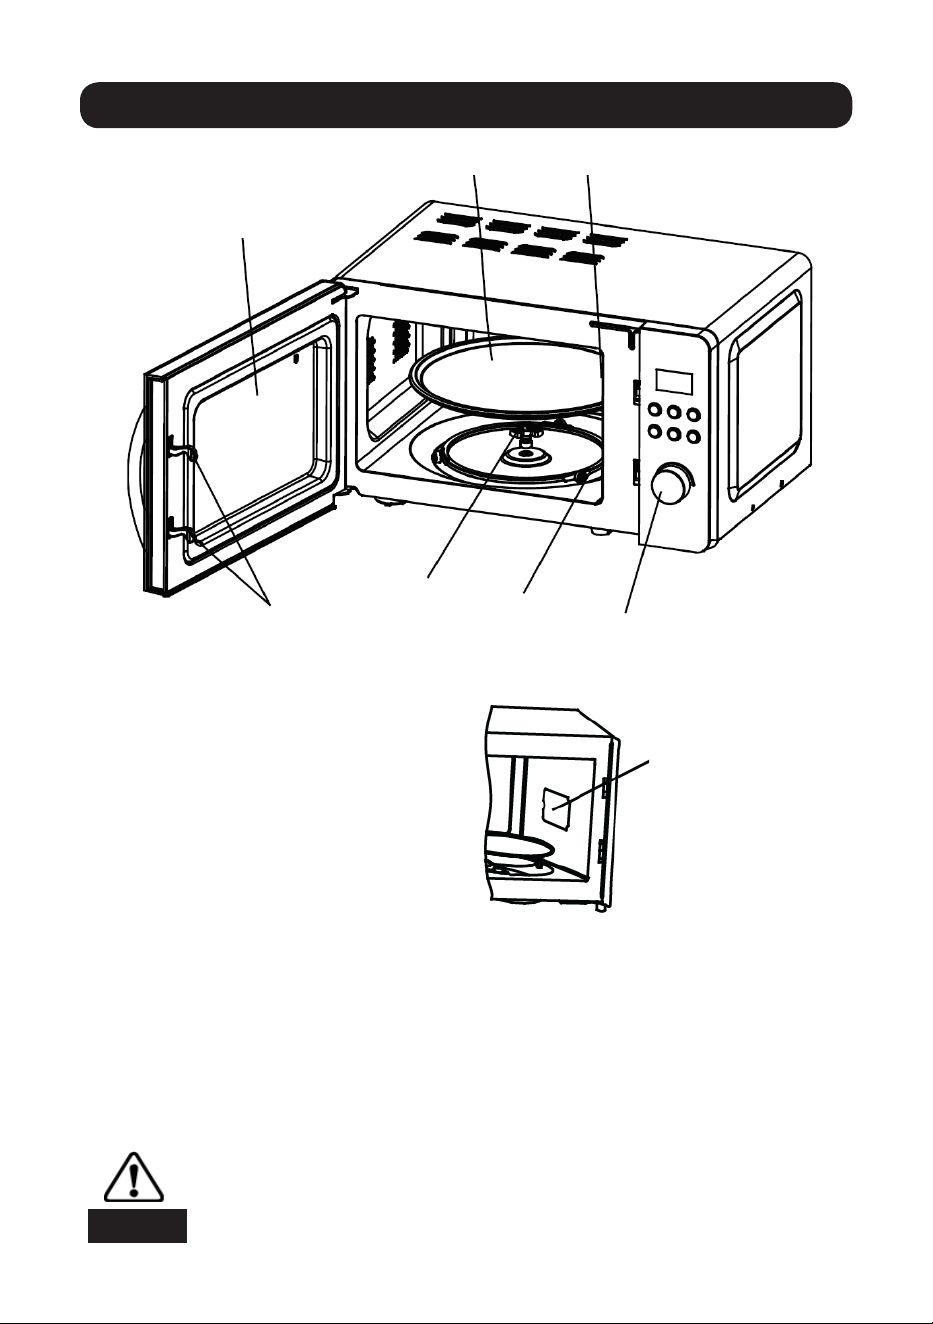
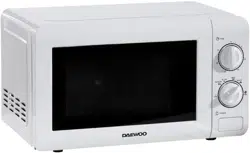
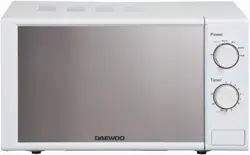
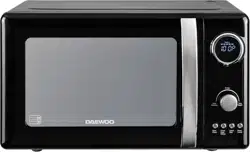
Features
1. Mirror window
2. Glass turntable
3. Waveguide cover
4. Door lock
5. Turntable support
6. Turntable ring
7. Control panel
Never remove the waveguide cover
Make sure the turntable support is correctly located
Warning
5
Waveguide
cover
The door of the microwave oven must be fully closed in
order for it to operate, this is due to a safety interlock
between the locking mechanism and the control panel.
Place the turntable ring rst, t the turntable onto the rotating
turntable support and make sure it is geared in properly
1
2 3
4
5
6
7
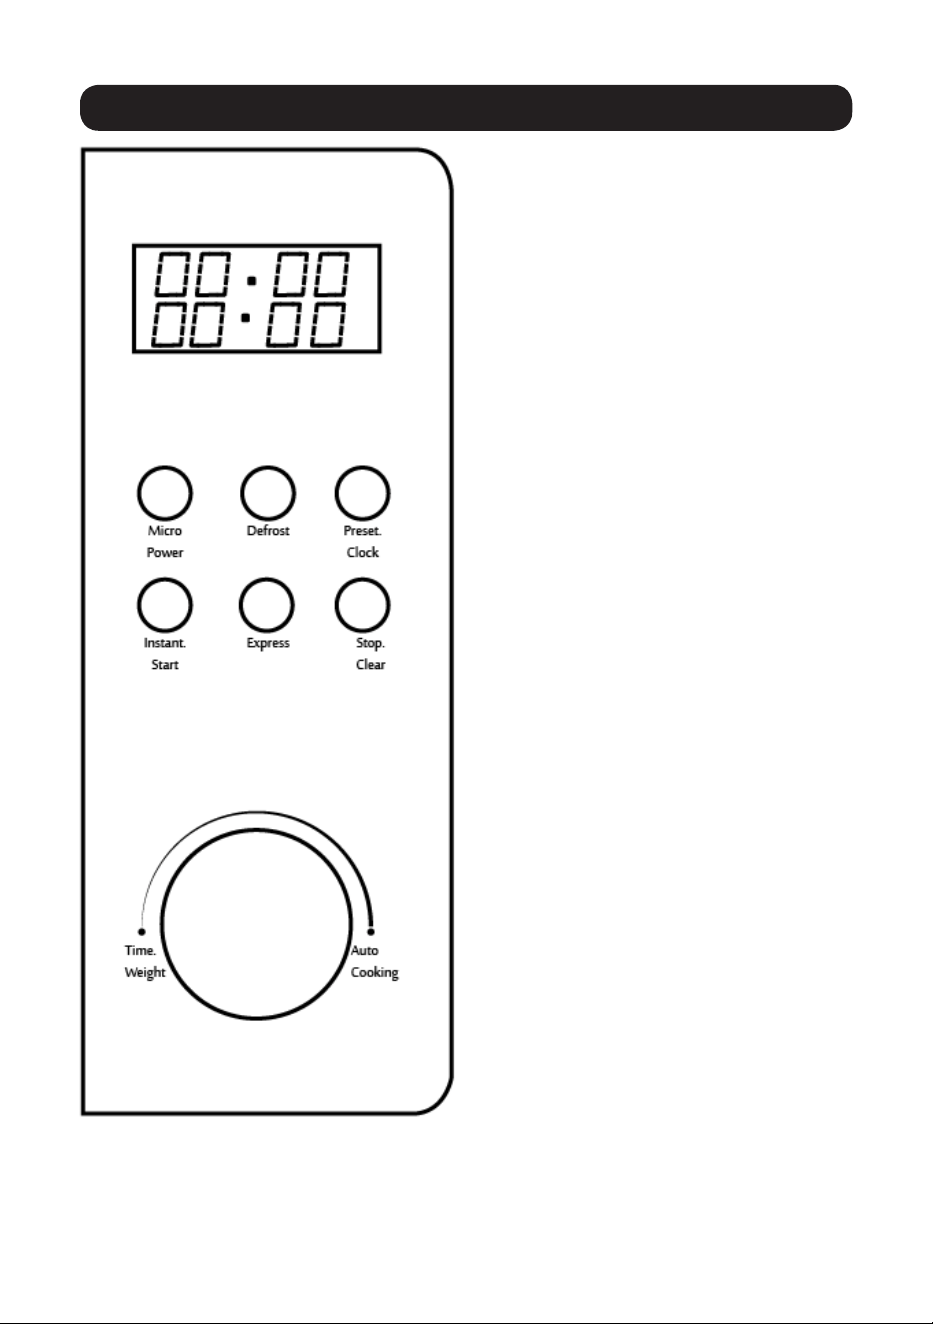
Control panel
Initial set up
The LED display ashes 3
times when plugged into the
power supply. The display
will then show “:”, prompting
you to input a cooking menu
and the time
Time.Weight/Auto Cooking
Increase or decrease
cooking time or weight. Turn
to choose from the Auto
cooking menu
Stop.Clear
Press once to cancel an
input. During cooking press
once to stop cooking, press
twice to cancel the program
Auto reminder
When cooking has nished
the LED display will show
END and 3 beeps will sound
to prompt you to remove
the food. If Stop/Clear is
not pressed the beeps will
resound at an interval of 3
minutes
Preset.Clock
Allows you to set the current
time and input a pre-set time
Instant. Start
Press to start instant cooking
6
NOTE: If the microwave oven is not used for 2 minutes it will
automatically go into standby mode. To start cooking, open
and close the door and press the Instant.Start button
Setting the clock
For example to set the clock for 12:30
1. After the microwave oven is plugged into the power supply
the display will show “:”.
2. Press the Preset.Clock, the display will show 0:00.
3. To set the hour, turn the Time.Weight/Auto Cooking knob to
12:00.
4. Press the Preset/Clock button to conrm. The minutes will
ash.
5. To set the minutes, turn the Time.Weight/Auto Cooking
knob to 12:30.
6. Press the Preset.Clock button to conrm or wait 5 seconds
and the display will show the time automatically.
Instant.start
You can start to microwave cook immediately, without setting
an auto programe, just press the Instant.Start button. The time
starts at 1 minute and goes up in 10 second increments. To
pause or cancel any cooking program, press the Stop.Clear
button.
NOTE: If the microwave oven is not used for 2 minutes it will
automatically go into standby mode. To start cooking, open
and close the door to activate the Instant.Start button
Microwave cooking
Press the Micro.Power button, the LED display show:
7
High Power 100P
100% microwave power for
quick and thorough cooking
Medium High Power 80P
80% microwave power for
medium express cooking
Medium Power 60P
60% microwave power for
steaming food
Medium Low Power 40P
40% microwave power for
defrosting
Low Power 20P
20% microwave power for
keeping food warm
The maximum time which can be set is 60 minutes.
Never operate the microwave oven when empty.
• If you want turn the food during cooking, open the door, turn
the food and press the Instant.Start button once and the
cooking time will continue.
• If you intend to remove the food before the pre-set time,
you must press Stop.Clear button twice to clear the pre set
program.
For example, to cook at 80P for 10 minutes
1. Press the Micro.Power button until the display shows
80P.
2. To set the time, turn the Time.Weight/Auto Cooking
knob until the display shows 10:00.
3. Press the Instant.Start button and the LED display will
count down to show the time remaining.
Defrost
Press the Defrost button, the LED display will show d.1, d.2 and
d.3.
It is important to turn food during defrosting to make
sure it is defrosted thoroughly. Check using a knife to
make sure that food is defrosted, a knife should go
through the food with ease.
For example, to defrost 0.4kg of poultry
1. Press the Defrost button to set the food type, the display
will show d.2.
2. To set the weight, turn the Time.Weight/Auto Cooking
knob until the display shows 0.4.
3. Press the Instant.Start button. During the defrost time
the microwave will sound 3 beeps to remind you to turn
over the food. Open the door, turn over the food and press
Instant.Start button to continue defrosting.
Caution
Caution
8
d.1 Defrost meat from 0.1kg to 2.0kg
d.2 Defrost poultry from 0.2kg to 3.0kg
d.3 Defrost seafood from 0.1kg to 0.9kg
9
Display Food Weight
A.1
Popcorn
Suitable for popping an 85g bag of
popcorn which is available from the
Supermarket. Should the popping
sound decrease towards the end of
the time to 1-2 per second, press the
Stop.Clear button
A.2 Popcorn Same as A.1 except for 100g
A.3 Pizza Reheat 150g of chilled Pizza
A.4 Tea or Coee 250ml
A.5 Tea or Coee 500ml
A.6 Potato
450g sliced potato - place into a large
dish and cover with cling lm
A.7 Potato Same as a A.6 except for 650g
A.8 Fish
Steam 450g sh. Place the sh
into and shallow dish and season,
cover the dish with cling lm. After
cooking has nished leave to stand
for 2 minutes
Using the Auto menu
1. Turn the Time.Weight/Auto Cooking knob, the LED
display will show A.1, A.2 and so on up to A.8.
2. After setting the Auto menu, press the Instant.Start
button, the timer will now start to count down.

Auto Start with timer delay function
You can pre-set a cooking time for later in the day, this consists
of 2 steps:
Step 1 - Setting the clock
Step 2 - Setting the cooking menu and time
For example if the time is now 12:30 and you want the cooking
time to start at 14:30 with 100P microwave power for 9 minutes
and 30 seconds. Check the display clock is set to the correct
time.
1. Select the cooking power by pressing the Micro.Power
button until the display shows 100P.
2. Turn the Time.Weight/Auto Cooking knob to set the
cooking time, the display will show 9:30.
3. Press and hold the Preset.Clock button for 3 seconds to
return to the current time on the display clock.
4. Set the cooking start time to 14:30 by turning the Time.
Weight/Auto Cooking knob.
5. Press the Preset.Clock button to set the hour at 14:00
6. Set minutes by turning the Time.Weight/Auto Cooking
knob until the display shows 14:30.
7. Press the Preset.Clock button to conrm the delayed
cooking time. The delayed cooking time has now been set
and cooking will start at 14:30.
8. You can check the pre-set starting time by pressing the
Preset.Clock button.
Multi-Sequence cooking
For the best cooking results, some recipes call for a dierent
cooking mode and time. You can program your personalised
menu as follows:
For example, if you want to cook with 100P microwave power for
3 minutes then 20P microwave power for 9 minutes.
1. Press the Micro.Power button until the display shows
100P
2. Turn the Auto Cooking/Time.Weight knob to set the
cooking time, the display will show 3:00.
3. Press the Micro.Power button until the display shows
10
20P.
4. Turn the Auto Cooking/Time.Weight knob to set the
cooking time, the display will show 9:00.
5. Press the Instant.Start button to start cooking.
When the microwave has nished cooking at 100P it will
automatically start to cook at 20P. A maximum of 4 cooking
sequences can be set.
Express Cooking
The express button allows you to heat up beverages or food
conveniently with using a set menu. The time starts at 1 minute
and goes up in 30 second increments. For example to heat for 1
minute 30 seconds:
1. Press the Express button until the display shows 0:30, the
time will automatically. The time will go up increments of 30
seconds.
2. To pause or cancel any express cooking, press the Stop.
11
Caution
The temperature of food before using the auto
cooking function should be between 20-25°C, a
higher or lower temperature before cooking would
require an increased or decreased cooking time.
The temperature and weight of foods largely eect cooking
times, if any foods deviate from the auto weights, for best results
adjust the cooking time.
Child lock function
The control panel can be locked so that children cannot use the
microwave oven, or for when you are cleaning it.
• To set the child lock - hold the Stop.Clear button for 3
seconds. The display will show OFF.
• To cancel the child lock - hold the Stop.Clear button for 3
seconds. The display will show the time.
12
Utensils guideline
Material of
container
Microwave Notes
Heat resistant
ceramic
Yes Do not use ceramics that have a
gilt or metal rim
Heat resistant
plastic
Yes Should not be used for extended
cooking times
Heat resistant
glass
Yes
Plastic lm
Yes Should not be used for cooking
meats as the higher temperatures
may damage the lm
Grill rack
No
Metal
containers
No Microwaves cannot penetrate
through metals
Lacquer
No Poor heat resistance
Bamboo,
wood, paper
No Poor heat resistance and risk of
ignition
It is recommended that only utensils and containers marked safe
for microwave use should be used in this microwave oven. As a
general rule containers made from heat resistant ceramic, glass
or plastic are suitable for microwave cooking. Never use metal
containers for microwave cooking as sparks are likely to occur.

Cleaning
Remove the power cord from the wall outlet before
cleaning. Don’t immerse the appliance in water or other
uids when cleaning.
• Wipe the exterior with soft damp cloth and dry thoroughly.
• Using a soft damp cloth, wipe clean the interior of the door
and door seals, interior cavity to remove any spill or spatter
and dry thoroughly.
• Do not remove the waveguide cover. Wipe clean the wave
guide cover making sure this is free from food residue, this is
located on the cavity wall on the right hand side.
• Wash the glass turn table, turntable ring and support in warm
soapy water and dry thoroughly.
Some foods, for example sh can leave an odour which may
linger, to refresh the cavity follow one of the 3 methods below:
Method 1 - Distilled Vinegar
1. Add 1 cup of water and 1/2 cup of distilled vinegar to a
microwave-proof bowl or plastic container and place in the
centre of the oven.
2. Heat on high for 2 minutes 30 seconds or until the
solution boils or gives o steam.
3. Leave to cool for 15 minutes before opening the door.
4. Open the door, remove the bowl and glass turntable, then
wipe the microwave with a clean damp cloth. Wipe over
the glass turntable and return to the microwave.
Method 2 - Lemon
1. Cut a lemon in two and squeeze the lemon into a
microwave-proof bowl or plastic container, add 1 cup of
water and place in the centre of the oven.
2. Heat on high for 2 minutes 30 seconds or until the
solution boils or gives o steam.
3. Leave to cool for 15 minutes before opening the door.
4. Open the door, remove the bowl and glass turntable, then
wipe the microwave with a clean, damp cloth.
5. Wipe the glass turntable before replacing.
13
Warning

Method 3 - Bicarbonate of soda
1. Add 1 cup of water and 2 tbsp bicarbonate soda to a
microwave-proof bowl or plastic container and place in the
centre of the oven.
2. Heat on high for 2 minutes 30 seconds or until the solution
boils or gives o steam.
3. Leave to cool for 15 minutes before opening the door.
4. Open the door, remove the bowl and glass turntable, then
wipe the microwave with a clean, damp cloth.
5. Wipe the glass turntable before replacing.
WARNING: Only allow children to use the oven without
supervision when adequate instructions have been given so that
the child is able to understand the hazards of improper use.
• Place thicker areas towards outside of food container, the
thinner parts towards the centre and spread evenly. Do not
over lap if possible.
• Start cooking with a shorter time setting, evaluate it after the
time nishes and extend the cooking time if needed. Over
cooking can result in smoke and burnt food.
• Food such as chicken, burgers or steak should be turned
once during cooking.
• Depending on the food type, if applicable stir from the outside
inwards to the centre of the dish once or twice during cooking.
• Make sure meat is cooked thoroughly there should be no
signs of pink in the meat or in the meat juices.
14
Cooking Tips
Electrical Connections
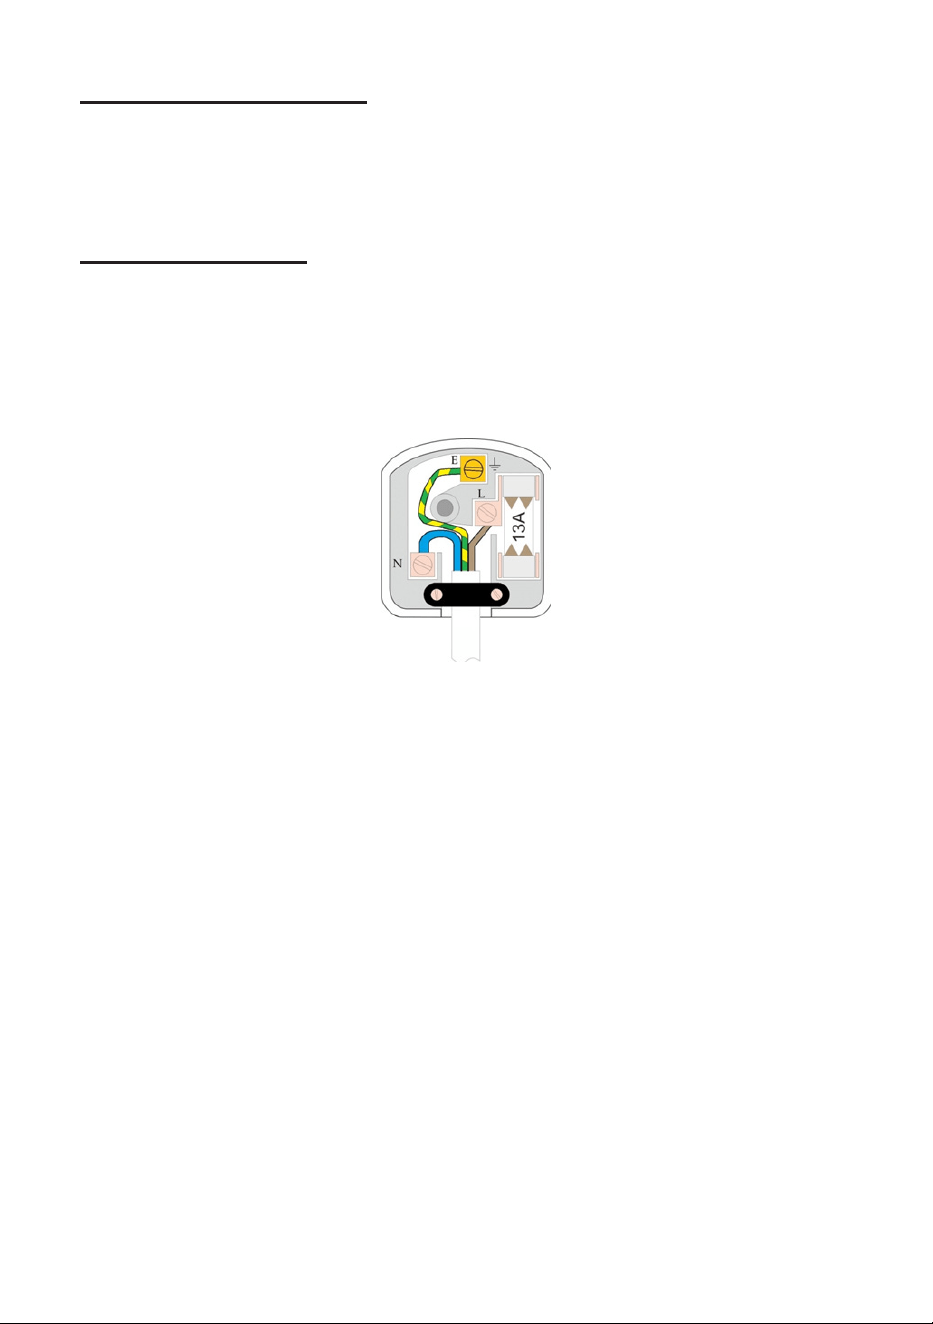
This appliance is tted with a fused three-pin plug to BS 1363.
If the plug has to be removed, it should be cut o and carefully
disposed of immediately. To avoid a possible shock hazard, do
not insert the discarded plug into a mains socket.
Fitting a new plug
If for any reason you need to t a new plug, the exible mains
lead must be connected as shown below. The wires in the mains
lead tted to this appliance are coloured in accordance with the
following code:
The Blue wire must be connected to the terminal marked N or
coloured Black.
The Brown wire must be connected to the terminal marked L or
coloured Red.
The Green and Yellow wire must be connected to the terminal
marked E or coloured Green.
Check that there are no cut or stray strands of wire inside the
plug.
Use a 13 Amp BS 1362 fuse, only use BSI or ASTA approved
fuses.
If you are in any way unsure which plug or fuse to use, always
refer to a qualied electrician.
After replacing or changing a fuse on a moulded plug, the
cover must be retted to the plug; the appliance must not be
used without a fuse cover.
Connect Green &
Yellow to Earth (E)
Connect Blue to
Neutral (N)
Connect Brown to
Live (L)
Ensure the outer
sheath of the mains
lead is securely held
by the cable clamp
15

Servicing
Servicing and repairs should only be carried out by
qualied service persons.
Some components still retain a high voltage charge even when
the microwave oven is disconnected from the mains supply,
never remove covers or guards.
If any part of the oven or cord become damaged stop using it
immediately and seek advice from a qualied service person.
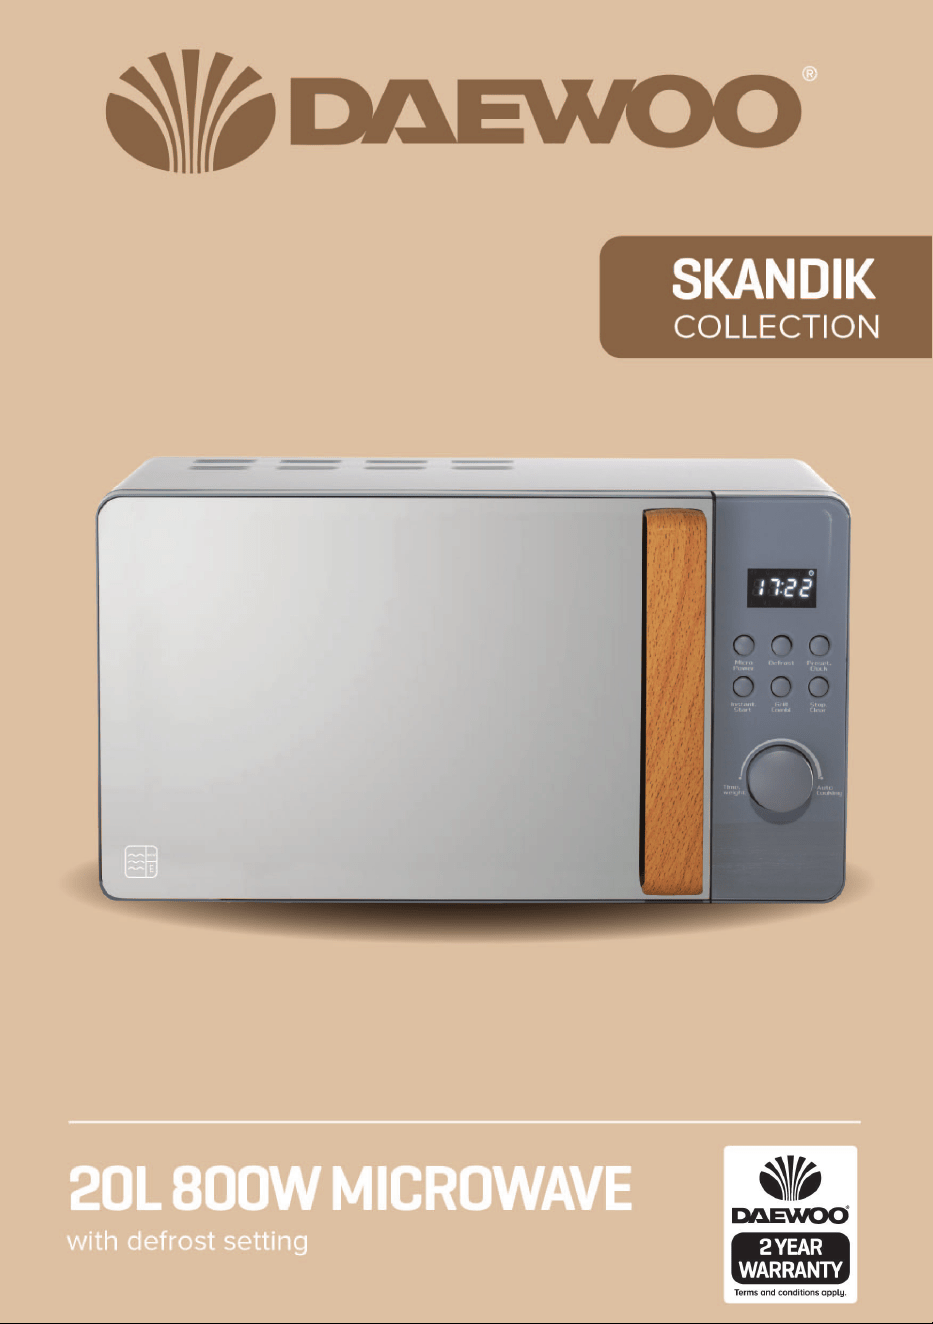
Technical Data
Protection Class : Class 1
Voltage : 220-240V AC 50Hz
Rated power (input) : 1280W
Rated power (output) : 800W
Microwave frequency : 2450MHz
Model number : SDA1704
Warning
16