Loading ...
Loading ...
Loading ...
16
reversing the door cont.
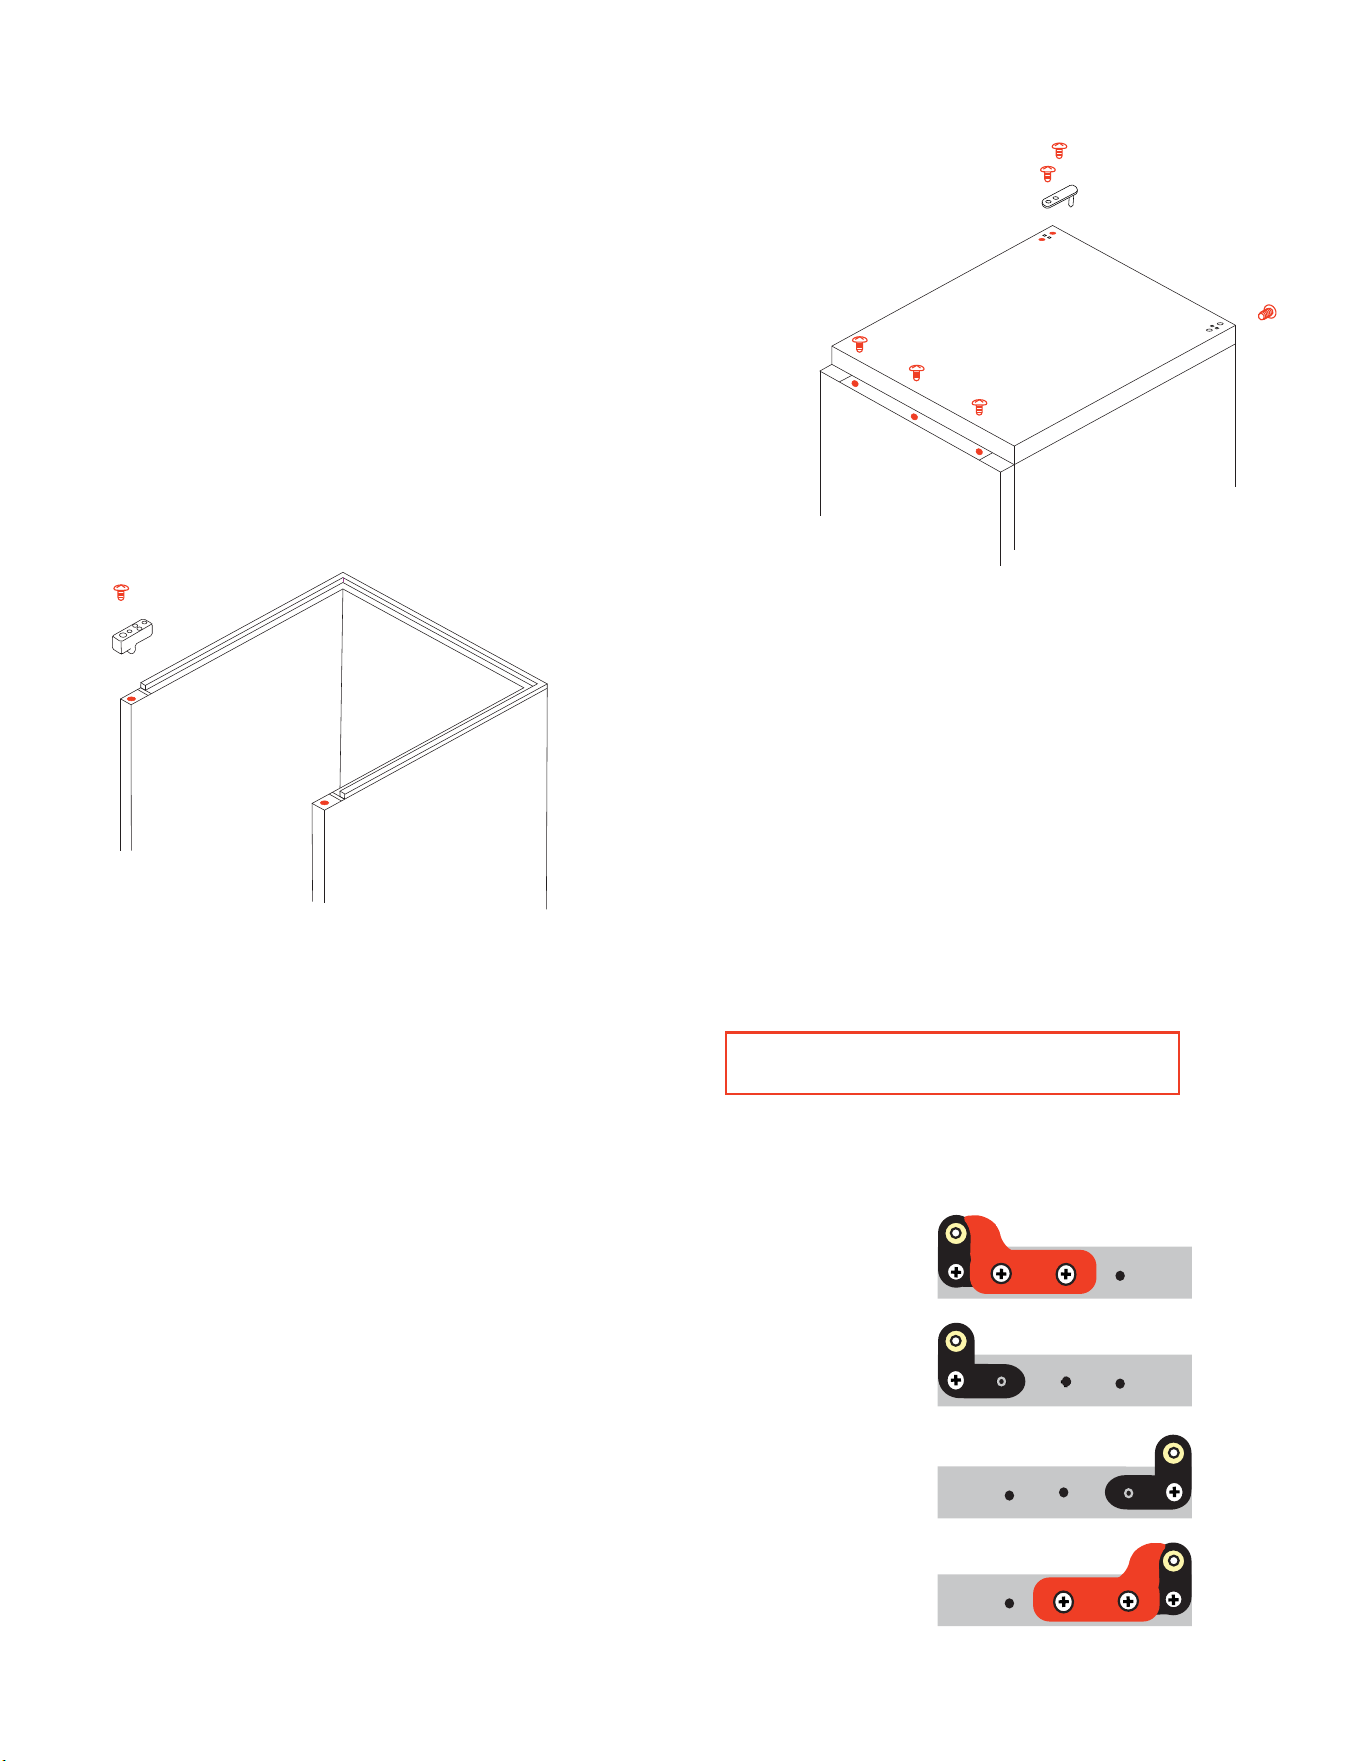
3. At the rear of the unit, there are three (3) screws
along the top. Remove these screws.
On the top front of the unit, there is one (1) additional
screw on the left hand side, remove this screw.
The Top Cover plate will now lift off.
.
REAR OF UNIT
TOP COVER
4. Remove the Top Hinge Support which is held in
place by one (1) screw from the right hand side and
transfer it to the left hand side re-attaching it with the
screw.
Replace the Top Cover plate using the three (3)
screws along the rear of the unit. The screw removed
from the top front on the left hand side - must be screwed
i
Remove the plugs from the left hand side screw holes
on the top cover and door and move them to the right
hand side.
nto the corrosponding hole on the right hand side.
TOP HINGE
SUPPORT
Panel Ready Units Skip to Step 5A
5. Center the hole in the bottom left hand side of the door on the bottom hinge pin and slide the door
down into place. Install the top hinge using the two screws removed in Step 1.
5A. Panel Ready Units Only:
Turn the door so the bottom edge is facing up.
a Remove the DOOR STOP (shown in RED)
b Remove the ANGLE BRACKET (shown in Black)
c Flip the ANGLE BRACKET over and install
using one screw at the other side of the door.
d Replace the DOOR STOP with the mirror image
door stop supplied with the unit using the screws
removed earlier.
Pop the small plastic bushing out and replace it after
the panel is installed. SKIP TO STEP 2 ON PAGE 20
a
b
c
d
Loading ...
Loading ...
Loading ...