Loading ...
Loading ...
Loading ...
20
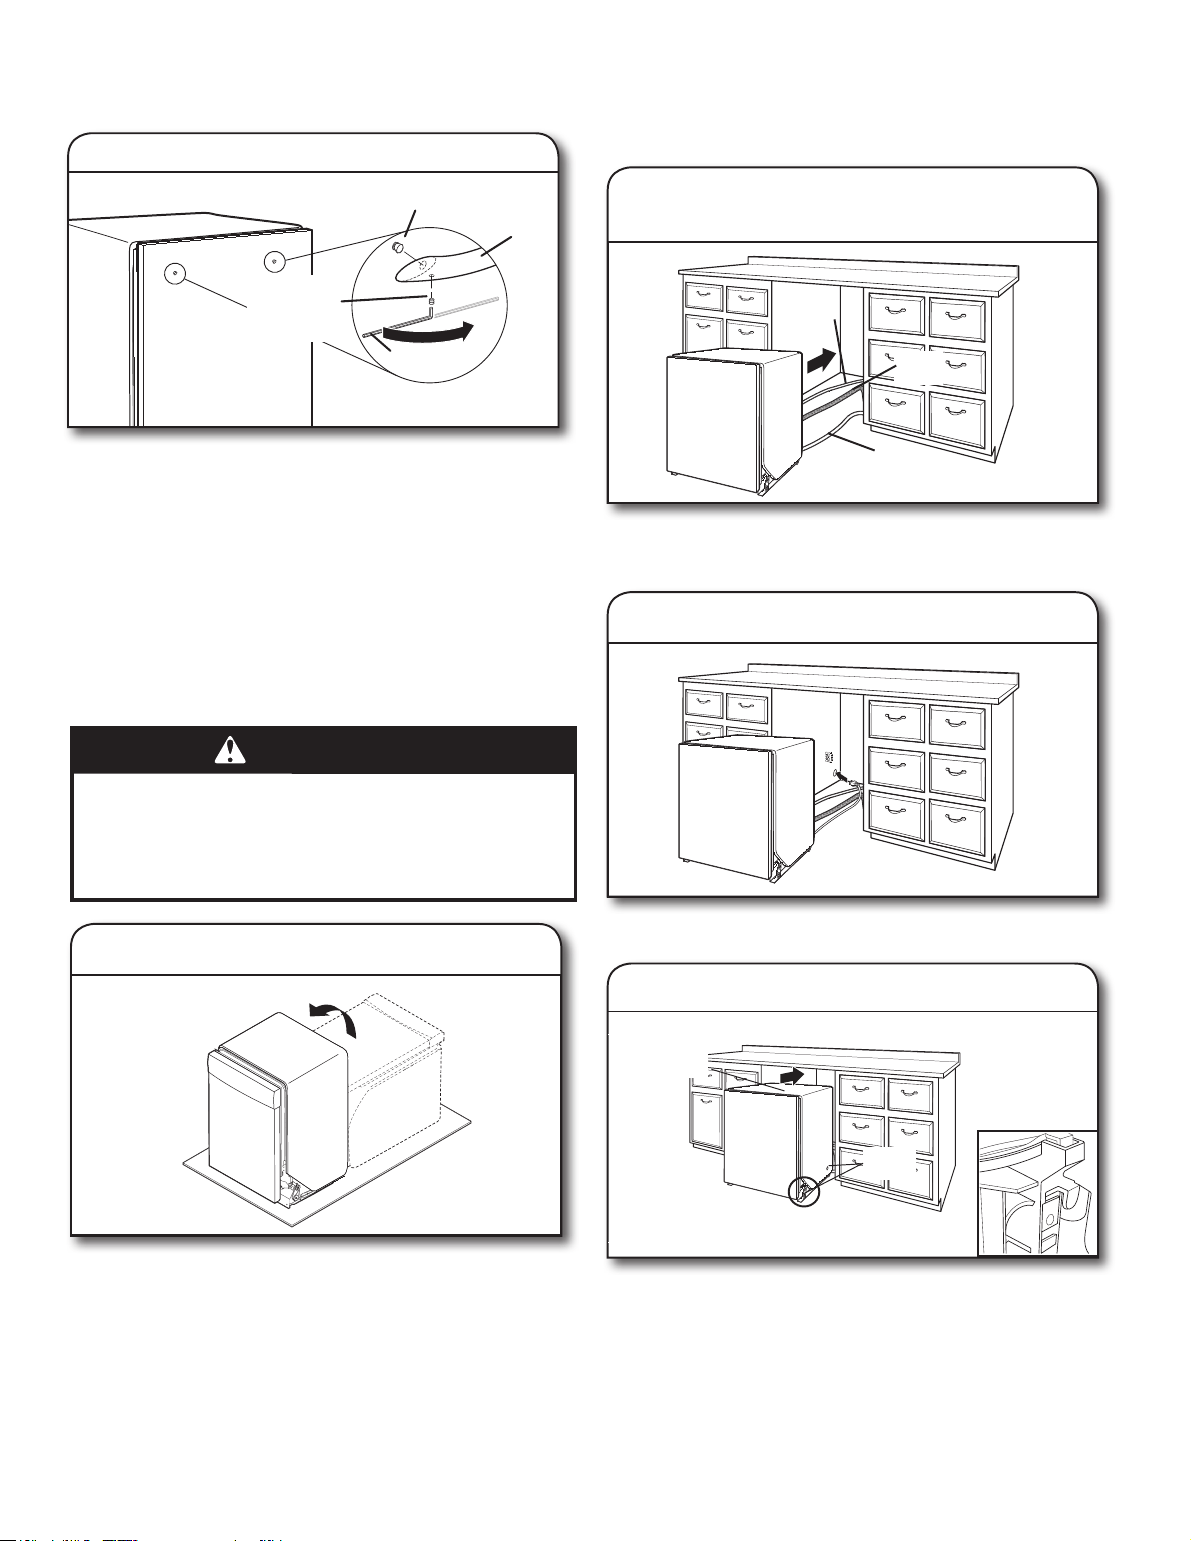
INSTALL DOOR HANDLE
(ON SOME MODELS)
IMPORTANT: Do not scratch the front panel during this
procedure. If door panel has a protective lm, peel lm back past
the point of the handle studs before installing handle. Handle is
easiest to install while unit is on its back.
Remove the door handle and hex key from the packaging.
Setscrews are already installed in the handle. Place handle on
mounting studs with the setscrews facing down. Push the door
handle tightly against the door. Insert the short end of the hex key
into the setscrews. Tighten the setscrews 1/4 turn past snug.
Retain hex key with Installation Instructions.
PLACE DISHWASHER IN CABINET
WARNING
Excessive Weight Hazard
Use two or more people to move and install
dishwasher.
Failure to do so can result in back or other injury.
26. Stand dishwasher upright
Using two or more people, stand the dishwasher up.
NOTE: Do not install kick plate until instructed to do so.
Dishwasher may t tightly into cabinet opening. Do not remove
insulation blanket—the blanket reduces the sound level.
IMPORTANT: Slowly move dishwasher completely into cabinet
opening. Do not kink or pinch water line, drain hose, power
cord, or direct wire between dishwasher and cabinet. Remove
cardboard from under dishwasher (if used).
NOTE: Route water supply, drain hose, and power cord out the
rear of the dishwasher. If your product has insulation around the
bottom, route these lines through the slits in that insulation in the
rear of the product.
27. Move dishwasher close
to cabinet opening
Route the utilities through the holes in the cabinet, and pull
the slack out at the same time as the dishwasher is pushed into
the cabinet.
28. Route power cord
If using a power cord, make sure to route the end through hole
in cutout before sliding dishwasher into the cabinet opening.
29. Secure insulation blanket
NOTE: Make sure insulation blanket is secured at both left and
right rear corners before pushing into cabinet opening to keep the
blanket from bunching up in a tight tting cabinet. The blanket
can be secured by pulling the insulation down toward the bottom
of the product and ensuring the hooks on the side members grab
onto the slots in the insulation blanket.
25. Install door handle
Secure
blanket
Water
line
Drain
hose
Cable
Insulation
blanket
Mounting stud
Handle
Hex key
Setscrew
(in bottom
of handle)
Loading ...
Loading ...
Loading ...