
1
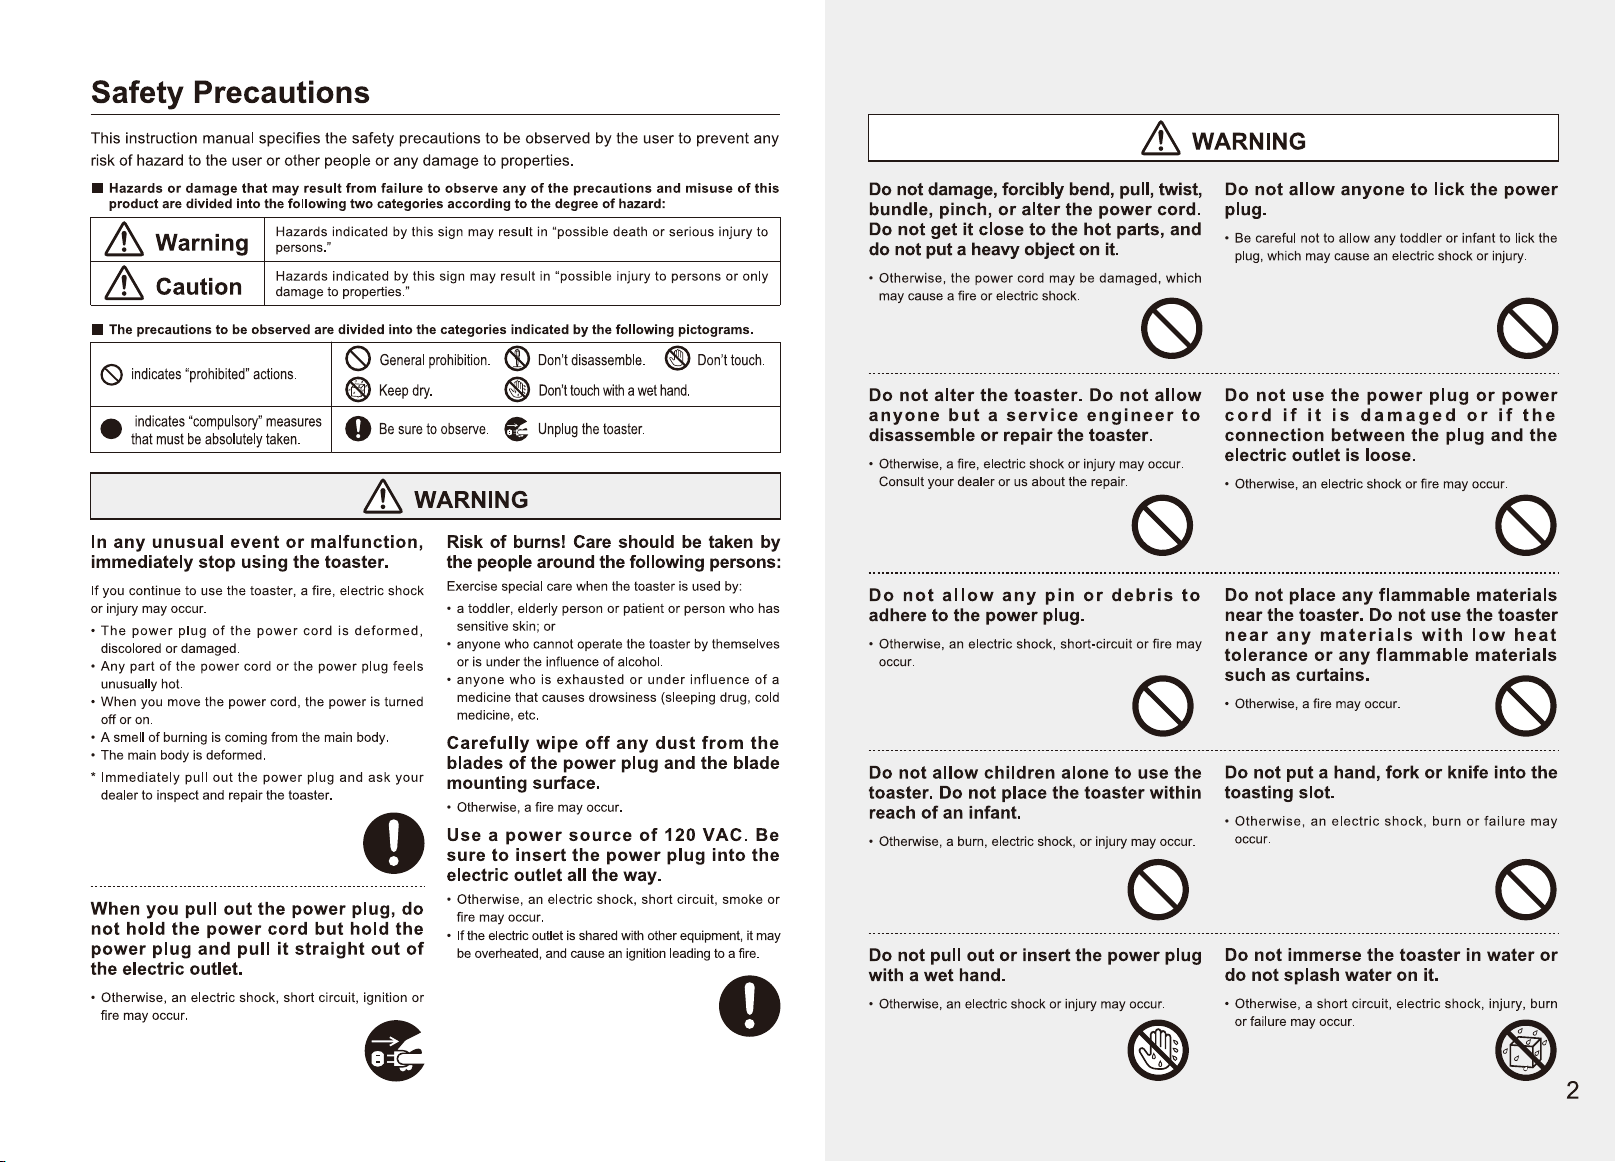
IMPORNT SAFEGUARDS
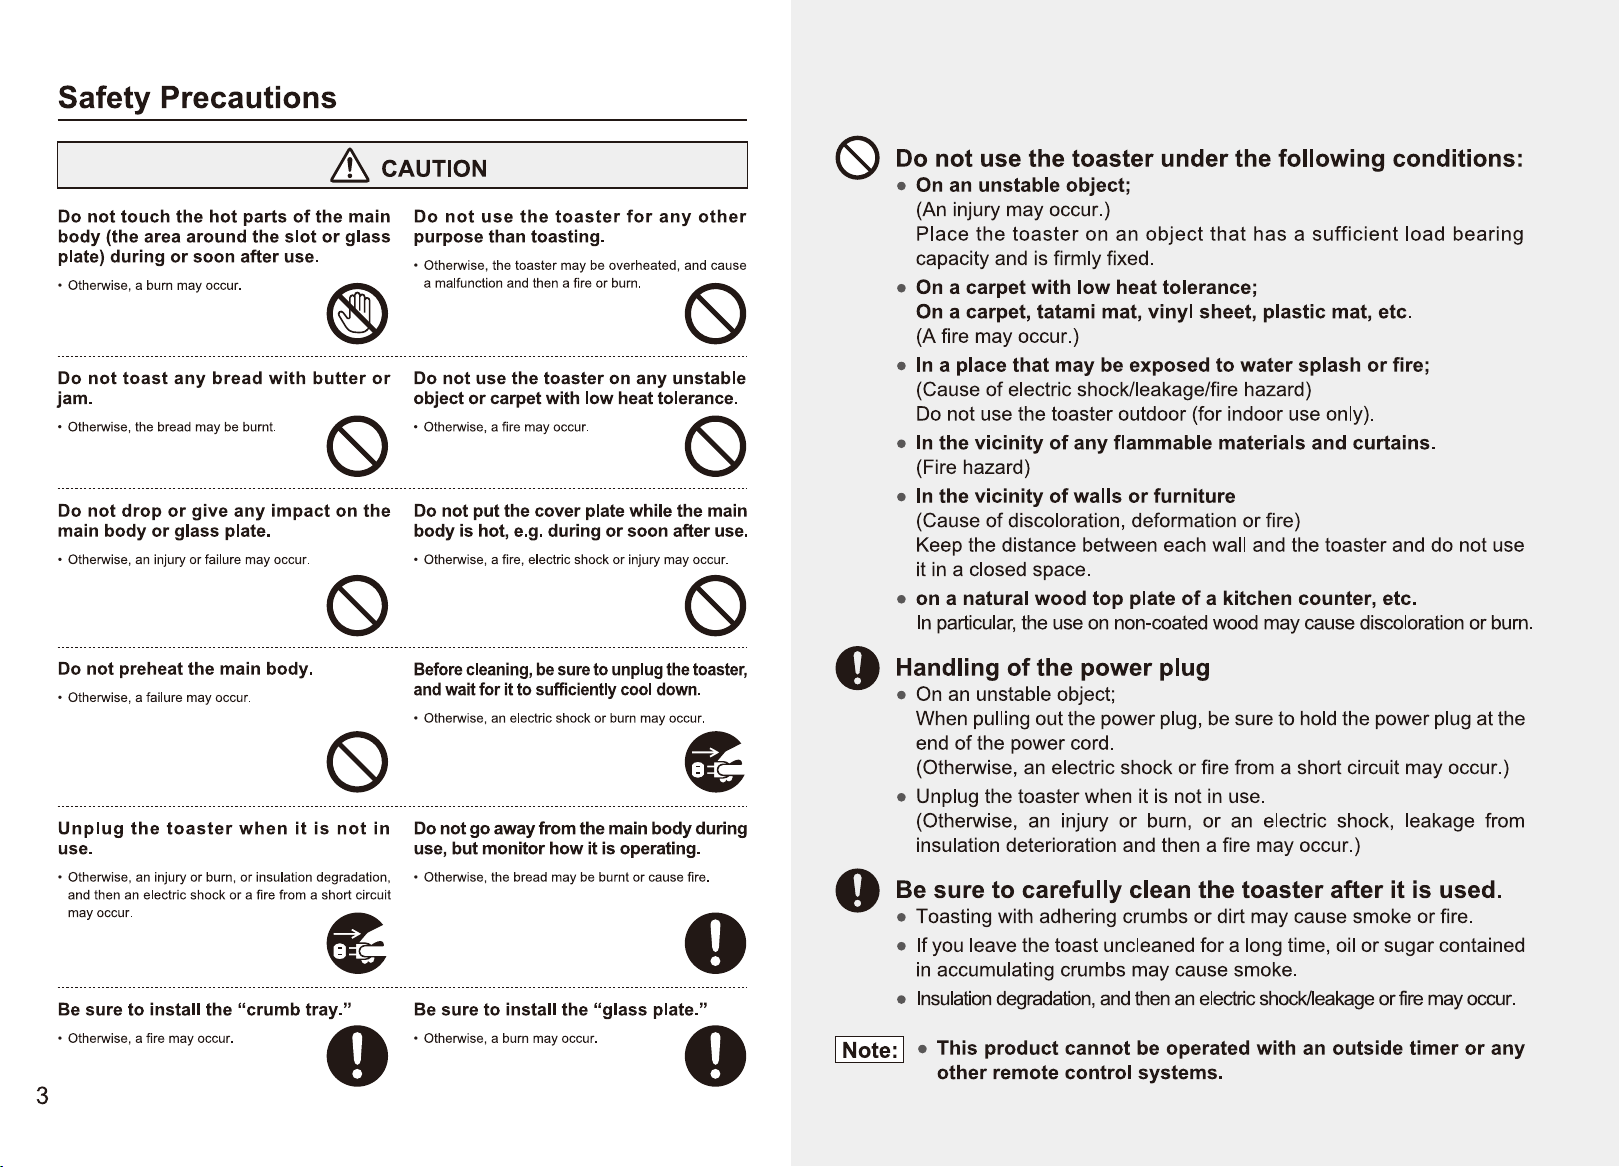
Basic Safety Precautions
When using electrical appliances, basic safety precautions should always be followed,
1.Read all instructions before using.
2.Do not touch any surface when the toaster-oven using. Use handle and knobs.
3.To protect against electrical hazards, do not immerse unit, cord or plugs in
water or any other liquid.
4.Close supervision is necessary when any appliance is used by or near children.
5.Unplug from outlet when not in use and before cleaning. Always allow to
cool before attaching or removing any parts.
6.Do not operate any appliance with a damaged cord or plug, or after the
appliance malfunctions or has been damaged in any manner. Return appliance
to the nearest authorized service facility r examination, repair, or adjustment.
7.The use of accessory attachments not recommended by the appliance
manufacturer may cause injuries.
8.Do not use outdoors.
9.This appliance does not need to preheat.
1 O. Do not let cord hang over edge of table or counter, or touch hot surface.
11.Do not piace on or near a hot gas or electric burner, or in a heated oven.
12.Extreme caution must be used when moving an appliance containing hot
oil or other hot liquids.
13.Always attach plug to appliance first, then plug cord into the wall outlet.
To disconnect, turn o Timer knob, then remove plug from wall outlet.
14.Do not use appliance for other than intended.
15.Oversized foods or metal utensils must not be inserted in a toaster oven
as they may create a fire or risk of electric shock.
16.A fire may occur if toasters are covered or touching flammable materiai,
including curtains, draperies, walls, and the like, when in operation.
1
Do not aempt to dislodge food when toaster is plugged in.
18.Do not operate unaended.
19.When heating toaster pastries, always use the lightest toast color seing.
20.This appliance has a polarized plug (one biade is wider than the other).
To reduce the risk of electric shock, this plug is intended to fit into a polarized
outlet only one way.
lf the plug does not fit fully into the outlet, reverse the plug. lf it stili does not fit,
contact a qualified electrician. Do not attempt to modify the plug in any way.
21.A short power cord ( or detachable power cord) is provided to reduce the risk
resulting from becoming entangled in or tripping over a longer cord.
22.Longer detachable power cords or extension cords are available and may
be used if care is exercised in their use.
23.
lf a longer detachable power cord or extension cord is used:
1 ) The marked electrical rating of the cord set or extension cord should be
at least as great as the electrical rating of the appliance;
2 ) The cord should be arranged so that it will not drape over the countertop
or tabletop where it can be pulled on by children or tripped over unintentionally.
24."Do not aempt to dislodge food when toaster is plugged in."
(This may be omied if toaster employs sheathed type heating elements.)
25."When heating toaster pastries, always use the lightest toast color seing."
CAUTION: Do not insert your fingers into any gaps or holes; it may cause
hazard or injury.
Do not breakdown any parts from the appliance.
SE THESE INSTRUCTIONS
HOUSEHOLD INDOOR USE ONLY
●

● When the crumb tray is installed, insert it all the way.
press Cancel button and then
the lever rises.
5
Before Use
Be sure to check the following items to ensure safety use of this product.
• Check thai the glass plate is installed. (See Page 7.)
• Check thai the crumb tray is installed. (See Page 4.)
• A lire or malfunction may occur if you toast the following bread:
• Any warped or deformed slice;
• Any slice covered with butter or jam;
• Any slice thai is too large or too thick;
• Any slice thai is too small or too thin; or
• Sandwiches, French toast, etc. (See the figures below.)
• Do noi use the toaster with the cover plate on or do noi put the cover plate on the main body
while il is hot aer use.
• Use the toaster only lo toast bread.
Do noi attempt lo toast rice cakes, etc. Otheise, a failure, lire or burn may occur.
About the size of a bread slice
In case of square bread
Width of slice
4.5 inches
In case of round-top bread
Width of slice
�
+
�
::-:·i/\\•_::
Height o
fslice
-
• ••
•
•
•
· .•
•
4.5inches
+
�.-./.:·_:_�\>
-• : : •
•
· ·:
•
. •. ( :
H
eight of slice
t
4.7inches
t
Thickness of slice
7/8 inches
Thickness of slice
7/8 inches
How to Preheat
When you use the toaster for the first time, it may generate smoke or odor,
however, it will gradually fade as you use the toaster repeatedly. lf you do not like
the odor, preheat the toaster.
* When you preheat the toaster, first remove every packing materials and do not put
anything in the toasting slot.
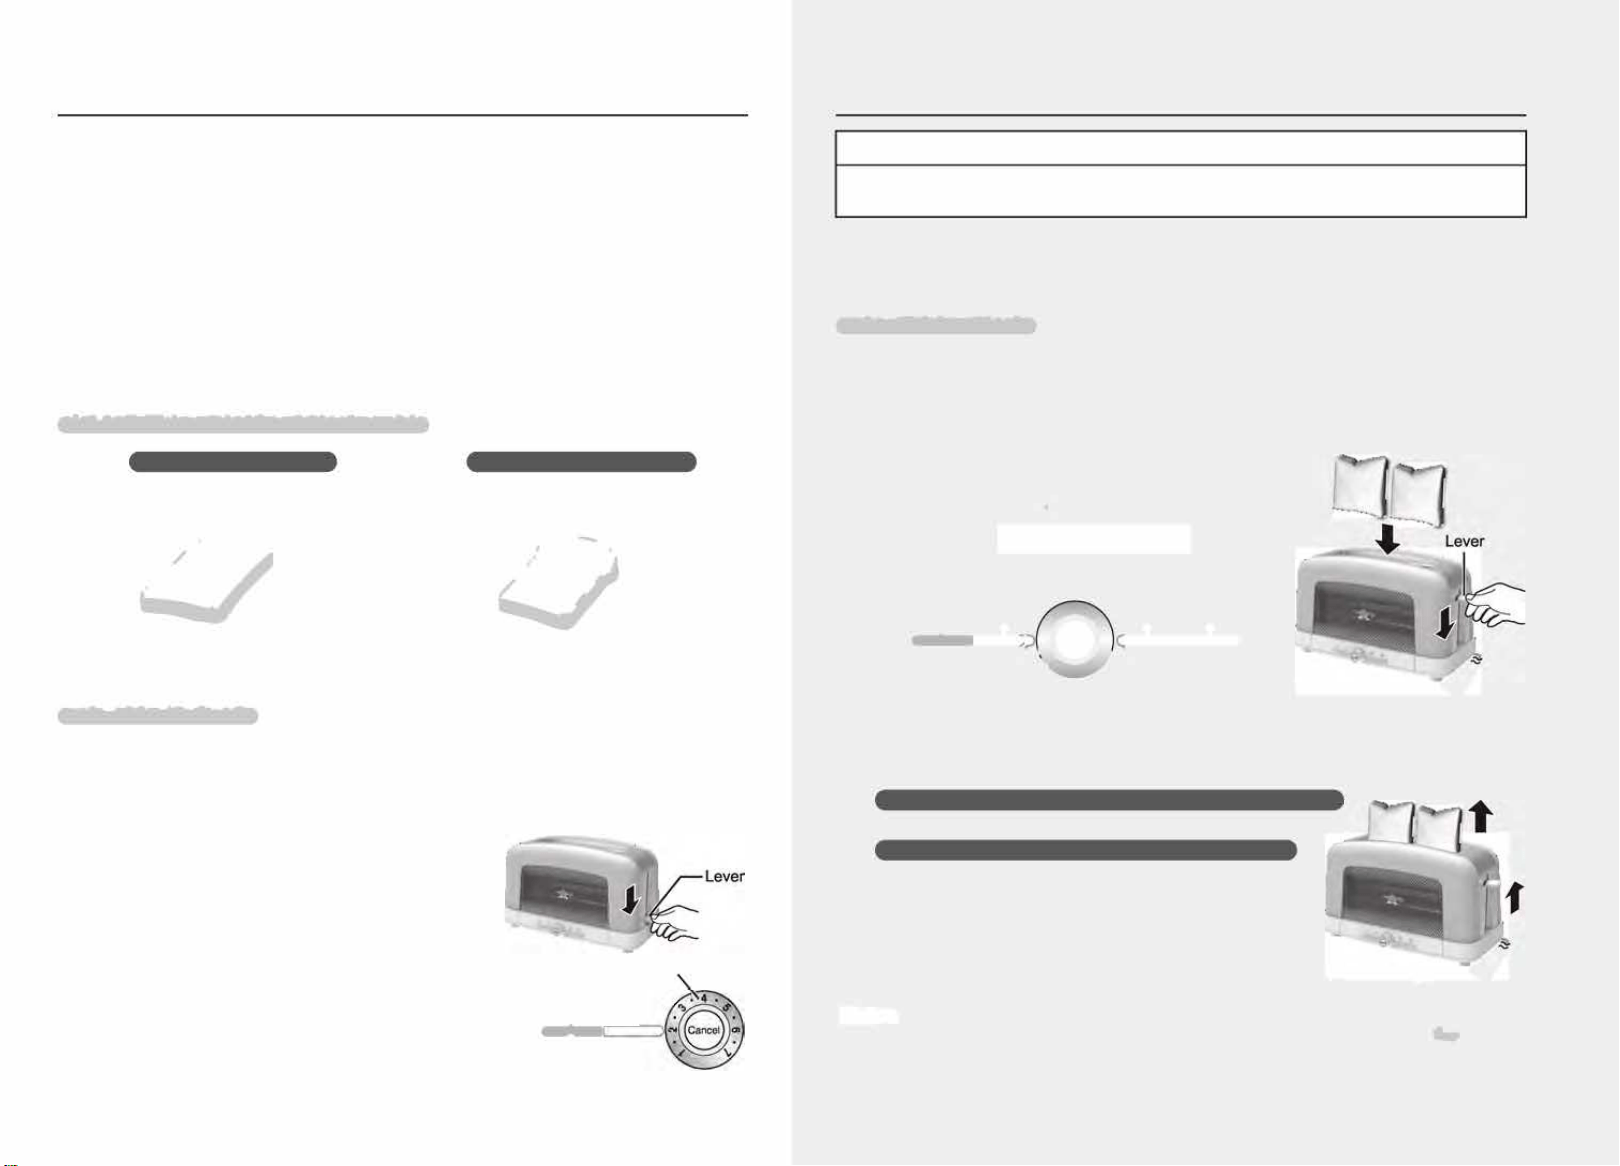
D lnsert the power plug into an electric
outlet.
Align Level 4 of Toast Color Contrai
knob with Dial reader
Push down the lever.
• Toast lamp lights up and preheating starts.
When the preheating is complete, the lever is
automatically raised.
Align Level 4 with Dial reader.
O
D
*
o
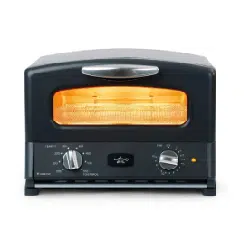
Toast button/lamp
•
Howto Use
&caution
•Be careful not to touch the main body when the toaster is in use or soon aer
use. Otherwise, you may get a burn.
• While the toaster is being heated by the heating elements, you may hear a "pop" sound from the
inside of the main body, which is normai.
• lf you toast a bread slice for an additional time, lower the lever, press Reheat button, and toast the
slice while monitoring it.
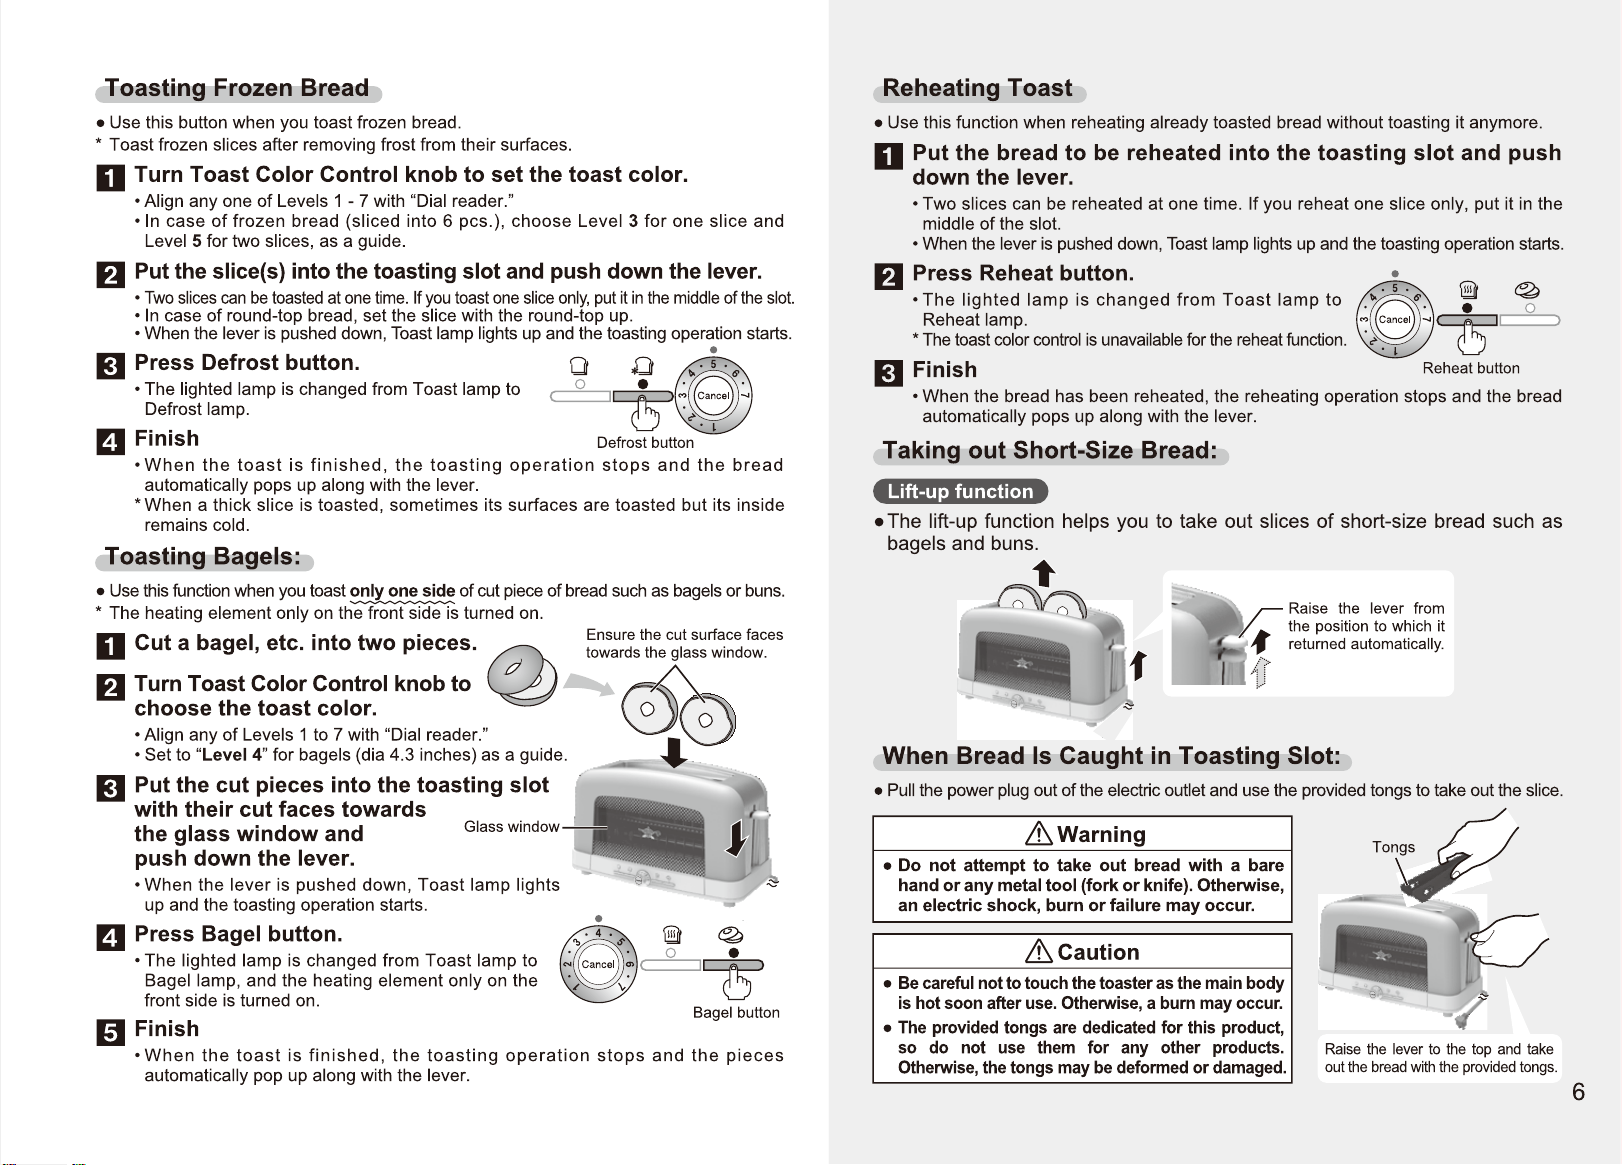
Toasting Bread
• Use this button when you toast bread.
D lnsert the power plug into an electric outlet.
Turn Toast Color Contrai knob to choose a desired toast color.
• Align any one of Levels of 1 -7 with "Dial reader."
• When toasting one slice (sliced into 6 pcs.), adjust the
knob to "3," and two slices, to "5," as a guide.
Toast color: Light
---♦Dark
Levels:
1 • 2 • 3 • 4 • 5 • 6 • 7
Dial reader (When it is aligned with Level 5)
i
QD .s.e @ �
•
o l ·· \ oo
�
��
t
Toast Color Control knobJ�� Cancel button
Put the bread into the toasting slot and push down the lever.
• T slices can be asd atone time. lfu toast one slice only, set it in the middle ofthe slot.
• In case of round-top bread, set the slice with the round-top up.
• When you push down the lever, Toast lamp lights up and the toasting operation stas.
When you check the toast colorduring the toasling operalion:
• Check the toast color through the glass window.
When you stop the toasting operation bere finish:
• Press Cancel button or raise the levar.
D Finish
• When the toast is nished, the toasting operation stops and
then the bread automatically pops up along with the lever.
Pull the power plug out of the electric outlet.
• When you toast bread with high conteni of sugar or oil, or small-size
�
•' �
slices, set the toast color to a lighter level because they a easily bumt. , ,
• When you toast slices wetted by using an atomizer, etc., set the toast
color to a darker level because they are noi easily bumt.
• The toast color can vary depending on the size or type of the bad slice.

7
How to Clean
warning
•Do not immerse the main body in water or do not splash water on it. Otherwise,
a burn, electric shock or injury may occur.
caution
•Whenever cleaning the toaster, be sure to first unplug the toaster and
suiciently cool it down. Otheise, you may get a burn.
•Do not use benzene, thinner, abrasive cleaner, metal scrubber or nylon
scrubber. Otheise, it may scratch surfaces.
•Whenever using the toaster, be sure to install the crumb tray and glass plate.
Otheise, smoke, fire or burn may occur.
■ When the su ace of the main body is dirty, wipe o the dirt with a dish towel wetted and then tightly
wrung, and then wipe with a dry cloth. When the dirt persists, wipe it o with a dish towel soaked
with kitchen neutral detergent, wipe o the detergent with another water soaked and then tightly
wrung dish towel and lastly wipe off water with a dry cloth.
* Any crumbs and dust adhering to areas around the slot musi be cleaned o as soon as possible.
■ Remove the crumb tray, glass plate, cover plate and tongs, wash them with kitchen neutral
detergent and a sponge, wipe o water and then dry them suiciently.
* Do noi use a dish washer/dryer.
How to remove/install the crumb tray.
• When removing the crumb tray, pull it towards you.
• When using the crumb tray, be sure to insert it all the way.
* Frequently clean the crumb tray and do noi use il with any
remaining crumbs. otheise. il may cause smoke or the
bread noi properly toasted.
How to remove/install the glass plate
lnstall the cover plate aer cleaning.
• When removing the glass plate, unlock the hooks (two points) on the bottom side, hold the handle
of the glass plate and pull it out.
• When installing the glass plate, be sure to insert it all the way and lock the hooks (two points).
* Whenever removing/installing the glass plate, be sure to first check thai the body has been
suiciently cooled down and do the work on a stable object. Otheise, you may gel a burn or the
glass plate may fall and you may gel injured.
-3-
----
----
Unlock
�
I
Lock
�
Glass plate
►
TROUBLESHOOTING
Problem
Check
The lever cannot be
set.
(lt would rise to the
originai position.)
The bread cannot be
lowered.
The bread slice
does not pop up.
The toast color is too
light.
The toast color is too
dark.
The bread is burnt.
The ozen bread
mains cold inside,
and is not warmed up.
ls the power plug properly
connected?
ls the inside of the toaster
already too hot?
ls the bread sli warped
or dermed?
ls the size and thickness of
the bad sli appropriate?
ls Toast Color Contrai
knob set to a lighter color?
Did you press Toast buon when
you tried lo toast fzen bread?
Did you press Reheat
button when you tried to
toast the bread?
Does the bread you are trying
lo toast contain water?
ls Toast Color Contrai
knob set to a darker color?
Did you press Defrost button
when you tried to toast bread?
Does the bread you are trying lo
toast contain a lot of sugar or oil?
ls the frozen bread slice
you are trying to toast too
thick?
Solution
lnsert the power plug into the electric
outlet.
The m sensor in e is
working pnt oting. Cl
dn the r b use (e 4)
Do noi toast any warpped or deformed
bread slice. (Page 5)
Toast appropriate bad slices.
(Page5)
Take out the bad slice stuck in the
slot. (Page 5)
Set the level of Toast Color Contrai
knob to a darker color. (Page 4)
Press Defrost button and then toast
the bread. (Page 6)
Reheat button can be used lor
reheating already toasted bread.
(Page 6)
Set the level of Toast Color Contrai
knob lo a darker color. (Page 4)
Set the level of Toast Color Contrai
knob to a lighter color. (Page 4)
Press Toast button and then toast the
bread. (Page 5)
Set the level of Toast Color Contrai
knob to a lighter color. (Page 4)
Defrost the frozen bread and then
toast il. (Page 6)
• lf the problem is not solved in spite of taking the actions above, contact
your dealer or our customer service.
8

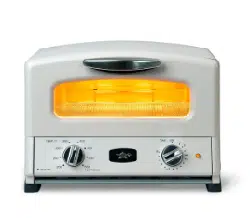
Specifications
Model No.:
Power:
Rated power consumption:
Size (app. outer dimensions)
Weight:
Length of cord:
Accessori es:
INOTEI
SEP-G17US
120 VAC; 60Hz
1670W
W40.3cm x 021.4cm x H23.4cm/
W15.8in x D8.4in x H9.2in
app. 3.4 kg/7.5Ibs
app. 1.0 m/3.2feet
A cover plate and a pair of tongs
8
LIMITED RRANTY
• The supplier whose name and address are on the reverse side warrants each toaster oven
lo be free !rom defects in materiai and workmanship far one (1) year !rom the originai retail
purchase date. This warranty applies lo normai use and service only and is subject to the
terms and conditions listed below.
• This warranty is made lo the originai retail purchaser. Any claim made under this warranty
musi be accompanied by a copy of the proof of the originai purchase such as a cancelled
check or a sales receipt.
• Normai wear and tear o! pas is noi covered by this warranty.
• Should any unii covered by this warranty prove detective in materiai and/or workmanship
during the one (1) year period, the defective produci or pari will be repaired or replaced
al the option of warrantor.
• In arder to receive service or parts under warranty, contaci the nearest authorized service
center.
• In the event it is necessary to return the
unii
, il musi be repacked in its originai factory
caon with the originai packing materiai. Il the carton and packing materiai were disposed
o!, arder them !rom your dealer or service center.
• The entire unii should be returned to your nearest service center. Shipping costs are the
responsibility of the customer.
• Please include a brief description of the difficulties experienced. Be sure lo consult the Quick
Cures to Common Troubles page in your owner's manual. Far detailed technical information
and assistance cali the supplier who's telephone number is listed on the reverse side.
• Should a unii be returned lor a cause noi covered by this warranty, any repairs, handling,
or testing will be made al owner's expense.
• Any damage thai may occur to the unii during shipment !rom the originai retail customer
or on the return shipment to the retail customer will noi be the responsibility o! the warrantor.
• No one has the authority to add to or change the terms and conditions contained in this
warranty or make any express warranty other !han this.
e ALL IMPLIED WARRANTIES, INCLUDING, BUT NOT LIMITED TO, ANY IMPLIED
RRANTIES OF MERCHANTABILITY OR FITNESS, ARE LIMITED IN DURION TO THE
DURION OF THIS WRIEN WARRANTY. REPAIR OR REPLACEMENT AS STATED HEREIN
IS THE OWNER'S SOLE REMEDY. THERE SHALL BE NO LIABILITY FOR INCIDENL OR
CONSEQUENTIAL DAMAGES. INCLUDING BUT NOT LIMITED TO, LOSS OF USE,
INCONVENIENCE, LOSS OF TIME, OR DAMAGES TO ANY BUSINESS OR PROPERTY.
WHETHER AS A RESU OF BREACH OF WARRANT
NEGLIGENCE, STRICT LIABILITY IN
TORT
,
OR OTHERWISE.
• This warranty gives you specific le
g
ai rights. u may have other rights which vary from
state lo state. Some states do noi allow limitations on the length of any implied warranty or
the limitation or exclusion o! incidental or conse
q
uential damages. Because o! this, the above
limitations or exclusions may noi apply to you.
RRANTY REGISTRATION
MODEL NO.
__________ S
ER
I
AL N
O
.
________ _
D
E
P
UR
C
HA
S
ED
_________
BRANO NAME
______ _
YO
UR NAME IN FULL
_
_______
___________
_
ADDRE
SS _
____________________ _
C
I
TY
_______
S
E
____
_ Z
I
P CODE
_
_____ _
DEALER'
S
NAME
______
_____
_________
_
C
I
TY ________ S
E
_____ Z
I
P CODE
______ _