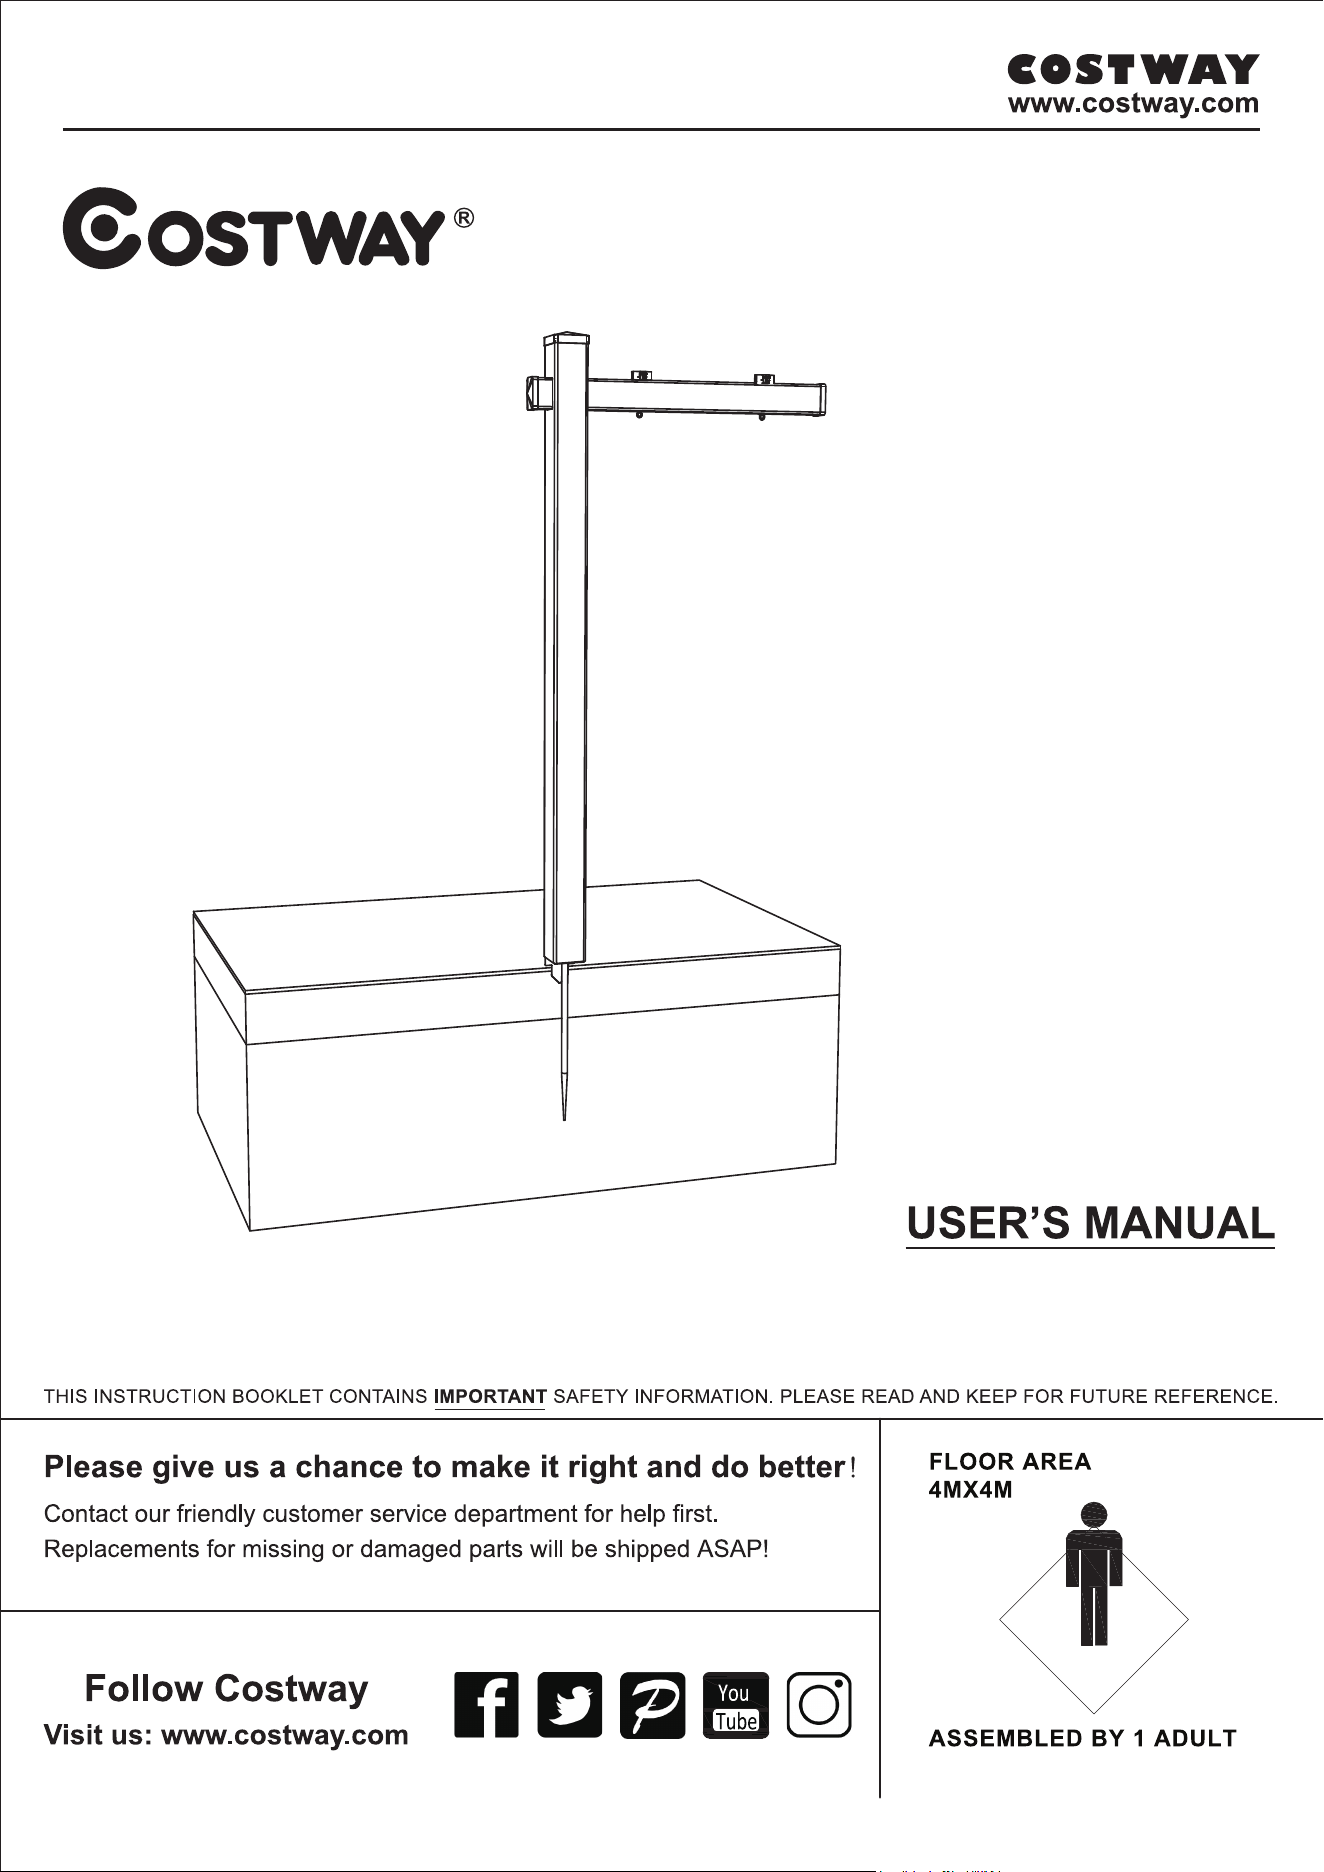
OP3931
Vinyl Real Estate Sign Post
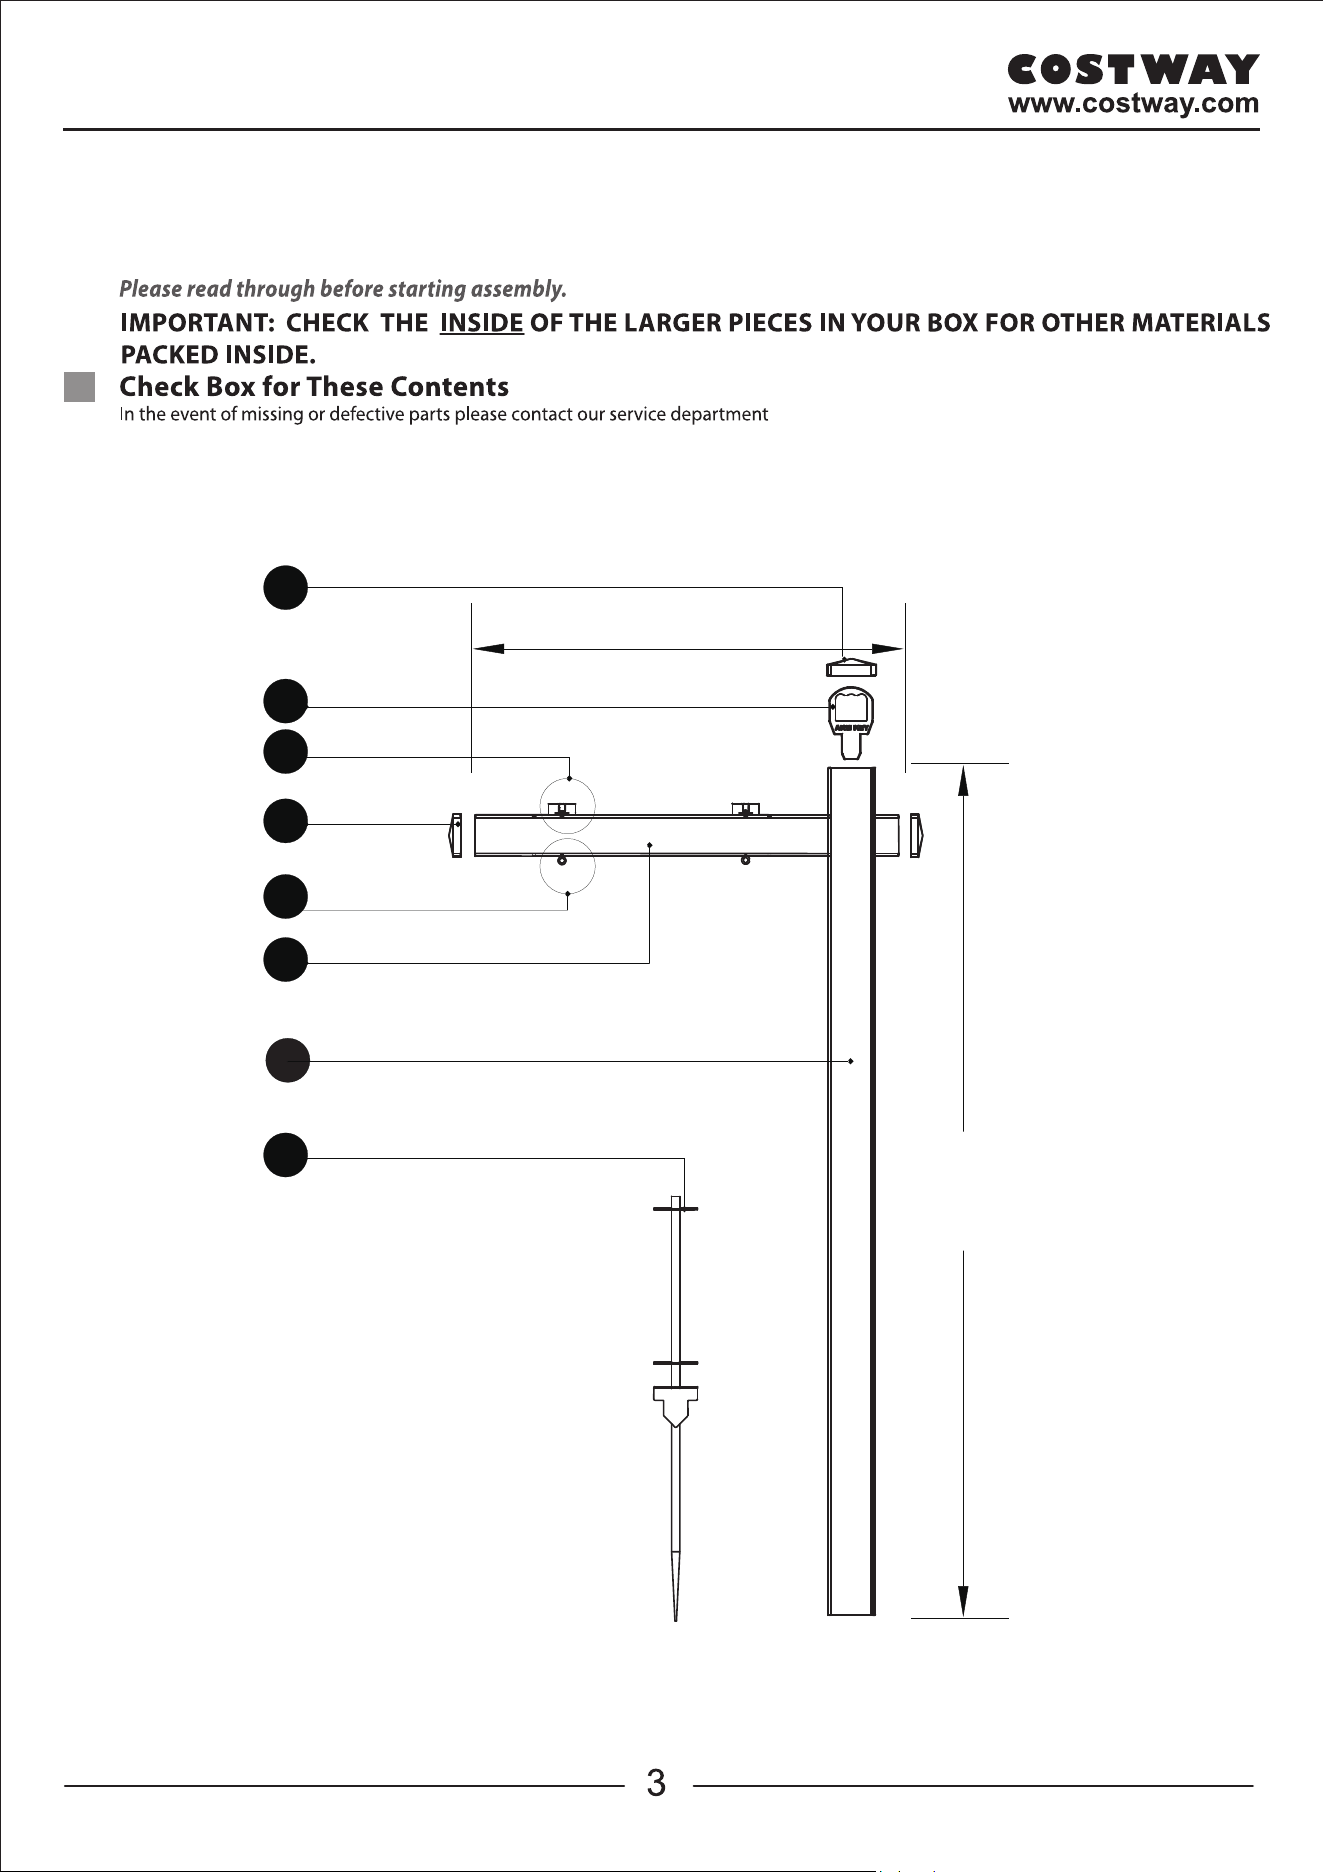
A. Post Cap (1)
B. Key
(1)
C. Rider Clip Kit (2)
D.
Cap (2)
E. Sign Clip Kit (2)
F.
Post (1)G.
Arm
Arm
36 inch Arm (1)
72"
A
B
C
D
E
F
H
36’’
G
Board Iden�fica�on
H. Stake (1)
Accessories inside
A. Post Cap (1)
B. Key
(1)
C. Rider Clip Kit (2)
D.
Cap (2)
E. Sign Clip Kit (2)
F.
Post (1)G.
Arm
Arm
36 inch Arm (1)
72"
A
B
C
D
E
F
H
36’’
G
Board Iden�fica�on
H. Stake (1)
Accessories inside
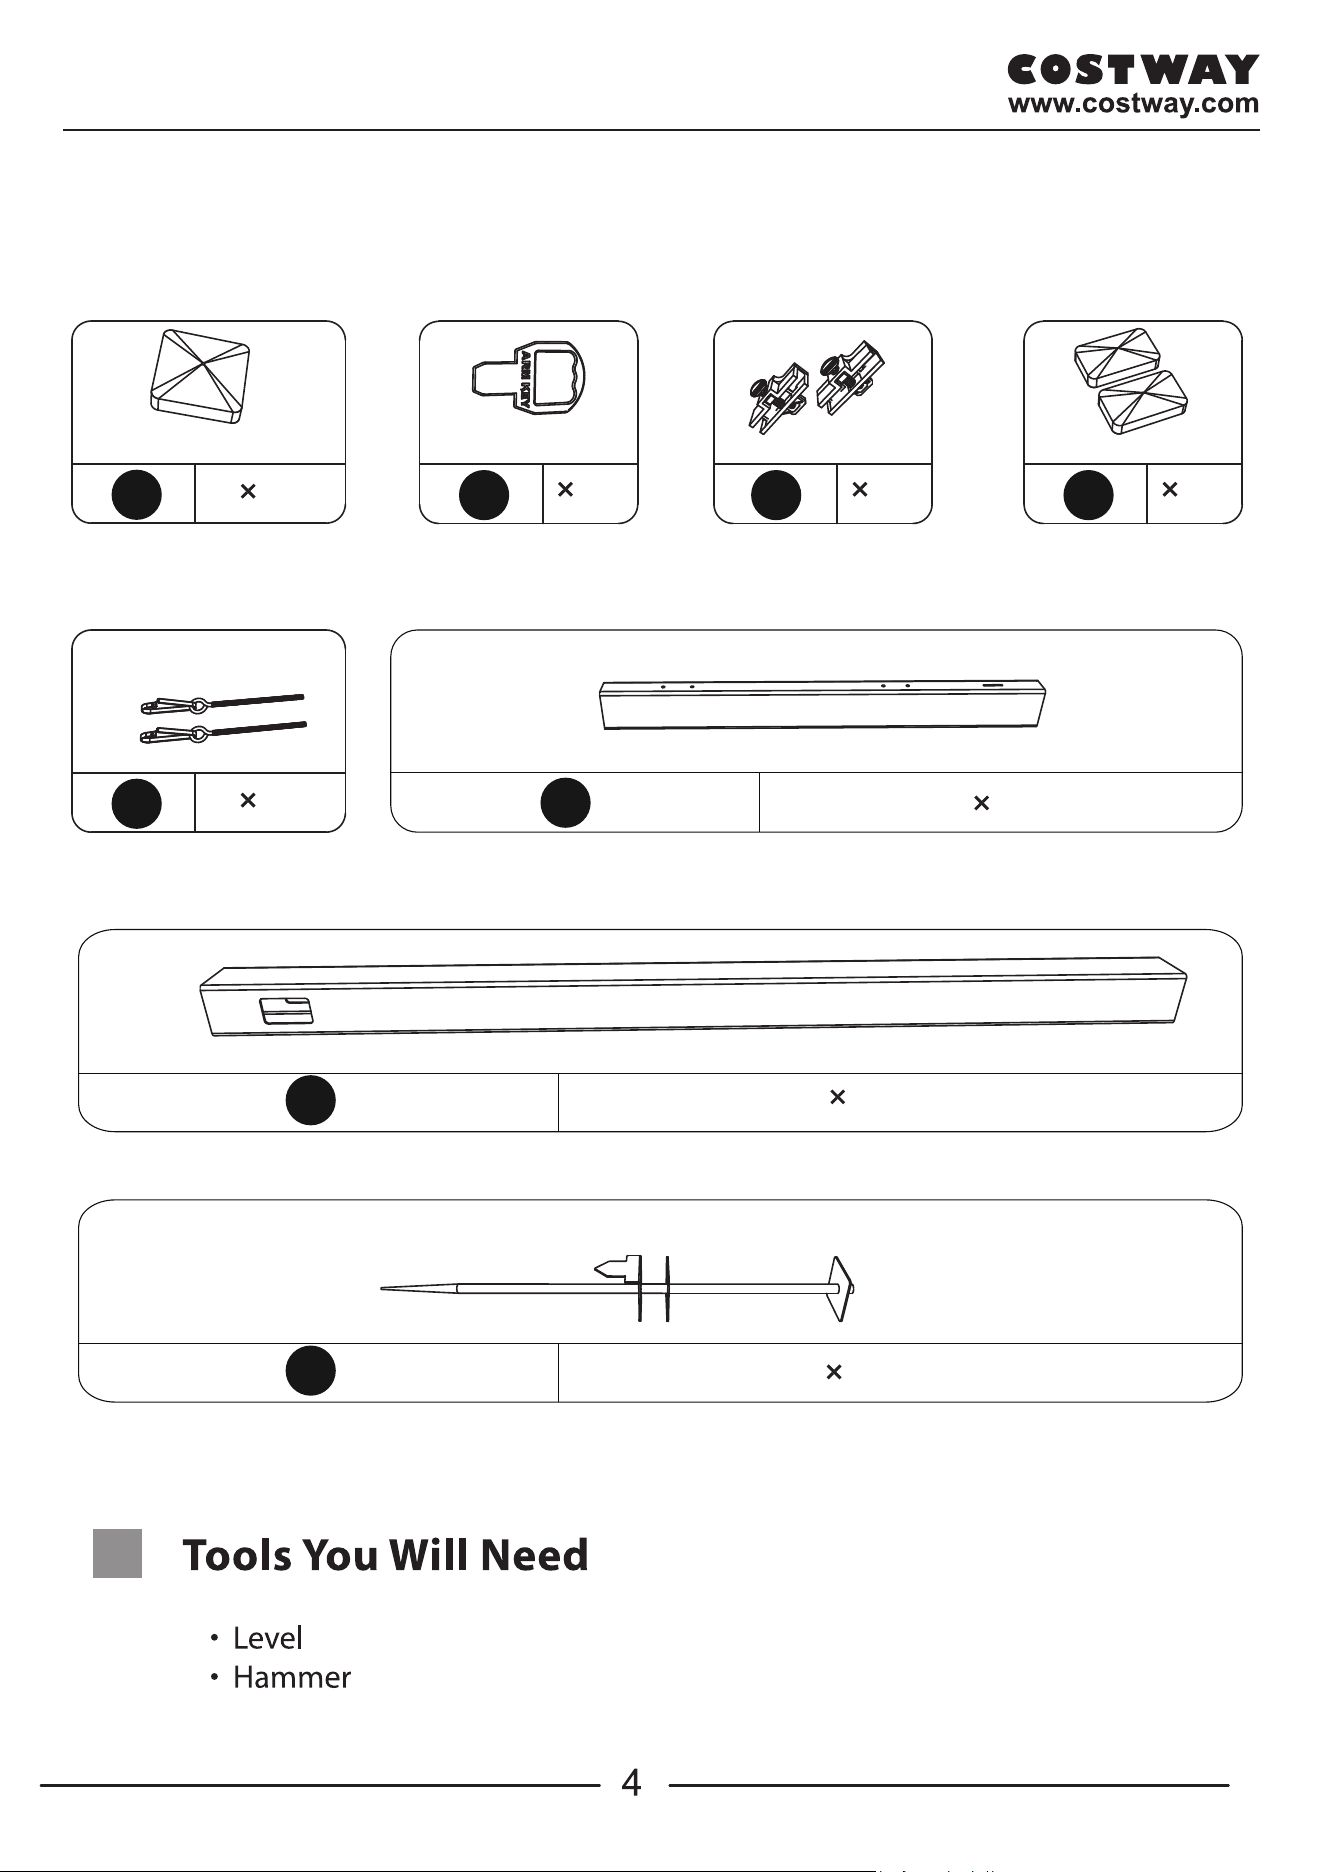
Box Contents List
Post Cap
A
1
For 4’’x4’’ Post
Arm Key
1
For 4’’x4’’ Post
B
Arm Cap
2
For 2’’x3.5’’ Arm
D
Rider Clip Kit
2
C
Sign Clip Kit
E
2
F
1
2’’x3.5’’x36’’ Arm
G
4’’x4’’x72’’ Post
H
4’’x4’’x36’’ Stake
1
1
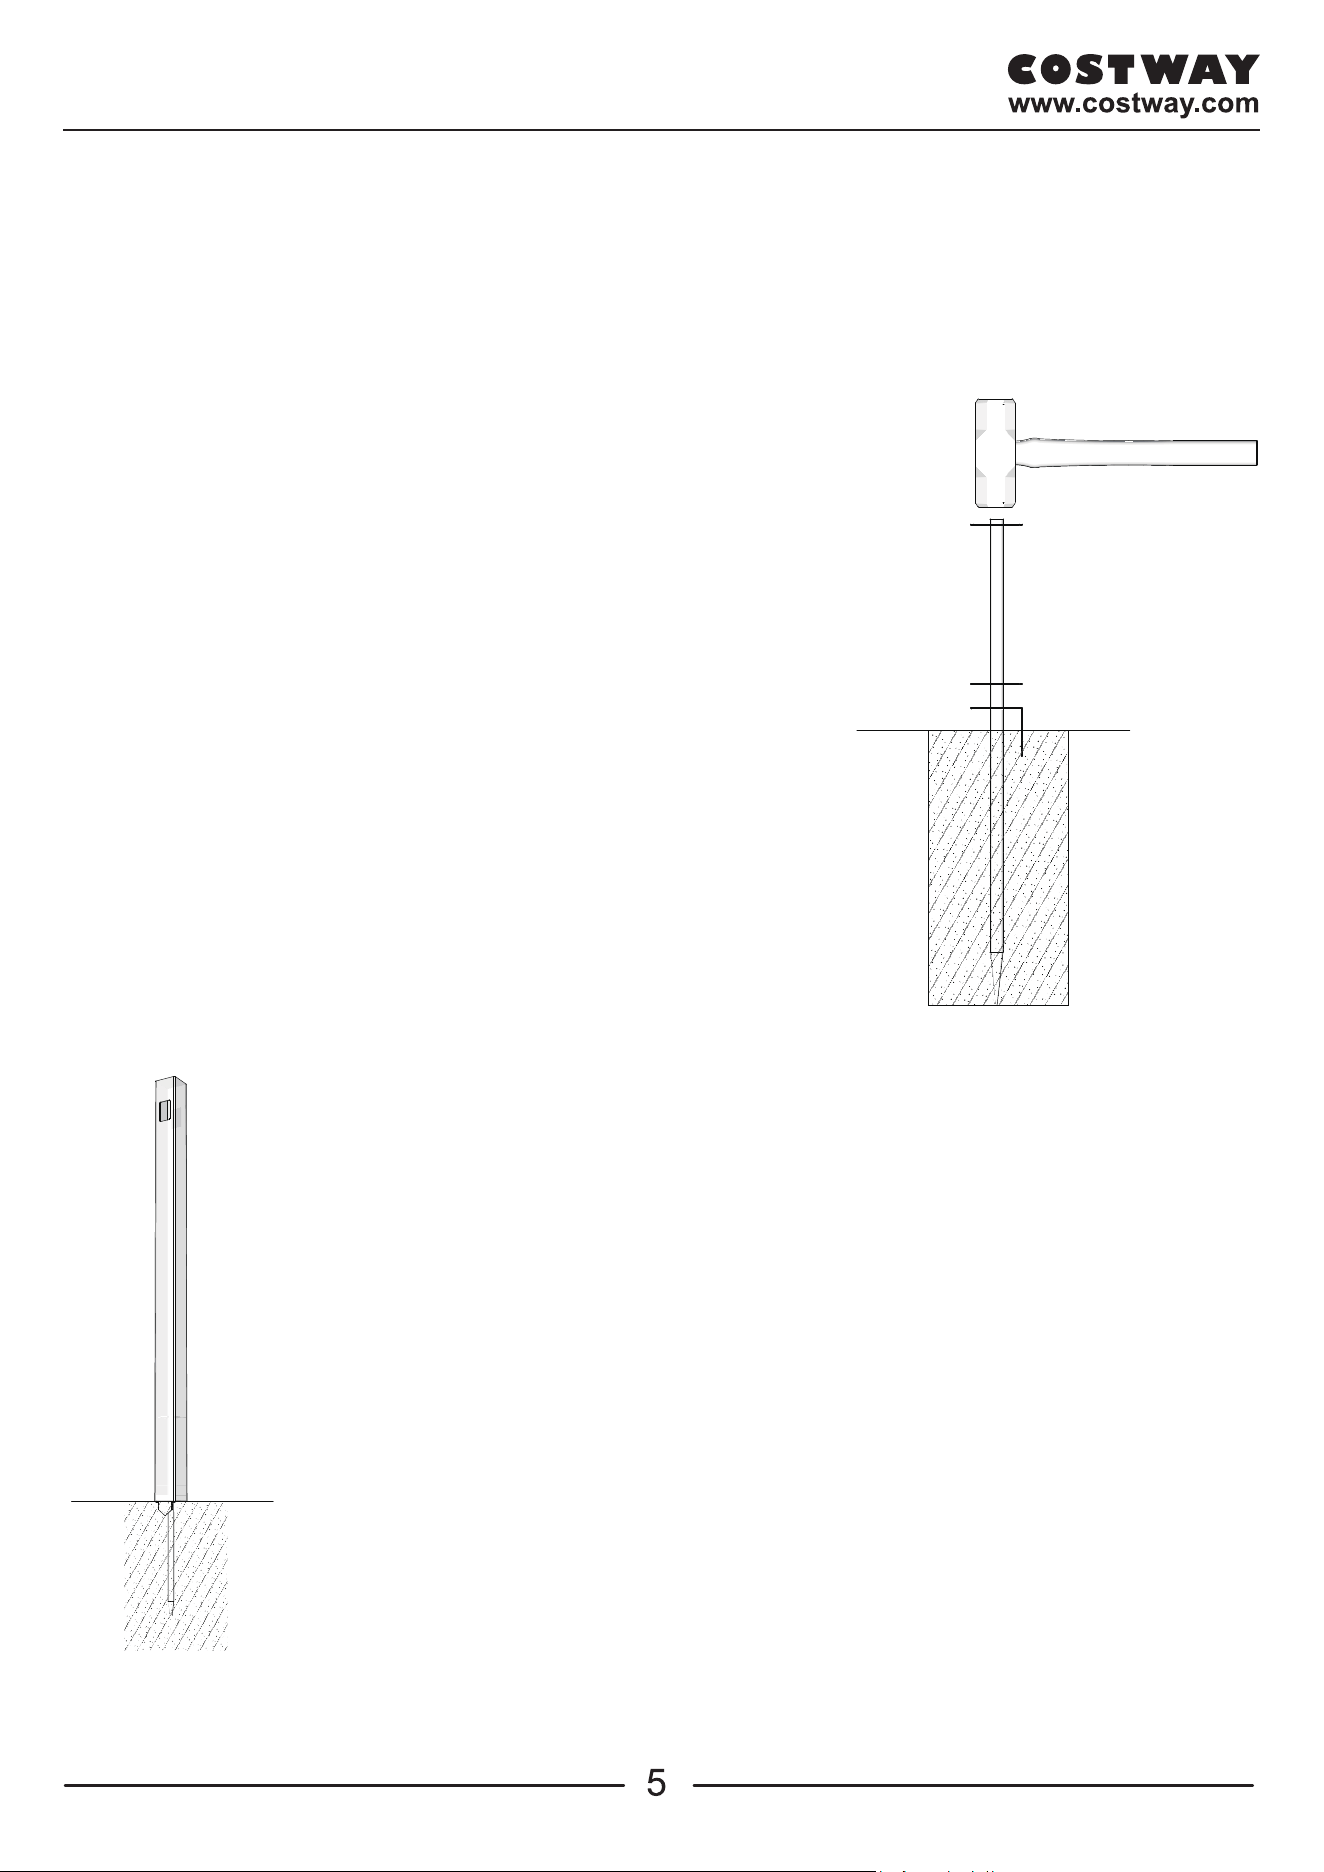
Step 1
Use a hammer to drive the
Steel Anchor into gound.
Make sure that anchor is
straight while hammering.
The anchor should be driven
downwards until the bottom
plate is flush with the
ground. The bottom plate
should be facing forward in
the desired direction of real
estate post arm.
Step 2
Slide the vinyl real estate post
the anchor until it touches
the ground. The hole on the
post should be at the top and
facing in the desired direction of
the sign arm.
For 2’’x3.5’’ Arm
over
Box Contents List
Post Cap
A
1
For 4’’x4’’ Post
Arm Key
1
For 4’’x4’’ Post
B
Arm Cap
2
For 2’’x3.5’’ Arm
D
Rider Clip Kit
2
C
Sign Clip Kit
E
2
F
1
2’’x3.5’’x36’’ Arm
G
4’’x4’’x72’’ Post
H
4’’x4’’x36’’ Stake
1
1
Step 1
Use a hammer to drive the
Steel Anchor into gound.
Make sure that anchor is
straight while hammering.
The anchor should be driven
downwards until the bottom
plate is flush with the
ground. The bottom plate
should be facing forward in
the desired direction of real
estate post arm.
Step 2
Slide the vinyl real estate post
the anchor until it touches
the ground. The hole on the
post should be at the top and
facing in the desired direction of
the sign arm.
For 2’’x3.5’’ Arm
over
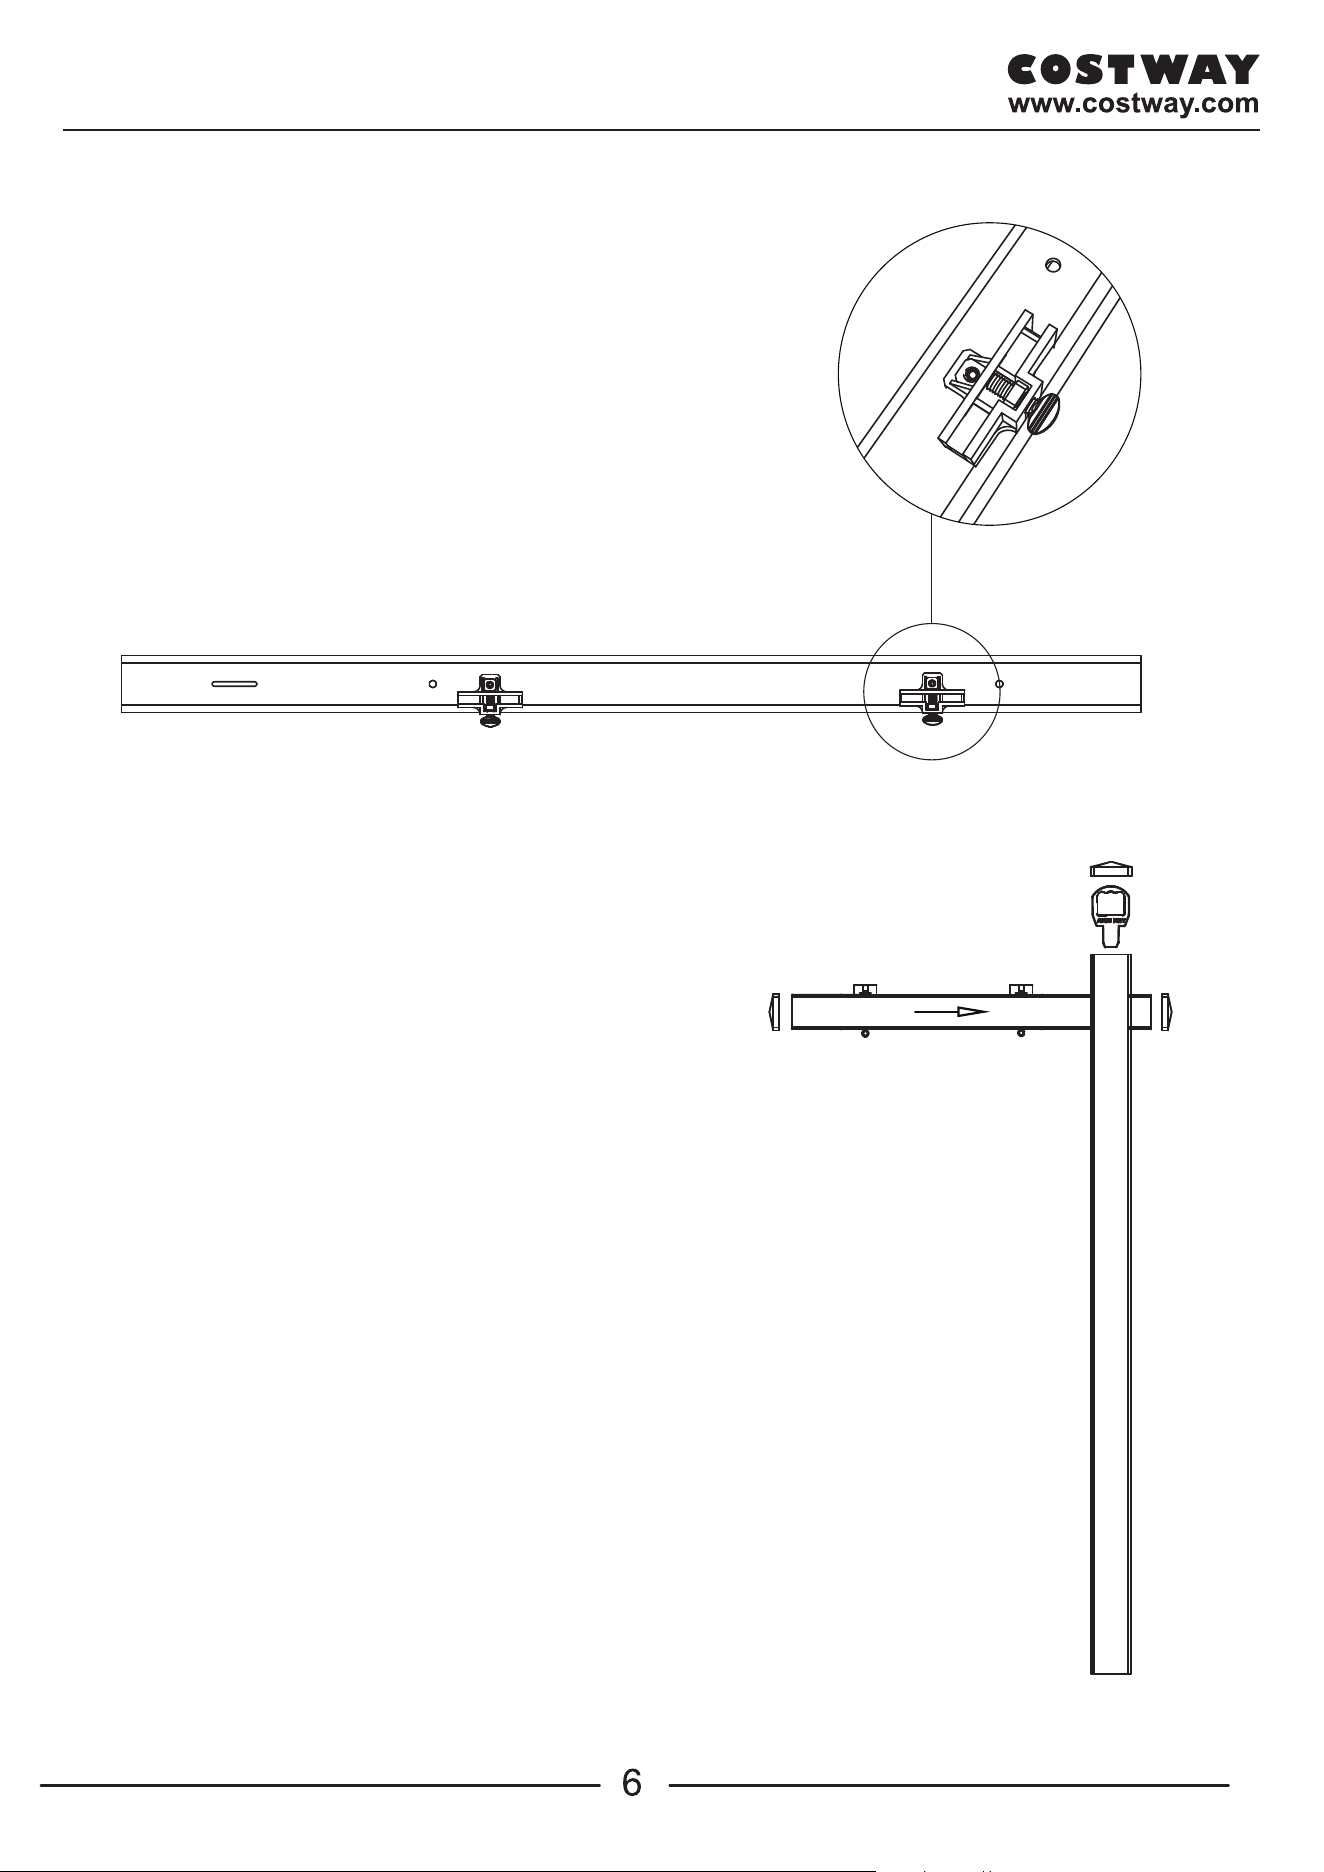
Step 3
Use a screwdriver and attached
screws to fix the rider clips on
top of post arm.
Step 4
Slide the vinyl into the
post. Make sure that the
rider clips are facing up.
Slide the arm through the
holes until the slot
s
are
alingned on the inside of the
post.
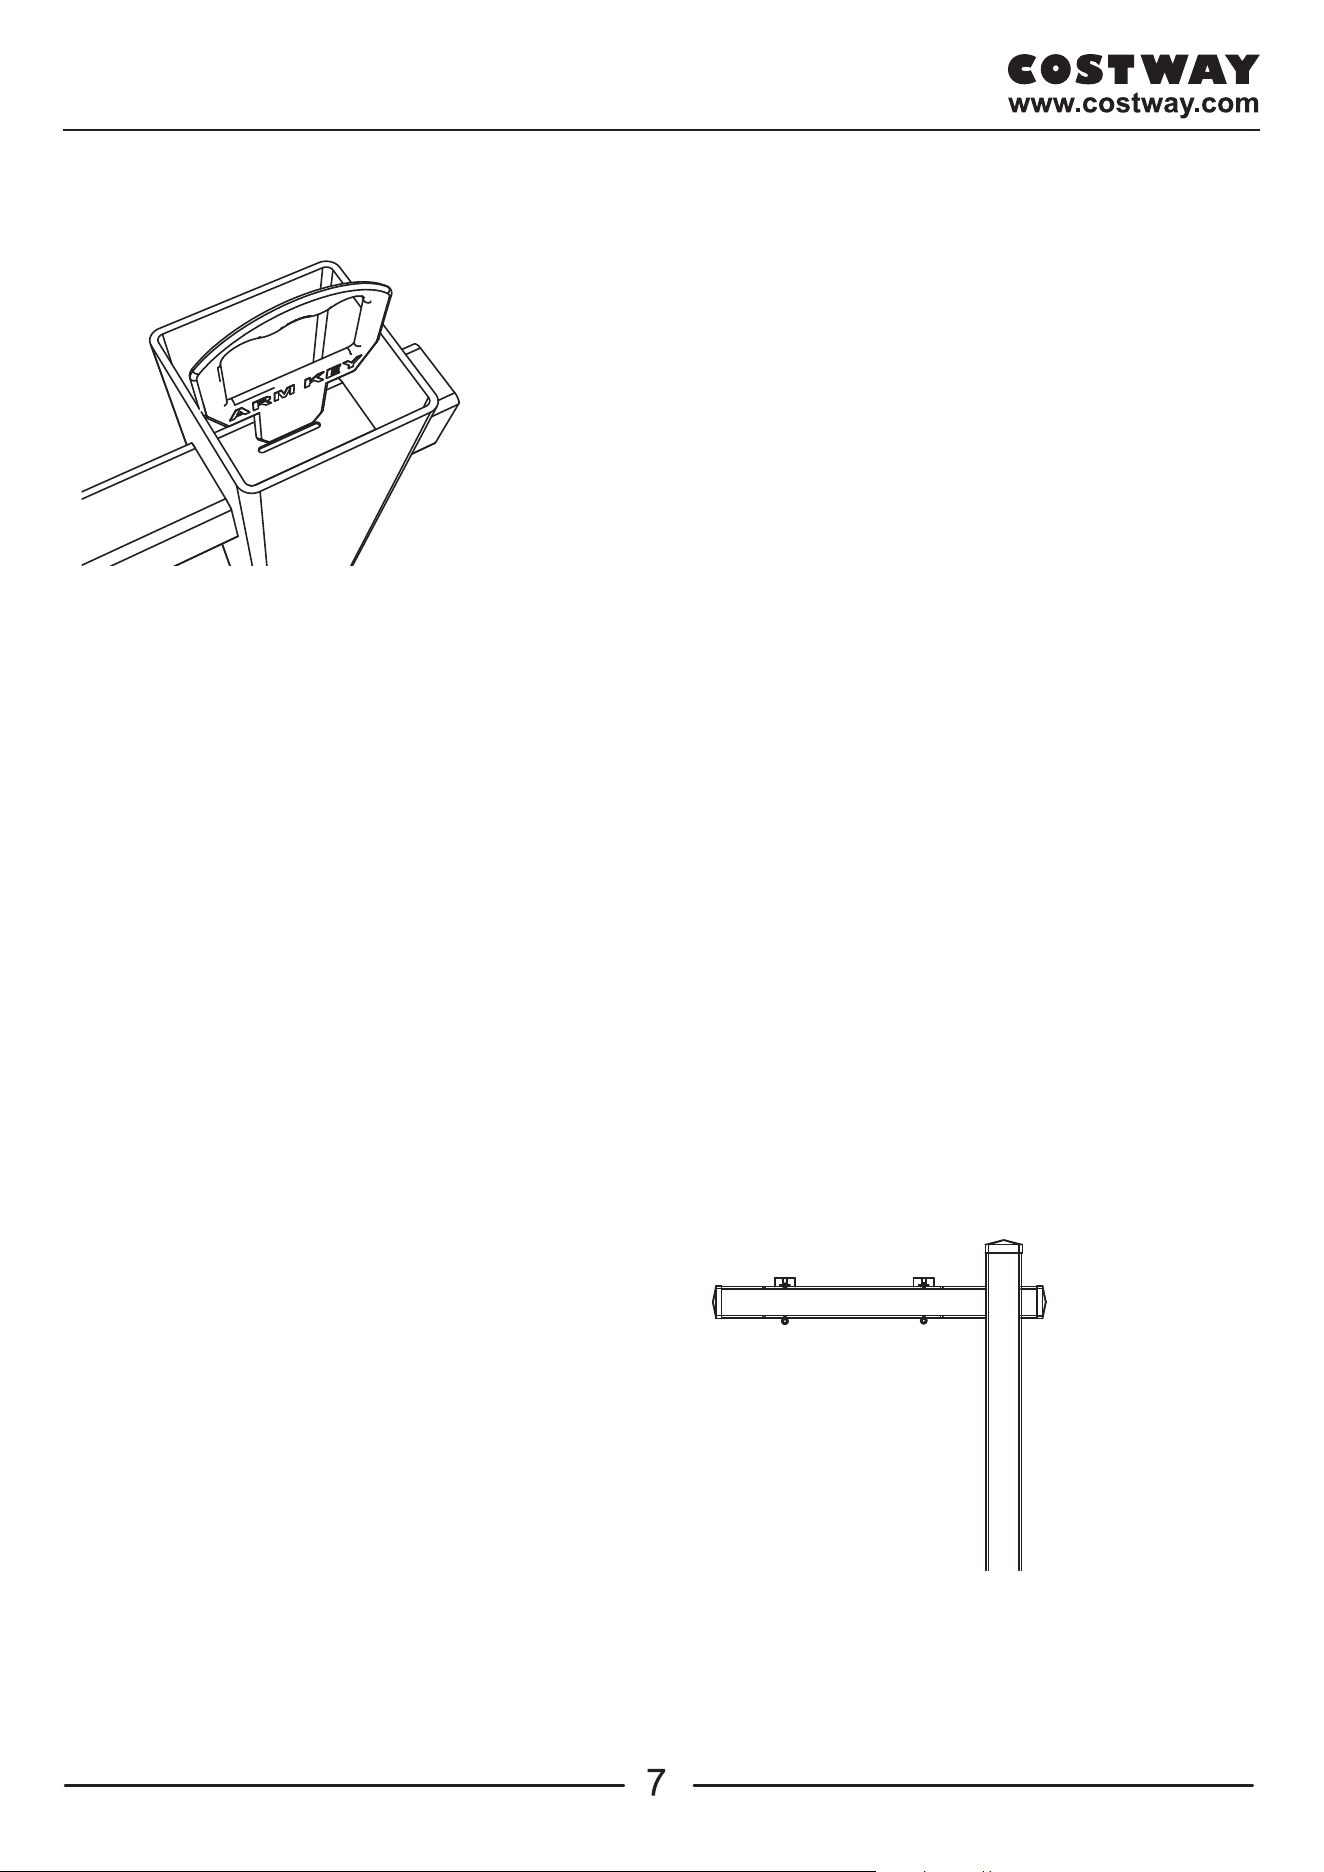
Step 5
Slide the key into the slots
of the real estate post arm
until it locks in place. This
will secure the arm.
Step 5
Step 6
Step 6
Slide the post cap onto the
top of the real estate post.
And slide the rail cap onto
both side of the arm.
Arm
Step 3
Use a screwdriver and attached
screws to fix the rider clips on
top of post arm.
Step 4
Slide the vinyl into the
post. Make sure that the
rider clips are facing up.
Slide the arm through the
holes until the slot
s
are
alingned on the inside of the
post.
Step 5
Slide the key into the slots
of the real estate post arm
until it locks in place. This
will secure the arm.
Step 5
Step 6
Step 6
Slide the post cap onto the
top of the real estate post.
And slide the rail cap onto
both side of the arm.
Arm
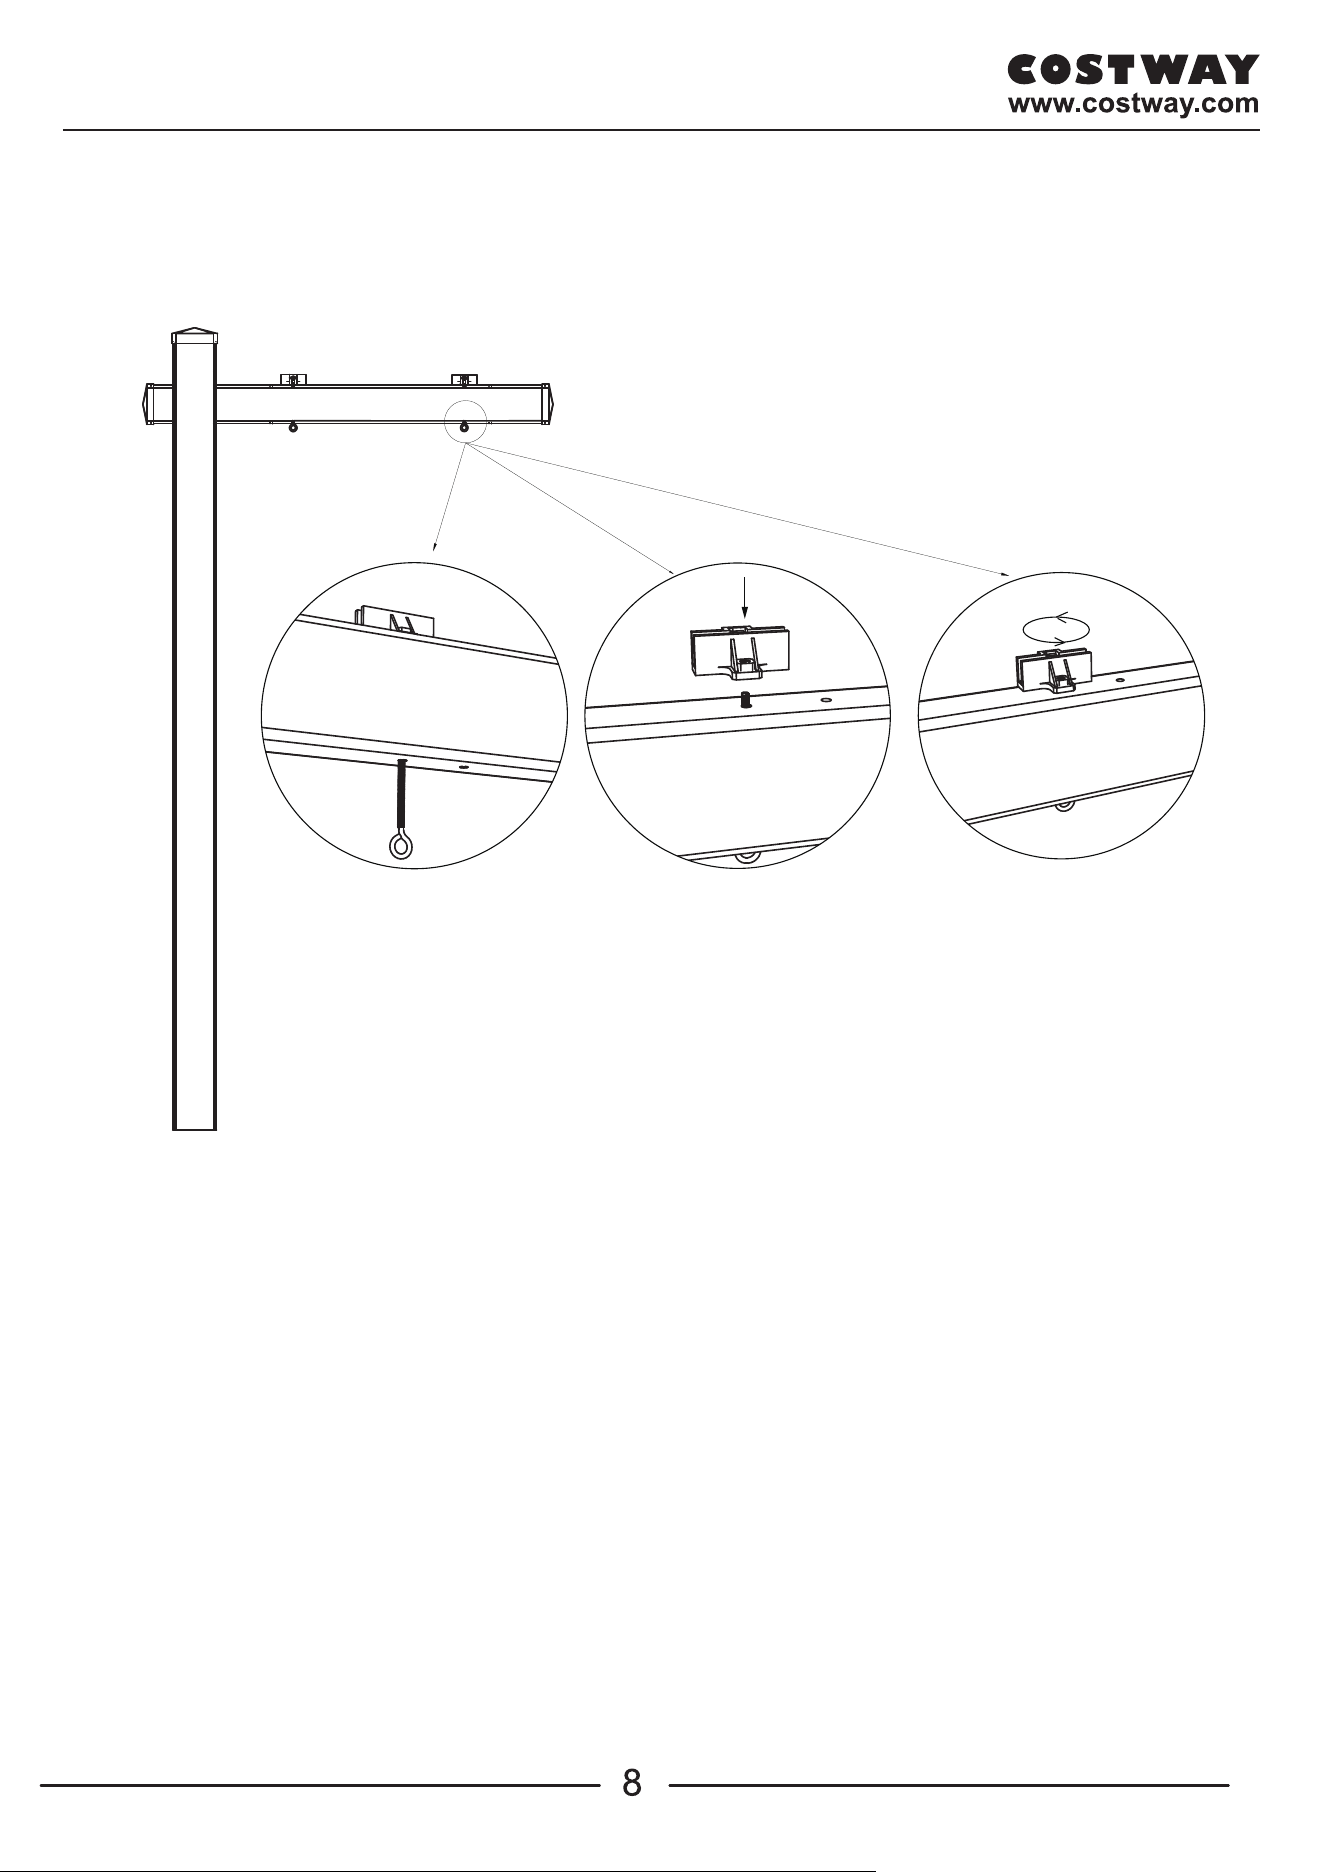
Step 7
Step 7
a
b
c
Insert the sign clip screw through the arm,
and then fix the screw.
Note: You need to choose the right hole on
the arm to fit the size of your signs
16’’
20’’
Hole distance option 1:
Hole distance option 2:
Up to 28 inch
Up to 28 inch

Step 7
Step 7
a
b
c
Insert the sign clip screw through the arm,
and then fix the screw.
Note: You need to choose the right hole on
the arm to fit the size of your signs
16’’
20’’
Hole distance option 1:
Hole distance option 2:
Up to 28 inch
Up to 28 inch


OP3931
Vinyl Real Estate Sign Post