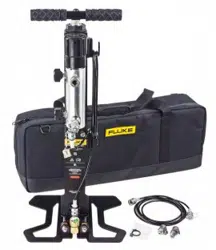
Loading ...
Loading ...
Loading ...

10. Use the vent valve on the calibration manifold to
slowly reduce pressure. Use the pump to increase
pressure to move to the next pressure reading. Keep
the inlet valve closed if the pump is not being used.
11. Use the variable volume for fine adjustment of the
pressure to achieve the cardinal point and take the
measurement at this point. Repeat the above steps to
take all readings at the predetermined pressure
points.
12. Upon completion of the tests, open the VENT valve to
release all pressure inside the calibration manifold.
The inlet valve needs to be opened to release any
pressure built up in the pump.
13. Fold the pump base and place in the bag.
Maintenance
Clean the Pump
To clean the pump of any contaminants accumulated
during use:
1. Remove the hose from the base of the pump. The
fitting on the pump is self seating.
2. Completely remove the vent valve screw at the base
of the pump.
3. Pump the unit to push the contaminants out from the
vent valve opening.
4. Once the contaminants stop coming out, replace the
vent screw and reconnect the hose.
Clean the Calibration Manifold (700HPPK Only)
To clean the calibration manifold:
1. Remove the hose that connects the calibration
manifold to the UUT.
2. Unscrew the fitting from the calibration manifold with a
22 mm wrench and remove the screen inside.
3. Tilt the calibration manifold slightly to drain all the
liquid contaminants from inside that port
4. Clean the screen of any particulates (or replace if
necessary).
5. Reinstall the screen and tighten the fitting.
Lubricate the Pump
If generation of pressure becomes difficult due to friction in
the pump, then the pump may require lubrication.
Depending on usage, lubrication of the pump may be
required monthly. Lack of lubrication can result in
premature wearing of seals.
To lubricate the pump:
1. Open the vent valve at the bottom of the pump.
2. Pull up the handle of the pump approximately 15 cm
(6 inches).
3. Hold the exposed metal shaft of the pump by one
hand and turn the handle counterclockwise to remove
the handle from the unit.
Note
A wrench may be required to hold the pump shaft
in place when you rotate the pump handle
counterclockwise.
4. By hand, unscrew the hose fitting at the bottom of the
pump to remove the hose.
5. By hand, unscrew the large plastic nut located at the
top of the pump.
6. By hand, unscrew the large black shaft () that is
above and attached to the desiccant tube. The entire
manifold/desiccant assembly should come off of the
pump base.
7. Pull the manifold/desiccant assembly up all the way to
expose the metal pump shaft.
8. Pull up and fully extend the metal pump shaft.
9. Apply a thin coating of the provided lubricant to the
surface exposed below the top metal shaft.
10. To reassemble the pump, reverse these steps.
11. F ollow the Safe Operation procedure at the beginning
of this document to ensure the pump is in proper
operating condition.
1.888.610.7664 sales@GlobalTestSupply.com
Fluke-Direct.com
Loading ...
Loading ...